Looking at a ship´s interior fittings is always interesting for me. As you may have read in the two previous articles about yacht interior design (read it here and here) I roamed the Interboot boat show to have a closer look onto 9 different approaches to designing the vessel´s internal spaces. Bitching around is easy, I know. But making a thorough interior fitting by oneself is a completely different task. That´s something I´m doing right now in the course of refurbishing my own sailing yacht, a 40 year old King´s Cruiser 33. This time it was the first ever element of the new internal fittings: The starboard saloon Teak panel.
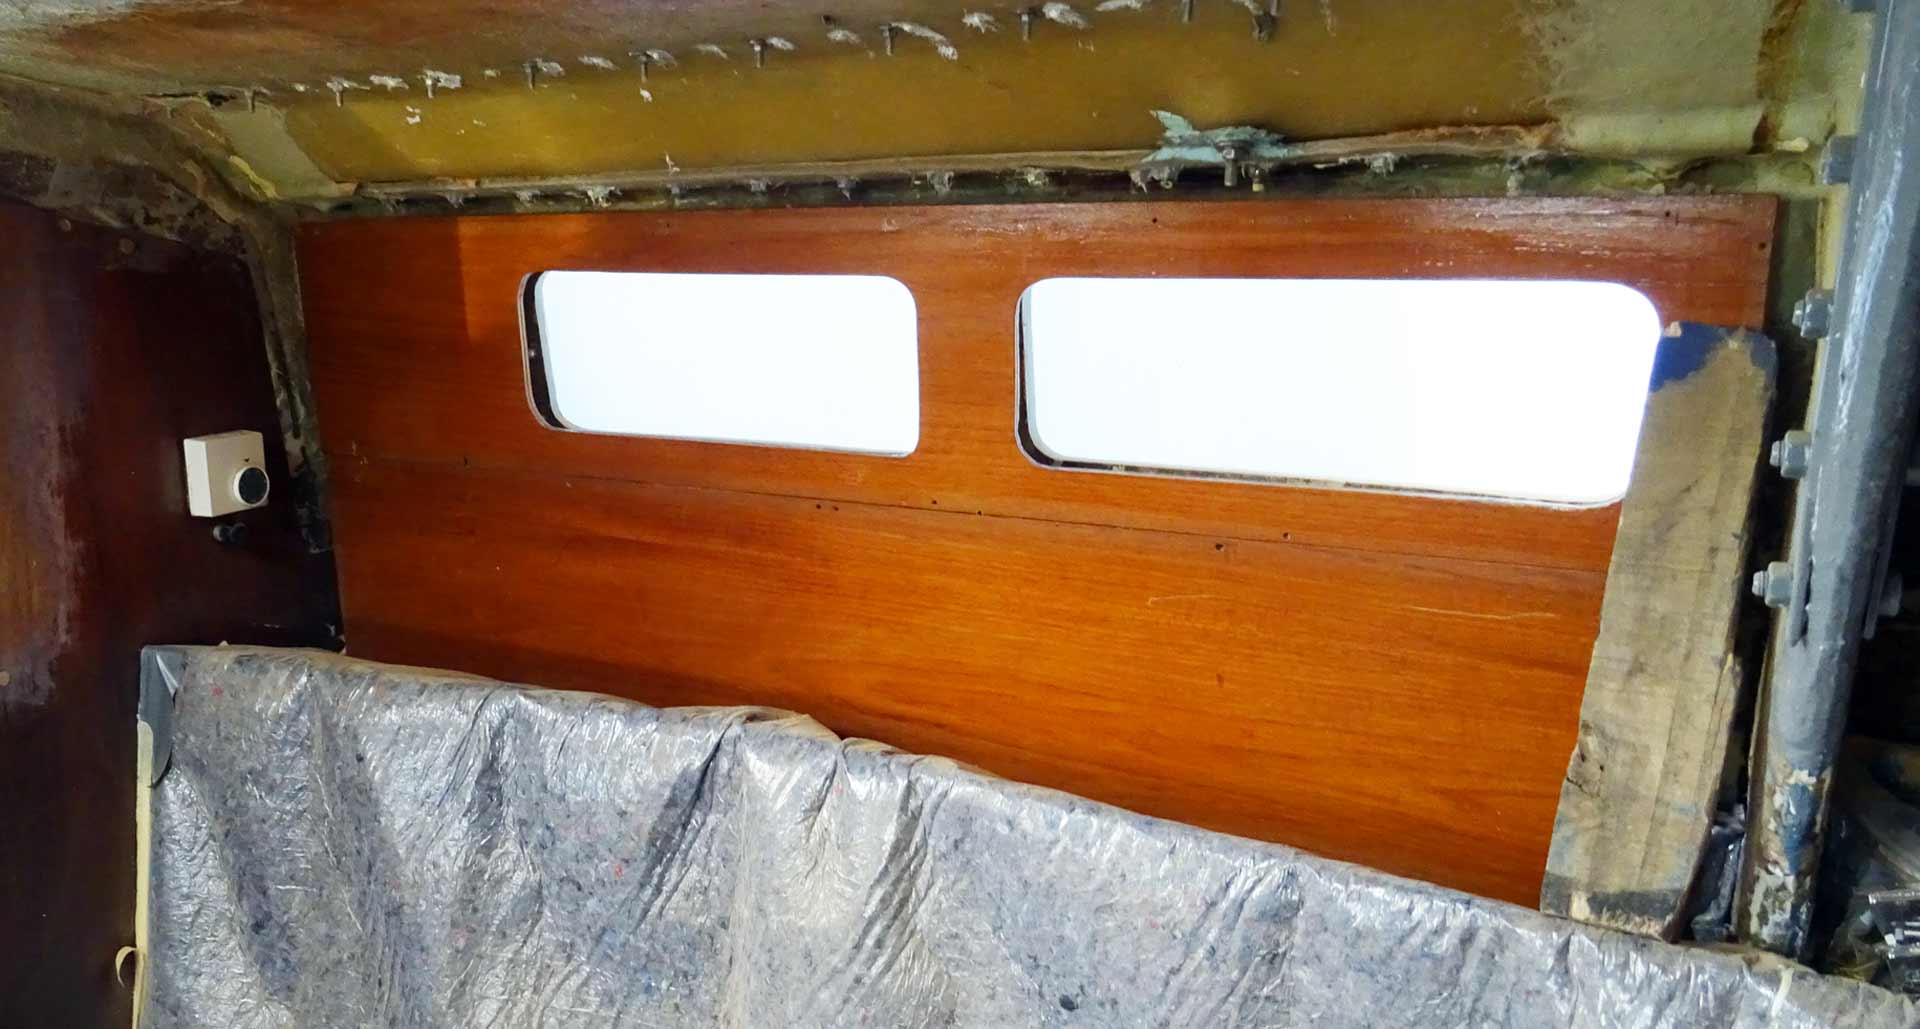
And this is where I start: Up to now the boat has a panel made of two plywood boards, held together by a decorative horizontal ridge. It has been varnished thoroughly and did fit in neatly. Solid built, but I find that the boat deserves better since the saloon is a place where me and my family are going to spend most of the time when down below deck. I want something nice, more ship-like. Since I do have some good experience with working with massive Teak (read about building the perfect chart table here) I bought some 15 meters of Teak batten and decided to fit the saloon with a classic ship´s ceiling.
Making the Substruction for the Teak Ceiling
A ship´s ceiling is made up of just two constructional parts: Vertical struts form the substruction onto which the decorative battens are horizontally screwed. The struts are positioned at least every 100 centimeters. Most examples I´ve seen, both ship´s side and struts have been painted in plain white, the battens are screwed with one millimeter interspace to allow a flow of air between the hull and the ceiling. To make the substruction, I went for hardwood: Oak.

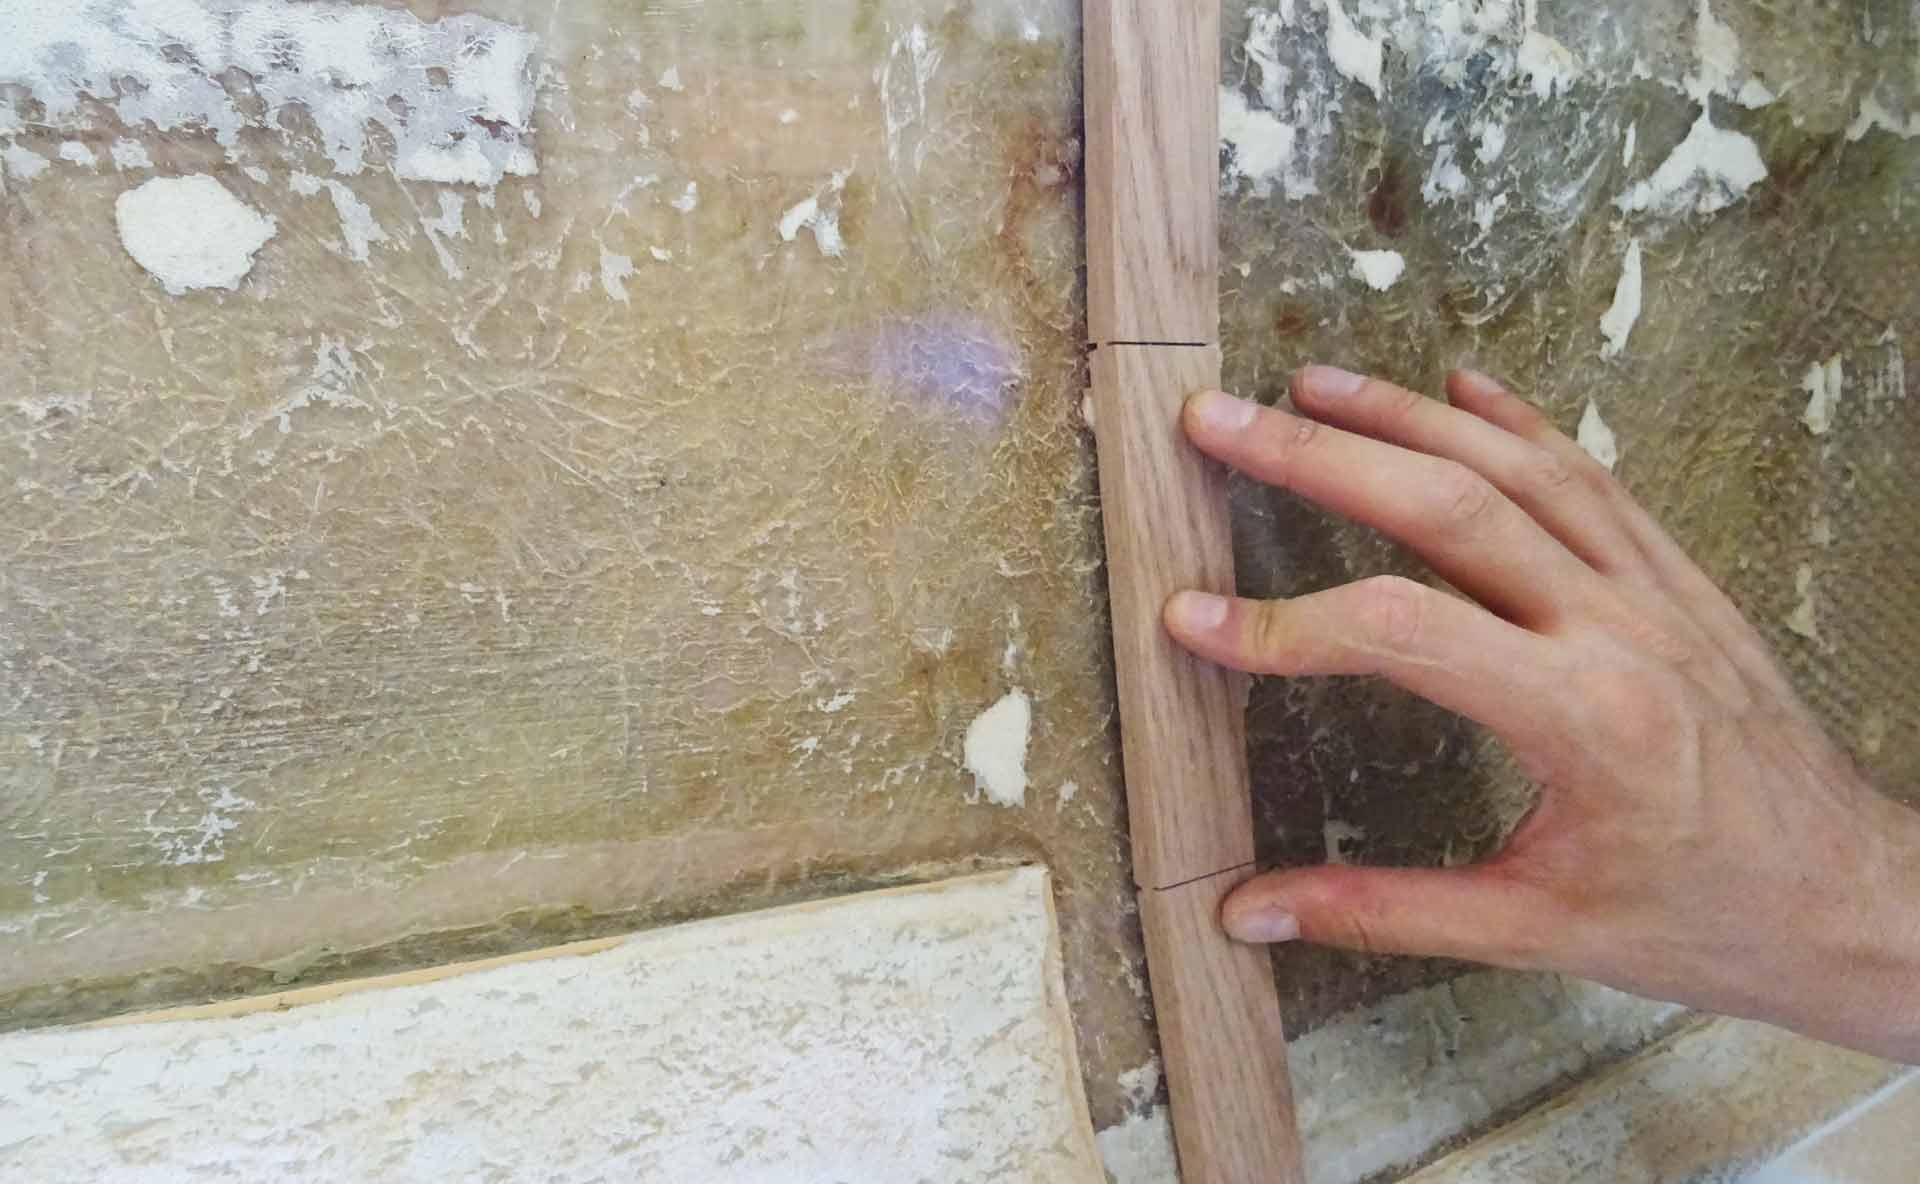
Taking measurements I am sawing the battens to the length needed. In the saloon I am going to have four struts mounted. But how? Especially as the hull is bent here and the battens are of course straight. With my padsaw I am placing a cut to one third of the thickness of the wood, from both sides. Then I can snap the batten without parting – that forms the curvature of the hull.
Getting the struts to the hull is a different question. Normally, as done in the fore peak and the quarter berth of my yacht previously, the struts are screwed into the GRP hull itself. This is something I don´t want to do because I think every screw will lessen the strength of the structure as it forms a hole. Another problem is that I don´t know the exact thickness of the hull and therefore cannot really estimate which screws actually to take. So I opted for glue.

I´ve made some very nice experiences with PUR – polyurethane based industrial glue. This is classified D4, stating that it will form a permanently waterproof connection. And this is achieved even by glueing fat timber like Teak. So with dry Oak it should be no problem at all. But there´s one constraint to working with PUR-glue: It needs pressure to bond. Lots of pressure. So in doing so I have to build a rig with stamps and wedges to get the needed pressure to the Oak-struts. The width of the saloon of my boat is 3.30 meters – a quite complex work.
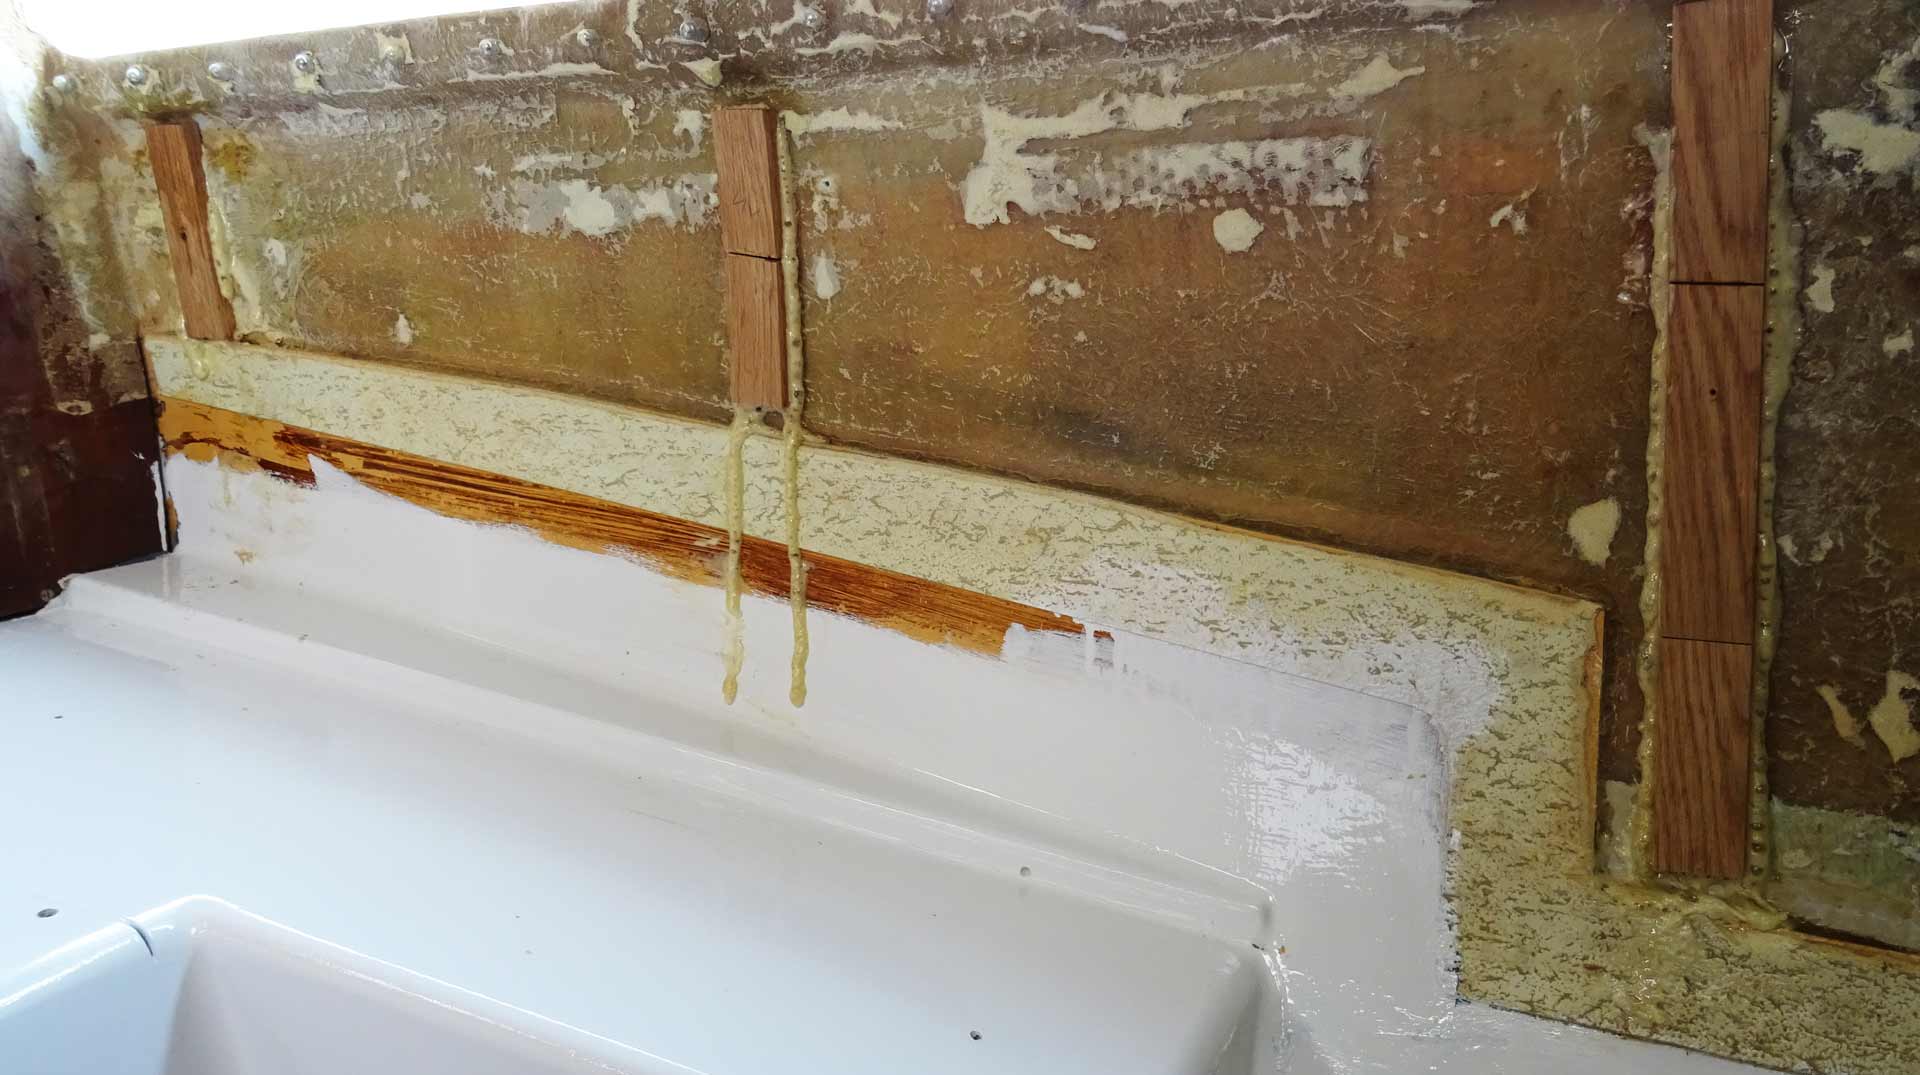
Nevertheless, in the end I manage to glue the 4 struts to the saloon as well as another 3 struts to the ship´s side so that I can go on to build the ceiling there which is a precondition to being able to finally mount the chart table and the main marine switch panel. PUR glue will develop into a foam under pressure, filling all voids before drying. Later I will apply a layer of epoxy but refrain from applying GRP. One step saved. Over the course of a week everything will thoroughly dry.
Making Teak Panels for the Saloon
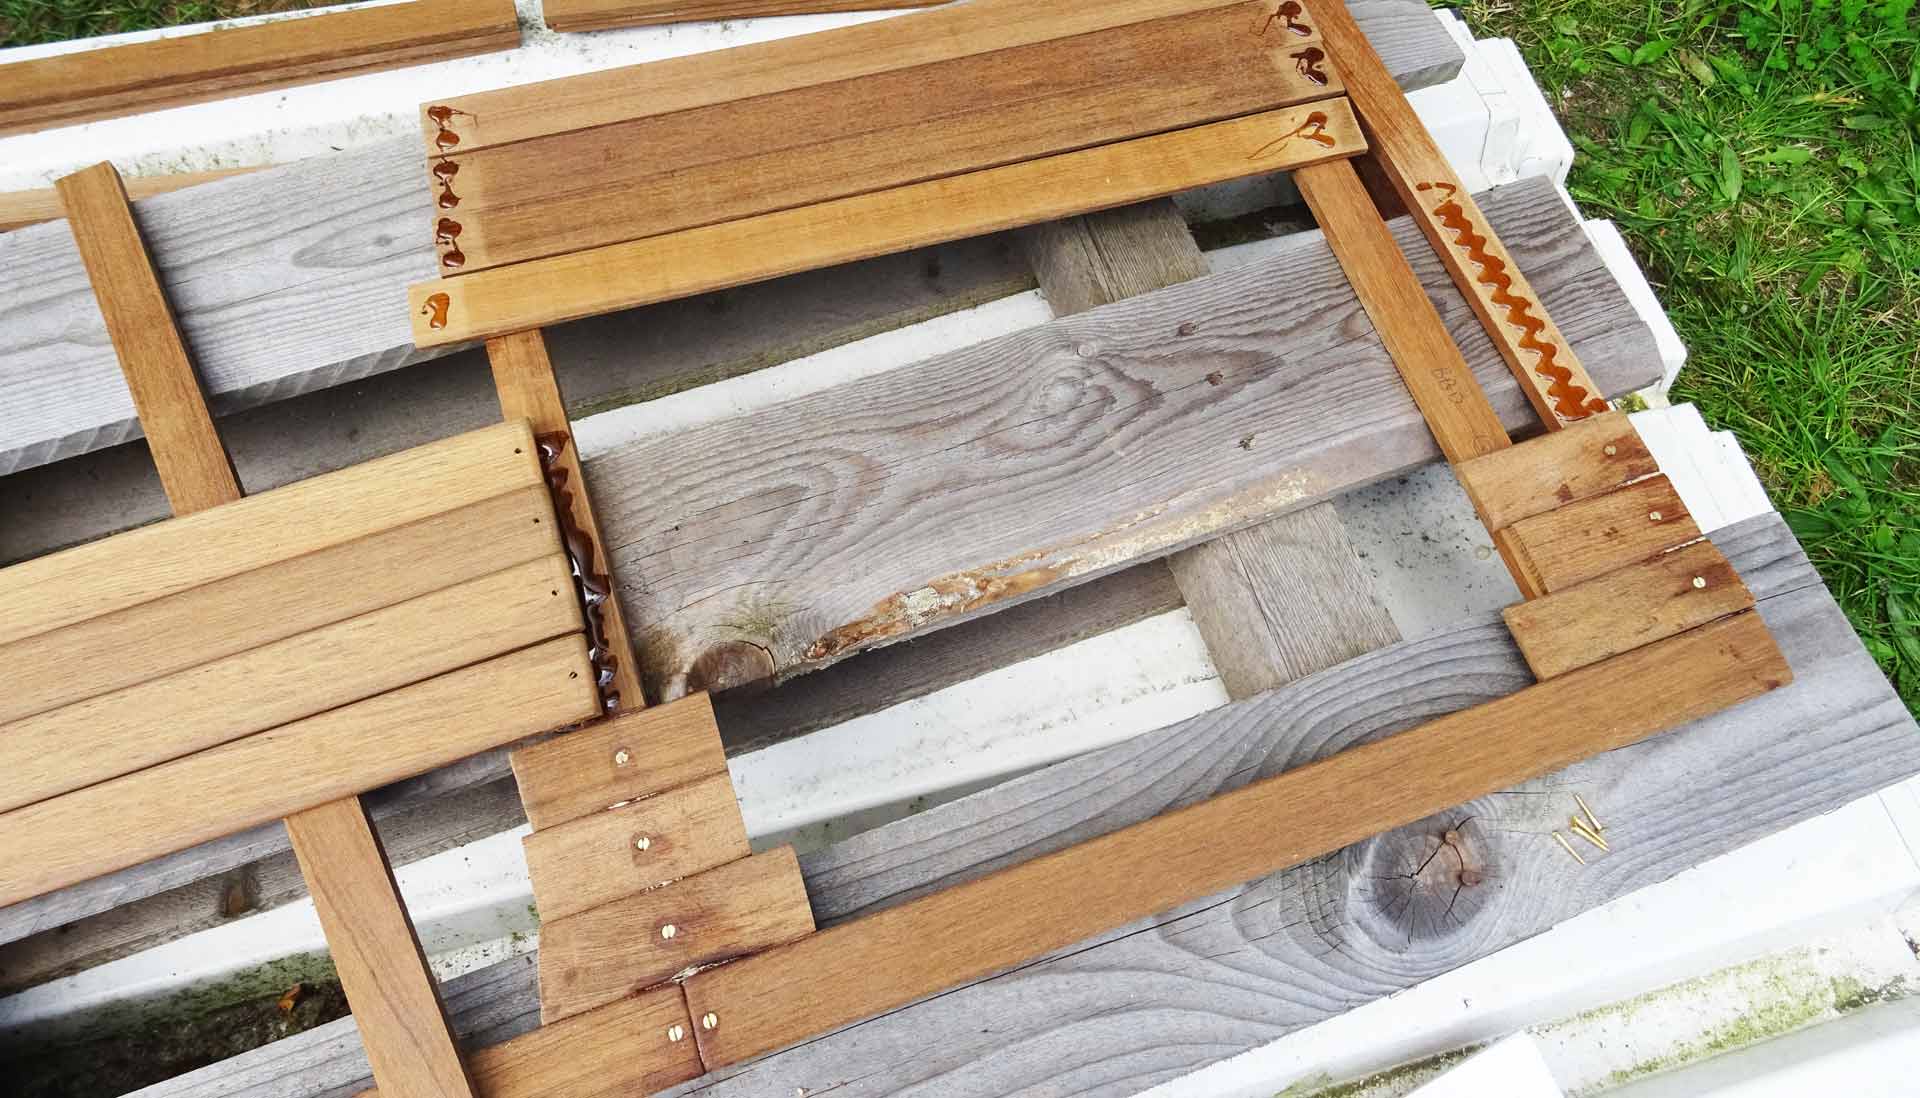
So, after having done the basic work in making the substrcution it was for the second step: Preparing the Teak battens. First of all the material: That´s massive Teak battens with an FSC-certified origin as I´d like to utilize only correct material in my boat. Those battens are in a raw state with rough surfaces and sharp edges. So I began to apply one or two sandings with the swinging grinder, the rest was done by hand and sanding paper. The aim was to get a smooth surface as well as round edges.

Sitting in the sun next to my boat was a treat although it was really tedious work to do. The constant monotonous movements soon made my arms sore, nevertheless I did had to care for a nice finish. After rounding the edges the whole latch got a finish with sanding paper and finally that was it – 2 hours later I finished working on some 10 meters of Teak battens. Now it was for serious business.

I take measurements in the ship as I decided not to screw the battens directly on to the struts for various reasons. The obvious reason was that it would be impossible to achieve a nice outcome in between the two large portholes of the ship´s hull. This could only be done by a panel – just as the previous ceiling has been made. So I take the measurements outside and begin to build the panel. 4 more struts which match exactly the struts in the boat onto where I was going to screw the panel as basic work, then I cut the Teak battens to size.

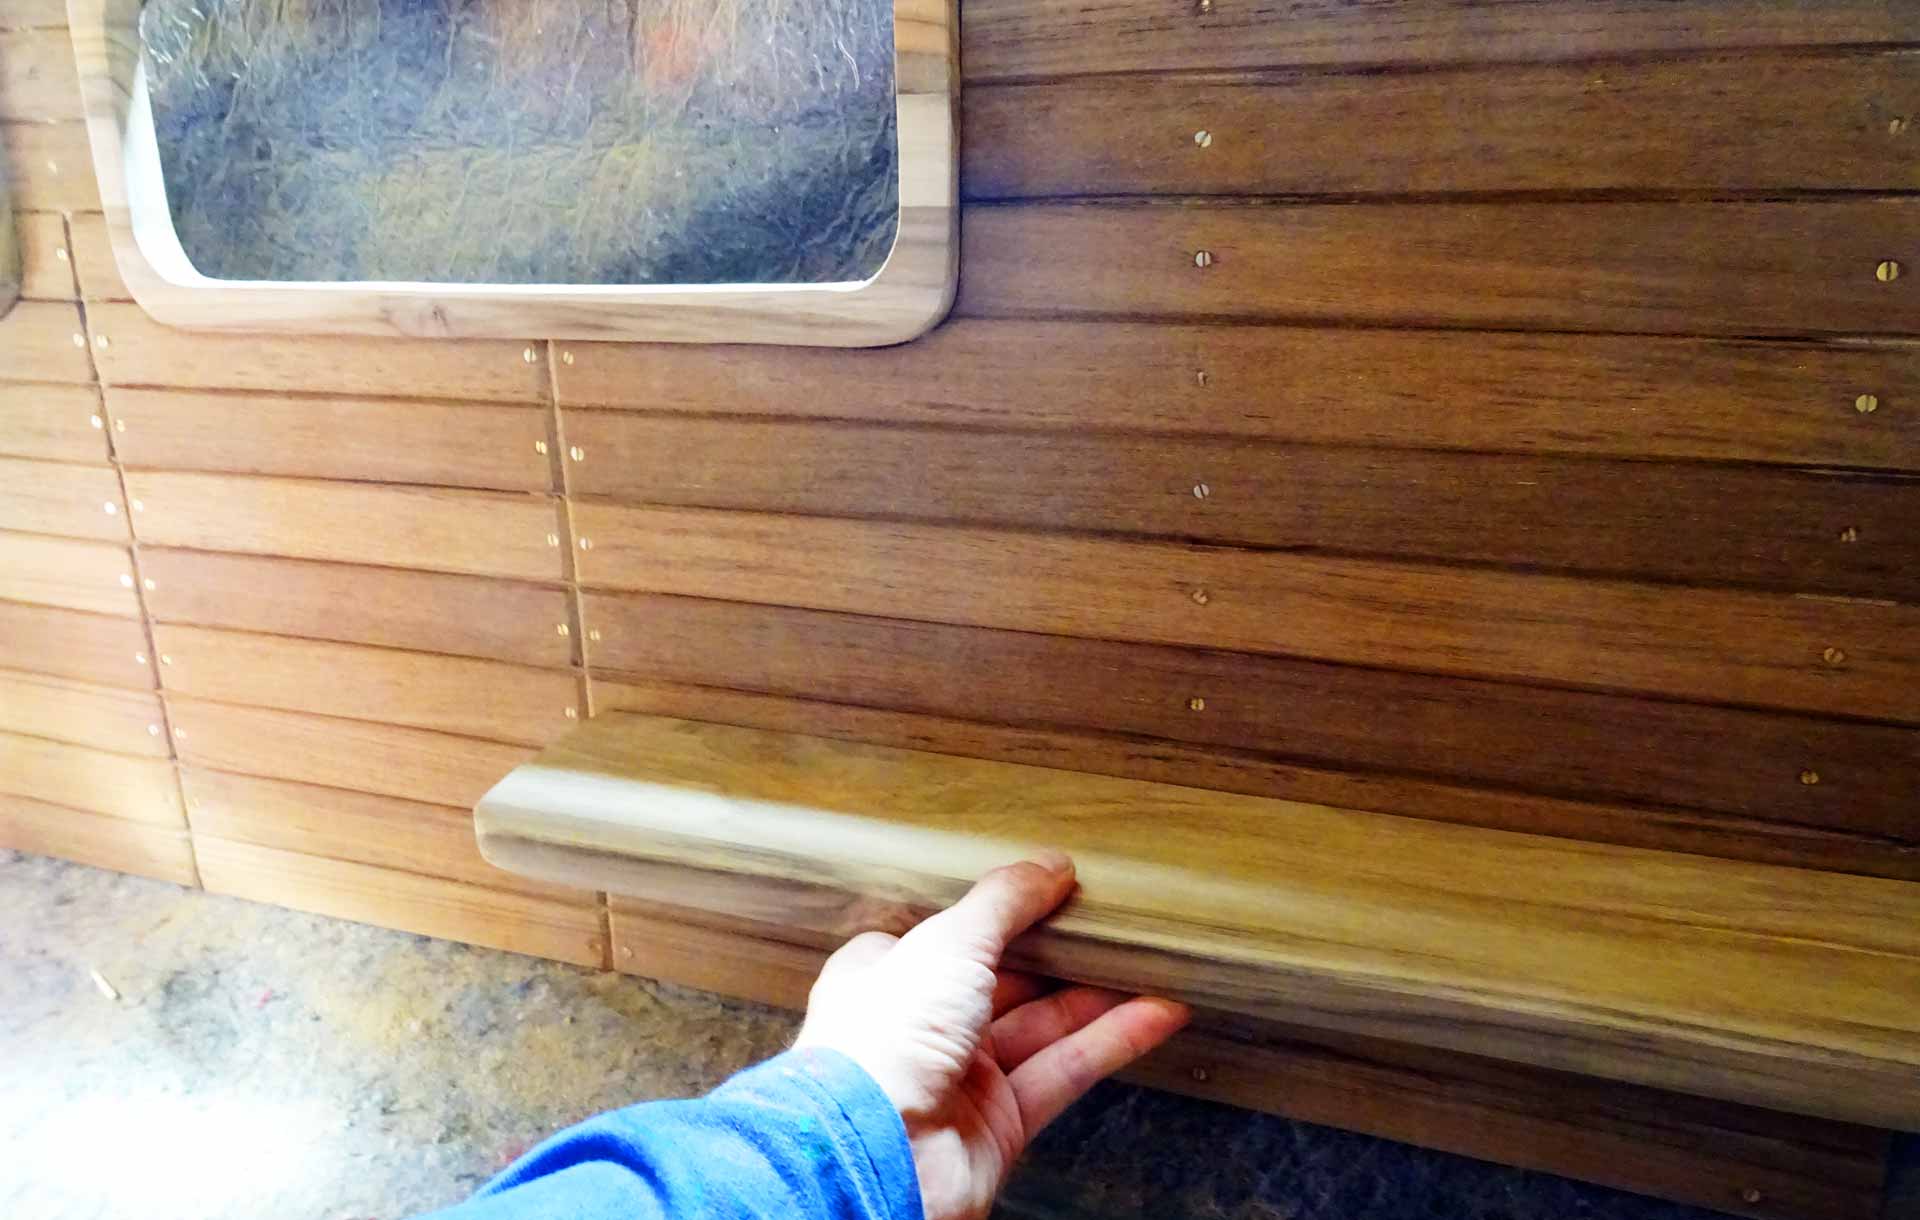
Each latch is glued onto the base by PUR-glue as well. Prior to this I did make small holes to either end of the latches as well as where the struts are to have additionally brazen screws screwed into the panel. That´s decorative on the one hand – on the other hand the screws will apply the needed pressure for the glue to form a bond. From time to time I have to wipe away the foam that´s developing between the battens and in the end I am going to properly sand out the gaps.
All in all the work is done very fast. After some five hours of working the panel is completed: Glued and screwed. The whole part measures some 1.30 meters width and 55 centimeters in height. It´s a bit tricky to have the screws applied in a way that the slits will all show in the same direction as it has been done in shipbuilding all the time. Upon finishing the work, I stand in front of it and feel very proud. But …
Better to double check. Or even triple …
Well, I am proud. For exactly one full minute. And that´s when it struck me completely and tore me out of my musing thoughts, substituted by the slowly developing shock and the realization, that I am a complete idiot. What the f***k?! It is now that I compare the old panel to the new one, that I see that my newly built panel is too large. Way too large! Although the old part was there all the time, just some centimeters away from where I was working! I couldn´t get it!

I am completely puzzled by the size or my error: In the end, the panel is a full meter oversized. How could this possible have happened? I cannot fully grab the situation, but one thing is clear: There´s absolutely no way of reversing the situation. All the fine battens have been cut to size, bore holes cannot be made undone and the glue has already begun to harden. I look at the notes I did take: I did take the right measurements. Even double checked them. But … anyway. There´s no mourning. I need a solution.
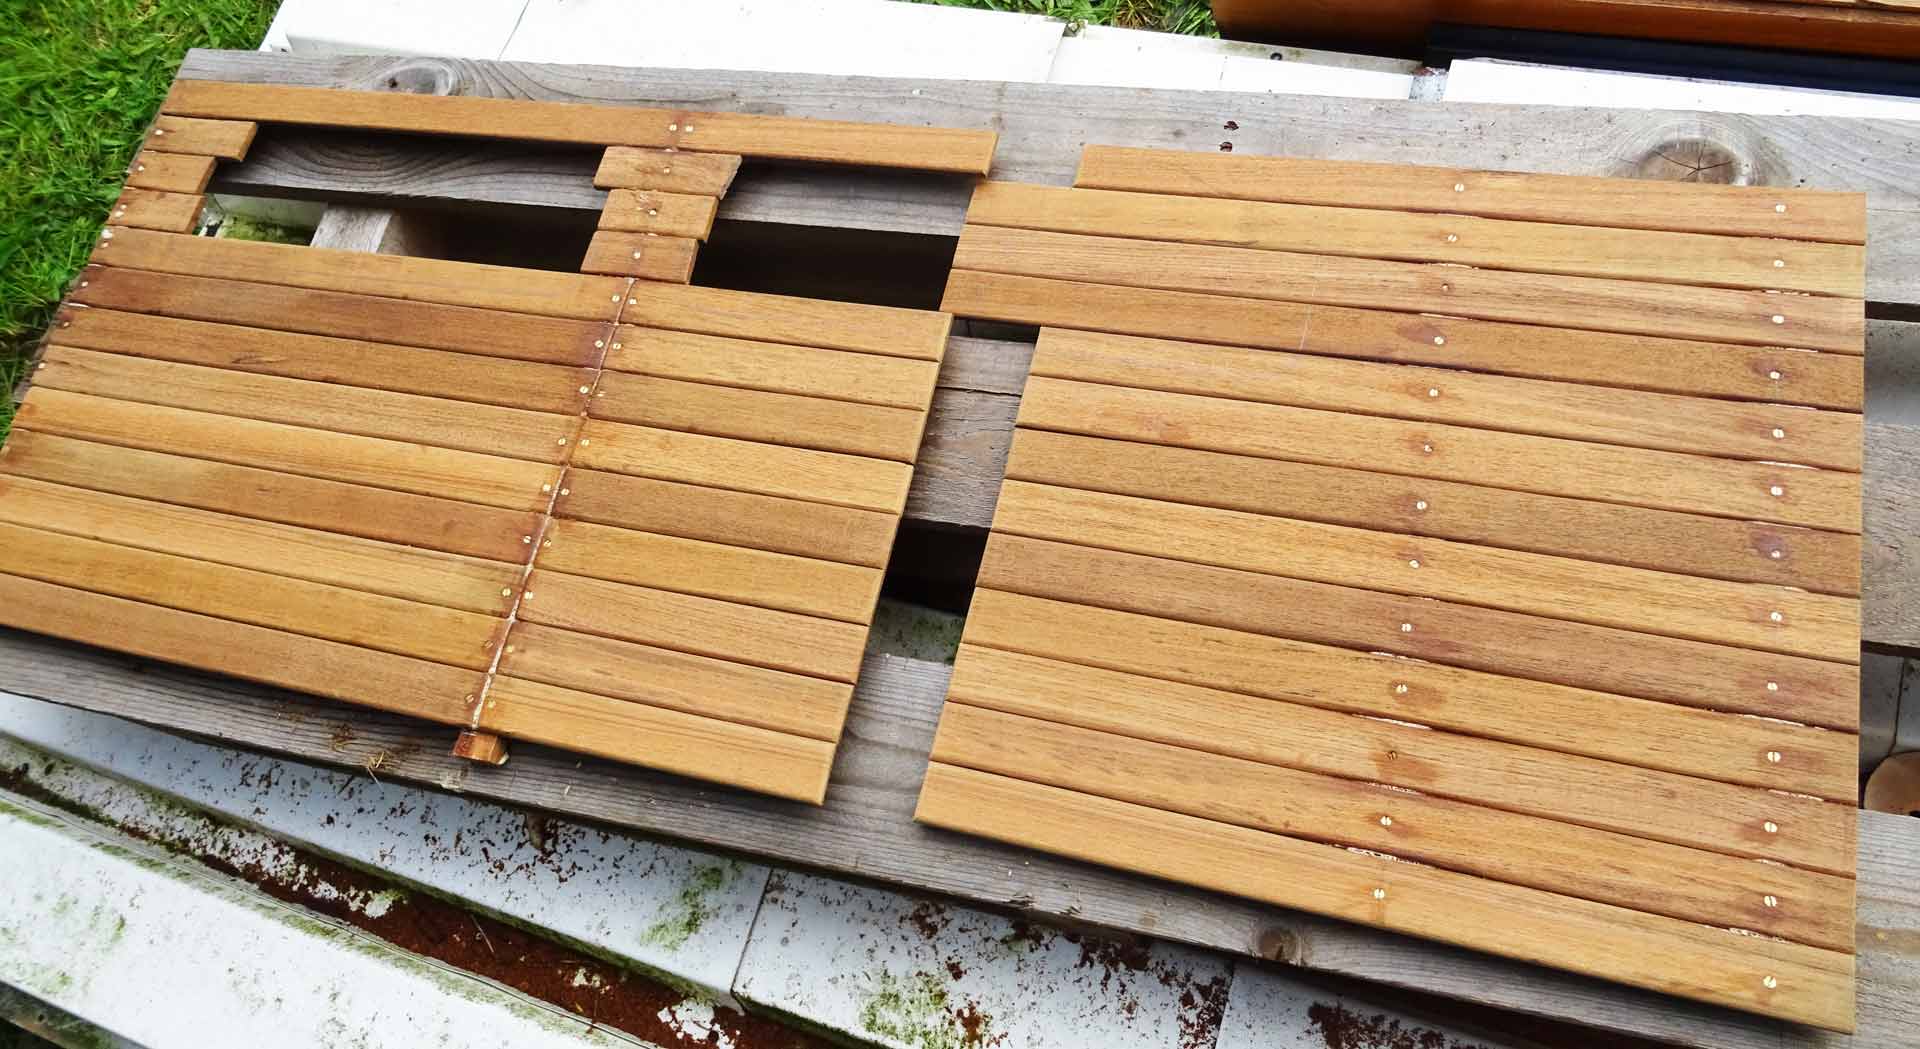
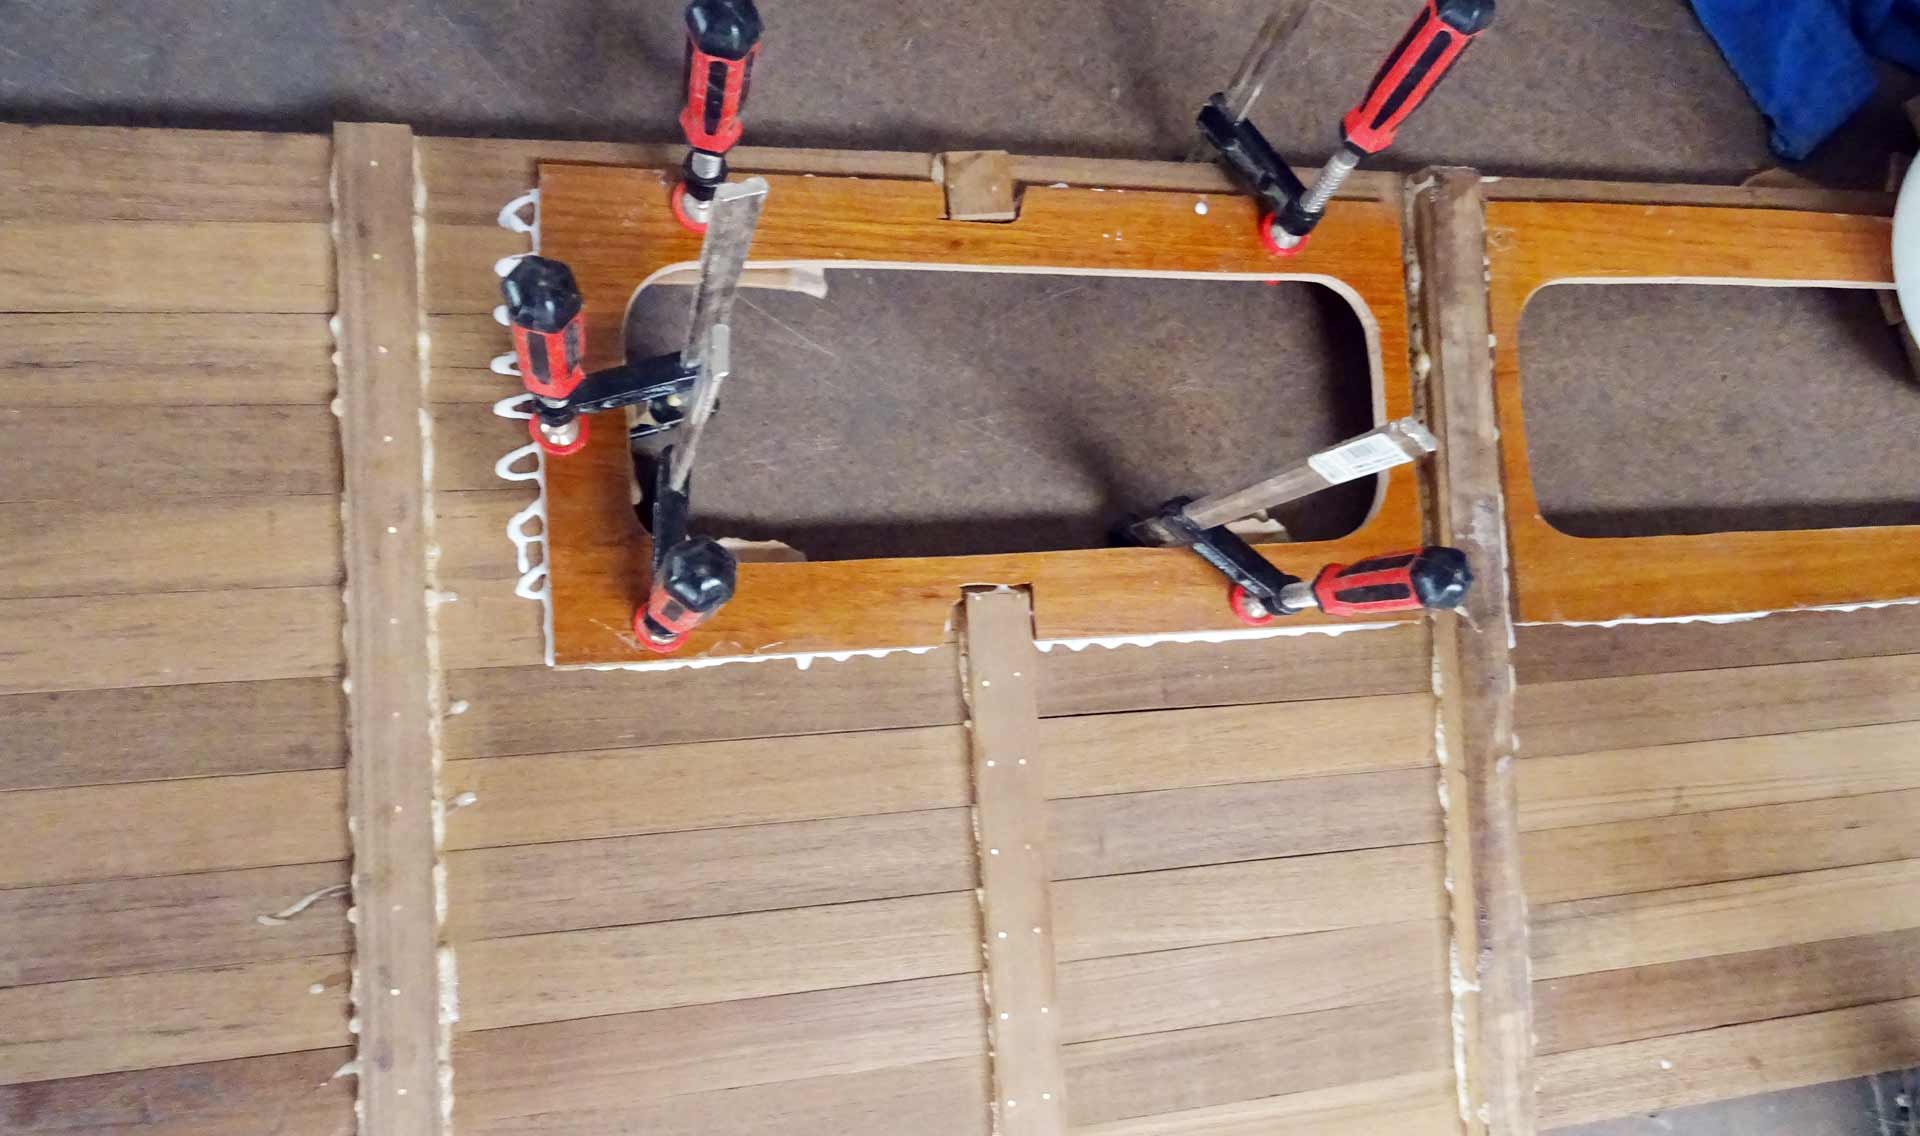
As much as I hate it, but there cannot anything be done rather than cutting up the panel into two pieces, take away the surplus material and bring it together again by means of glueing and screwing the two parts. Well, I could get rid of the panel, of course, but that would mean wasting precious timber and some 200 Euros. No way. So I adjust the padsaw and cut through the freshly made panel. My heart is literally bleeding. Rounding the edges, making the holes and applying the glue. That´s what stupidity looks like in the end.

After having done so, and checking the right fitting, I do cut out the right size for the portholes themselves and begin to sand the Teak. Taking off the arrears of surplus glue and making the surface smooth and nice, the panel indeed starts to look nice again. But as nice as the panel may look, I am inconsolable this day as I quit work after some 6 hours and a deep profound disappointment.
Sailing Yacht Luxury: Porthole Frames
The world looks a bit nicer on the next day. I arrive back at the yard with fresh new ideas and I must say I may be lucky of being such an idiot because I certainly wouldn´t have had the following idea: Why not add some more luxury to the porthole panel? Because I have the feeling that something chic is missing …
At first I recycle the old porthole panels made of plywood by cutting them up and attaching them to the back of the panel. Again by using glue and screws. Looking at the outcome from the “right” side, this adds a bit more depth to the construction as well as some stiffness to the panel. Another effect is that the covers will narrow the windows. I could leave it that way: By applying some Teak-varnish and five to six layers of clear paint it should look awesome. But that´s not enough.
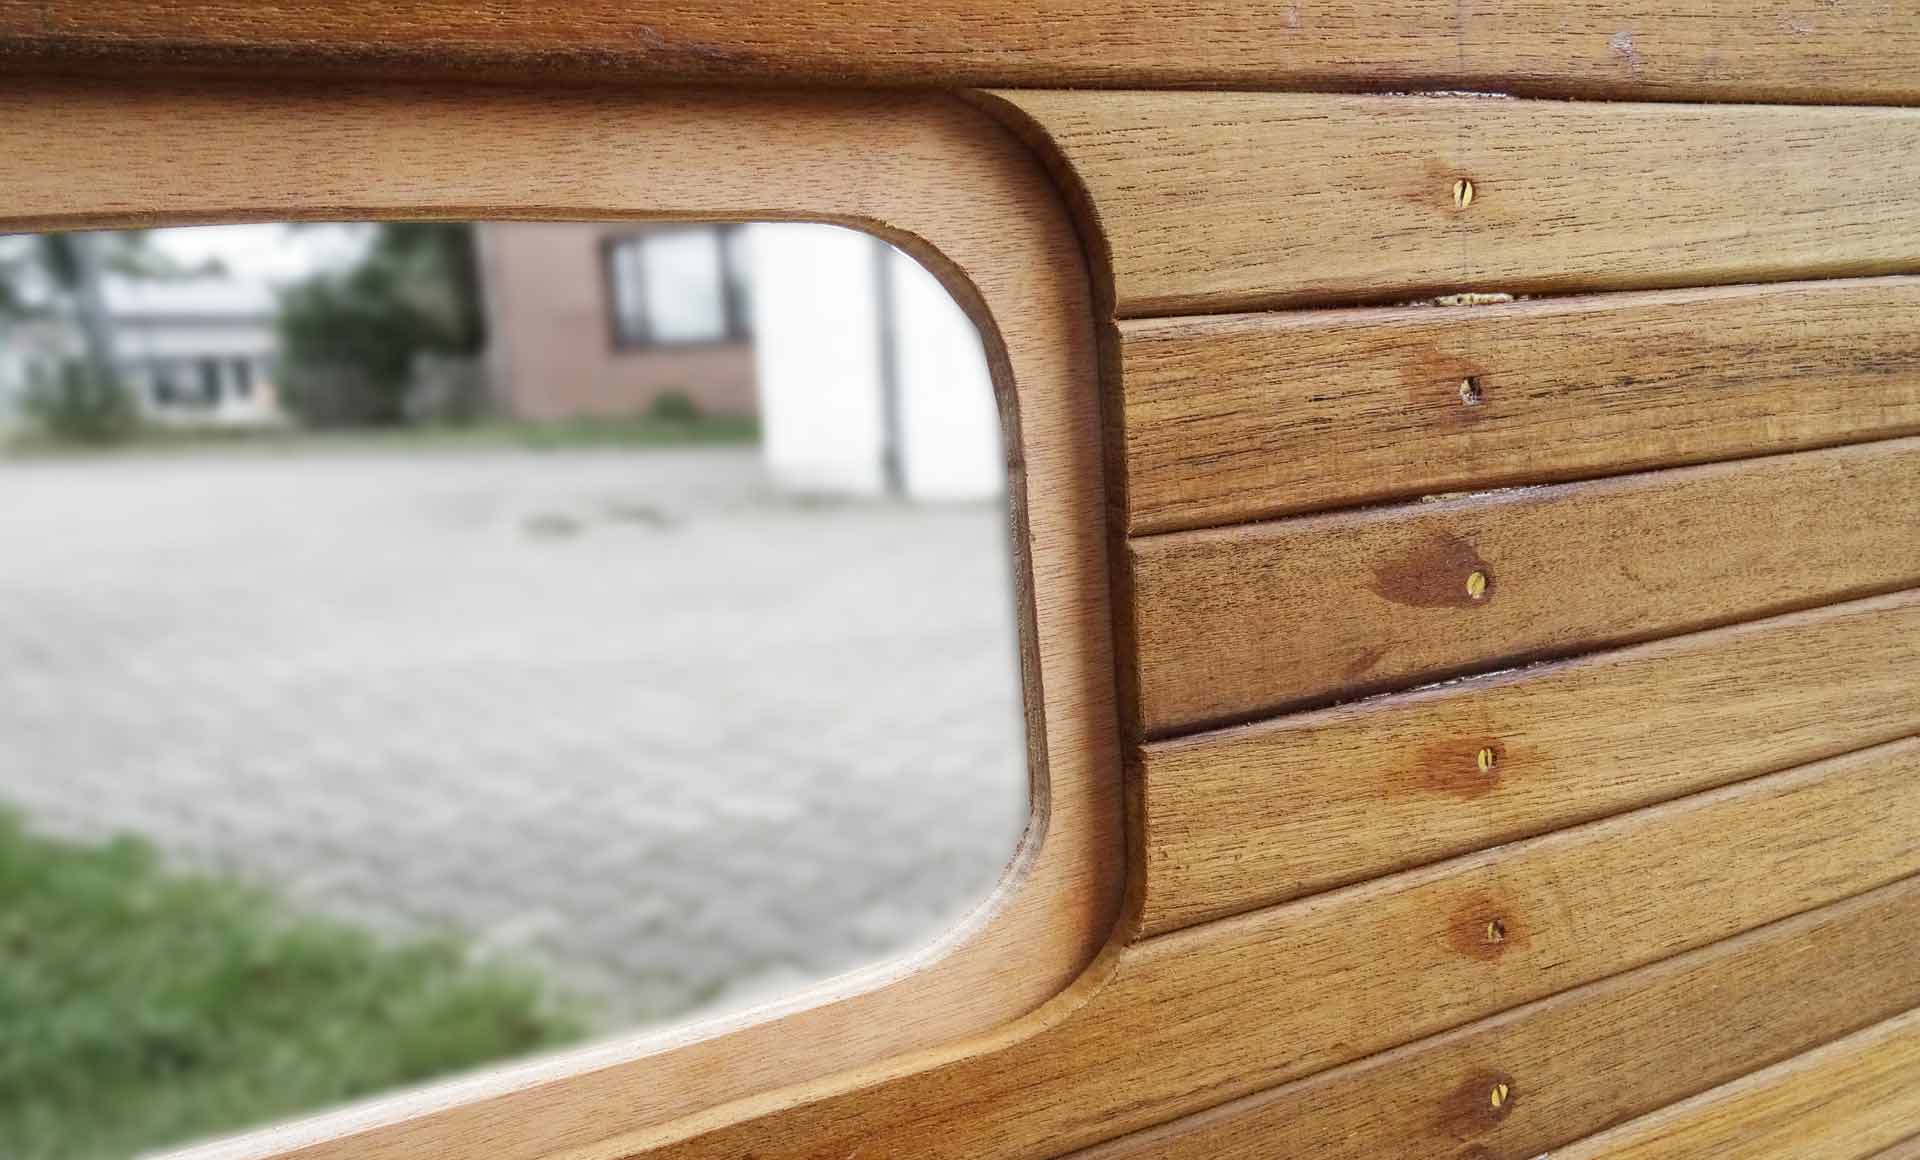
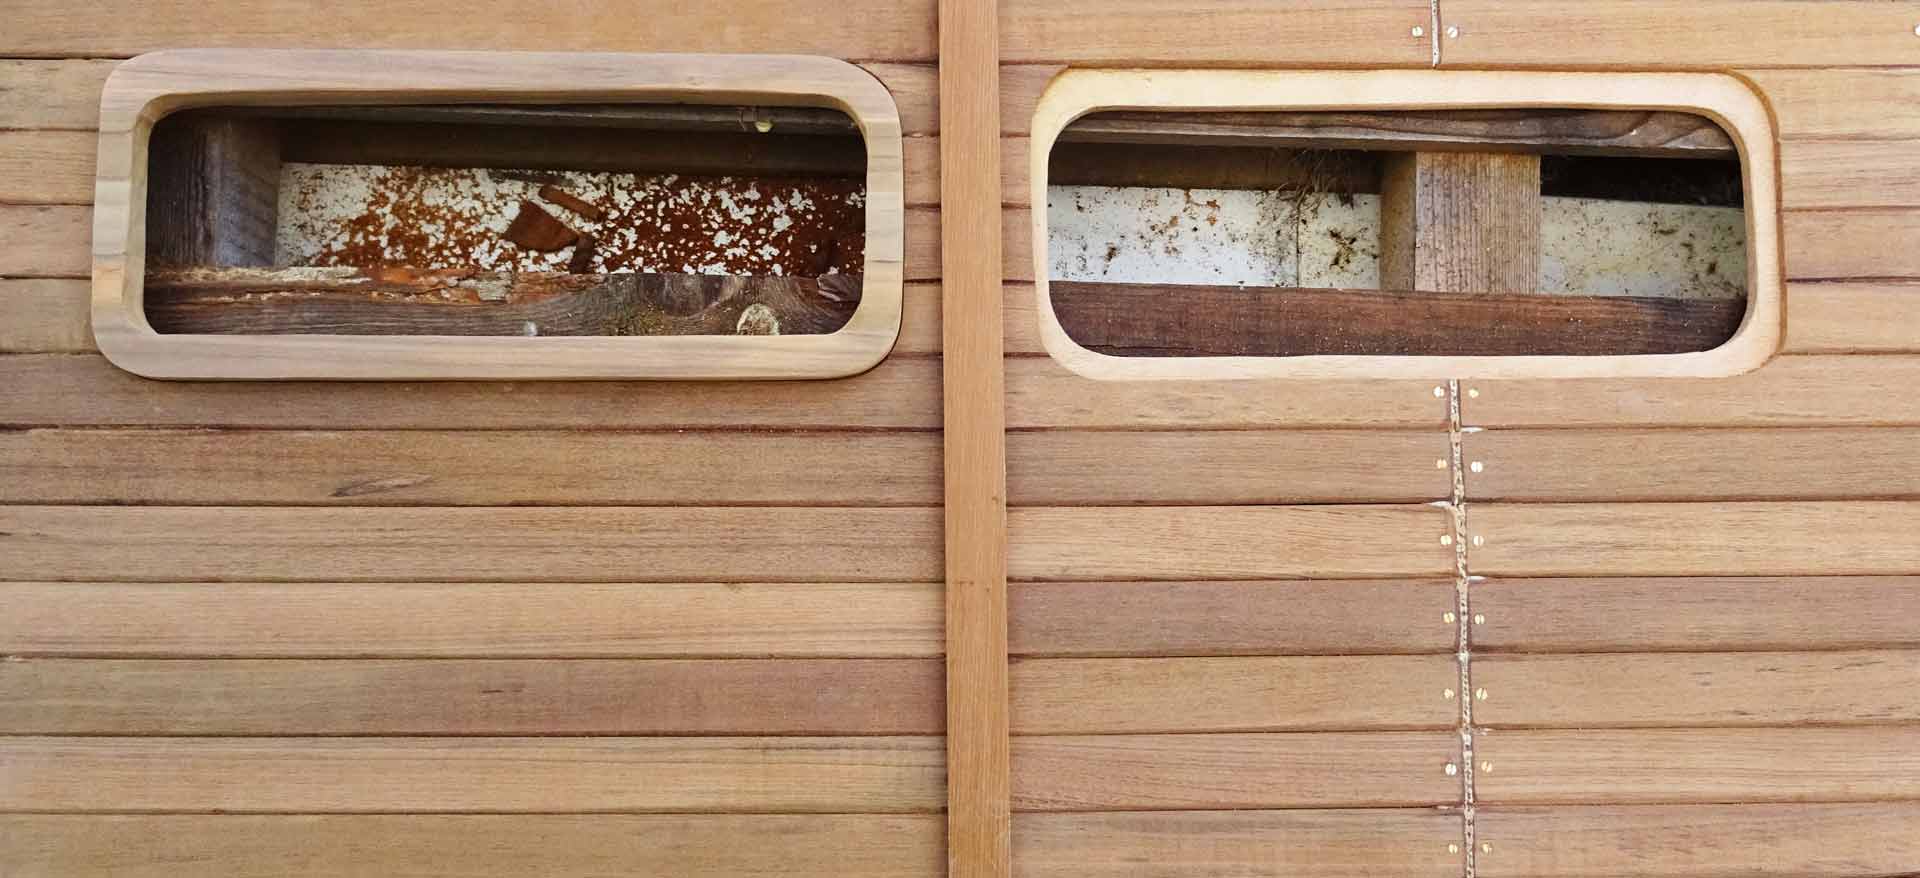
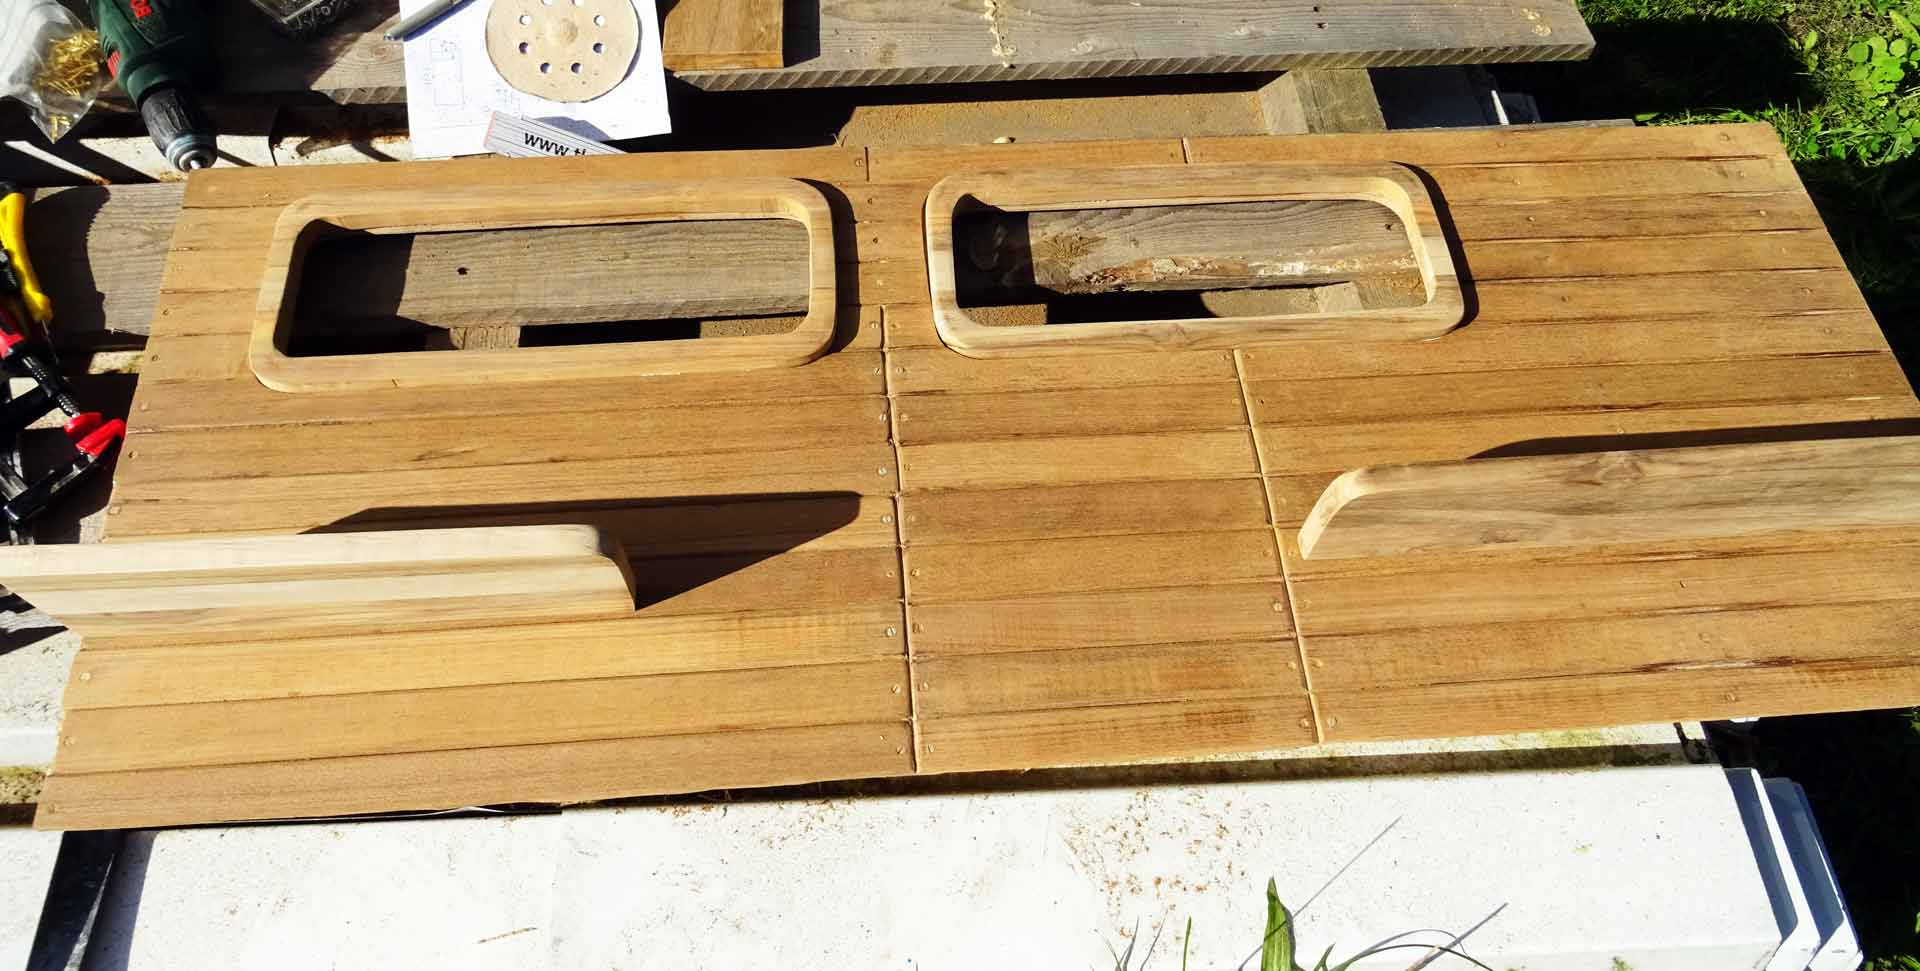
As I do have some massive Teak left over from building the new galley´s worktop (read the article here) I decide to do something special. First making a cardboard model to meet the exact form of each porthole I cut a tray of Teak. Sanding it to fit nicely, I produce covers for the portholes. Next thing is to mark a 2 centimeters thick line all around the inside of the tray – and again begin to utilize my padsaw.

In that way, I get a thick porthole frame cut out of massive teak which already looks great without any further sanding. I congratulate myself to that idea and go on producing the second porthole frame. Rounding the edges with sanding paper and the surfaces smooth and nice the outcome is fascinatingly nice.
Looking at my work I am deeply satisfied – as much as I was destroyed just yesterday. The panel looks just awesome and though I am thinking of applying vertical strips of Teak to cover the lines of screws, I reject the plan because I have the feeling that after varnishing and clear painting this panel the screws won´t attract too much attention anymore.

I really can´t wait to have the panel installed in the saloon, clear painted and finished. It should spread a warm atmosphere making the saloon cozy and ship-like. Well, it´s definitely no joinery as one could expect it to get with a Hallberg-Rassy, but it´s my own hand´s craftsmanship and I am convinced of being able to increase the quality of my work in the course of the refit program of my boat as this very part has been the very first of much more to come.
Adding some shelves
I didn´t really sail my King´s Cruiser that much. But after three days of taking SY OLIVIA from her pre-owner to Hamburg (read it here, here and here) I could notice that especially in the saloon all kinds of stuff was flying around: The lighter(s) for the candles, bottle opener, a small flashlight, spare batteries and smartphone charger leads. What is desperately needed is some form of stowage for the thousandandone things.
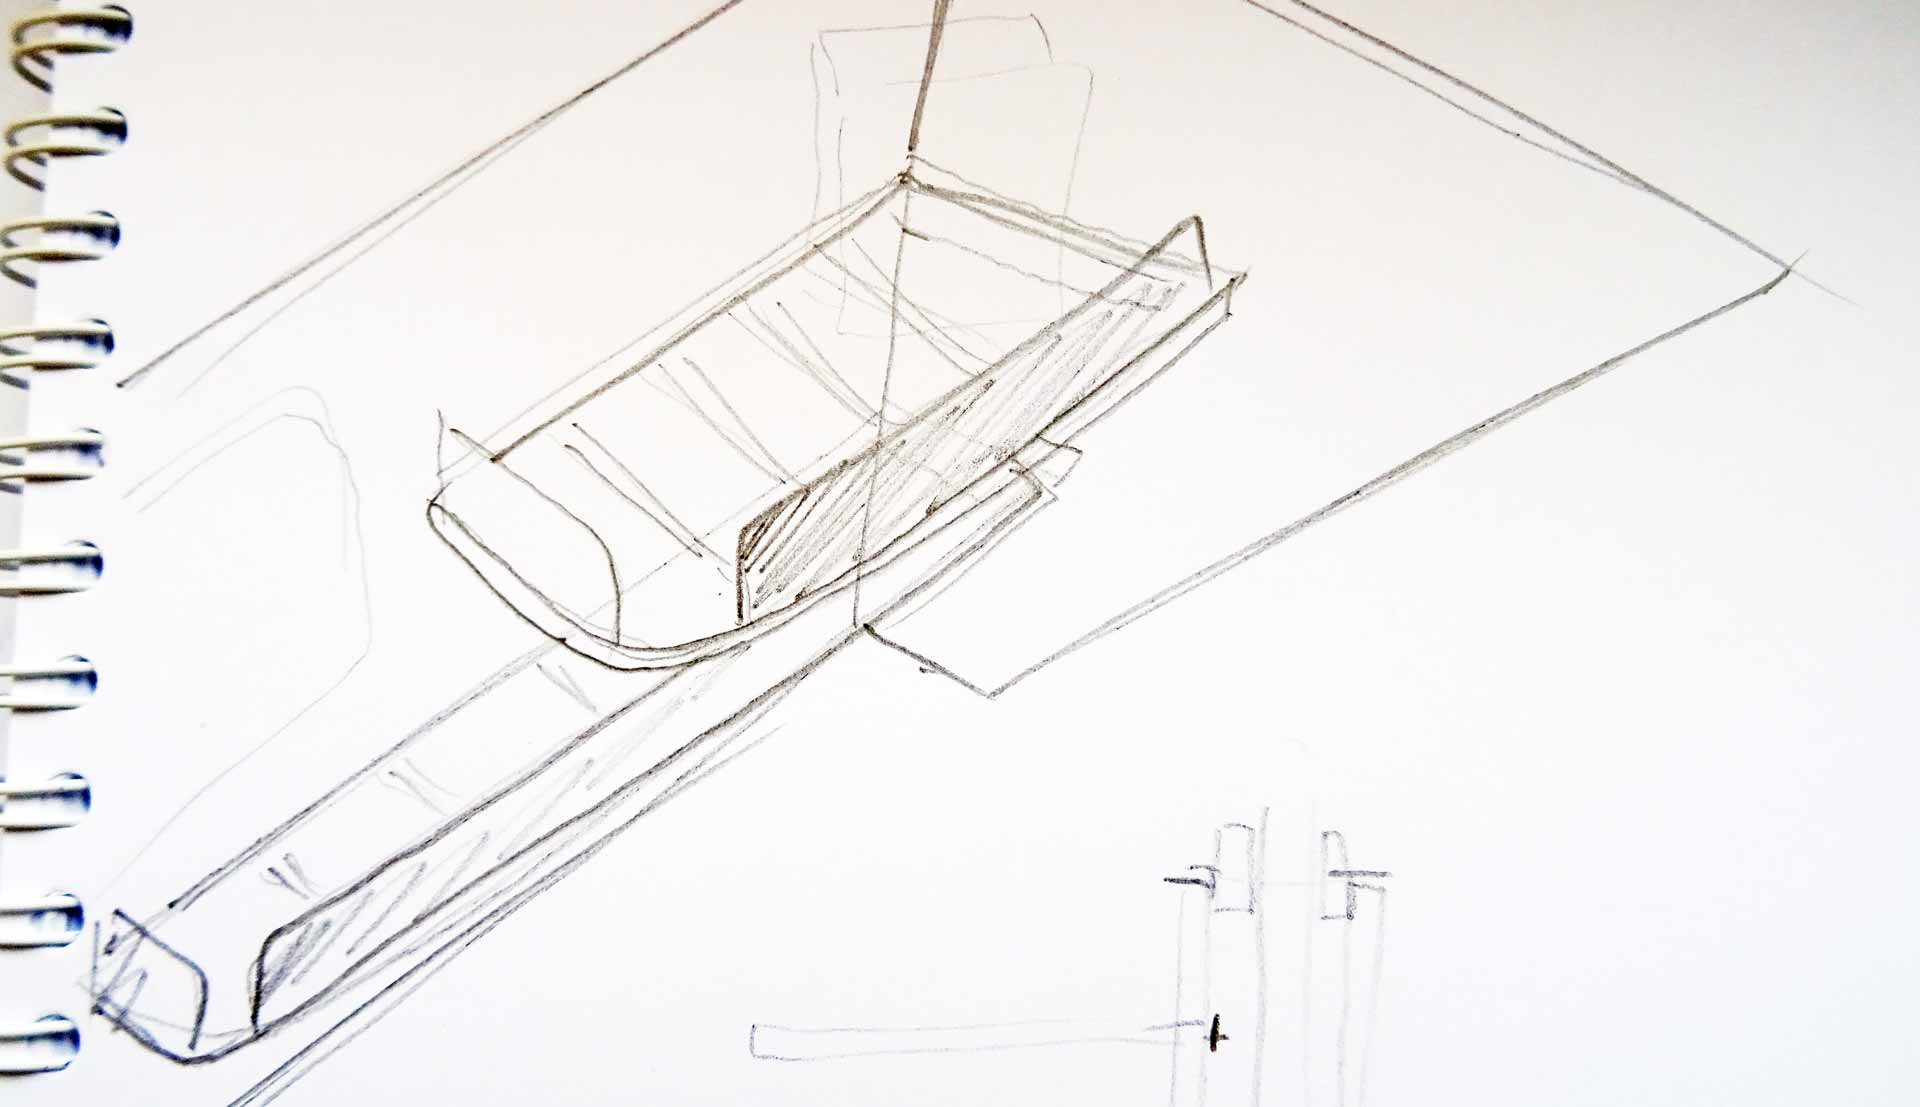
After doing a little sketch I returned to the yard to see what I could do. As I am planning to have a really big cupboard between the two shrouds there was no real need to add most of the stowage to the freshly made porthole cover panel, but at least one or two shelves should do it.
Cutting some of the leftover Teak into size and adding round edges I adjusted the shelves to the panel. There will be one larger shelf to the aft-side of the panel and a shorter one to the bow-side of it. Of course, the port-side panel will be an exact mirror-inverted copy.
As the panel ´hasn´t been hardened through completely I quit work at this stage. During the next phase of works on this panel I will add bore holes for attaching the panel to the ship itself, but for the time being I was extremely satisfied with the outcome of my work, especially when I think of the major error I was prone to at the beginning.
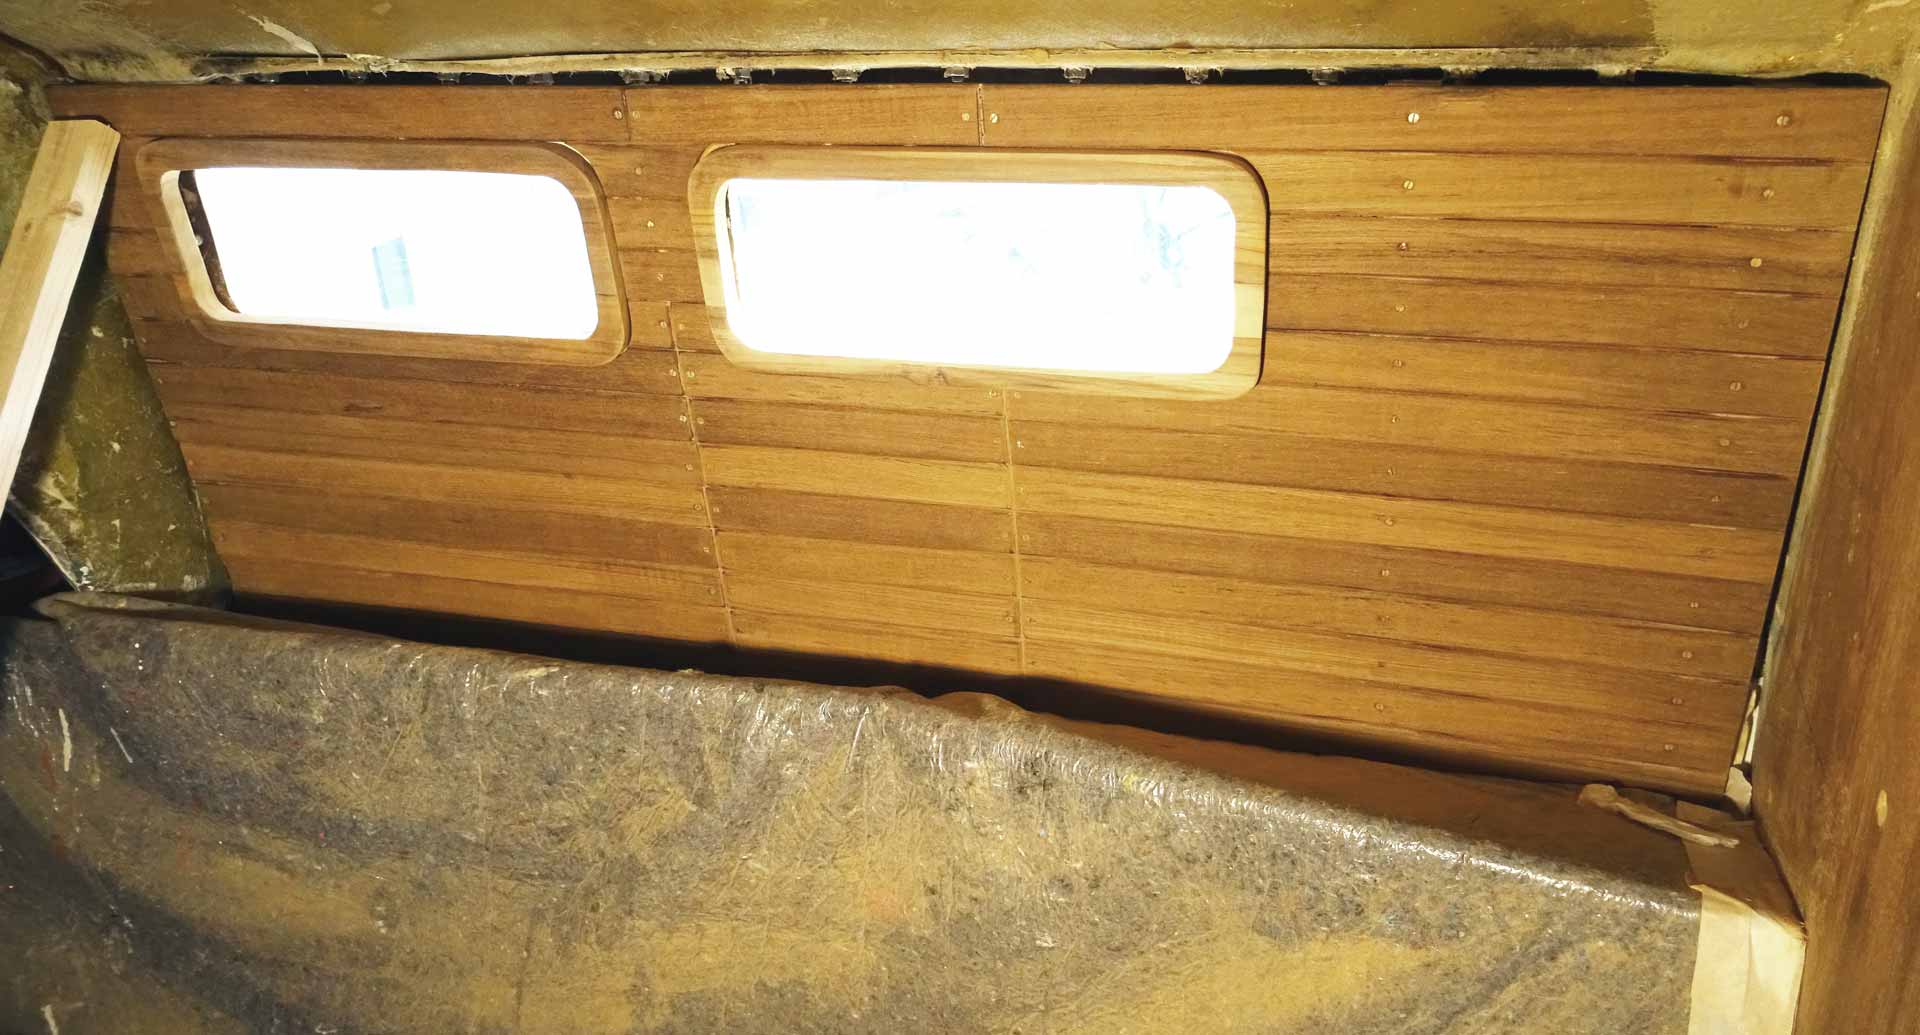
The panel fits in just neatly to the yacht and was instantly boosting the interior appearance of the saloon. It´s definitely worth all the efforts to replace the simple plywood covers by real Teak as it will pay back tenfold in coziness and appeal. But on the other hand, that´s so much work ahead: The copy of this panel for port side must be manufactured as well as two smaller covers adjoining the forward bulkhead and the cover-cupboard-construction of the shrouds. Oh my …
Next Steps on the To-Do-List of the Yacht-Refit
I must admit, the current state of my boat´s appearance is a bit frightening: I am sanding all the wooden surfaces right now, there´s half of the work done. Next is forward bulkhead, heads, companionway and fore cabin. Having completed those works, I could empty and clean the boat of all the dust again.

And there´s the new galley waiting to be installed (read the article on the new Teak made worktop here) as well as the new chart table awaiting installation. This all can be done only if all of the ceiling has been installed first: Apart from the vastness of this task, it´s just simply a matter of money. Because there´s so much timber needed that I have to buy it step by step due to budget restrictions. I guess, it will take a lot more time than expected to get this boat into the water again.
But how does the saying go? “A yacht´s refit takes twice as long and will be threefold more expensive than calculated.” I guess, I will increase it to fourfold …
Black Hole Yacht Refit? Read an Interview with the brave crew of SY ZIRKON
Refurbishment of an old-filthy bilge
Building the perfect chart table of massive Teak