Another net 12 working hours have been accomplished and I´ve made a huge step forward in working off my – up to now – 30 items long to-do list. After having emptied the boat completely and nearly finishing working on a bilge-refurbishment (which can be read here) it was the task of the last weeks to give all the internal GRP-surfaces a treatment to make them ready for priming and painting. Why? My Kings Cruiser´s interior is dominated by a 40 year old yellowish gelcoat-color that simply annoys me. I want it in a straight modern plain shiny yacht-white. Time to apply a load of sandpaper …
First Trial Fore Cabin: This is how I do it
Advertisement
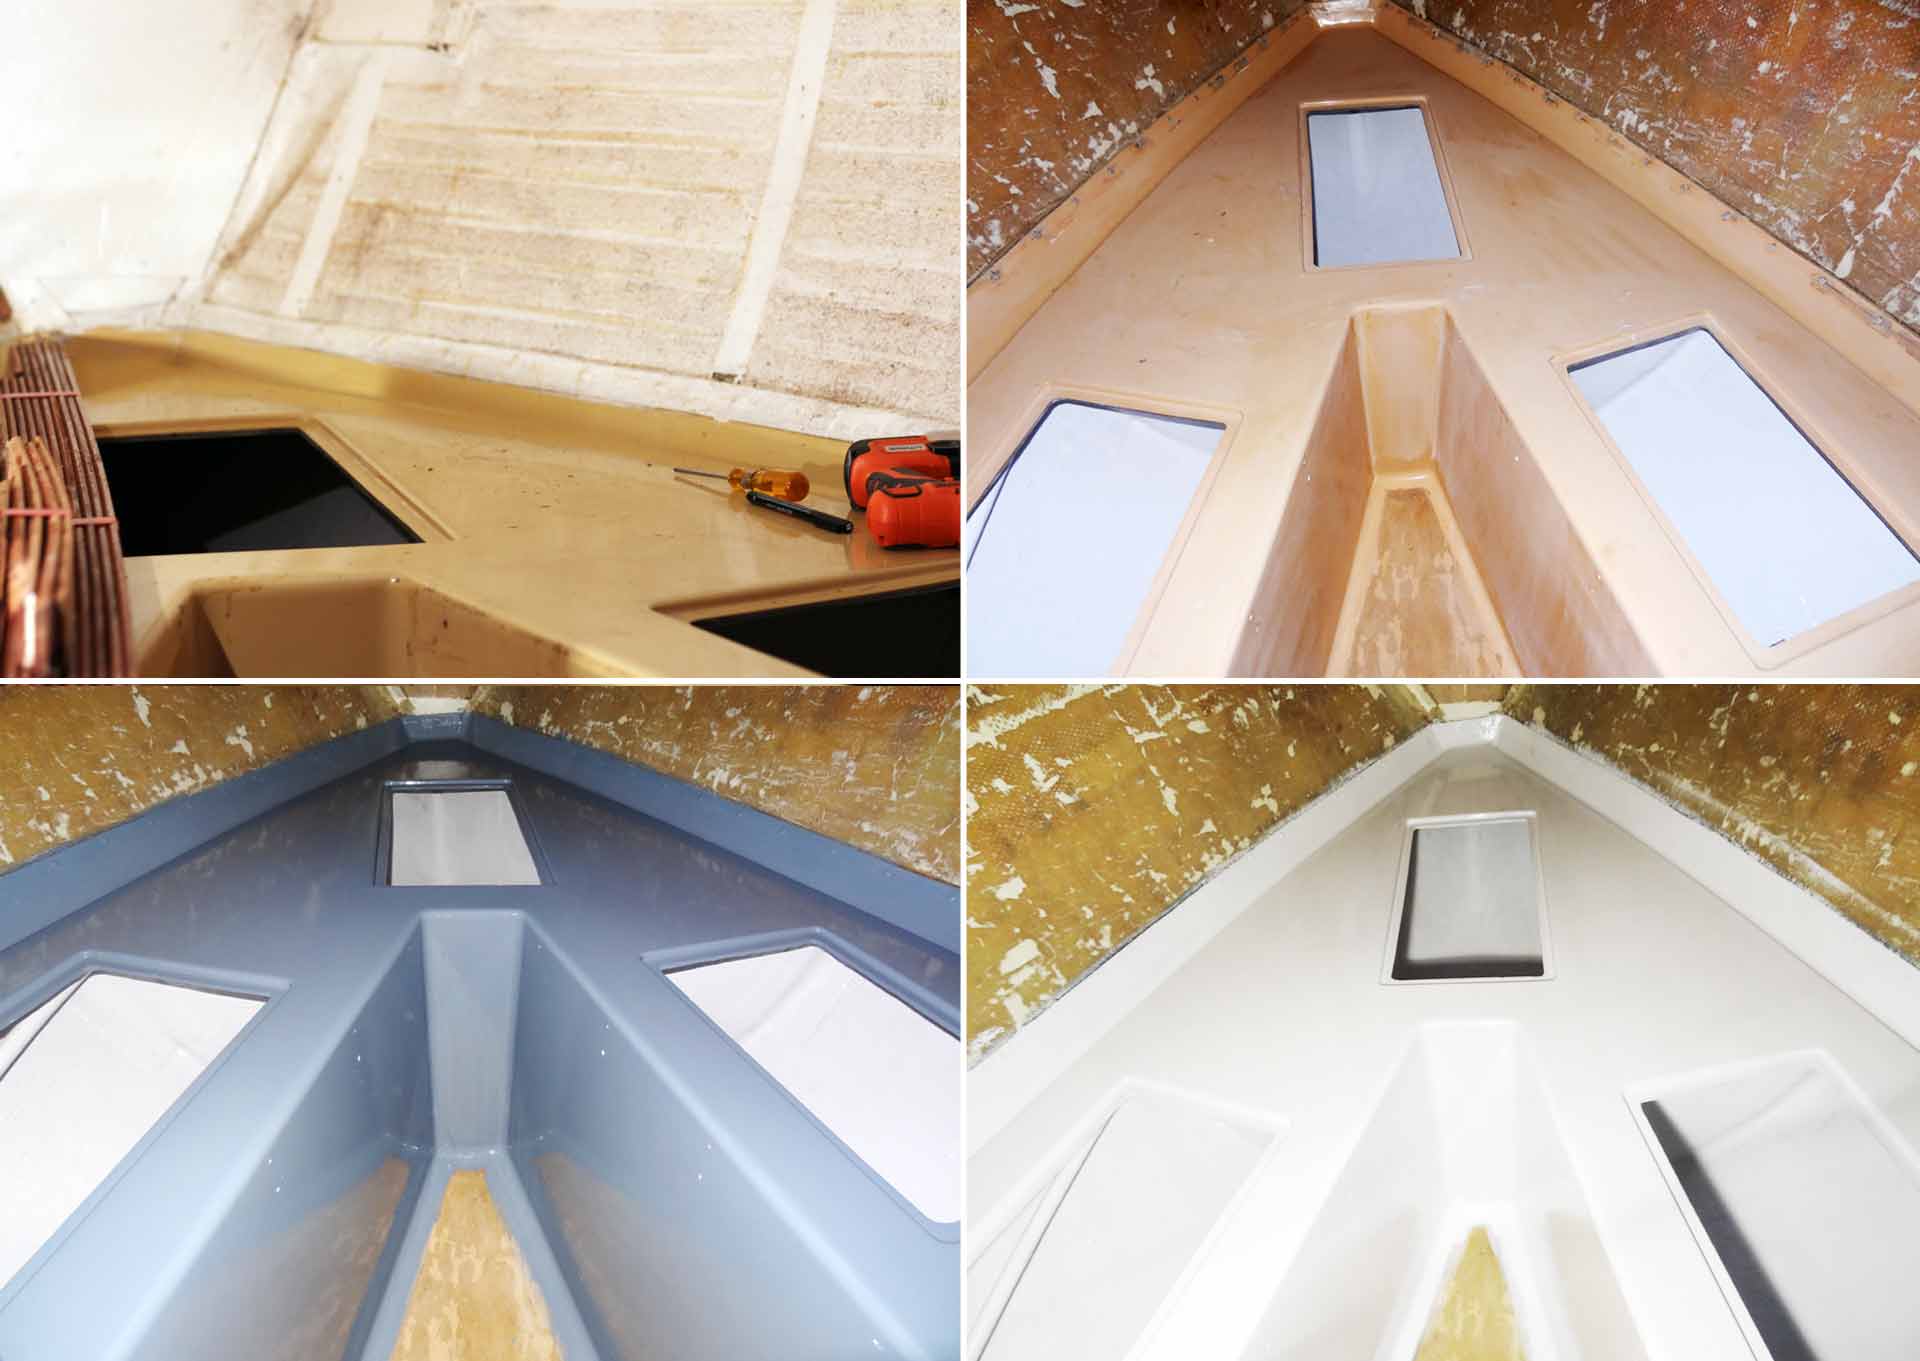
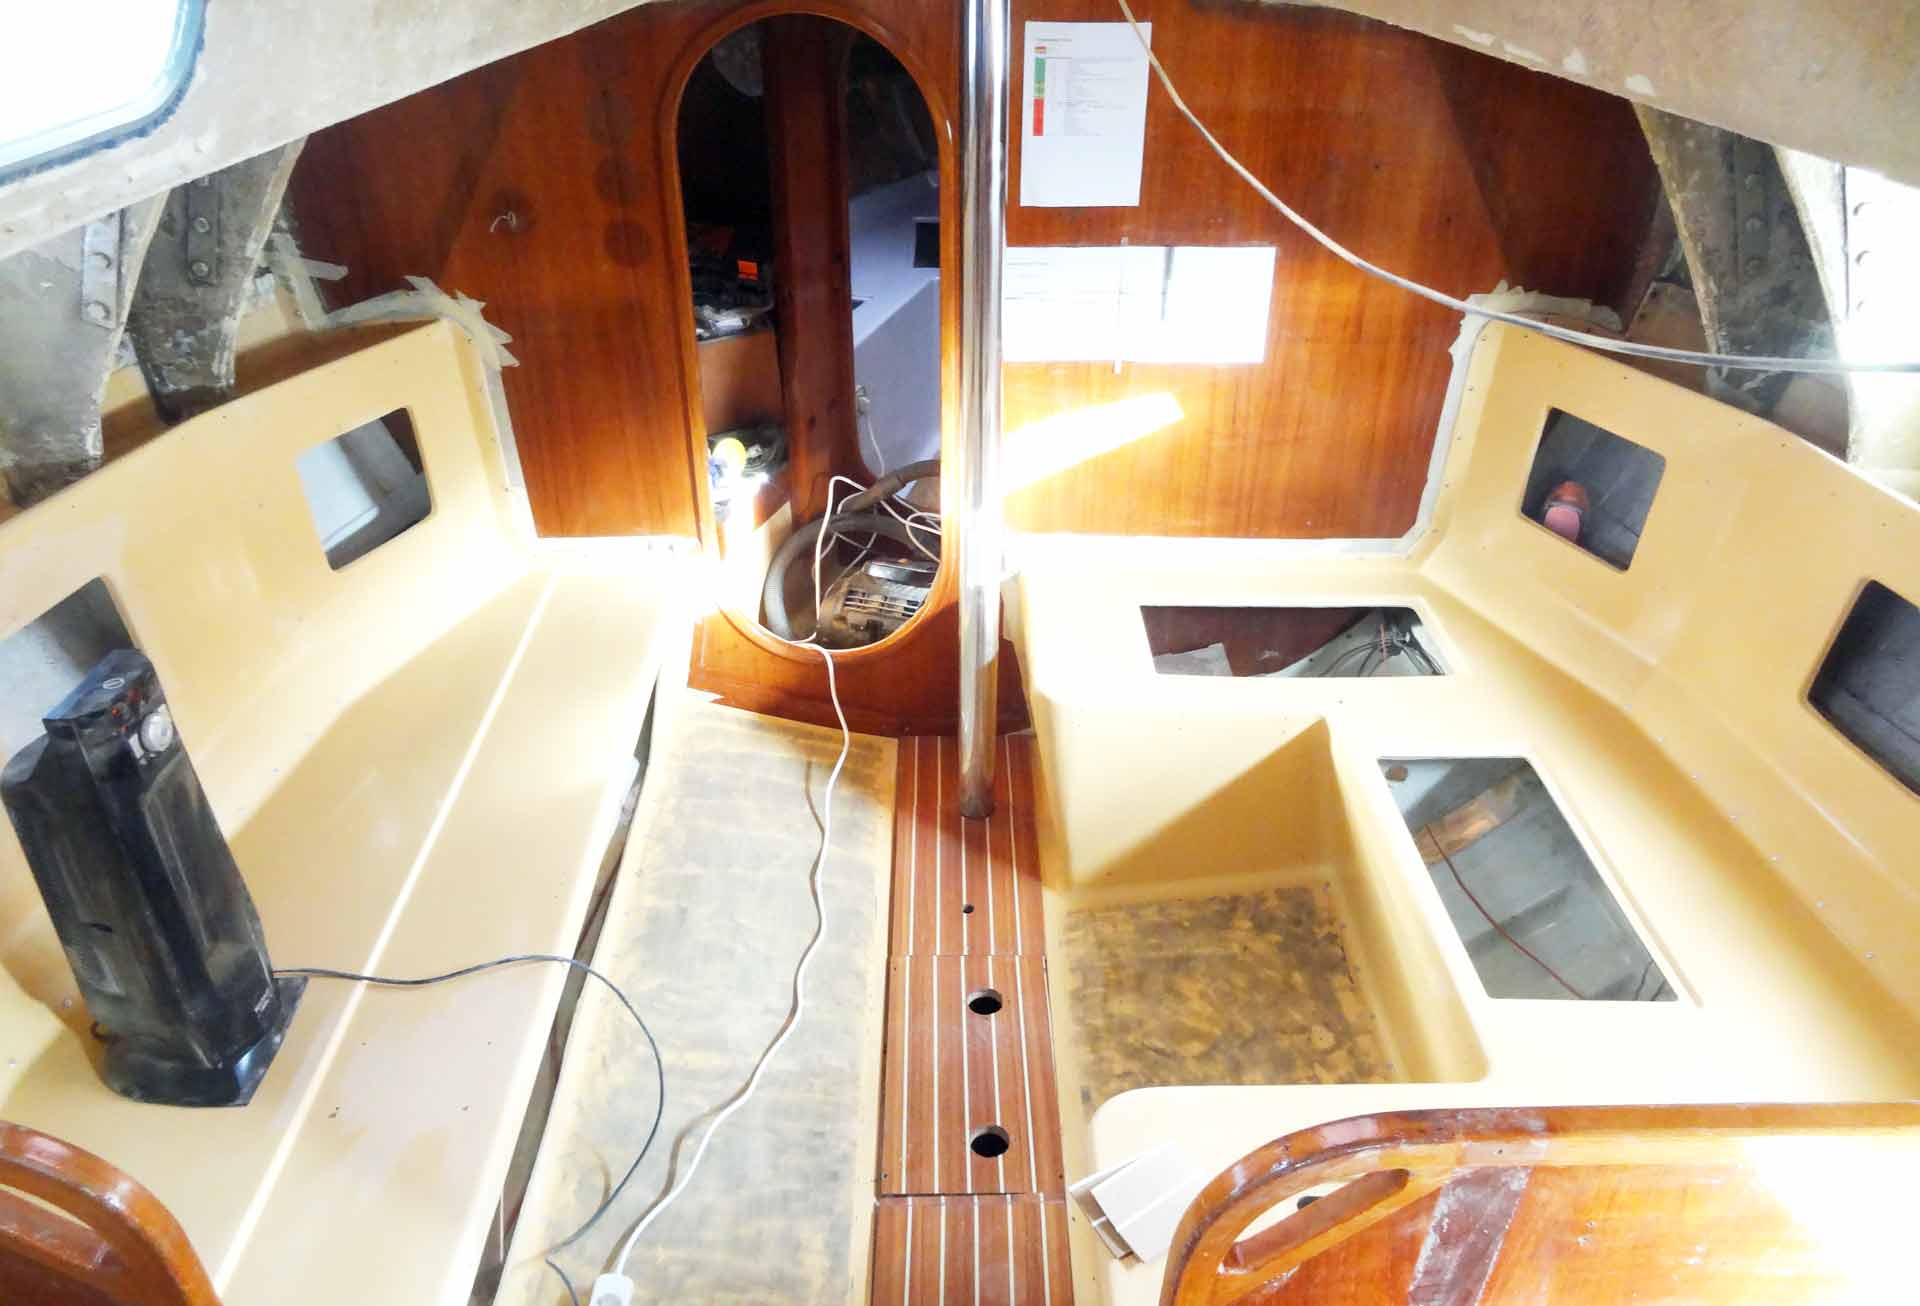
As I was pointing out in another article on my plans with the interior refit I want to preserve the character of my classic cruiser where it is possible and where it meets a modern day skipper´s aesthetic pretensions. Keeping as much wooden panels as possible is one major point and trying to preserve the overall look of the boat is another. But the yellow Gelcoat is just horrible. It must be changed completely: A plain shiny white is the solution. Is it really? I wasn´t that sure and besides, I´ve never worked with glass reinforced fibers before so I chose to give my ideas a try before going about with the whole ship. The Fore Cabin was predestined: Most of its GRP-surfaces would be covered by cushion when finished so making mistakes would be tolerable. I could hide any fault.
Object of Trial: Sanding, priming and painting of the Fore Cabin.
Sanding the whole stuff was just one point. But the most interesting here: Which tool to choose? Which grade of the sandpaper-grains would suit best? And what would it be like to sand off Gelcoat? Well, sanding it down with a grade 60 sandpaper on a vibrating grinder was – at first – the best way for the big flat surfaces. It took me less than two net working hours to have the whole forecastle cabin sanded. The big plus of the vibrating grinder: The cuspid tool can reach into the tweakiest corners allowing to sand right down where the GRP surface meets a bulkhead or other surfaces. It´s a very accurate tool though. After having done that, sitting there in this cramped room without a breathing mask, I had to clean the room thoroughly, which was a matter of at least one and a half hours (Note to myself: I should do something about the dust!) and I began to apply the blue primer in two layers, days later the first layer of yacht-white paint (International TopLac). It looks gorgeous! But I´ve learned a lot: What was good. And what went fundamentally wrong.
Tools for Sanding down Gelcoat
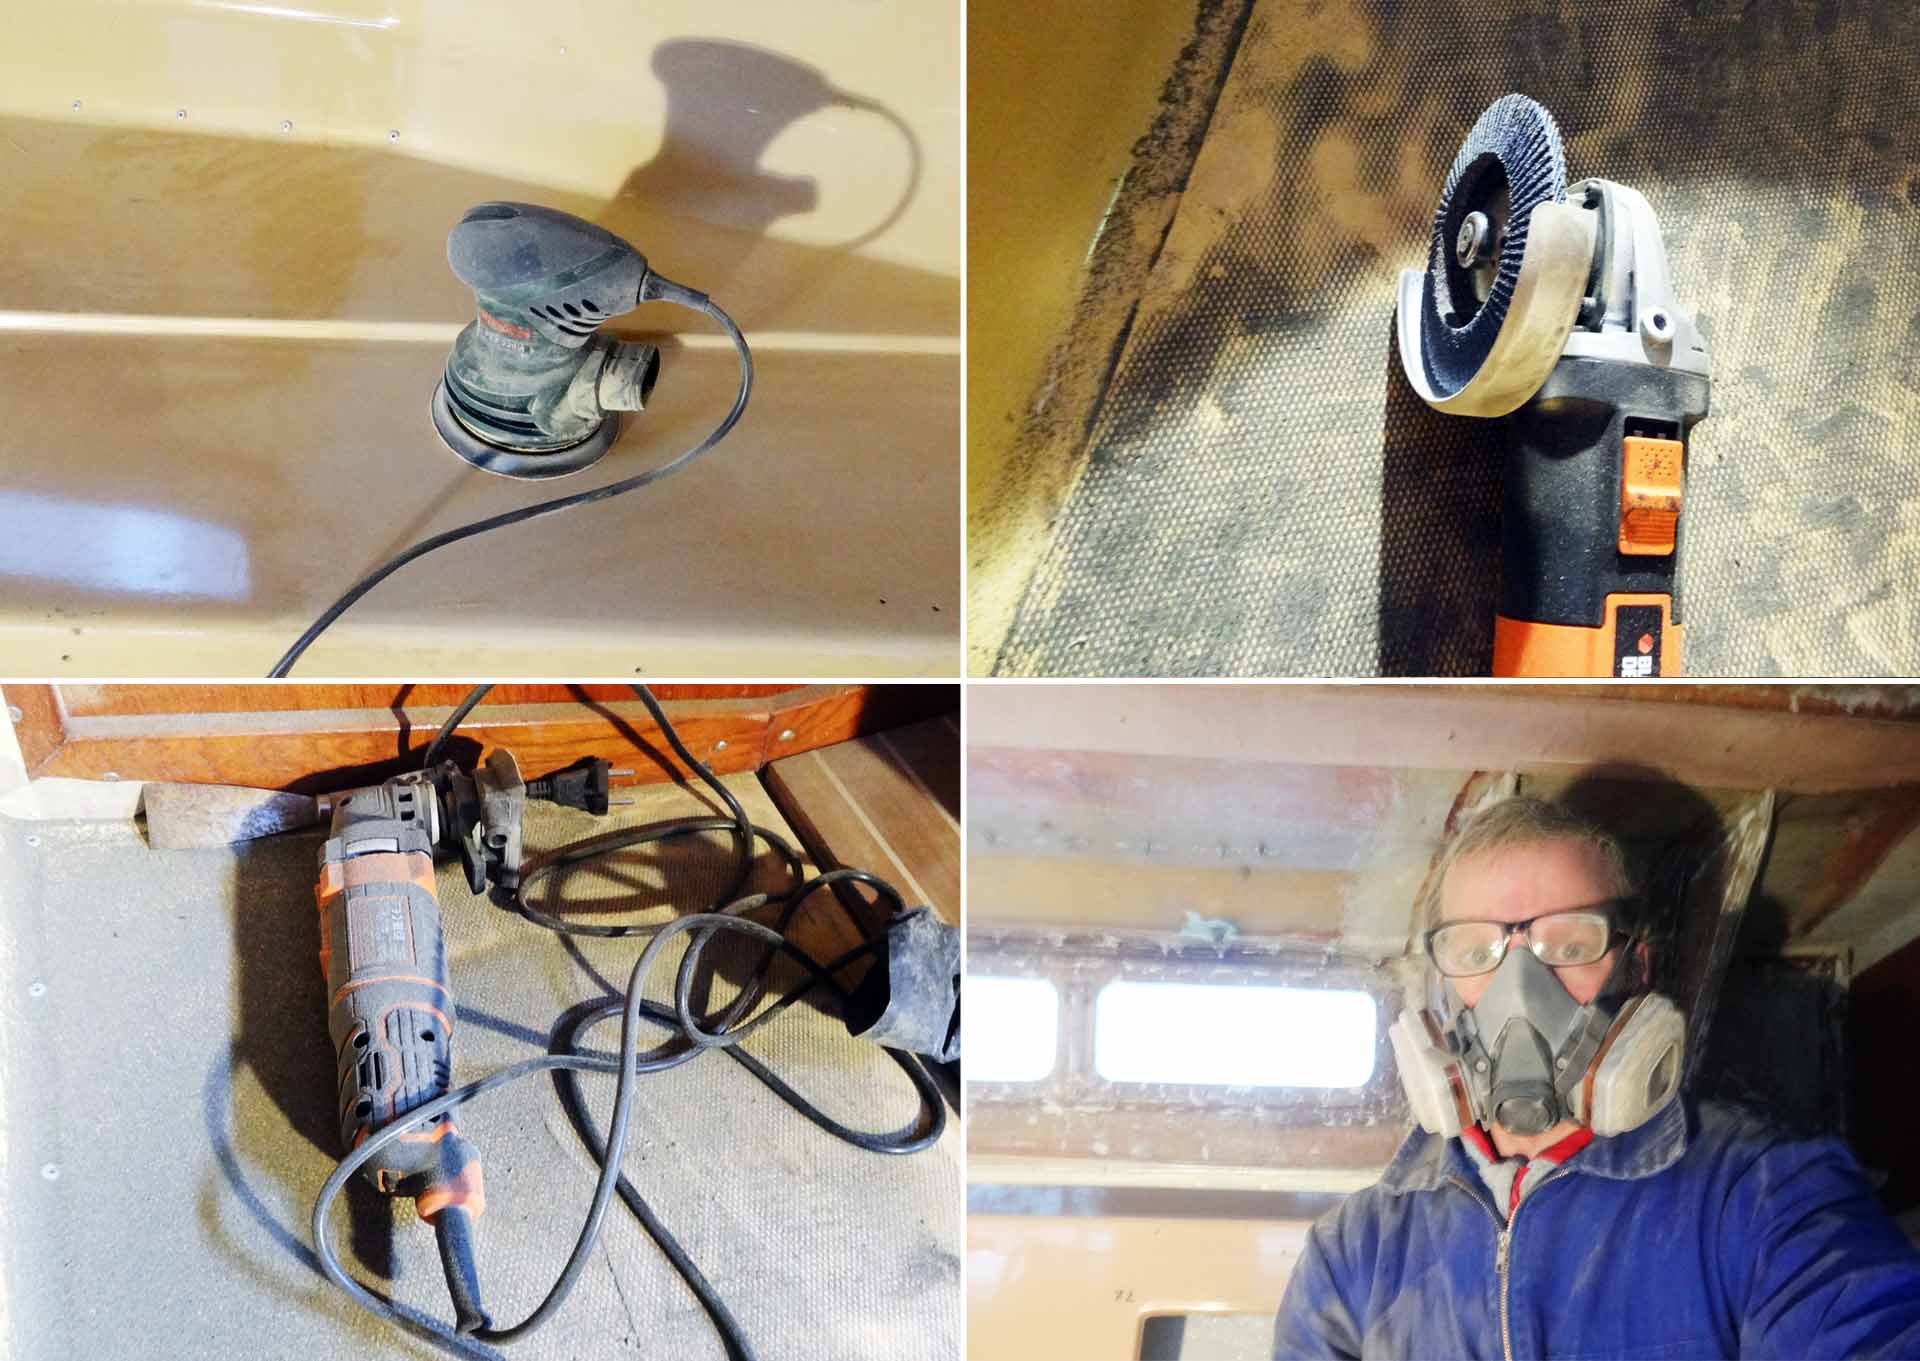
When it comes to grinding and sanding such a huge overall surface, the yacht refitter will go directly for a mechanical solution in applying an electric tool. As I wrote previously, I´ve utilized an 80 Euro Black&Decker vibrating grinder at first. Well, the tool worked fine. For four hours. After having finished the fore cabin and the lavatory, I couldn´t use it anymore. The head of the tool on which the sandpaper is fixed by a hook-and-pile-fastening system, has been worn out. None of the sandpapers would hold so I could choose between buying an estimated total of ten to fifteen new heads (for roughly 10 Euros each) or to go for another tool. I chose the latter.
Four Tools and two Hands: You do not need more
What really worked was an oscillating grinder. Sacrificing the ability to reach into every corner this was the tool of choice! I´ve bought one from Bosch for 90 Euros and this was it. This tool has a far better Velcro-fastening system of the sandpapers which won´t wear out over time. After having sanded the whole ship´s internal GRP-surfaces now the whole tools just looks a bit dusty but nevertheless works like on the very first day. The other I see!-effect was … well, pure handcrafted sanding. Utilizing 60 and 120-grade sandpapers it is the most effective way to sand by hand when it comes to the hidden, difficult to access areas and small details here and there. Sanding by hand was a bit stressful for my biceps but definitely worked best. So here is my advice: Go for an oscillating sander and apply your bare hands.
Working in the Lavatory – Breaking a Backbone
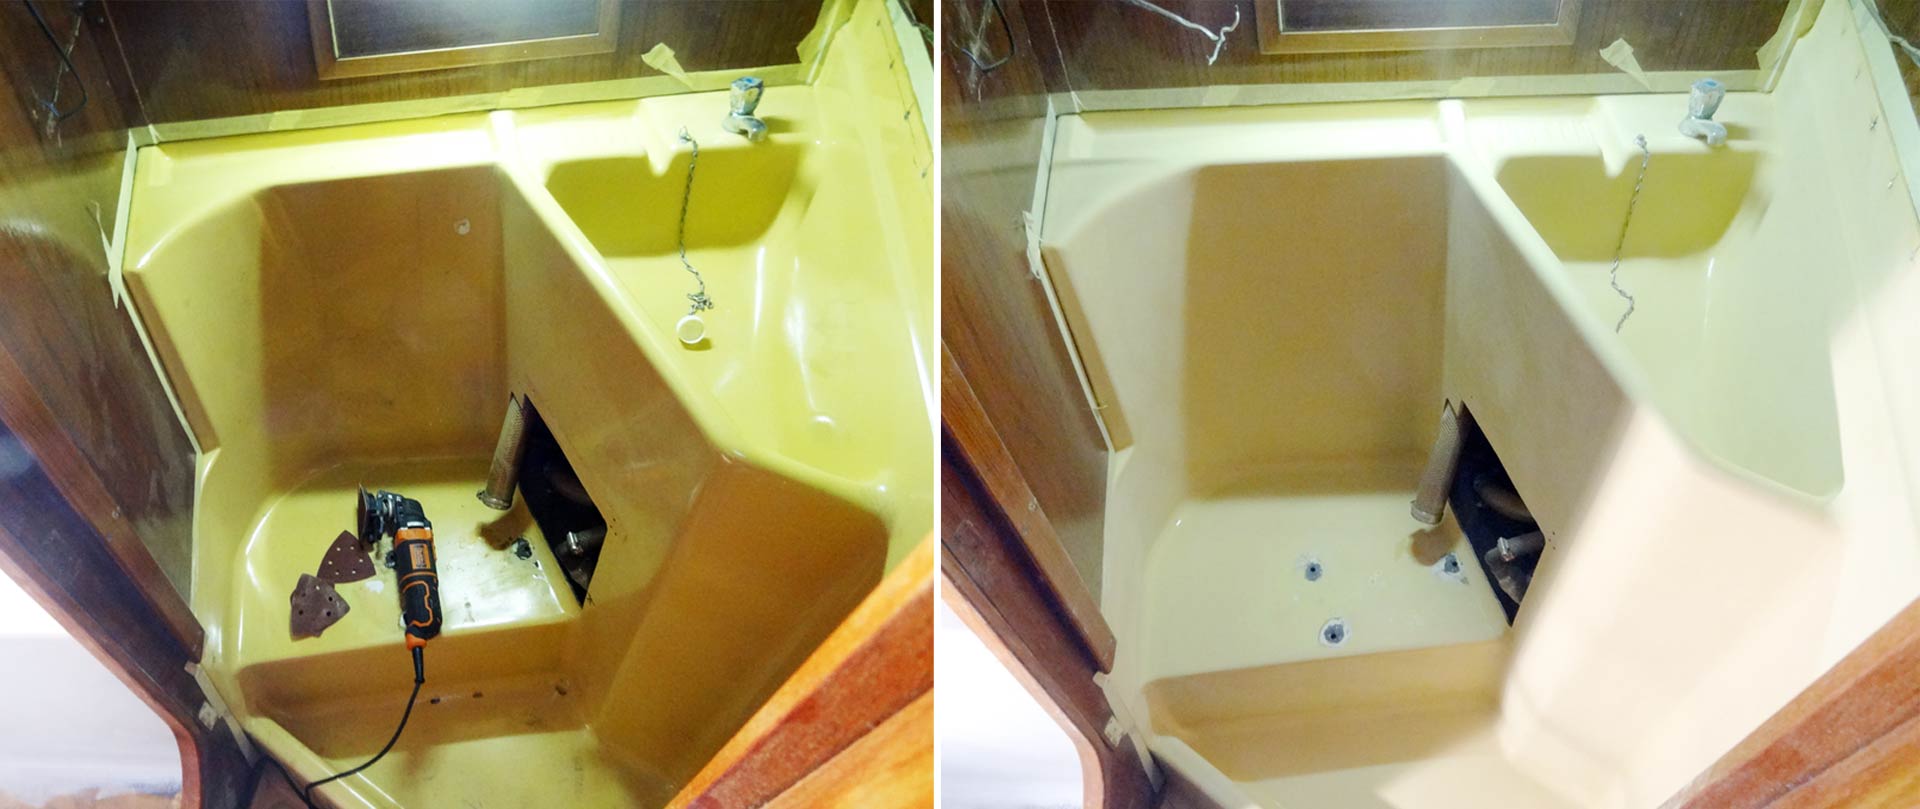
Just when the fore cabin has dried thoroughly and I was sure how to do it, I decided to work my way aft from bow to stern. Next was the cramped lavatory which I had emptied completely in advance – the old toilet has been removed weeks ago. The vibrating grinder was turning useless right after I´ve started working so I had to sand everything by hand – which was a surprisingly fast and effective way of sanding the lavatory since it was cramped and full of corners and sharp bends.
Small but nice: The KIng´s Cruiser 33 Lavatory
Sanding the lavatory made me think of what I wanted to do with this cabin on board. It will be in frequent use though there´s no shower and we mostly do not wash ourselves under those tight conditions I want this cabin to be as inviting as possible. Sure: Having painted all this from old fashioned yellow to shiny white will be a huge step forward. Maybe I´ll install a floor-grid made of teak, a better sized mirror and – which would have the biggest impact of all refit done here – a proper hatch instead of the small milky window in the ceiling. I don´t know yet. The hatch is a bigger project quenching me right now but who knows, maybe that´ll change.
Utilizing the right Techniques
S I have mentioned before, I was really astonished on the outcome of sanding by hand. After having relied mostly on electrical tools before it simply was out of my thinking that pure handcrafted work could produce such a beautiful product in the end and turn out to be as fast and as effective as every special and expensive tool could be. So I will definitely explore bare-hand-work over the course of my refit here in the future. What I´ve also learned was a big lesson in health and safety measures whilst working. Sanding will produce dust. A lot of dust! Sanding Gelcoat – which is nothing more than a bunch of varnished, synthetic compounds and other, not very healthy smelling fine dust particles – will produce a lot of hazardous dust.
Beware of a LOT OF DUST!
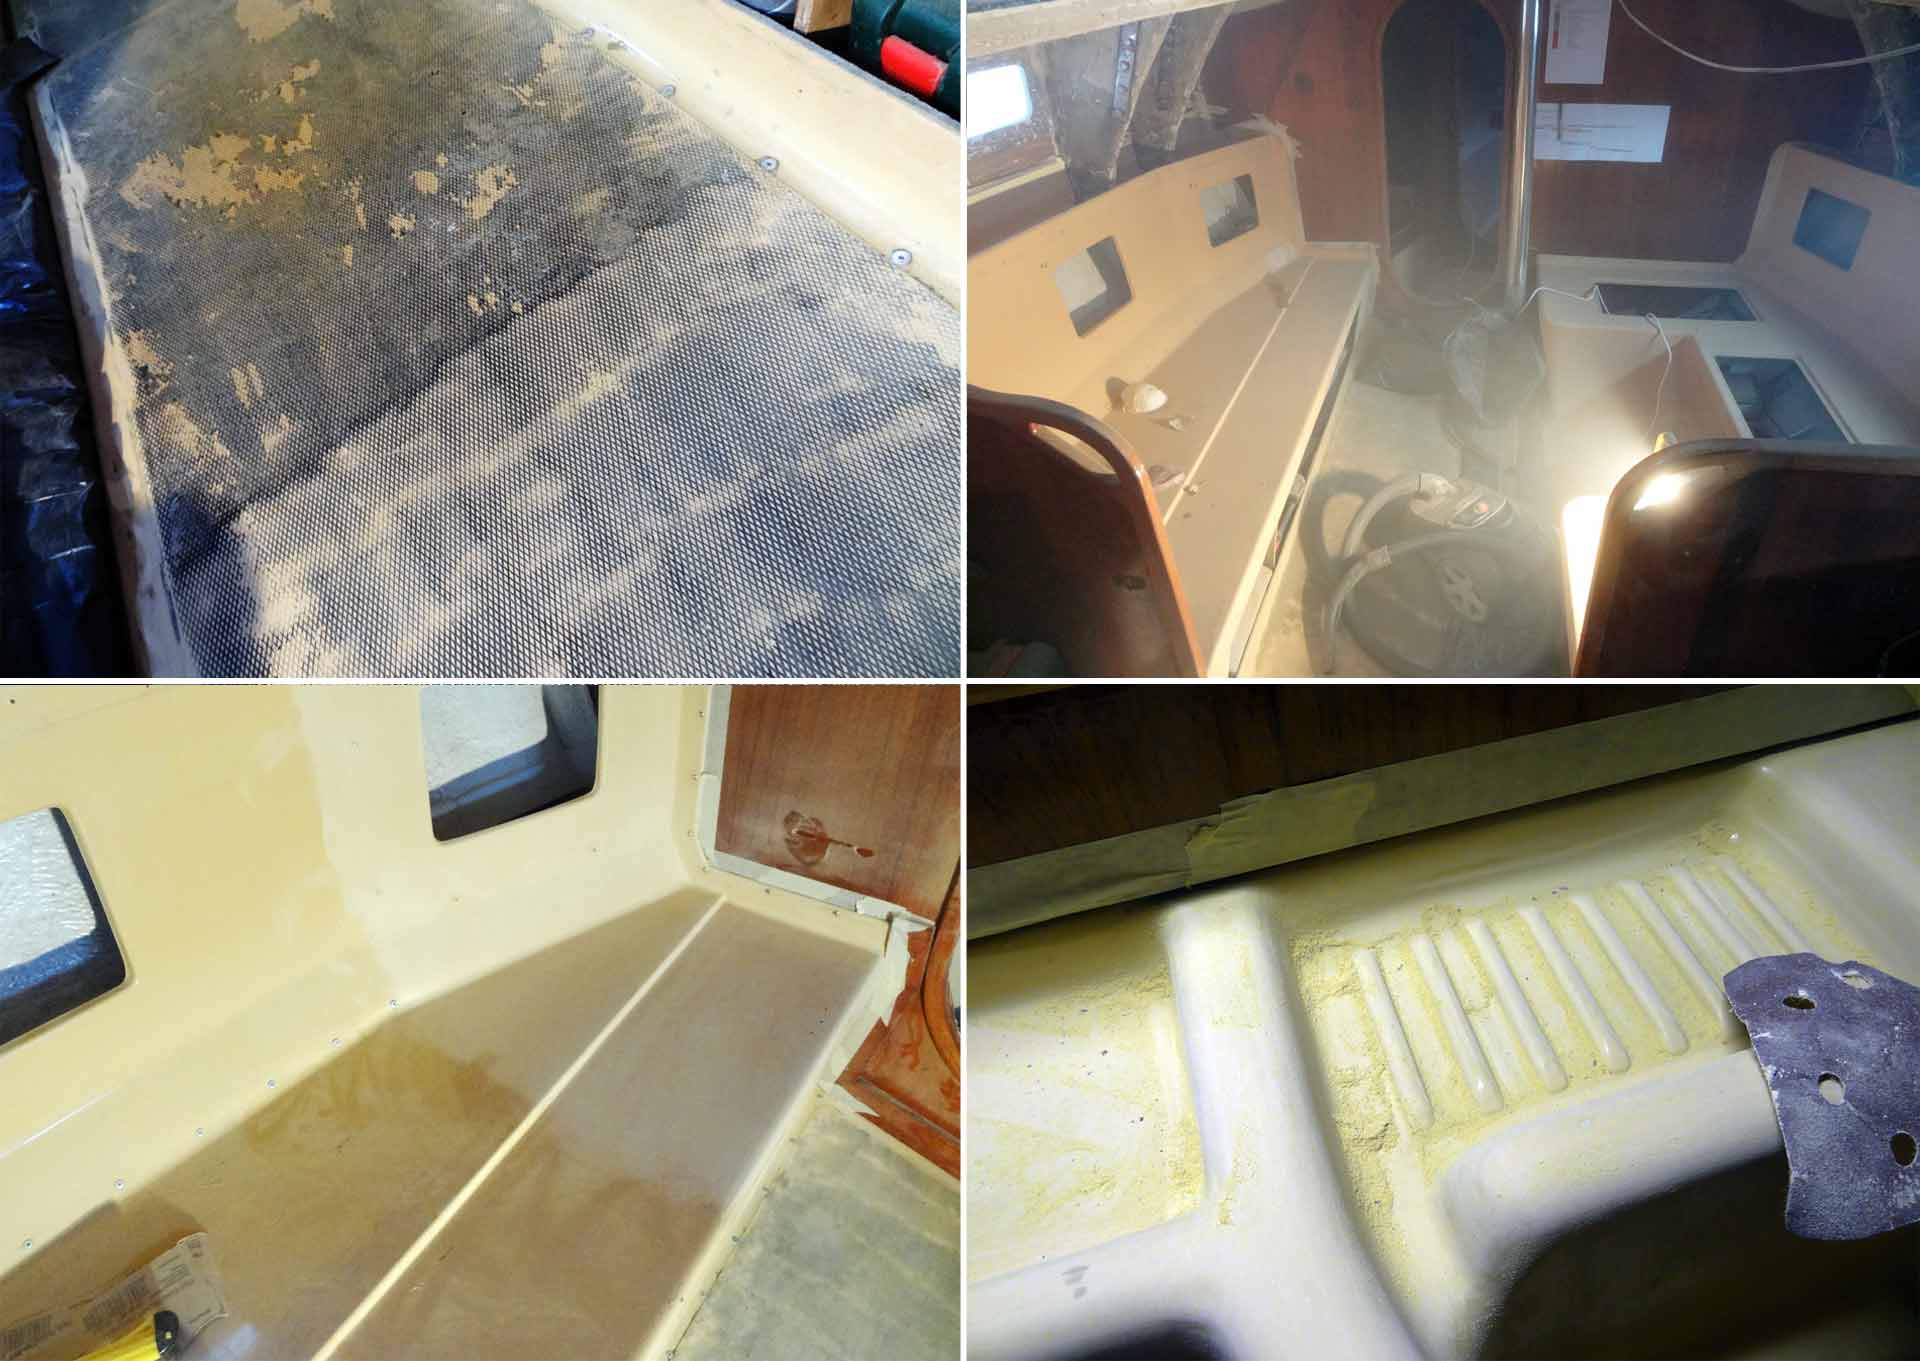
So after sanding and breathing this stuff for hours in the fore cabin and lavatory I decided to do something for my heath and bought a breathing mask. That measure definitely improved working quality and should add another 15 years to my lifespan for not having to breathe a kilogram of Gelcoat particles. You may read the full article on my respiratory mask-test here. Another thing was the grinding of the deck – after removing the old decking there was left a millimeter-thick layer of old rubber-like glue. I opted for the cutting grinder and a grade 60 grain grinding disk to sand it down. Beware: That provided for the thickest dust-attack of the whole refit so far! But it sands off effectively the old rubber-glue.
The Yacht´s Saloon: As easy as ABC
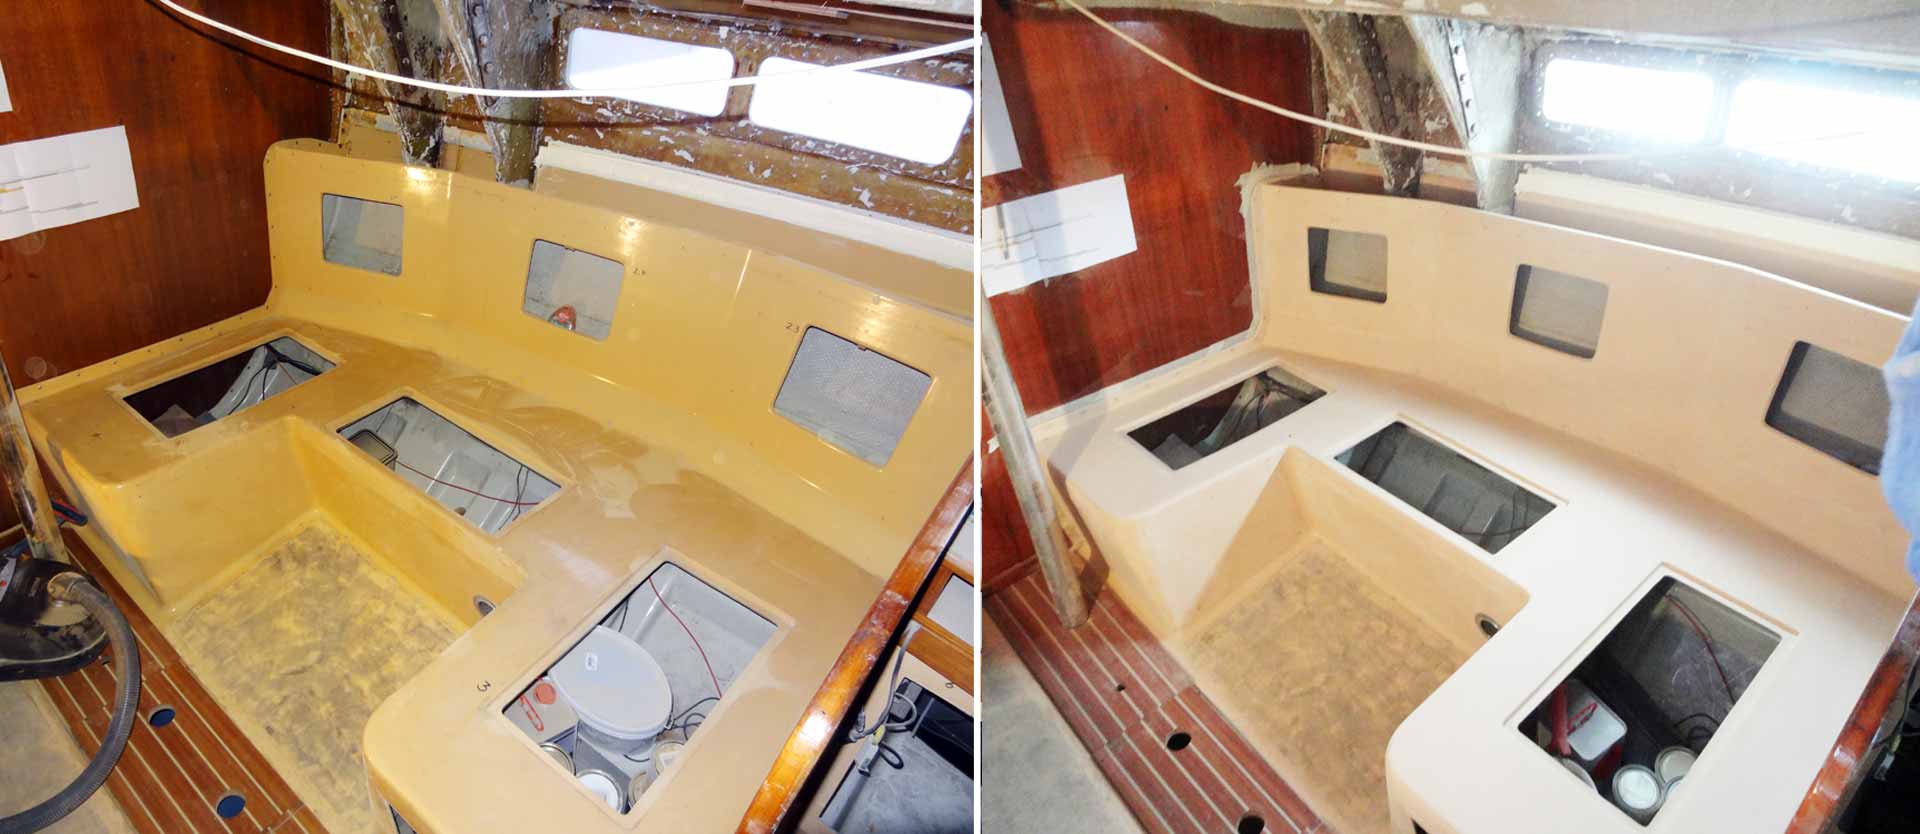
After finishing the lavatory there came a deep gasp of relief: The smallest and most cramped areas of the yacht have been finished. It was now for the big areas, the spacious saloon of my King´s cruiser: I do have two big berth to either side of the boat. Portside a 3-seater or single bunk, starboard side a suite that can be turned into a full size bed for two persons. Measuring some 2 meters in length and 3.10 meters at its biggest width the whole saloon was a no brainer in terms of sanding it down.
The Saloon was a No-Brainer – Big Surfaces are easy to sand
It took me one working day or net 3 hours to sand down the port side bunk and another day of three and a half working hours to completely sand down the starboard bunks and the decking as well. Seeing the saloon completely sanded and having the color of the GRP changed from yellow to this very light beige fills me with joy and pleasant anticipation to finally see it all in full shiny white. I sat there for nearly half an hour imagining the saloon finished: White Gelcoat, newly varnished wooded panels and deep blue cushion under LED-lighting. What a prospect!
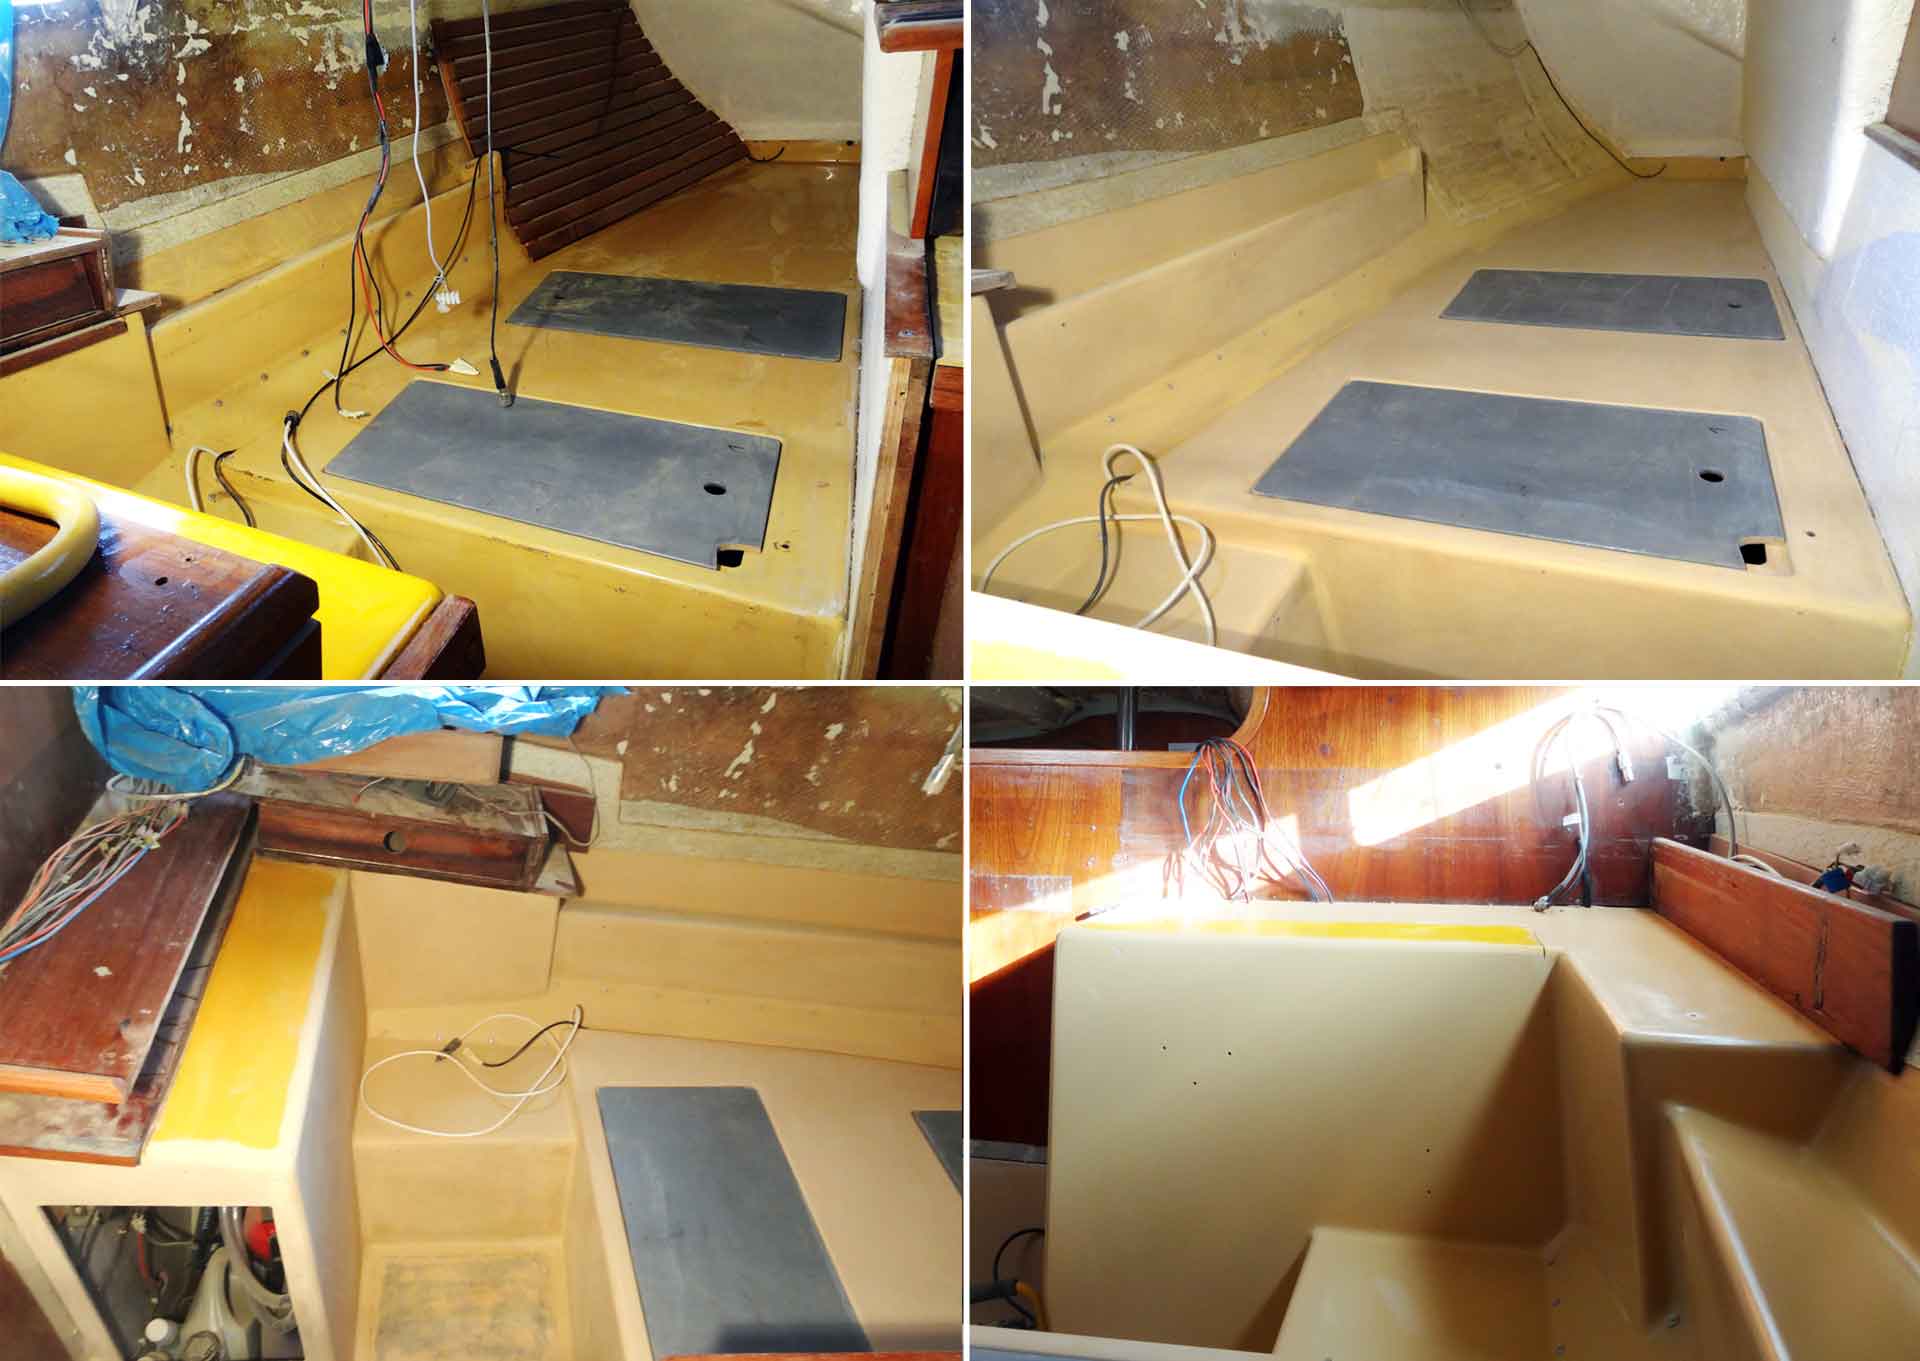
Quarter Berth and Navigator´s Place
Oh my, the quarter berth! I just thought all the cramped places have been finished but working here was hard again. Laying on my belly facing aft to grind the Gelcoat either by hand or with the machine was a mess. The quarter berth is simply a neat cave: All the fine dust cannot escape since there´s no room. It was a matter of minutes after I started to work when I barely couldn´t see my hand in front of my eyes. It took a full day for the dust to settle. It was awful.
The sanded Quarter Berth with a new Navigator´s Place
When it came to the chart table, I decided to be brutal here. My King´s Cruiser has a very thick, stable and well-made chart table from which I disassembled one part and was originally planning to let the other part remain on board and try to refit it there right in place. But when I looked closer I noticed that the chart table´s foundation was completely worn out and showed severe signs of breakup. I simply ripped apart the whole thing and we will see if I can save the table itself and fit it to a new foundation or I´ll go for a completely new navigator´s place instead. Seeing it empty like this is a great chance of re-defining this area of my boat from scratch. Another exciting prospect here.
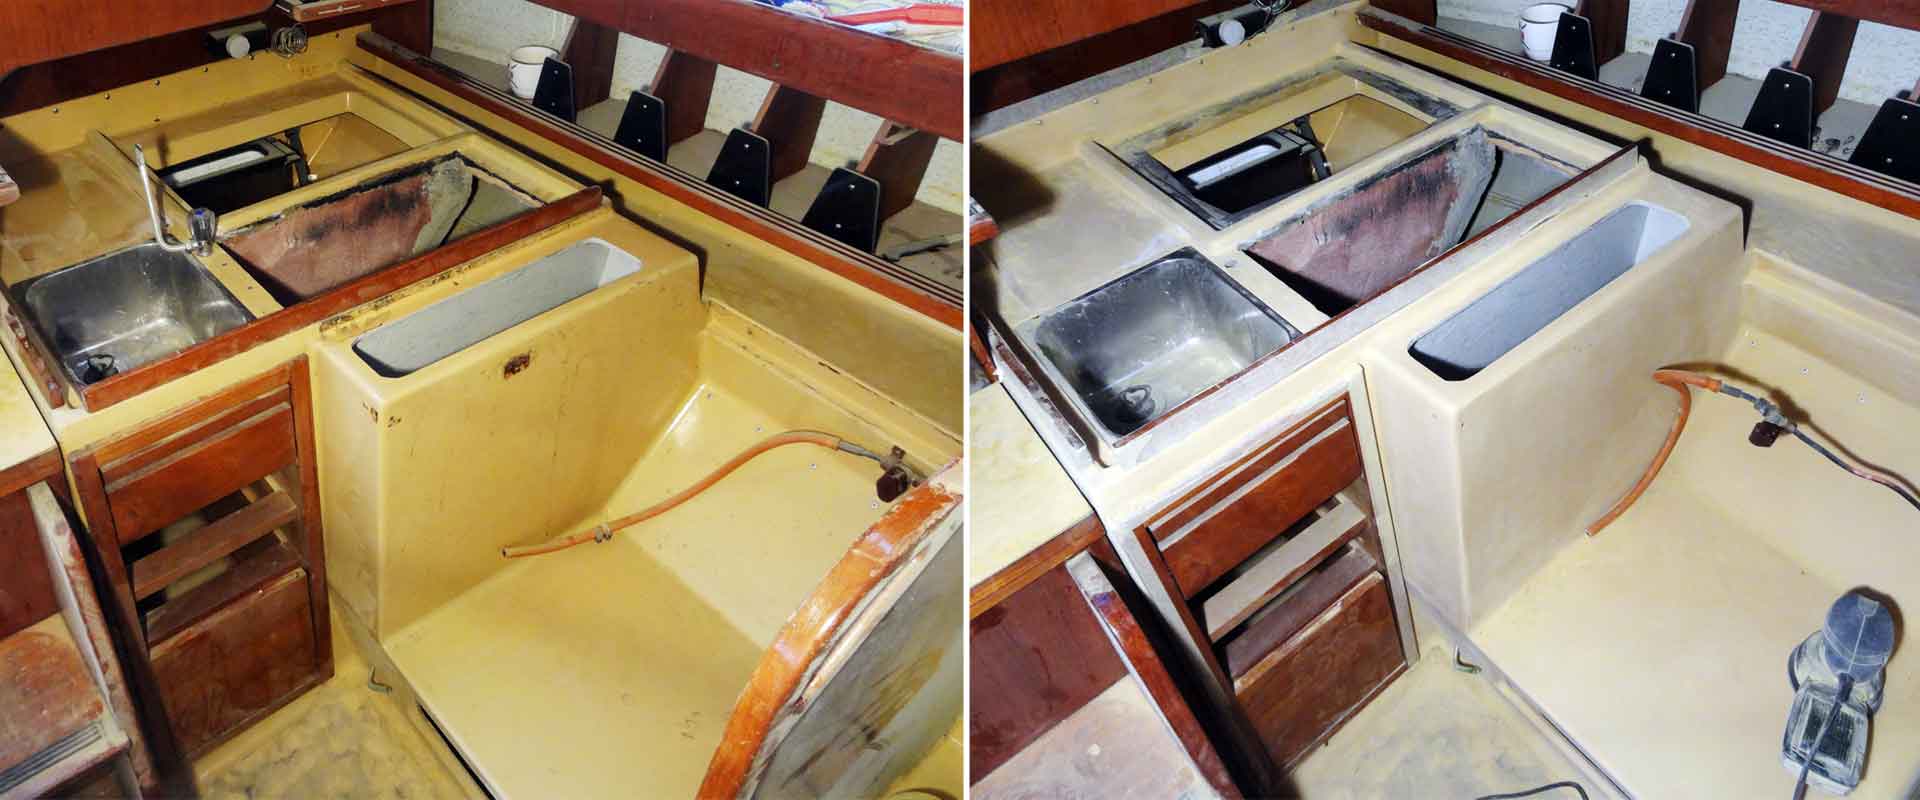
What a Mess: Getting the Pantry clean
Last but not least, the pantry. Well. Here I do have a problem: I simply cannot disassemble the whole cupboard-construction and wasn´t therefore able to remove the old leather-coating at the ceiling. Same with GRP: I was able to get out a big locker next to the sink as well as to disassemble a closure head from another locker but that was pretty much it. Some of the Gelcoat on the hidden surfaces will have to remain yellow.
The Pantry – once moldy and greasy, now ready to be shiny white again.
As for the portholes where I was not able to remove the old covers: I try to construct a wooden panel which I can mount there to block the view from the old stuff. Not the cleanest but the smartest way here in terms of expenditure-to-cost relation. The rest is fine: It took me one another day to sand down all the Gelcoat stuff, especially the area around the oven looks far more inviting now since my pre-owners haven´t been all too cleanly here and I had to remove a thick crust of everything that once fell off the stove. Imagining all this in yacht white with a new oven makes my dream of this yacht complete. Just perfect!
Advertisement
Next Steps of my King´s Cruiser 33 Yacht-Refit
So, finally that´s pretty much it. It took me net 12 working hours to accomplish a neatly sanded internal boat. Today I was vacuum-cleaning the whole boat in every corner and having a complete wet wipe-out of the whole ship to remove the dust. When I was emptying the bucket of its cleaning water – it was full yellow and had a thick viscous yellow layer of pure Gelcoat at the bottom. Next weekend I will repeat this step and clean everything thoroughly again to be ready for the next step of my yacht refit program: Painting action!
I cannot wait to see all this in shiny new yacht white!
There is my bilge waiting for the final layers of bilge-paint (you may read the full article on bilge refit here) and the fore cabin will get its final second layer of yacht-white. All the rest – lavatory, entryway, saloon, quarter berth with chart table and finally the pantry will receive two layers of blue primer and at least two layers of yacht white, areas of high exposure like decking, corners and stuff will get three layers. That´s a load of exciting work ahead but watching the ship developing like this is pure joy and recreation for a 10 hour-computer worker like myself.
So stay tuned for another article on my King´s Cruiser 33 yacht refit.