Working my way up from keel to mast-top is was the bilge that was next on my list of things to do. A smaller part of the refurbishing project of my King´s Cruiser 33. I thought at first. I chose the bilge for a couple of reasons. First of all normally the bilge is hidden underneath the deck-plating. Being a newbie in refitting a sailing yacht I thought it might be a good idea to start with a spot where flaws of my own hands work wouldn´t catch everybody´s eyes at first glance. Secondly I would be able to practice working with GRP and all stuff connected. It was a good idea – apart from a completely wrong estimation of the time needed to complete working on the bilge.
What a dry and clean bilge is good for
Advertisement
We all know what a bilge on a boat is good for: It´s the lowest point of a ship and thus responsible for collecting all liquids for drainage. A bilge might be compartmentalized for separating different liquids like water and oil – which might be called the engine-bilge. Mostly, the “normal” bilge will have a pump to handle the water and get it outboard. This might be done manually or with an electric pump which also can be operating automatically.
This is how I started … a puddle of filth
If you ask me, and that´s my own personal opinion, the bilge is much more than just a technical part of the ship with a function to keep it dry. It´s the visiting card of a ship. Like the saloon being the parlor of a yacht, underneath the floor-plates the condition of a bilge tells so much more of how the owner is looking after his ship, how honest and committed he is towards maintenance, tidiness and thus his whole seamanship. When it came to the bilge of my own boat it was, well, let´s call it a somewhat hackneyed vcard …
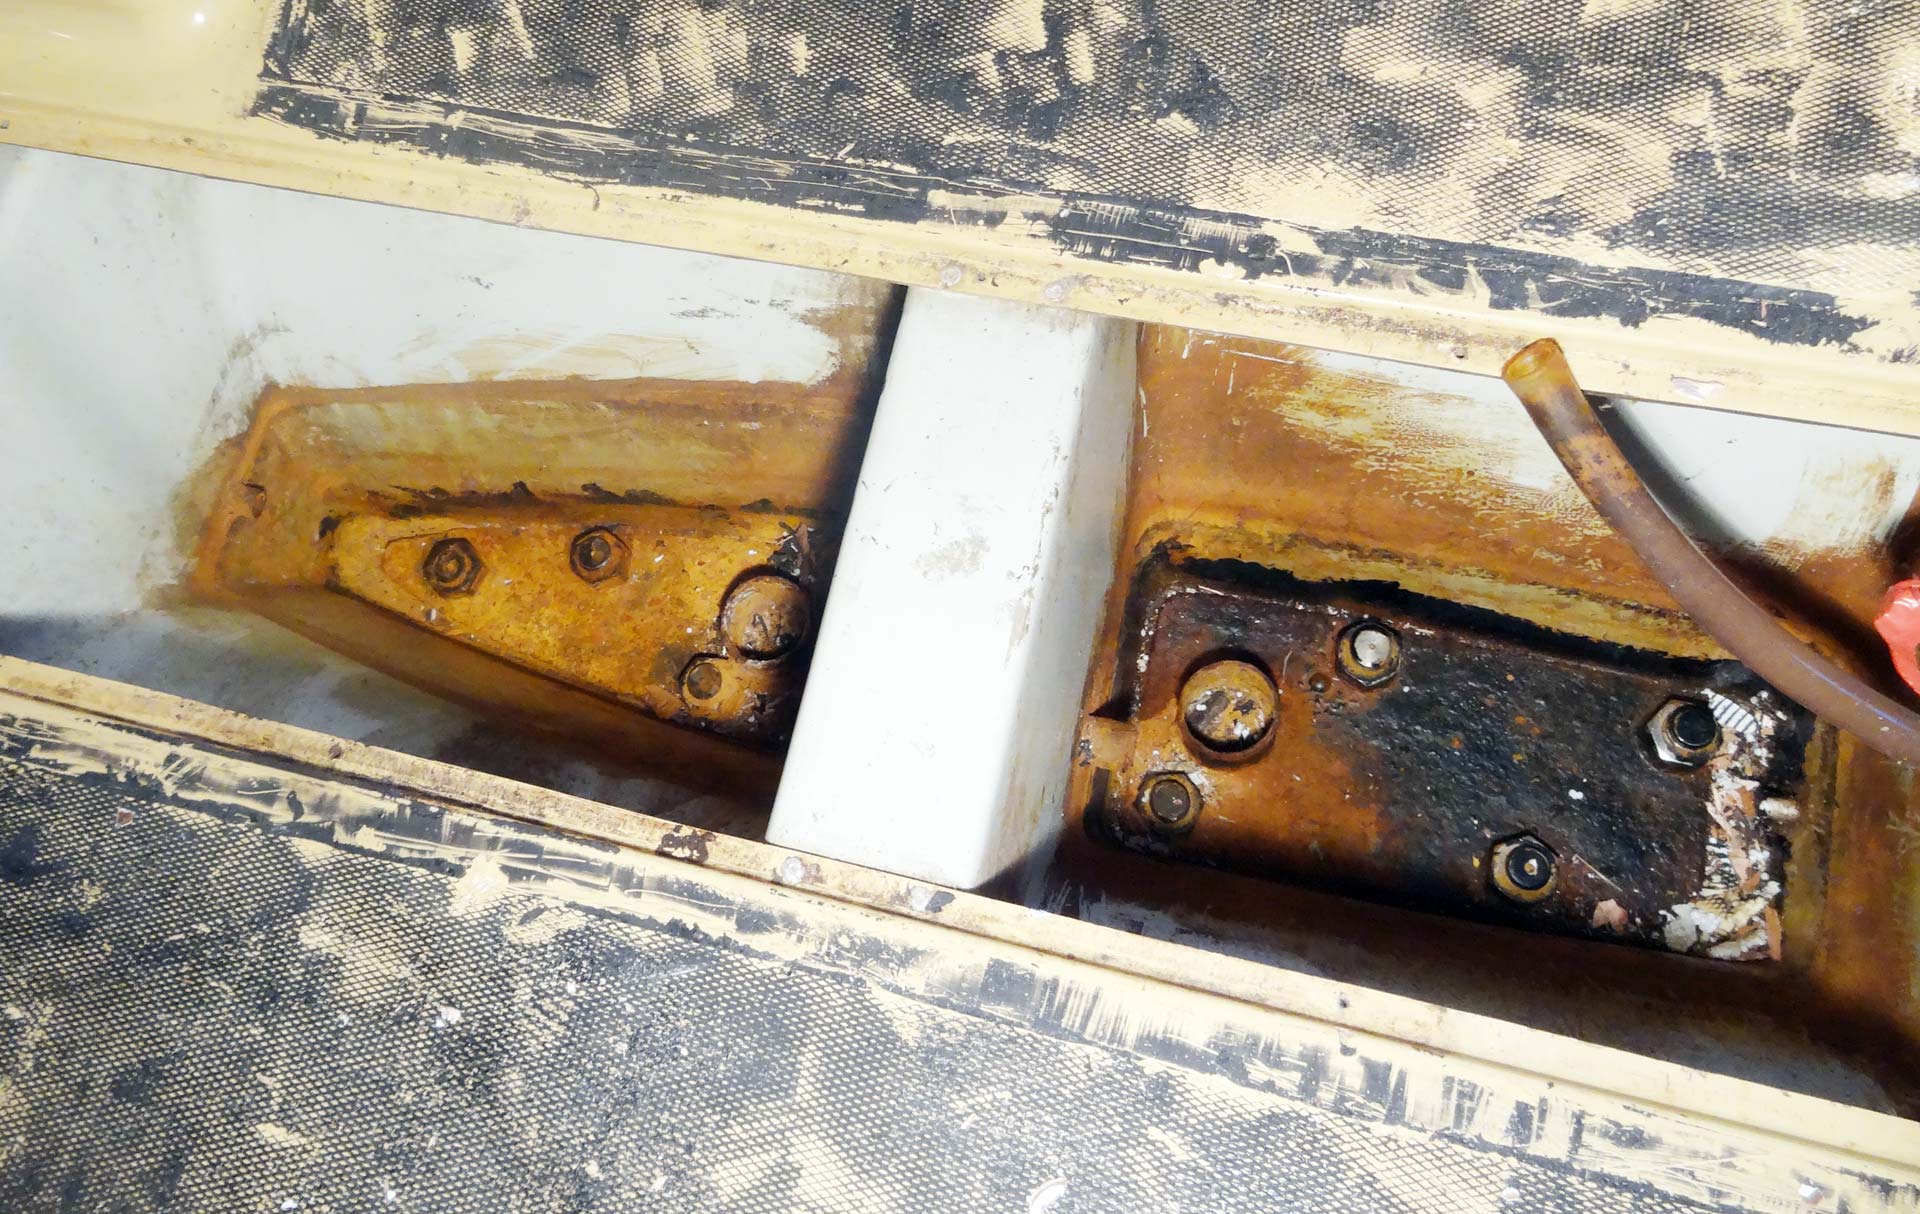
From where I started: A dirty, filthy cesspit.
SY OLIVIA is a dry boat. She really is. The pre-owner was asserting this fact and after we went out for a thorough test-run with some 30 degrees heeling and having our portholes fully under water for long stretches of time I was assuring myself that she wasn´t taking water in too much. But her bilge tells a different story: When I first inspected the boat the bilge was dry as the desert but appeared as if she had been under water for years. To put it frankly: It was a dirty cesspit.
That´s quite some work ahead …
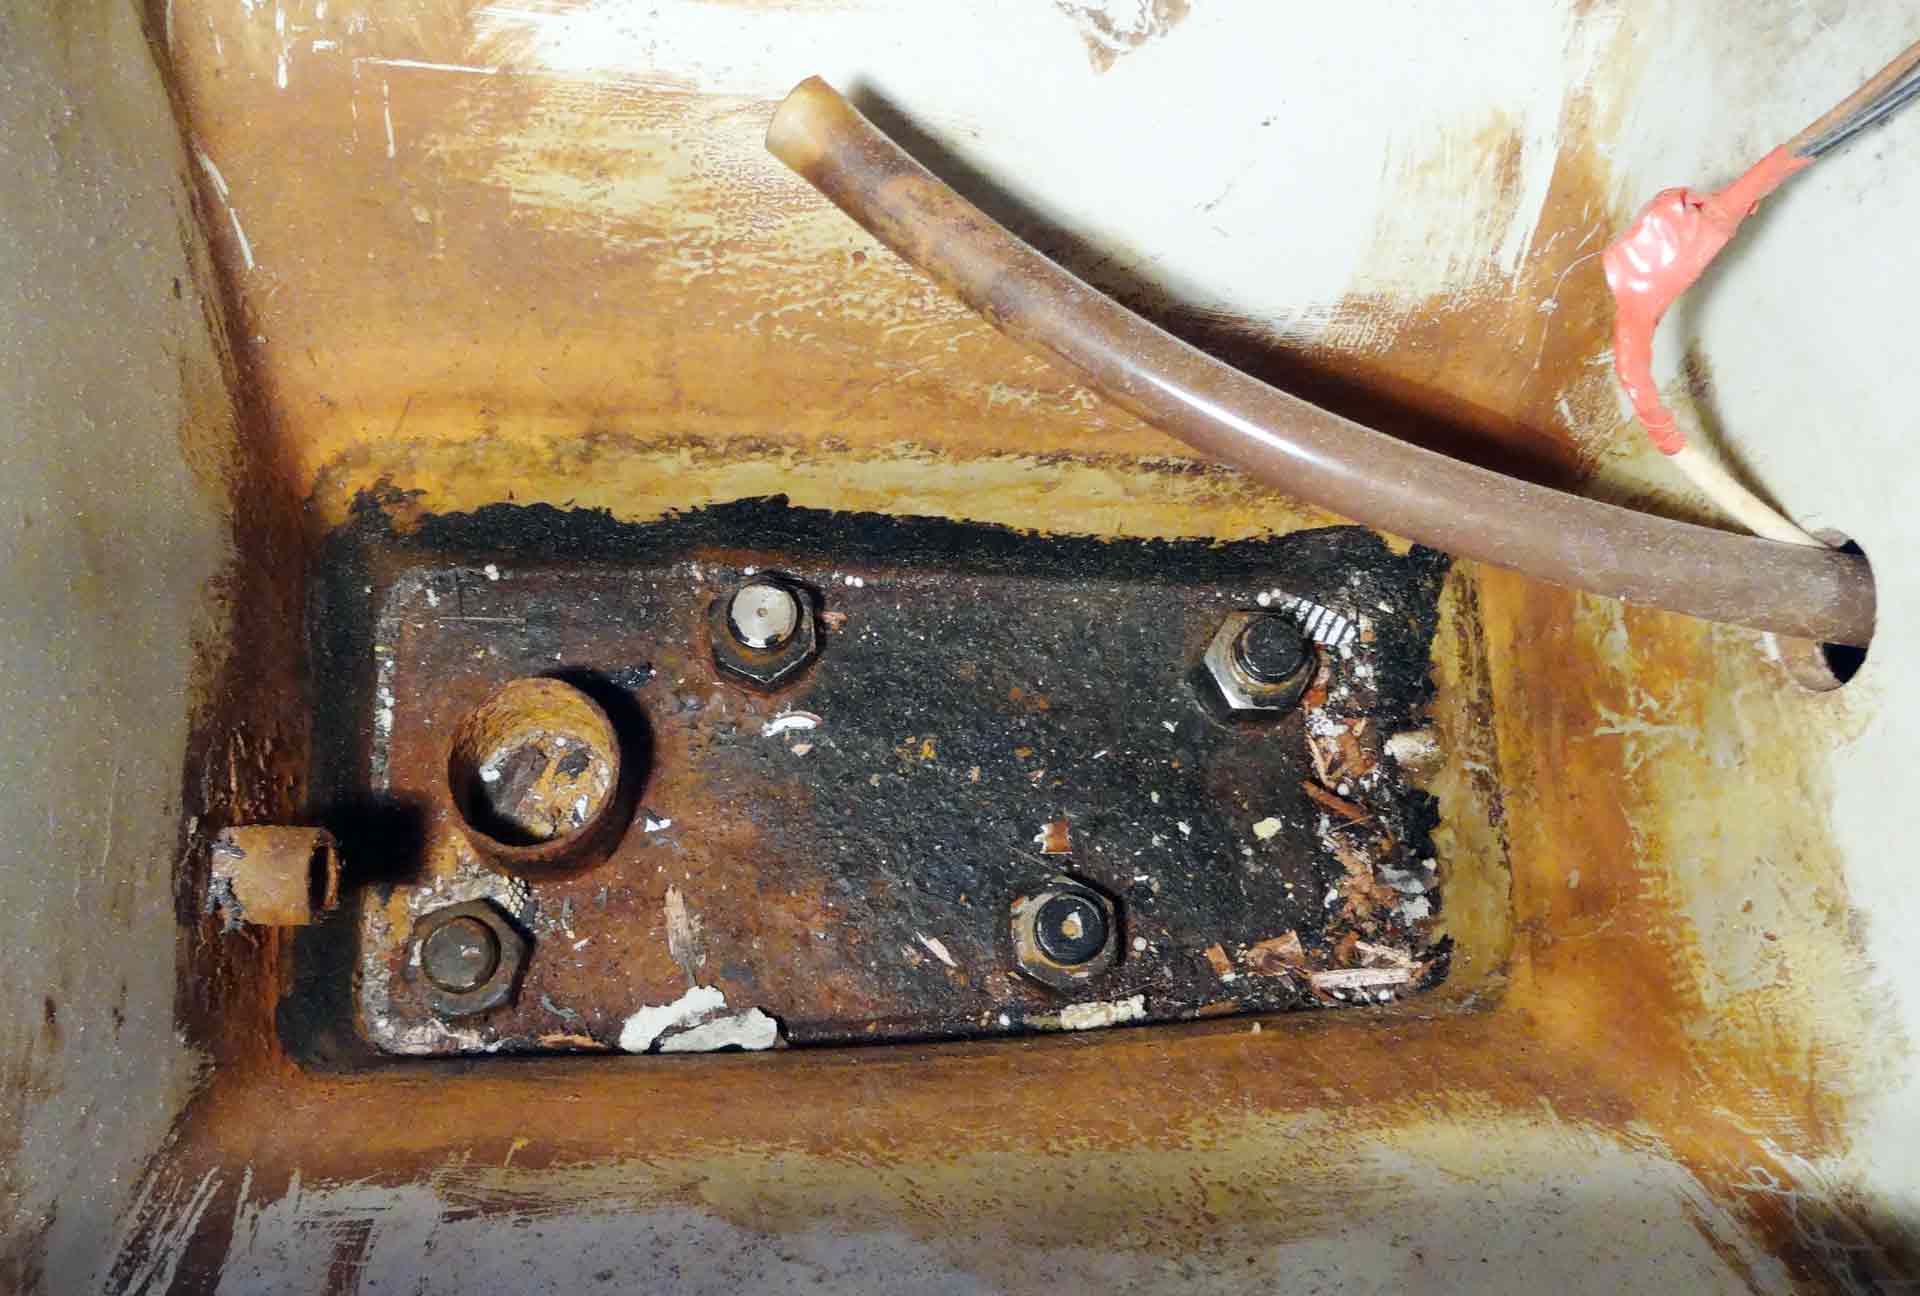
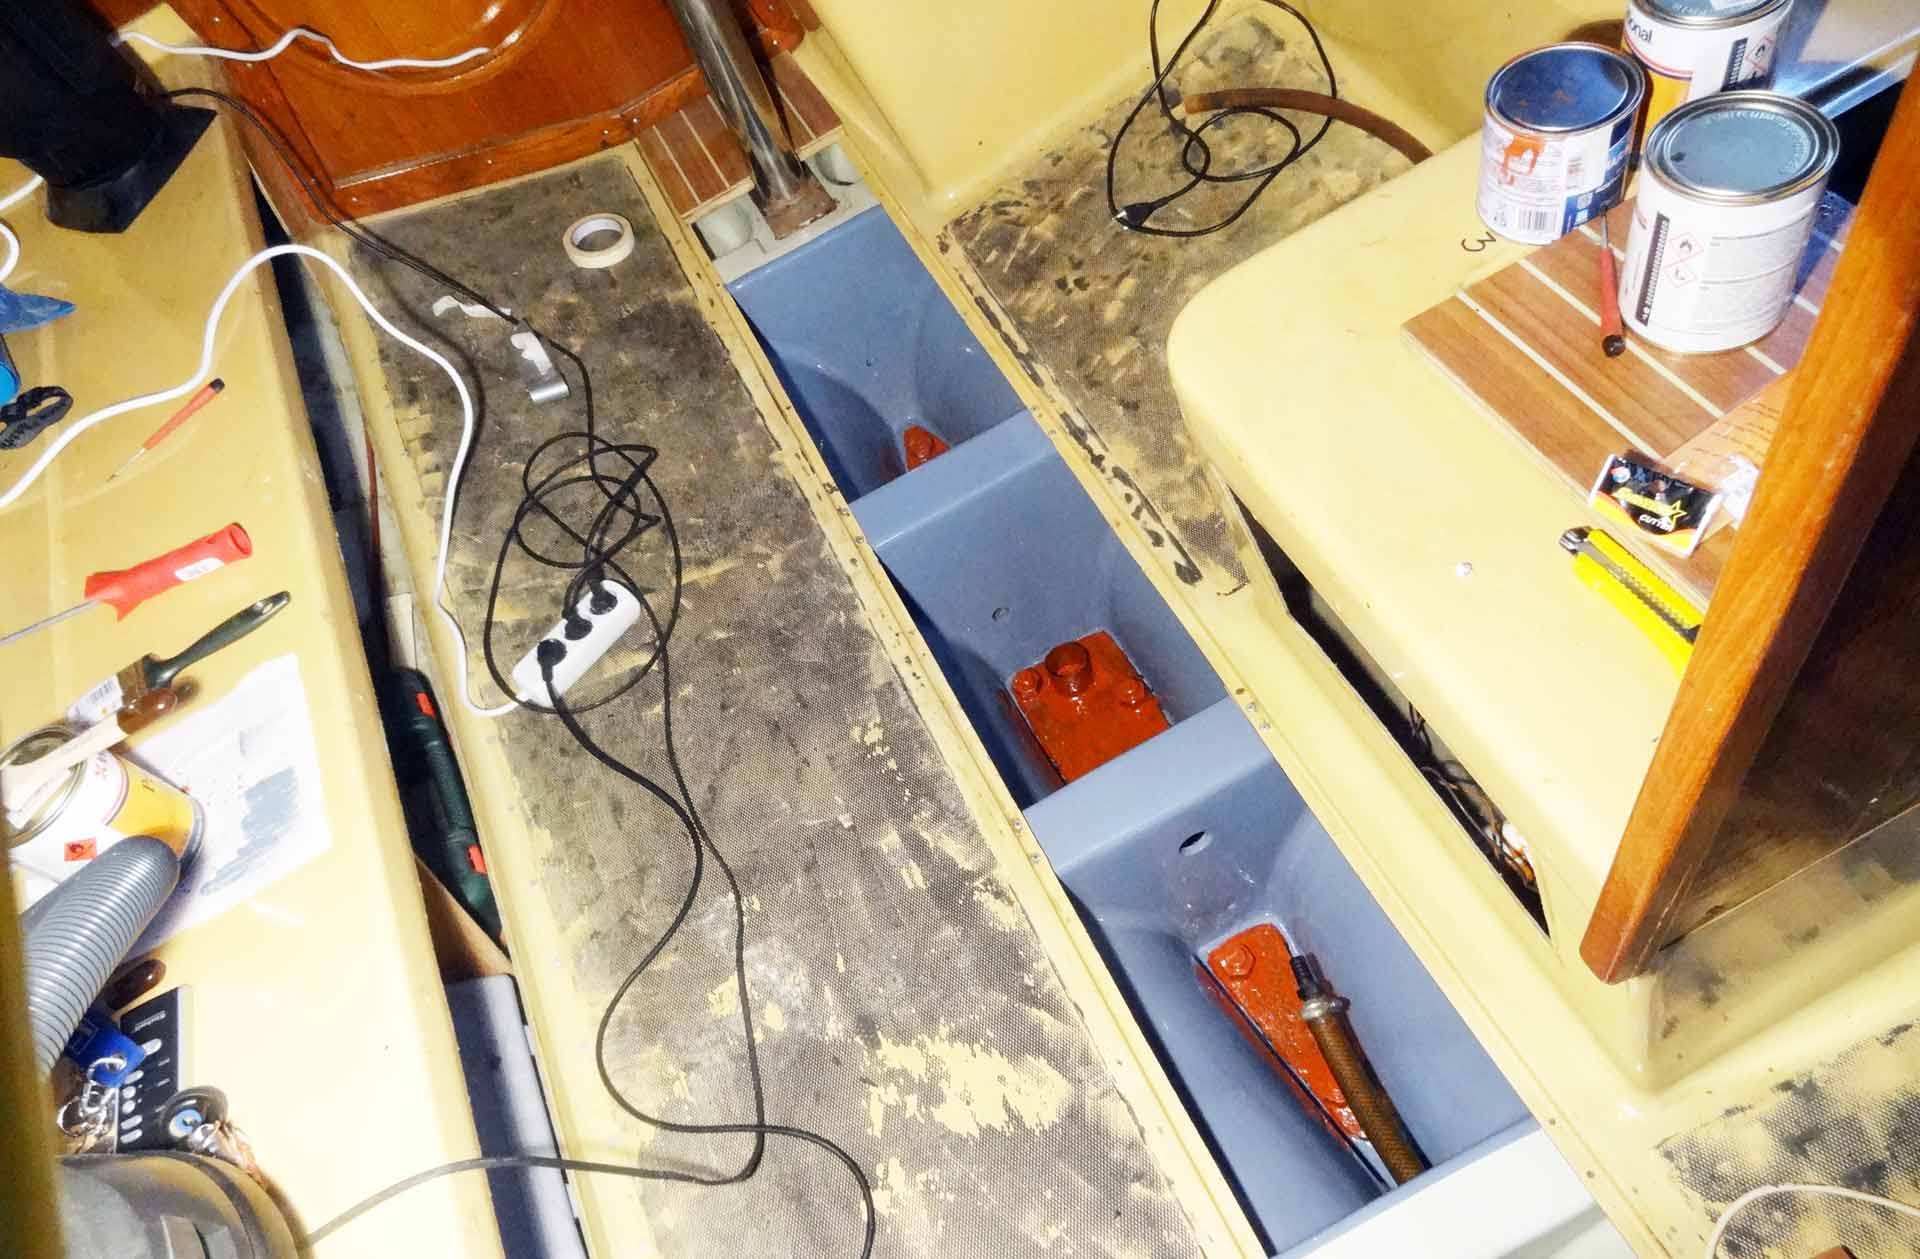
A King´s Cruiser´s bilge is divided into three separate compartments which are normally not connected. The pre-owners had drilled holes to drain the water into the middle compartment where a worn out but still working pump was waiting to clear it from water. A thick crust of indefinable layers of paint, oil or something else was overgrowing the whole area. A strong stench of an – again – indefinable mixture of oil, fusty water and some kind of organic smell was a torture to one´s nose. Well, that´s a load of work ahead – this I knew instantly.
Basic cleaning of the bilge: Super Cleaner by International
First step was a basic cleaning of the bilge. Vacuuming the bilge just took off the biggest part of the filth: Splints of wood, old rusty bolts and screws and knobs of filth sucked up into the bag of the vacuum cleaner. You should have taken a sniff of the discharged air of the vacuum cleaner! Preparing a bowl of hot water it was time for scrubbing. I knew that I wanted to refurbish the whole part of the bilge including the keel-space and the sides of GRP up to the connection to the upper shell of the hull. So I began to soap the whole bilge thickly with International Super Cleaner – undiluted.
Cleaning the bilge with Super Cleaner
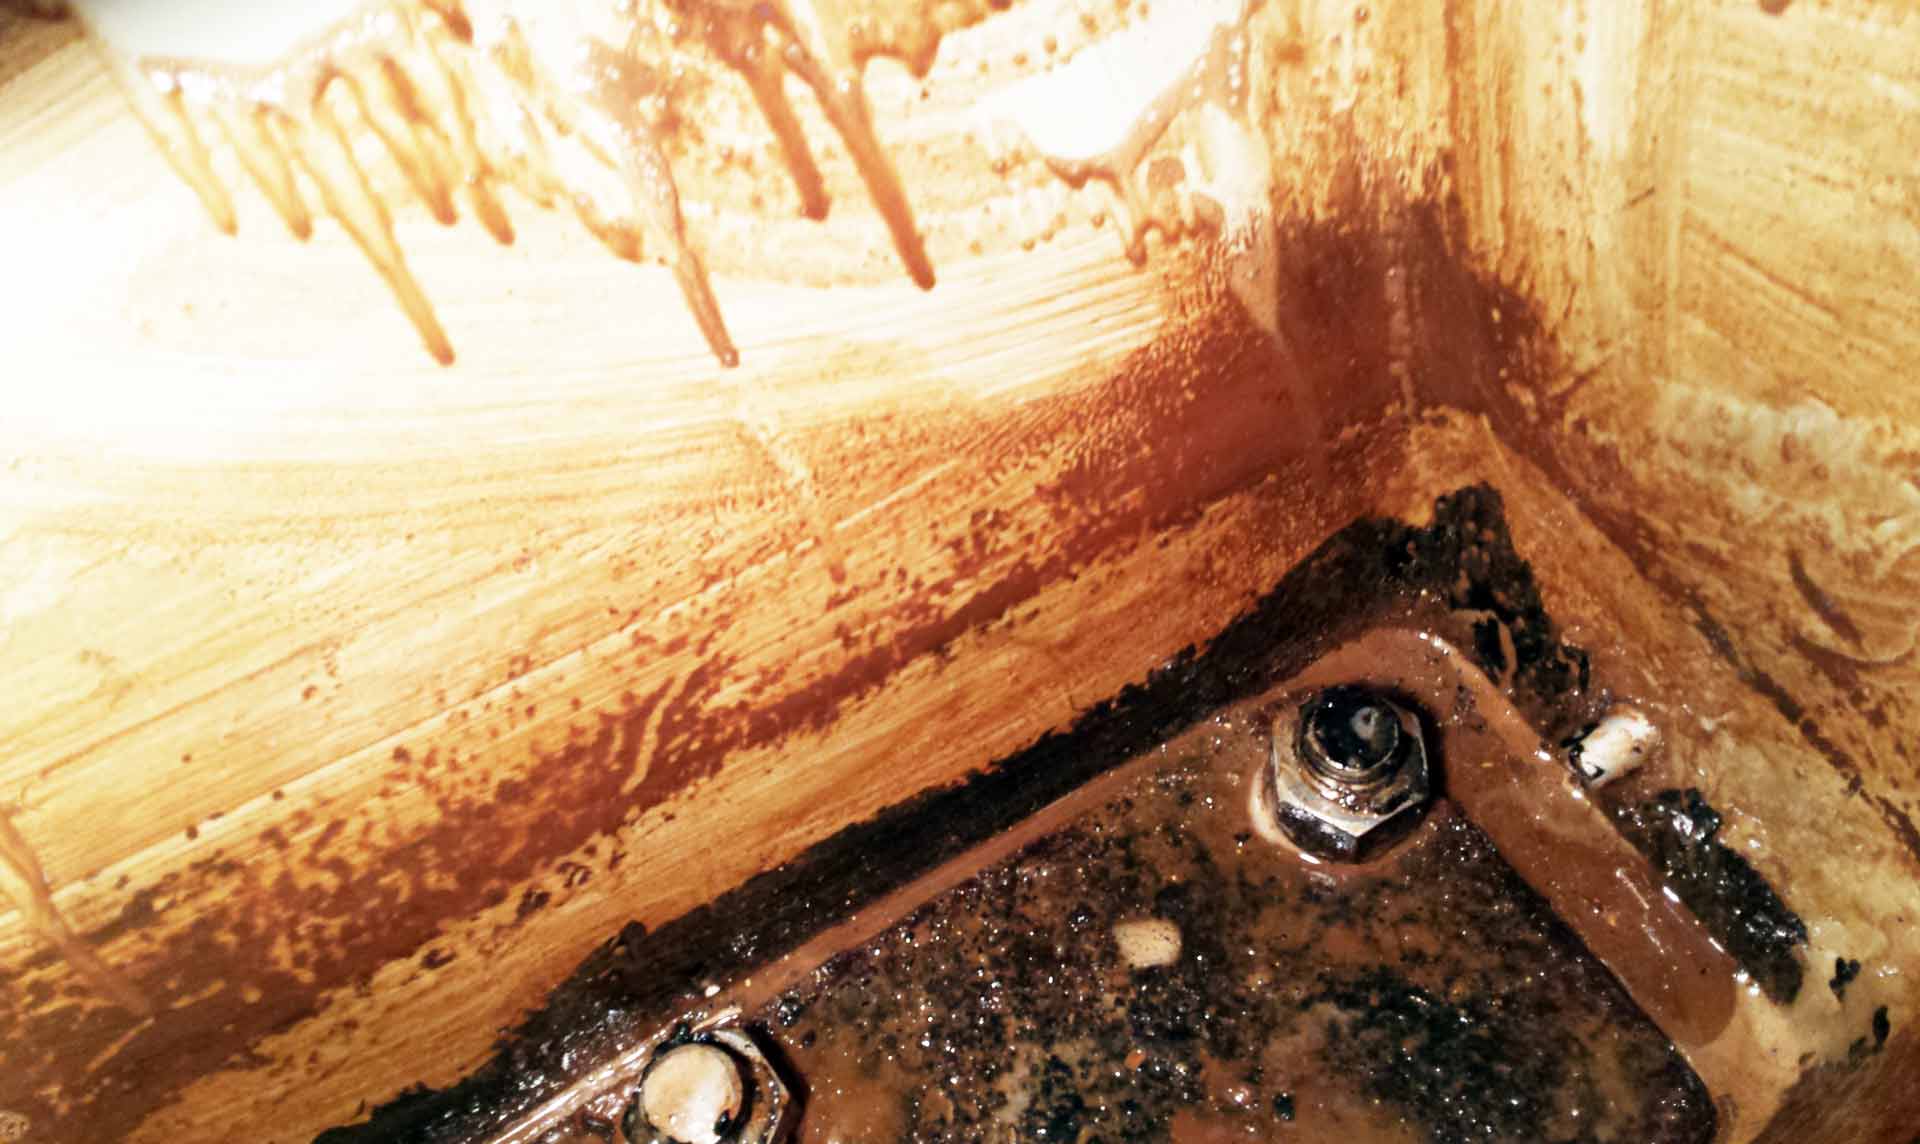
After some minutes of soaking I scrubbed the surface hard to be sure to get off as much of the dirty stuff as possible. I must admit, the smell of the cleaning agent wasn´t that appealing as well but the outcome was a great leap forward: Though the bilge itself didn´t lose any of its dirt, the adjoining GRP-surface was so much cleaner and whiter than before that this step alone was worth all the time spent. I still cannot get it why the pre-owners hadn´t been able or willing to invest just these five minutes to clean the bilge from time to time – before it came to the heavy crustations I had to fight now. Anyway, after having cleaned and dried the whole area and scratching hard of the crust I was sure that I´d had to call up more heavy artillery in order to get rid of the dirt. It was time for a thorough rust-removal.
Removing a crust of rust from the bilge: Here´s a magic potion
In order to complete this task I was searching the internet on the various techniques available to best remove the thick rusty crustation of my bilge. For most part all the mechanical solutions turned out to be unfeasible due to the vulnerable GRP adjacencies of the bilge and the fact that my bilge measured less than 2 meters in length and some 25 or 30 centimeters width. So although removing rust with a scaler is considered most effective – it was out of question for me. So why not ask what the chemical industry offers?
Keep it boiling: De-rusting at 80 Degrees Celsius
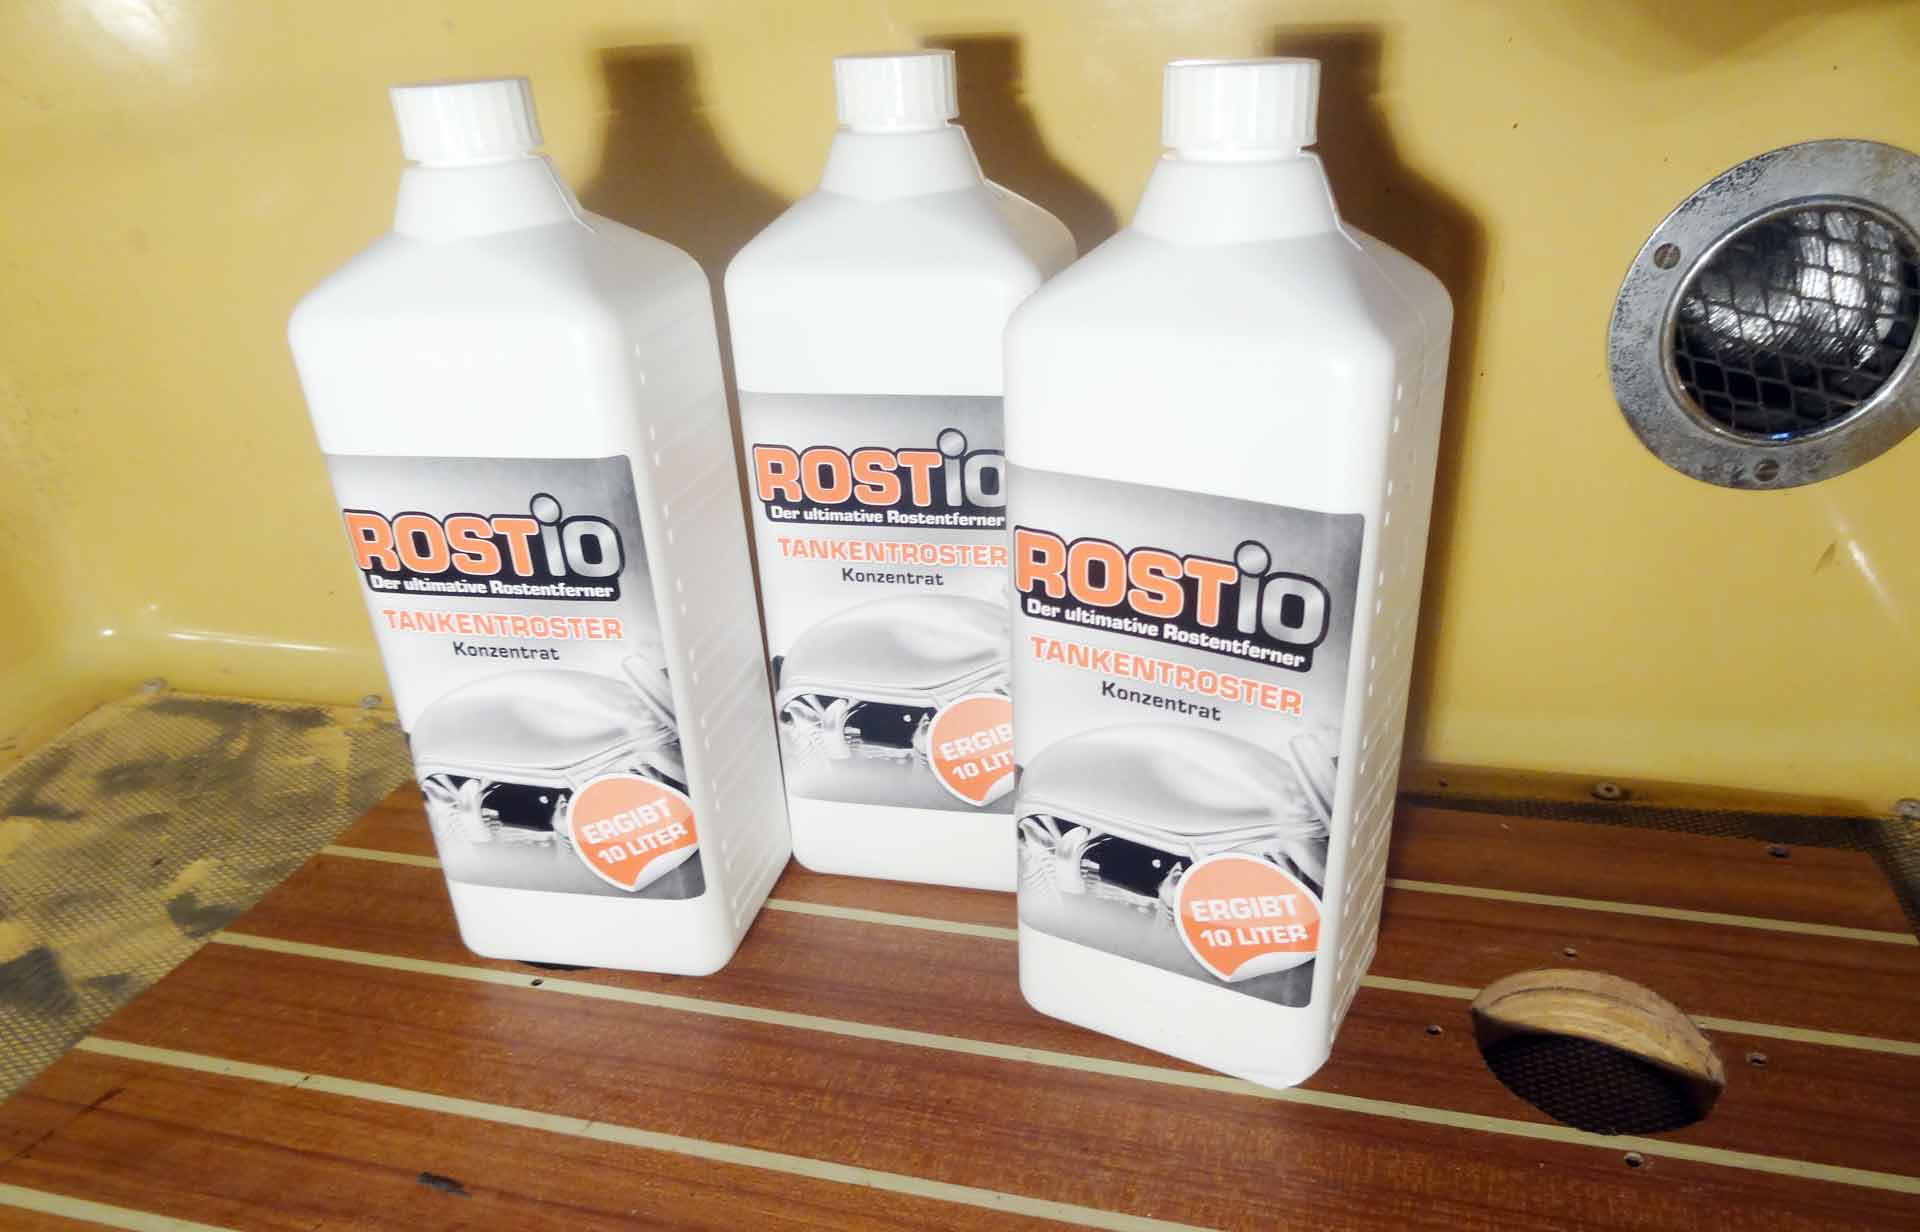
And here I´ve found the magic potion. Believe me. I´ve found a small German company called Rostio producing and selling its products mainly to clients who are working with cars. After making contact with the staff and telling my problems they recommended their strongest product: The Tank Rust Remover. It´s a biodegradable and thus non-toxic solution that can be disposed of without special care. Utilization was a bit tricky: I thinned the concentrate 1:3 (a solution of 1:10 is recommended) with boiling water and poured it right into the bilge. Now the tricky part comes in: It is essential for the liquid to operate that it constantly maintains a temperature of 70 to 80 Degrees Celsius. So I´ve bought an immersion boiling device (which is great fun since only a few people and shops will have such an outmoded device to sell) and kept it running for some 10 to 12 hours.
Rostio – the Magic Potion
As I returned after the first cycle I was shocked of how wet the whole inside of the boat has been! Which is a logical thing since boiling water will turn to water vapor and condense all over the cold surfaces onboard. For the second cycle I built a tarp out of a rubbish bag and covered the bilge to drain the condensed water back into the bilge. Returning after this second cycle the boat proved to be dry and so I went on to de-rust the remaining two bilge-compartments with the same technique. All in all two times á 10 hours of derustation. After six days of boiling my bilge I was astonished of the outcome: Really, some 90 per cent of the crustation has been removed, large portions of the keel-bolt opposition-plate were shining silvery again. Wow! So really, here´s the ultimate recommendation for rust removal: Rostio!
Dirty, tricky, tiring: Grinding off 40 years of sloppy maintenance
Now I was some large steps ahead and made so much progress. I was really surprised by the outcome of my work so far but to be honest not really satisfied. Since the keel-bolts are made of high-grade steel the result of my work was best apparent when looking at them: It was like they have been applied yesterday. A brand-new appearance. What Rostio wasn´t able to resolve was the space between the counterpart-plate and the GRP and some areas around the bolts. Maybe a mechanical handling wasn´t such a bad idea?
After de-rusting: Quite a good outcome
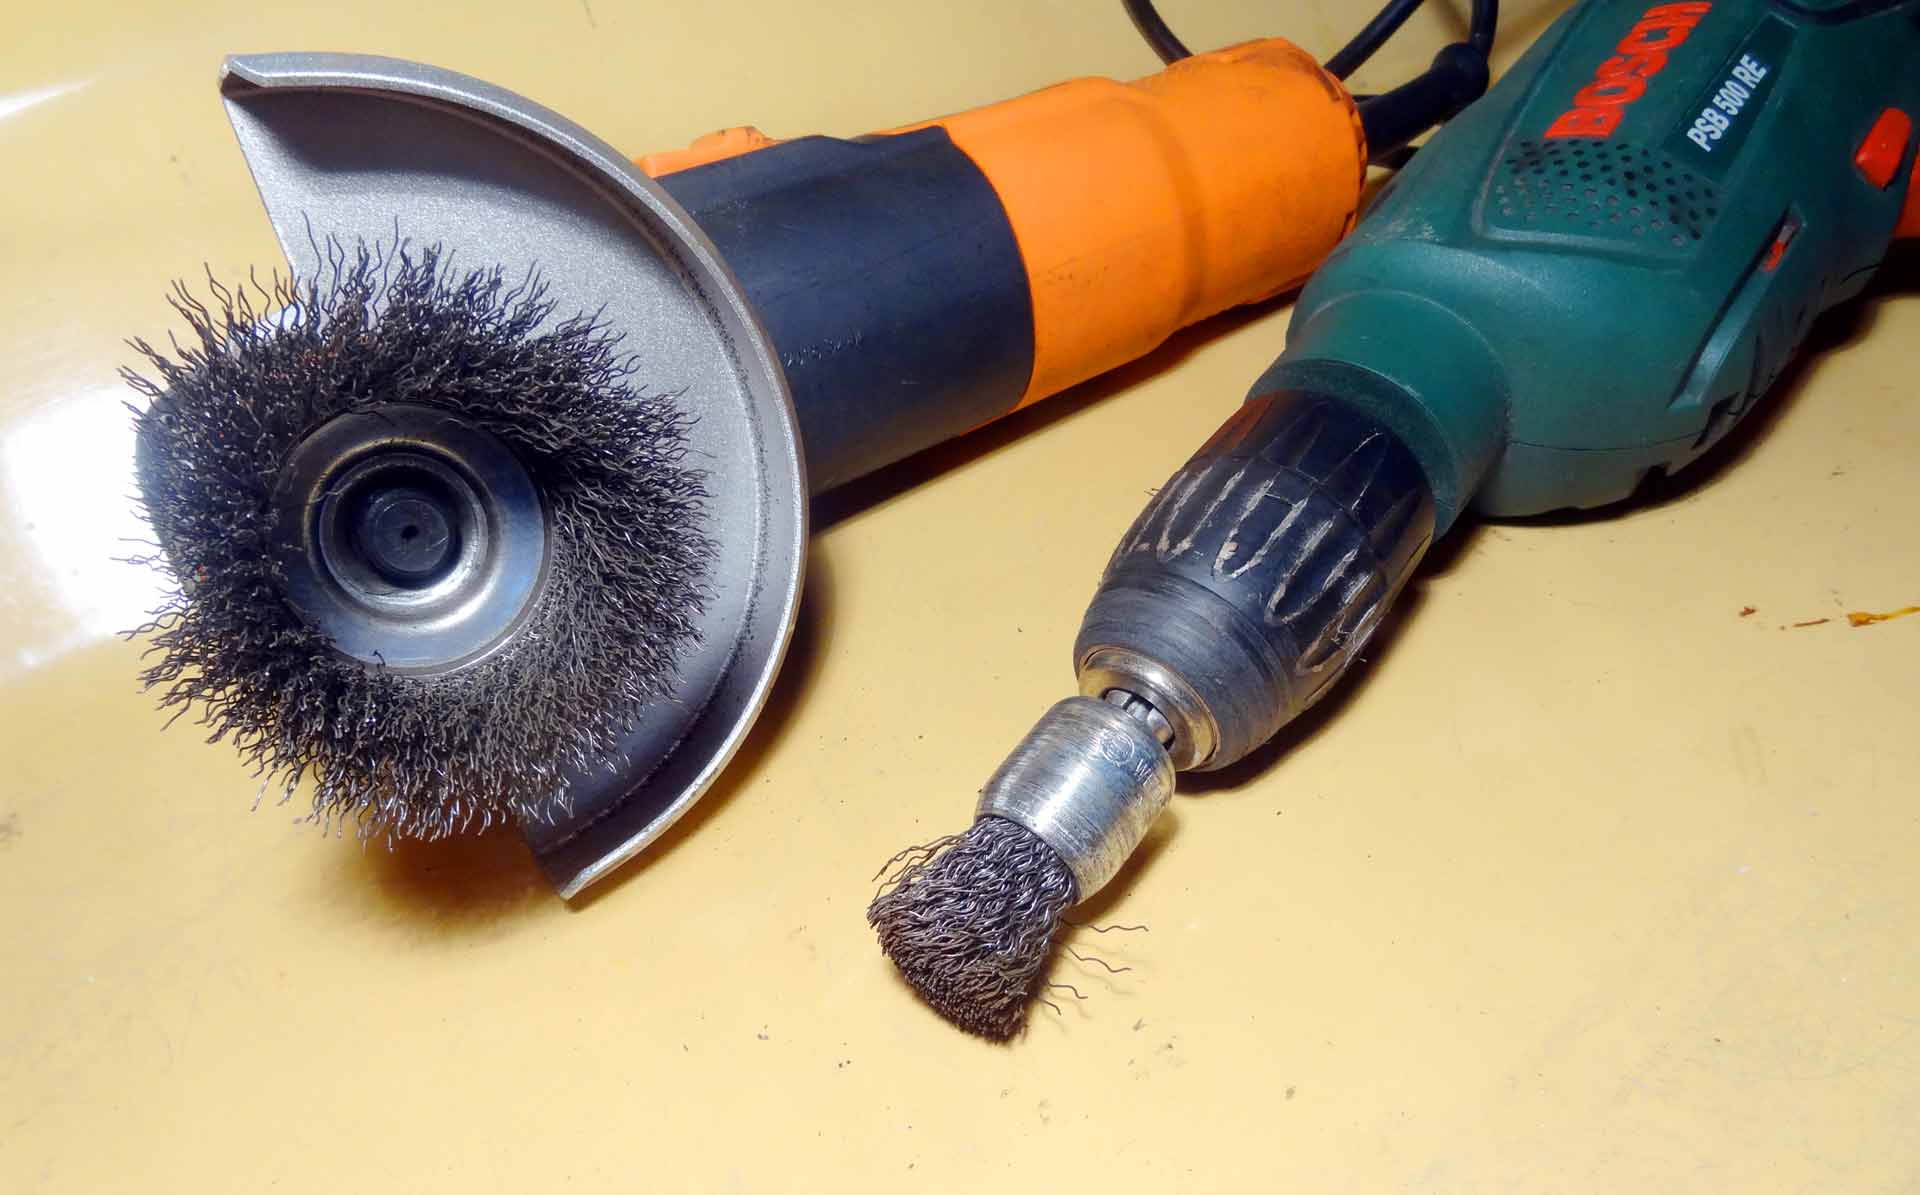
Again roaming the home improvement stores I bought an angle-grinder with a rotating brush made of steel wire and for my drilling machine a flexible prolongation with smaller versions of rotating wire-brushes. Taking off most of the filth was a tricky matter since working in these cramped conditions is really not a good idea for the backbone. But after some hours of hard work and cleaning the bilge again I was much more satisfied than before. Looking back it was a matter of hours to remove the remains of 40 years of sloppy maintenance. Now the next task was to turn the worn out vcard into a shiny new visiting card again.
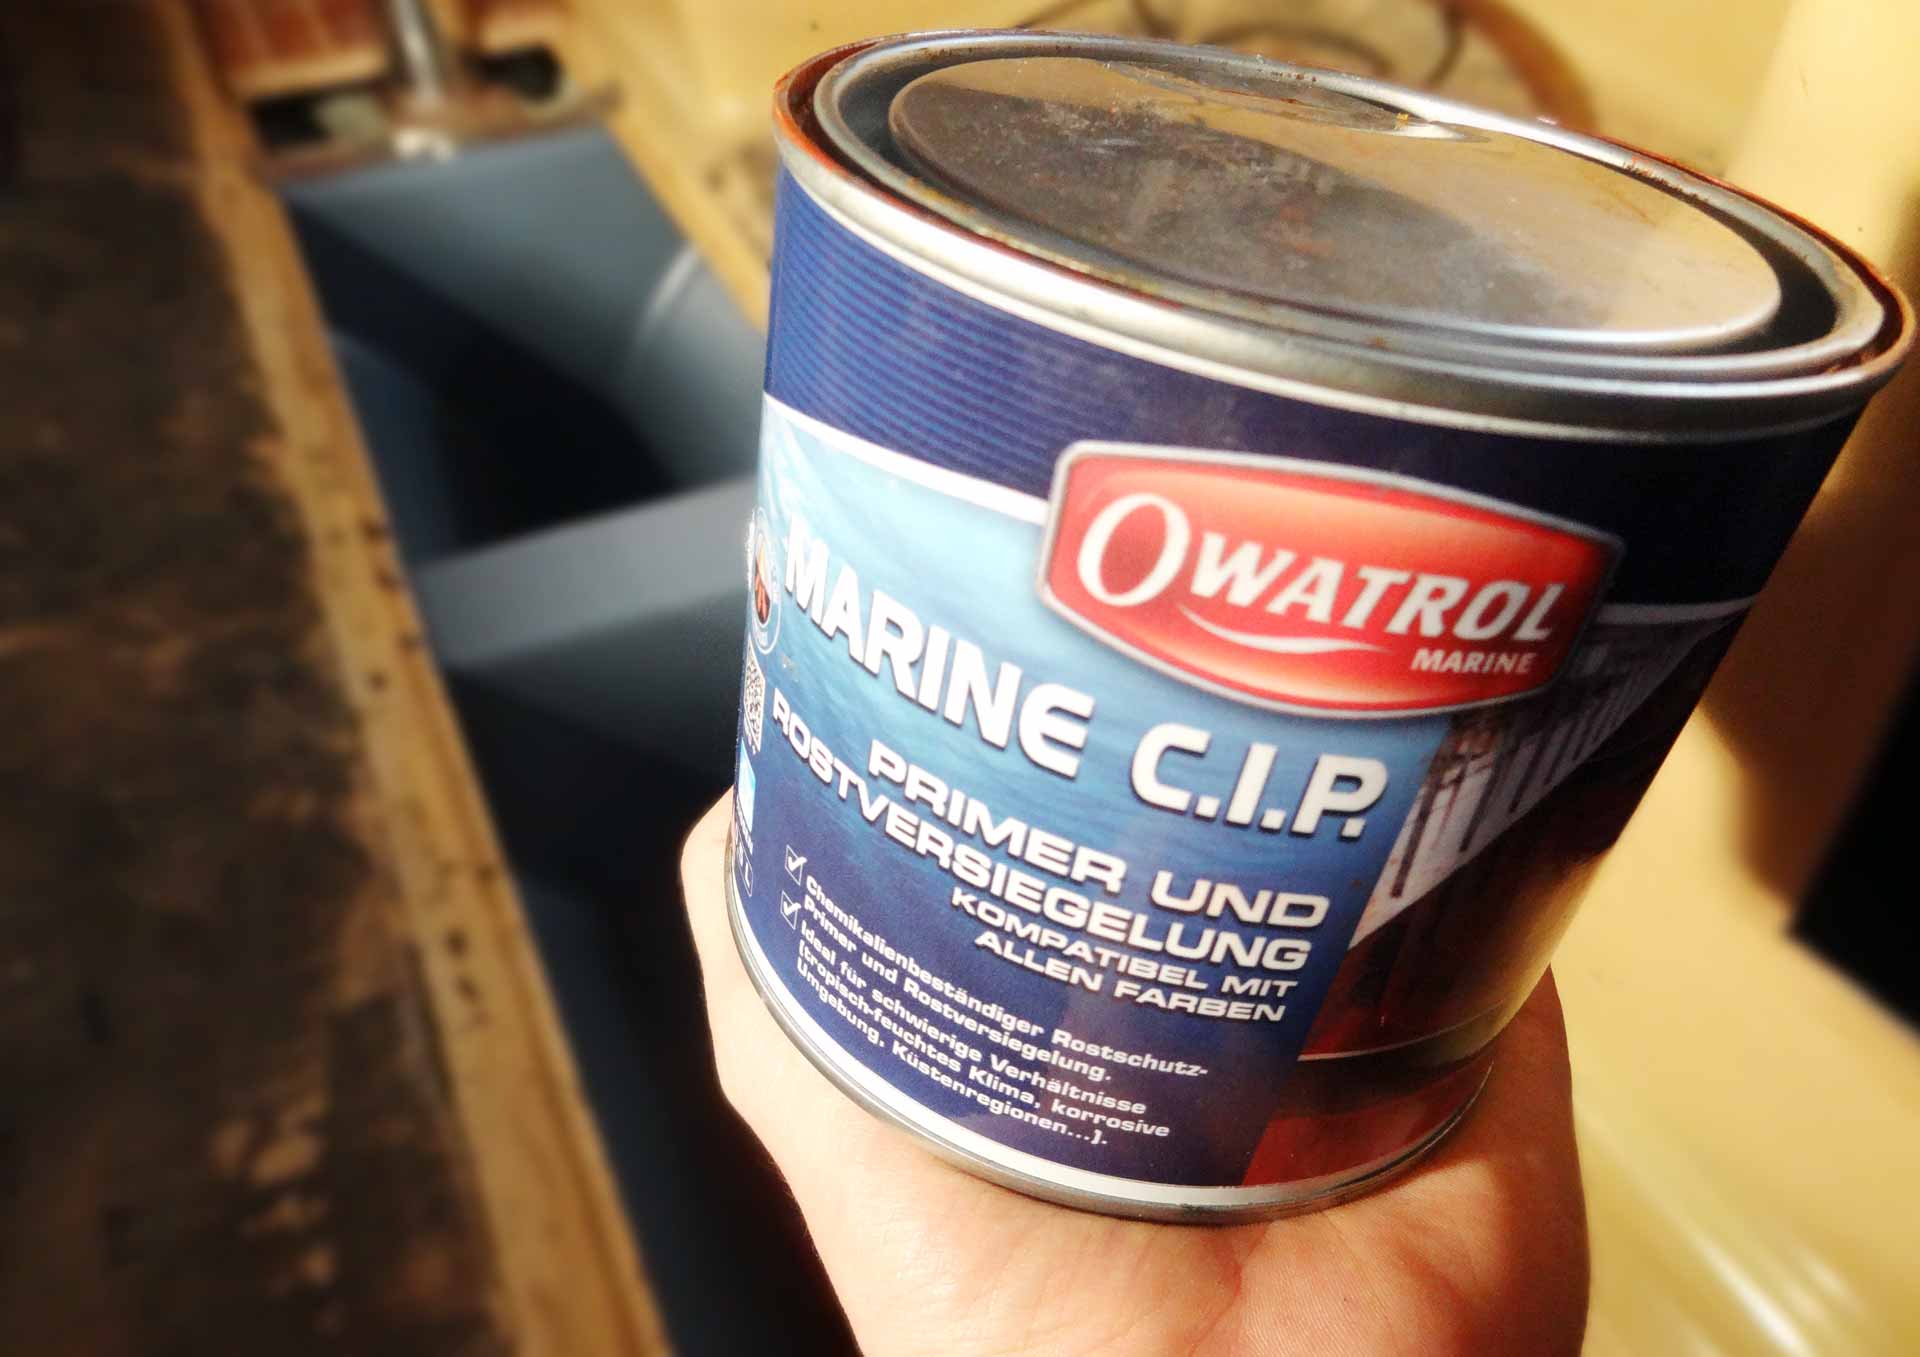
Sealing the keel-bolts and iron counterparts with Owatrol Marine
Still feeling the pain of my backbone it was my utmost concern to prevent a newly rust attack on the keel bolts and the counter-plate. So I went to buy Owatrol Marine C.I.P. – a special anti-rust primer that has the ability to creep into the thinnest areas under, beneath and below metallic stuff to seal it off from air, water and thus from rust. Owatrol can be painted over by 1K and 2K paints easily and is used by the professional shipping as well. Again, applying it was a bit tricky.
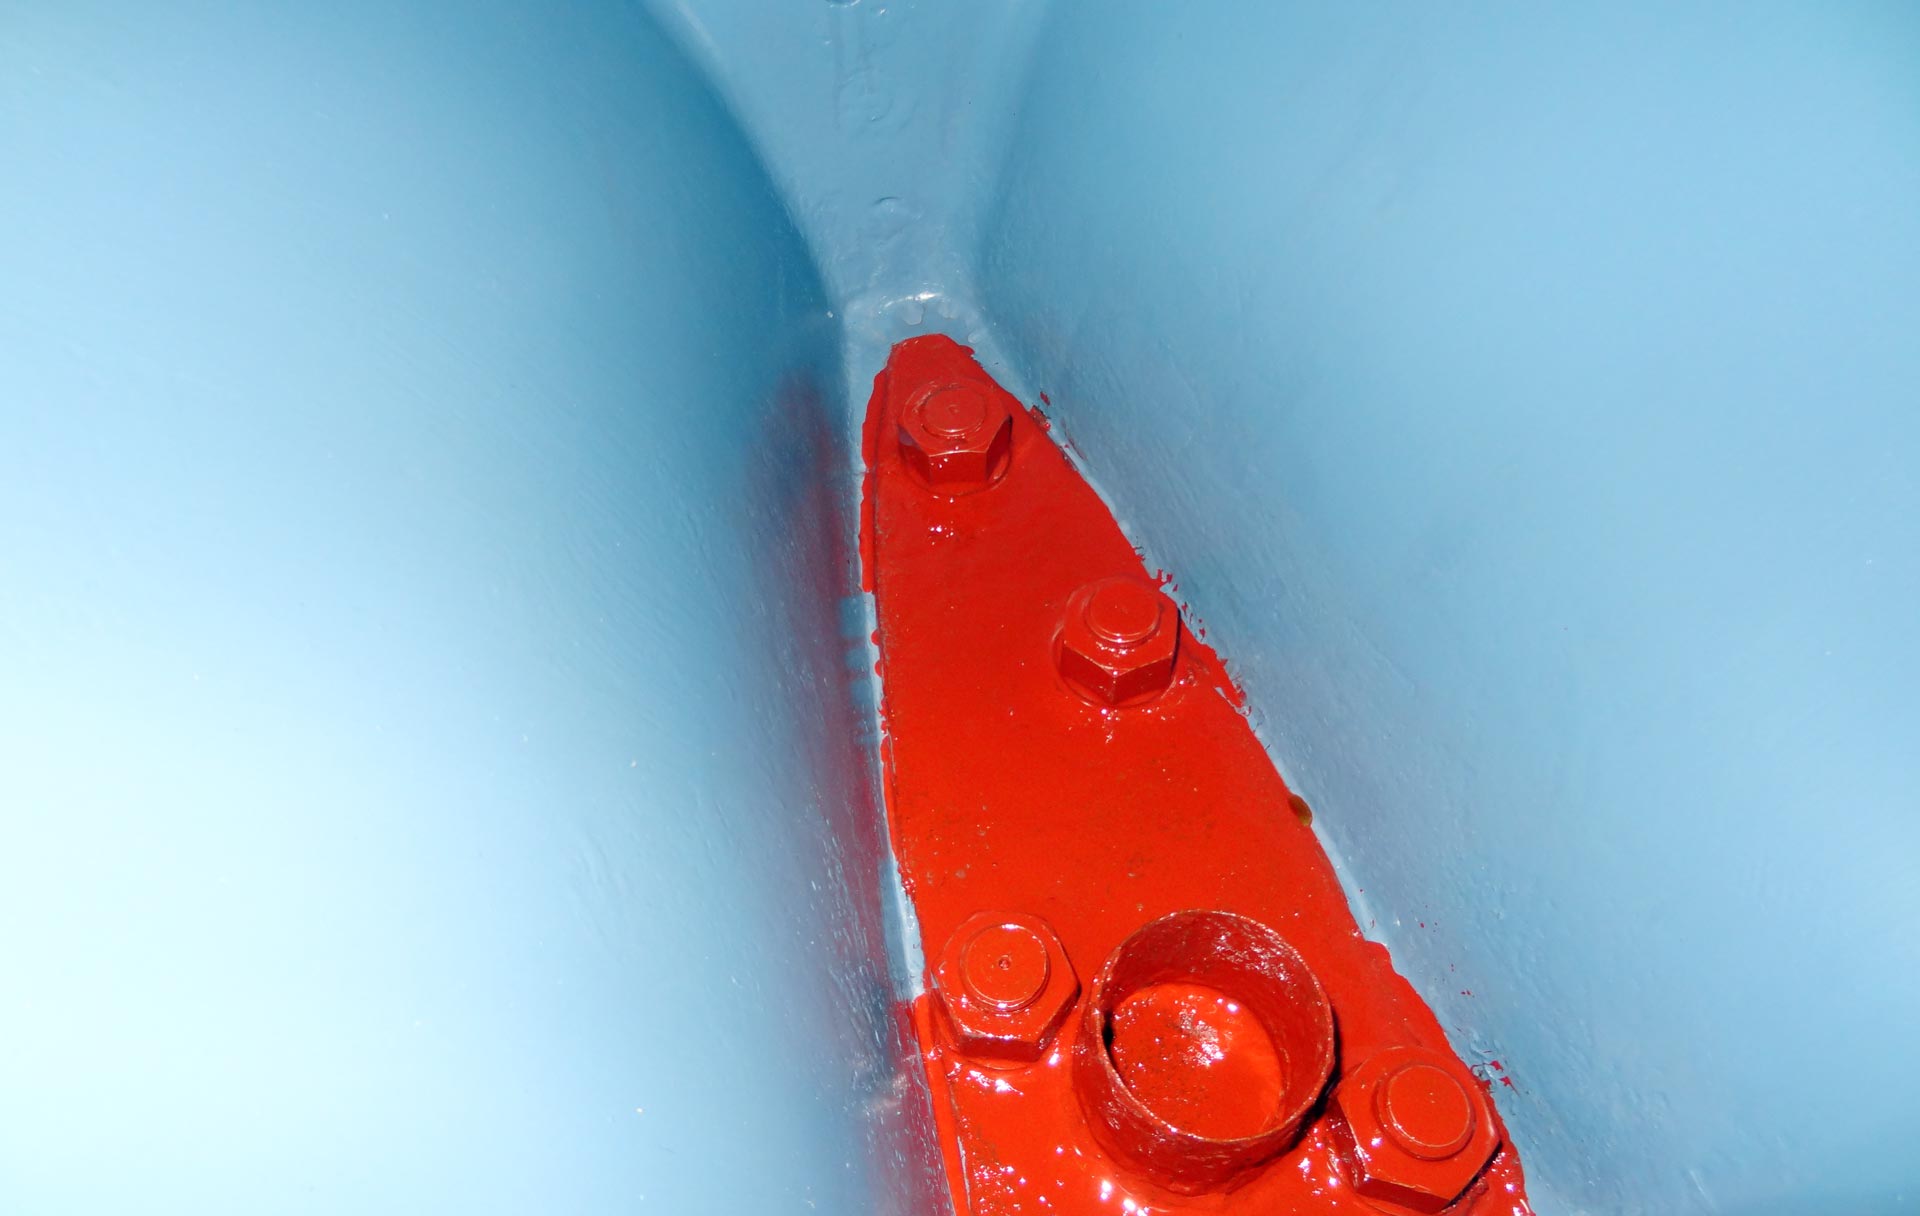
Red is for the corrosion inhibitive varnish by Owatrol
Since the recommended minimum application temperature shouldn´t be lower than 5 Degrees Celsius I had a problem. It´s winter right now, though a mild one, but temps are now getting just below 5 during the night. So I went to buy a ceramic heater which I placed just above the bilge and programmed it to steadily hold 17 Degrees Celsius. Again, drying of the first layer took not less than eight days! Logical: The cast-iron keel accumulates the frostiness and will slowly dispense it through the bolts into the hull as well. Second layer was better, three days for drying. But nevertheless the outcome was pretty convincing and definitely worth all the hustle.
Varnish like a pro: Owatrol Marine C.I.P.
Having done two layers of sealing primer I am right now waiting for them to dry out a bit furthermore to apply the third and last layer. After that I hope to have some peace and quiet with the bilge and most important of all having provided for a thorough rust-prevention of the keel for the coming 40 years. Above all I hope that if I will sell SY OLIVIA one day my predecessor won´t have such a trouble with his new keel as I had.
International Pre-Kote: Three layers for a solid foundation
Just along with painting the metal-parts of the keel I started to prepare the GRP surface adjoining to the keel-plate for varnishing. Here too I was grinding off the surface, some of the lower parts I had to grind much more because apparently my pre-owners had painted the bilge by themselves, but this I could see without any professional application of the paint nor with any demanding on themselves. Having achieved a fairly smooth surface structure I went on to prime the GRP. Of course: With Pre-Kote by International.
Blue is for the Pre-Kote – later everything will be shiny white
That´s a common used fast drying primer. I chose the blue color due to the fact that after application of the upcoming first layer of real paint – and the follow-up work of dragging the surface to smooth out – one can distinguish the paint from the primer-color. So blue was the color of choice. I tried not to let a drop of varnish on to the red-colored metallic surface and have been fairly successful. Applying two layers of Pre-Kote took all in all some two hours. Even with nights that cold the primer did dry out very well within the next 24 hours. Two layers have been applied and will do.
A long stretch of time for this wee bit of work?
So that is the status quo of my current works in the bilge. It is clean now. It is primed now and awaits two more layers of Marine C.I.P. and Pre-Kote for the next step. To sum it up, from the start I have been on the keel-project for some nine working hours now. That´s not so much, right. But the stretch of time needed to achieve the goals is immense: Having started to work some four weeks ago the amount of “dead” time needed to wait for the derusting to boil or the paint to dry is the vast bulk of time here.
Won´t work without it: Mechanical devices
Standing above my work and looking at it makes me proud. No really. It´s not just the first part of the big puzzle called “refit of a yacht” coming into its place, it is more indeed. It is a proof that working DIY for most parts of the refurbishment is possible even for someone who is not a pro boat builder. You shouldn´t be afraid of the tasks ahead and even though my knowledge is limited and I am really not a very experienced craftsman in that matter it´s quite possible to achieve professional results.
Advertisement
What´s up next
My initial plan was to finish work on the bilge within two weekends. Which was a totally false calculation by not having incorporated the vast time needed for drying of the various layers of varnish and paint. Nevertheless my estimation of net working hours could prove to be right. So what´s up next? As I mentioned, the keel-bolts and counter-plate will receive two more layers and then I guess I will let the whole system dry thoroughly through for three or four days.
I am pretty proud of my work so far
Last part of this milestone: Application of Danboline bilge paint in two, maybe three layers and the installation of a new bilge-pump will bring the whole project down to a whole figure. After some 6 weeks of time and – roughly – 12 to 14 net working hours the bilge will appear in shiny white and will be as new and fresh as back in 1975 when my boat was launched in Turku/Finland.