Any sailboat´s keel is an absolute vital part: No margin for errors here, you simply don´t mess around with a yacht´s keel. In this, detecting a manufacturer´s flaw in my freshly cast lead keel was a true moment of terror. How to deal with it now? Here´s what happened, why it took us so long to reach a decision and how we finally solved the problem.
Yepp, this was a true moment of terror. And I am not over-exaggerating here, yet, the whole story dates back a few months – and I am so happy that the boatbuilders back in the shipyard had been able to solve it once and for all a few days ago. Yesterday, during a short weekend´s visit to the building shed, I was able to get a picture (in the literal and metaphorical sense) for myself and, spoiler, I am happy. But let´s start at the beginning: Rewind to July 2025, the day my newly cast keel arrived at last …
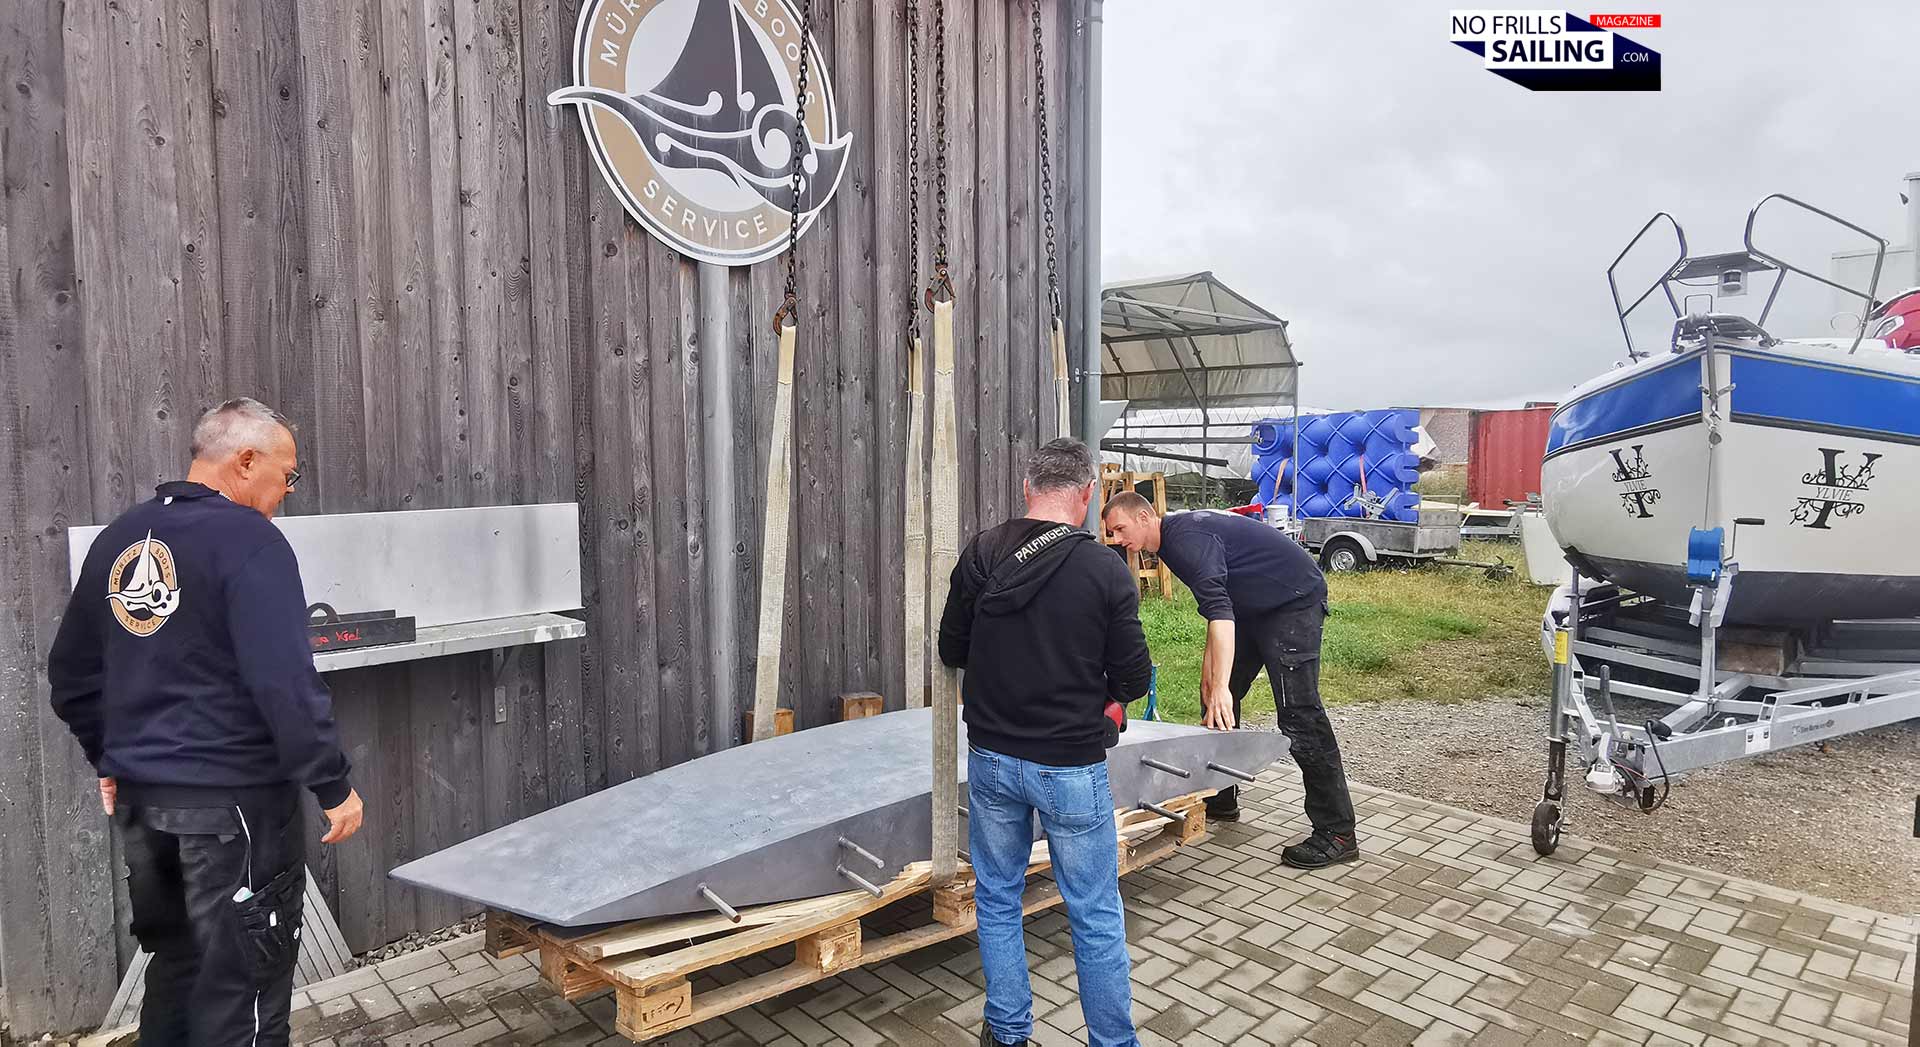
If you follow my blog and especially the building of the Omega 42 sailboat closely, you may have known what an Odyssey it was to find a foundry capable and willing to cast my keel in the first place. There are – to my knowledge – only three casting houses specialized and focused on dealing with lead left in Europe. One in Poland, one in the UK and one in Germany. UK was out due to post-Brexit cost increase, transport distance and budgetary reasons. I had contact with the Polish foundry but after a few emails the exchange was so complicated that I didn´t even asked for a quote. As for the German casting house, everything went smooth … but it took a looooooong time to get it done. Anyway, at some day the 3.7 tons of pure lead arrived. So far, so gut.
Detecting a fissure in the keel

But here´s the thing: I did not spot the issue, but the boatbuilders did. I am still puzzled about the fact that a rupture that size hadn´t been detected by the specialists back in the foundry, neither during or after the casting nor during meticulous sanding and fettling of the keel. In any case, there it was: A 15-20 centimeters ling fissure, as you can clearly see in the picture below:
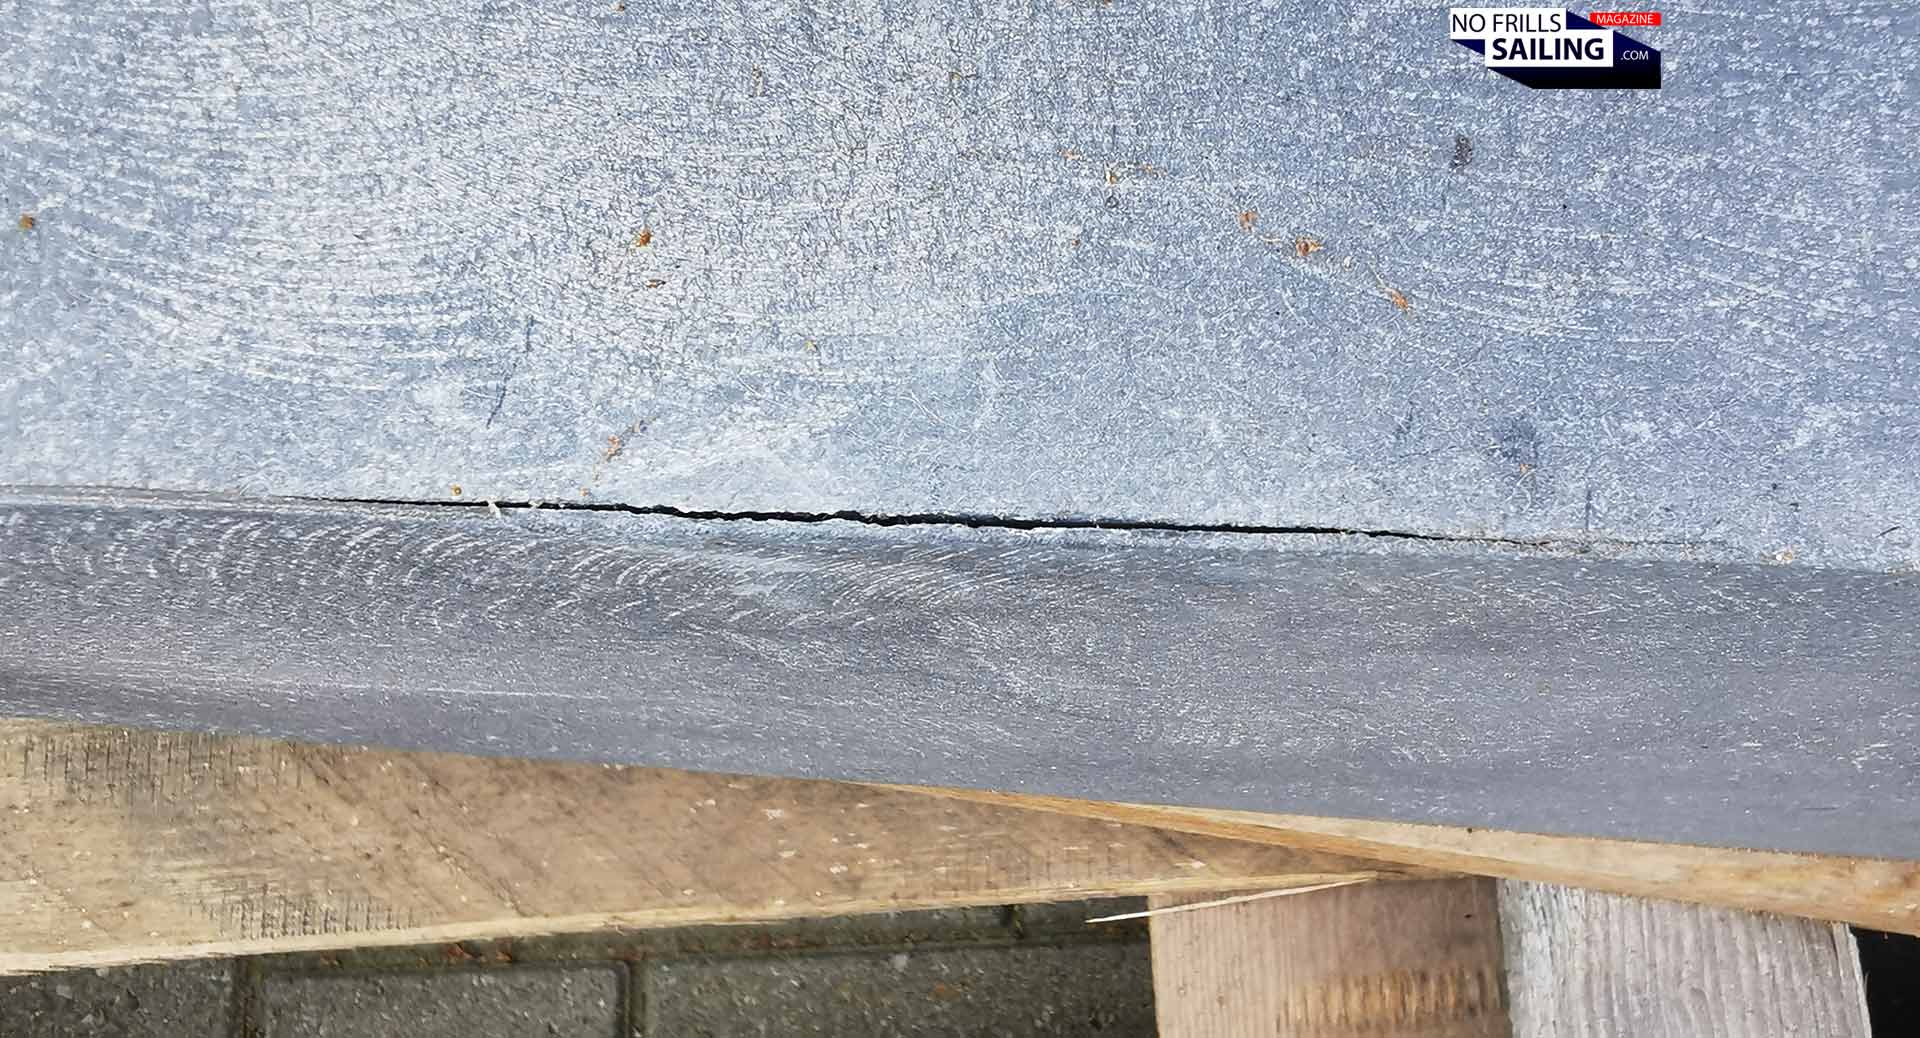
You can imagine how shocked I was at first, a feeling, only drowned by disappointment after I learned how casual and non-alarmed the foundry reacted. The emphasized to “take a torch, heat it up a bit, melt the area superficially” and it will work out. I am not sure if I should have activated the legal of action here, which I did not. Apparently, the fissure was only in the thin, rear part of the keel and only restricted to the utmost upper part of the keel – neither in the mid-section or somewhere “critical”. Nevertheless, I am still wondering how cool these guys have been. I mean, this is the keel, right? Not some random, unimportant part of the ship …
How could this possibly happen?
Today, with a few months time having passed now, I am a bit more relaxed myself as well. I understand that it is a very small and limited area being affected and that apparently the fissure does not reach deep into the keel´s internals. In the meantime, a metal expert had been revisiting the keel and probed the rupture, partially giving and all-clear signal. This is not – and I am very happy about that! – a showstopper nor critical. This fissure is instead a visual inconvenience and the consequence of scruffy work.
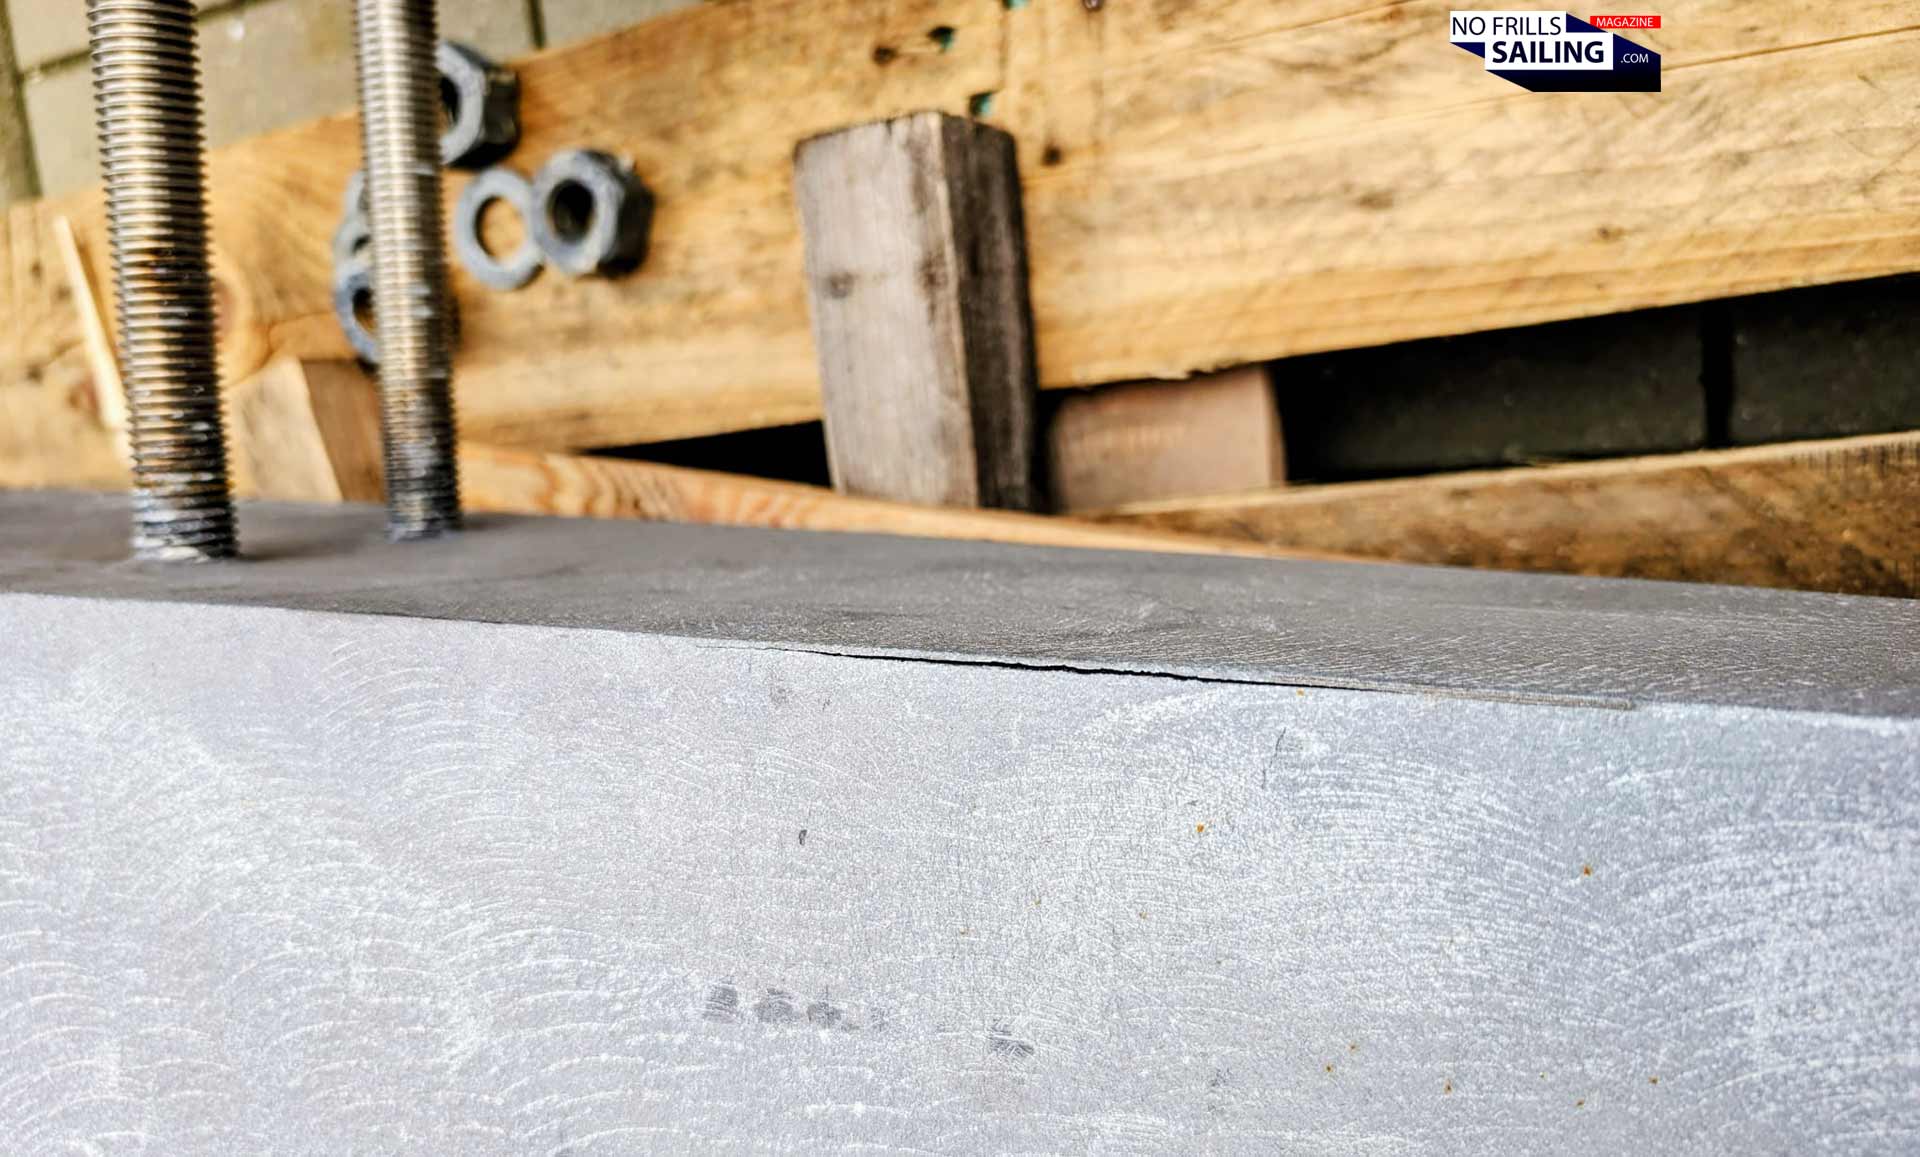
It possibly happened during casting when most – meaning 99.9 % – of the keel had already been cast. We suppose that there was some leftover molten lead still in the melting pot and/or a few grams still missing to hit the target weight of the keel. When this “leftover” had been poured into the casting mold, the temperature difference of the keel´s lead and the newly poured lead was too big so already a skin of hardened lead had been formed, finally separating both layers. It´s, with everything in boatbuilding, a matter of craftsmanship and human assessment. Errors can and will happen, no matter how skilled people are or how much effort is exerted. And so my brand new keel ended up being born with its small congenital defect.
To melt or to agglunitate?
It took us so many months to decide how to deal with that issue because some things need time anyway. I wished, and I am honest here, that the casting house would have offered more help, more insight and explanation and ultimately, a hand-on approach in getting this issue solved by their own people, who had been the source of this, but they didn´t. I don´t blame them, but in the end it´s a bit of an disappointment, after all the keel´s budget was more than 20.000 Euros. And of course we both agreed that we wouldn´t just take a torch and melt the lead … I mean, have you ever celebrated the new year´s eve pastime of pouring lead to tell the future? Once molten, this stuff behaves like water!
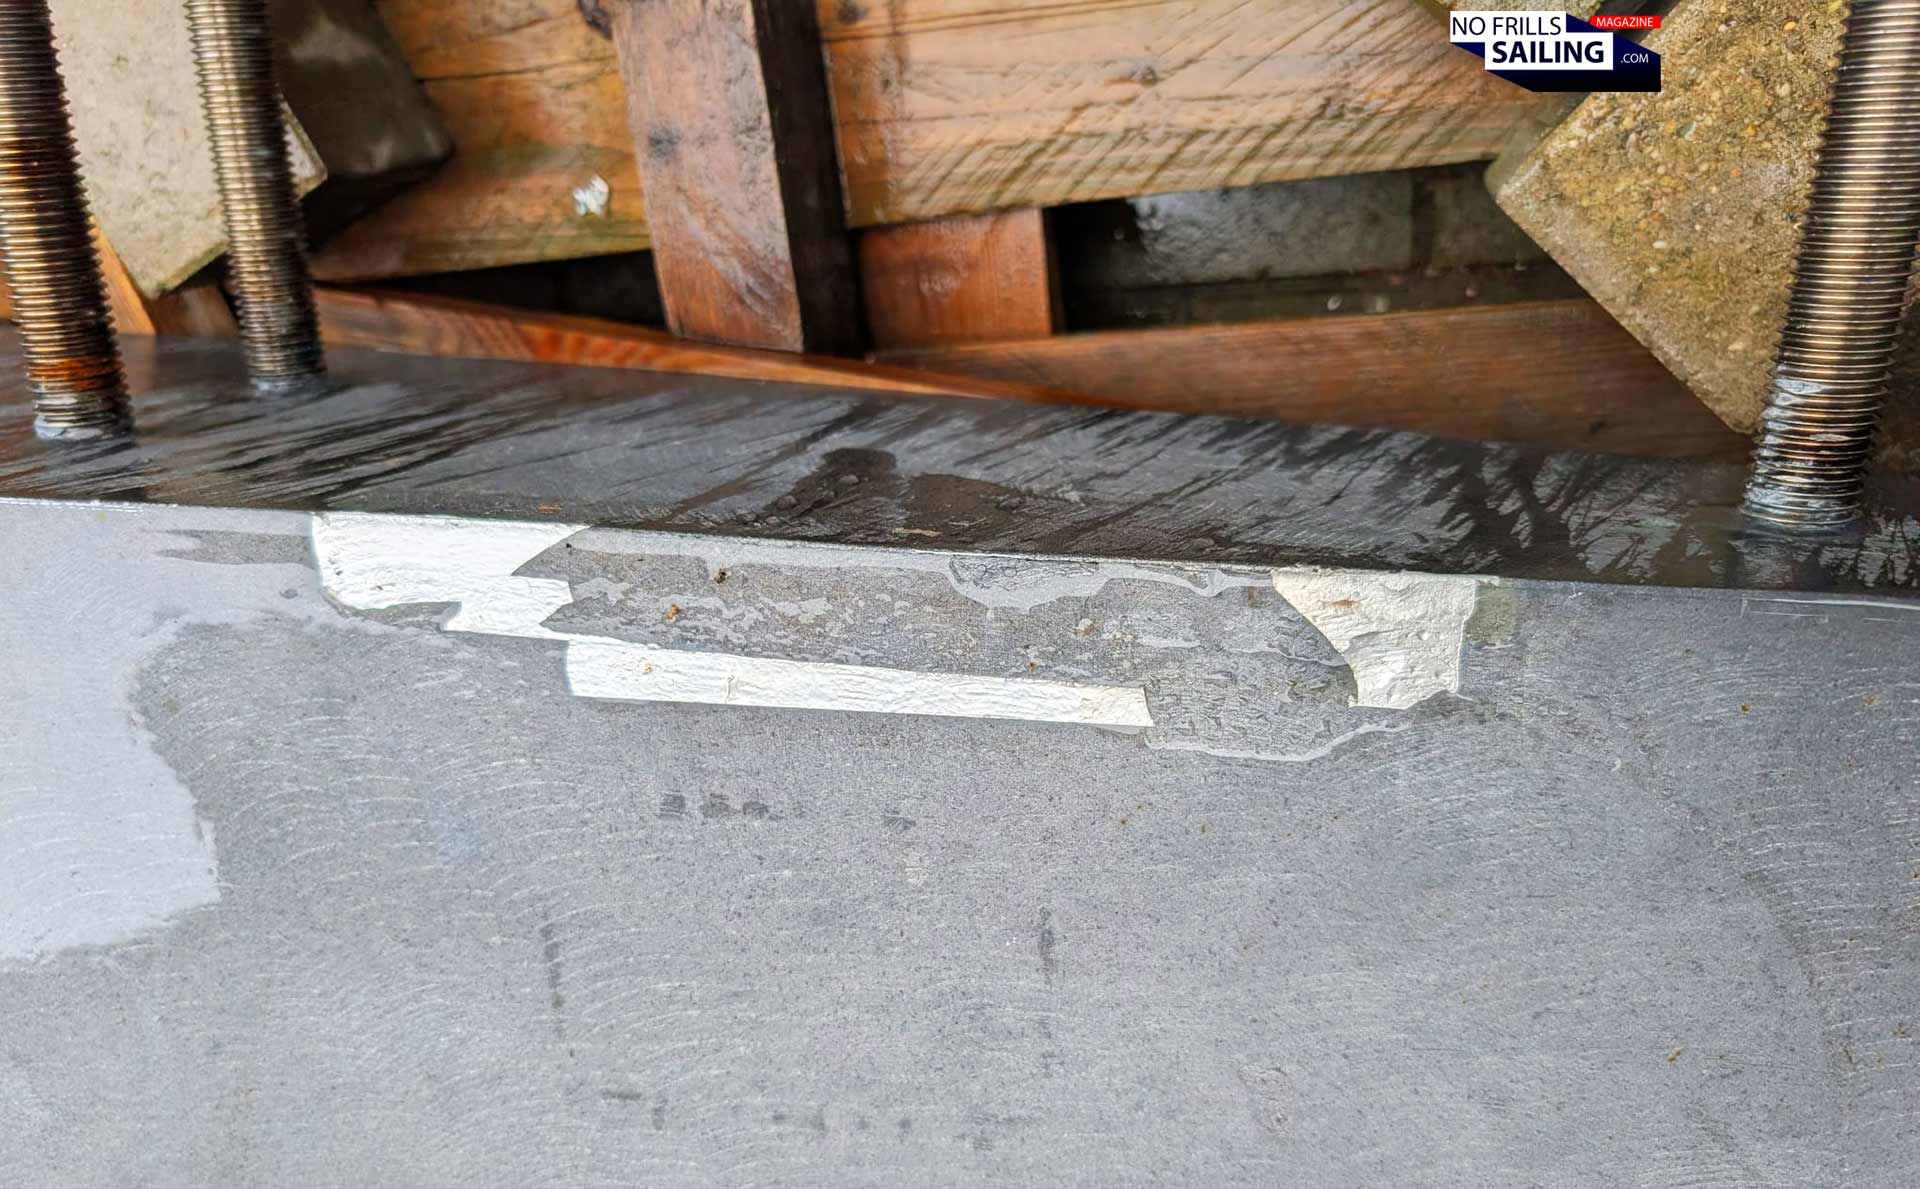
In the face of acknowledging that the rupture was just concerning the upper-most part of the keel in a non-structural area, the only premise was to close it. Because, if for some reason water would permeate the later sealing and then freeze during winter time, severe damage could happen! Seeking the expertise of several experts and consulting the different strategies, the shipyard decided to utilize a special epoxy-mixture. There are indeed special two component metal-filled epoxy resins providing waterproof, mechanically strong and lasting bonds between metals, including lead.

Operation succeeded. What´s next?
For obvious reasons I cannot disclose the product utilized and due to the sensible nature of this operation the guys did not make any pictures of the process, but the outcome looks perfect. The fissure is closed, if it wasn´t for the working marks, you would not notice that there had been an issue in the first place with the keel. Once I had received the “it´s done!”-picture, you can imagine my relief, having this issue finally removed from my chest. Well done, guys!

As you can see in the upper picture, they have already begun with preparations to seal the keel. As this is pure lead, a hazardous heavy metal, regulations are asking for a complete separation of the material from marine life. This means that a few layers of yet another special epoxy resin have to be applied in order to achieve this barrier layer. Usually, cast iron keels receive a layer of filler which irons out imperfections and rough spots of the surface area to create a smooth, hydrodynamic shape. This is not necessary for my keel as it had been otherwise cast just perfect and – as I already mentioned – had been fettled to near perfection back in the shipyard.
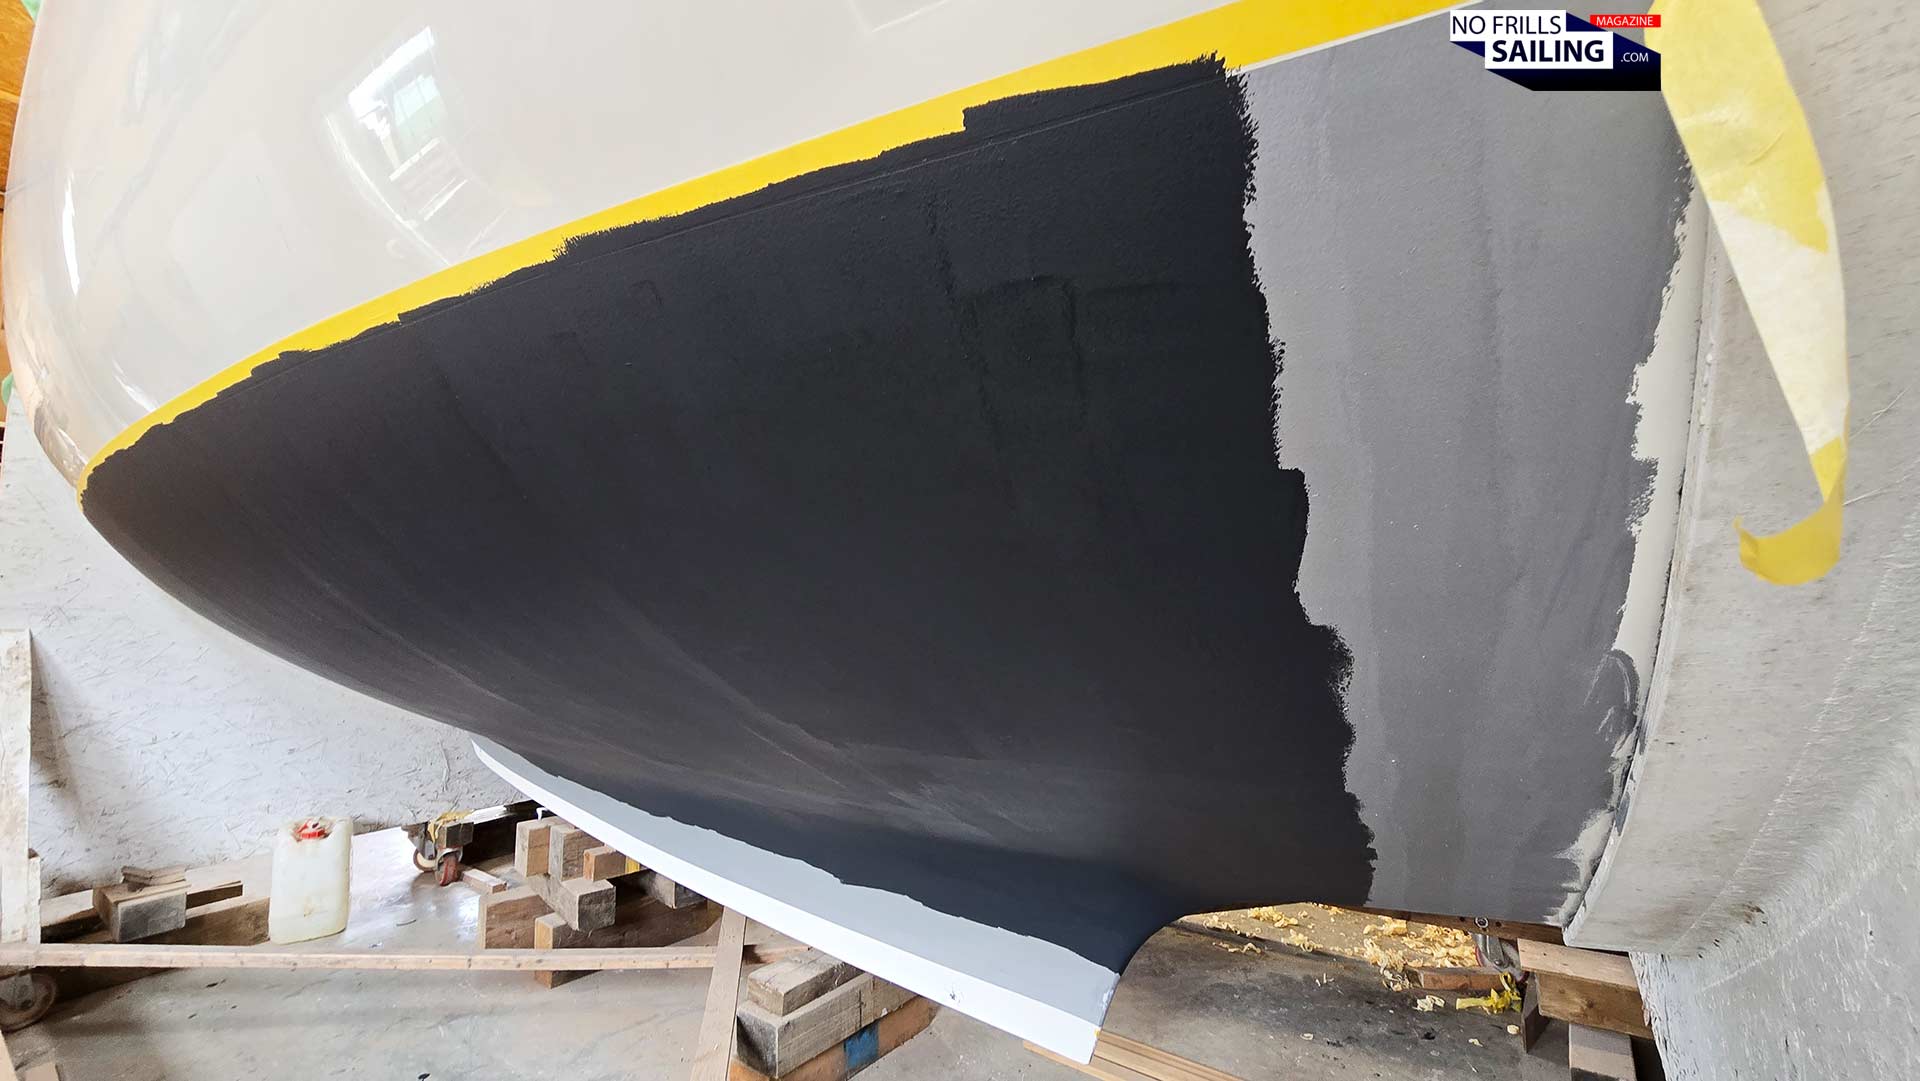
The underside of the keel is covered in epoxy. In the coming days the keel will be put to an upright position so that the rest can receive its epoxy-coat too. Together with the already prepared hull, where I have left the bottom paint “mounted”, I will apply the finishing layers of primer and antifouling paint once the keel has been finally mounted and fitted thoroughly. I guess, this will happen in a few weeks and I promise that this will be an occasion of which many, many detailed pictures and possibly a YouTube film will be shot.
You may also like to read these articles:
The complete work-in-progress documentation from start to now
Casting the keel of the Omega 42
Clever Keel: At the Linjett shipyard