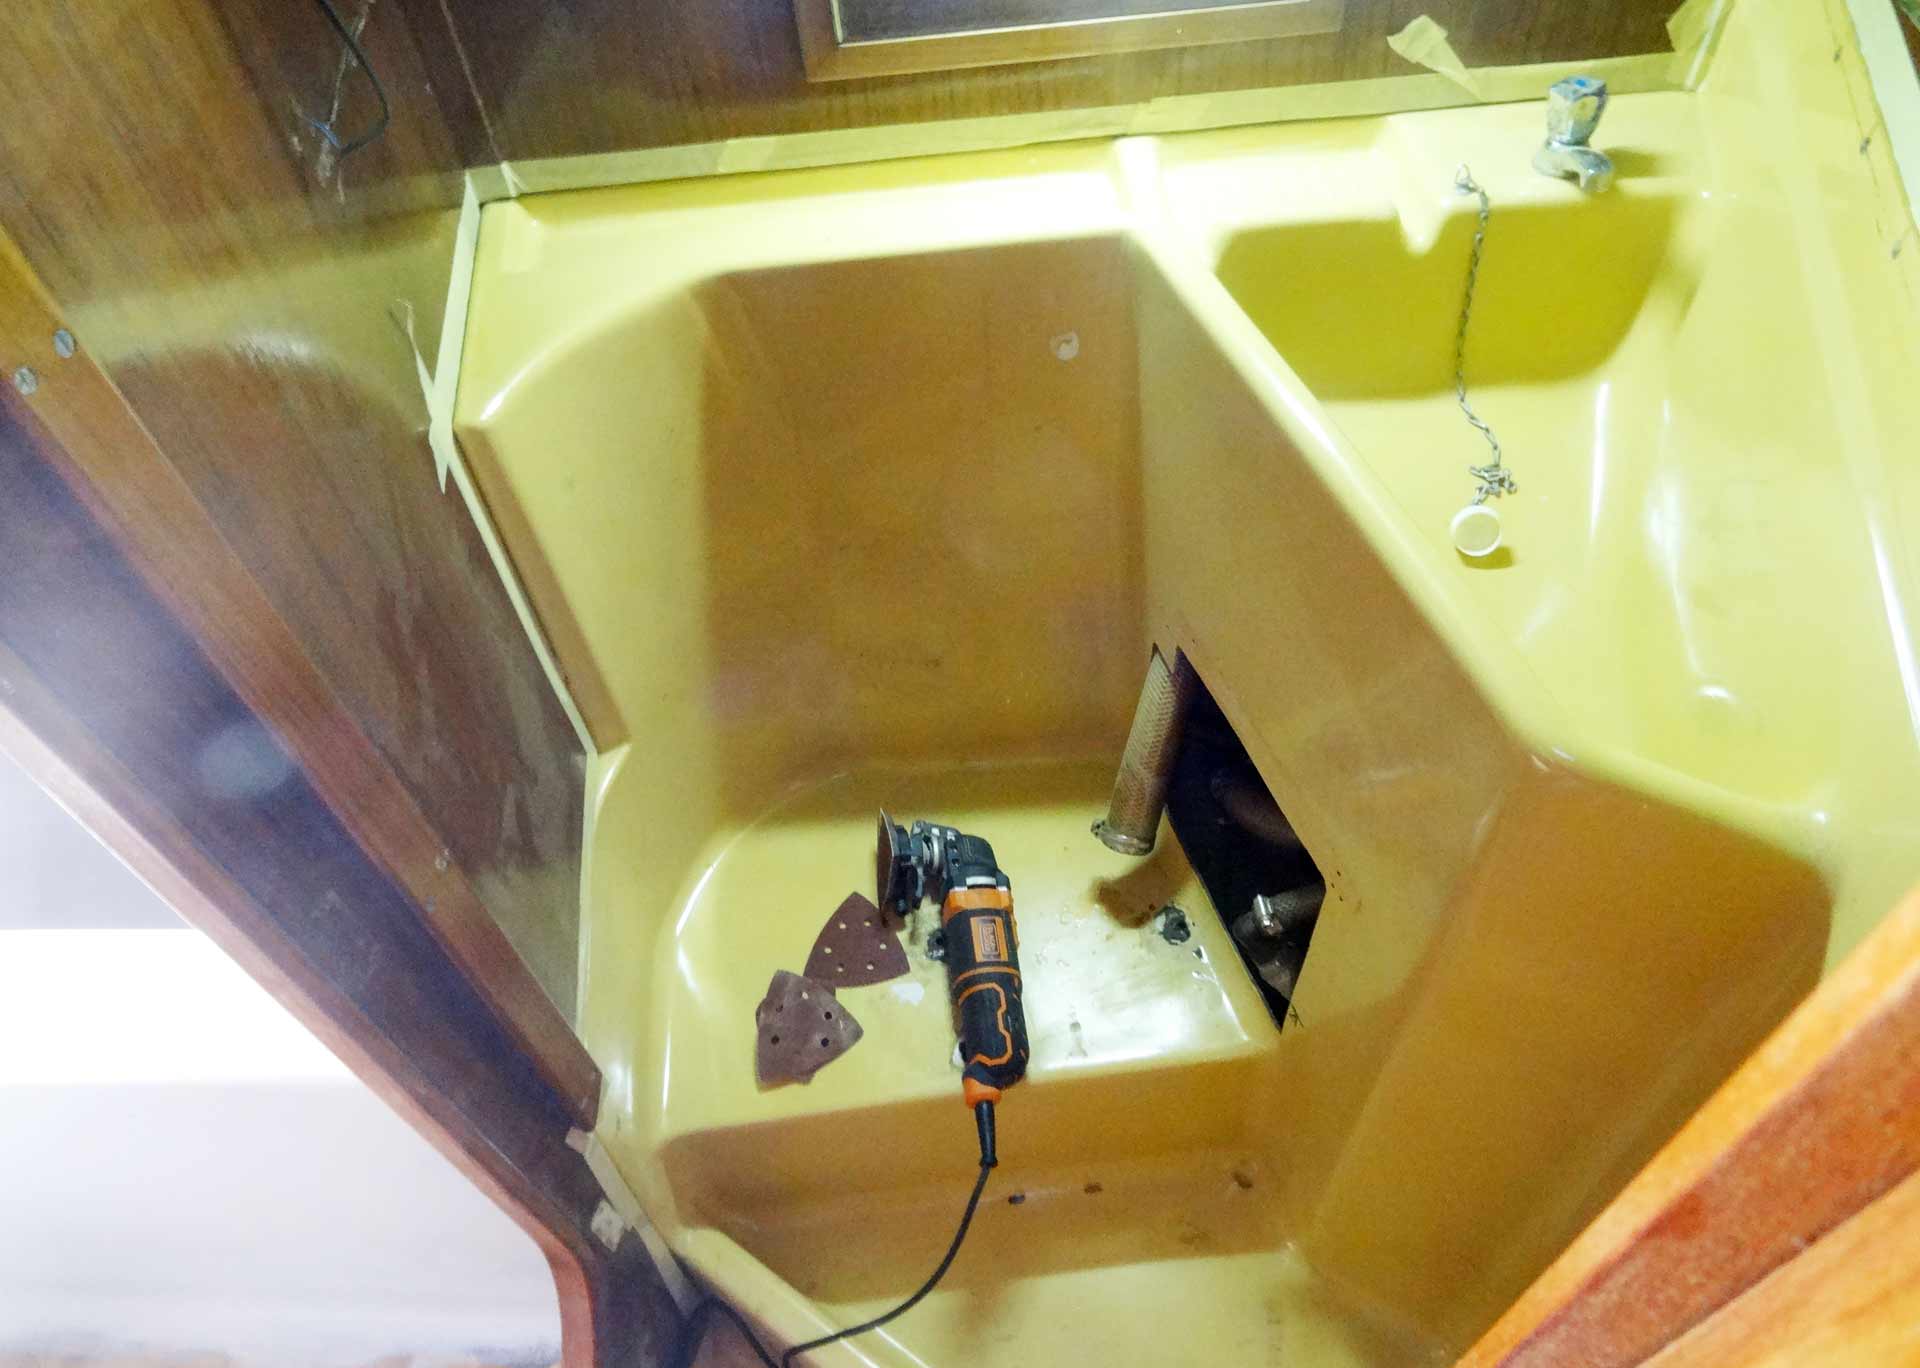
Although most of my Skipper friends don´t really like to talk about that particular topic it´s nevertheless one of the most crucial questions of whether one likes a yacht or not: The lavatory, or, as we call this special cabin on watercraft, the head. When I took over SY OLIVIA everything has been working well and so did the pumping toilet. But I must admit it has never been a nice feeling having a pee on this some 15 year old ceramics. When deciding to go for a refit, I took off the old toilet as well and dumped it. Since the drain isn´t smelly at all and determining their good shape by looking into the tubing I decided to just replace the toilet itself. That´s all? Well, not really …
My Plans for the new Yacht´s Head Cabin.
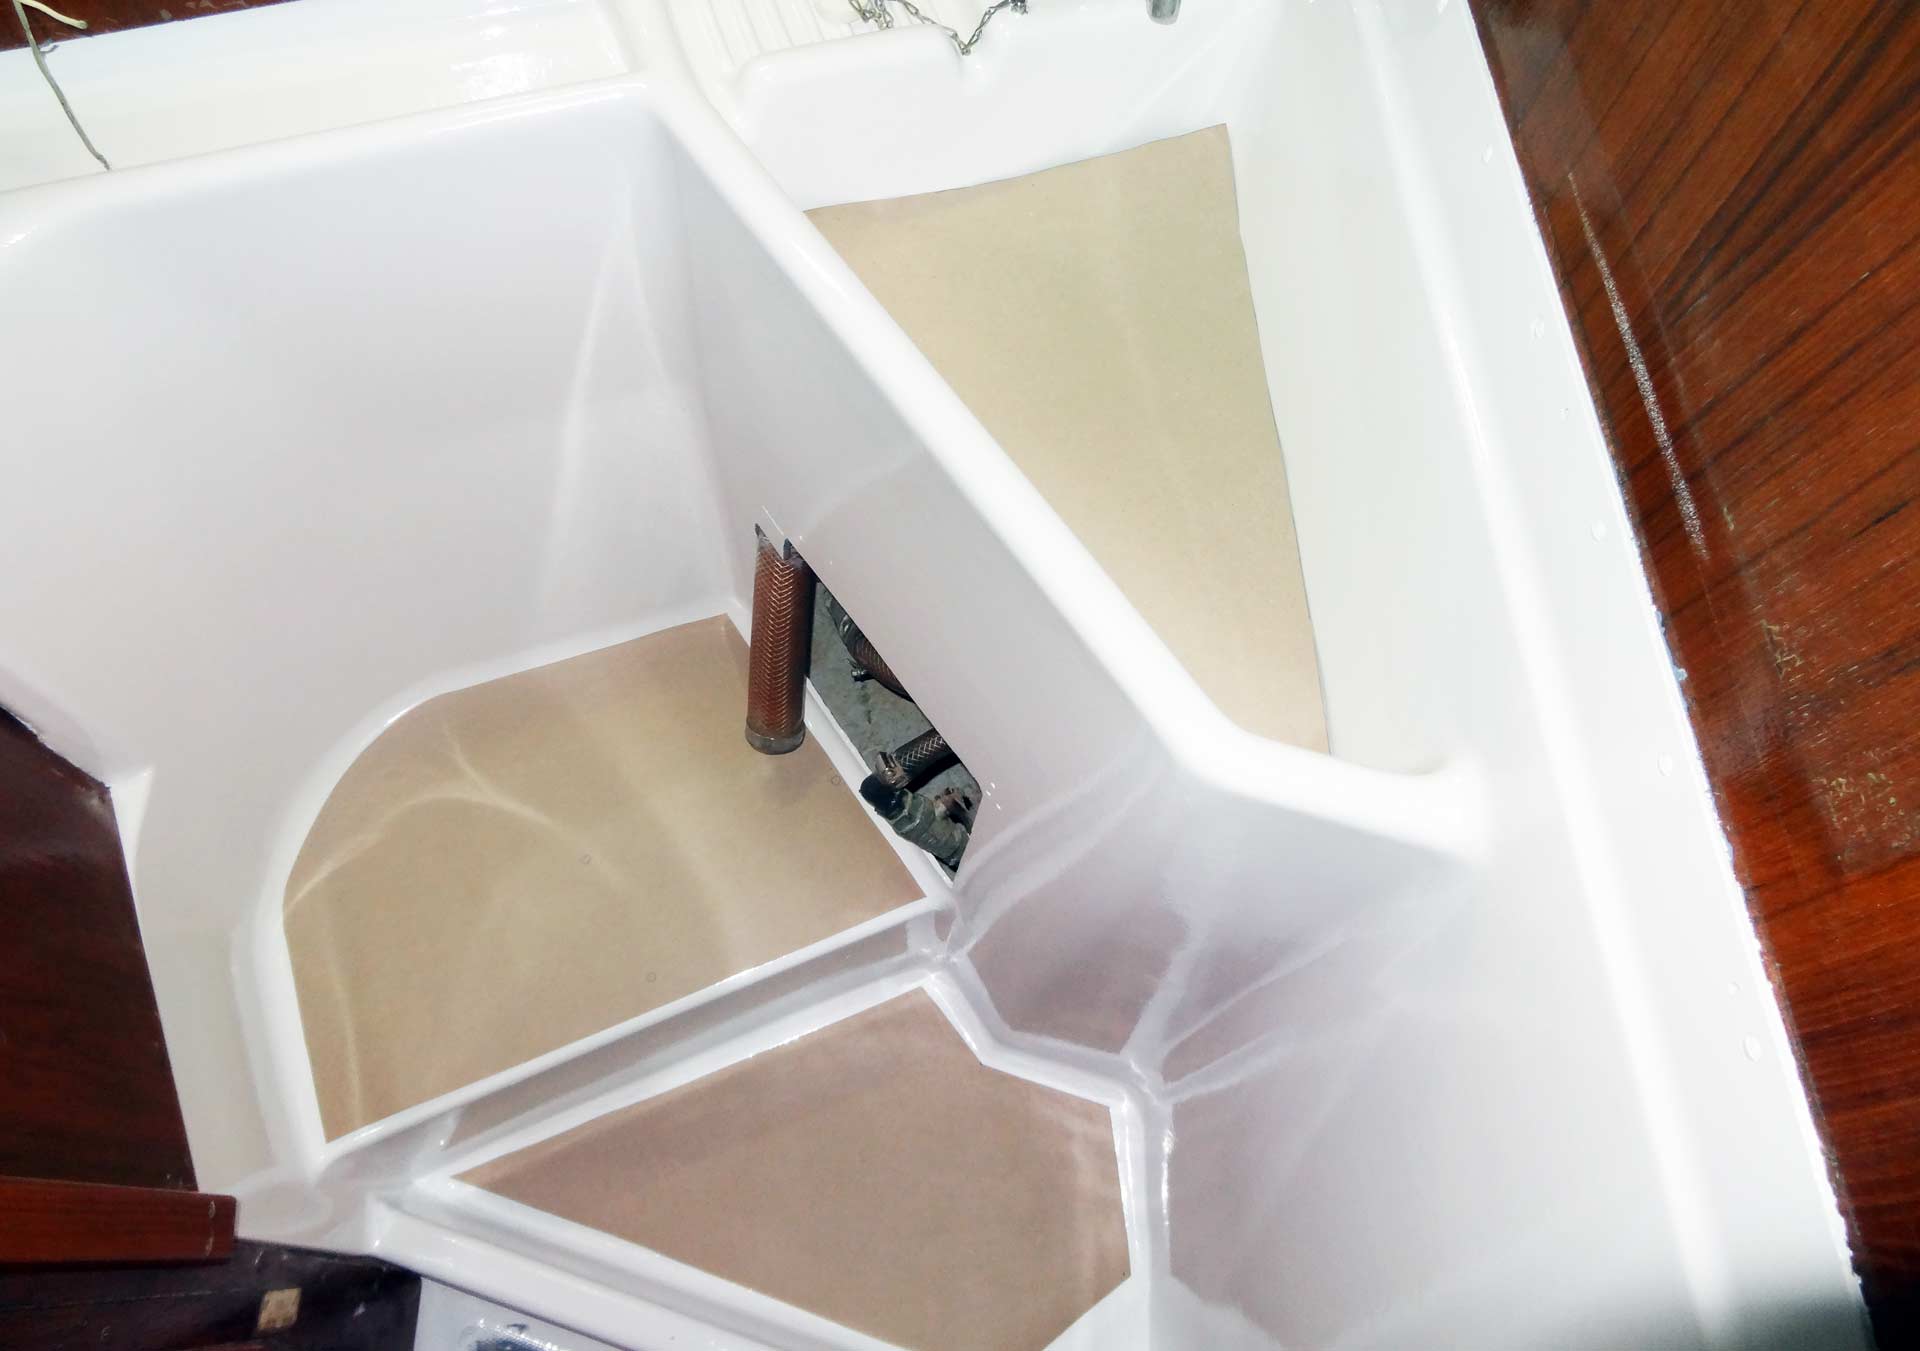
After having sanded all the GRP-surfaces of the whole ship´s interior (which can be read in a detailed article here) I´ve applied two layers of Pre-Kote primer and three layers of International´s Toplac to replace the outdated original yellow Gelcoat-color with modern, plain but shiny fresh new white (here´s another detailed article on painting the yacht´s interior.
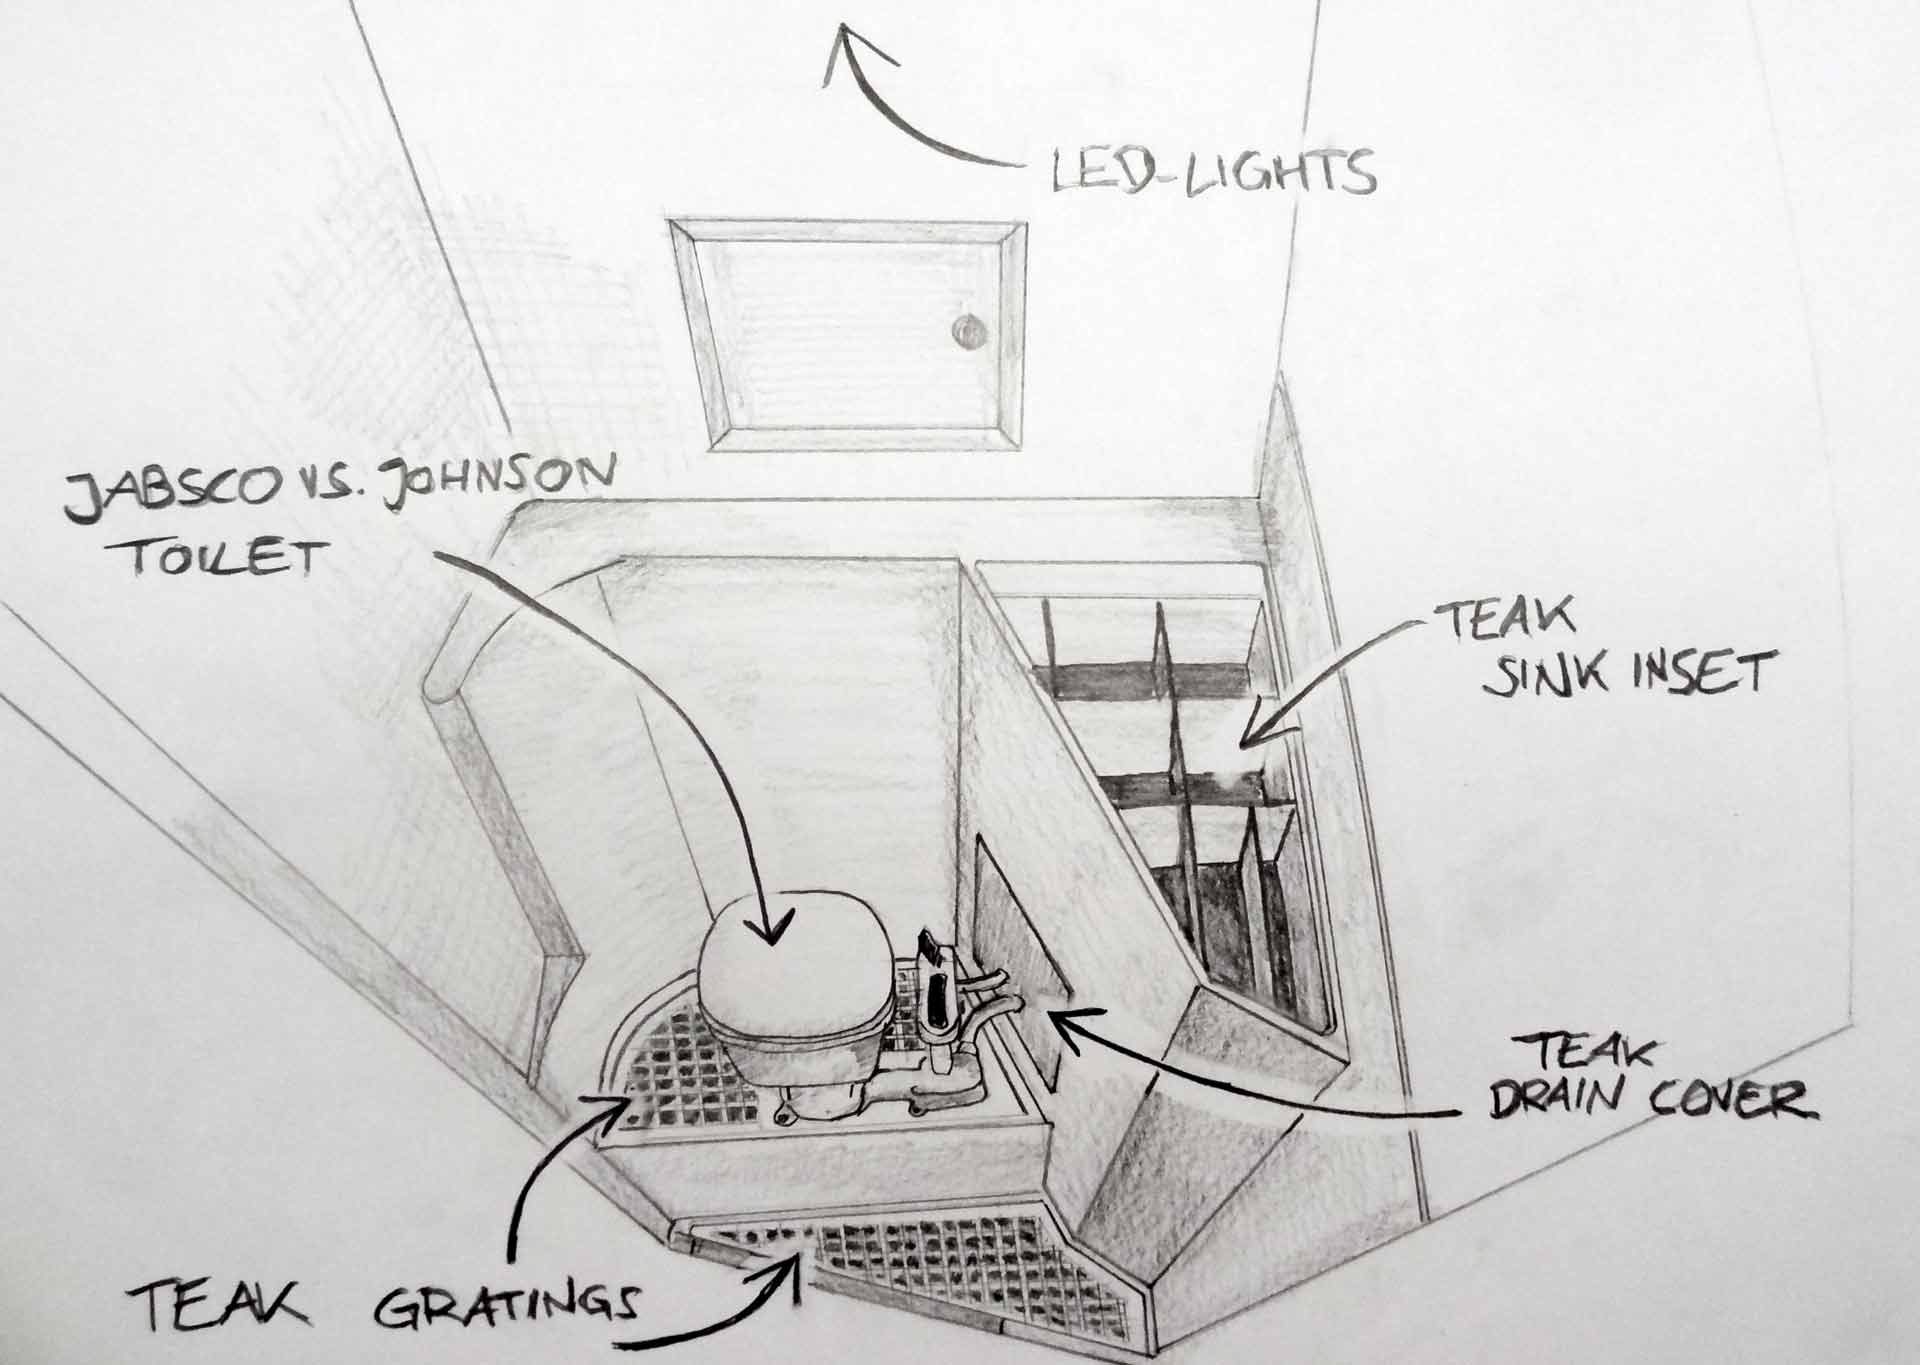
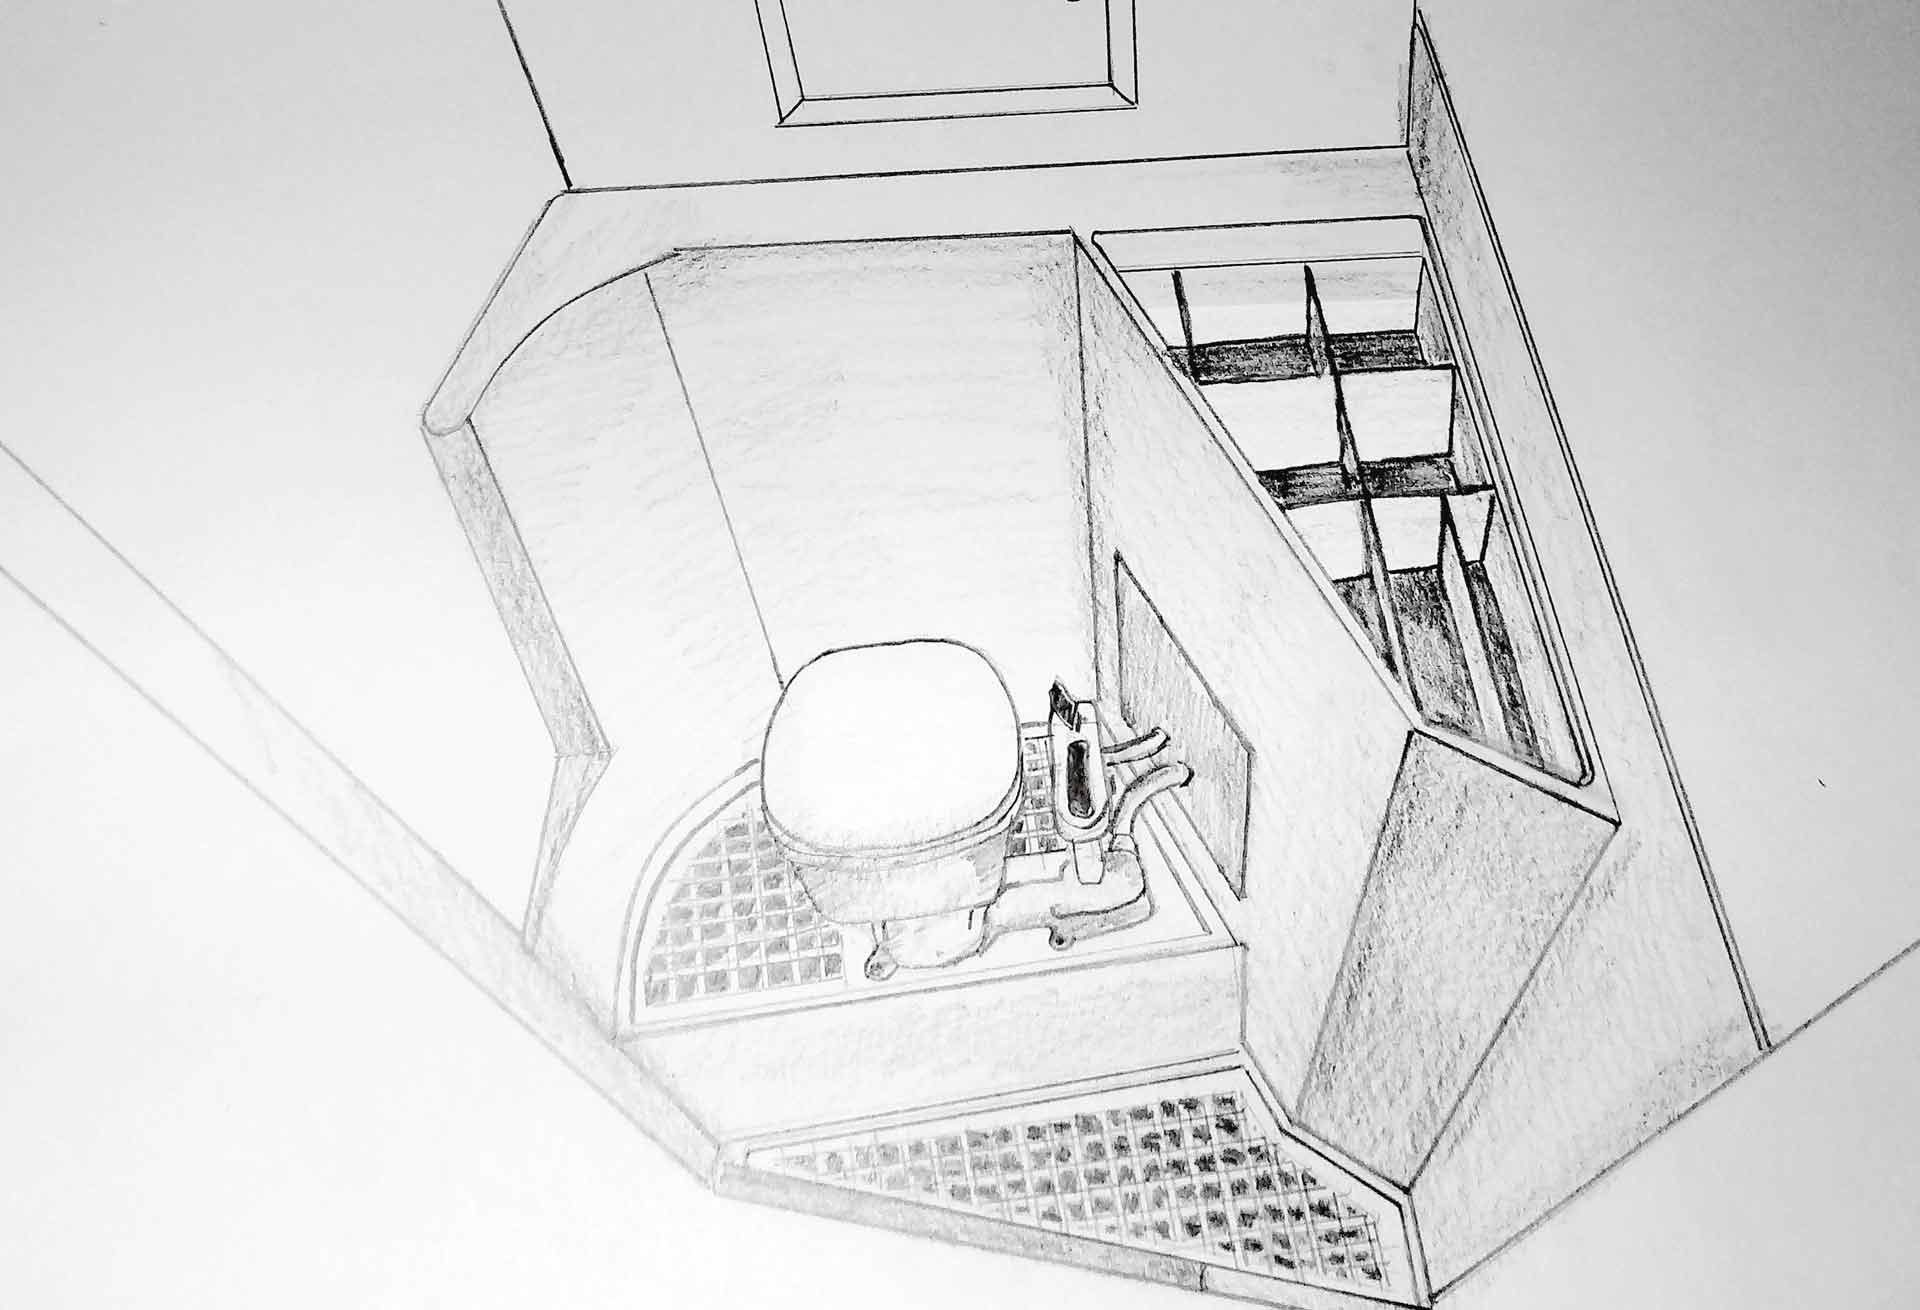
Now it was time to make some plans. My ship is rigged to have a shower but that´s far from imagination since installing a shower would imply to go for a water-heater, a sufficient drainage and all that stuff. Apart from that fact, the whole head cabin has tiny measurements making it a stunt-like show with a high risk of inflicting bruises and wounds to oneself so that this isn´t an option. So I thought, what about a classy Teak grating at the bottom of the head? And when doing one, why not have a second underneath the new toilet, adding a more shiplike appearance to the whole cabin? Nice idea, isn´t it?
When looking back, I remember an ugly flexible linoleum-cover for the drain piping going into the inner shell and to the valves. I want to have a wooden panel instead by still being able to shut off and open the valves in foul weather and upon leaving the ship for a longer period of time. To have new LED-lights in the head as well (see this article here) is agreed upon long ago and finally I am thinking of reducing the two mirrors – one very big (and heavy) at the inner side of the cabin door to just one of smaller proportions: This is not a bathroom at all. It´s a lavatory. Last but not least I want to have an inset where to stow toilet paper, toothbrushes and stuff because we are not using the sink anyway.
Taking Measurements for Calibers
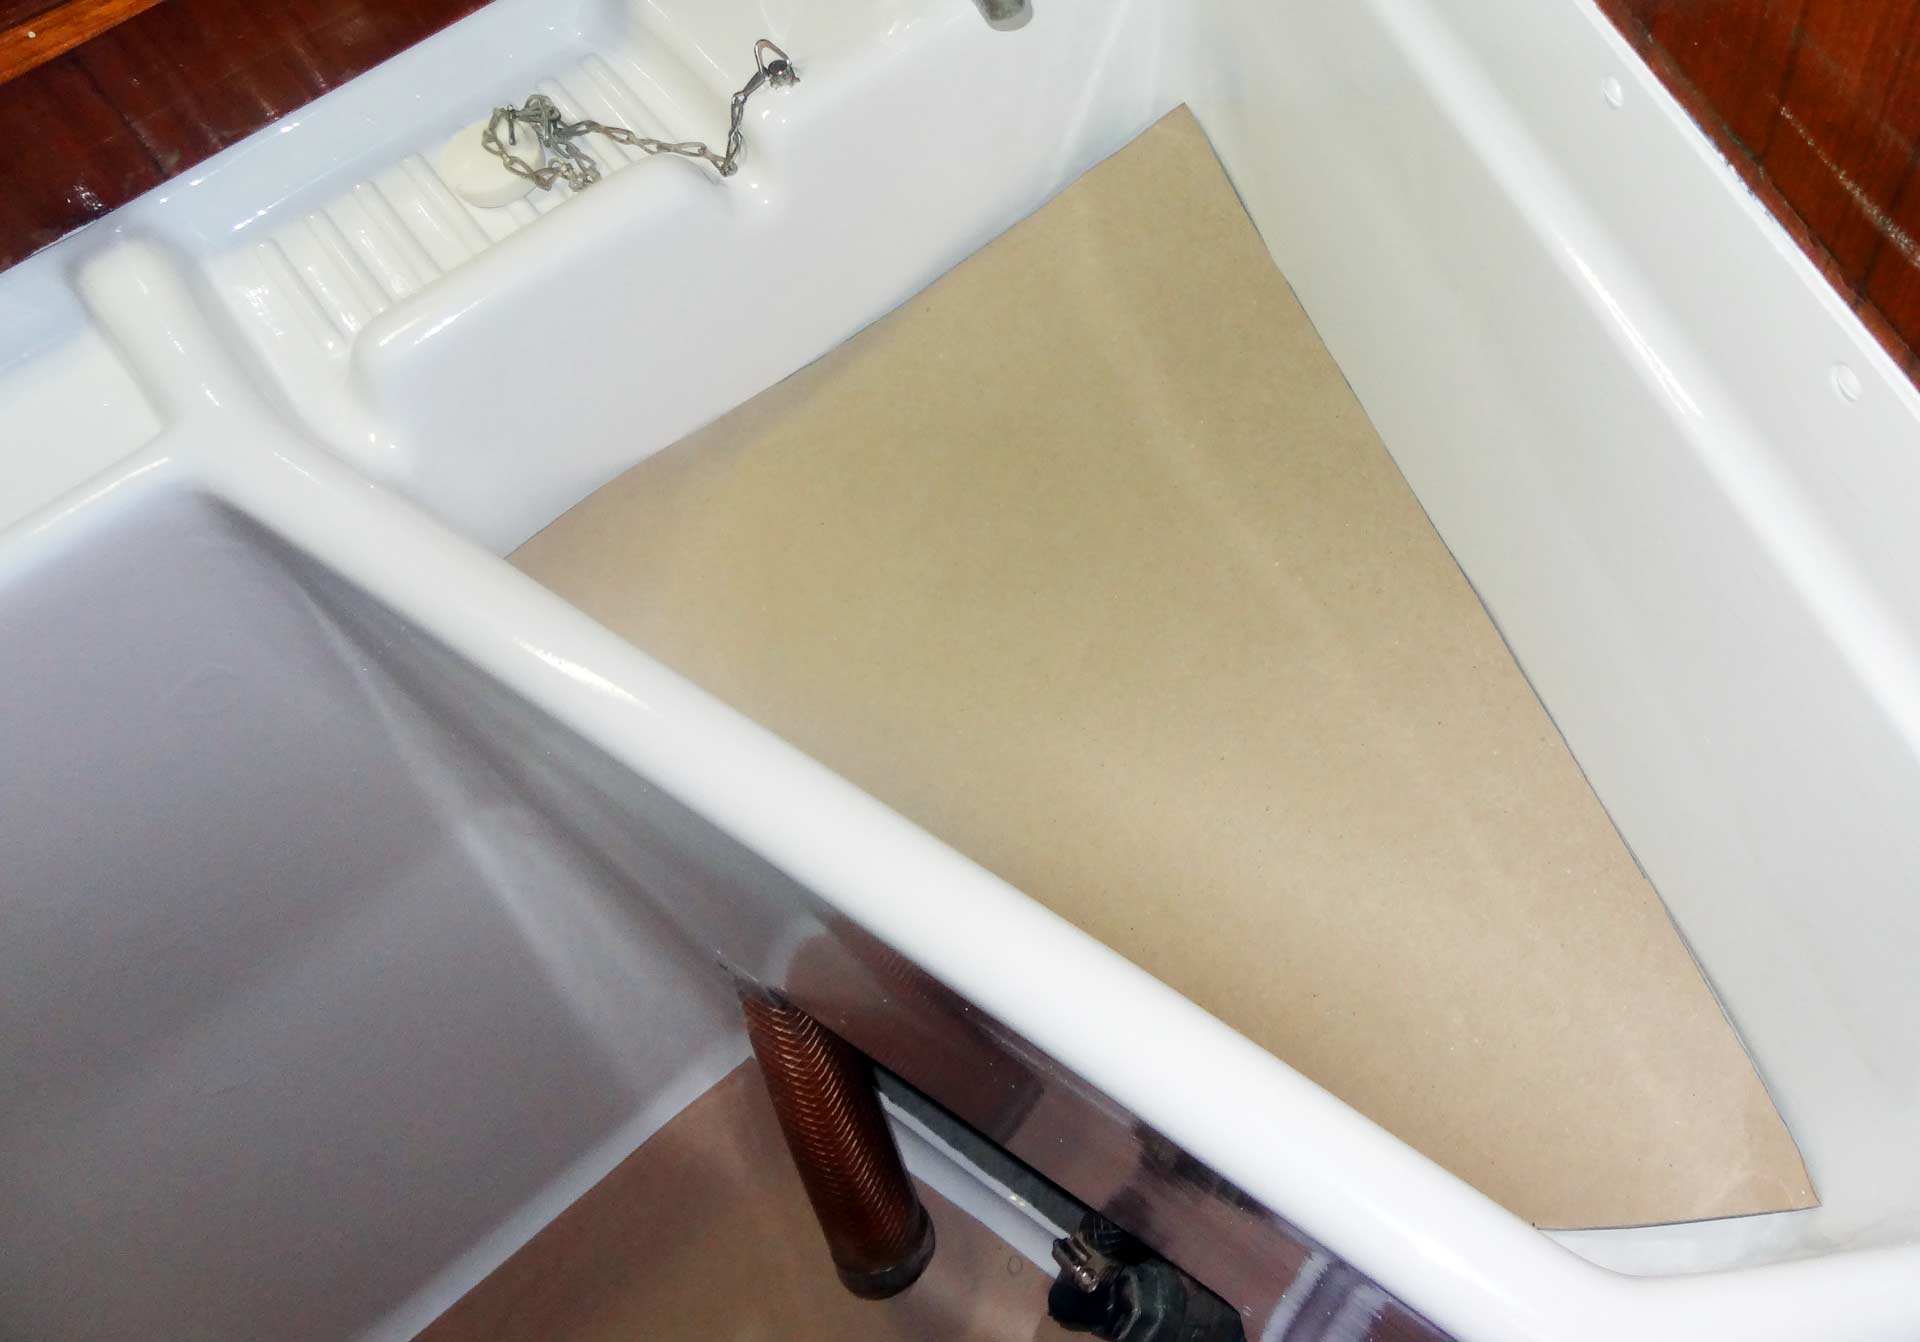
Since this cabin is tricky to measure – cramped and tiny as it is with a lot of corners, some sharp, some rounded and a lot of pointed angles I decided to have a good measuring and cut our calibers with a scissors and cardboard to fabricate exact templates for producing the very wooden gratings in the end. Taking measurements was a struggle since I had to perform some extraordinary contorted movements to finally get some data.
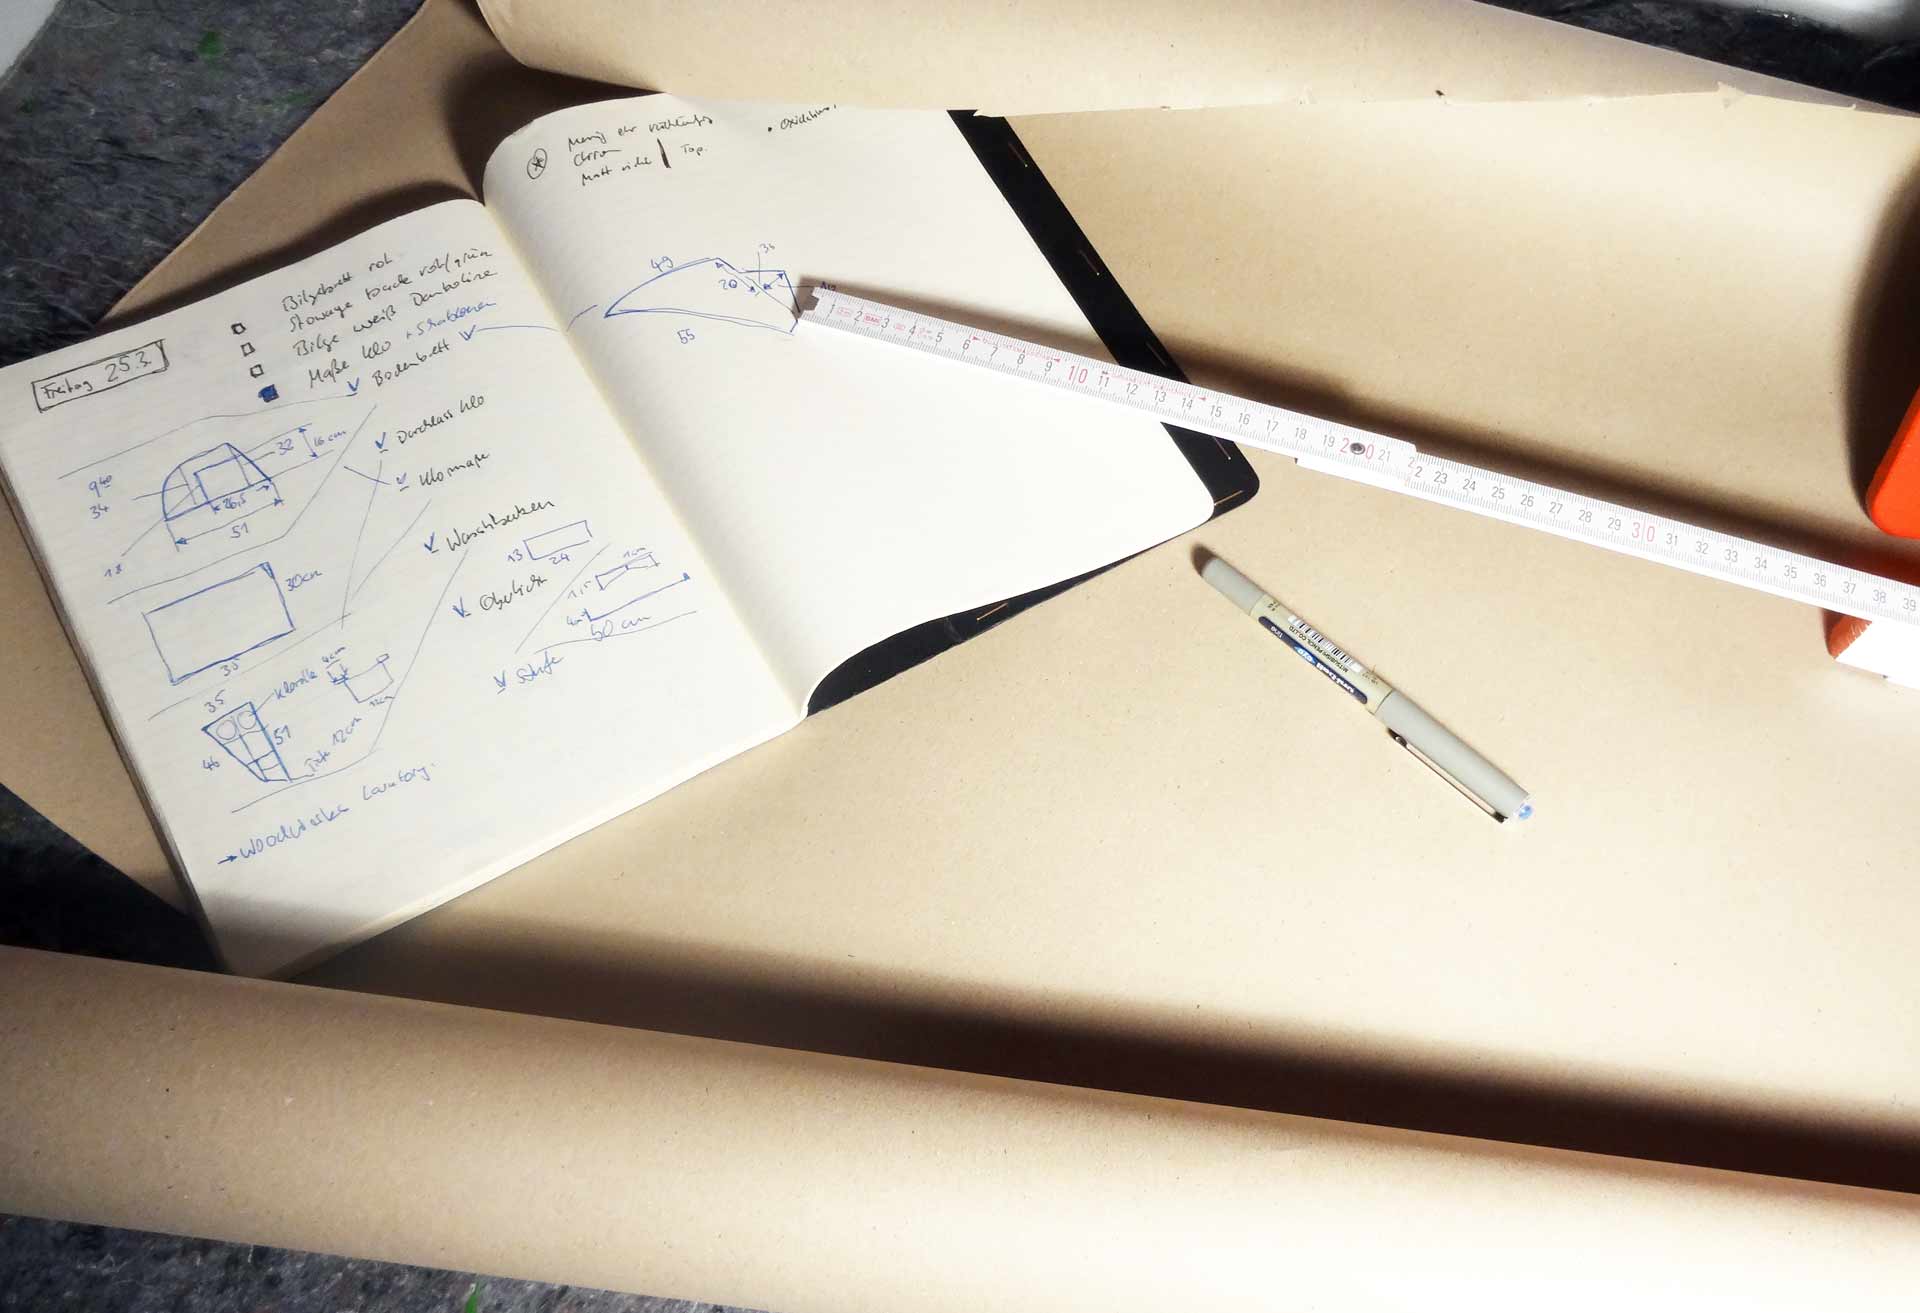
I transferred the measurements onto cardboard and the scissors took over. I did cut out the first caliber took it to the head and checked for its fit. Well, just to realize that I´d had to apply multiple corrections of up to 5 centimeters to produce a more accurate caliber for a second trial. The second caliber proofed to be just right and after cutting down some minor edges the first was done.
When producing the second caliber for the floor of the head cabin it took me three trials to finally achieve the perfect fit. Though this might look an odd way of working the outcome is perfect: Having to cope with such complicated forms producing calibers seems to logical choice and looking at my work I feel a profound satisfaction. Back home I check for artisan enterprises which have specialized in manufacturing wooden stuff for boats – and looking at the price tags for standard gratings I goggle: A standard sized 60 by 60 centimeters grating will come in at some 300 Euros. Those firms offer custom made gratings but I fear looking at the jumble of my special lavatory gratings I can foresee a much higher price. What to do?
I guess the only way to get my Teak gratings is to send massive sheets of Teak to firms which can utilize a computer-aided waterjet cutter. This plotter-like machine can cut even metal with a high pressurized cutting beam of water. I hope to be able to find a firm that can produce my two gratings for a reasonable price – I look forward to produce a report on that step.
Jabsco vs. Johnson Toilet
Also back home I do check for a new toilet. Since the head cabin is a tiny one I think I´ll go for the compact ceramics: 34 to 45 centimeters, the “comfort” type measures 35 to 47 centimeters and comes in with more than 2 kilograms of additional weight. Installing a manual pumping toilet is set – an electric one is out of question. Since me and my family will use the restrooms and bathrooms of the marinas when tied to pier side I won´t go for a wastewater tank since this would imply a much more complex task. But one question remains: Shall I go for the Jabsco-toilet or opt for the Johnson?
Doing research online does not help very much: It´s like a religion. One thinks Jabsco is the non plus ultra, others are strongly recommending the Johnson pump toilet. I guess down in this price segment there´s not much difference between the two: Otherwise I´d go and buy the Rolls Royce of pumping toilets – the classy Rheinstrom. But starting at some 1.100 Euros and go as high as 1.600 Euros I do the math: For one Rheinstrom I could change a fresh Jabsco eight times and have a brand new toilet every two years for 16 years now … allright, that one is through. Jabsco is a complete toilet for some 140 Euros ready to use. Whereas with Johnson for some 130 Euros I´d need to buy the pumping unit and the valves separately for additional 130 Euros. I´ll think it through and try to get some expert´s opinion later.
A New Skylight for the Head Cabin
Last but not least there´s another problem child of my yacht´s head: The skylight. I don´t want to call it “skylight” neither because it´s more a poorly cut out whole with a rounded, bleaches plexiglass that has been bolted to the hull from the outside. Not only that this thing has an utterly ugly look and the craftsmanship is very poor – it is that strongly bleached and yellowed that the skylight doesn´t provide for any light at all.
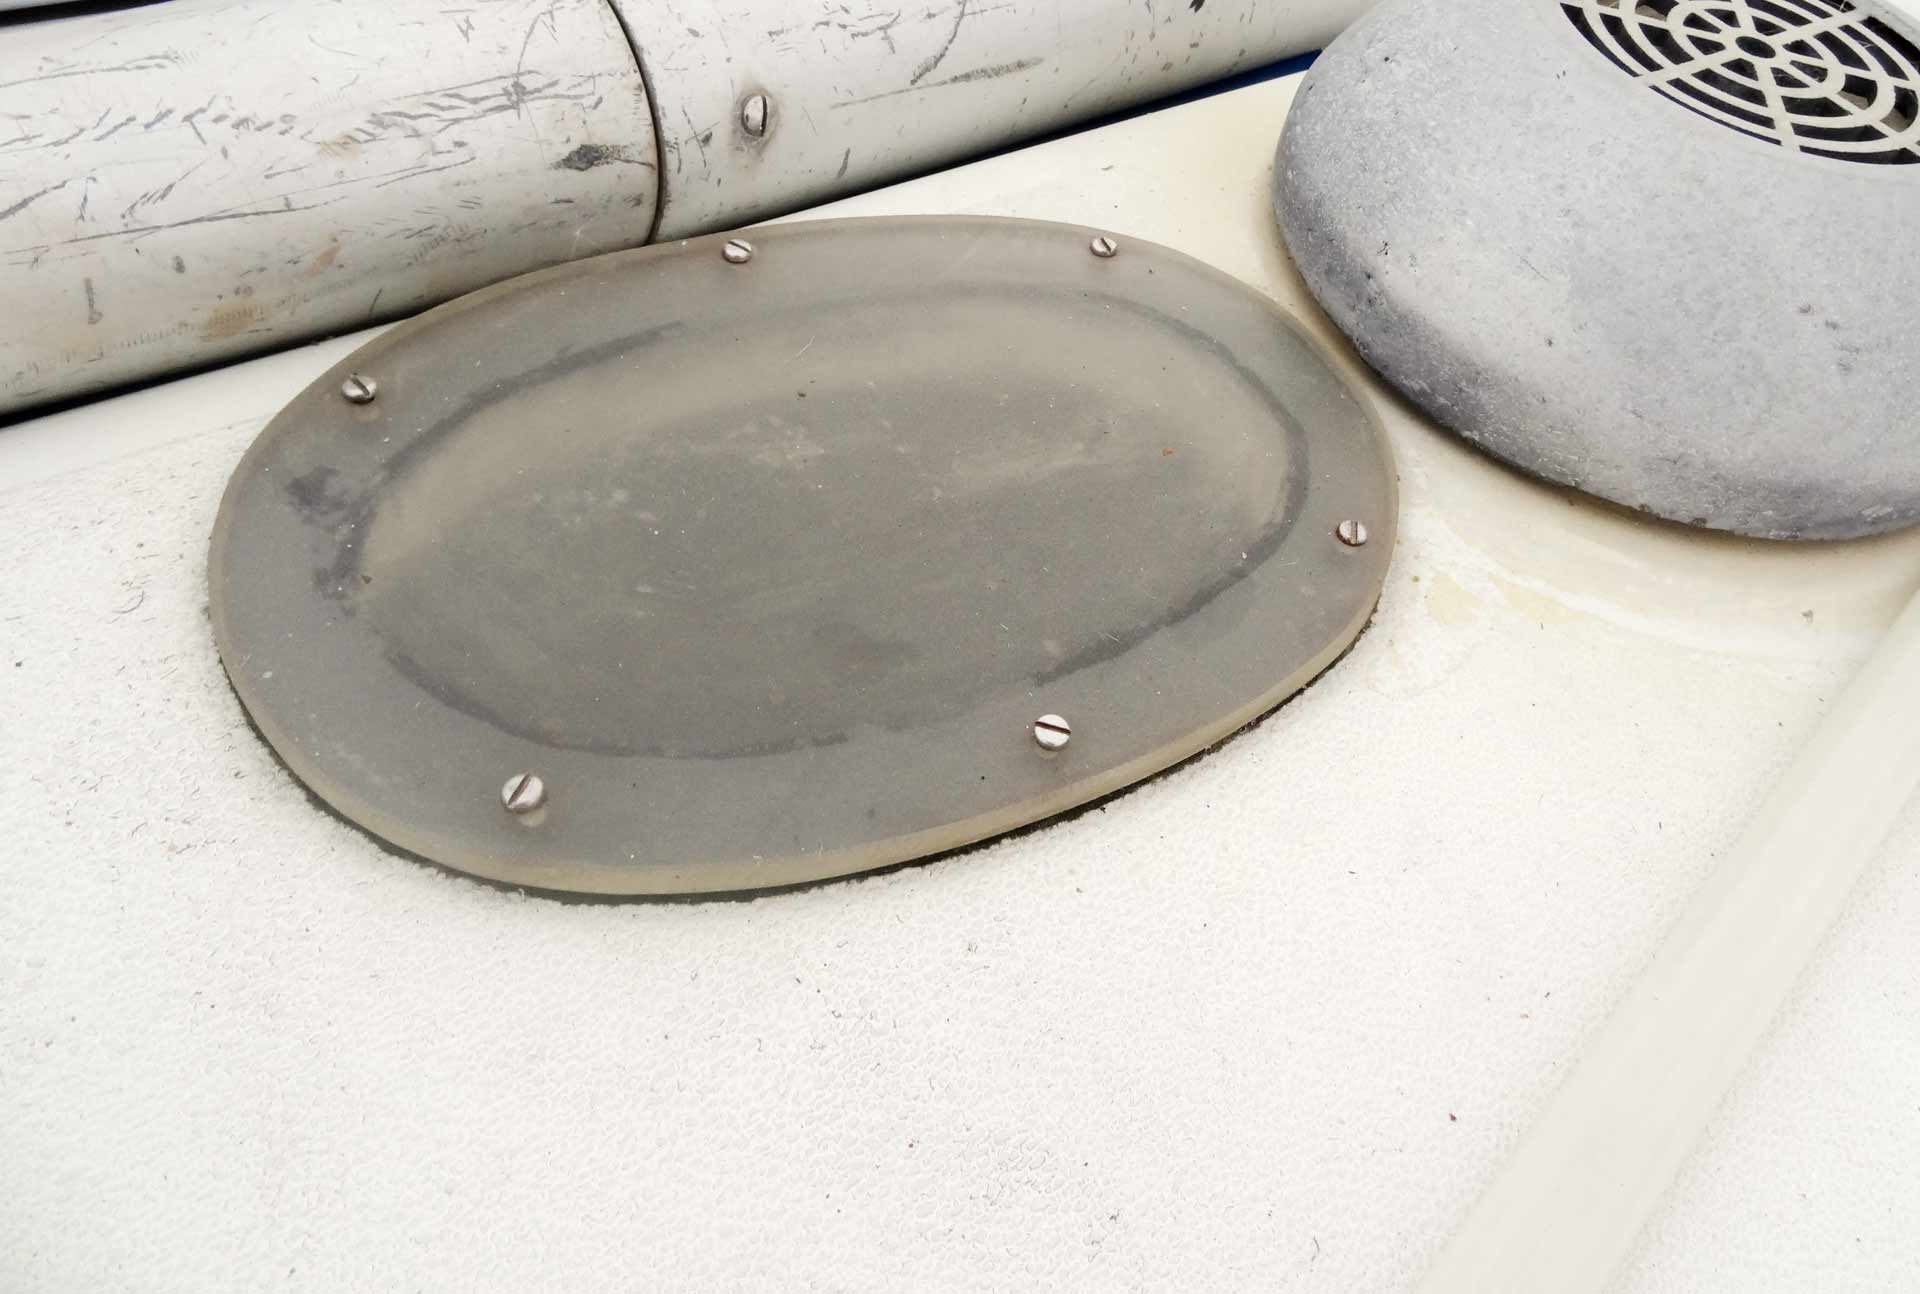
So I produce another template of the maximum area that I could possibly widen the cut to install a proper skylight, but having just 24 to 13 centimeters to offer doesn´t fit to any of the skylights available in shops: The closest to match my measurements would be a 28 to 14 centimeters porthole. Tomorrow I´ll check if this one fits. If not, another – but unequally more complicated – solution could be to close the current skylight and cut out a proper new one in a different place.
Oh my …