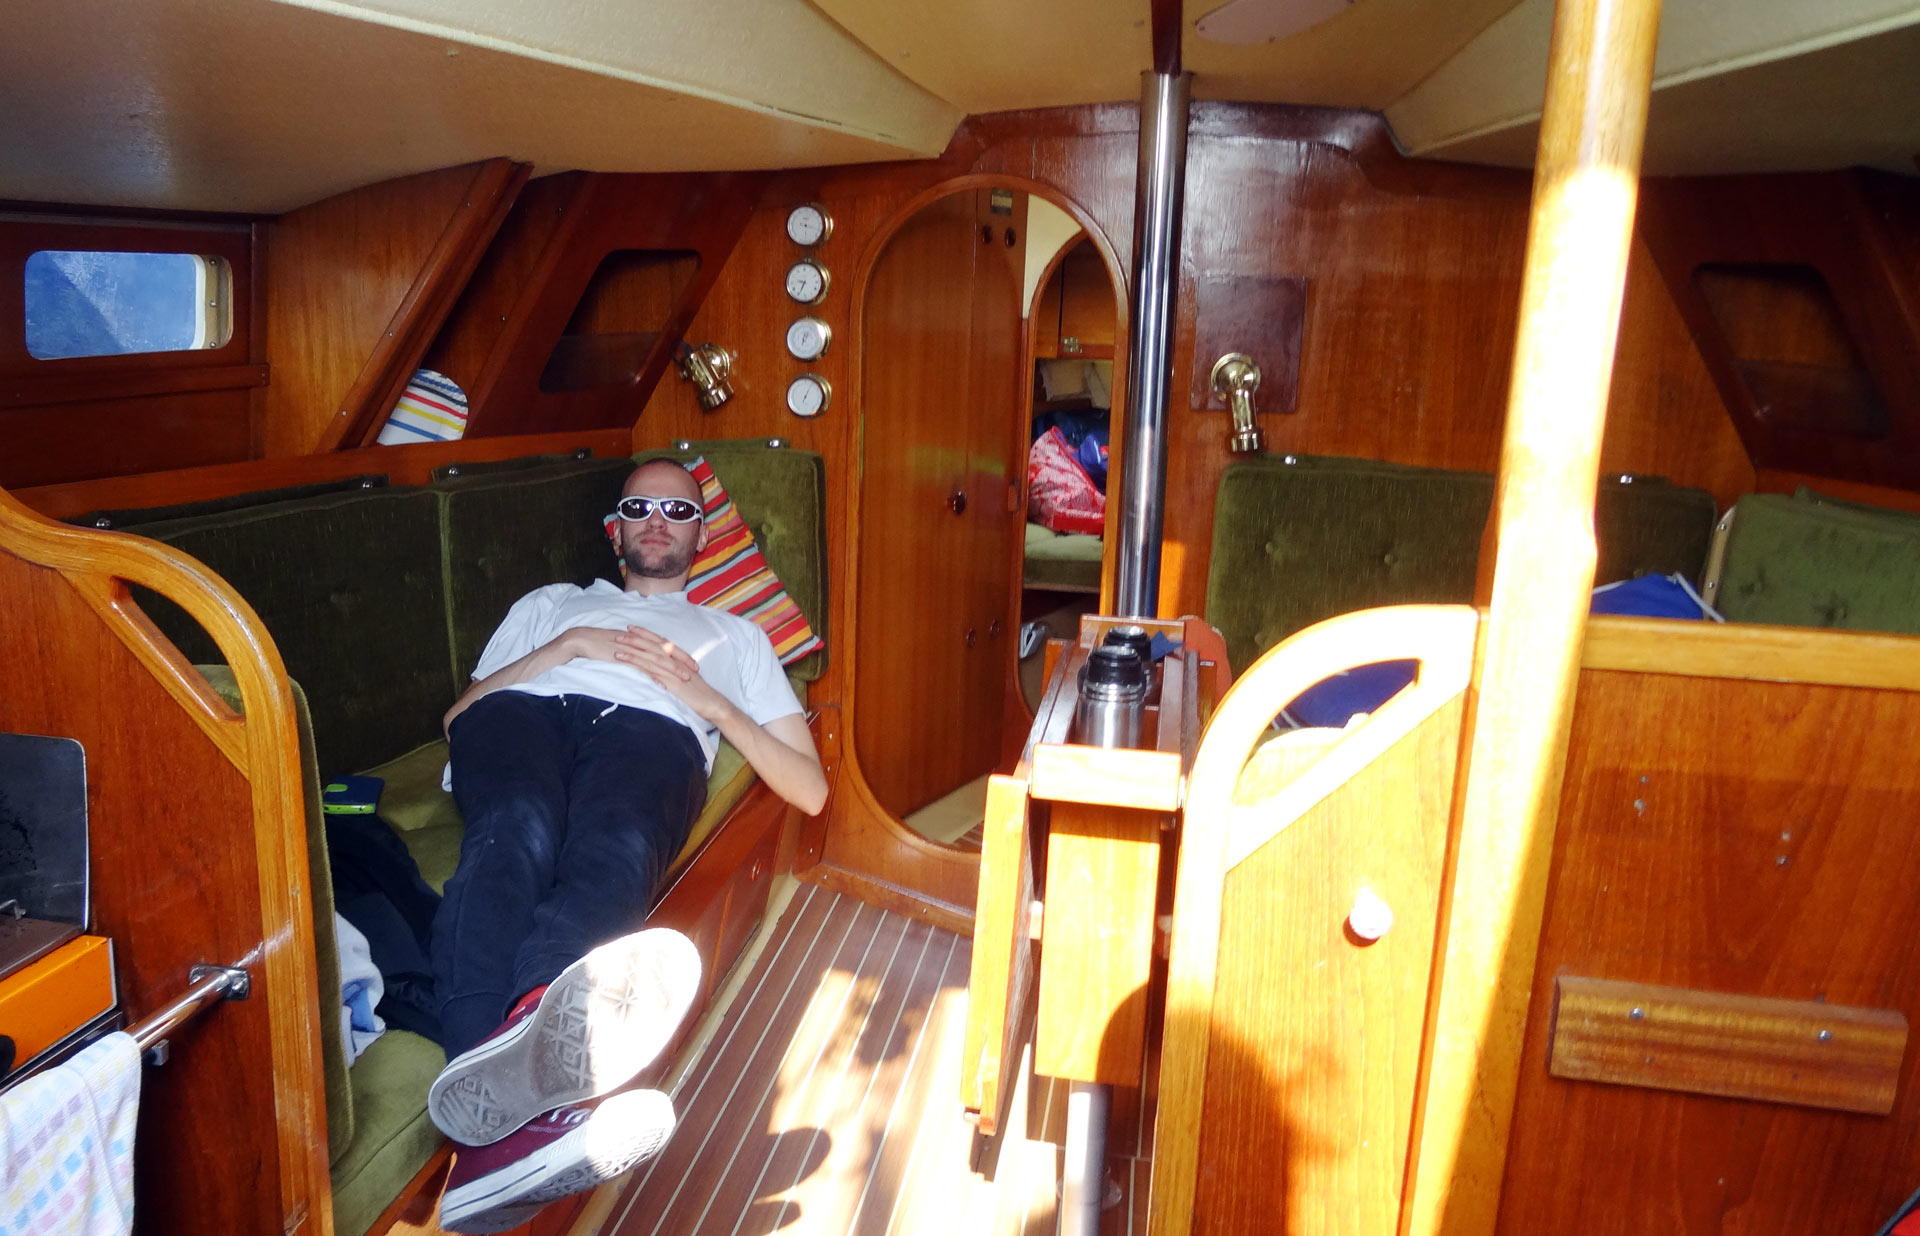
Being in the midst of the refit of my King´s Cruiser 33 sailing yacht a lot of items have been crossed off my list indeed. A lot more made it onto the list during work, I guess that´s the normal way when digging deeper and deeper into the bowels of an old ship. Mine is 40 years old so it was no surprise finding that I should take a look onto the chain plates of the yacht too. This is what I´ve done today. And, well, yes, with a sigh … some more items made it onto my to-do list after some 3 hours of work. I started with a thorough baseline study of what should be done in the first place.

What are chain plates and which purpose do they have on a sailing yacht? Basically, chain plates are the fitting for the yacht´s shrouds which for themselves do absorb and derive the forces of the wind bending the mast through the sails. Shrouds deviate those forces into the chain plates which for themselves should be fitted tightly to the hull where the forces will be finally absorbed. Naturally, having the chain plates, shrouds and terminals checked is mandatory – and a special thing with my King´s Cruiser 33.
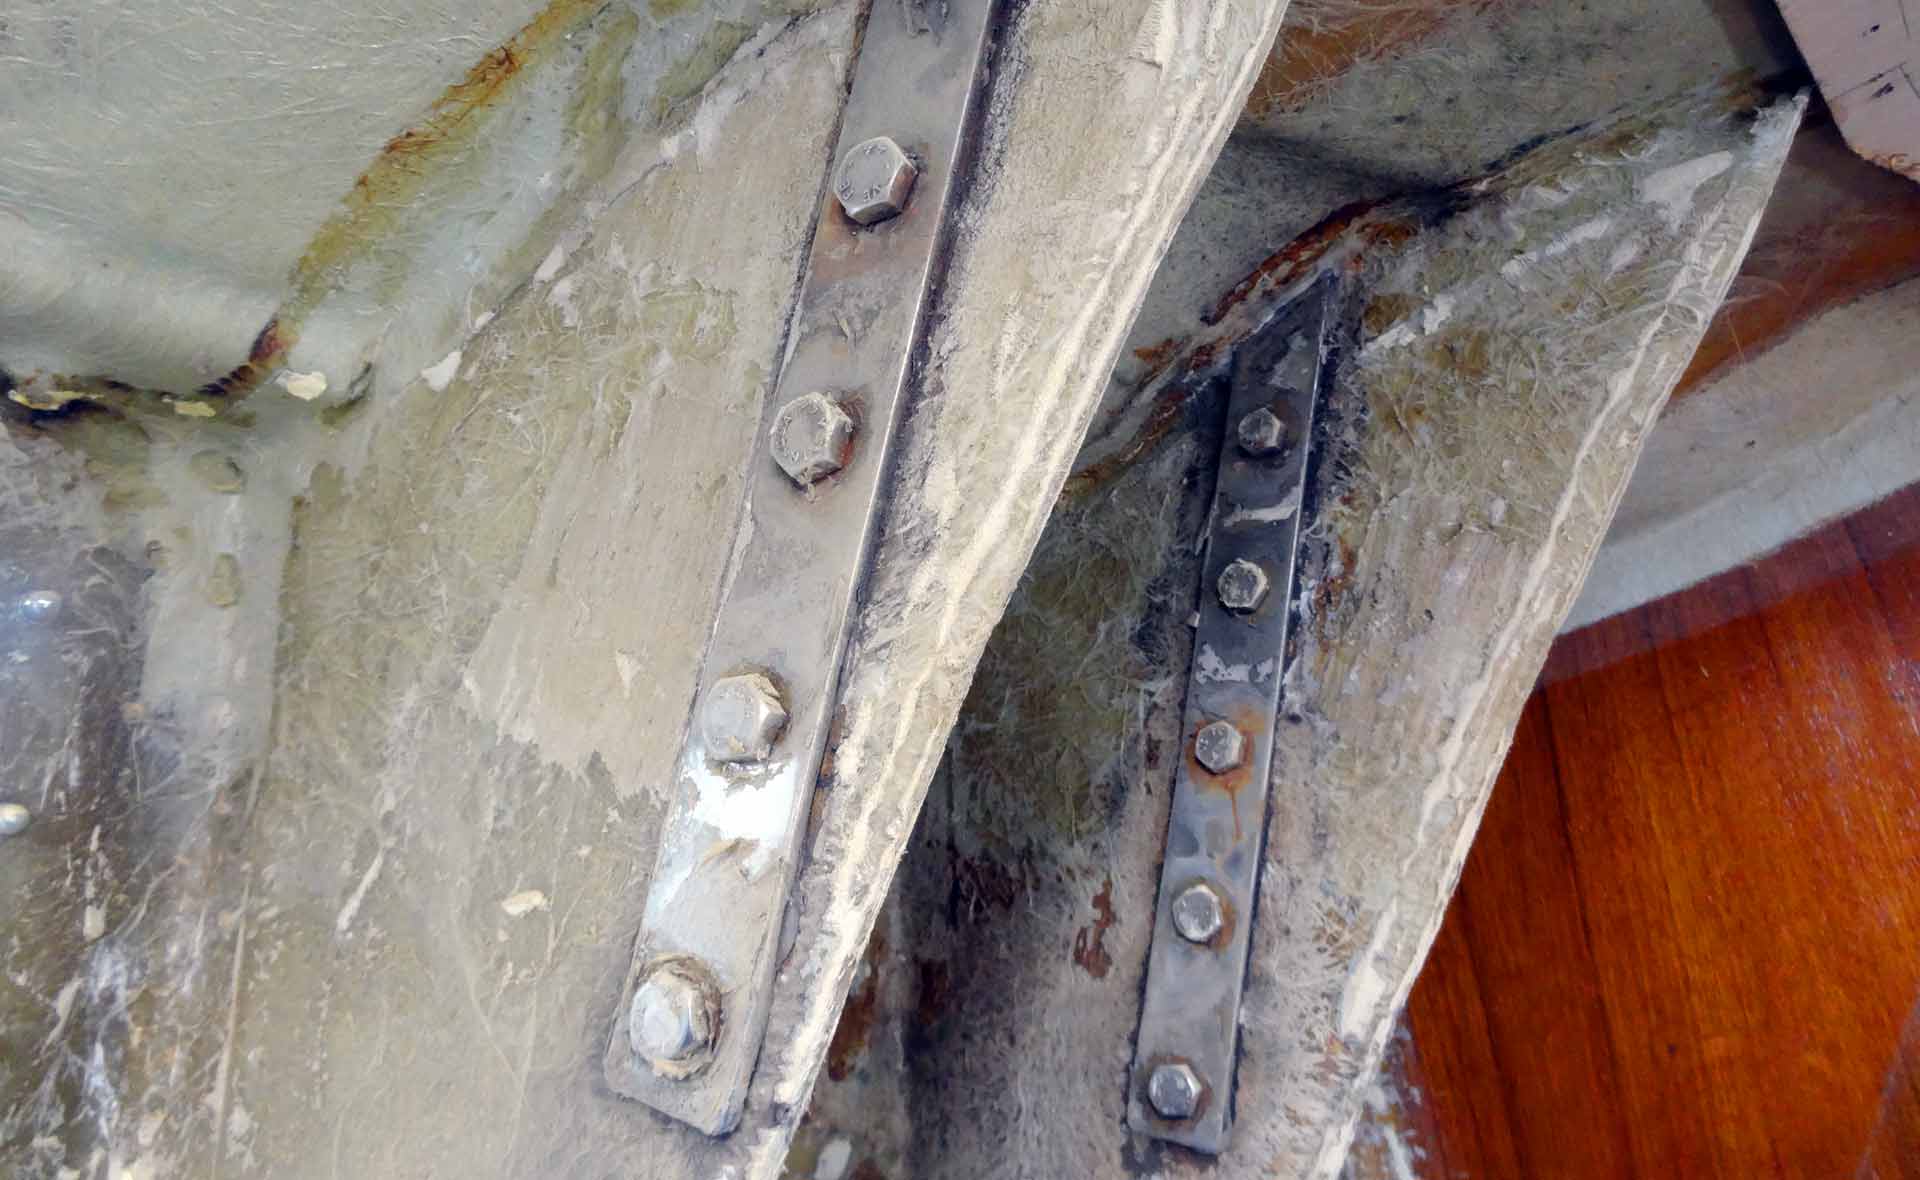
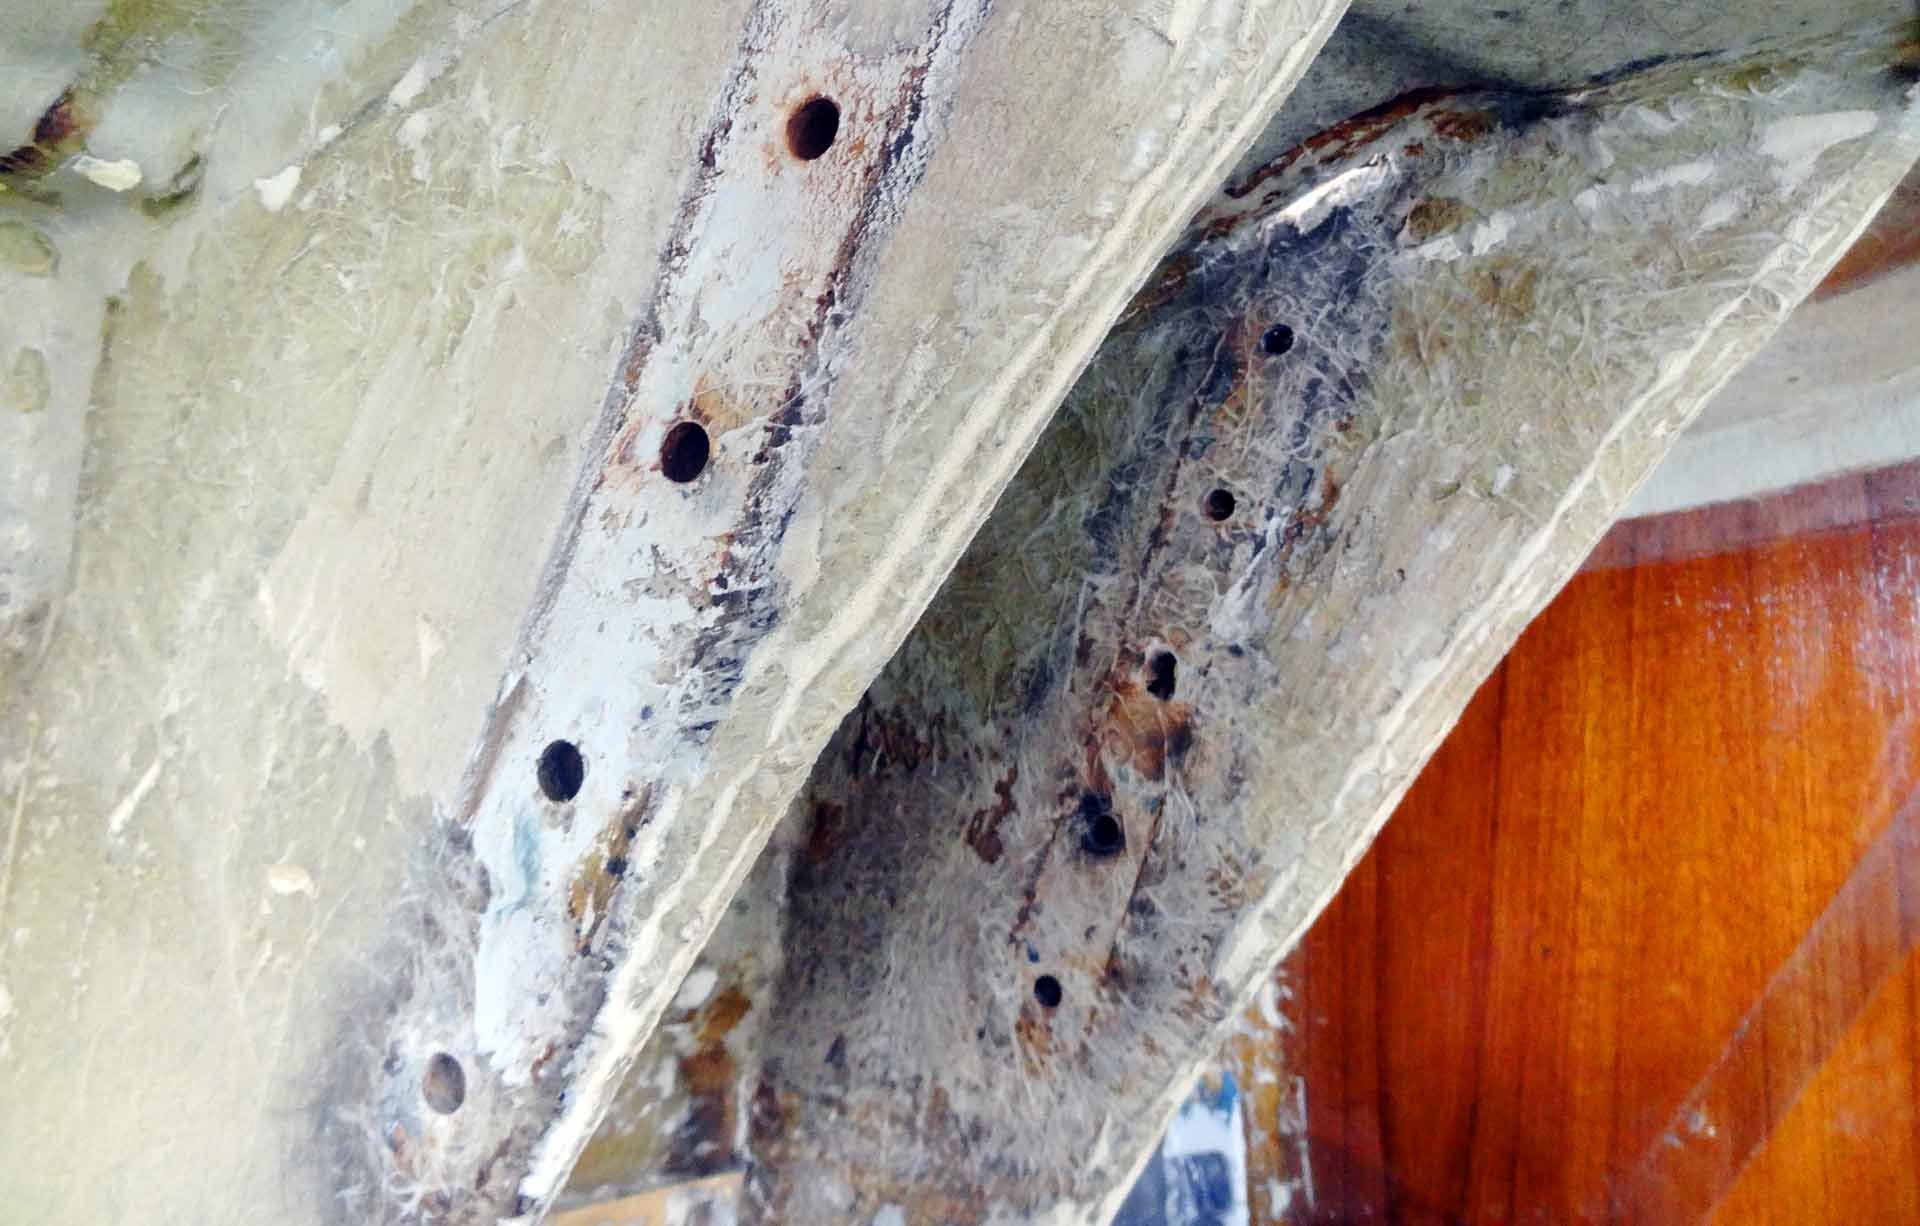
As you may see, my ship does have two shrouds on each side ending in one chain plate each. The chain plates are made of Niro-steel and a duct through the cabin roof where they are attached to massive beams made of glass-reinforced fiber which are laminated into the outer shell of the hull. Since those beams are covered in wood and in faux leather (which I took off as the first step of my refit program, read full article I wasn´t able to check the condition of the chain plates before buying my boat. So it´s a nice box of chocolates …
Disassembling the Chain Plates
As I could see after removing of the wooden cover and the faux leather at least two of the shrouds did get leaky over time allowing small amounts of water penetrate the cabin. On starboard side a major part of the wooden cover is therefore destroyed and will have to be rebuild. Even if there´s just a drop every hour coming down the chain plate – after 40 years that´s a huge amount of wet stuff. Don´t forget: A King´s Cruiser – just as many sailing yachts even today – has a sandwich construction. Unless the middle layer isn´t made of foam but of Balsa wood instead there´s a danger of the wood to simply rot.
As a yachtmaster you should pay close attention to seal your chain plates both on the roof of your cabin as well as in the duct itself and finally down inside in the cabin itself. When done properly there shouldn´t be any problems for years to come. If done scruffy, count the miles until you notice the moisture somewhere behind your nice saloon veneers. The pre-owners of my ship did notice a problem with the chain plates: On three of the chain plates I found thick layers of silicone sealing mass, something the Fiskars yard back in 1975 surely didn´t had at hand. Never use silicone on a sailing yacht! Why? Well, a long story …
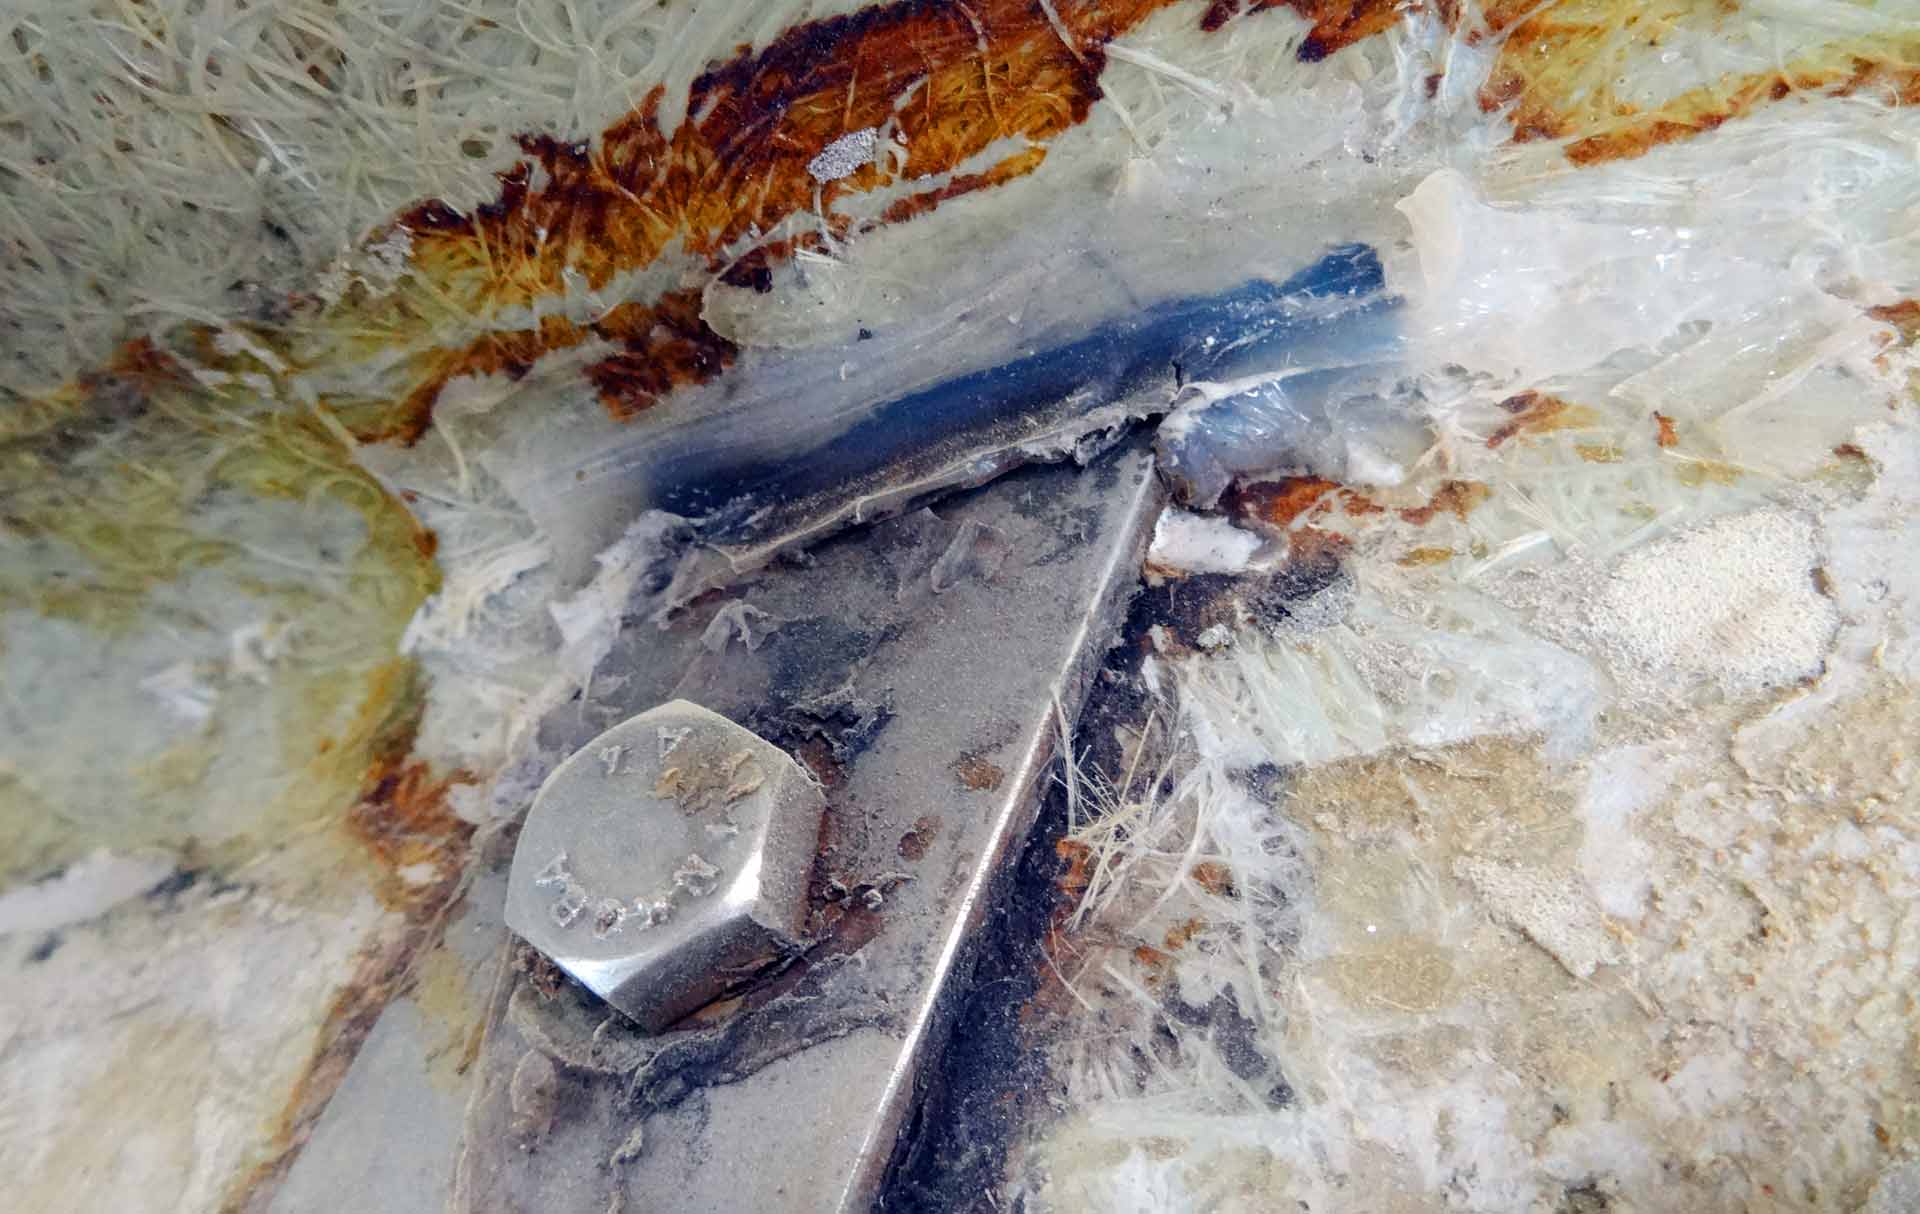
At first: Where silicone once was something else wouldn´t adhere unless the surface is sanded properly. The chemical characteristics of silicone make it a separating agent than an agglutinant. When exposed to constant moisture – as it is the case when used trying to seal the duct of the chain plates – it will rather soak and swell and quickly loose it´s (nevertheless poor) sealing qualities. Silicone isn´t UV-proof and will also disintegrate over time. Instead of silicone one should utilize marine sealants based on polyurethane such as made by 3M or the all-time classic Sicaflex.

I began to unscrew the chain plates and take off screws, nuts and the plates themselves. I was surprised that some of the bolts have been screwed very tightly so that I had to put about a lot of power to get them loose, some of them appeared to have been screwed not as tight. Eventually I had them disassembled and took of the counterparts of the chain plates and had a look: Though made of stainless steel I could spot a lot of rust but I´m pretty confident that this is just superficial and wouldn´t be a problem to remove. Same with the rest.
Checking Chain Plates & Terminals for Rust and Frailty

40 years of being out on salty waters, exposed to constant strain and forces by the shrouds, waves and ups and downs of temperatures do leave their marks on every material. It´s the same with my chain plates, nuts and bolts. I first had a close examination of the chain plates themselves: Can I spot marks of extreme abrasion such as hair cracks, deep rust or staining that could be an indicator for extreme high forces and fatigue of material? I couldn´t and I was relieved a bit.
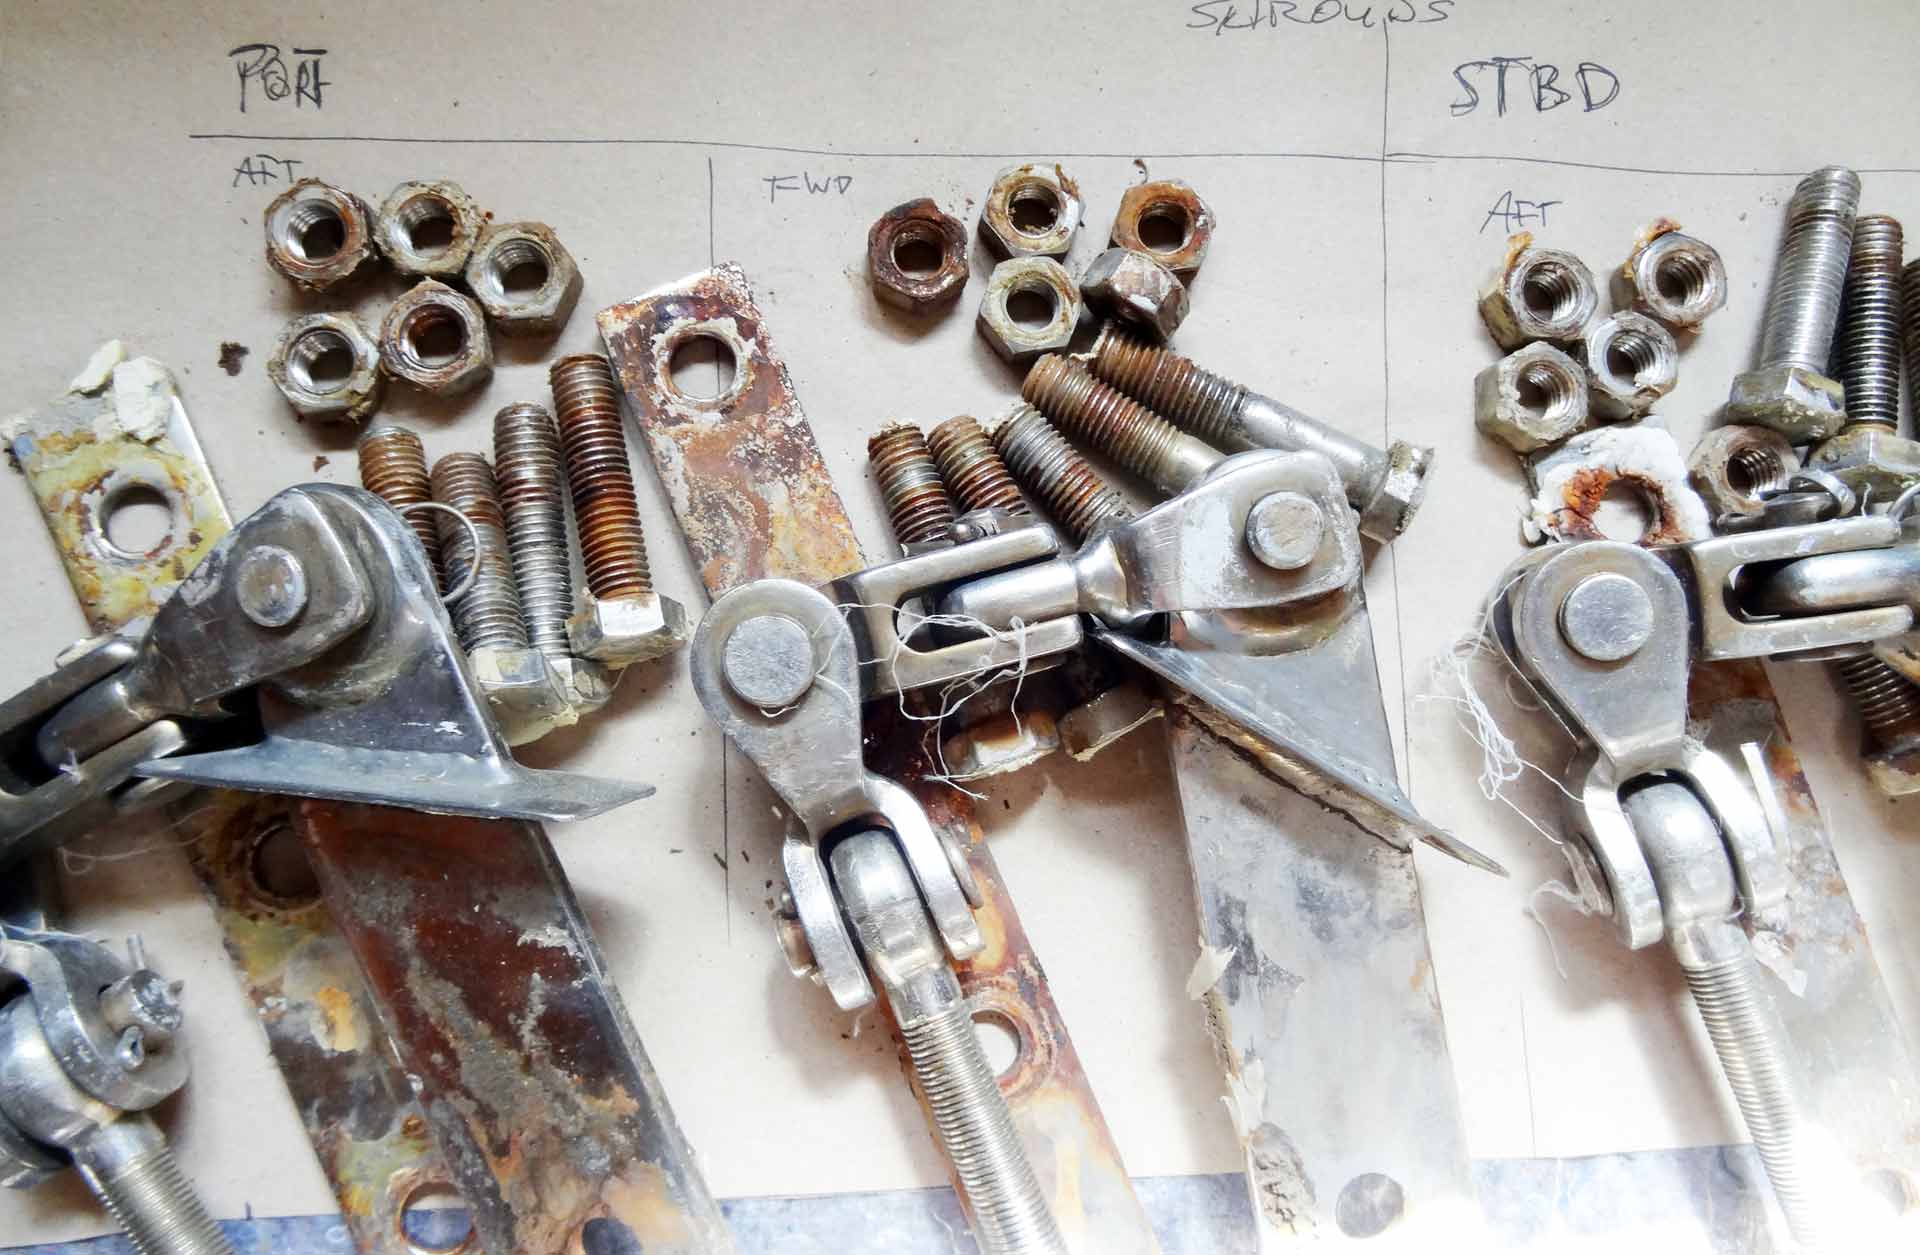
Arranging each nut and bold as well as the chain plate and it´s very own counterpart on a big sheet of paper stating to which side of the ship and which shroud each of the part belongs I will later insure that the parts will return to their respective place just where I took them off. Over time the chain plates have been adapted to the very shape of the surface of the beams. And how does the saying go? Never replant an old tree …
As I´ve made very good experiences with an de-rusting agent called Rostio I already ordered another pint of this wonderful stuff to have the chain plates, their nuts and bolts shining brand new again when putting them on again. Which brings us to the bigger problem …
Leaking Water through Shrouds & Chain Plates
As a sailing yacht is sailing, different forces are applied to the whole system of standing rigging all the time. Depending on the strength of the winds and if the boat is on starboard- or port-tack, the shrouds will have to cope with very different amounts of strain. Eventually the whole system will begin to shift and move, will work fractions of millimeters up and down. Over the years these constant different forces will create tiny rifts through which water will and can leak into the boat itself. That´s what has happened with at least two of the chain plates.

On port side it´s the chain plate of the lower shroud on starboard side it´s the shroud coming directly over the spreader down which is leaking. Not very much, I have to state, and I am very relieved not to find the boat completely worn out because having to replace the whole system would be a catastrophe. But I want my boat as dry as I can get it so first thing was to sand off the surface underneath the chain plates. Out onto the GRP directly a dark brown layer of rotten stuff has been formed. I took it all off.
That looks instantly better. I decided to have a layer or two of Pre-Kote paint applied to the beams later for two reasons: First is to seal off the pure GRP-surface from potential future drops of leaking moisture coming over the chain plates into the inside, a second one is to have a clean start and a new indicator if – in some years to come – I do check the chain plates again and will thus be able to quickly distinguish new leaks from the old ones. Then it was for to check for the condition of the sandwich Balsa-core inside the beams. The chain plate itself is screwed tightly with five bolts each to a counter part on the opposite side of the beam. Screwed tightly it will thus absorb the forces coming down from the shrouds into the beams. The beams themselves are not solely made of GRP on my Kings´s Cruiser 33.

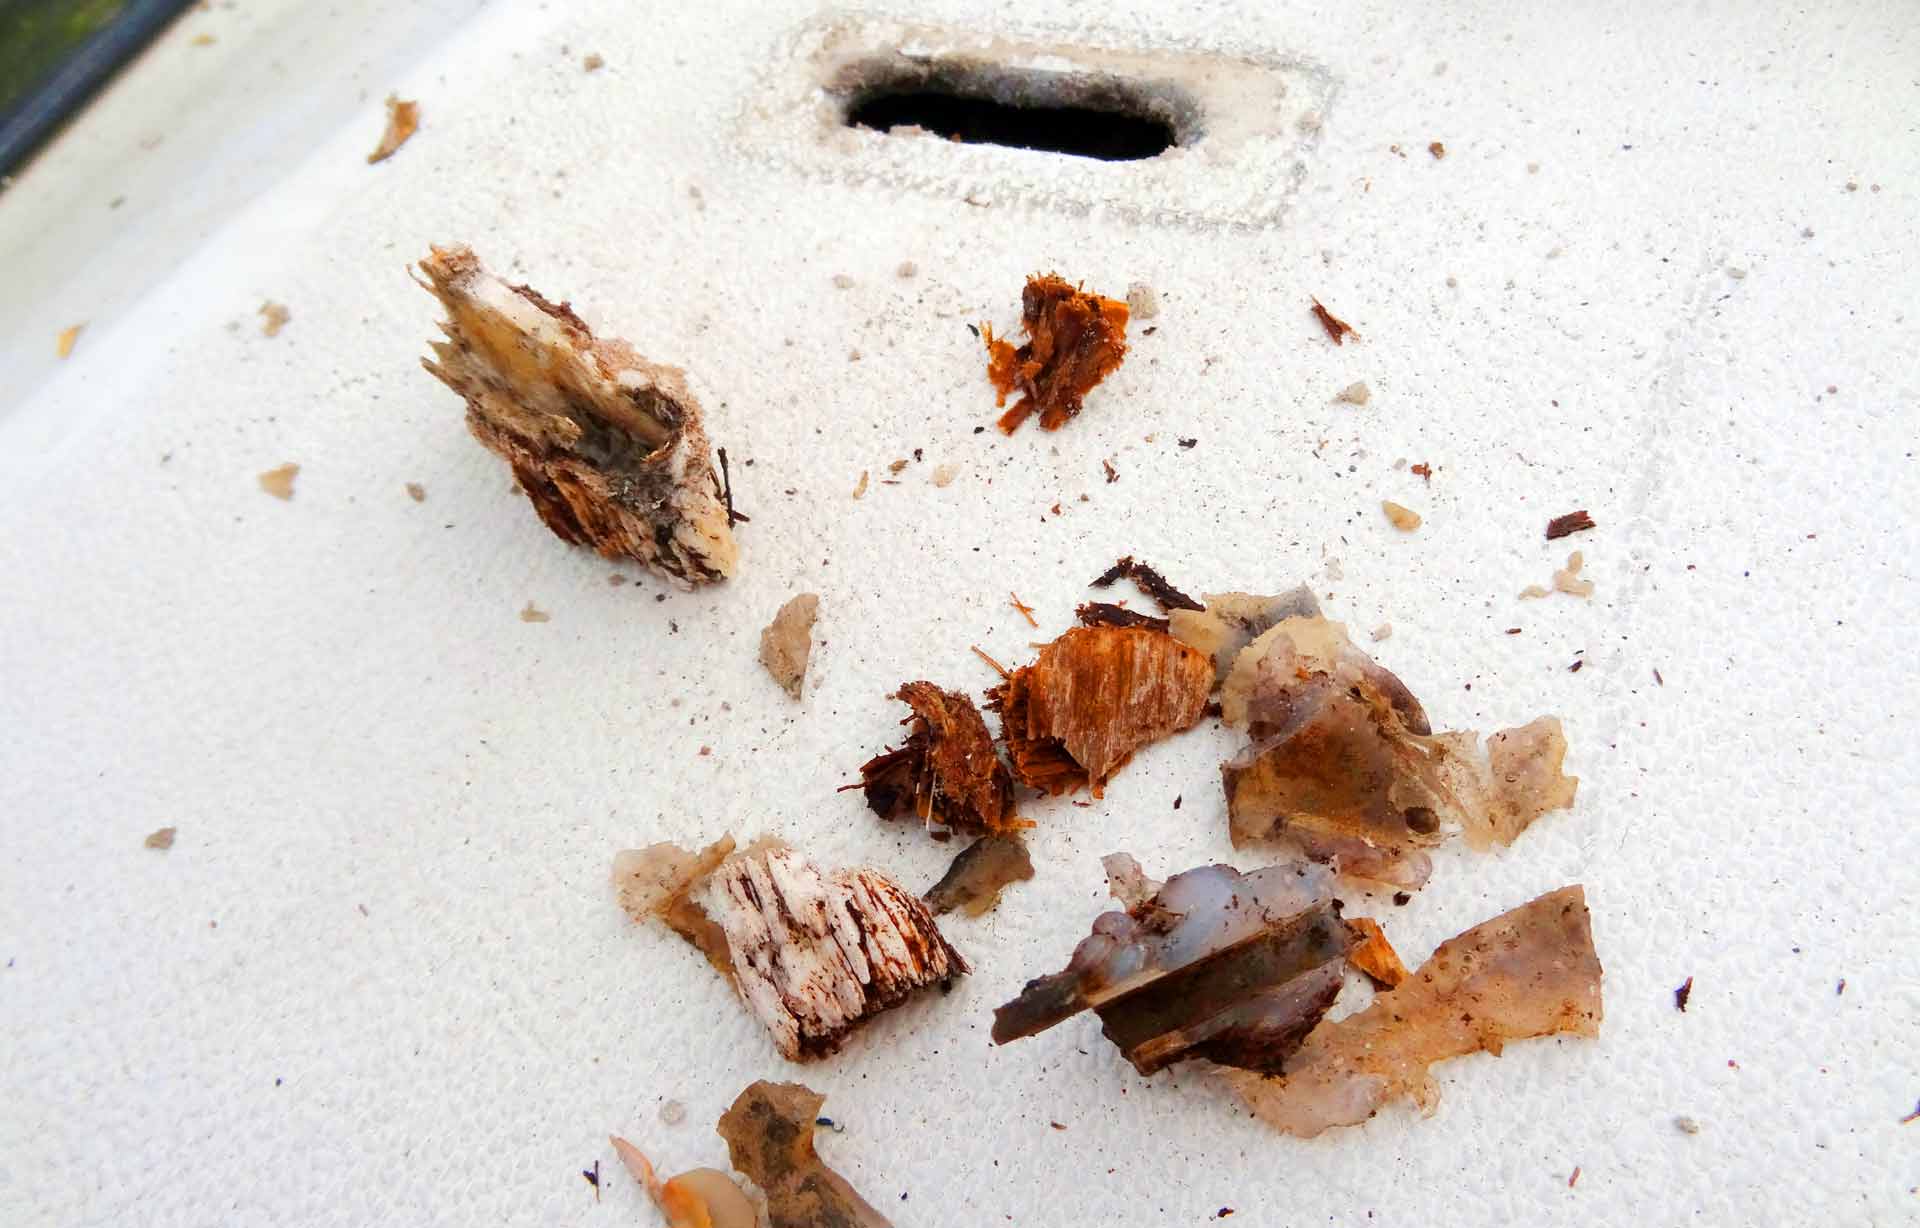
It´s a sandwich-construction as well. And having water coming down the chain plates, having seen some of the bolts covered in silicone I had the impression that maybe some of the moisture did as well creep into the wooden core of the sandwich-construction. So like a dentist with his hellish instruments I was probing through the screw-holes into the core of the beams. Finally I´ve found most of the Balsa core intact and dry but eventually three holes have been severely attacked by the moisture. Oh my! Out of two bore holes I could shell a lot of dark pieces of rotten wood, vacuuming everything thoroughly I asserted that the core around the holes with a radius of up to 7 centimeters is virtually gone. I will have to rebuild the core, at least fill up the holes with resin and GRP-mesh to again insure stability. But that´s a task for later.
Revisiting the Ducts of the Chain Plates
A quite similar picture – much to my regret – with the ducts through the saloon cabin roof. The very two chain plates which have caused the core in the beams to partially disintegrate have done much more damage to the roof. As I was taking off the chain plates from the outside I could already spot the dark brown color of rotten wood.
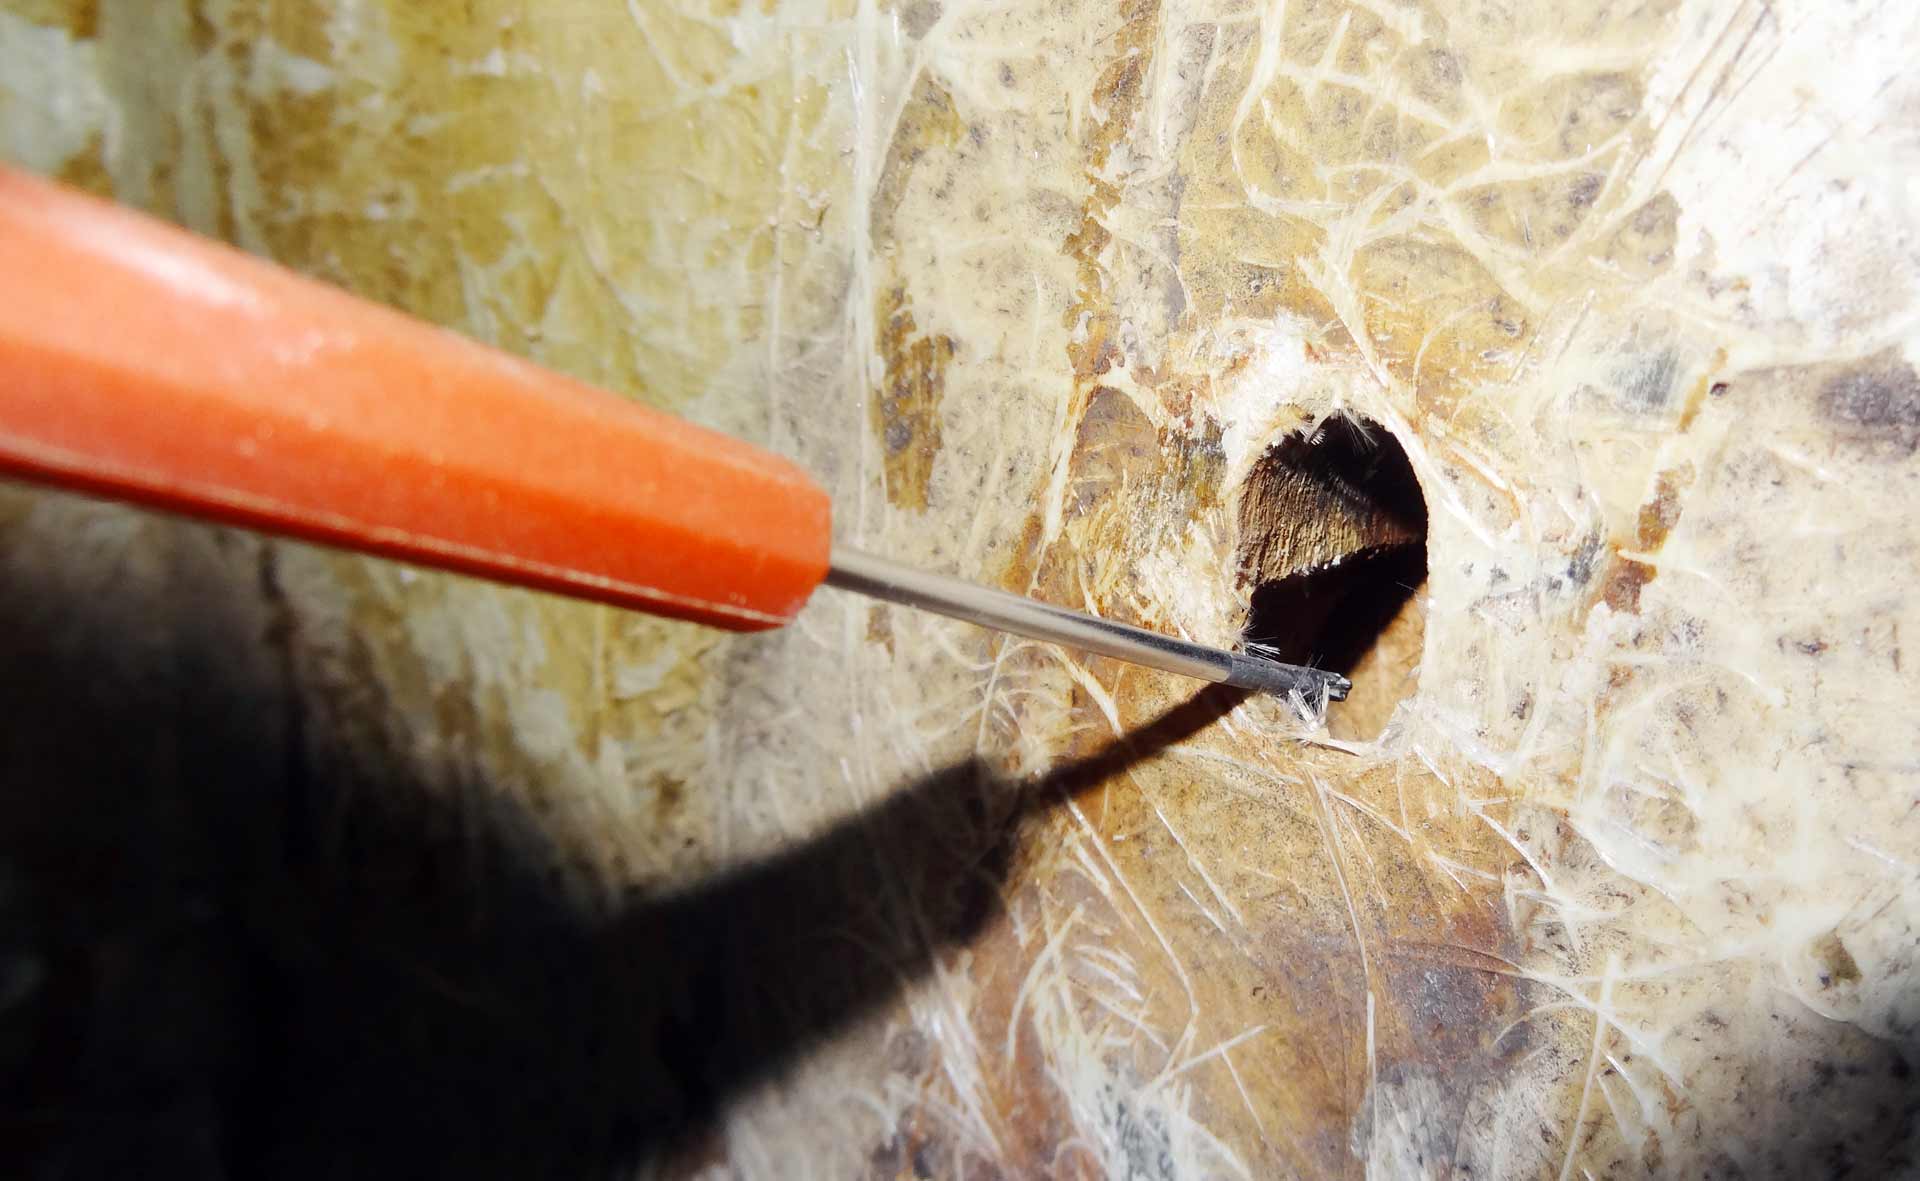
Removing the old silicone is a messy work. Neither the sharp blades of a carpet knife nor scratching, chiseling or sanding off worked satisfactory. Again: Never, no – never! – dare to use silicone on your sailing yacht. It´s simply a mess! After minutes of scrubbing I desperately began to use sanding paper to get the whole stuff at least visually clean. Maybe later I will apply electric-mechanical help by Mr. Dremel to finish work here …

Trying hard to remove the old silicone on one instance I took out a huge piece of an even older provisional filling of the gone Balsa core. So one of the pre-owners at least must have been working on the same problems as I did. But instead of doing it right he opted for simply filling up the hole between the two GRP-layers of the roof with soft silicone. On port side I found the core of the roof gone in a radius of up to 10 centimeters, starboard side is a bit less severe but again I too out a lot of wet shreds of rotten Balsa wood.
After putting some 3 hours of work into this first step of working on the chain plates of my sailing yacht I concluded work and sat down to think of the next steps to go in this part of the refit program. First thing to do is to get the whole steel parts de-rusted and cleaned for sure. A bottle of de-rusting agent has been ordered right away by smartphone whilst working.

Next Steps in Refitting the Chain Plates
First task is to get the wet Balsa as dry as I can. Thankfully it´s going to get very hot during the summer and under the tarp of the yacht so that there will be a sufficient influx of drying heat now that the chain plates have been disassembled. To speed up this process I am going to fill the holes with those little packages of silicate which will hopefully suck out all the moisture from the wood. Depending on the time needed to do so I think the whole process will take one or two weeks.
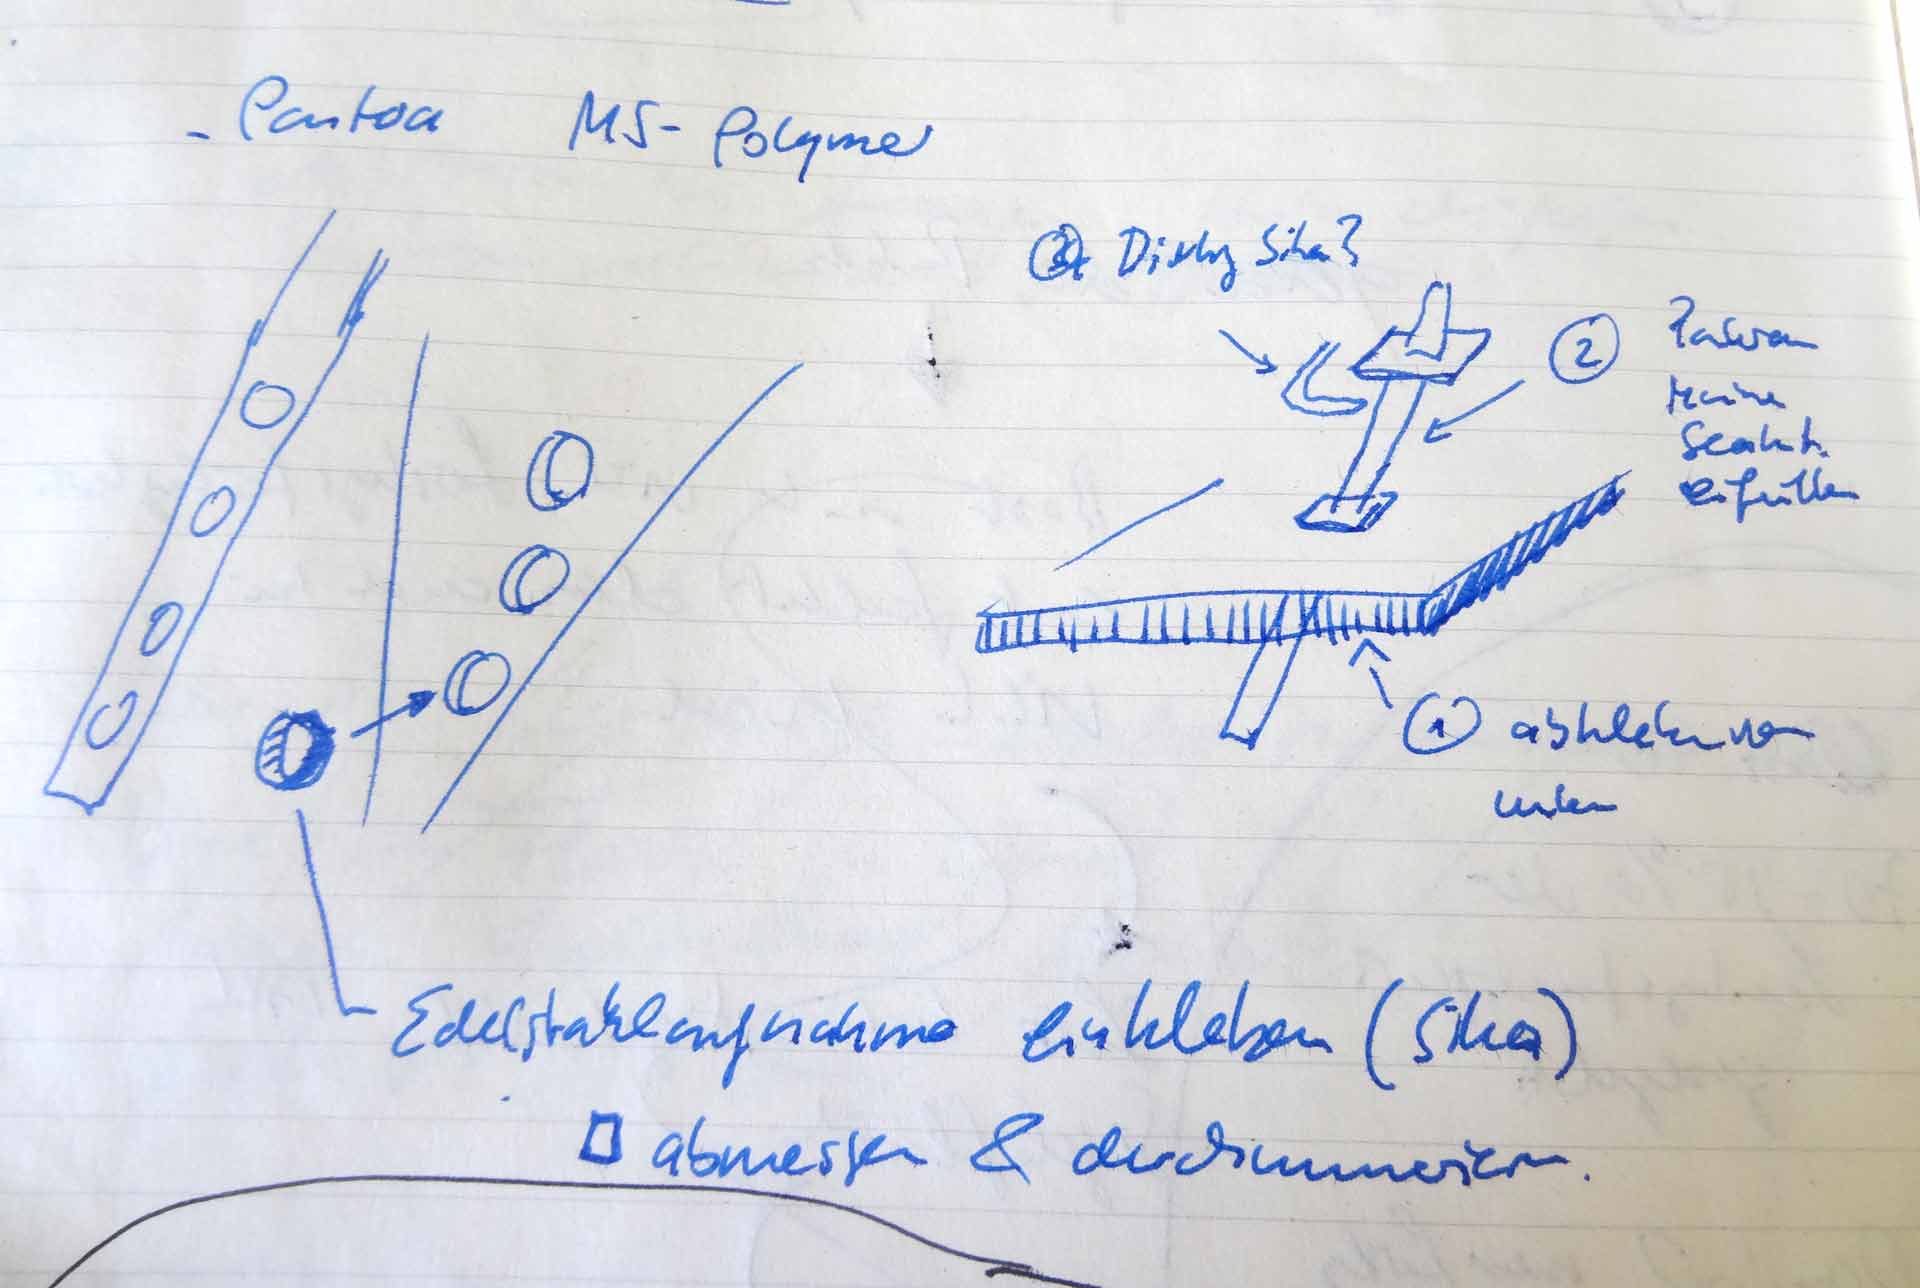
At the same time, as I said earlier, I will apply one or two layers of Pre-Kote paint to the beams. Third – mostly important – step will be the filling of the rotten Balsa core. I am currently checking different methods which is the best way: Resin without GRP-mesh, resin with GRP-mesh, classic filler. I just don´t know yet. But that´s a different story, part 2 of the refit of my sailing yacht´s chain plates, shrouds and terminals will come soon – up until part 3 that will show how I assemble everything back in place, seal off the chain plates both from the outside and the inside, apply a layer of anti-rust paint onto the chain plates and thus finally having completed another task in the to do list of my yacht´s refit program.
Stay tuned – and read some more stories on the King´s Cruiser refit here