Another big thing of my King´s Cruiser 33 refit program is in the making: Refurbishing all of the wooden parts in the boat is marking a significant milestone in the calendar, since after having done so it´s “just” the electric wiring,the ceiling and the engine room left to do. So, time to get out the sandpaper again …
A lot of Teak Veneers in my Boat …

… or is it Mohagony? I still don´t get the difference. Anyway, to not getting lost in all the stuff I´ve divided the work into two major parts: Refurbishment of the stationary mounted wooden parts and the removable wooden parts which I´ve taken away from the boat and stored dry and safe in as one of the very first things I´ve done in the refit of that sailing yacht anyway. Since I´m working from big to small, it´s the stationaries I am doing first.
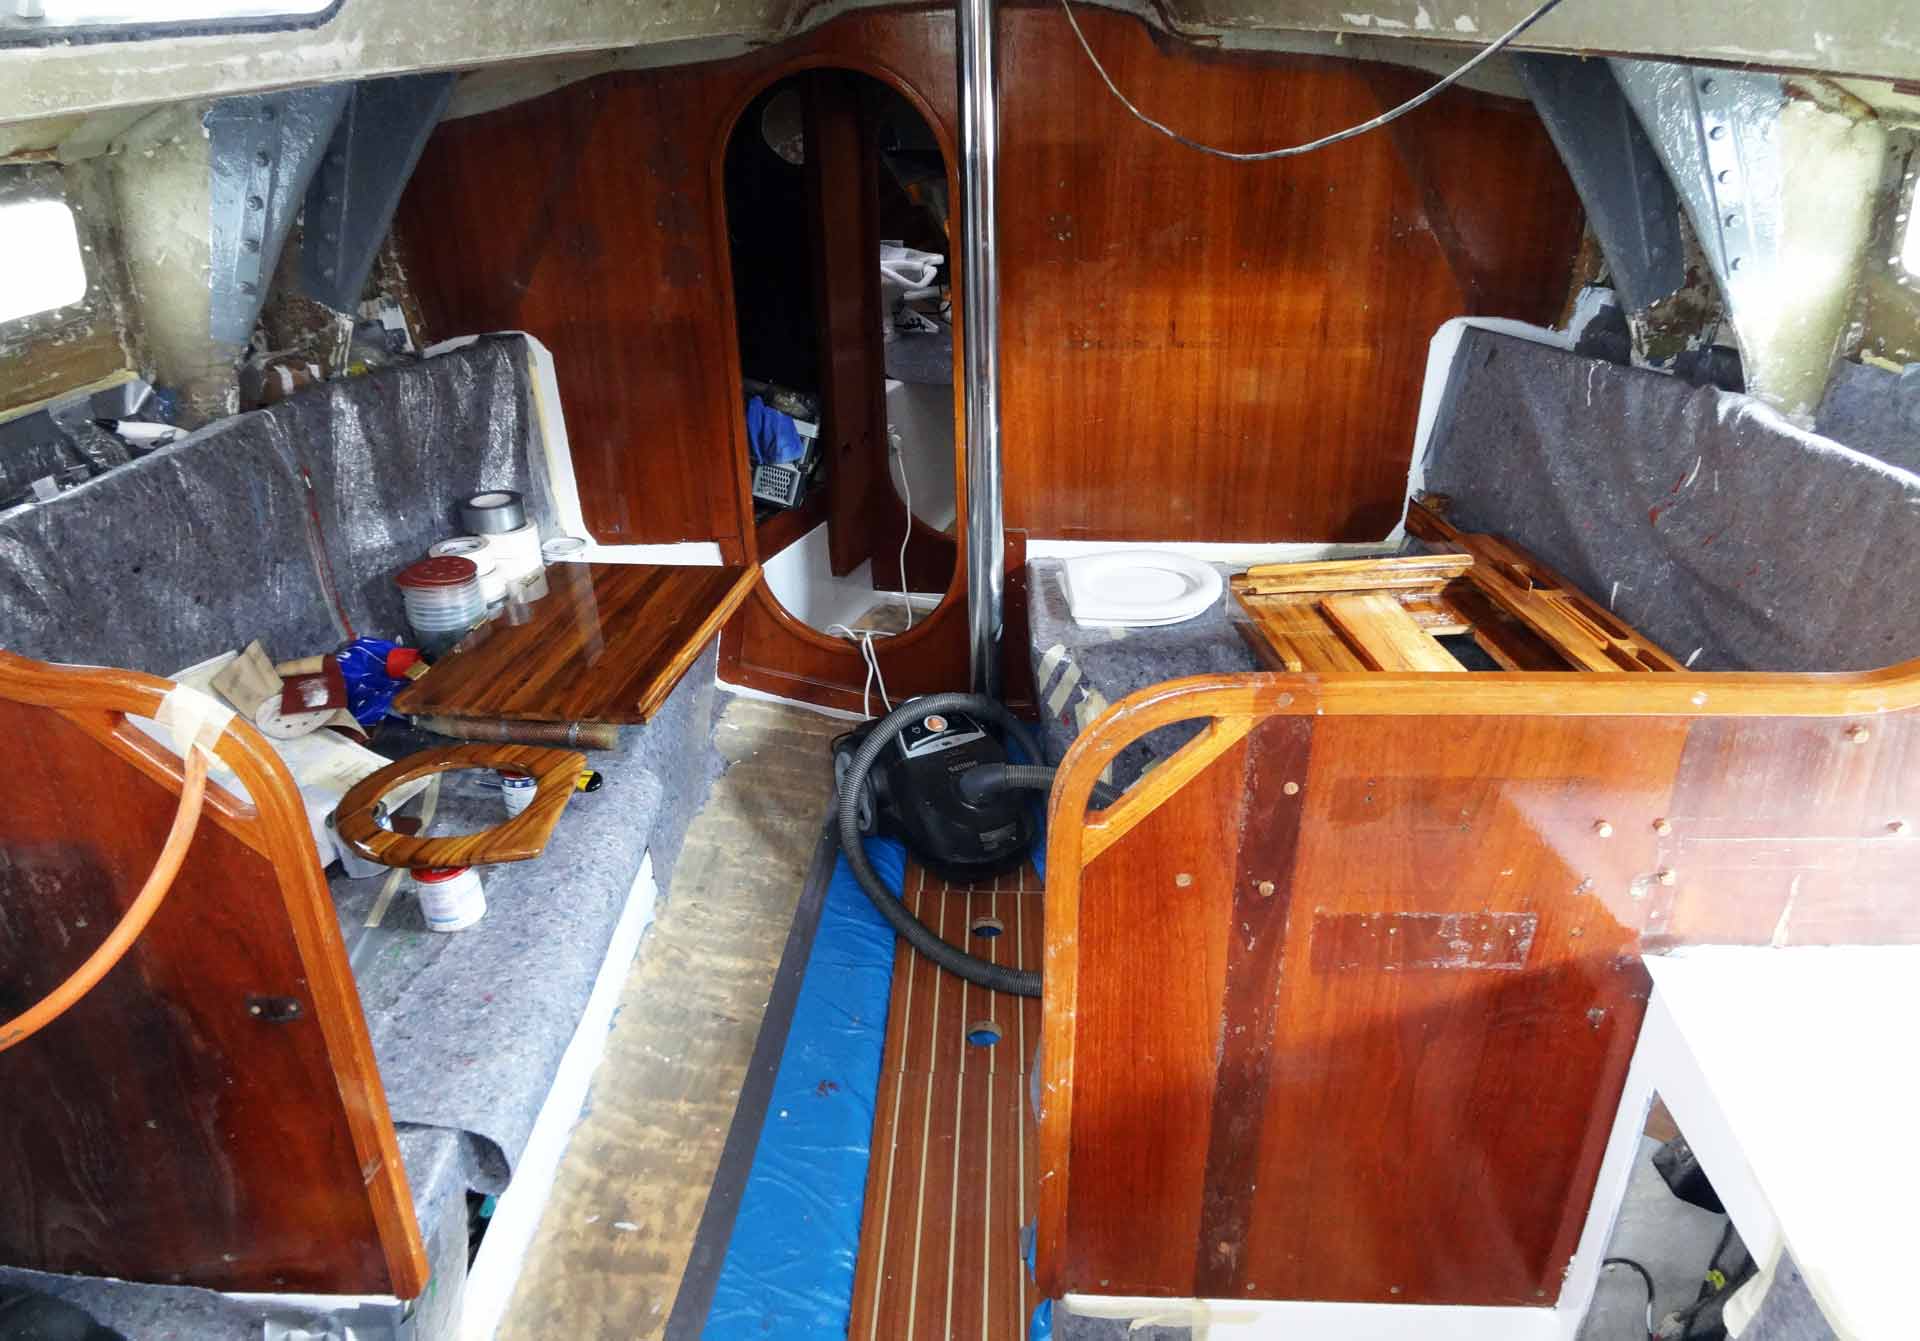
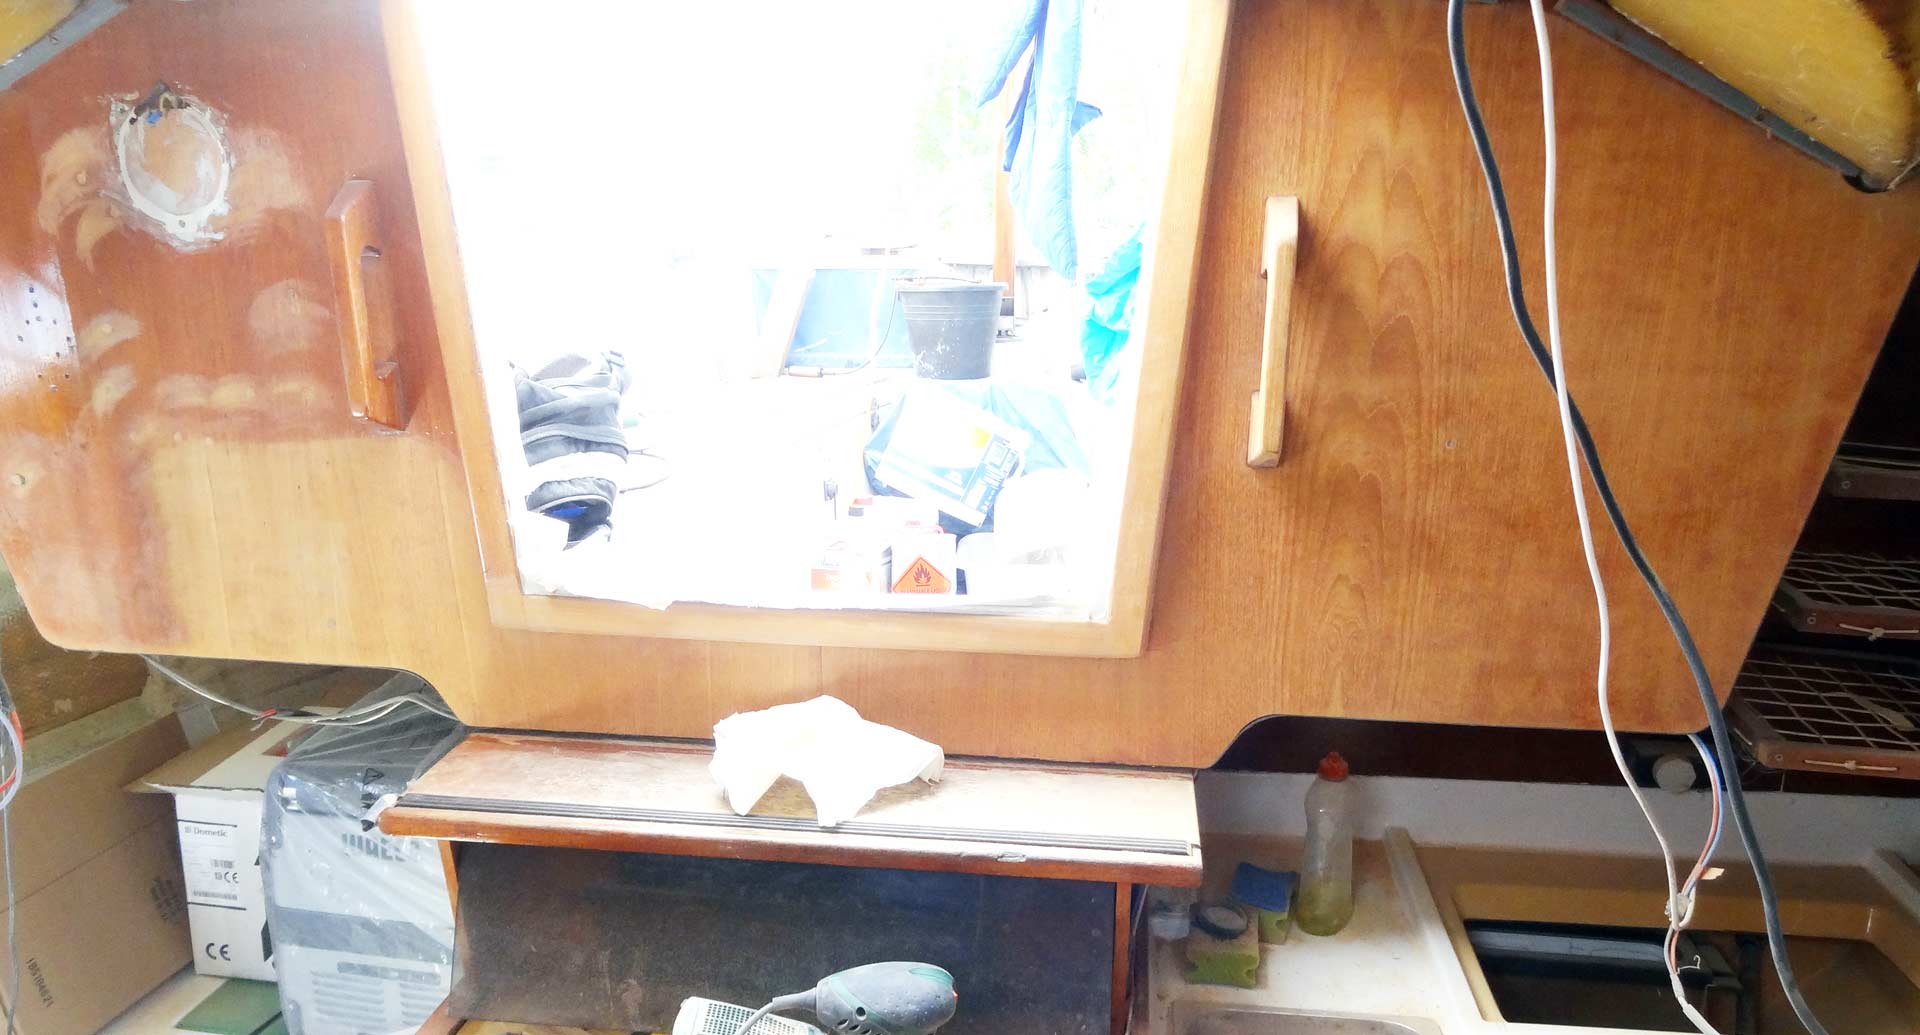
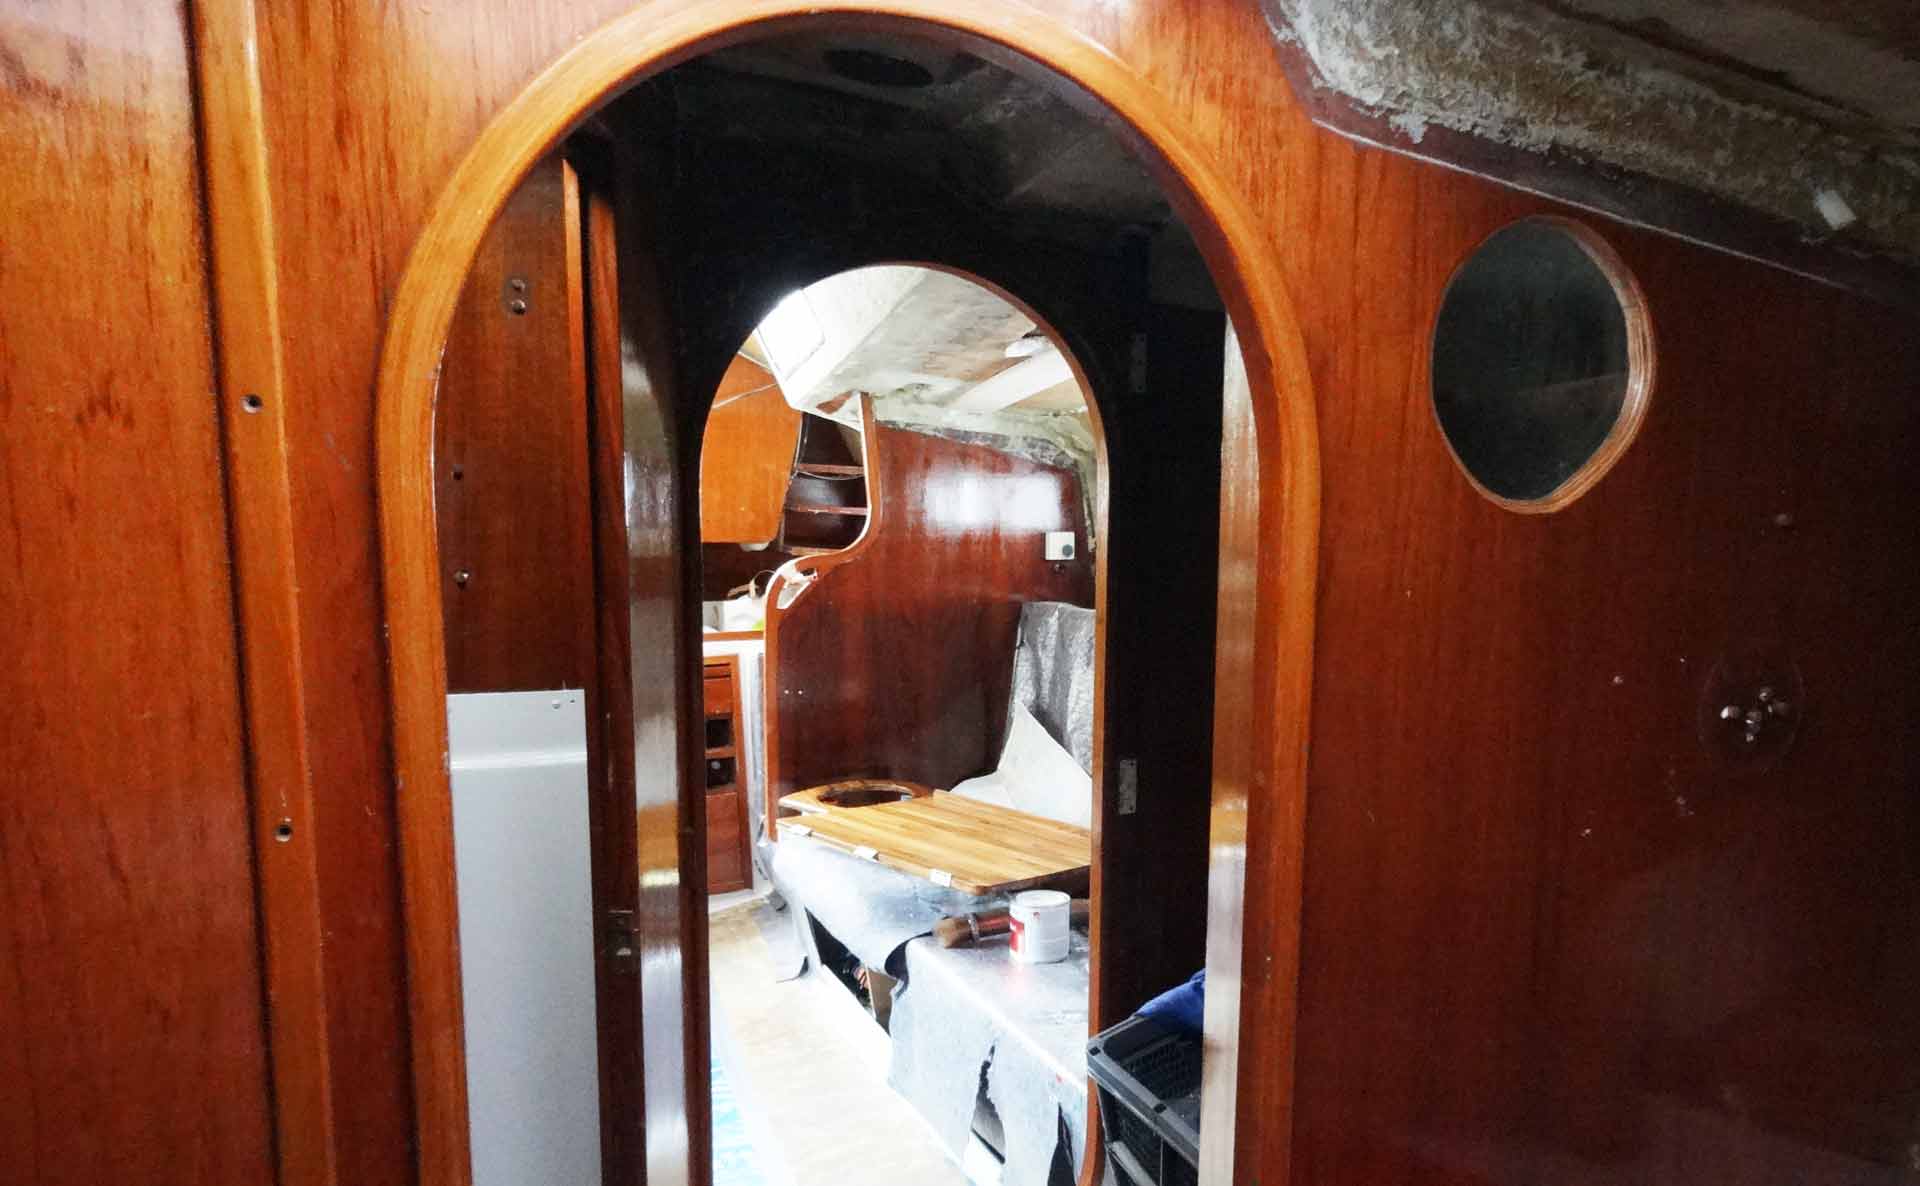
The King´s Cruiser 33 is a GRP-classic and that means there´s a load of such wooden fittings. Mainly bulkheads, of which there are four all in all from stern to fore peak. Another bigger chunk is the head, covered in wooden veneers almost completely from deck to ceiling. Since a bulkhead has a rear and a forward facing sections, all in all we have no less than eight big surfaces to work with here. That´s a lot of area.
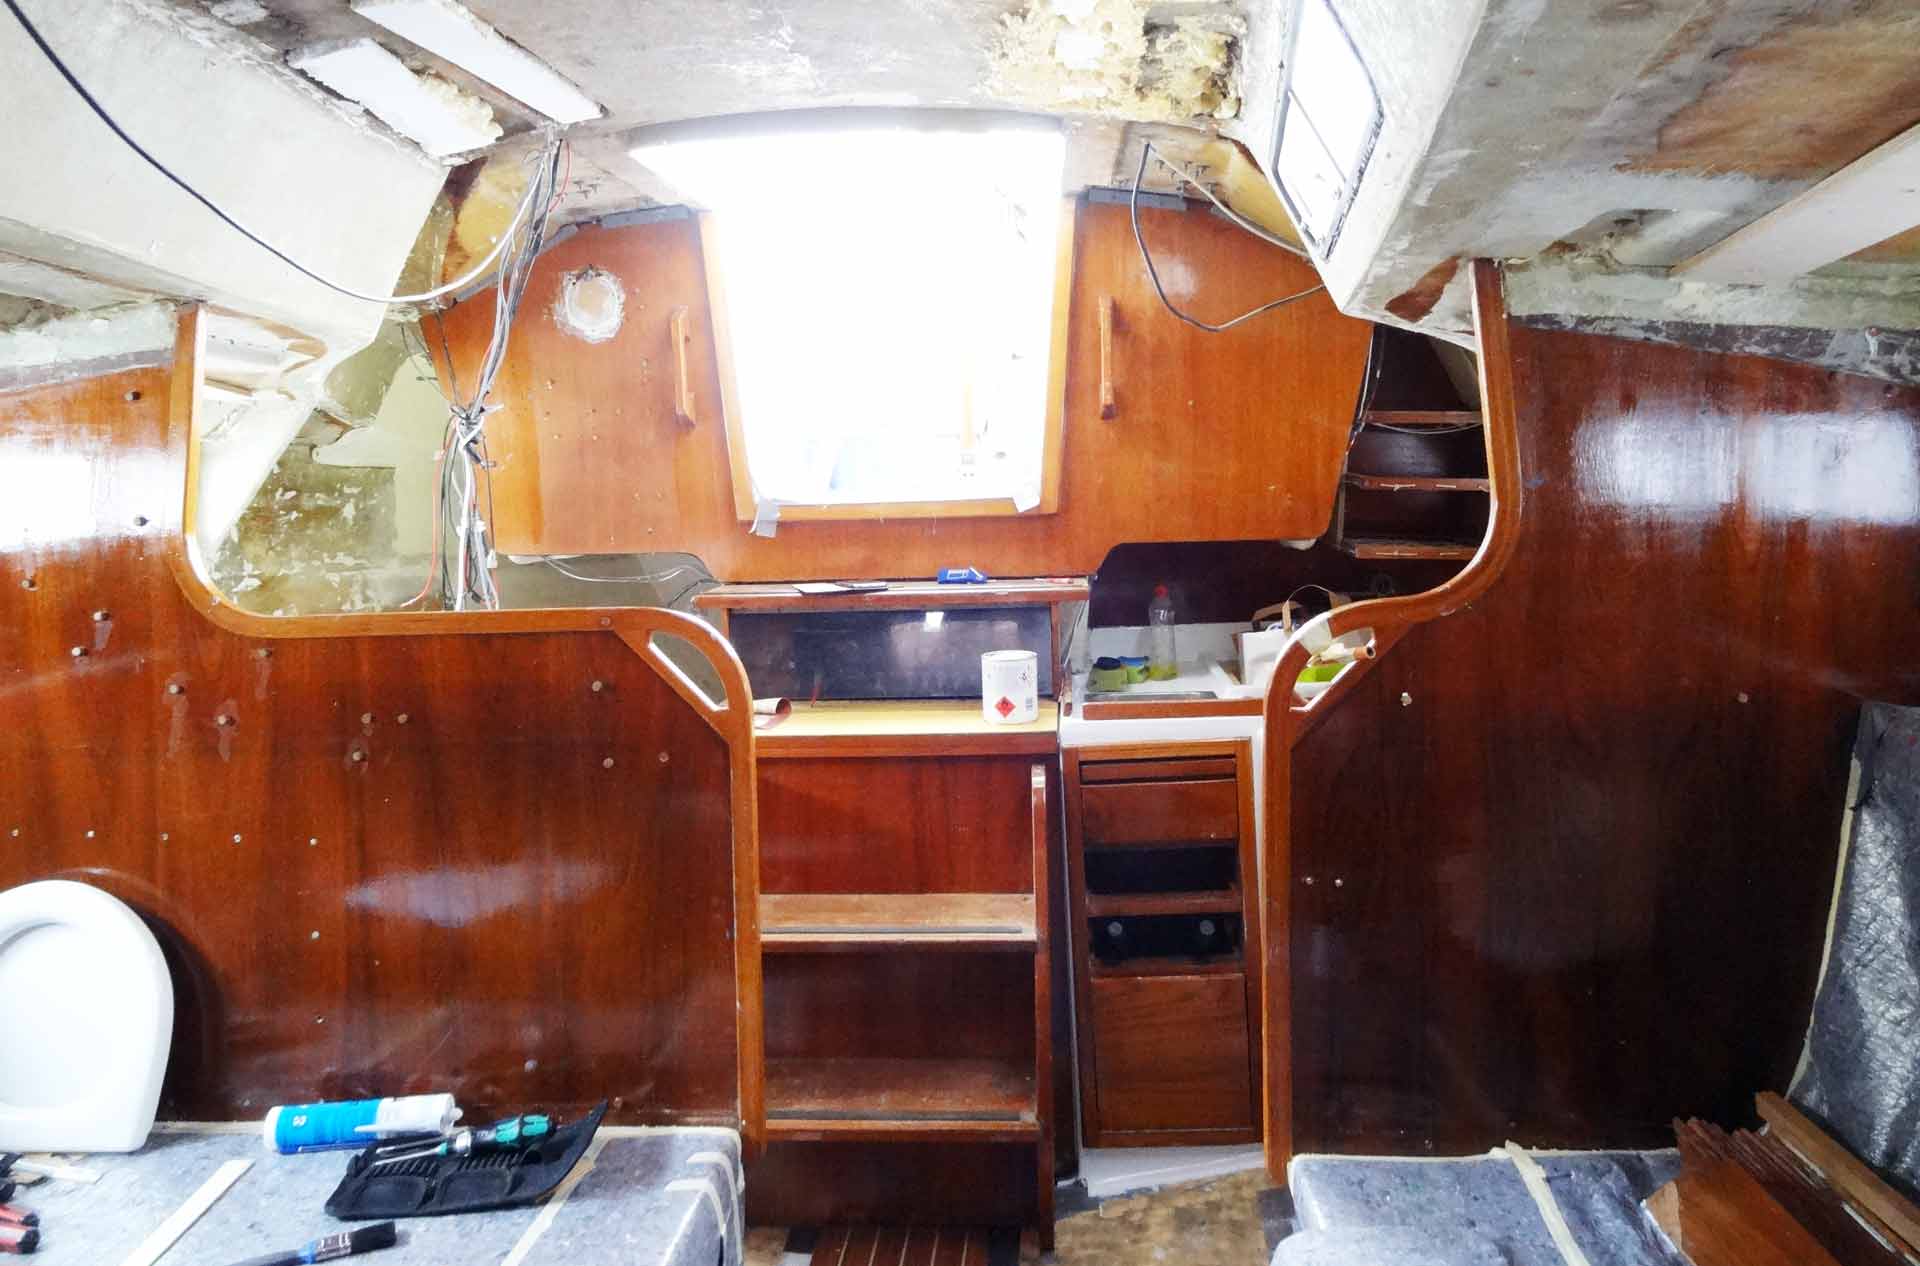
Bulkheads aren´t done in massive teak, of which I have gained some experience of working with after (nearly) finishing the all-new chart table (read it here and here). Common sense in boatbuilding is the utilization of special plywood – normally it´s glued birch tree – with a veneer of Mohagony or Teak. So, having a veneer will in the end mean to be very, very careful with sanding because it´s happening fast and one has sanded away all of the nice veneer. Birch tree texture and color is not very nice to look at in the end …
Besides: Never ever dare to have your sheeting done with any kind of pinewood. That´s too soft and will rot in a matter of time.
The Legacy OLIVIAs Pre-Owners
But before I can start working there´s the legacy of no less than three pre-owners of my boat – some 40 years during which everybody has drilled a hole here, mounted something there, had a nail hammered and a screw driven. Not a single surface without an old bore hole. Even after dismounting the navigational stuff like the old VHF and the Navtex from the nav-station, I finally decided not to have this old gear installed back again but to go for brand new tech. The old holes are not needed anymore.

Worst condition is therefore the rear bulkhead of the navigation station where there are no less than 15 older bore holes, but also in the saloon where the old light-mounts and brazen instruments leave three hole per installation. All in all I´ve counted one hundred and fifty seven bore holes of 3 to 5 millimeters each. Solution is simple: Make ´em bigger!
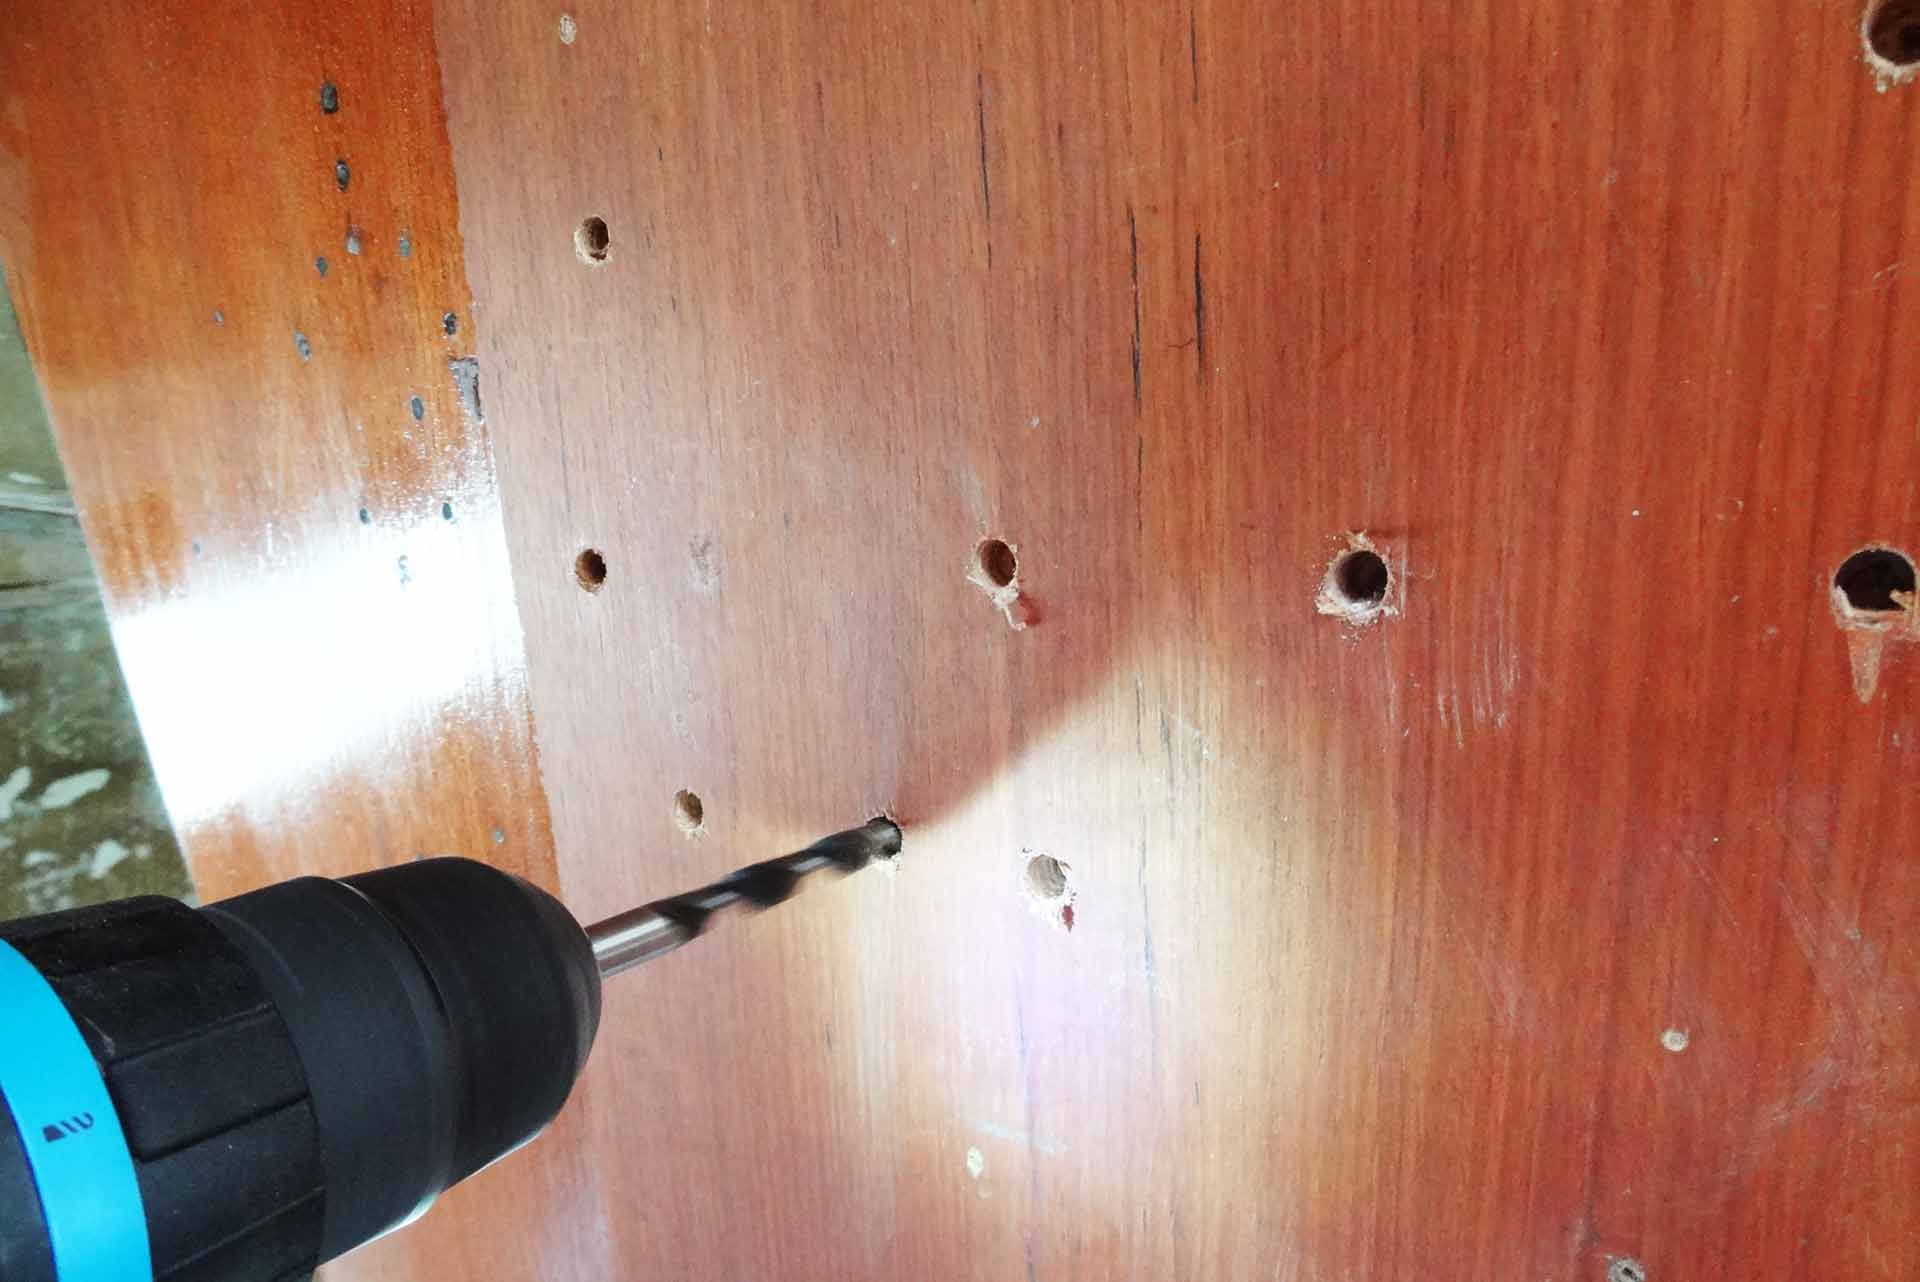
So the very first step in refurbishing the wooden veneered fittings of my yacht is to roam about the whole ship from stern to bow and to aim the drilling machine with an 8 mm drill bit (sometimes I would even rather use the 10 mm bit) to widen the old bore holes and have a clean, perfect round shaped new hole. That will take some time and I must honestly admit, that´s no fun because one has the feeling of making the situation even worse than before.
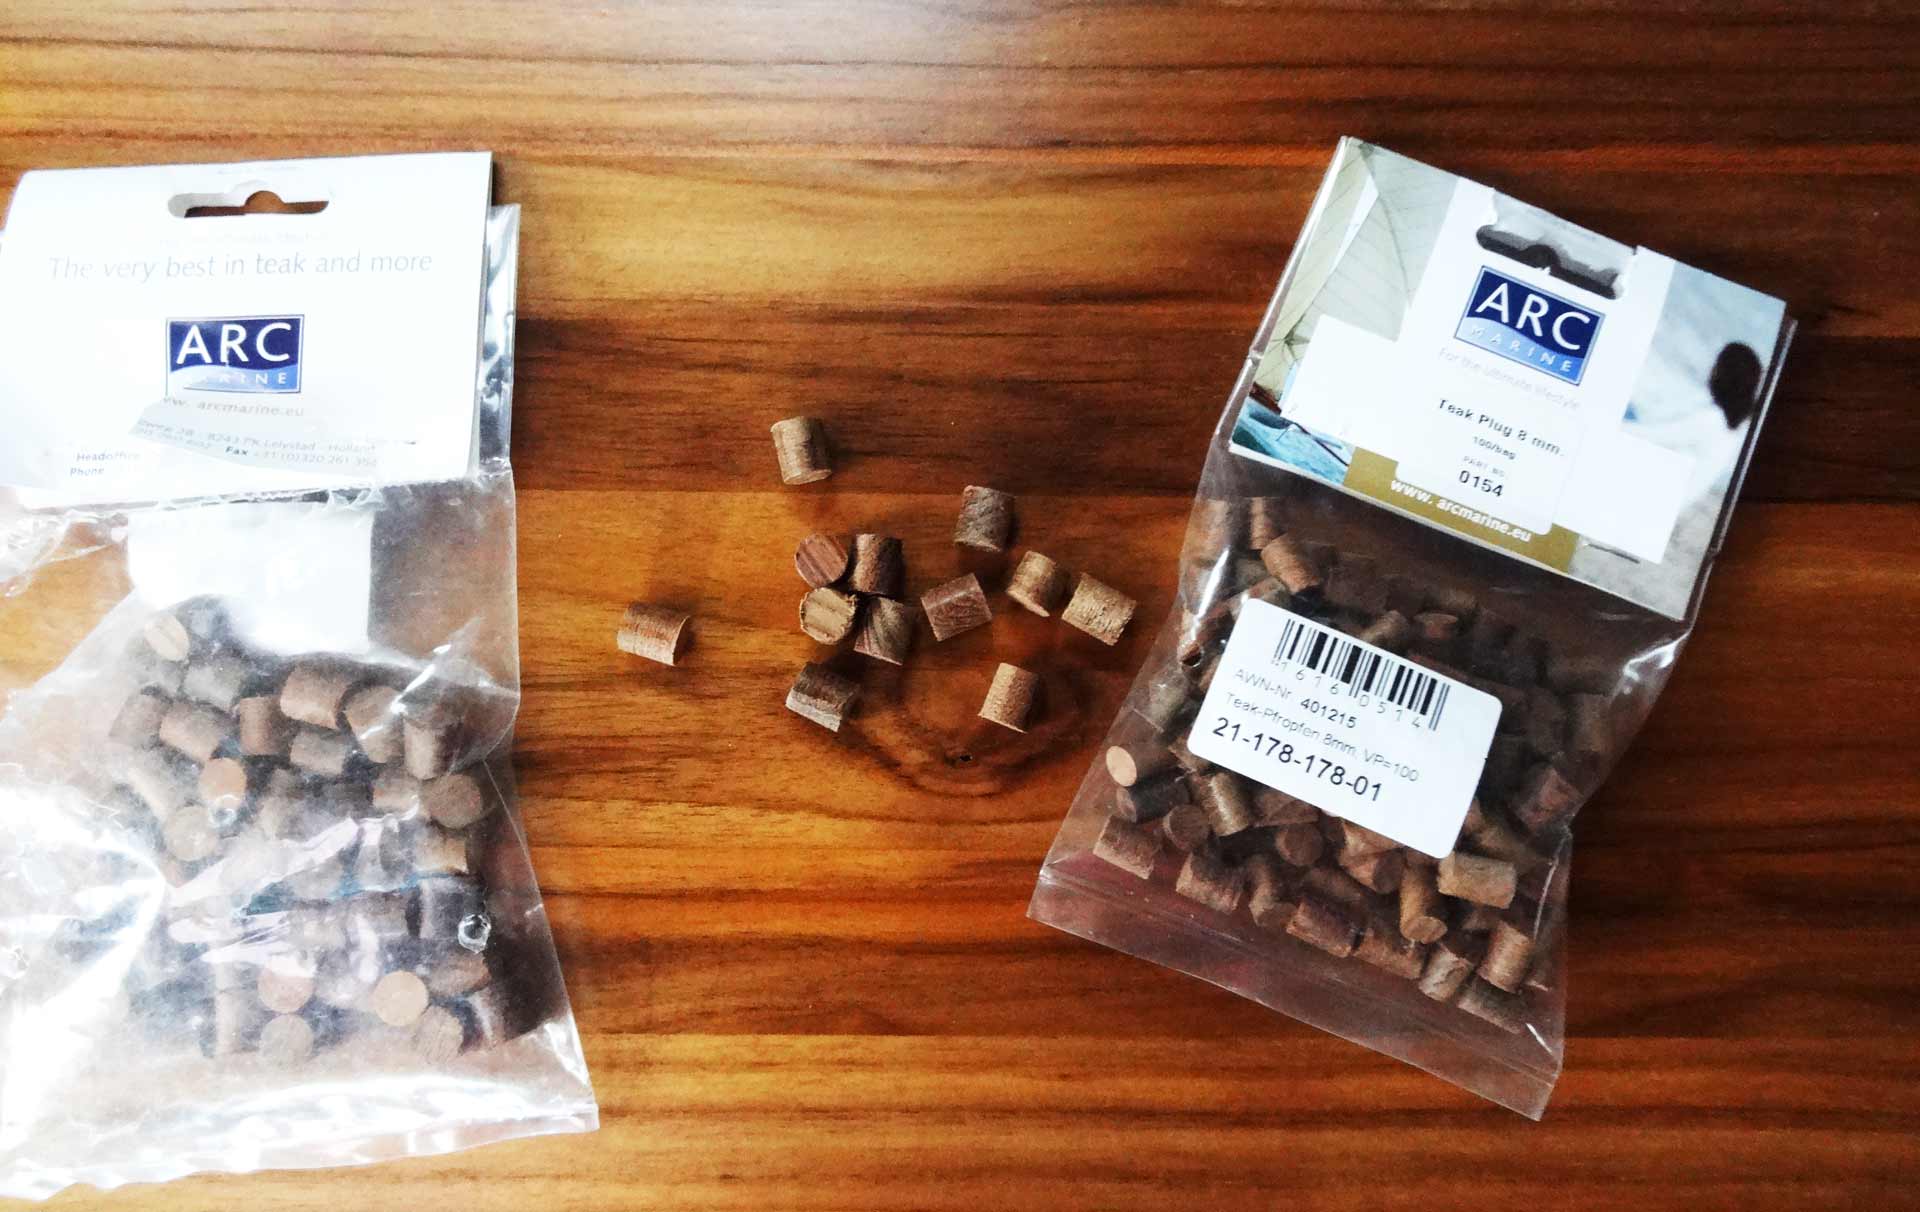
Teak Plugs by ACA Marine
But solution is near. I´ve bought two packages of teak plugs, in this case made by ACA Marine like virtually everything purchasable in Germany when it comes to readymade teak-stuff. One package contains some 50 to 80 teak plugs – go for the right diameter! A package comes in at 10 to 15 Euros per package. Teak is an expensive thing. After having widened and redone the bore holes, I put in some wood glue in each and try to have the whole hole covered in glue.
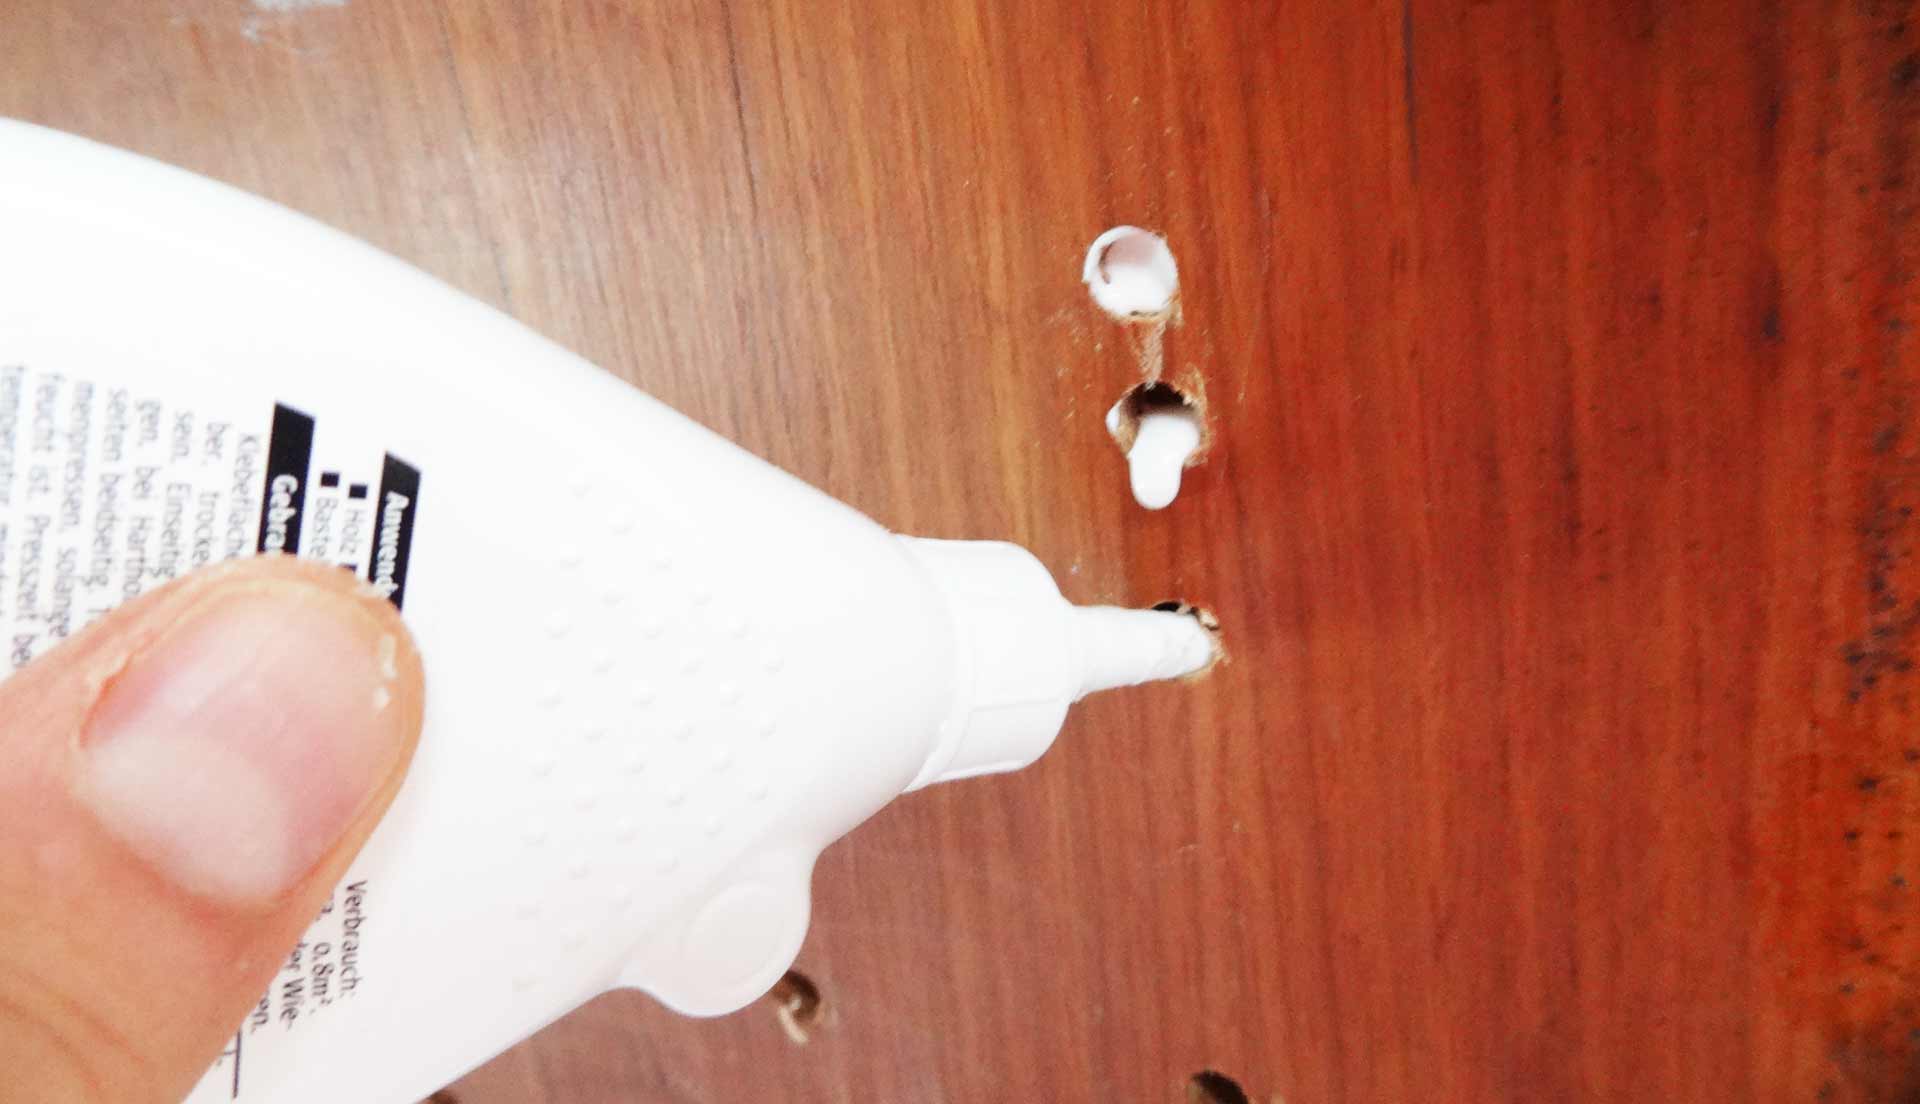
Now I´m taking a plug, put it in and while pushing it into the bulkhead I am turning the plug. That has two reasons: First, by turning I am distributing the glue all over the contact surfaces in the bore hole (since most of the glue will have gathered at the bottom anyway) and second I want to adjust the grain texture of the teak plug to the texture of the veneer. There´s nothing more disturbing than different textures in one surface!
Don’t bother if you cannot put the plug all the way into the bulkhead or surface – in contrary, that´s disirable. We even want the plug to stick out of the general level of the surface anyway. Later more on that. Sometimes the holes go right through the veneer so that one single plug won´t be enough. No problem: Just put in two plugs, one from either side so that they will stick out on each side too.
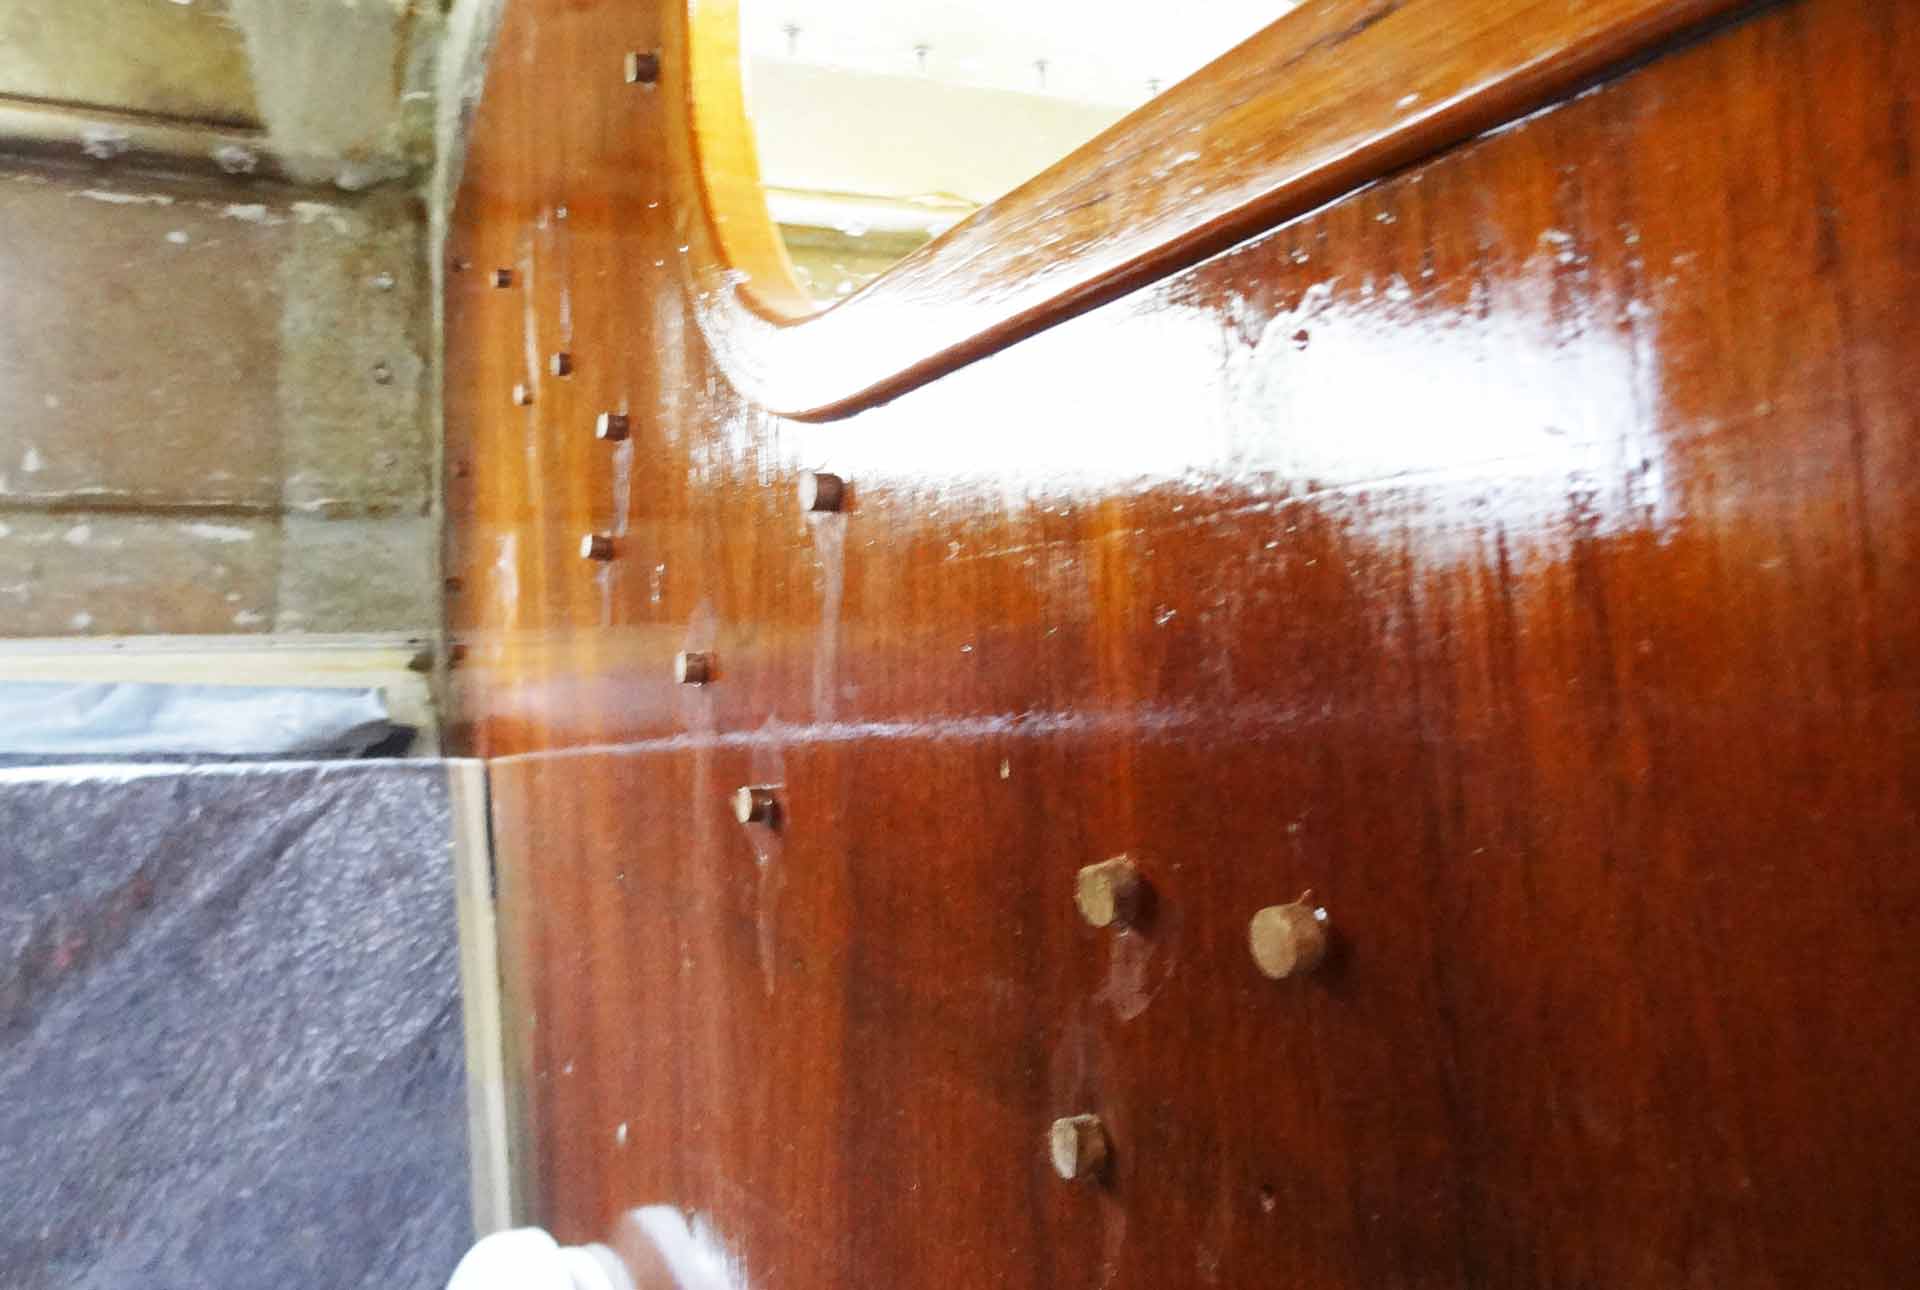
That´s a bit tedious work here since at the end your fingers will be covered with wood glue and dirt, the plugs will sometimes be covered with glue as well and also in some occasions the glue will be forced out of the holes and running down the surface. No problem: It will be sanded all away nice and clean later. In the end, it was a 2 hours working time session in my Kings Cruiser yacht and 157 plugs installed …
Sanding Teak Veneers
Now let´s go for the fun part: Sanding off the old layers of varnish. To have a bit of foreclosure here – it´s awful, dirty, back-aching work ahead. You´ll need an oscillating pad sander for sure (but don´t opt for the really big ones!) and a load of pads (in my case with 60 and 80 grain) and some additional sandpapers for handwork-sanding (the most fun!). Sometimes it makes sense to utilize a triangle-shaped oscillating sander for edges. Let´s go.
As I started from the rear bulkhead working my way forward I quickly learned that I – again – underestimated time consumption of this work. Boat varnish will have been applied in at least 5 thick layers of clear coat and in my case another layer of colored mordant as base. Sanding this approximately 0.5 millimeter takes a while. But beware of sanding too much here – the teak veneer is sanded off all too quick! Concerning the plugs: That´s the first to do is sanding down the surplus material of the plugs – in the end, you´ll get a smooth surface. If done proper, you will barely be abler to notice the old bore hole.
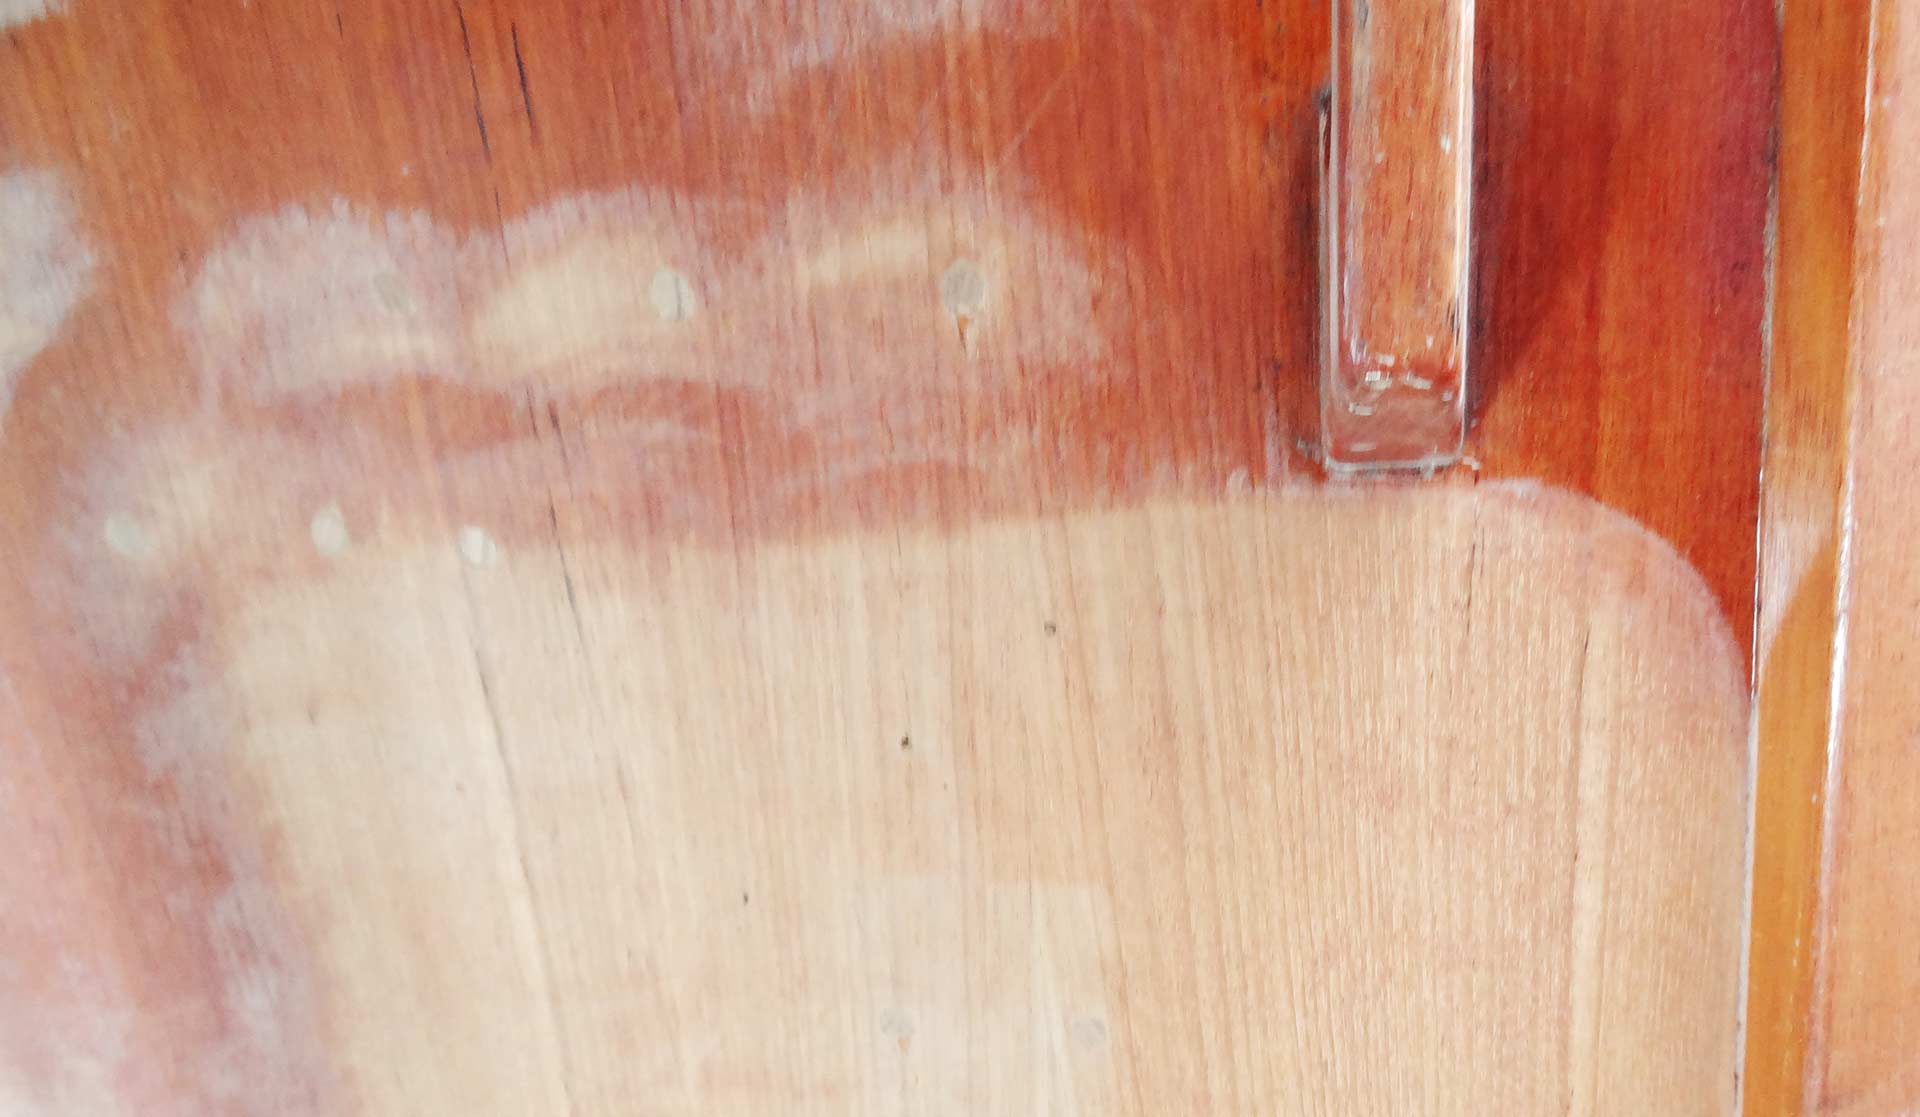
What I´ve noticed instantly after having sanded away the first inches surface of the old layers of 40 years is the difference in color. It came as a huge surprise – and a very nice one too! – to see, that after taking off the mordant the veneer has a very different color now. Full of lightness and freshness, very friendly and not so … red … anymore. I barely can´t wait to see all of the ship´s wood in this fine color since the effect will be great: The once more darker boat (dark-red wood, dark-yellow topcoat) is getting a chance to appear a lot lighter: Bright wooden fittings and a new white top coat for the GRP-surfaces.

Oh my … such tedious Work.
Well, but in order to achieve this outcome, there´s a lot to do. If I was wondering whether I would be able to sand ALL of the bulkheads in one session, I later was wondering if I would be able to finish at least ONE bulkhead in one session. And after 1.5 hours of working my back was aching that bad that I´d had to abandon this one bulkhead surface after sanding some 80 per cent. It´s really tough work here that will take some time!
So the next weekends are full of fun: I estimate there are some 12 net working hours ahead until all of the bulkheads are fully sanded. I also protect GRP and topcoat areas of the adjoining elements. After having redone these I don´t want my grinder to accidentally sand off the freshly painted areas. So I´m using two layers of masking tape, whose application also takes some time since this must be done accurately. Reminder here: Don´t go for cheap masking tape. It´s a horror to work with because stripes won´t come off the spool without ripping all too often. Nerve-wrecking!
Allright, that´s what I am doing refitting my boat right now – an in the coming weeks. Next step after having sanded all the bulkheads will be the re-painting with varnish and clear coat again. And here I´m going to have the well-experience technique applied again: First working with three layers of a thinned solution starting with 10 per cent paint-thinner, later 30 and 50 per cent before switching to full 100 per cent paint in at least three complete layers.
I hope being able to complete that work well within the warm-dry summer season.
Here´s an article on how I was building (my) perfect chart table from massive teak
Another article on refurbishing an old, filthy bilge may be read here
All yacht-refit related article may be browsed here