Putting the deck on the hull of a GRP-sailboat is called “the marriage”. The choice for this denomination is not by chance, because just as a marriage between men and women, the robust and lasting connection of hull and deck are paramount for the rest of a sailing yacht´s life. I witnessed the whole process of mating the deck with the hull at my new sailboat, the iconic Omega 42: And this is part 2 of this absolutely awe-inspiring, beautiful and exciting undertaking.
If you have missed it and not read yet, please check out part 1 before reading this article so that you have the complete picture. You may also check out this article, depicting all the prepping work and tedious arrangements that had to be carried out by the shipyard´s boatbuilders to ensure a smooth operation. Because, once the glue is applied and out of its cartridge, the clock is ticking: Time is crucial!
Deck is fitted, but that´s just step 1
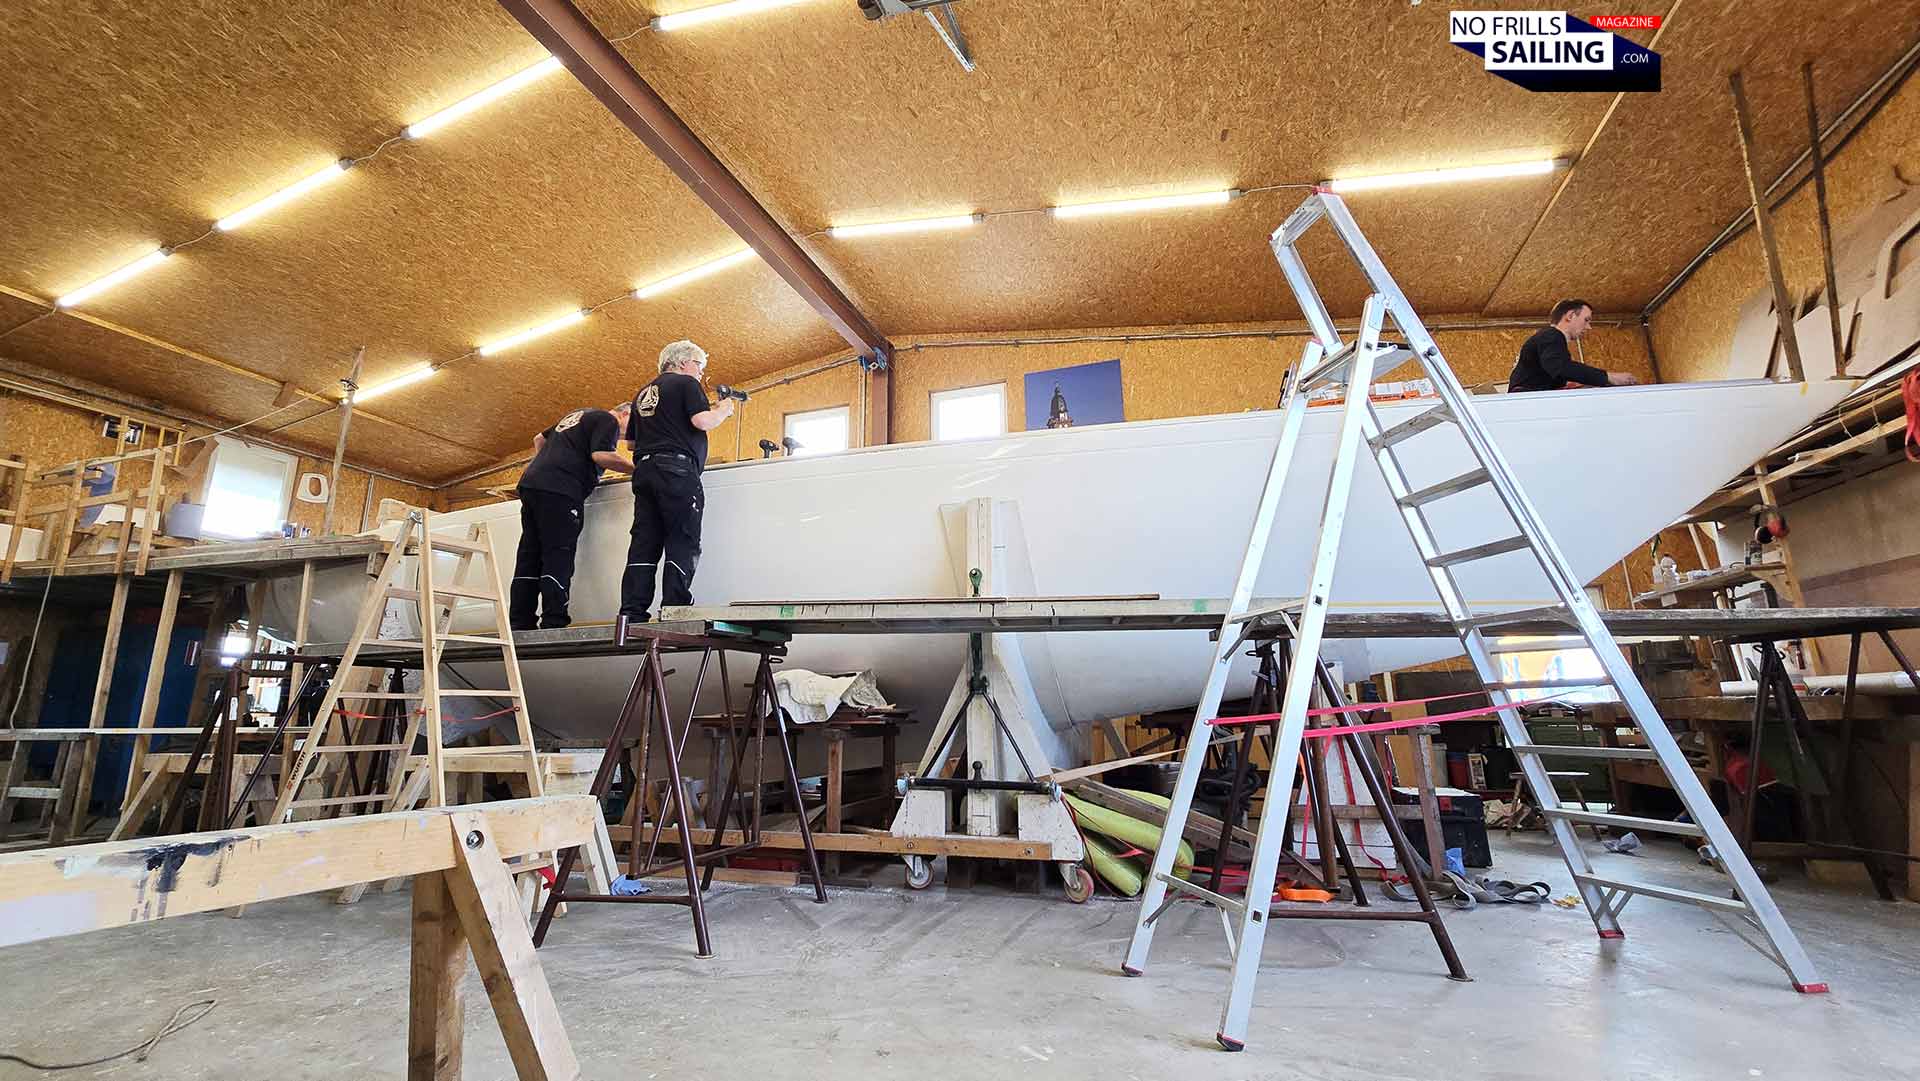
I ended the first half of the mating-report during the short lunch break: The five-person team had just finished attaching the deck to the hull by the use of a special, advanced chemical bonding agent and fitting no less than some 120 stainless steel bolts, countered by the same amount of washers and nuts. Whilst the team took a little break, relieved themselves and enjoyed a snack, Heiner, the shipyard´s boss, roamed the construction site, controlling their work. After some 20 minutes he left: Smiling. I guess, it was all to his satisfaction.
After the deck has been glued and bolted to the hull
Advertisement
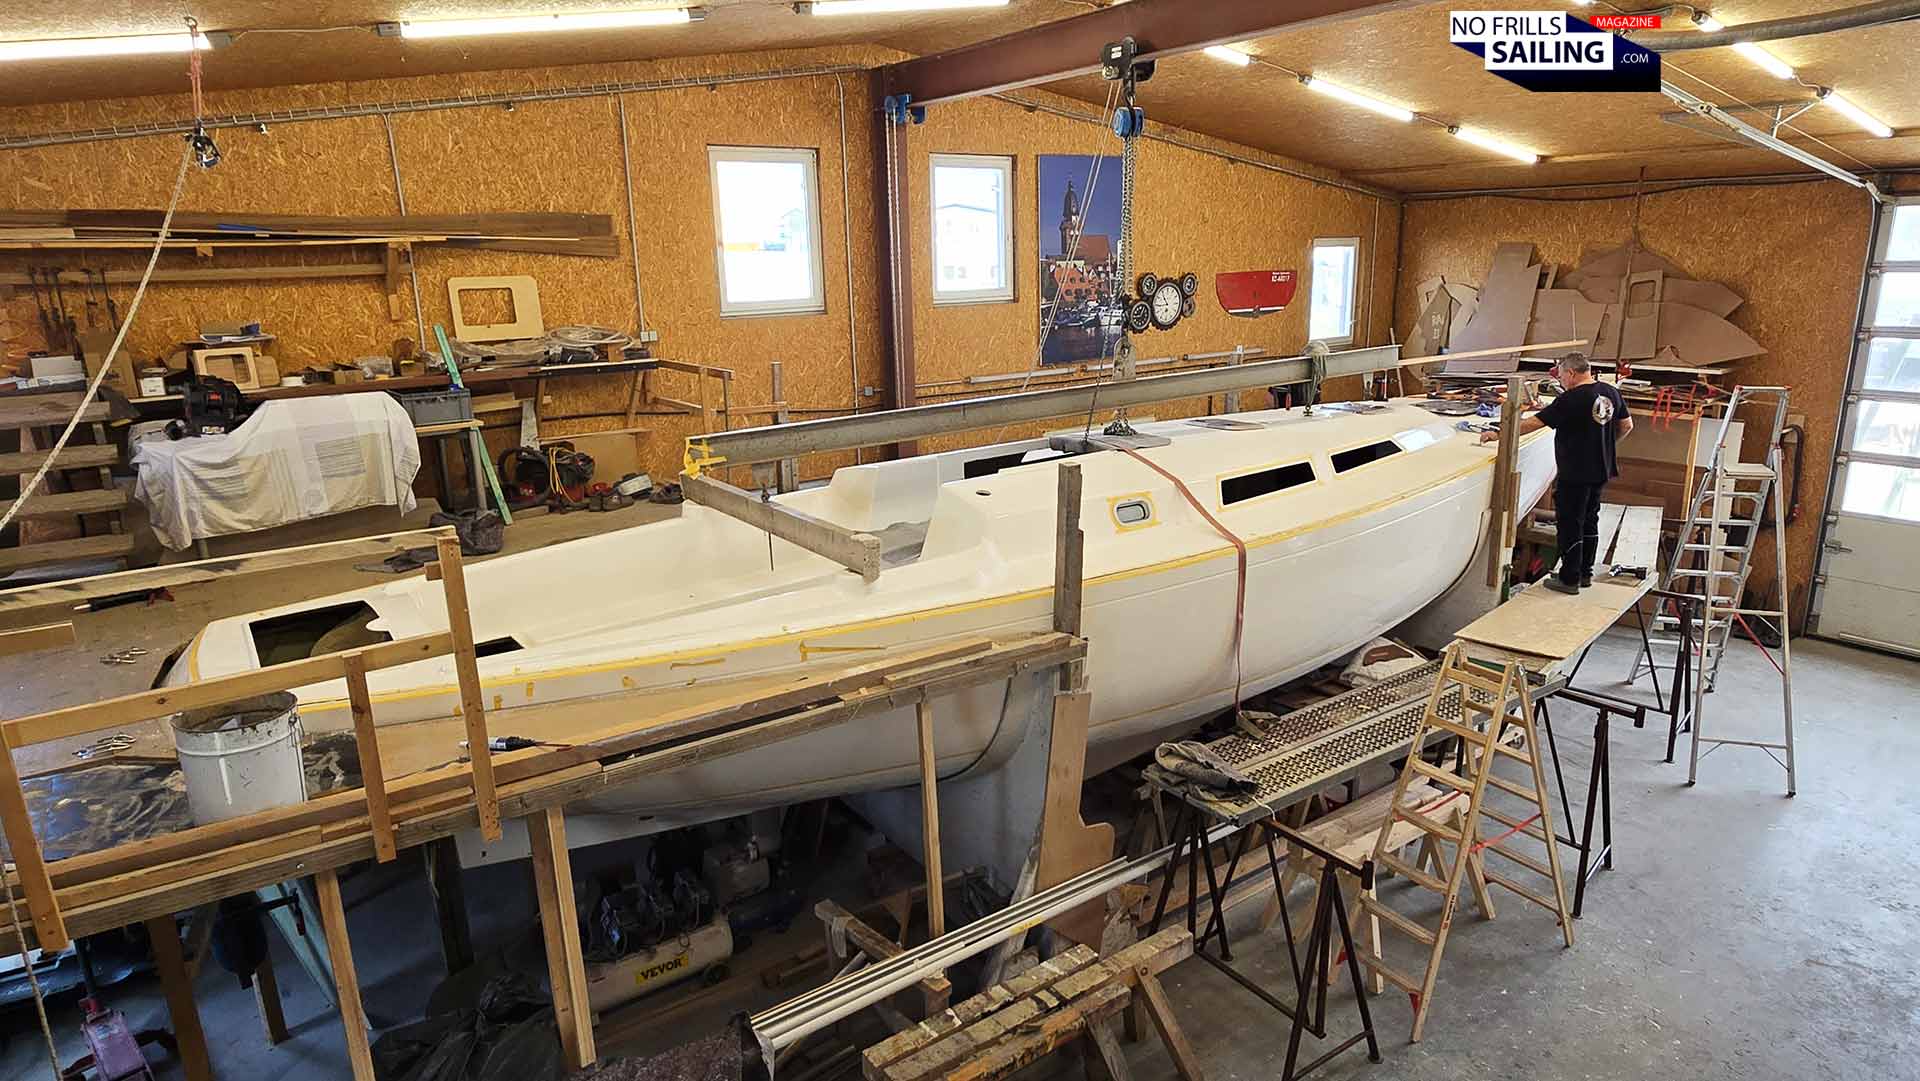
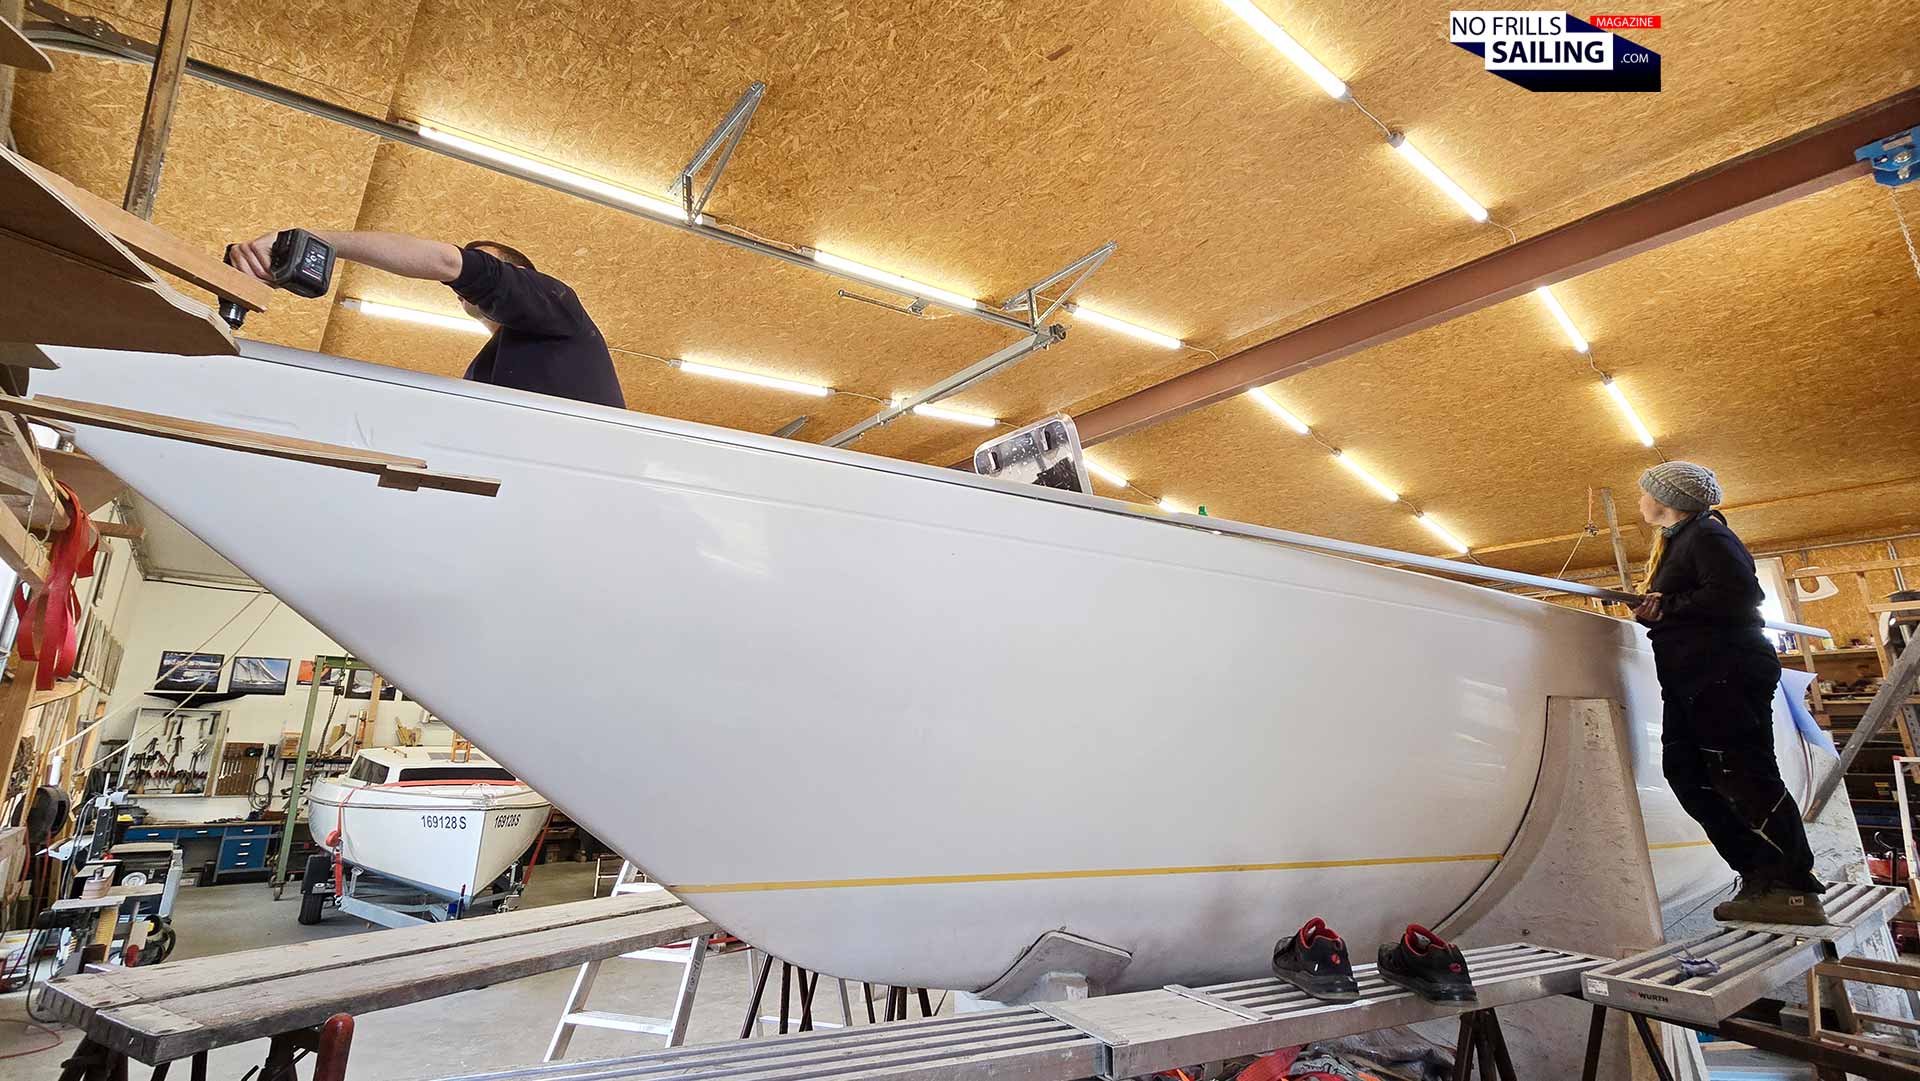
Standing there, alone, in the construction hall, was a very seldom moment of such a clean purity that it was absolutely moving. I mean, if you are following my work-in-progress here from day one, it´s an almost three years long journey now. Financing such an expensive semi-custom yacht is not an easy task: I am very happy that the shipyard moved along my rollercoaster ups and downs (budget-wise). Something, an “ordinary” brand or series production shipyard would never tolerate.
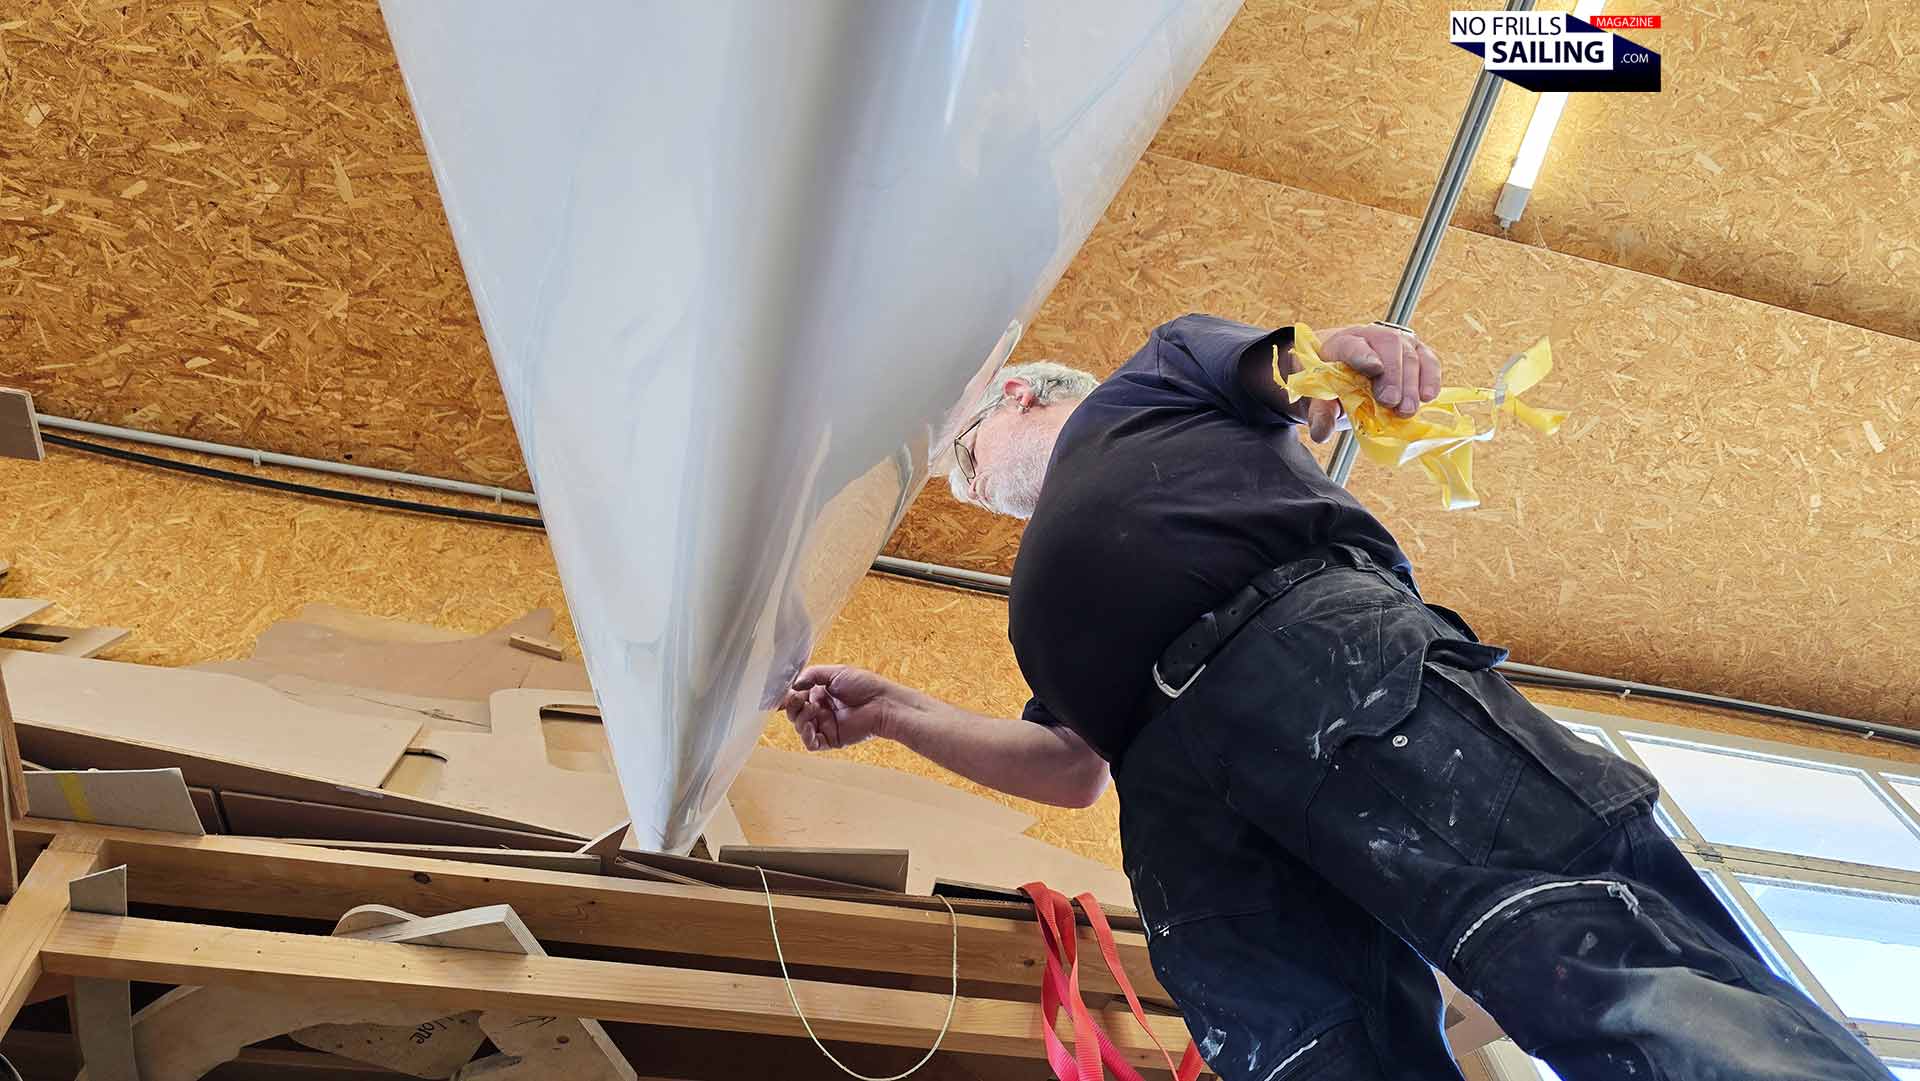
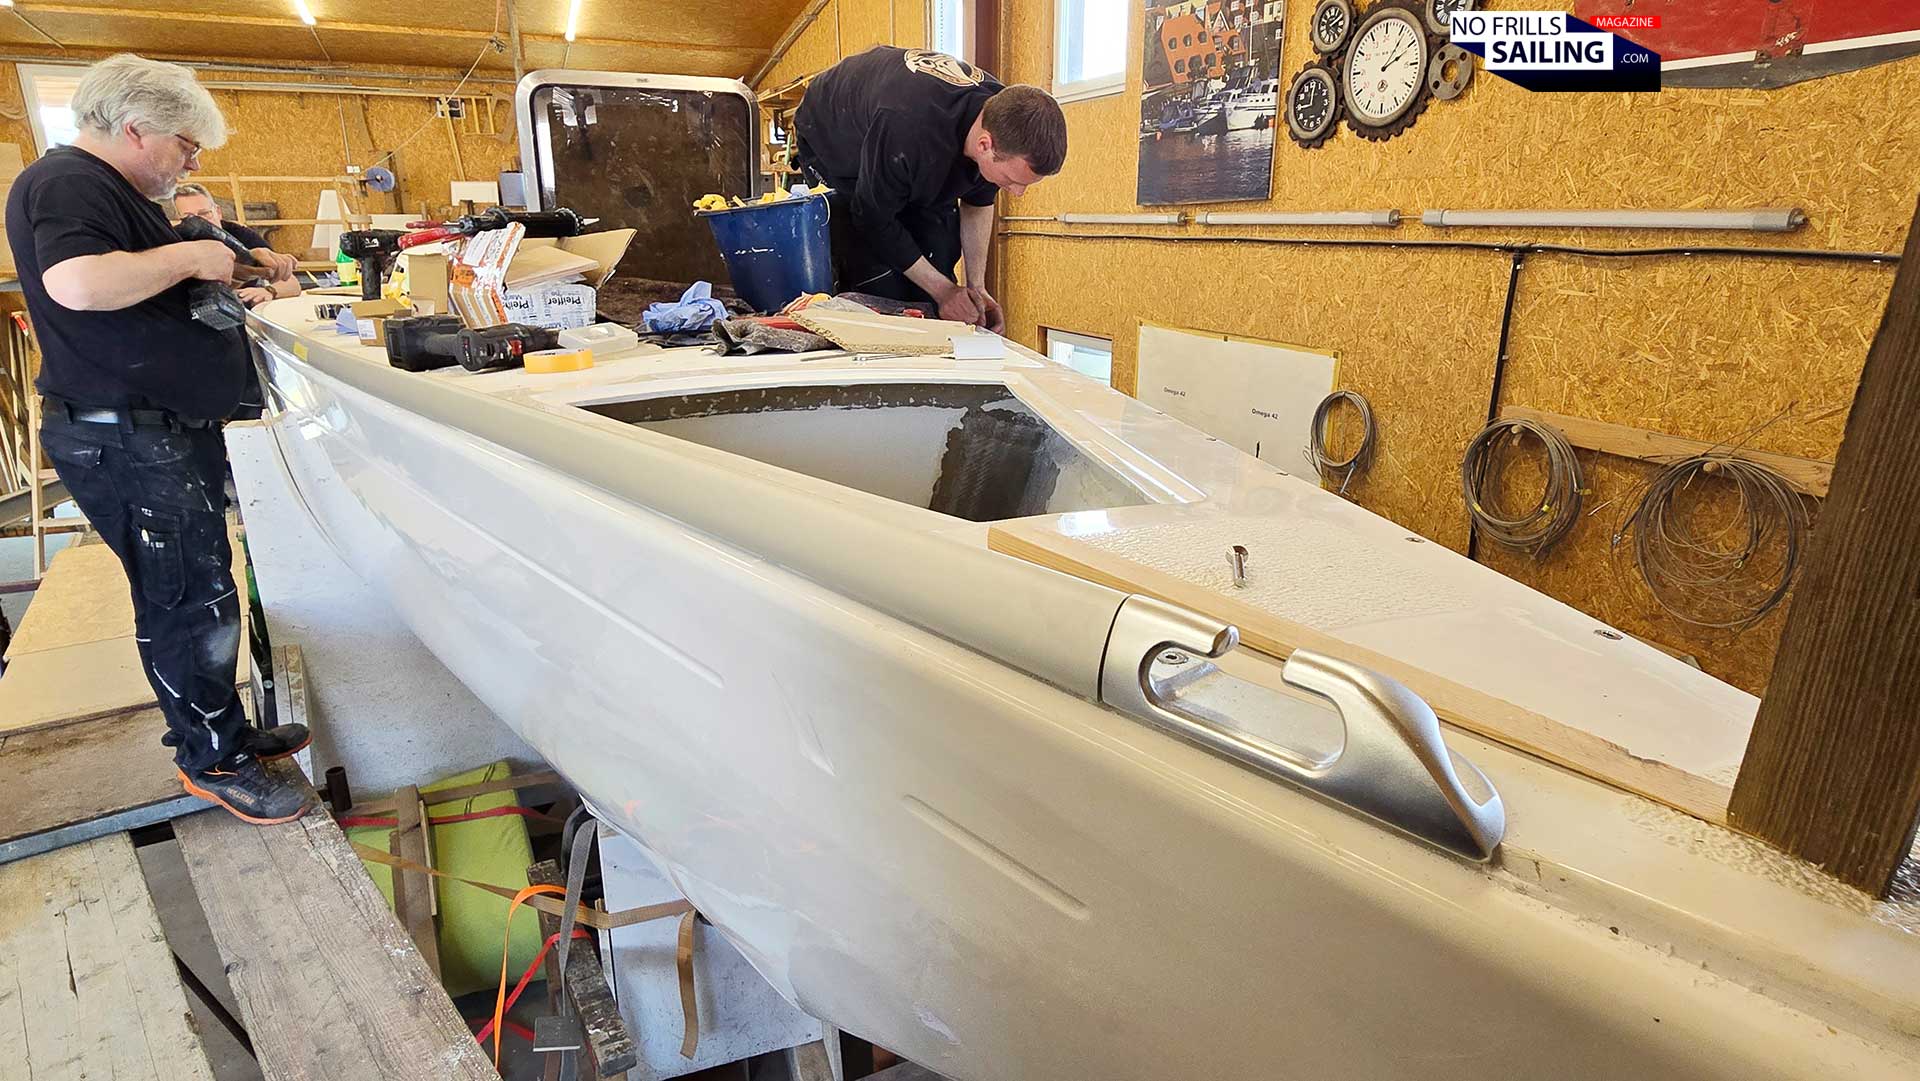
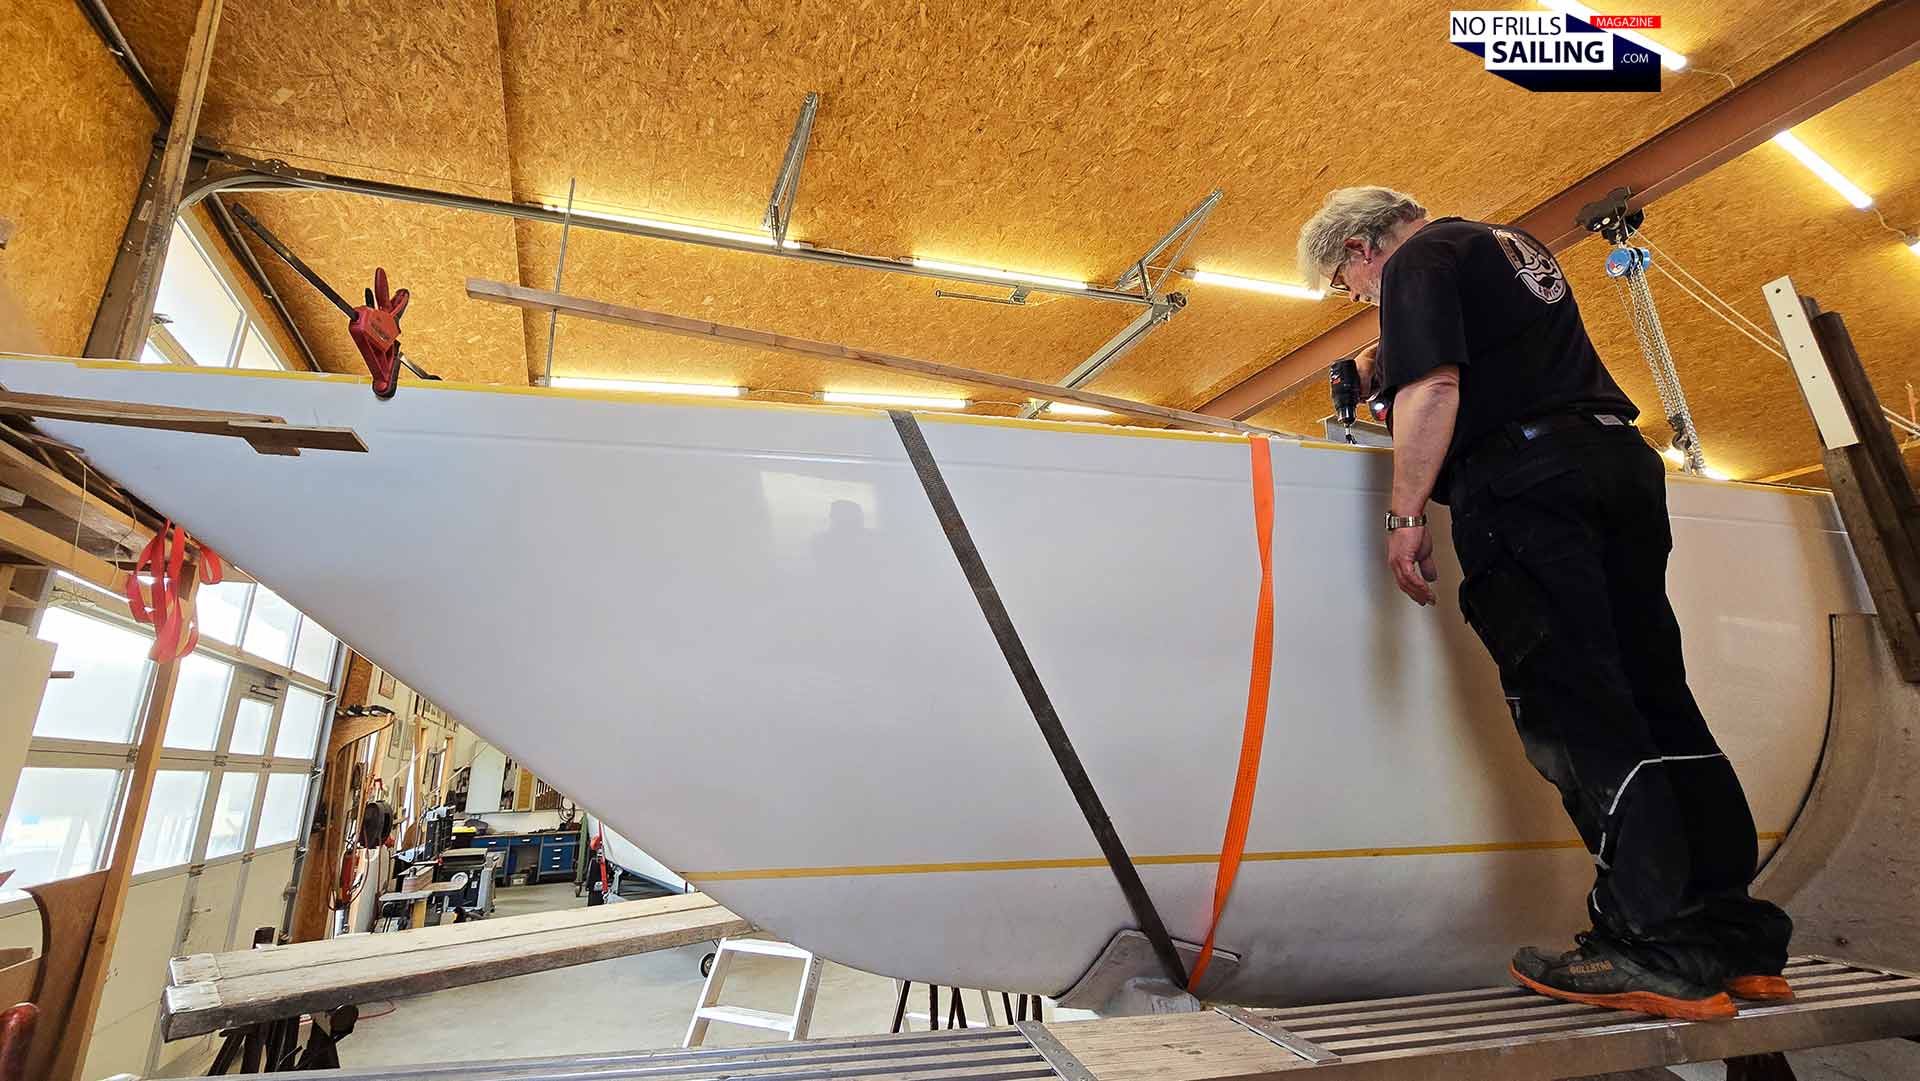
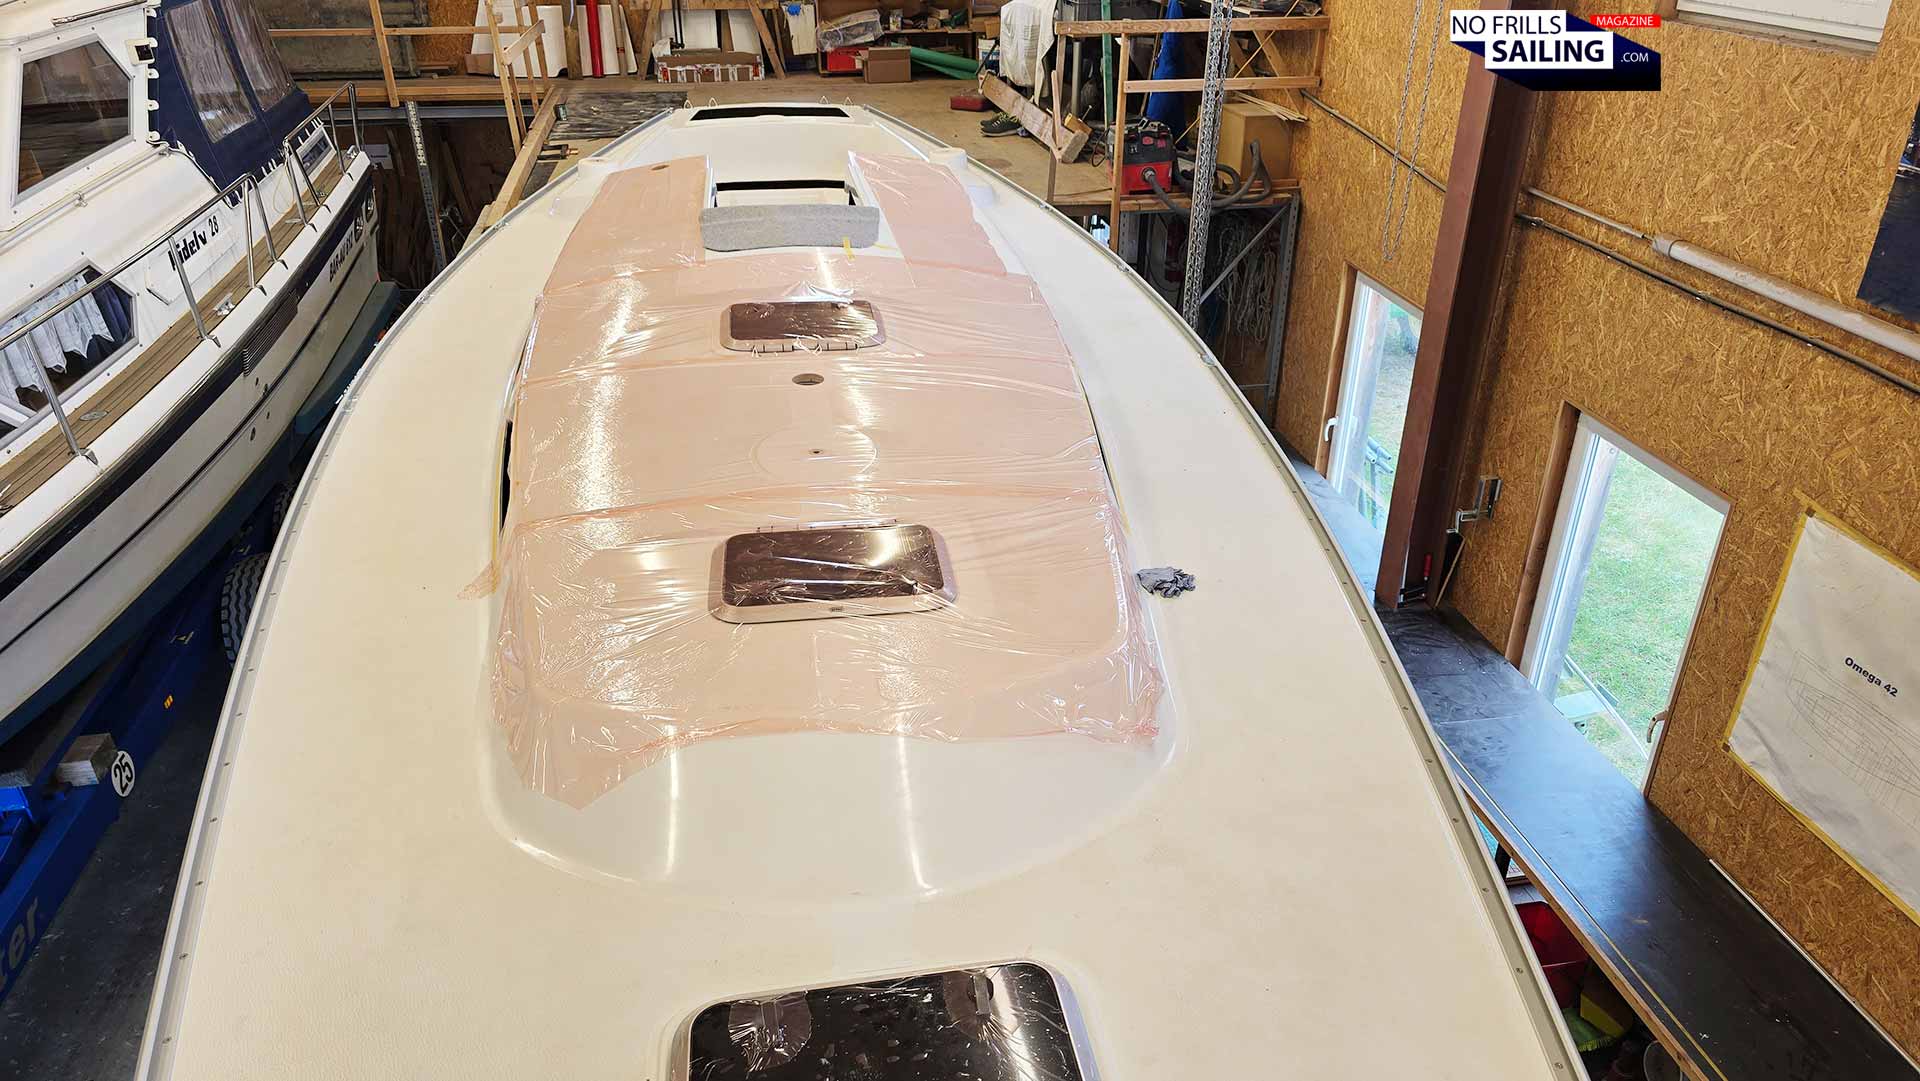
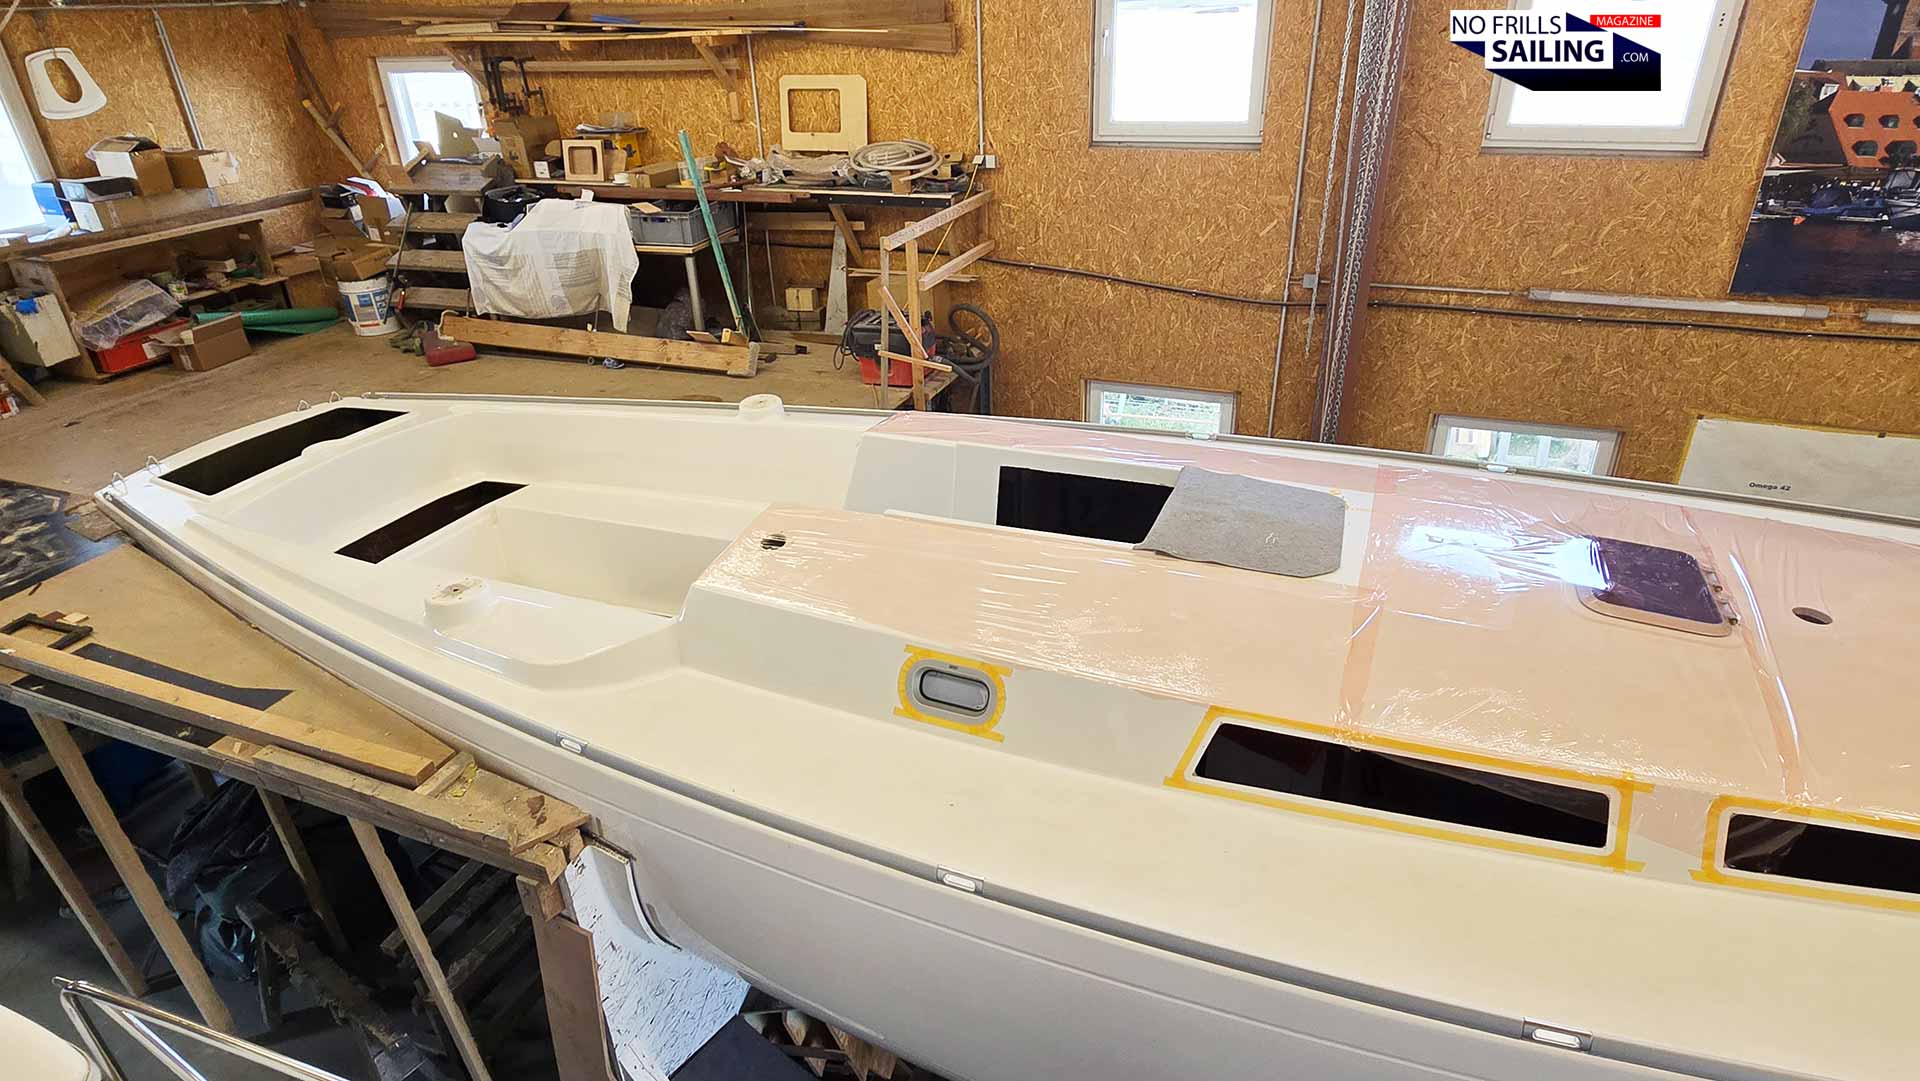
Admiring Peter Norlin´s tempting design
I was both thankful and absolutely delighted! Now, for the first time, you can clearly see the neat, sleek lines of Peter Norlin´s masterpiece! With the deck attached, for the first time, the immense pointy and sharp bow with its extreme overhang becomes palpable, revealing the nature of this yacht, and her sailing character. She is a beauty, indeed, and I congratulated myself a thousand times for my buying decision. Truly, this is no ordinary yacht, for sure! I would post another hundred pictures of her, just because she is so beautiful … but let´s go on.
Is it perfectly even?
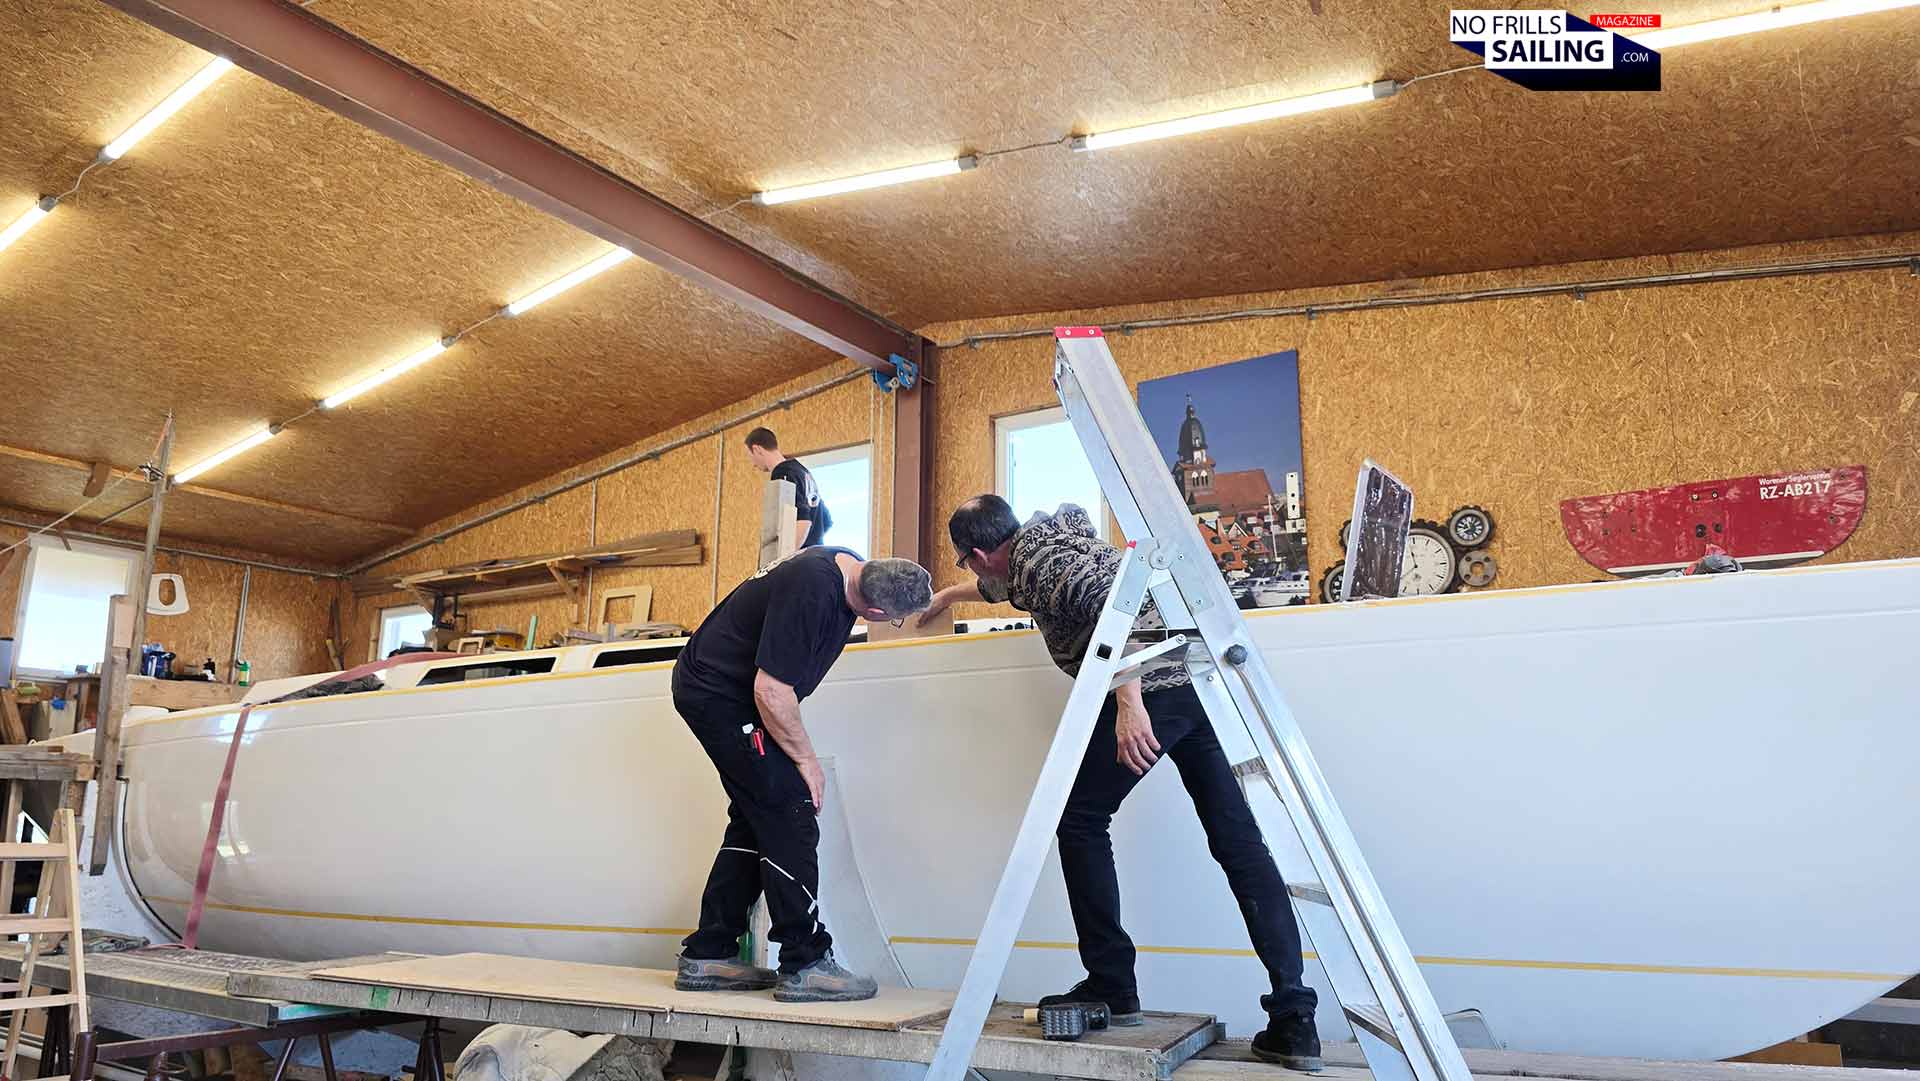
After the lunch break, it was Heiner and Jonas, the master boatbuilder for this project, who briefed the team for the second step to come. Not that the guys needed it – of course they knew perfectly well what was up next – but both reminded them of the importance of working most accurately and clean. Even if time was not as critical as during the glueing-phase, their skills and craftsmanship was needed even more. “But what are the next steps?”, you might ask yourself: After all the deck is securely glued and tightly fitted by the nuts, right? Well, it´s far from over, rather: The most time-intense production step is coming up.
It´s not over yet!
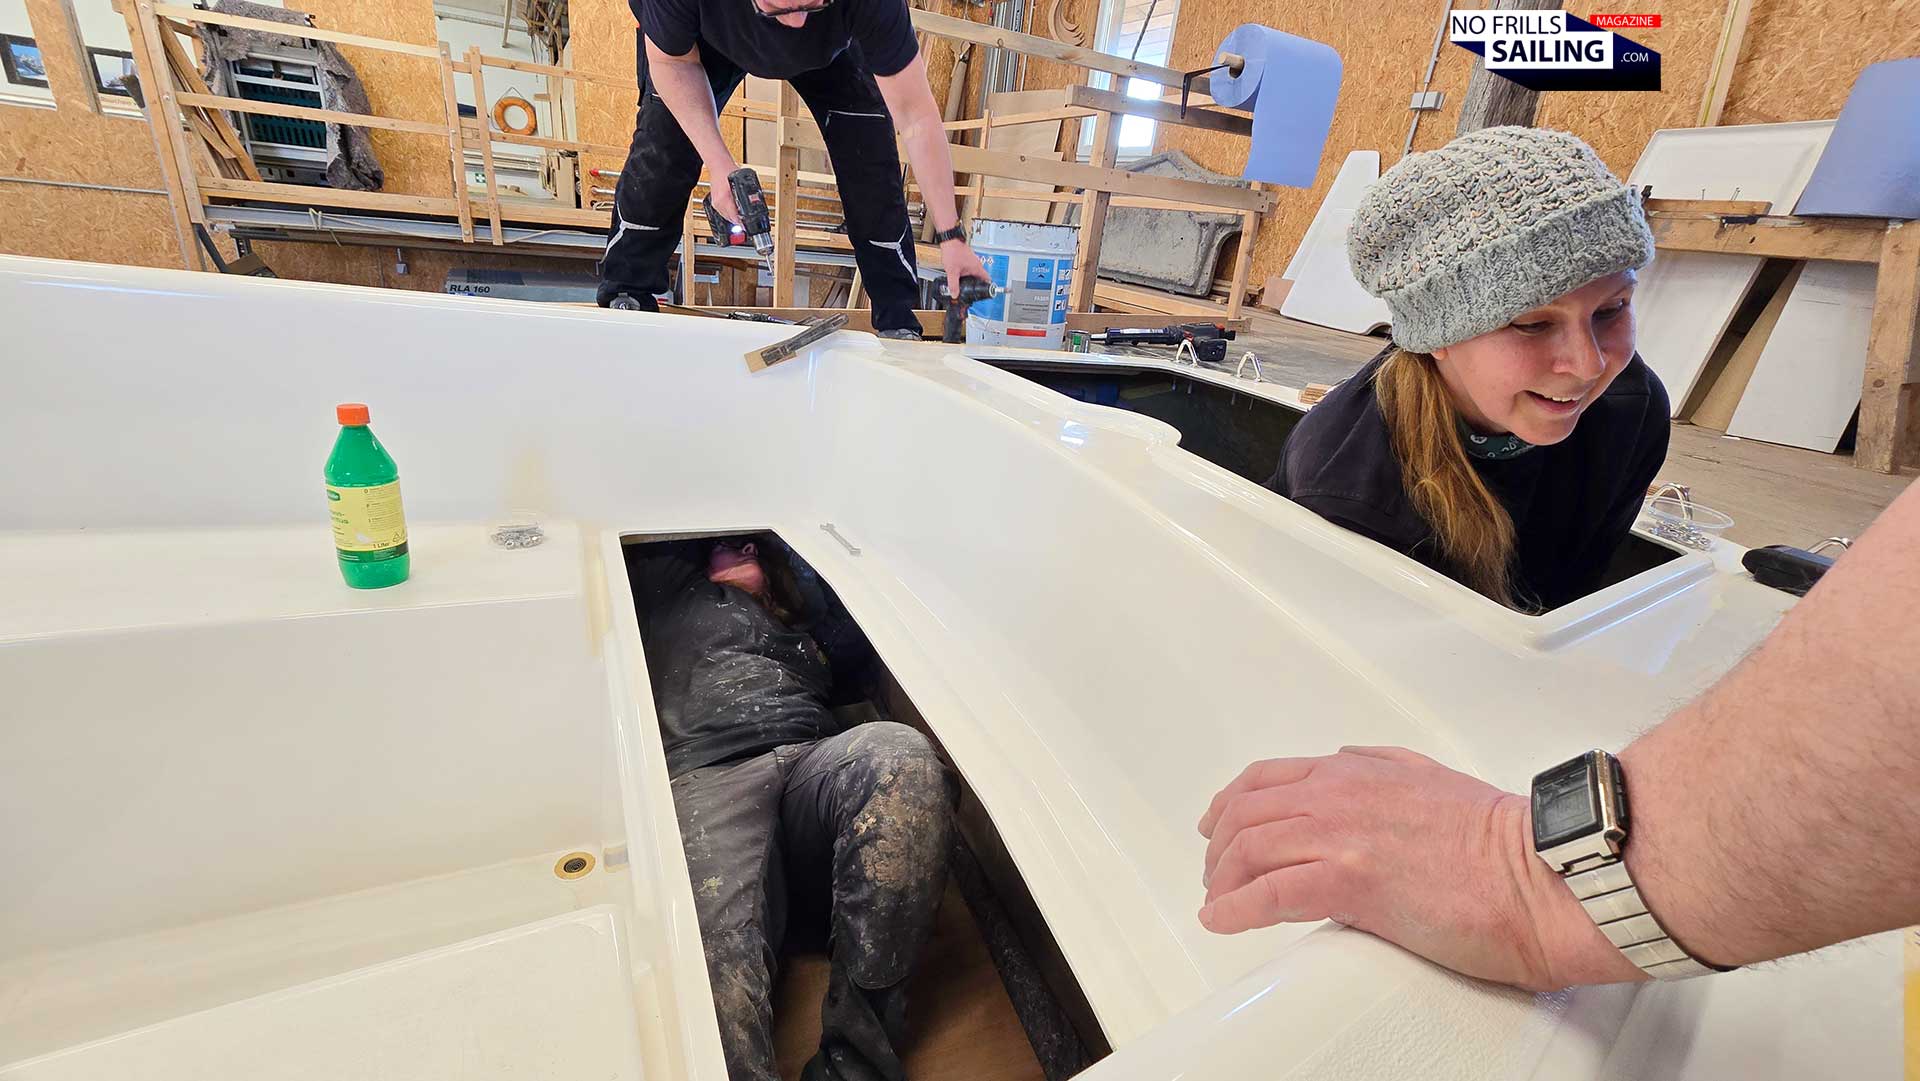
The two female boatbuilders, who had been countering the nuts from below deck whilst the guys had tightened them from the outside, went down for a last time to check their work. Then they re-emerged, happy, that it was now over. Down below, I could imagine, it was rather dark, hot and cramped. At least when you have to wear safety work clothes, thick steel-capped safety shoes and in some areas breathing masks. Opening all of the hatches did not help much.
The ladies re-appear from down below.
By means of a long, perfectly even bubble level they checked for any inconsistencies, bulges or cones that might have been developing. A few revolutions tightened too much and the nut would create a “cone”. A few too less and there would be a bulge. In a miniscule process the guys now went from the anchor locker in the front all the way back to make sure that the deck would be leveled. And there was still more to do.
Accurate work: Super less surplus glue
As it turned out, all of the bolts in the fore cabin, the stowage, the salon and for most of the galley and nav-station had been fitted. Everything was fine. But there were a few in the stern section of the yacht still missing. As the glue vulcanizes, the time window when it would be still kind of fluid and shapeable was closing. Jonas called upon the team to resume work and they joined in: Let´s do this!
Fitting of the last – and most complicated – bolts
I felt a bit sorry for the ladies, as they again seem to getting assigned the worst job. Like they had done in the boat´s front, the ladies had to squeeze themselves into the aft stowage lockers. And this in the most neck breaking awkward positions: As usual, the task was to counter the bolts with a washer and a nut whilst the guys from above would tighten them ever so slightly.
The ladies have to go down under again …
At least now I know which awesome volume of stowage my boat offers in the cockpit, I thought, feeling really pity for them. But, they pulled it off and did it: In a few minutes the last remaining bolts were applied and tightened, and I really could see how much of a relief it was for them as they climbed out of the aft lockers. Then it was Jonas´ turn again, as he already placed a couple of metal parts ready to be fitted.
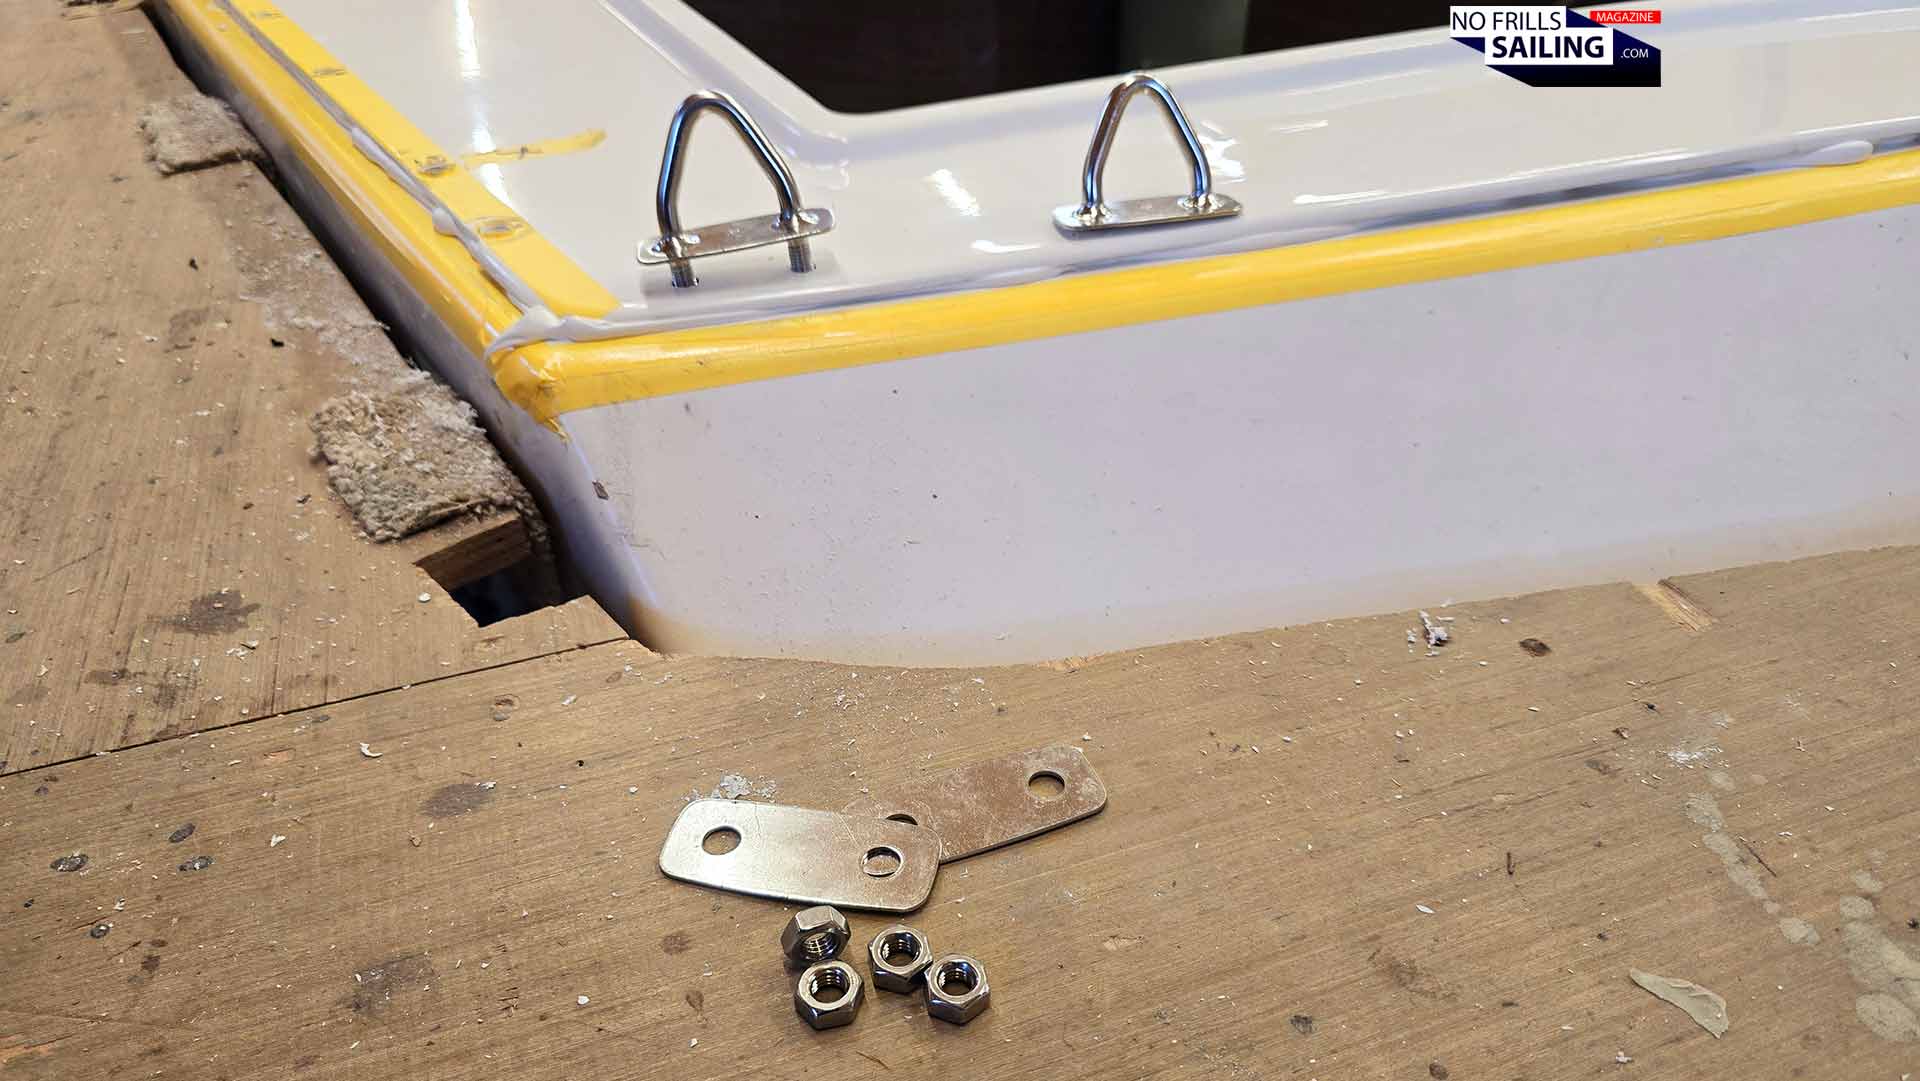
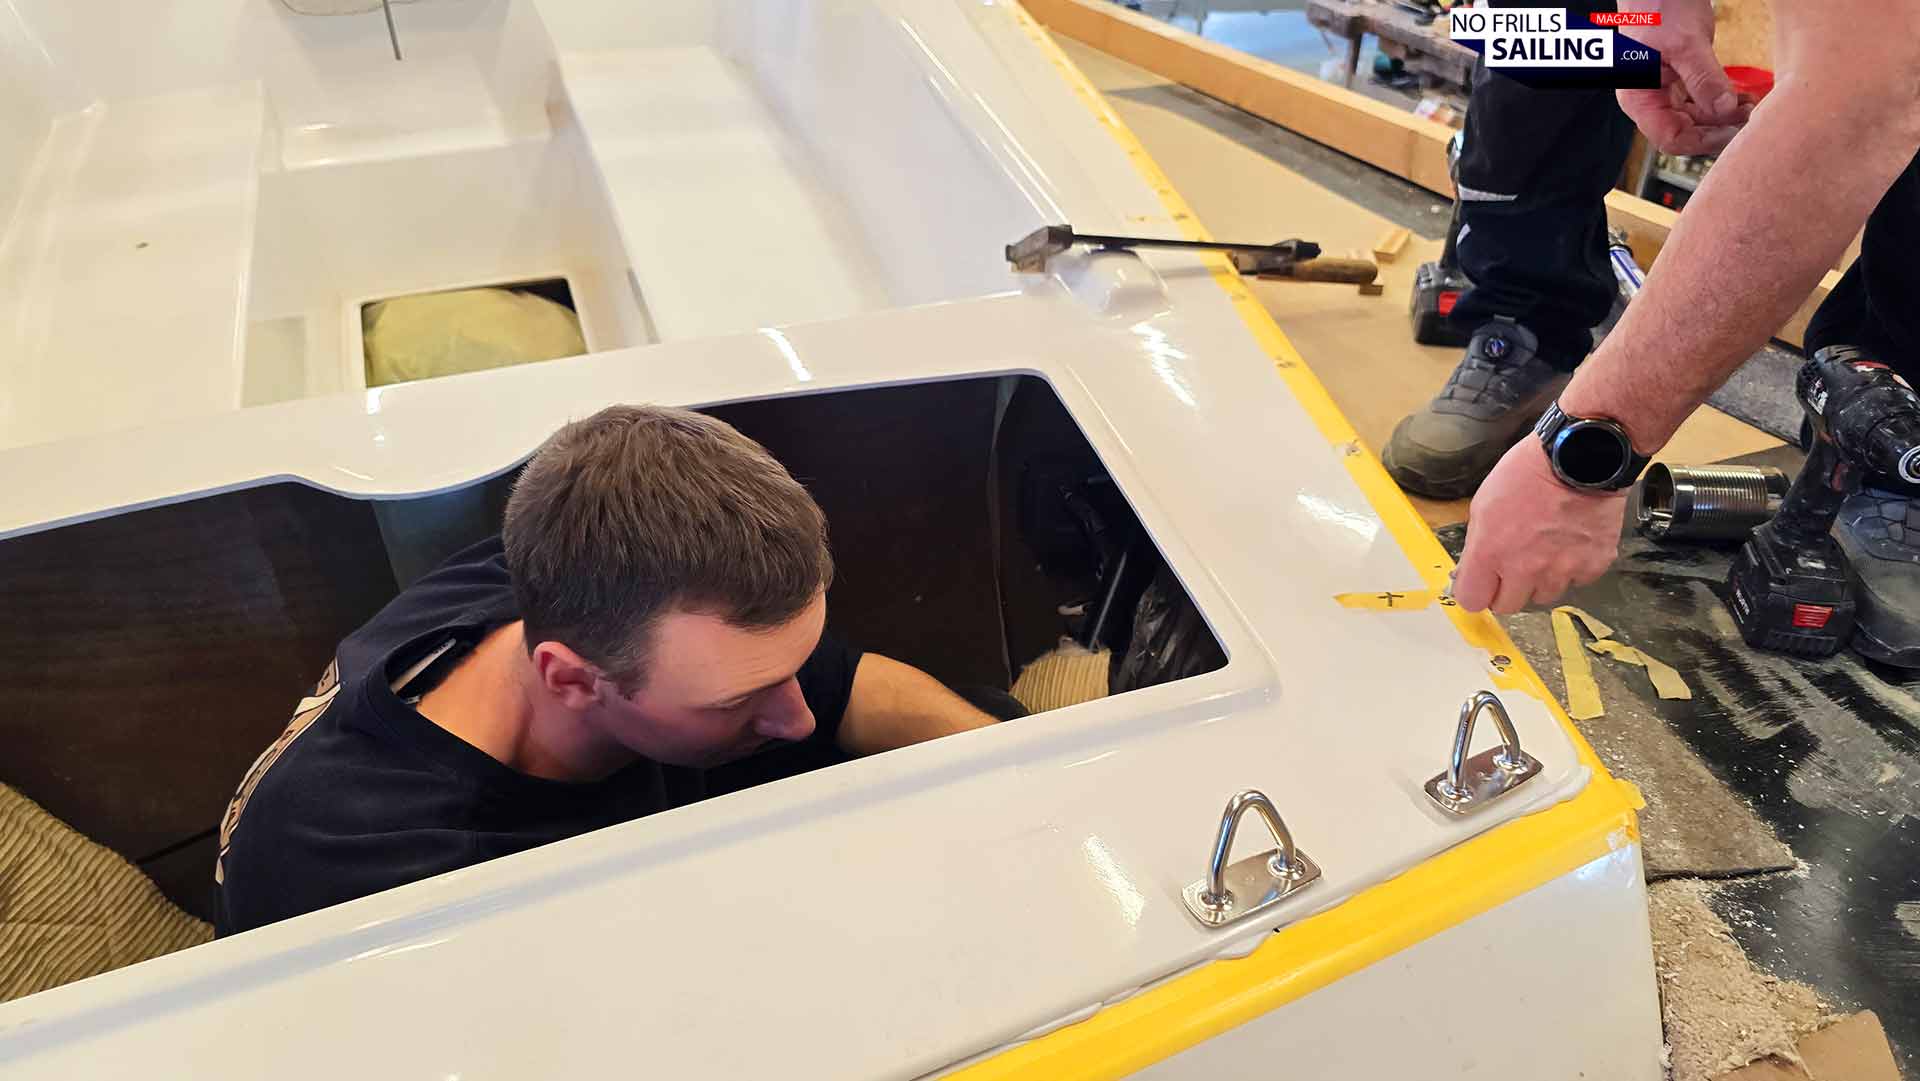
Fitting the backstay fairleads
These were the very first parts of the standing (and partially also the running) rigging of my boat. The Omega 42 features a mast with a running backstay that must be loosened and tightened, depending on the tack you´re on and the point of sail. Here we had the fairleads, massive stainless steel rings with their corresponding washers to counter from beneath.
Jonas´s job
Jonas wouldn´t give that job away, jumped into the aft locker and started to fit these parts. It may seem like a little details, not worth mentioning, but it´s not: For the coming week there´s a visit planned from Sören, working for the German importer of Seldén masts: Sören will meticulously gauge the boat to measure the dimensions of the boat´s rigging before my mast will enter production in Sweden at the Seldén factory. For that to do, he needs all attachment points for the standing rigging to be fitted: Chainplates, forestay chainplate and – of course – the aft fitting points. As well as the mast foot, of course. But that will be another story: Stay tuned for that one too! So, back to the boat.
Cleaning and prepping for the next step of procedure
Before the next big step of the hull-deck joining process could be kicked off, it was time to clean the boat from the surplus glue and dirt. It´s a shame I wasn´t allowed to show how the mating process is done in a series production shipyard (as I had mentioned before, I have documented this at a Beneteau factory a year ago or so), because I would be able to refer to their techniques. Back then, as the French guys were mating an Oceanis 51.1, the amount surplus glue that was coming out to either sides of the boat´s hull was staggering!
Let´s get prepared for the next step!
But now, having seen how the guys here do it, I know why: At Beneteau (and I am guessing that´s the same with almost all the other modern shipbuilders) they solely rely on the bonding capacity of the chemical agent alone. There is no bolting – at least not the amount of bolts used for my yacht. If I remember correctly, at Beneteau, the only bolts driven through between hull and deck were the mooring cleats. That´s it. So, of course, they over-used glue just so that it would bond 100 per cent.
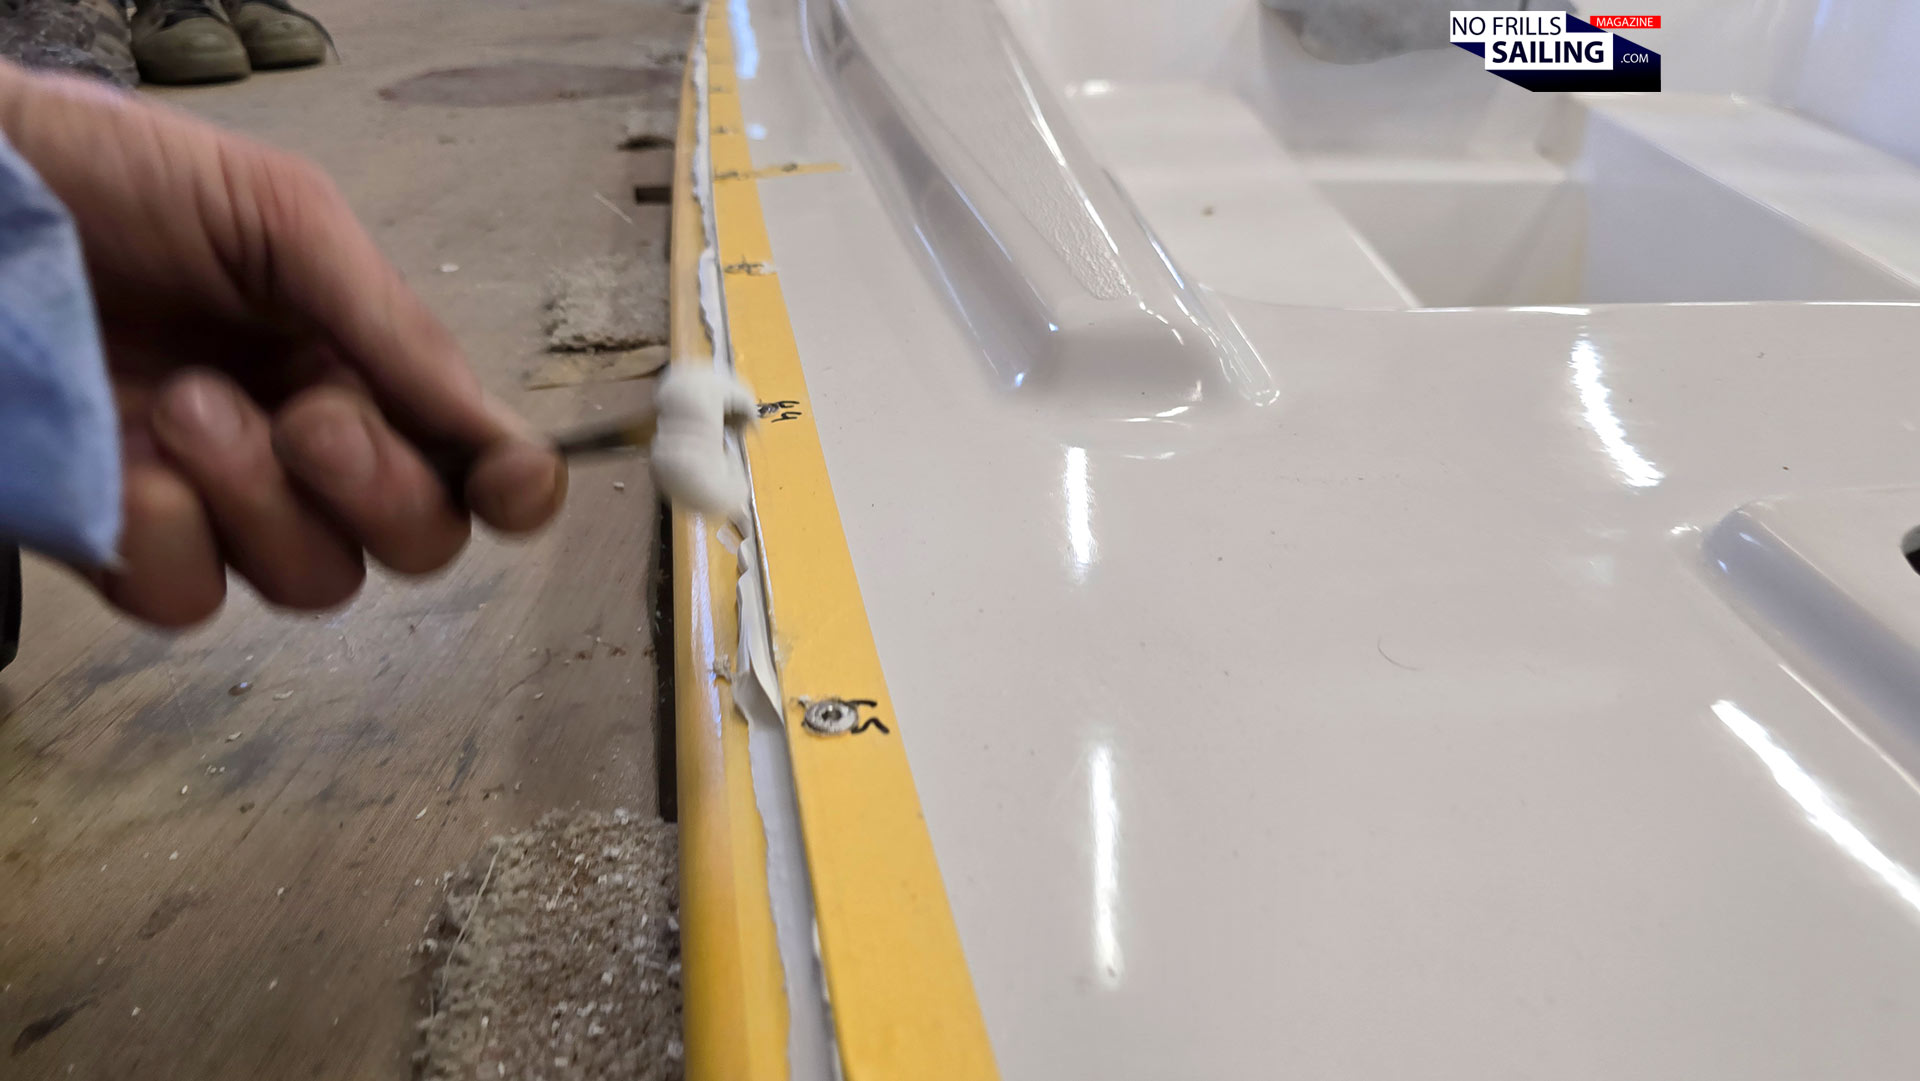
Removing surplus glue
Jonas and the gang started to scrape off the overlaying glue. As a matter of fact, they partially had to cut it with a carpet knife, it was hardening and bonding so fast! It´s really a work against a ticking clock. But as Heiner explained to me, utilizing Sikaflex instead of epoxy resin has its advantages too: If they had chosen the “classic” way, they would have needed a person mixing resin and hardener all the time, delivering a fresh round of bonding agent to the teams on the yacht: Providing a mix that would always have the precisely same proportion of hardener and resin is a task of its own, he says. Very stressful and much of the pressure lasts on those shoulders. Judging from the feedback, the team preferred the Sika-way.
… headache potential!
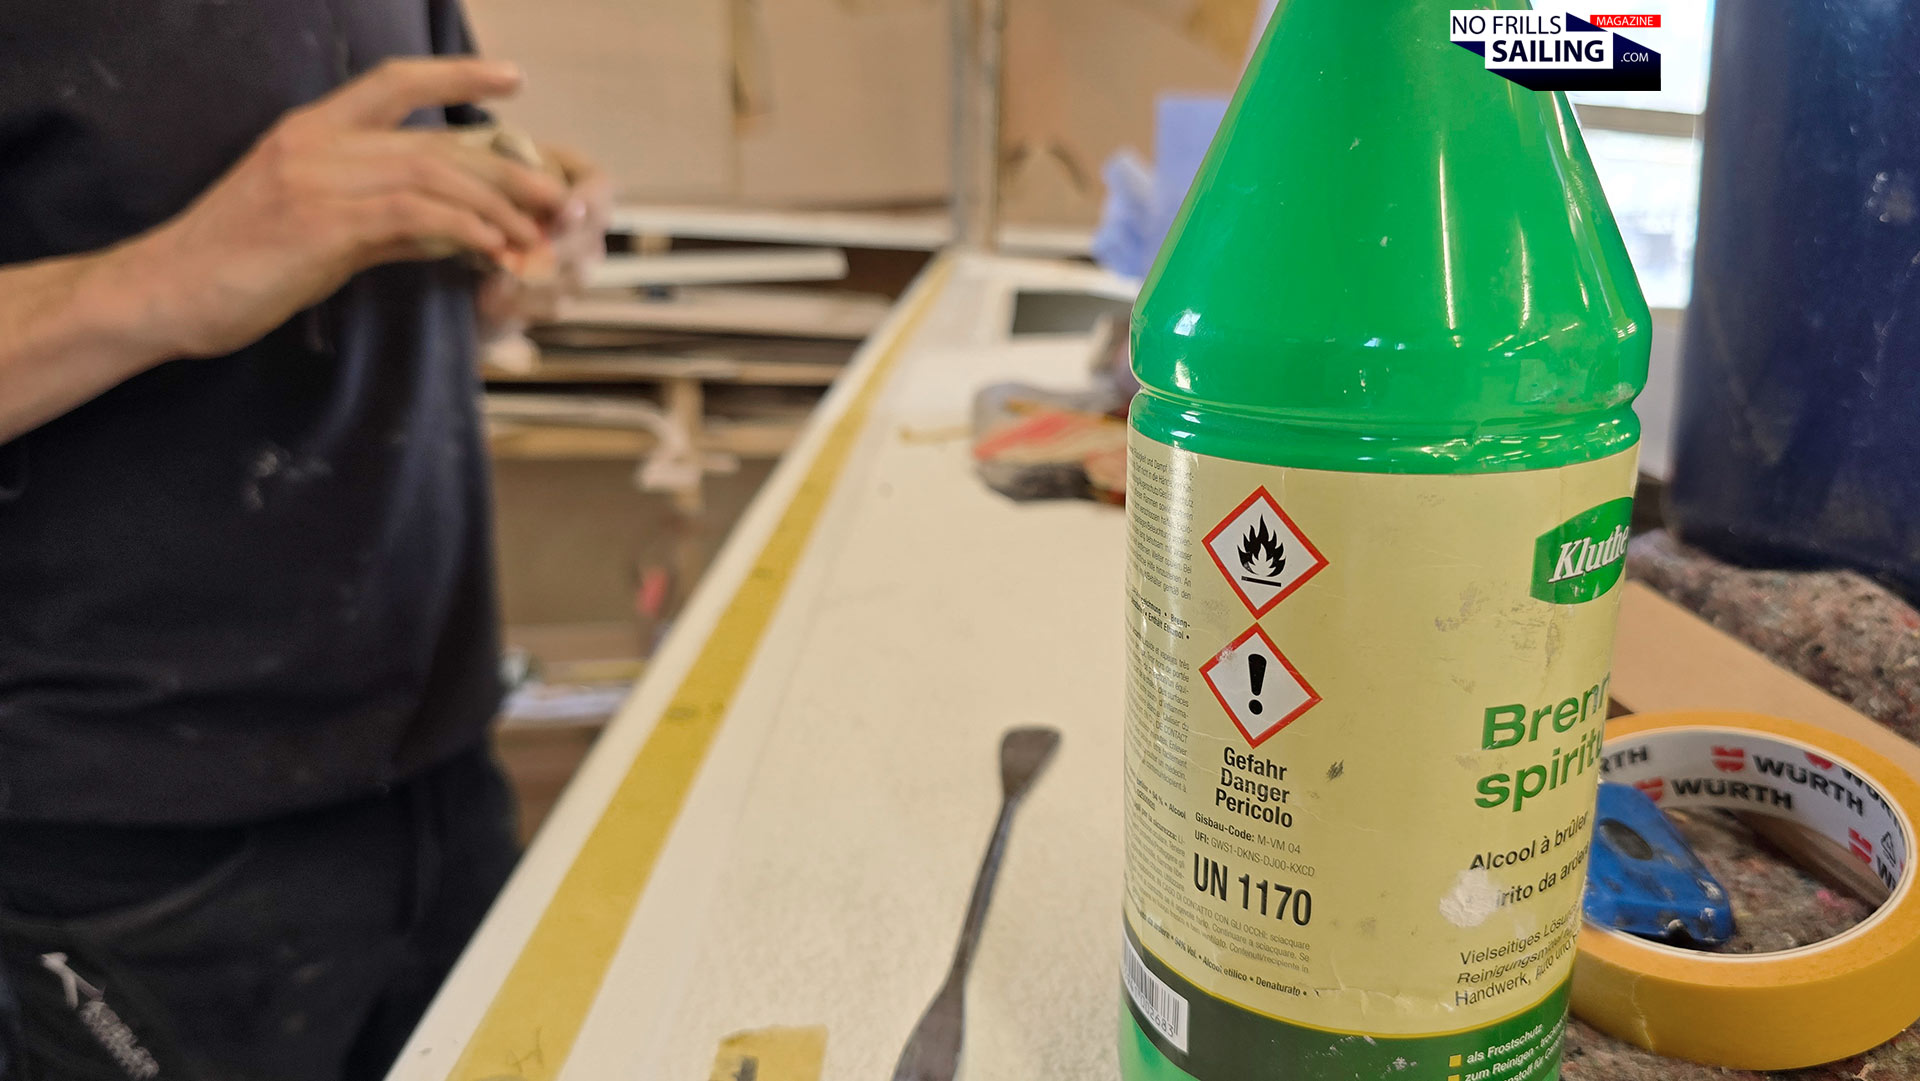
As for me, a nasty headache was setting in. No wonder, facing all the chemical scents, with the sharp stench of ethyl alcohol now setting in. It flooded the proximity of the boat as the guys started to peel off the masking tape and cleaned the gelcoat from overlaying Sika. I don´t know how many bottles of this spirit had been used, but I took the chance to have a snack outside myself and catch a bit of fresh air. Because what followed after cleaning, I didn´t want to miss: The fitting of the toe-rails!
Why toe-rails are almost obsolete nowadays
So that´s a bit of a classic here too. Modern sailboats very rarely come with a toe rail nowadays and there´s a reason for it. As the chemical industry came up with better and better types of glue, the need for mechanically attaching the deck to the hull was ridiculed. As I mentioned earlier in respect to Beneteau, modern day series production boats are almost all glued, when it comes to the hull-deck joint. Only a few bolts are utilized for applying surplus mechanical force, mainly those of the mooring cleats.
This is how the toe rail is fitted
This makes sense: As surprisingly fast as the guys had fitted the deck up to now, as elaborate and (time-)expensive this undertaking has been! Almost three hours to glue and bolt the deck to the hull for the first step. Spoiler: It will take the five boatbuilders another five (!) hours to fit the toe rail! So that´s a full working day for five people just for the marriage of hull and deck of a 42-footer! On the contrary, mating the deck of the Oceanis 51.1 (that´s 50 feet!) lasted no longer than 45 minutes back in France, of course, with a team double that size. But anyway, much, much shorter – hence much, much less expensive! And that´s the true reason why modern yachts do not feature a classy toe rail anymore: It´s cheaper and faster without, enabled by modern high-strength chemical adhesives, for example 2-component polyurethane mastics or structural epoxies for the hull-deck joint. It also saves on weight, clearly, and of course the boat won´t have any corrosion problems afterwards. Lastly, without a toe rail, the clean, neat lines aren´t compromised. And honestly, I just cannot imagine a present-day Hanse or Nautor´s Swan with a metal toe rail … it´s somehow dated.
The advantages of a metal toe-rail
But not for our Omega 42, of course: Here, the classy toe rail is part of the boat´s design and appearance. Not fitting it would not be true to Peter Norlin´s initial design. But we, let´s say, “tweaked” it a bit …
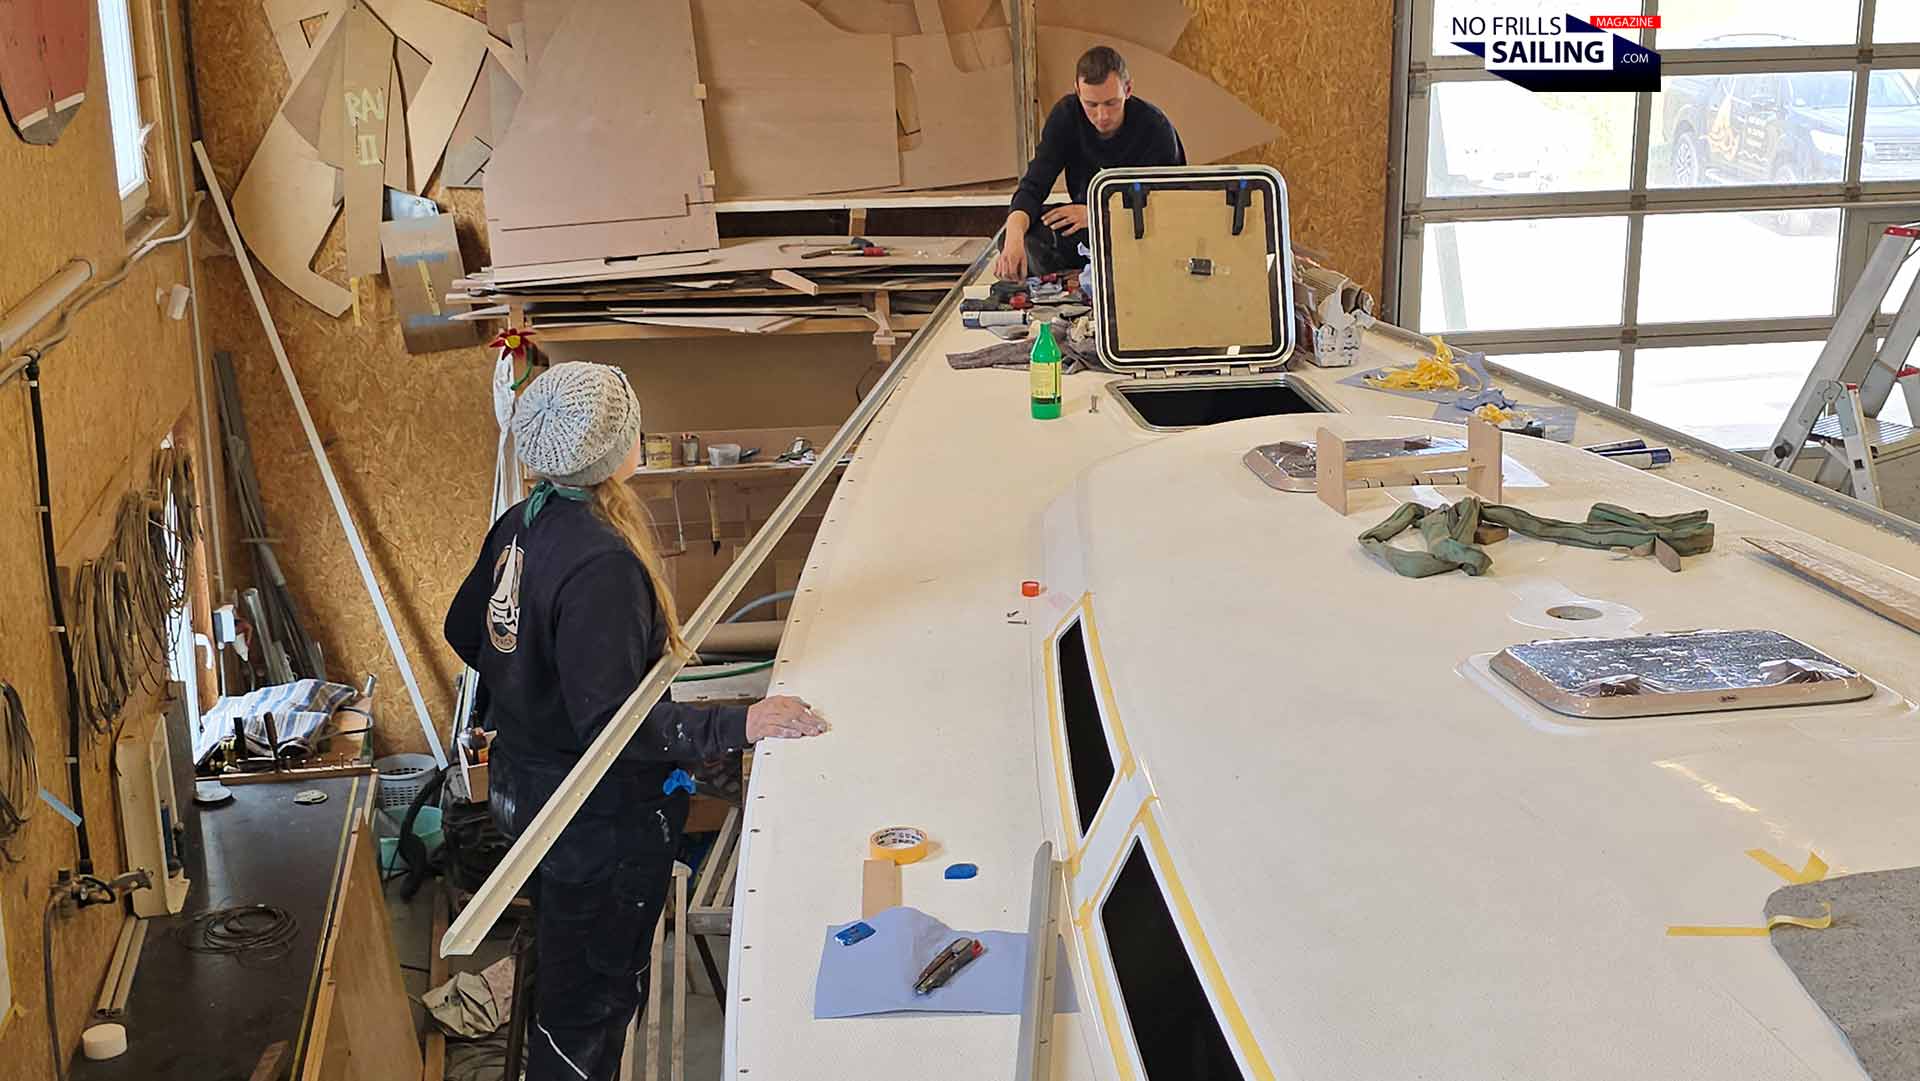
Beginning at the bow
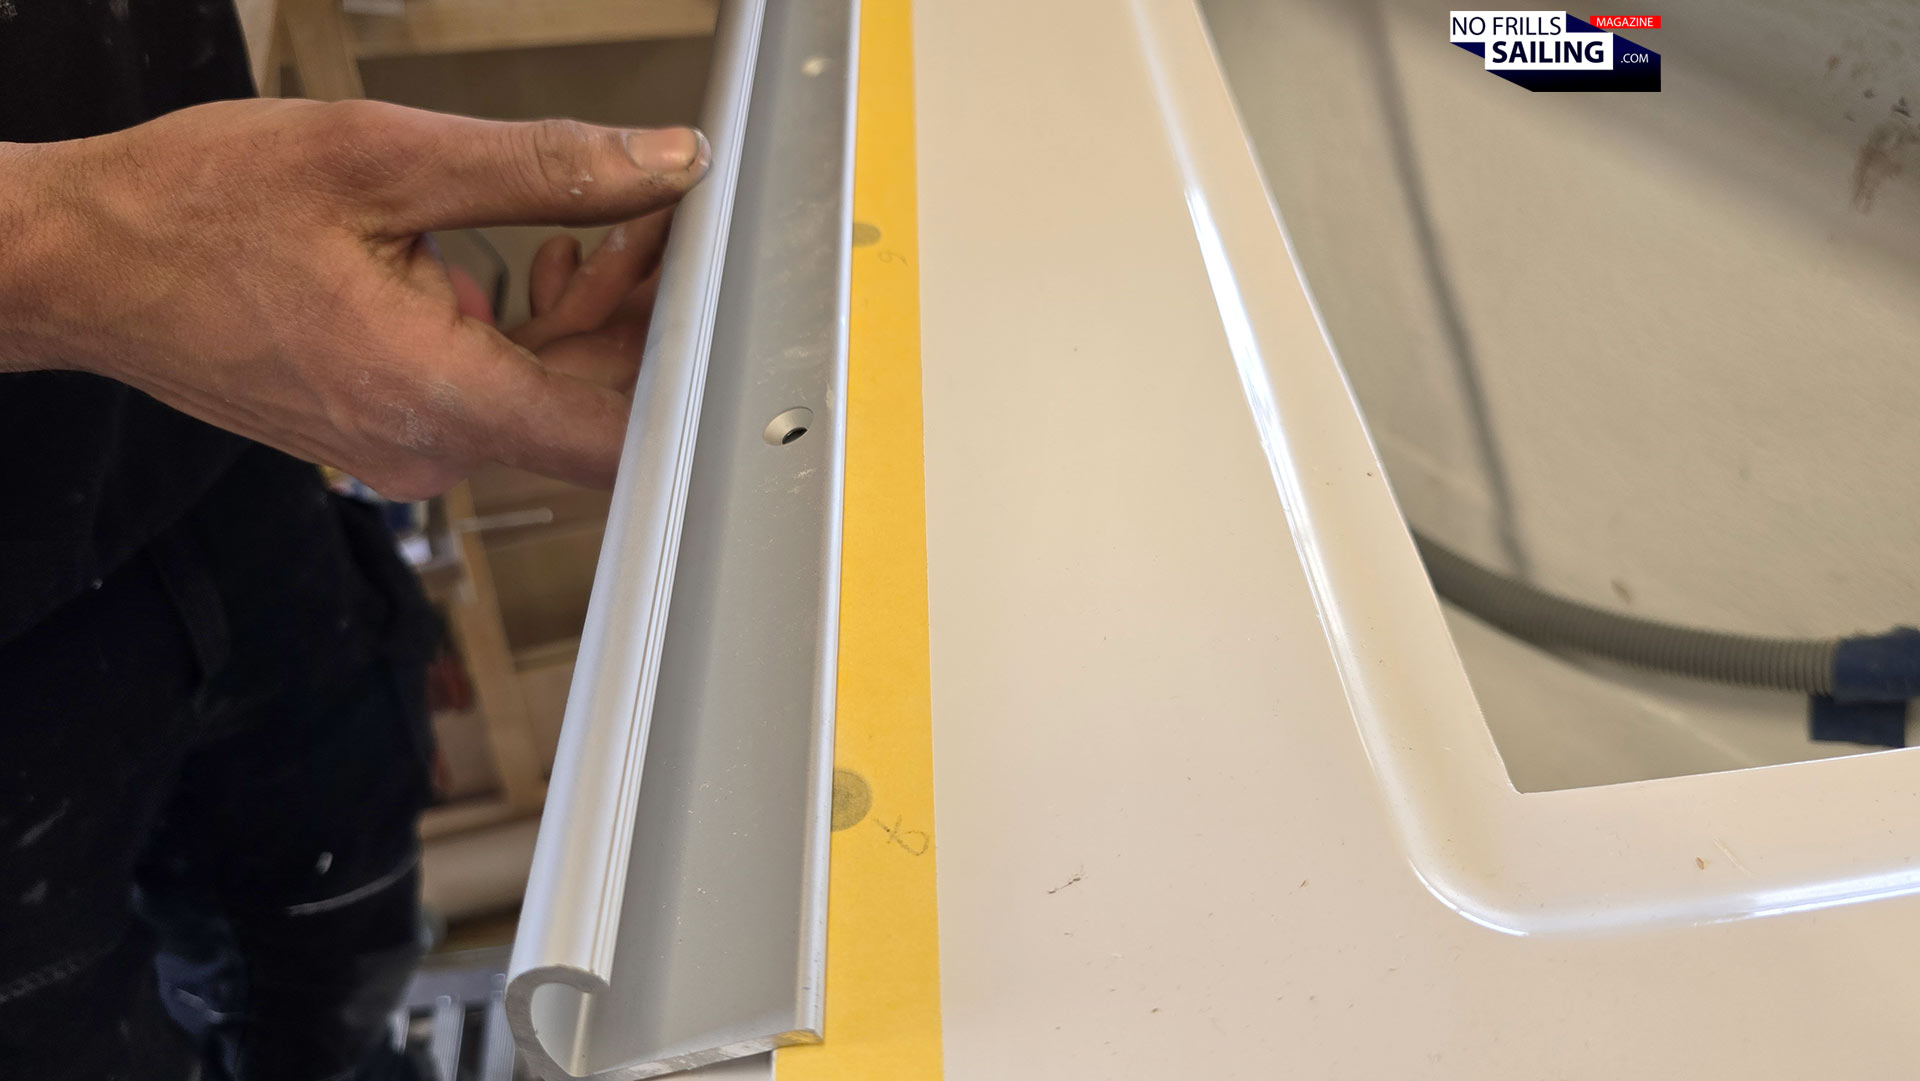
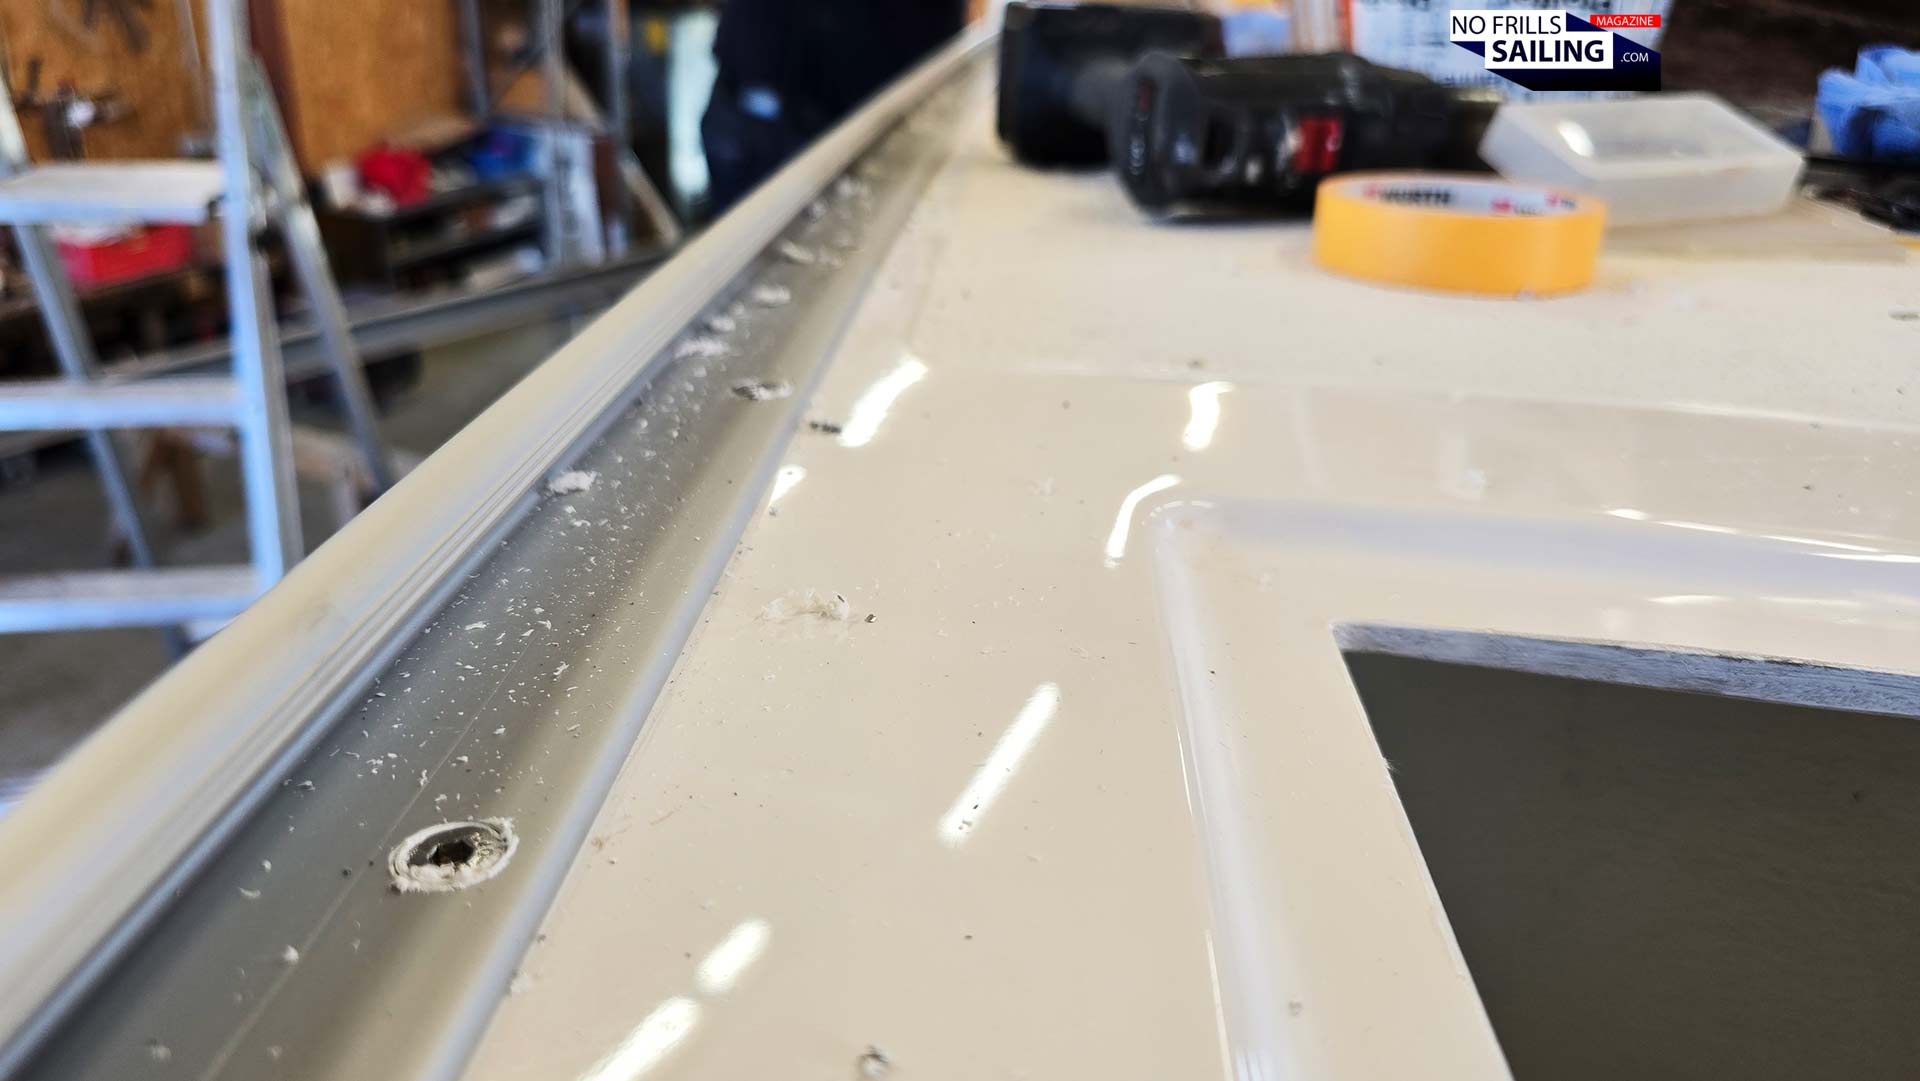
For the first part, we refrained to use the old-fashioned slotted design. Those, which literally had the capacity to break your toe. We went for the modern railing track system by German manufacturer Pfeiffer Marine. They utilize a corrosion-resistant aluminum alloy that had been anodized. The track itself has no slots, but there will be connectors and end-parts at the stern and bow were spray water can easily drain. These connectors at the same time serve as fairleads for the mooring lines to the nice Nomen cleats. So, as you can see, the track itself will also be bolted to the hull, making its way through to the hull, being fastened with washers and nuts as well. That way it serves as another fitting and load-spreader for the hull-deck joint.
Meticulously controlling each and every hole
This means, the guys will now have to drill another 60 or so holes to fit the nuts to fix it. Thus doubling the mechanical attachment points of hull and deck to some 240! Possible uneven areas, the famed “bulges”, will also be flattened out to achieve a perfectly even deck. Later, one of the advantage of having a toe-rail is the protection against sliding gear or feet overboard. On modern yachts this has to be part of the mold, when a toe-rail is part of the laminated deck design.
Challenge accepted: The intricate business of fitting a toe-rail properly
But this technique also comes with downsides, or let´s say, possible disadvantages: Corrosion between the stainless steel nuts and the aluminum rail can happen when not sealed off against each other. Secondly, leakage can occur: One single one of them bore holes is a potential leak in the future, so a toe-railed boat for sure is demanding intensive maintenance or a sharp eye in this respect. But this is all ailing of old yachts, made back in the 70ies till the late 90ies when toe-rails were still en-vogue. I am sure I won´t have problems like these in my Omega.
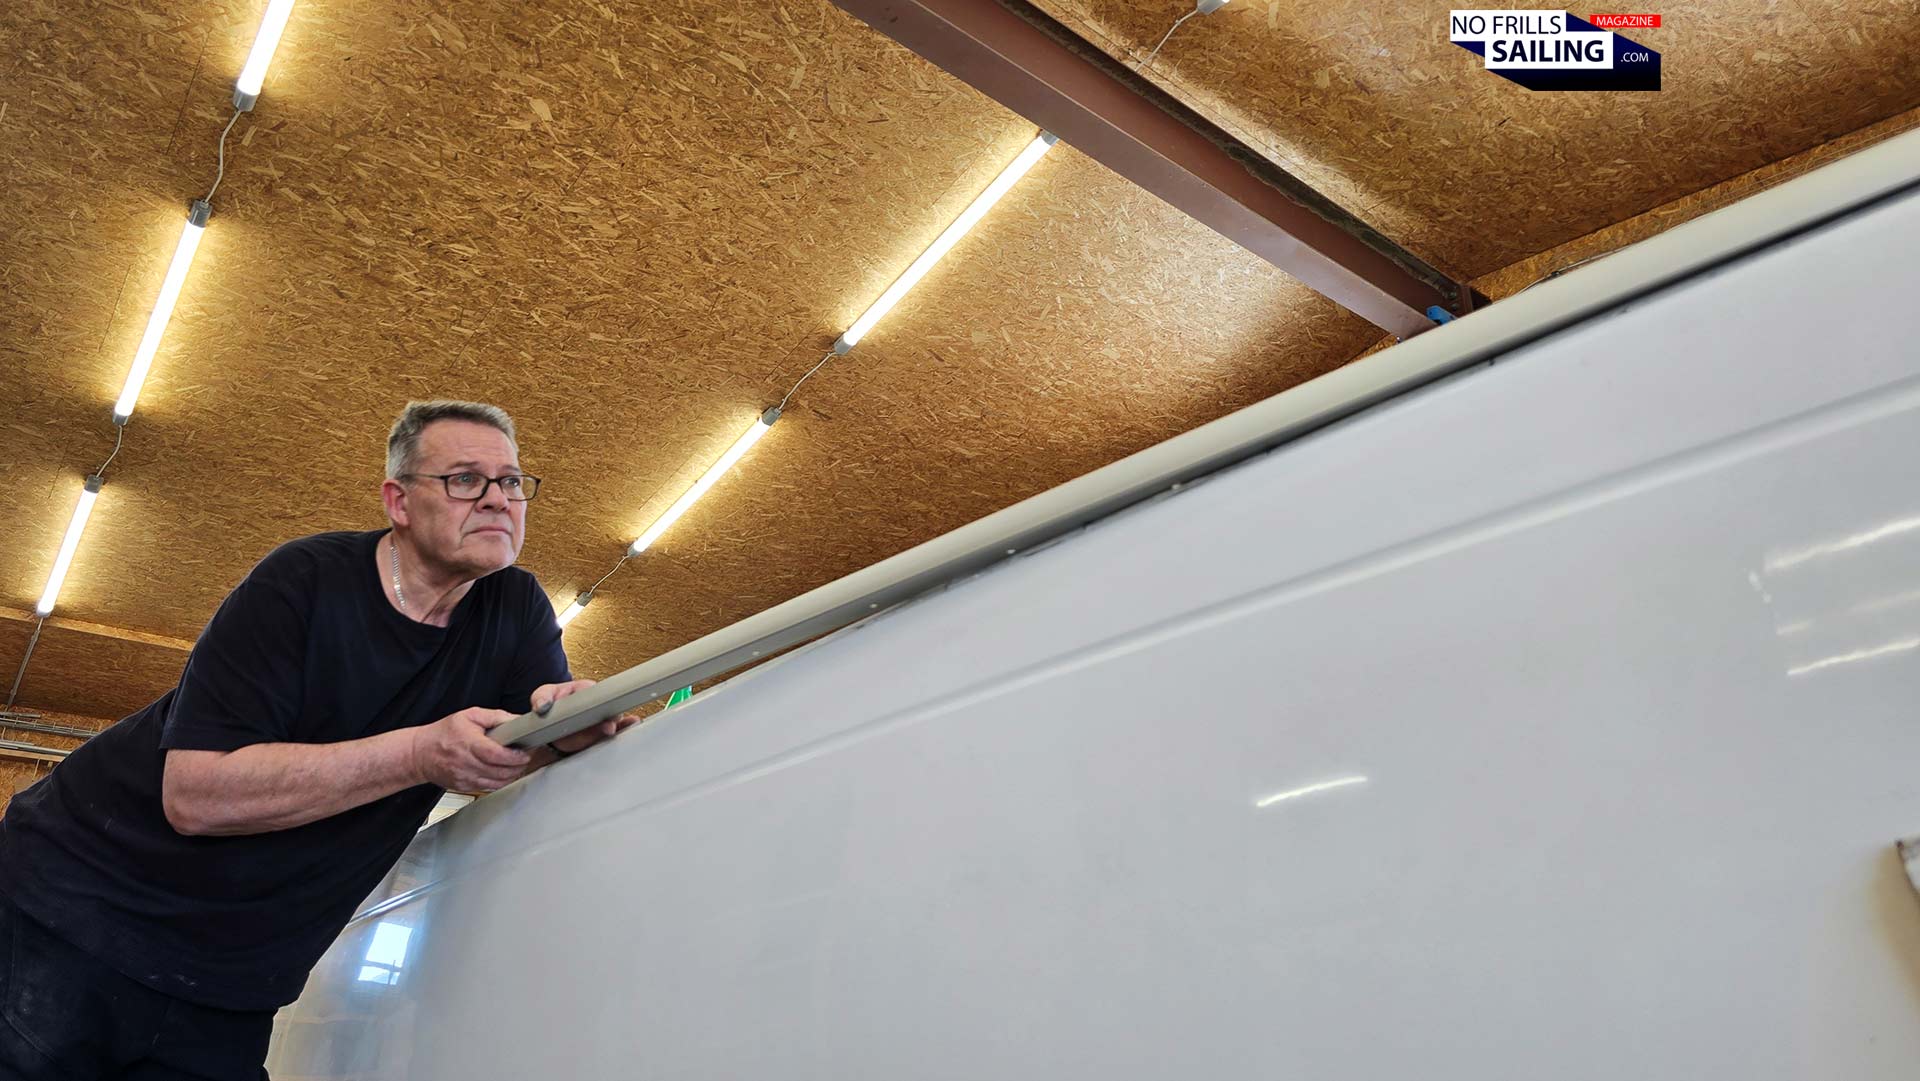
How to make straight things bend?
So, how do they fit the straight aluminum track to a not so straight shape? That´s one of the biggest challenges. Together with the process of drilling each individual hole (something they were able to prepare for the first round after the deck had been glued to the hull) that´s the reason why it took the team so long to finish: We have another five hours to go. Indeed, fitting of the toe-rails was the bulk of today´s jobs related to the marriage.
There´s not all too much pressure needed
After fitting the first two or three nuts and the track-end part to the bow, one of the guys went to the rear end of the still straight track and slowly, cautiously started to bend it all along the curved line of the boat´s hull. For the first third of the boat it all went effortless, they didn´t even need “external” pressure, possibly by lashing straps or c-clamps. The trick was to bend the track to a position when it would fit perfectly for the next hole. Then, the second – drilling and screwing guy – would tell the bending guy to stop, mark the position of the bore hole and release the pressure on the track again. Sometimes, when the bending angle would allow, they would do two, three or more holes in one take.
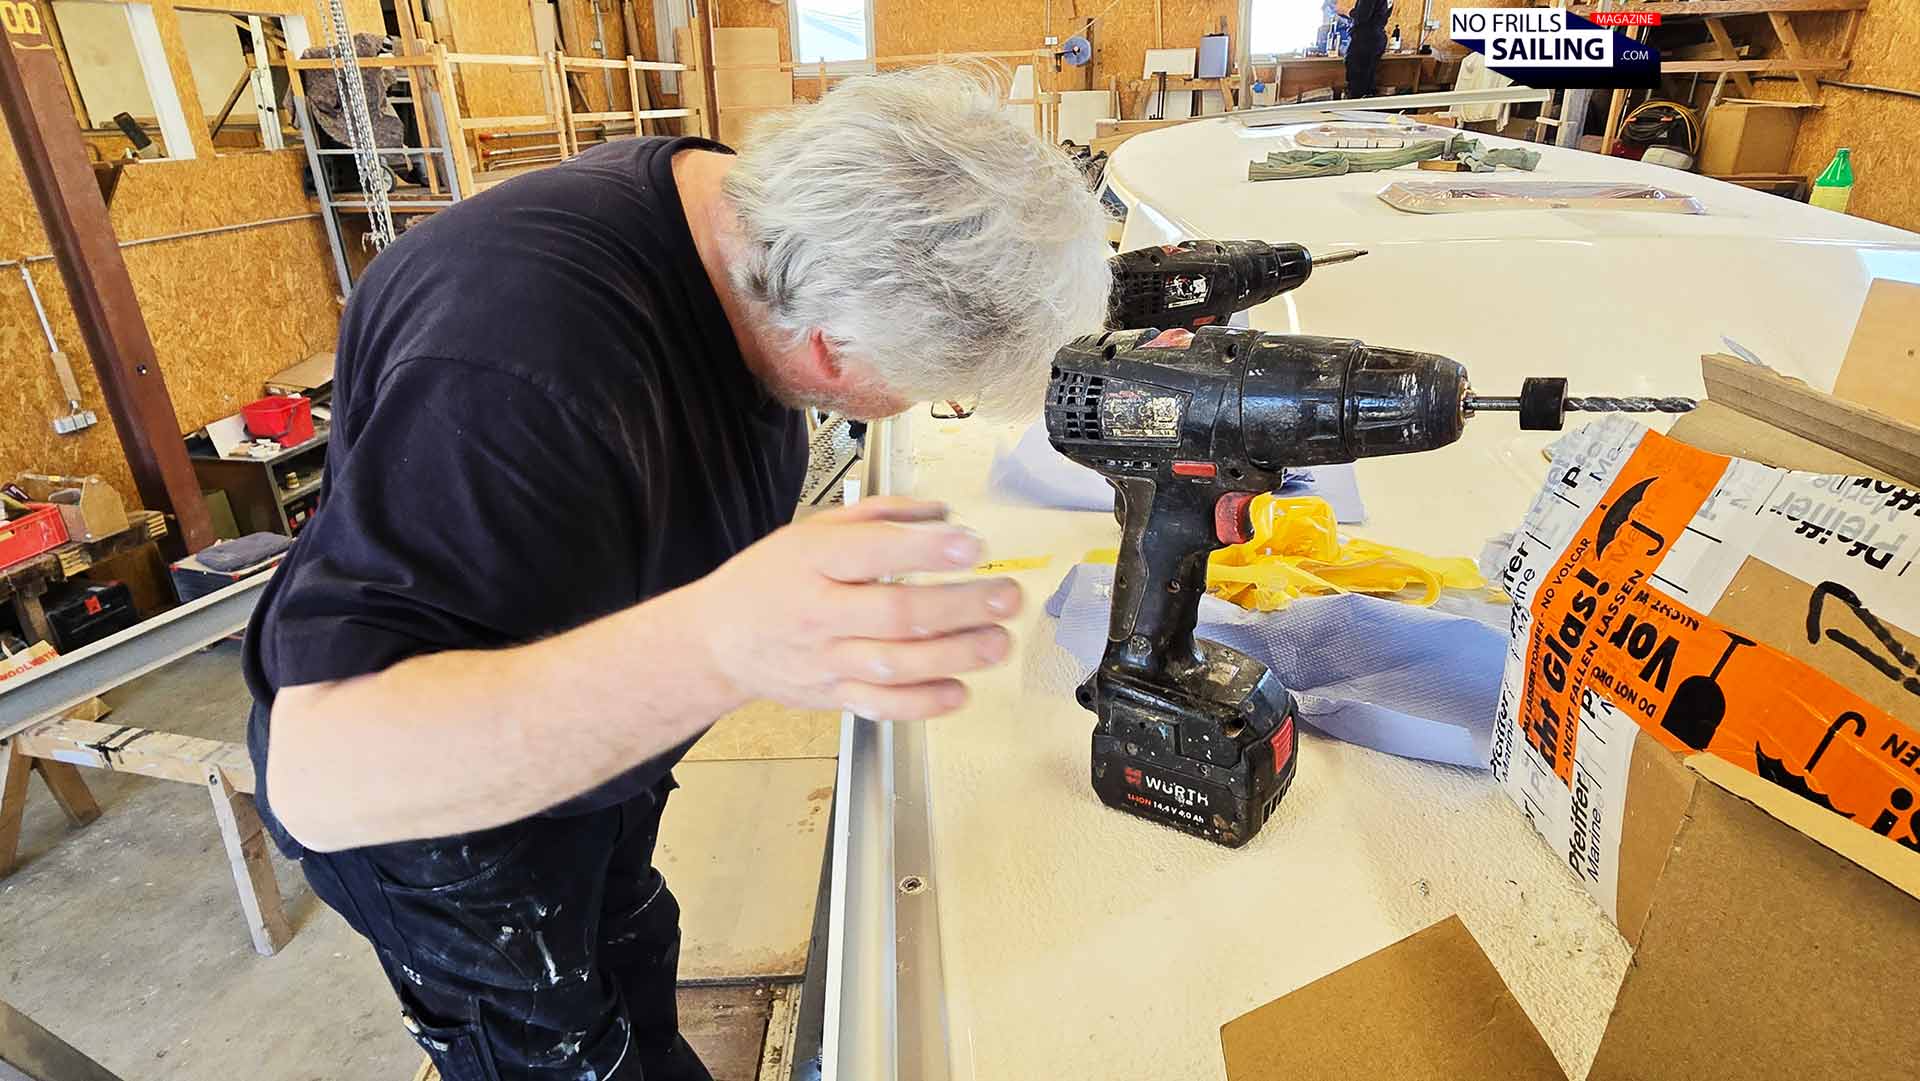
Drilling & controlling …
After thoroughly checking the position of the new holes – appropriately marked to sit exactly in the middle between the already fitted screws from the first round – they would take the drilling machine and go through deck and hull. Cleaning the bore hole, unraveling it and sealing it, it was time to bend the rail again and finally fit the bolts and nuts. As I said, this had to be done for another some 120 times. You can imagine how much effort it is still demanding from the team. As Heiner said for motivation: “Let´s get started ladies and gents, as long as the glue hasn´t hardened!”
The Omega 42 receives the final step of her hull-deck joint
And so the two teams formed up again and begun attaching the toe-rail. I guess it is the same with every task that´s on your list: When you start, it´s still a new thing, no matter how clear the theory is, the practical side of stuff, the literal doing it by your own hands is always another level. But, as professionals, the guys quickly found their rhythm and started to drill and fasten the bolts one by one.
Bolt by bolt the rail gets fitted
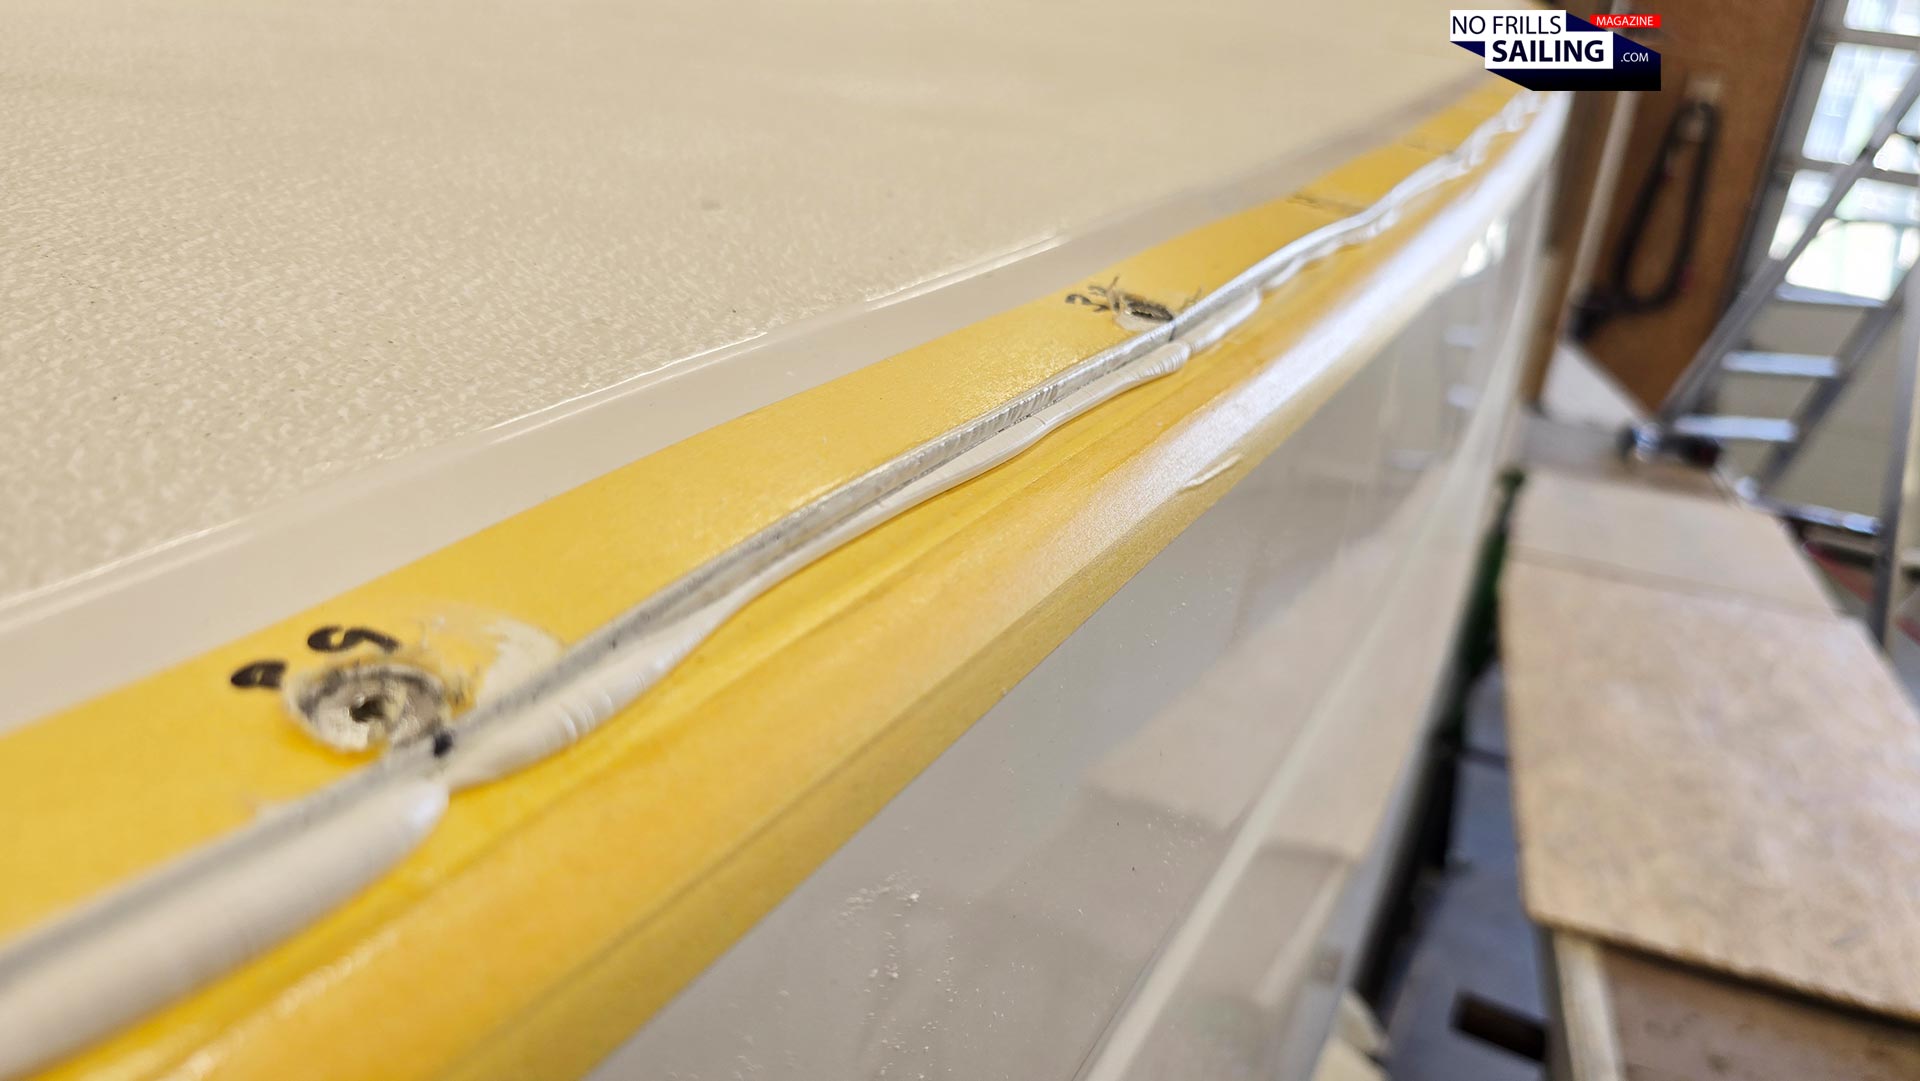
In doing so, the toe-rail took on another function: It corrected the slight imperfections which had been built into the deck and the hull by the laminating shipyard. If you look at the anchor chain locker bulkhead (click here) you will easily spot that the left hand side is a bit “off”, compared to the right hand side of the bulkhead. It´s a mere centimeter, but noticeable. As I said, back in the day, there had not been any CNC-milling machines and programs guiding their precision tools: The mold for the deck and the hull had been itself molded from the male prototype, just as they do in one-off yacht production nowadays as well.
Note the offset bore-holes
Secondly, the shipyard back in Sweden did cut off one or two centimeters too many from the deck´s side so that in some areas it misses the exact outline of the hull. This is something that surely will be corrected once hull #003 (and many more following, I hope) are in production. But as for my boat and the first hull, the toe rail was also used to kind of “cover up” the “missing” millimeters and asymmetric imperfections of hull and deck.
Bolts sealed and tightened
Another point of possible concern could be the utilization of dissimilar metals for this matter: The toe-rail itself is an aluminum alloy, the nuts and bolts are of course made of stainless steel to provide strength and robustness. Now, as we all know, if a nobler metal (in this case the bolts) have direct unshielded contact with a less noble metal, in our case the rail. Then the less noble metal acts as an anode (just like the ones we put on your hull, keel and shaft/saildrive) and corrodes faster to “protect” the nobler metal. It kind of sacrifices itself, hence the name. For two reasons I am pretty sure that this won´t happen (all too fast, for many years to come) to my boat.
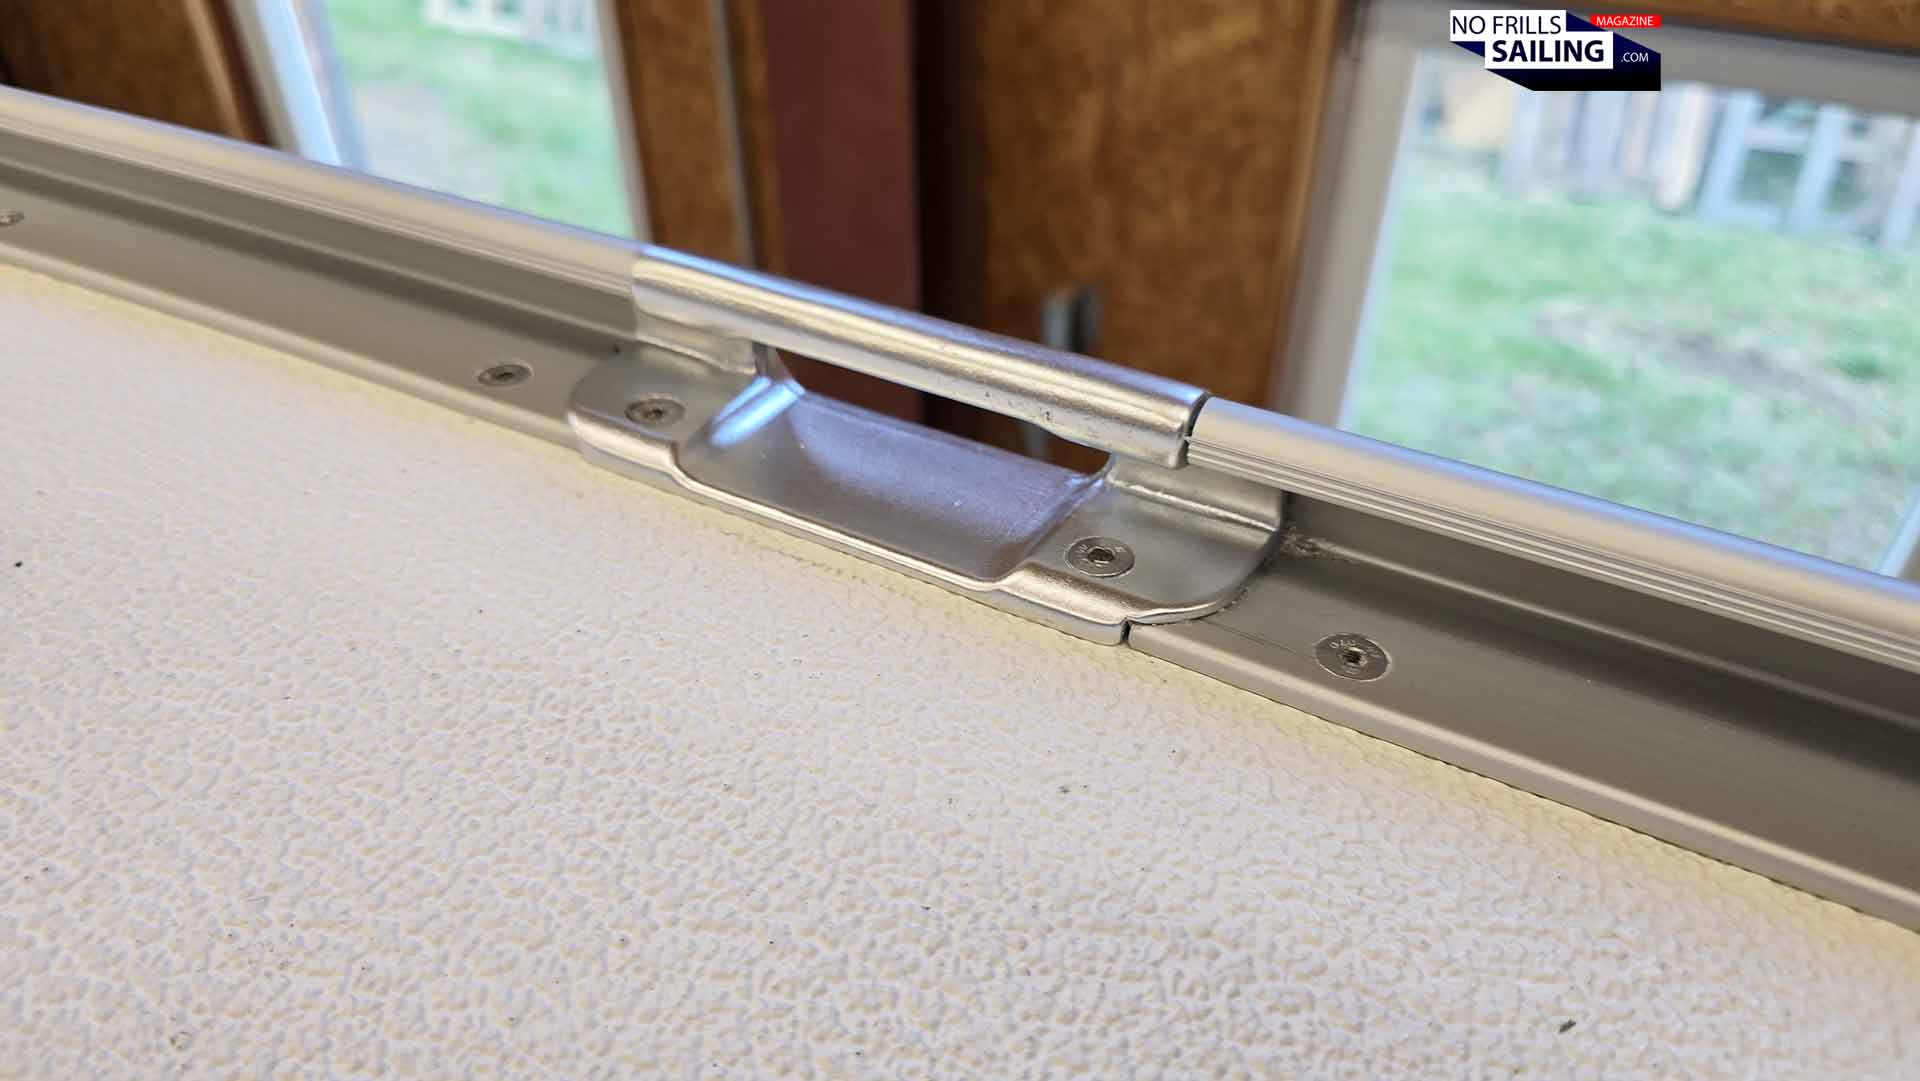
A connector in the middle of the boat
First, the toe rail is anodized which, as the same suggests, takes care of the galvanic corrosion problem. In applying a thick, impenetrable layer of oxide, the pure aluminum ist kind of “shielded” now and will tackle possible corrosion much better. Secondly, the screws had been applied with sealant upon fastening (you can clearly see it in the pictures) which acts as a secondary barrier. We will probably see the outcome in ten years …
Meticulous quality control – is everything plain & even?
As time went by, the two teams worked their way back to the stern. Fitting two more connectors roughly amidships, had a nice effect too: Here, I can put through the spring lines very elegantly which will look absolutely clean and nice, but more so did it ease a bit the bending works necessary to adjust the toe-rail´s curvature. Because here at the center of the boat, the shape becomes a bit too much for bending. Thus, the connectors take off some of the mechanical stress from the rail itself.
We are getting there!
Again, constant checks and balances were needed to make sure that this work is executed in the most accurate way possible. This is a yacht that should last decades to come. Apart from this approach, there is simply no second chance here: If the guys mess up, the deck is gone. Even if one would be able to remove it again, I just don´t want to imagine the hustle (and budgetary cost!) needed to fix it again. It just has to be perfect with this one single try. Because of the fact that I did not receive a call from Heiner after I had left the guys that day, I assume that latter has indeed been achieved.
It´s done. Finally!
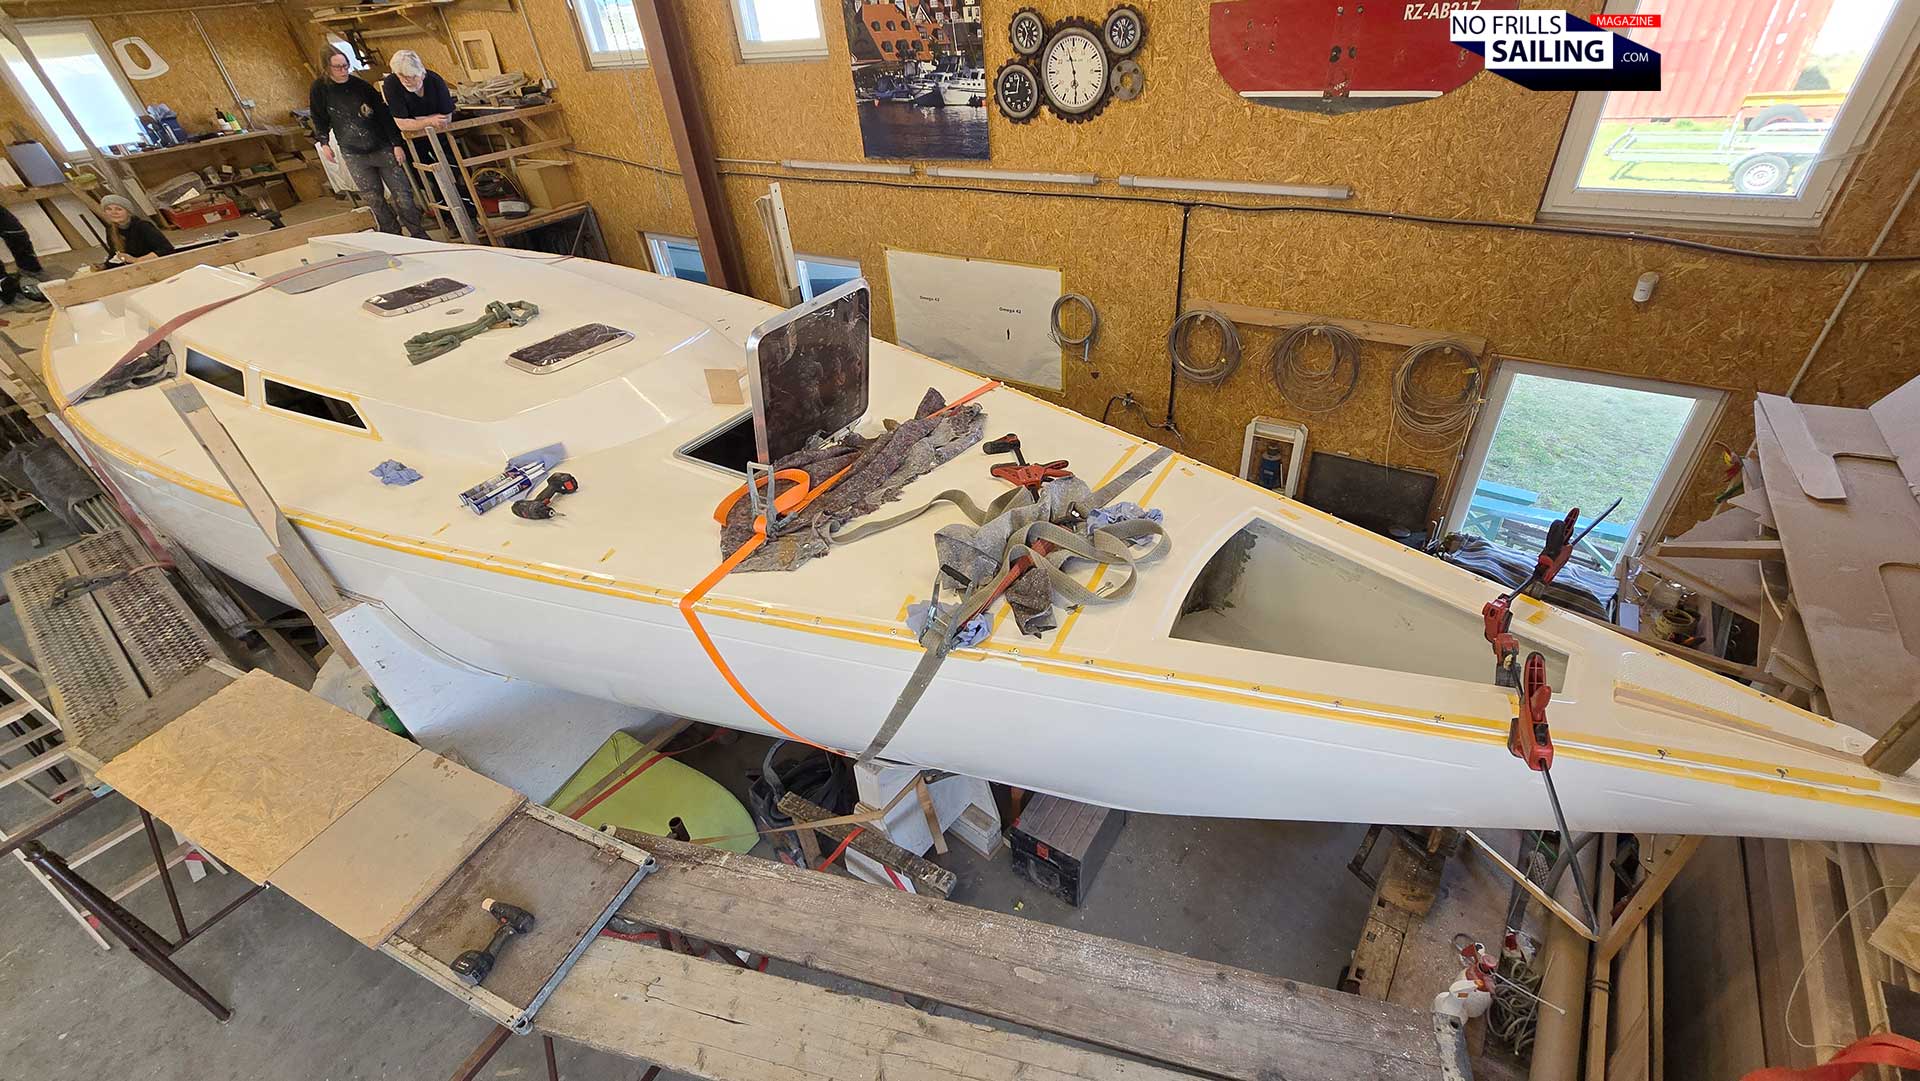
I had to leave before the finished work, but went to the shipyard on the following Saturday, two days after the actual marriage took place. Although it was sheer pleasure and so exciting to watch the boatbuilders work, it was also an overflow of information. There was so much to see! And when I went to the stern because it was interesting, something new happened at the bow. For real, I got up with sore muscles the day after! So, on Saturday I´ve had the shed for all for my own – now I had the chance to really inspect and look for details. It was just awesome!
Inspecting the hull-deck joint from below decks
As promised, the guys did indeed finish the complete list of tasks connected to the mating process. When I took off the dust-protection cover, my heart jumped even a bit more! The deck was fitted, the toe-rail nestled perfectly all along the yacht´s tempting curves. It looked kind of complete, although, of course, so many things are still missing. But again, as I phrased it in the first article: This mating of deck and hull kind of corresponds with your unborn kid´s first ever 3D ultrasound picture. Still unfinished, but already so much to see.
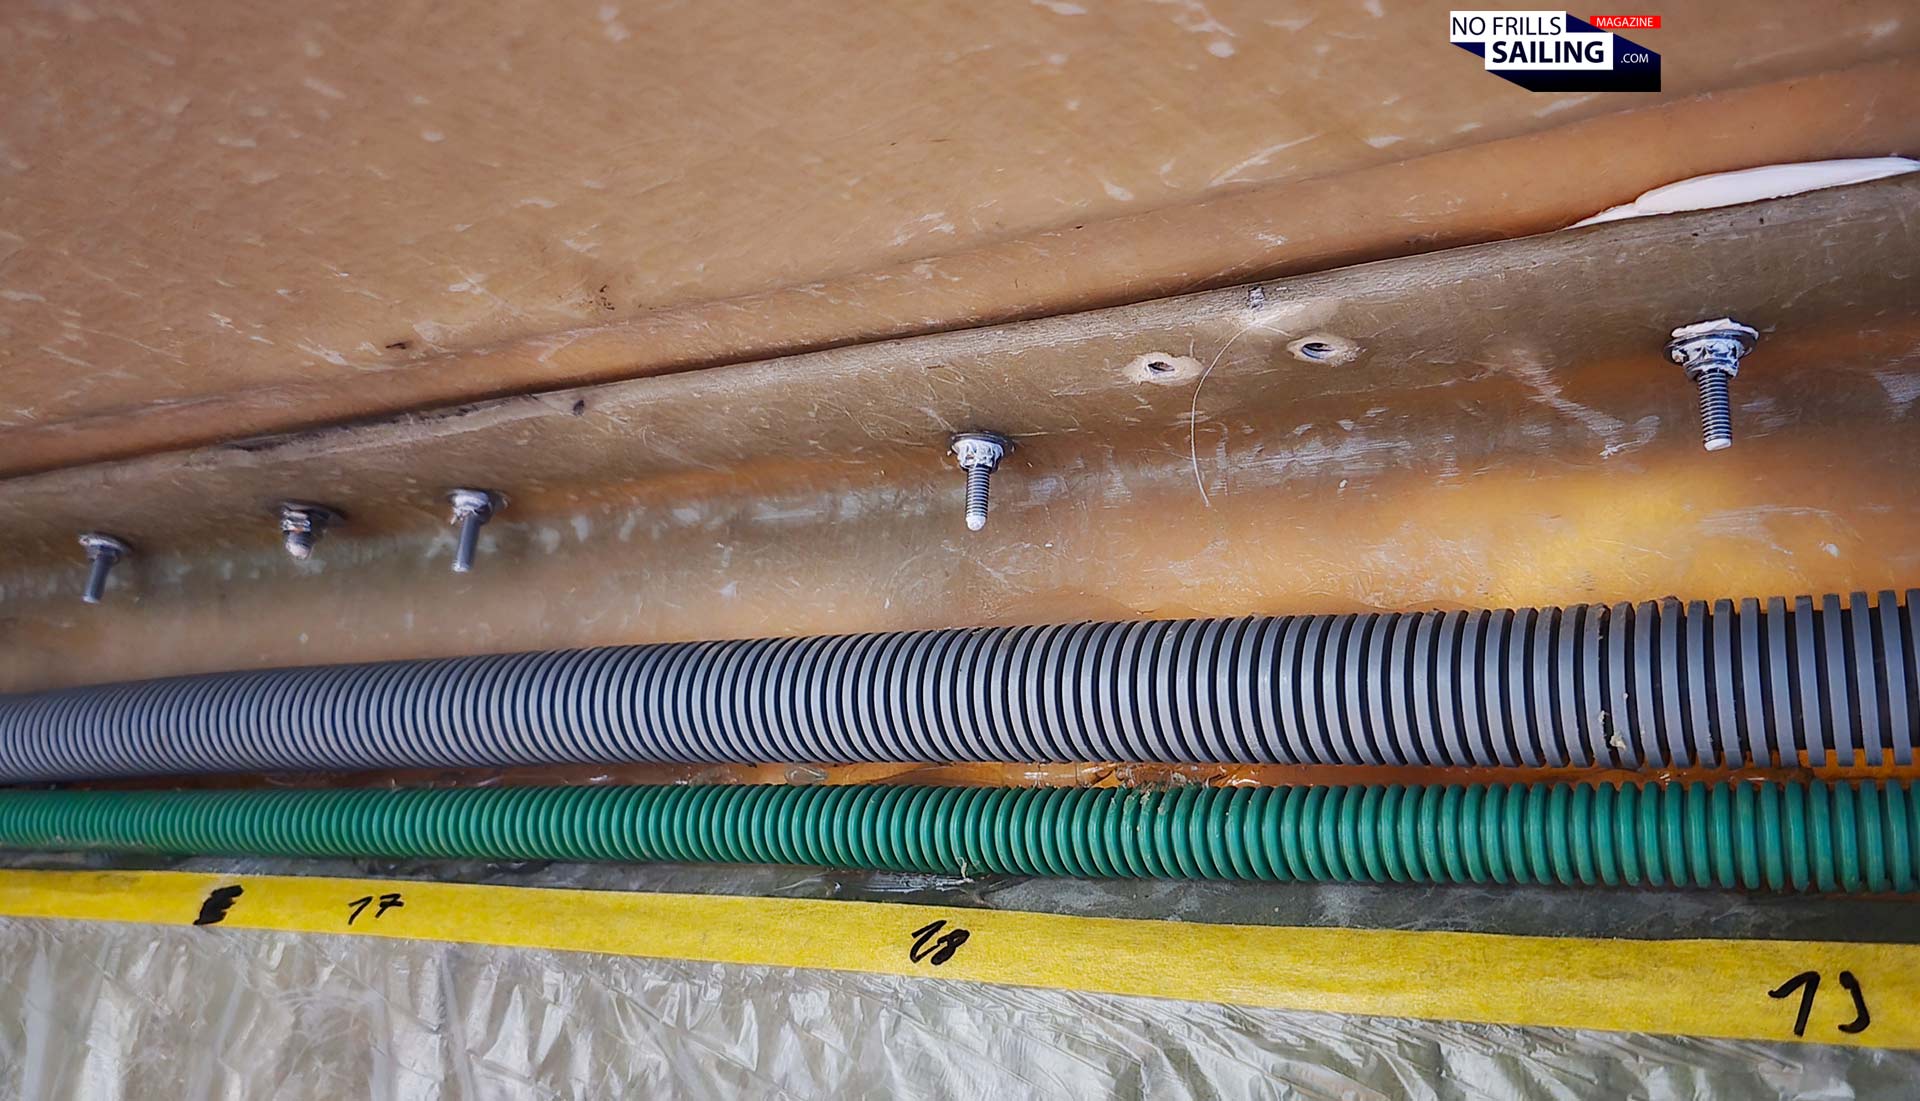
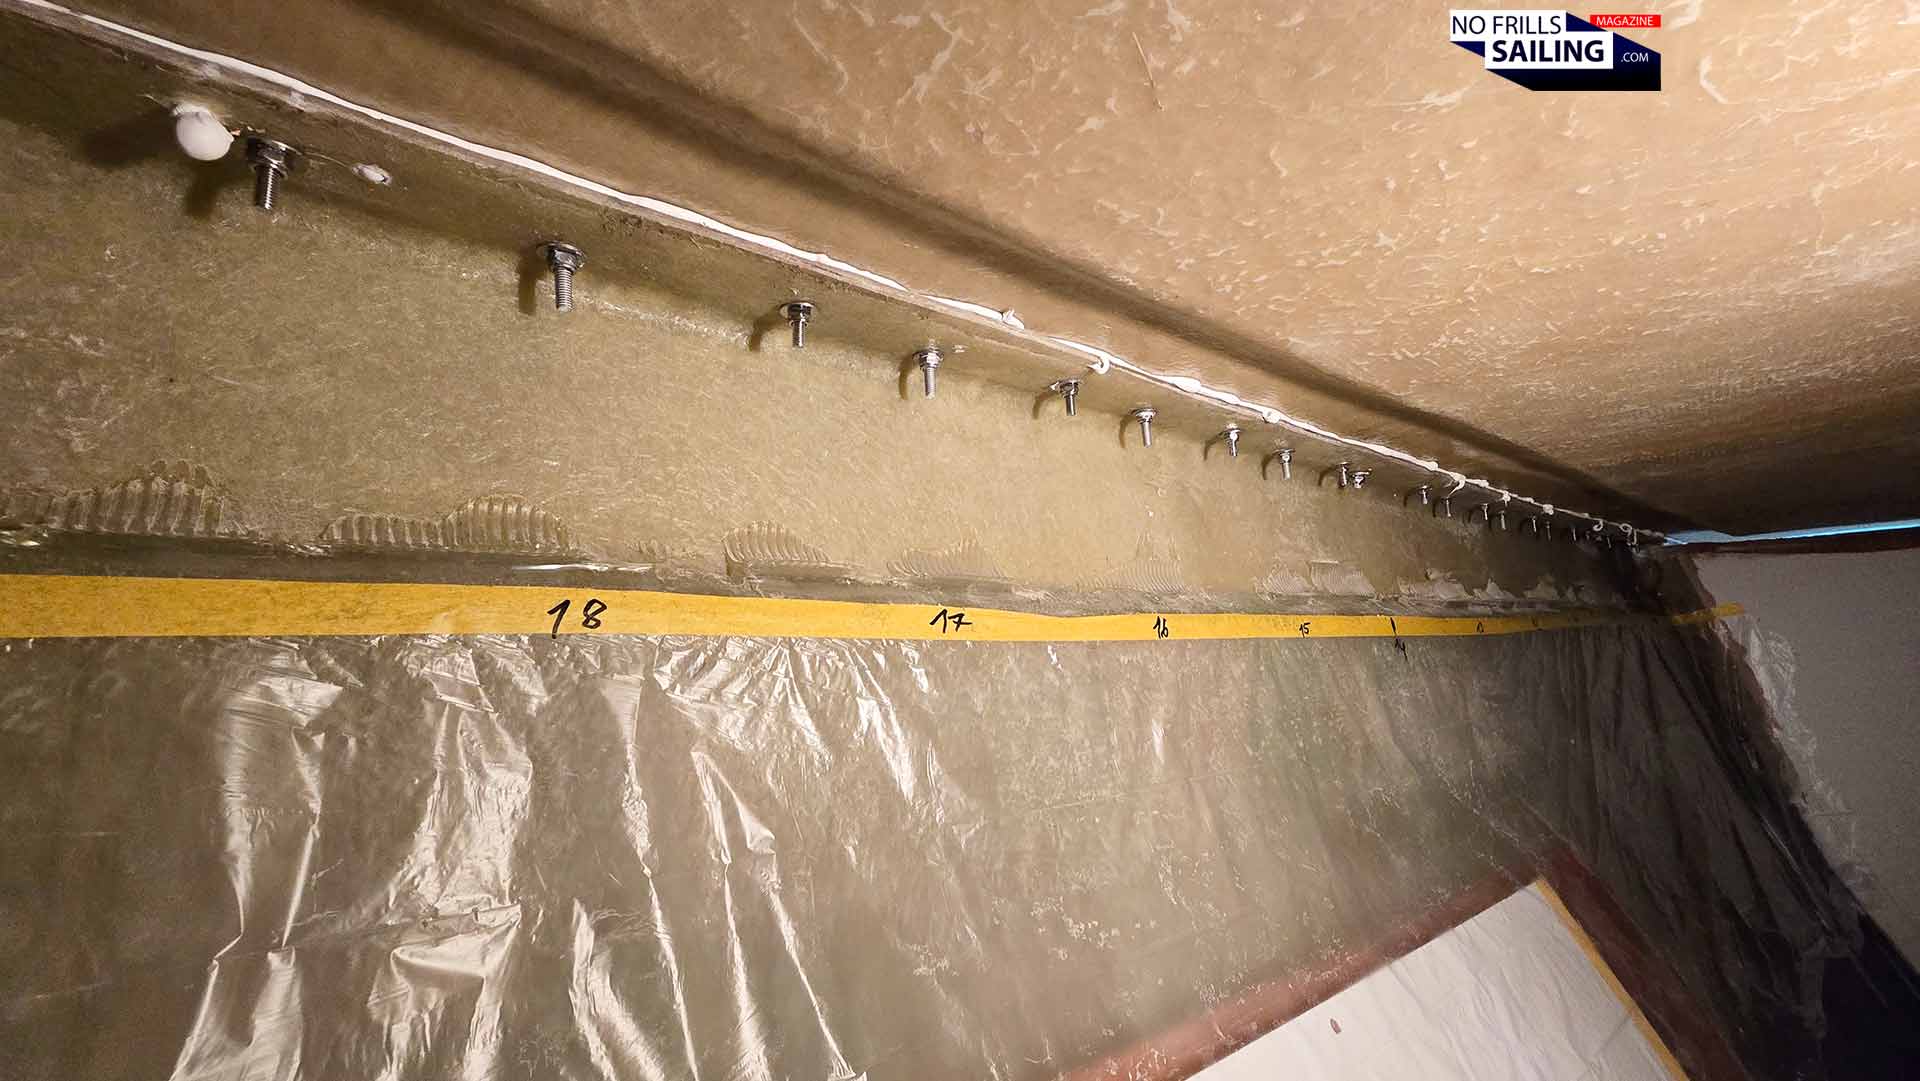
Seen from below: +240 bolts!
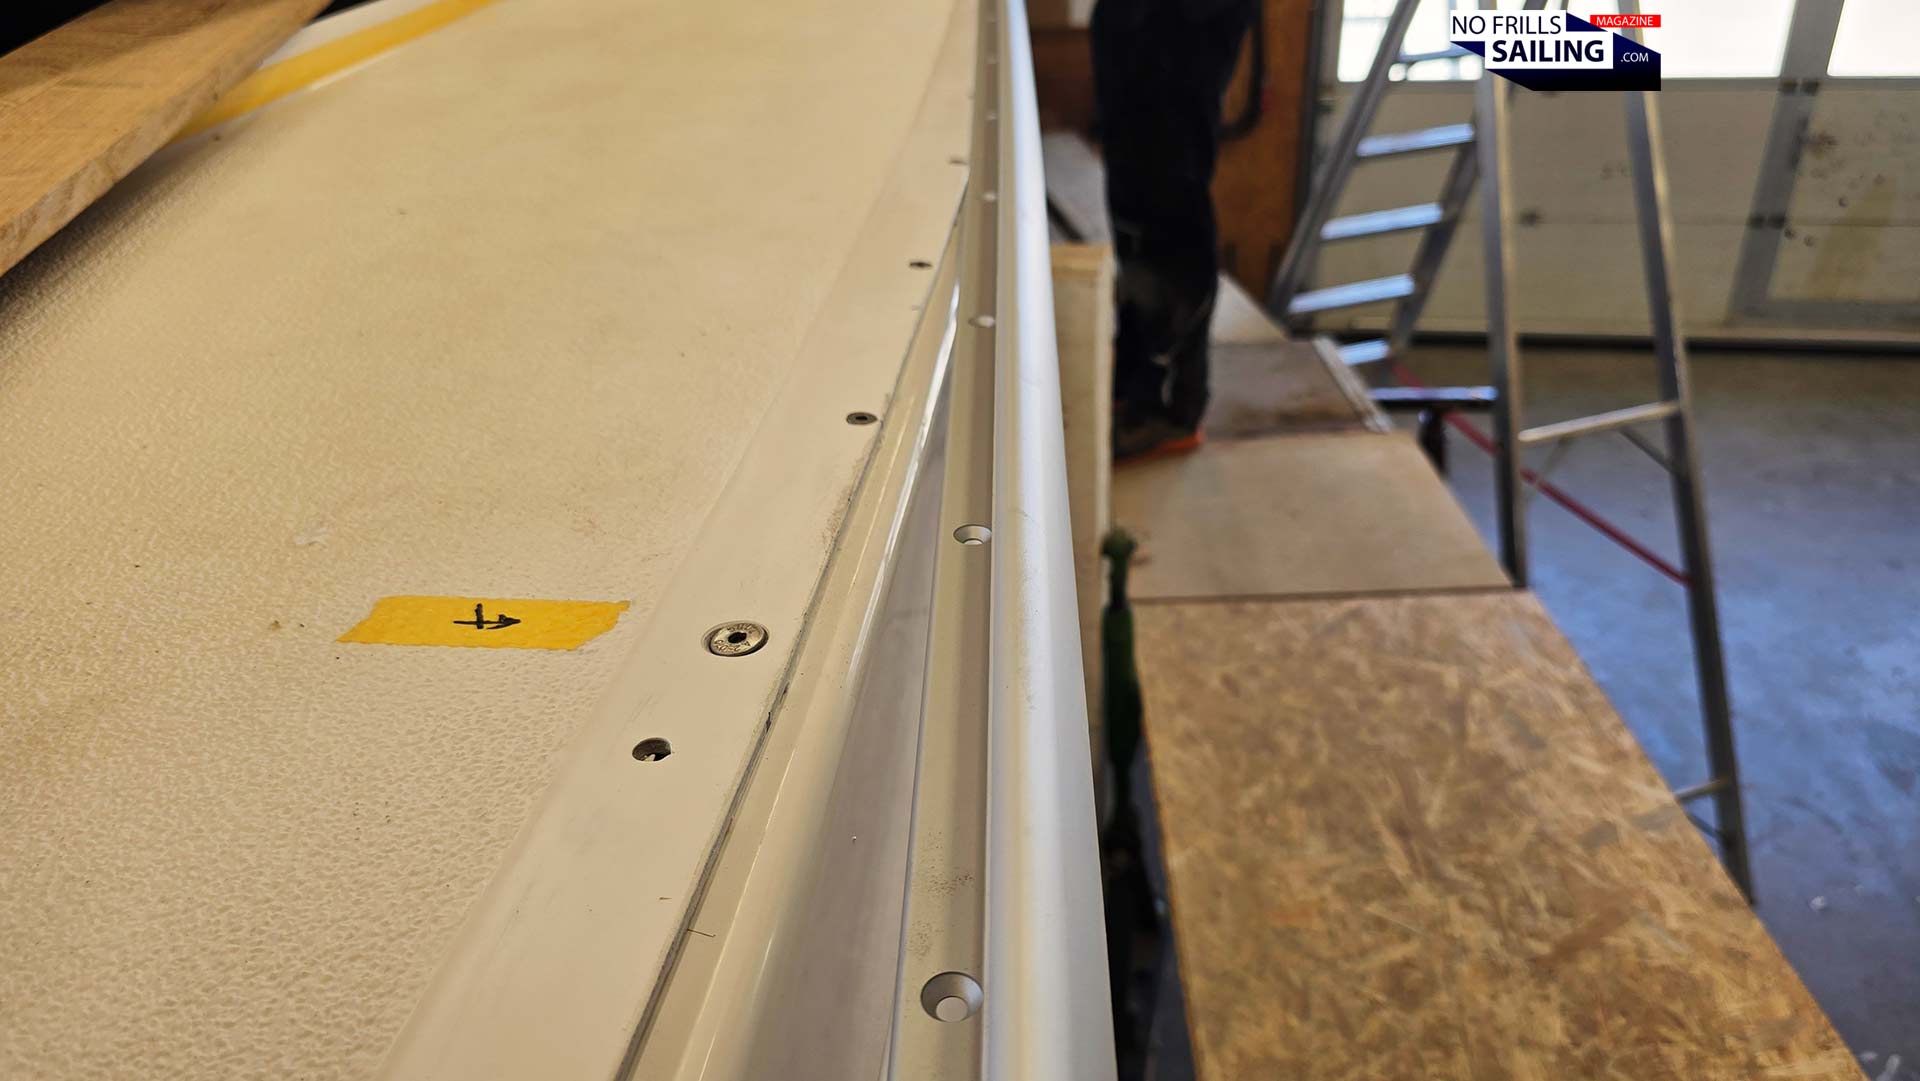
I went under deck, which itself was a completely new experience, since for the first time there was an actual ceiling. For three years, when being here, there was just the free space above me with the hall setting the end point. Now I experienced for the first time the boat´s real standing height. And I can tell you, I can walk completely upright inside the salon up until the mast stand in the front of the salon. I am 1.86 meters tall, just for clarification. But back to the underside: Above and below you can see pictures depicting the amount of nuts and bolts utilized to fix the deck onto the hull.
Nice work, guys, nice work!
You may also identify the yellow masking tape with the numeration of each bore hole. In fact, one of the boatbuilders told me that they did not come up with this idea back in the day when they had been joining deck and hull of the first Omega 42. It was a Babylonic chatter, a turmoil and lots of misunderstanding as to which bore hole was the one they talked about. Such a simple idea, such a simple solution, amazing, how much easier these little numbers made it in the end, and how much time they saved the guys. I took pictures from ever section down here, because later this all will be covered by nice panels and decorative felt. It´s a good feeling of having confirmed the firmness of this bond!
A big step forward in the building process of my new sailboat
It´s such a big leap, indeed! For the first time, I speak of a “boat” when referring to this project. Before, it was a “construction site.” Now everyone can see what this is going to be: “You have got the most beautiful boat of the whole Baltic Sea!”, a colleague from the business told me the other day, casually inviting himself to a dash out with her. Of course, it´s still a long way, but the end is at least well in sight.
I can see a yacht here.
Next week there are two major appointments: One with the craftsmen who are making the decking for the yacht. They will arrive in the she shed to hand-draw the gauge models for the whole deck, cockpit and bow-areas, which will serve as templates for the actual PVC-panels. I will of course be present at that day to show you how its done. Secondly, the Seldén-agent will also arrive, suited up with a high-precision laser and a very special gauge to do the final measurements for the mast and the standing rigging. Again, I will document the whole process, of course!
With a much higher rate of strokes now here in the shipyard, I would like to suggest anyone who hasn´t subscribed already to the monthly NO FRILLS SAILING newsletter to do it now! It´s free and that way you cannot miss any new article: From deck to electronics, from cushion-making to the new floorboards, the keel treatment and fitting (another big, big highlight!) and all the things which will come up in the next weeks and months. It´s really worth it!
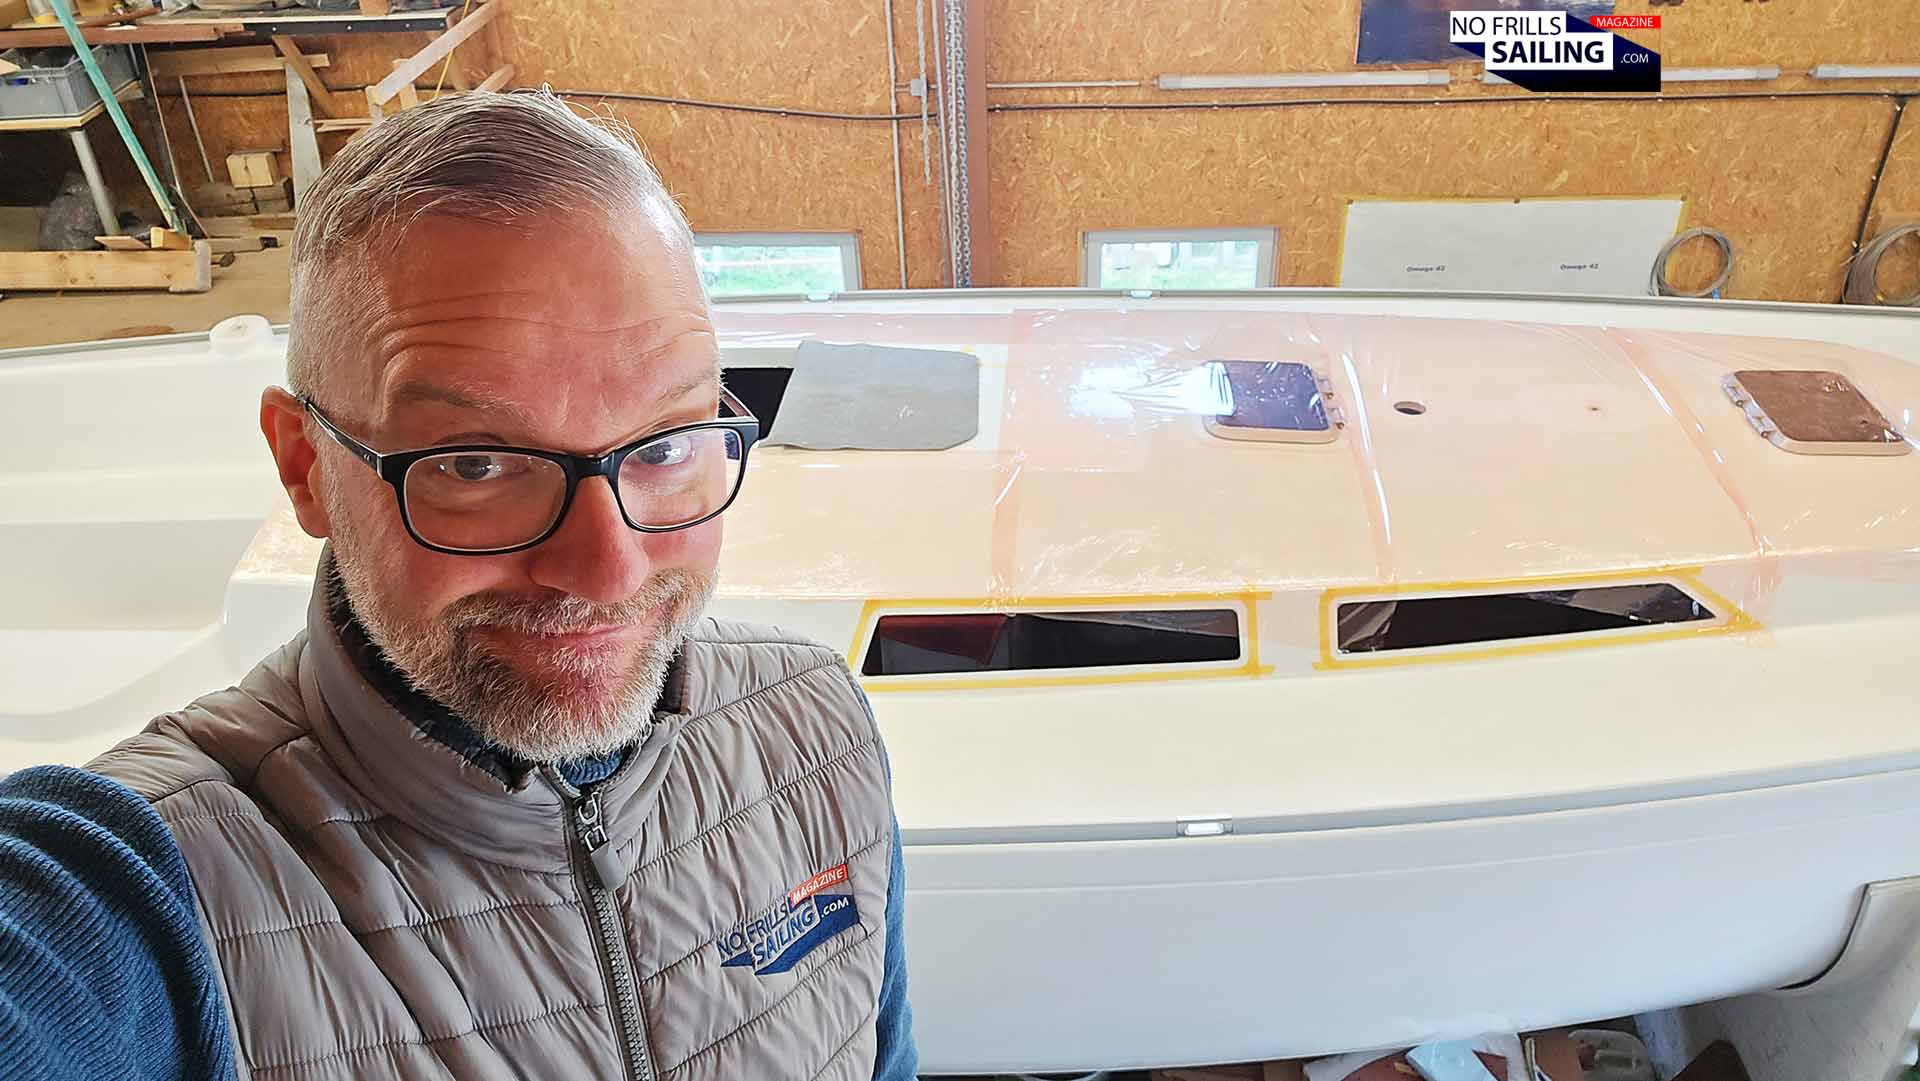
One happy guy, for sure!
For now, as you can see, I am overwhelmed and happy as I can be. So far, everything I wished and hoped for did indeed become reality. I´d say that I am a lucky person because Heiner and his team are not only just boatbuilders working on a job, they are really dedicated to achieve something truly great, something different. The level of passion and craftsmanship is amazing, as is the outcome. Can you imagine how much pleasant anticipation there is, boiling inside of me, like the magma down under Yosemite?
Advertisement
The next big decisions
Apart from the decking and the mast, we are working on the final set-up for the electric system for the Omega 42. In one of the next articles I will show in detail how many (and which) batteries we went for, how we separated engine and domestic and which ideas we have for secondary electricity. I think I will come up with a pretty unorthodox, but nevertheless easy, simple and practical solution. For the medium-turn, I am also planning the bottom paint, which will also be quite interesting as I have decided to apply it by my own: Something, I always wanted to do!
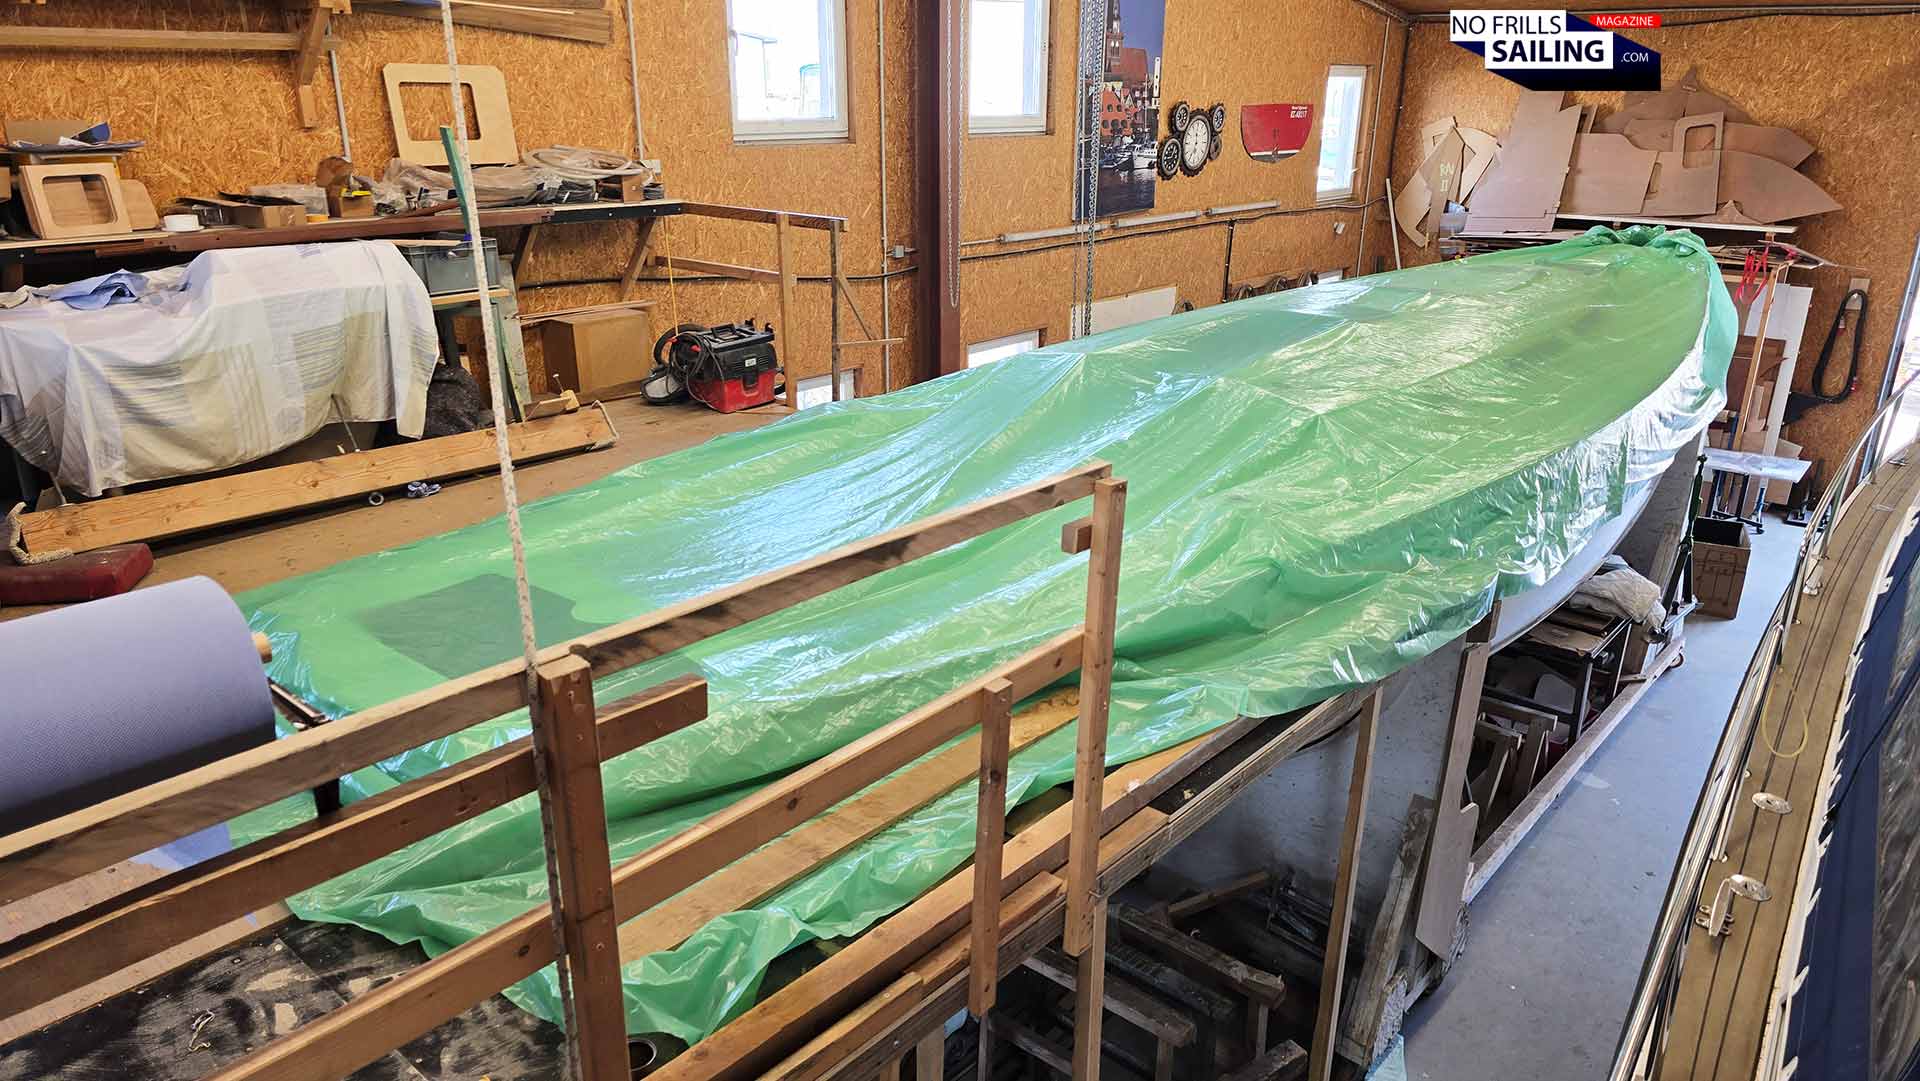
For now … goodbye, ALPHA
For now, I put back the dust-protection over the freshly fitted deck. Thanks to the team, thanks to all of you, ladies and gentlemen! Great work, I am still amazed to having had the pleasure to witness it. Most boat owners don´t get that chance, I seized it and I´m happy. Stay tuned for the next building progress-articles, if you haven´t read enough today, here is some more for you …
You might as well like to check out these related articles: