As you may know, I´ve decided to refurbish the interior of my King´s Cruiser 33 classic GRP boat completely with Teak. That´s the classy way of doing it, I prefer Teak over Mahogany because I think it´s much more lighter (though still a bit dark compared to Oak or other light interior fittings). As I am working for some 100 hours until now with this timber, over time a stack of offcuts has been accumulated.
So, what to do with this stuff? The parts are too small to be used in bigger fittings but too big on the other hand to just throw them to the trash. Besides, Teak is a very precious natural product and very costly and putting this to the trash bin is no option for me. So, it struck me yesterday: Why not putting the parts to a use for my new roofing in the saloon and fore cabin? That said, the idea was born to make plinths for the new LED-lights to be installed with the roofing panels.
Making the Teak Plinths
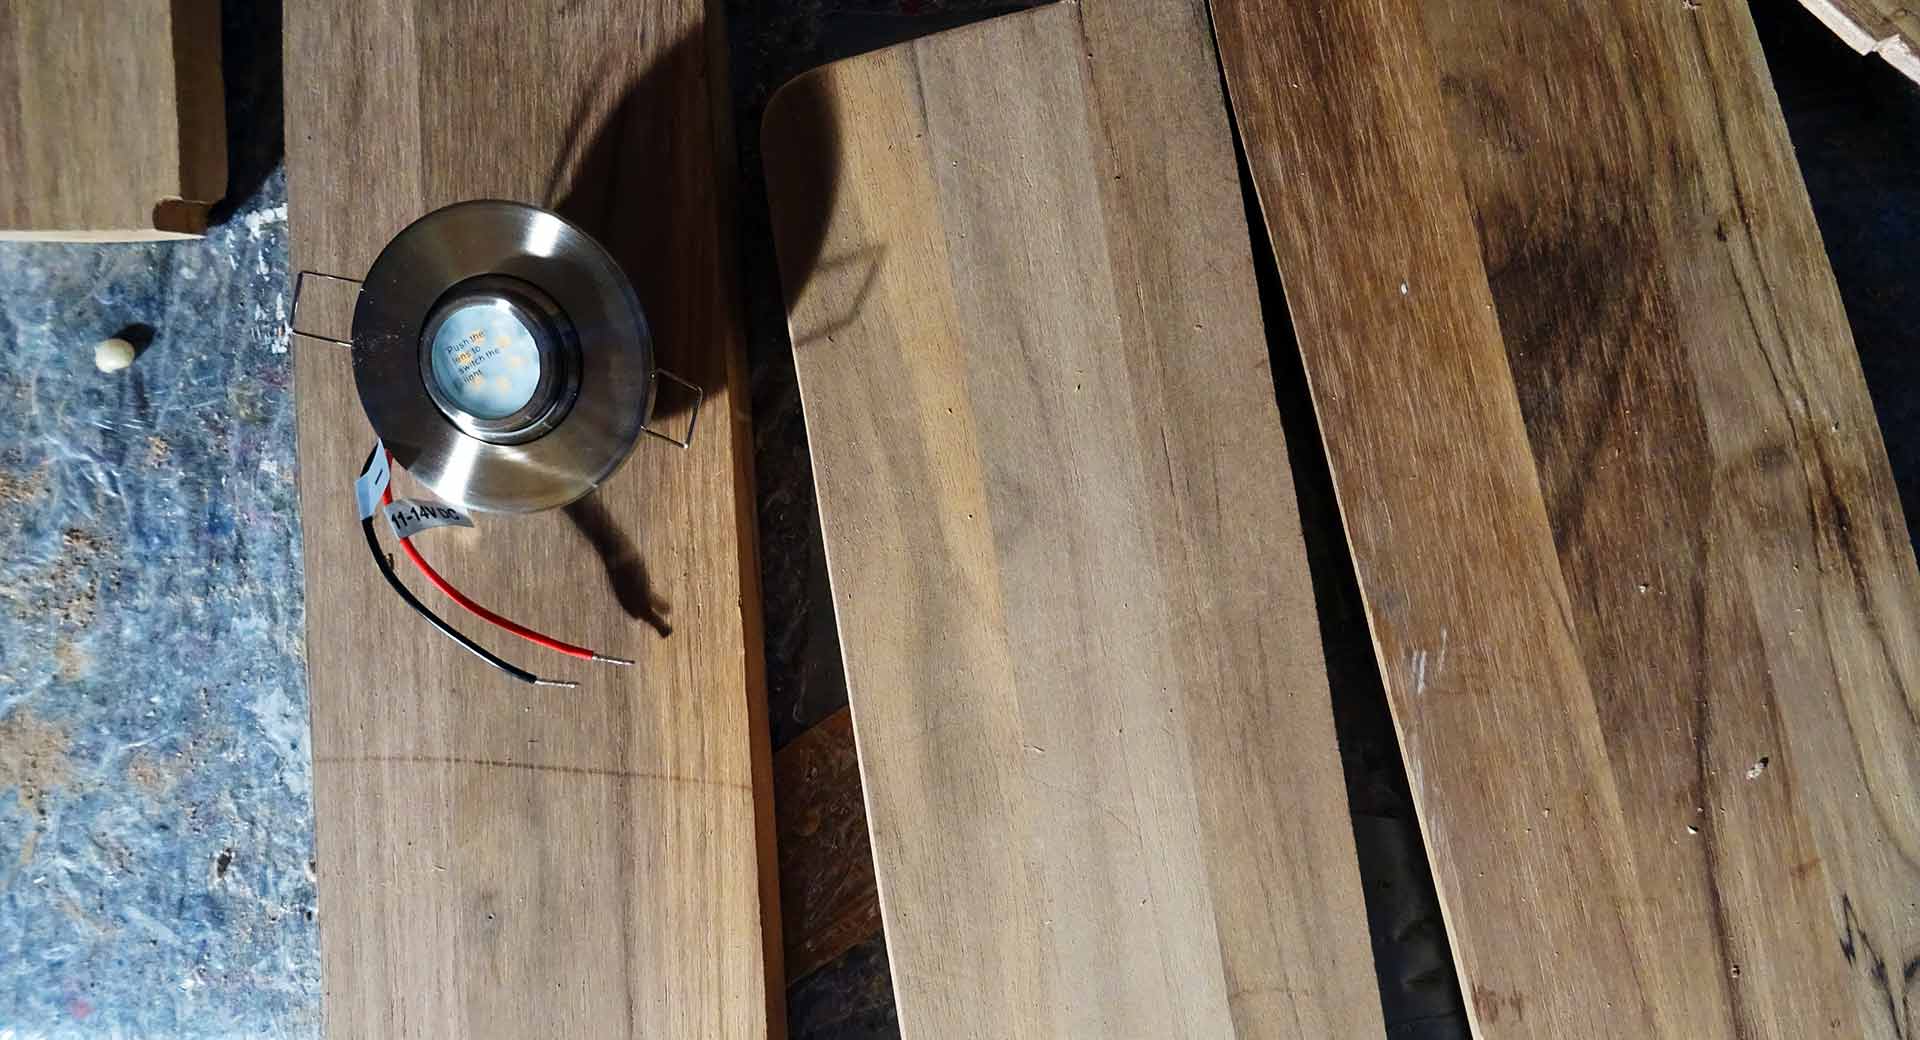
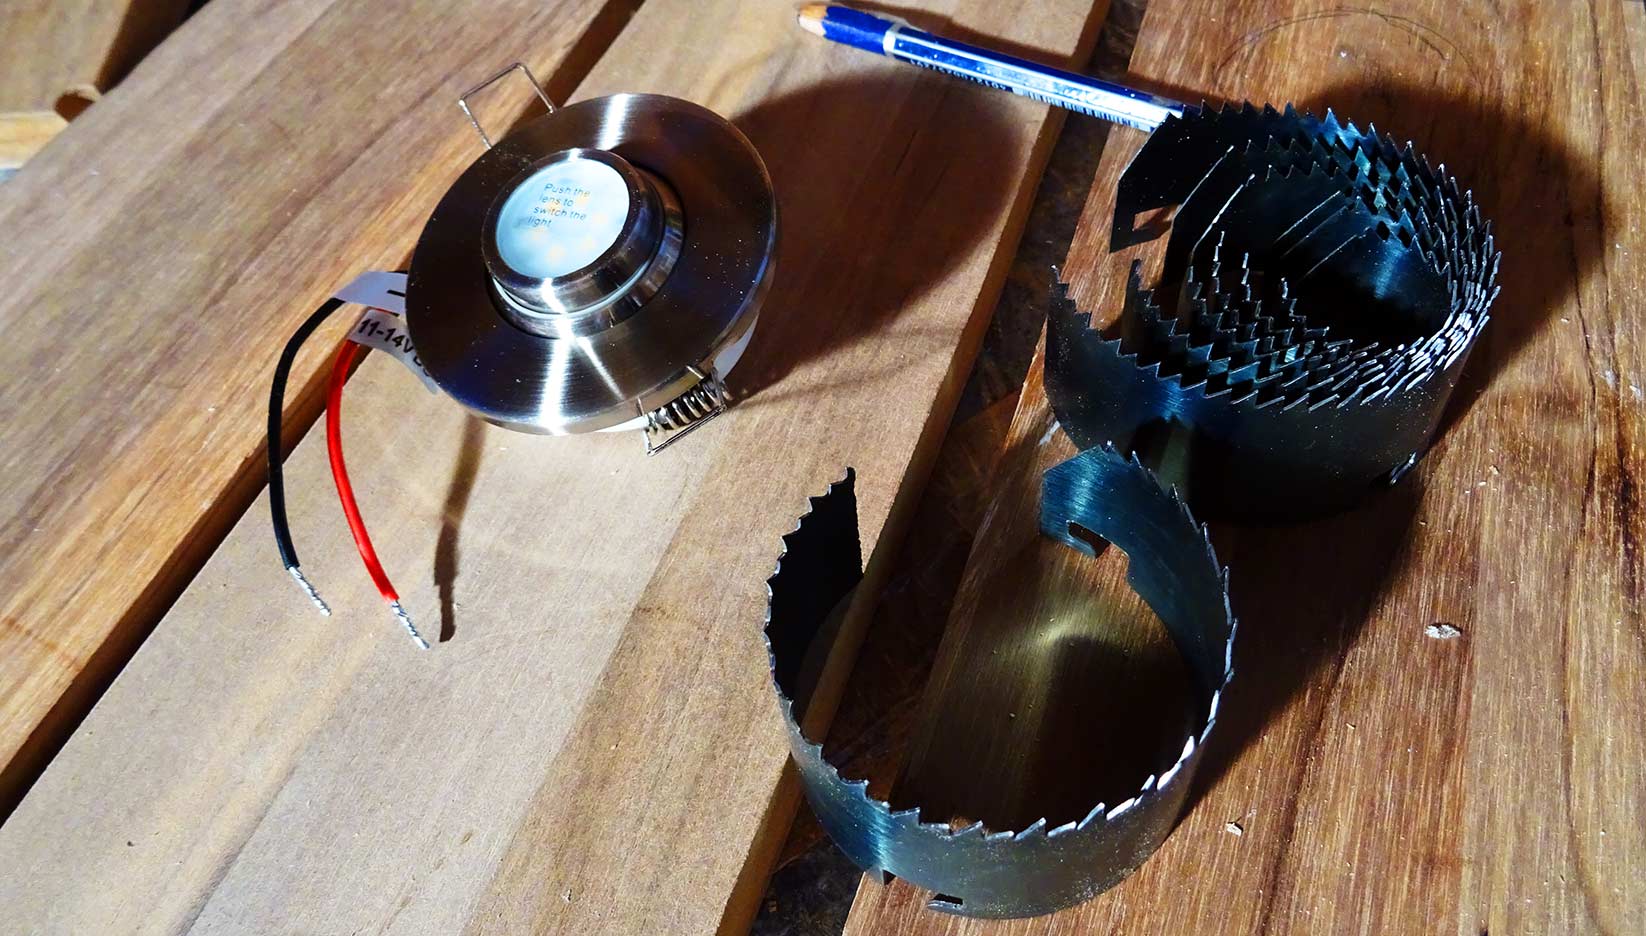
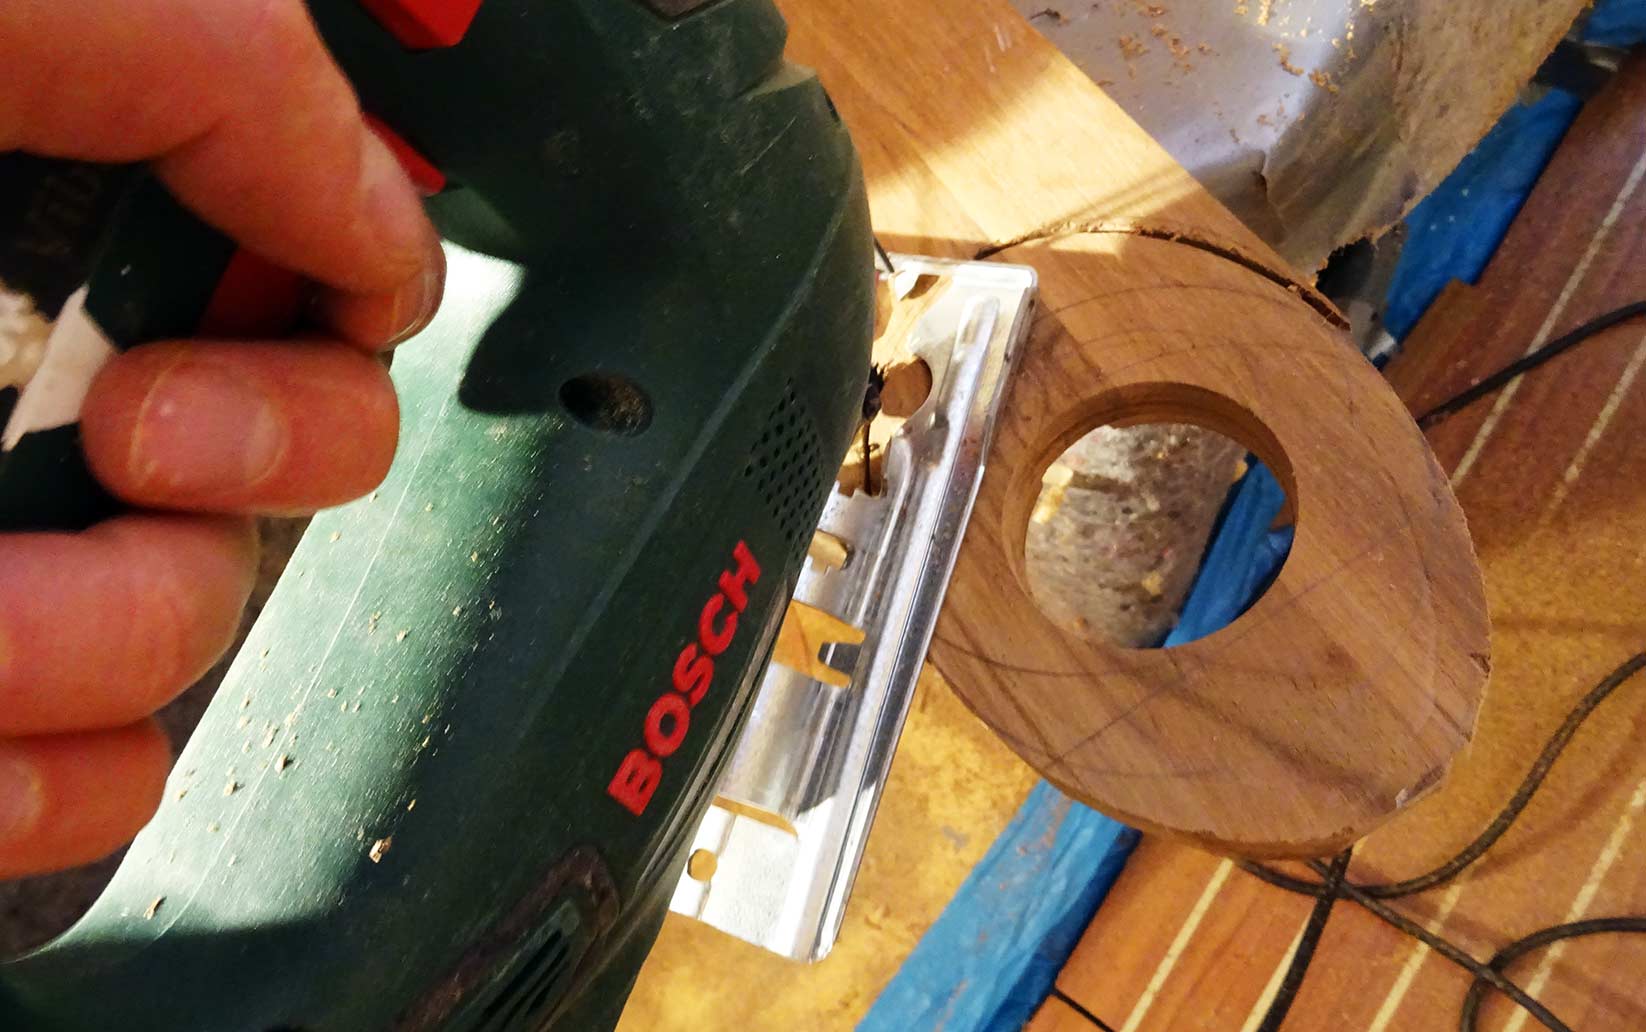
At first I took measure of the inner diameter of my new LED lights and began to cut out the inlets with a keyhole saw. That was a bit tricky since the material has a thickness of 18 mm and I had to apply the drill from both sides: There´s a lot of intertia in the once drilling machine that could easily hit you by surprise, so keep awake and brace for safety measures here, that´s a hell of a machine!
Eventually that was done and I had to decide which form the base mountings should have: Perfect circular? Square? Elliptical? I went for the ladder since this was putting material use to an optimum and I really like elliptical forms. Mounted with the thin curves along the longitudinal axis of the boat these bases will perfectly match with the overall Teak look of the boat – classy.
After cutting out the blanks I did have 8 of these items at my disposal – just as many as there will be LED-lights in my boat. I am planning to have two lights directly above the entryway and just before the main skylight shining directly onto the folding table. On either side of the saloon mounted above the heads again two lights, arranged in a way that they will be suitable both for laying down reading a book or dispensing additional lighting for a dinner. All of them will be switchable separately or connected by series as pairs of two. Two more lights will be mounted in the fore cabin.
Sanding & Testing with LED-Lights
To achieve a smooth and evenly form I did pack four of the blanks together held tight by screw terminals and began sanding down the sides of the ovals. That done I changed the clamps to sand down the other curves, making the blanks having the exact form. The same was done with the other four plinths as well.
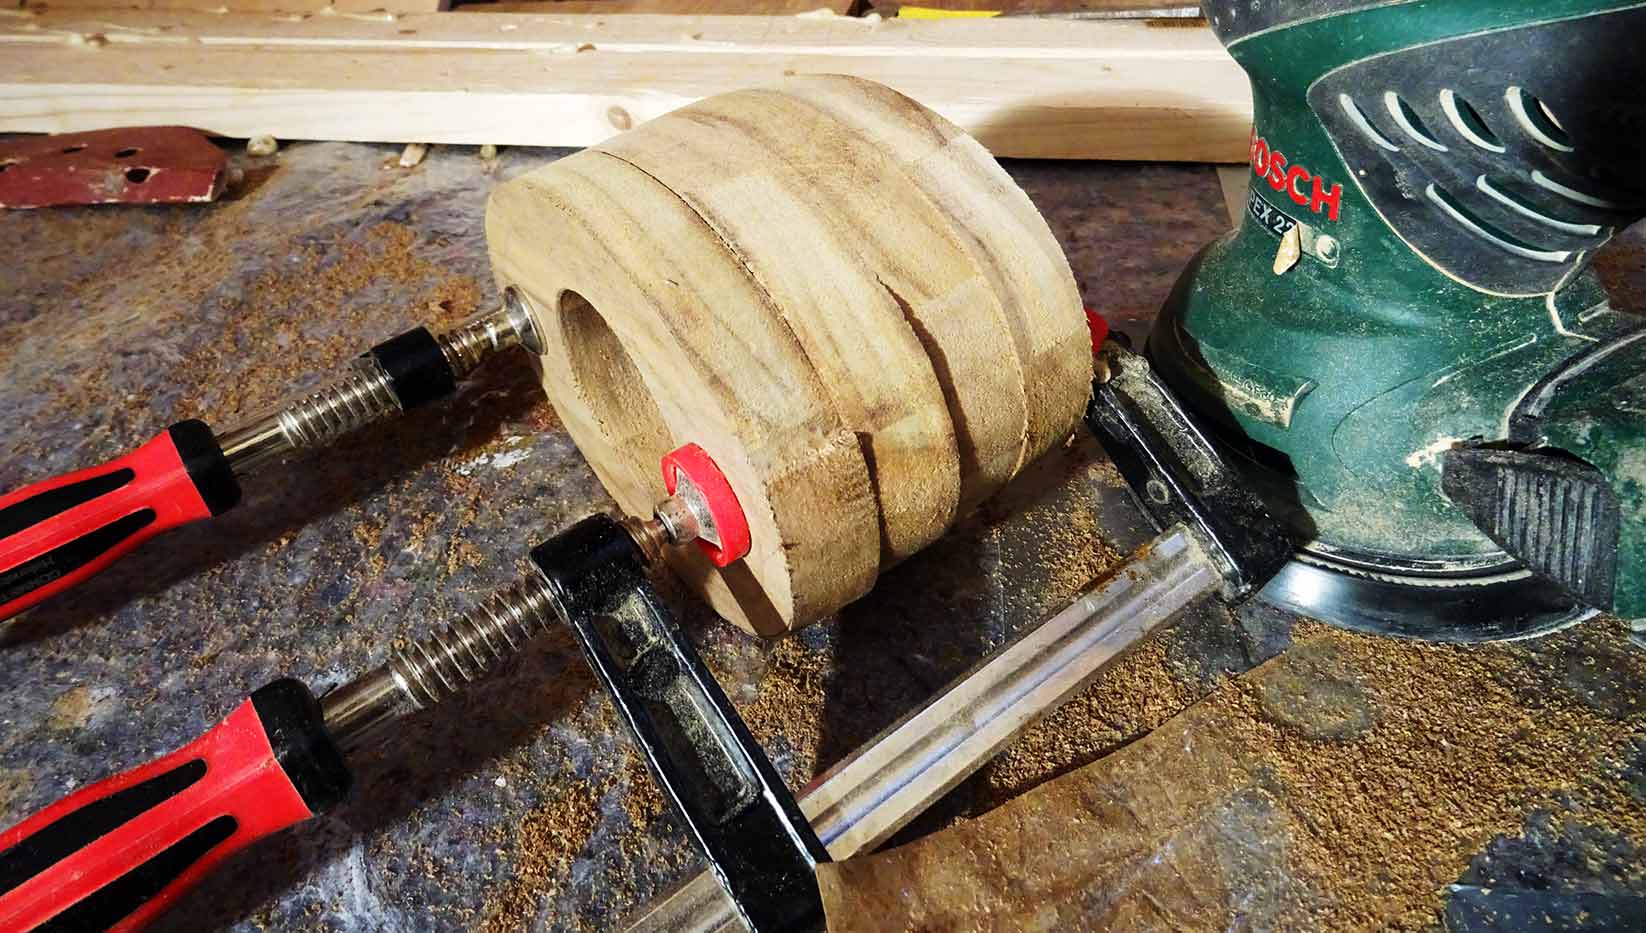
Rounded edges have been done by superfinishing each of them at a time – a very tiring and time consuming process. Of course, by doing so each plinth will get its own unique curvature, something a professional carpenter or shipwright would be certainly capable of doing better, but anyway, I was very satisfied with the outcome of my work as I had finally finished sanding – starting with a 40 grain for the raw work, switching to an 80 grain and finally the 120 for the fine tuning.
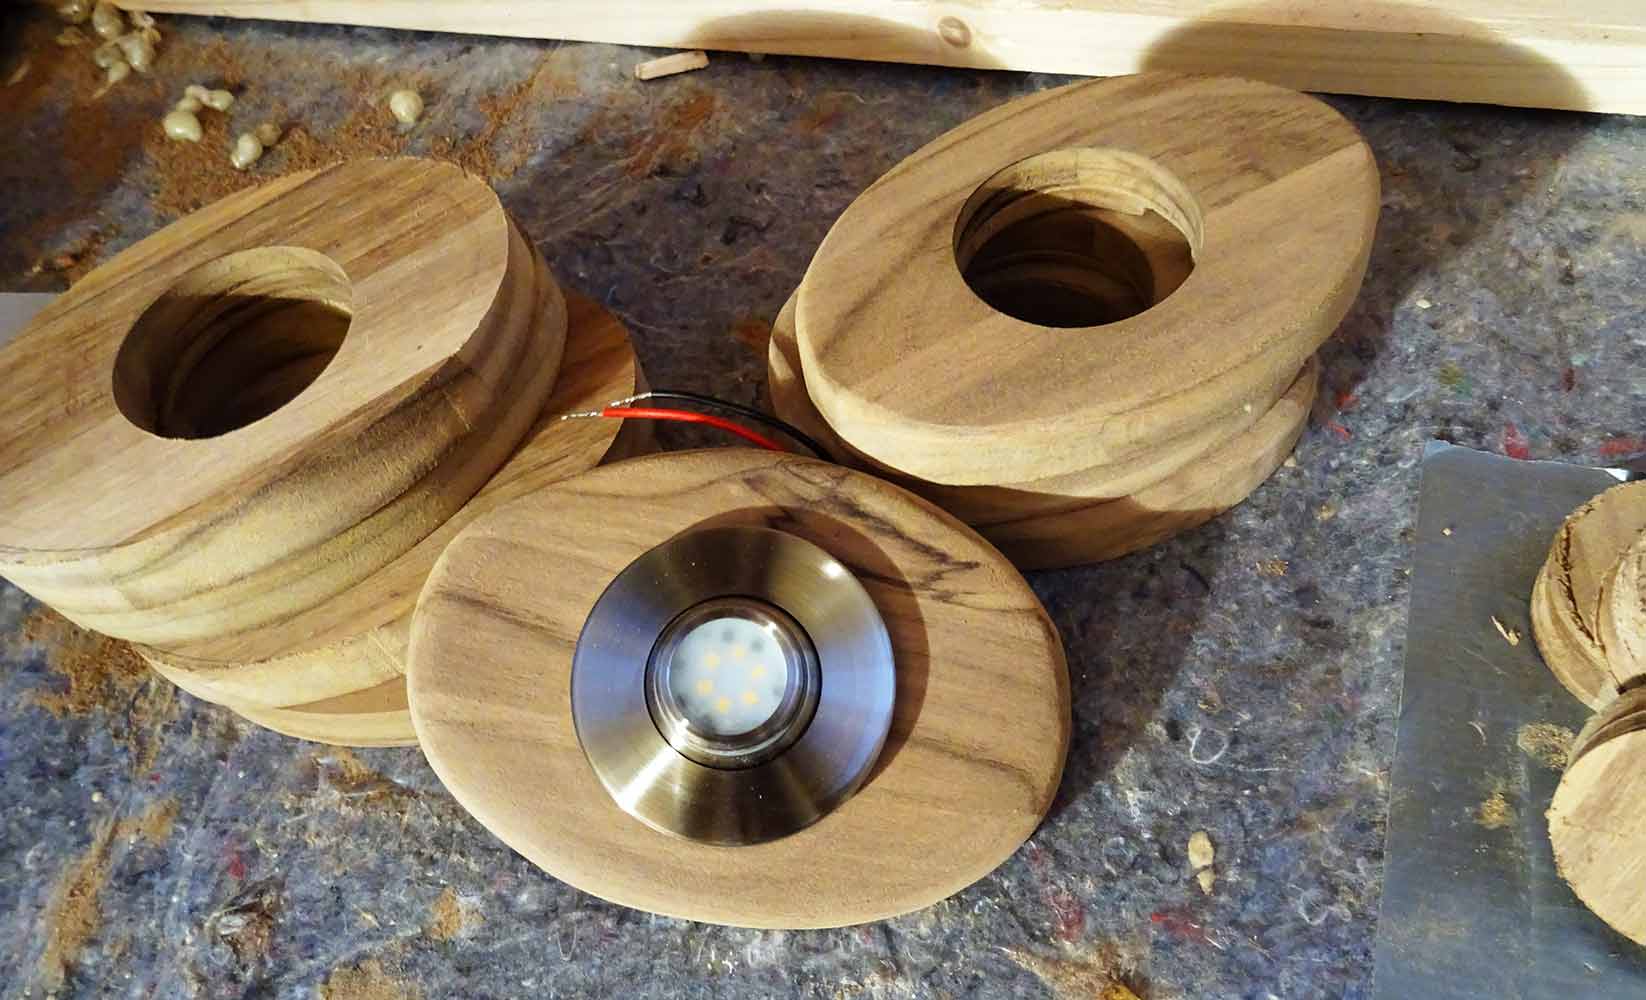
That done I couldn´t resist but to unpack one of the lights and put it into the base. Man, that´s really an awesome look: As I was at first a bit reluctant to go for these LED lights as they appeared to be too modern in their design, I must say, together with those Teak made plinths this is not the case anymore. It´s just a gorgeous look in my eyes.
Next Steps in the Sailingboat Refit Program
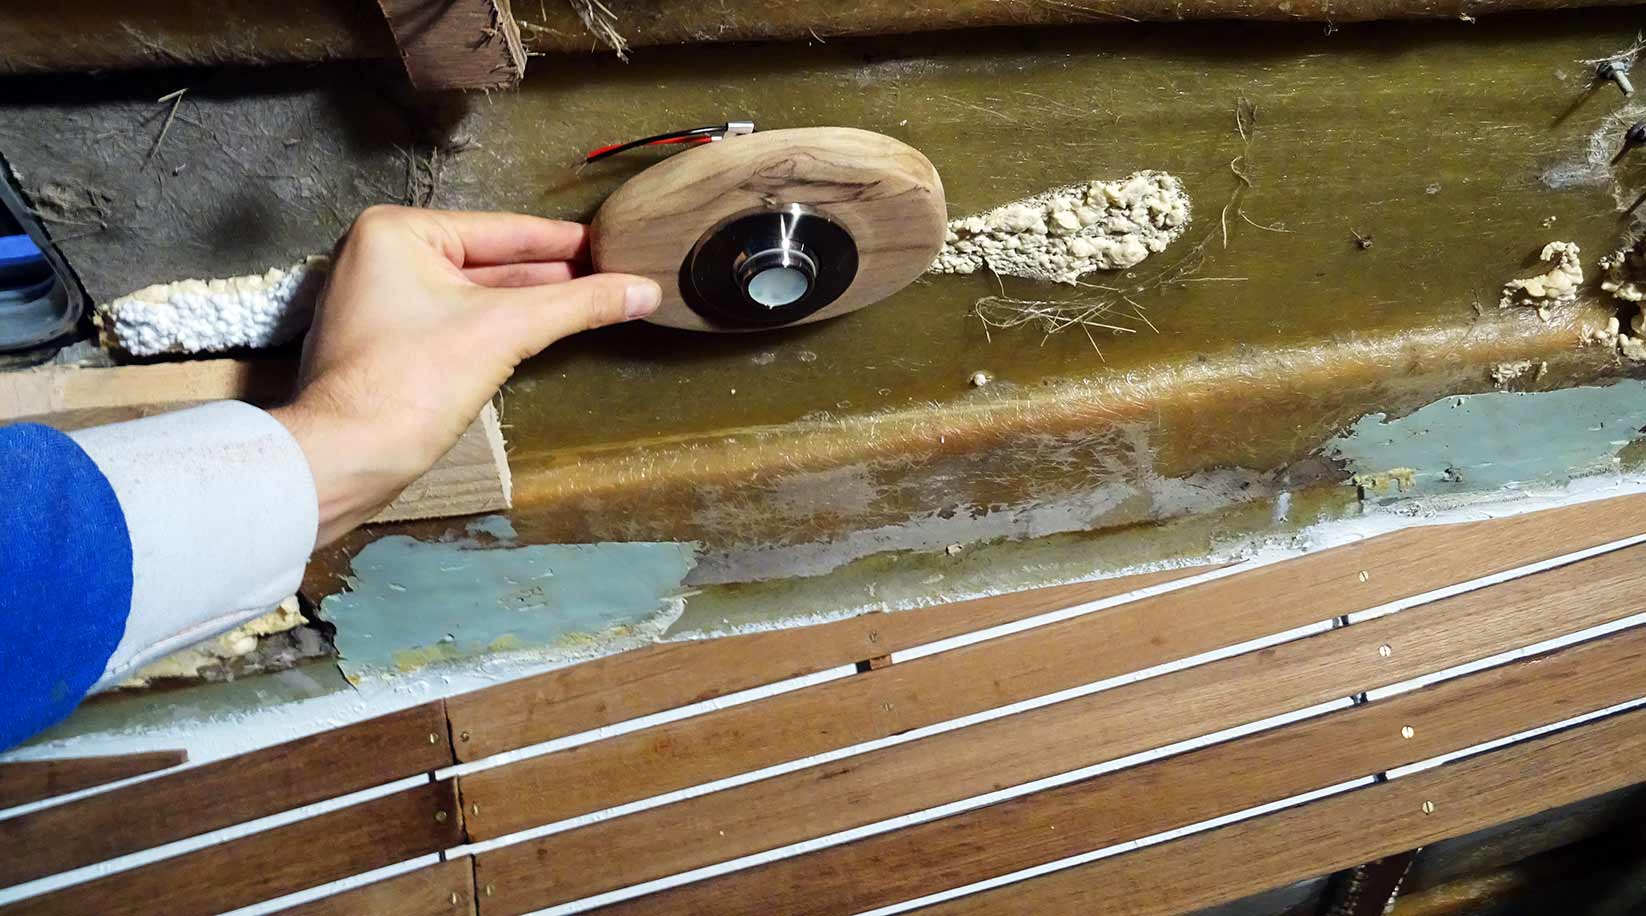
So what´s up next here in the saloon of SY OLIVIA? As I am awaiting delivery of the plywood sheets for the roofing panels, I am trying to figure out what´s the best way for the wiring of the LED lights because I will have to connect all the lights completely as there will be no chance of doing it after assembly of the panels themselves.
Making the panels will be a very interesting next step as they won´t allow any errors in measurement nor scruffy craftsmanship. But I am very confident of being able to achieve a satisfactory outcome here again. Stay tuned.
Interesting articles on that topic:
Making the basic substruction for the new roofing panels & ceiling
Mounting of Teak ceiling batten
All refit-related articles