Having sanded all of the internal GRP-surfaces lately (you may read the full article here) this work left my boat covered with a thick layer of dust. Despite the fact that I am a cleanly coeval I couldn´t leave the ship like this and switch to the next task of my refit-program because this dust is hazardous at first and would simply always be swirled and dispersed by every movement I´d make. Not so good when it comes to painting the whole boat. Even worse for my lungs (here´s an article on health and safety whilst at work on a yacht). Today was a day of marvelous sunshine and I took the opportunity to have an advanced Spring Cleaning of my yacht´s interior – and a tough testing of International´s Super Cleaner as well. Here´s what I´ve experienced.
DIY Yacht Clean Service
I did let the yacht calm down after finishing my sanding work. I gave her full three days of rest and that´s enough time for the fines dust to fall out and come to rest of the surfaces again. Opening up the yacht I was able to smell the odor of loose glassfiber and gelcoat particles. Not the fines smell of them all to be honest. I prepared the powerful vacuum cleaner with an all new bag and began to have a thorough primary cleaning from bow to stern. I vacuumed all of the horizontal surfaces as well as all the vertical ones like the bulkheads and stuff.
When I finished the first run in the quarter berth I had a cup of coffee and brought the vacuum back to the fore cabin (besides, here´s an article on how I´d like to have the forecastle refurbished one day) and had a second run. This time I focused on gaps and the neat little corners, hidden surfaces and alike where the dust might have crawled into. Some 30 minutes later it was time for another coffee and I´ve prepared a bucket of fresh water. Having finished again, I swept through the whole boat twice and wiped all surfaces with a rag and scrubbed them clean. After disposing of the first bucket of water – it was colored yellow then by the gelcoat particles – I found a thick residuum at the bottom of the bucket, pure gelcoat, viscous and a bit frightening I must admit. After the second run with fresh water it was only grey brackish water I´d had to get rid of. First step done. Now it was time for the tough part: The filthy inner shell of the hull. A dark, dirty place.
Testing the Super Cleaner by International
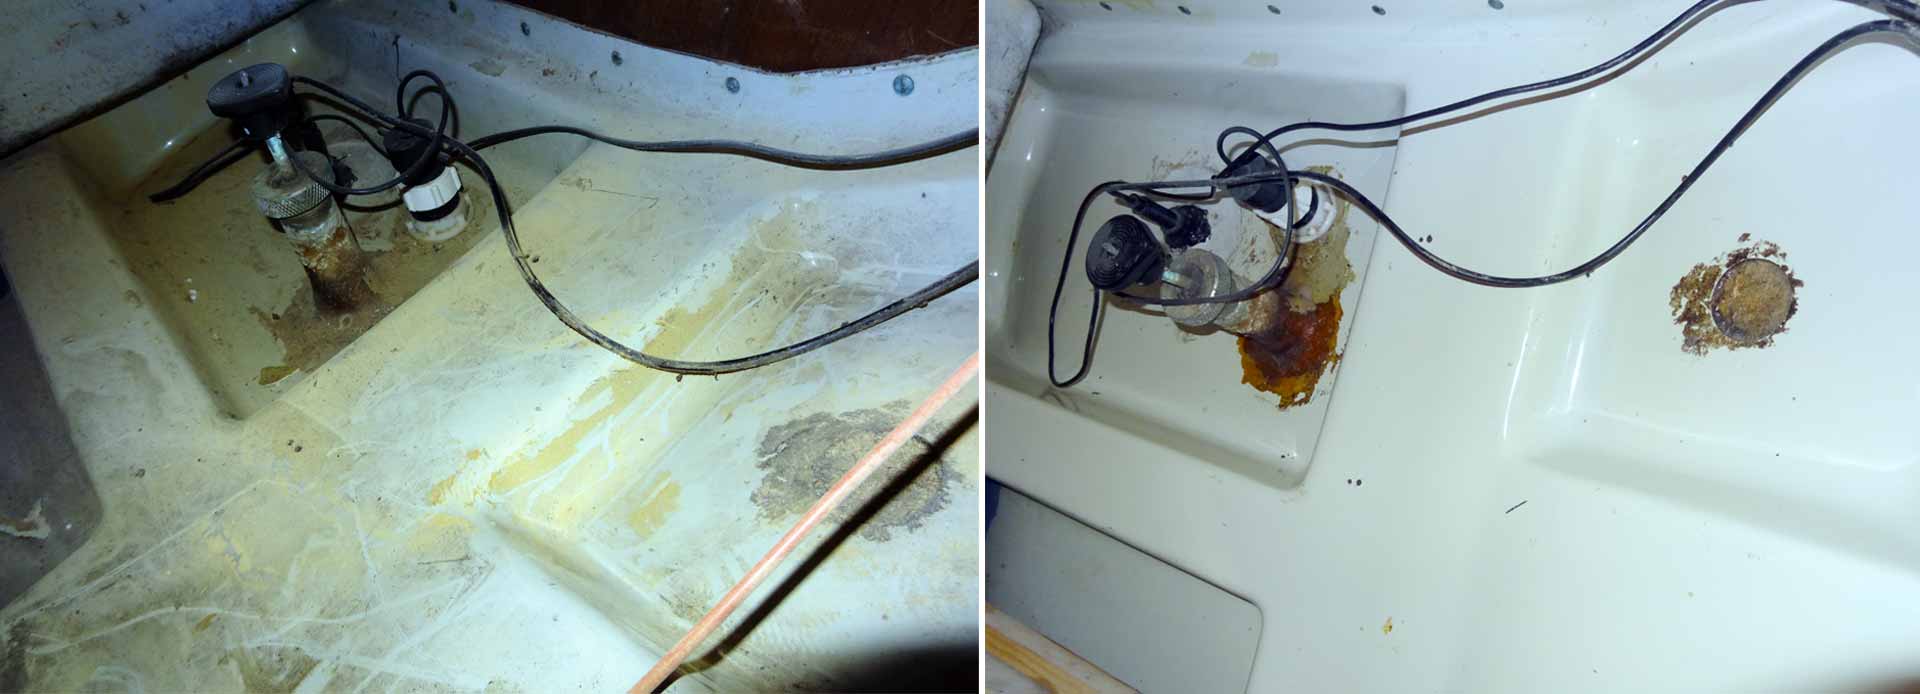
Nevertheless a place essential to the functioning of my yacht: During cruising in all the stores and different stowage we will put the provisions, store away spare clothing, bottles of water and other stuff needed whilst on the high seas. I cannot understand why my pre-owner apparently did let the whole stowage deteriorate. I´ve found a thick layer of greasy dirt covering the stowage under the seating in the saloon and right behind the backrests of the saloon´s cushion. I know, it´s not the most fun work on a ship and it´s a backbreaking task but … honestly, do I want to eat food stored away in such a filthy place before? Definitely no.
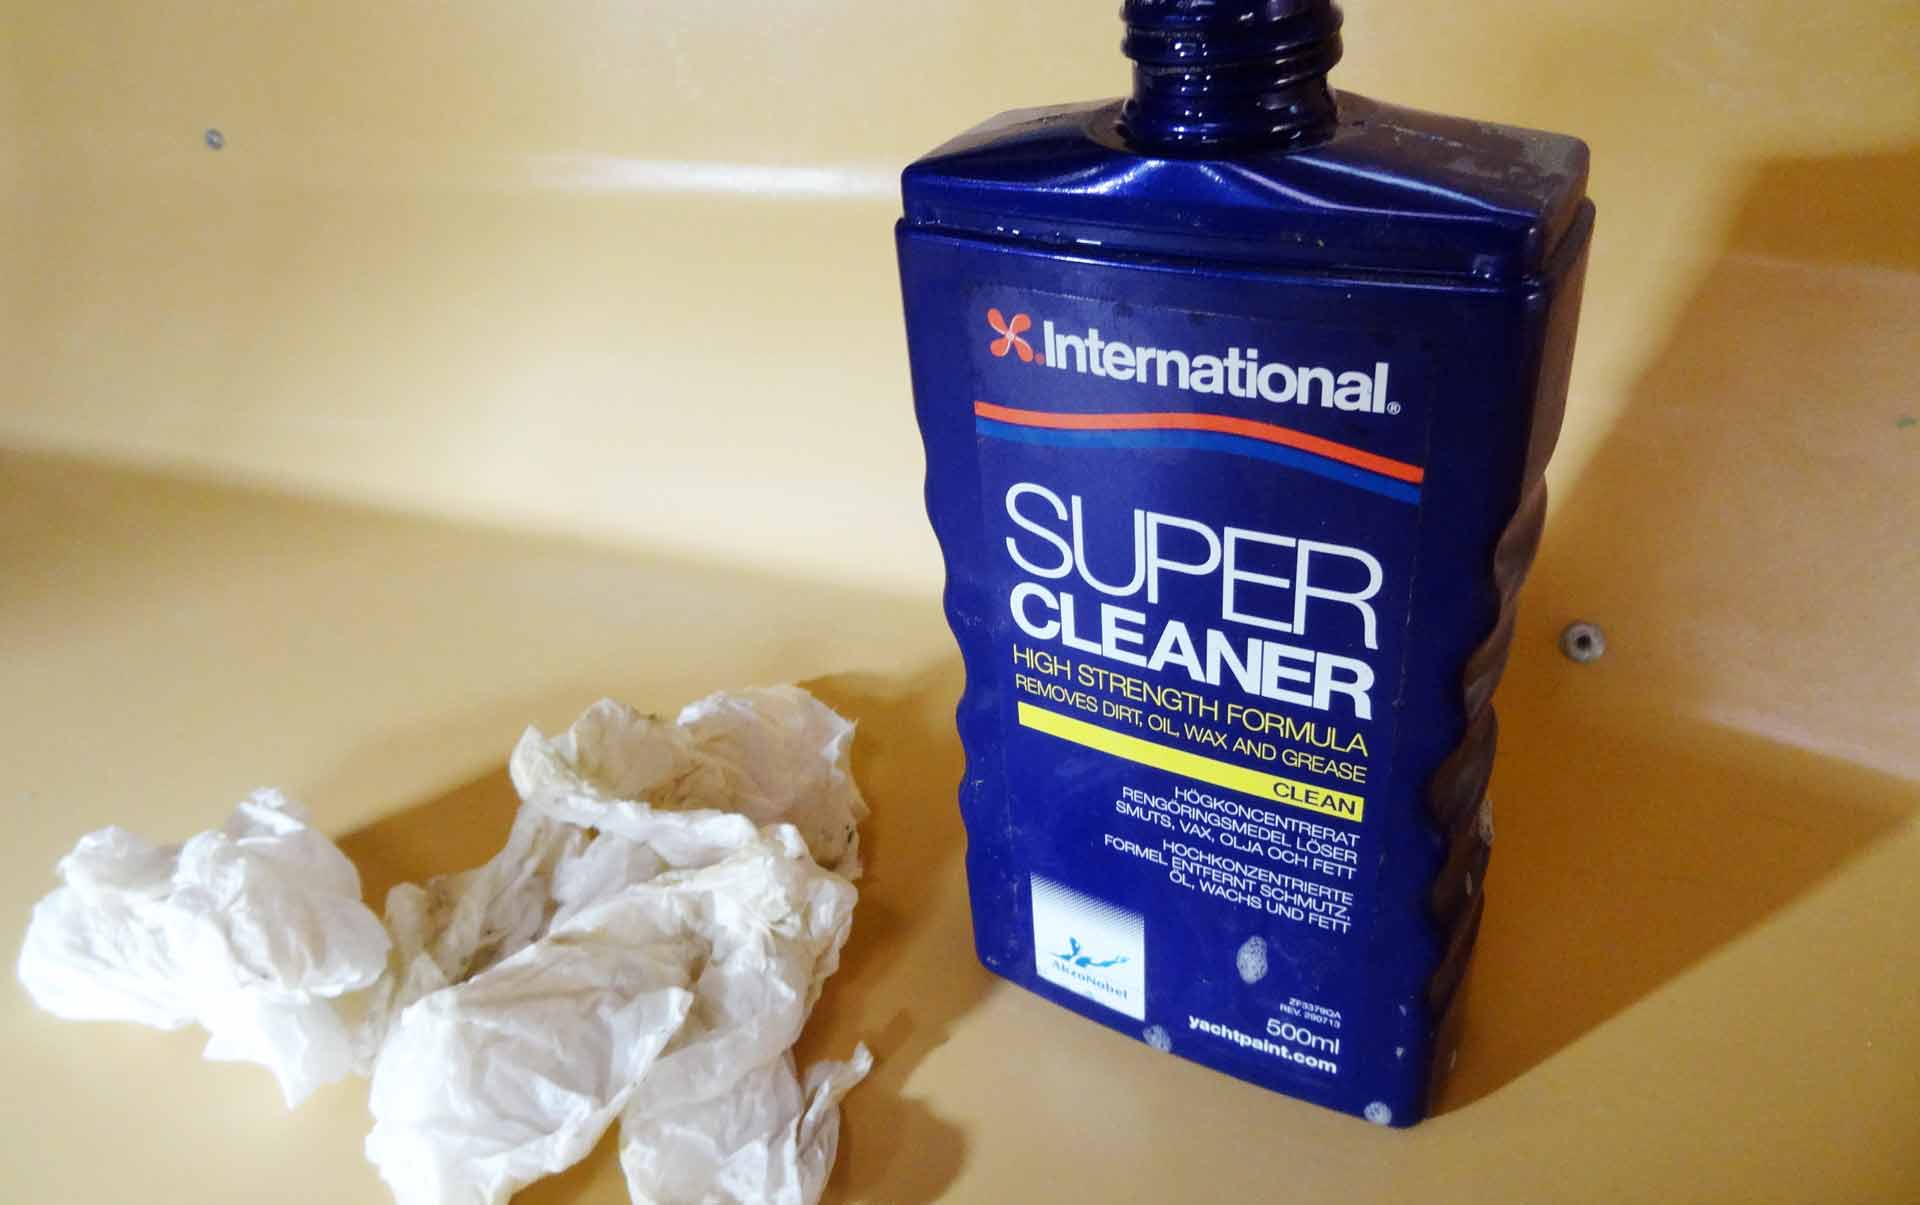
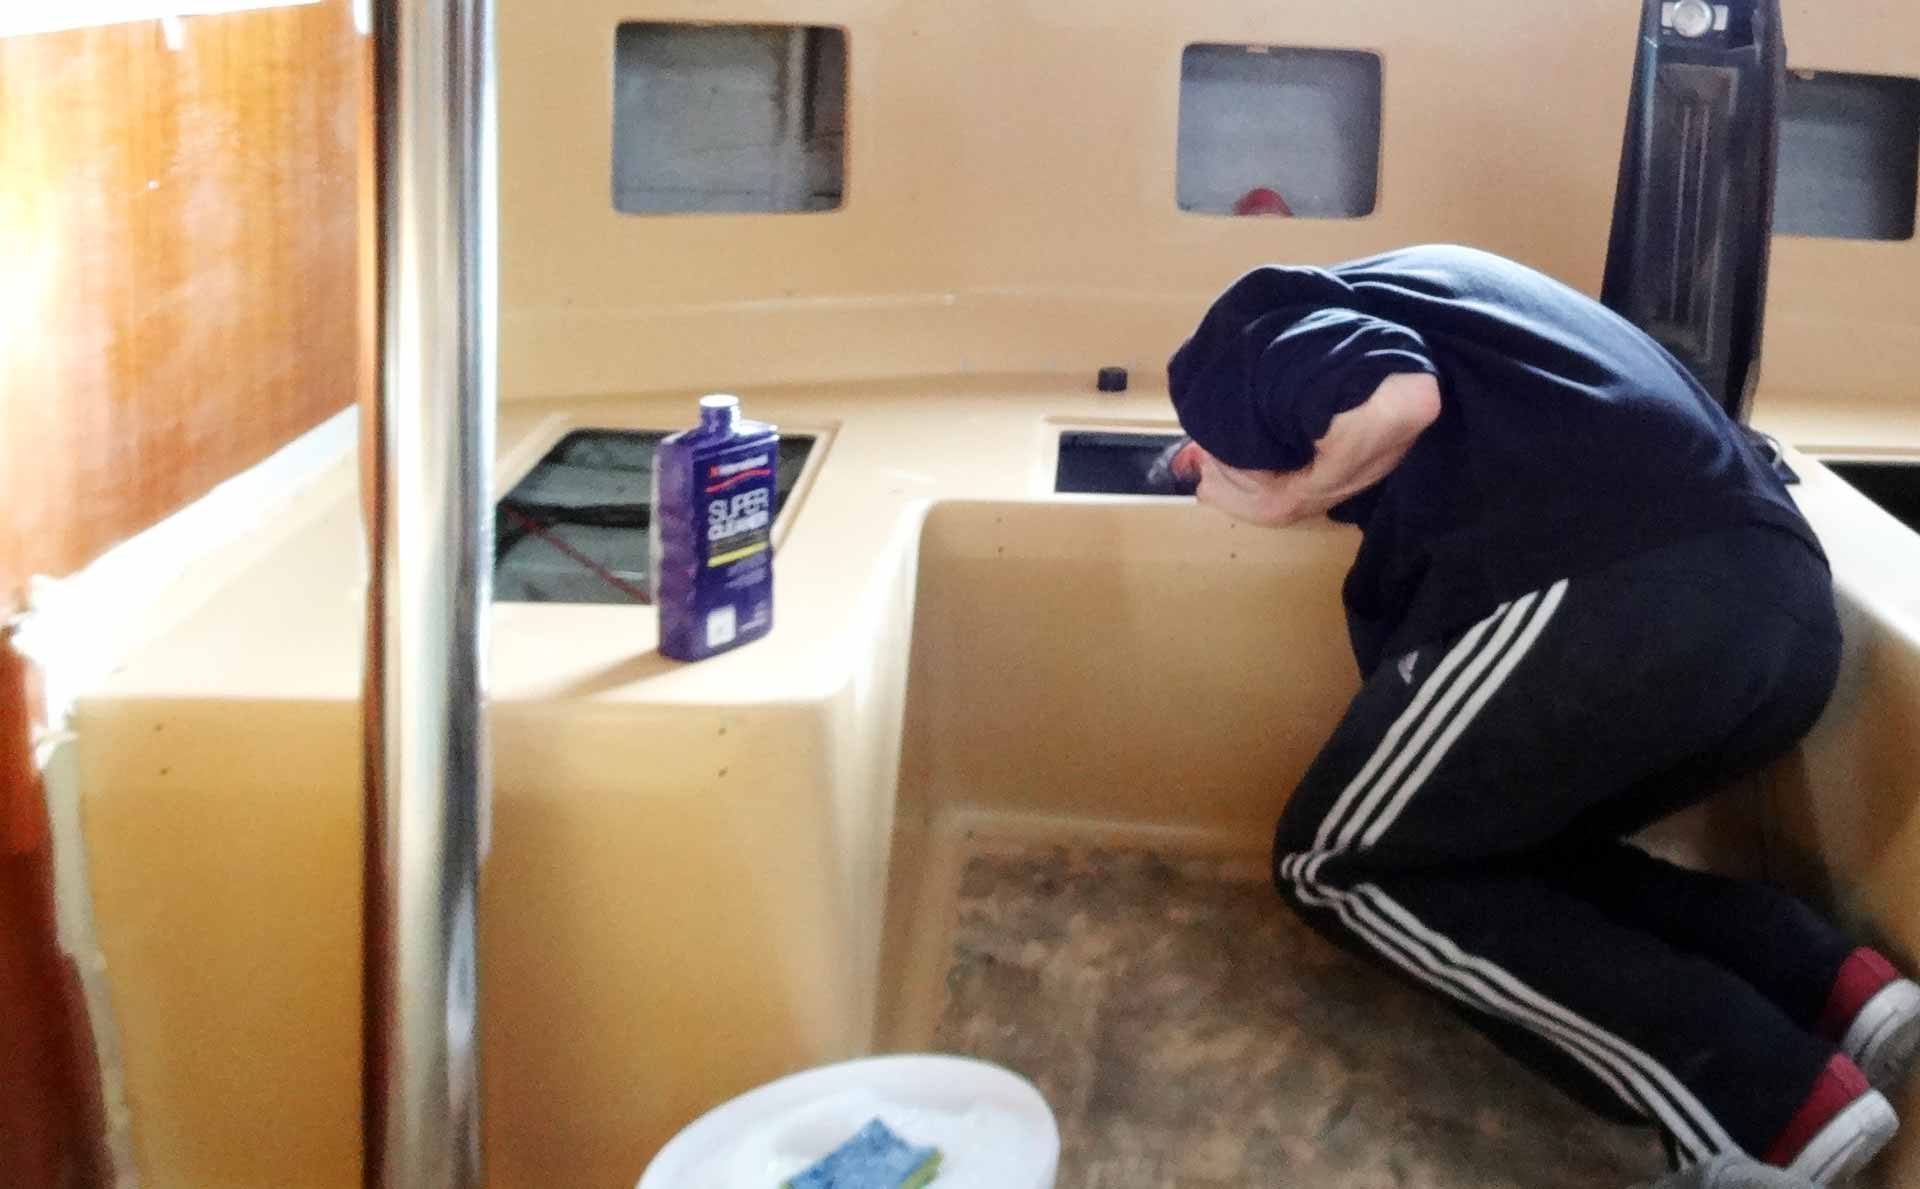
The weapon of choice was the Super Cleaner by International. As promised on the package it was to be utilized on heavily messy GRP-surfaces and I´d had plenty of to offer. All the time I was asking myself whether I would be lucky and could clean the stowage up to a point where it would not be hazardous and disgusting to have the provisions stowed away there or – worst case – if this whole mess was hopefully lost and I´d have to sand these too to re-paint the whole stowage just like the rest of the boat. I was begging Mr. Super Cleaner would help me to prevent having to paint.
Foaming away 40 Years of Filth
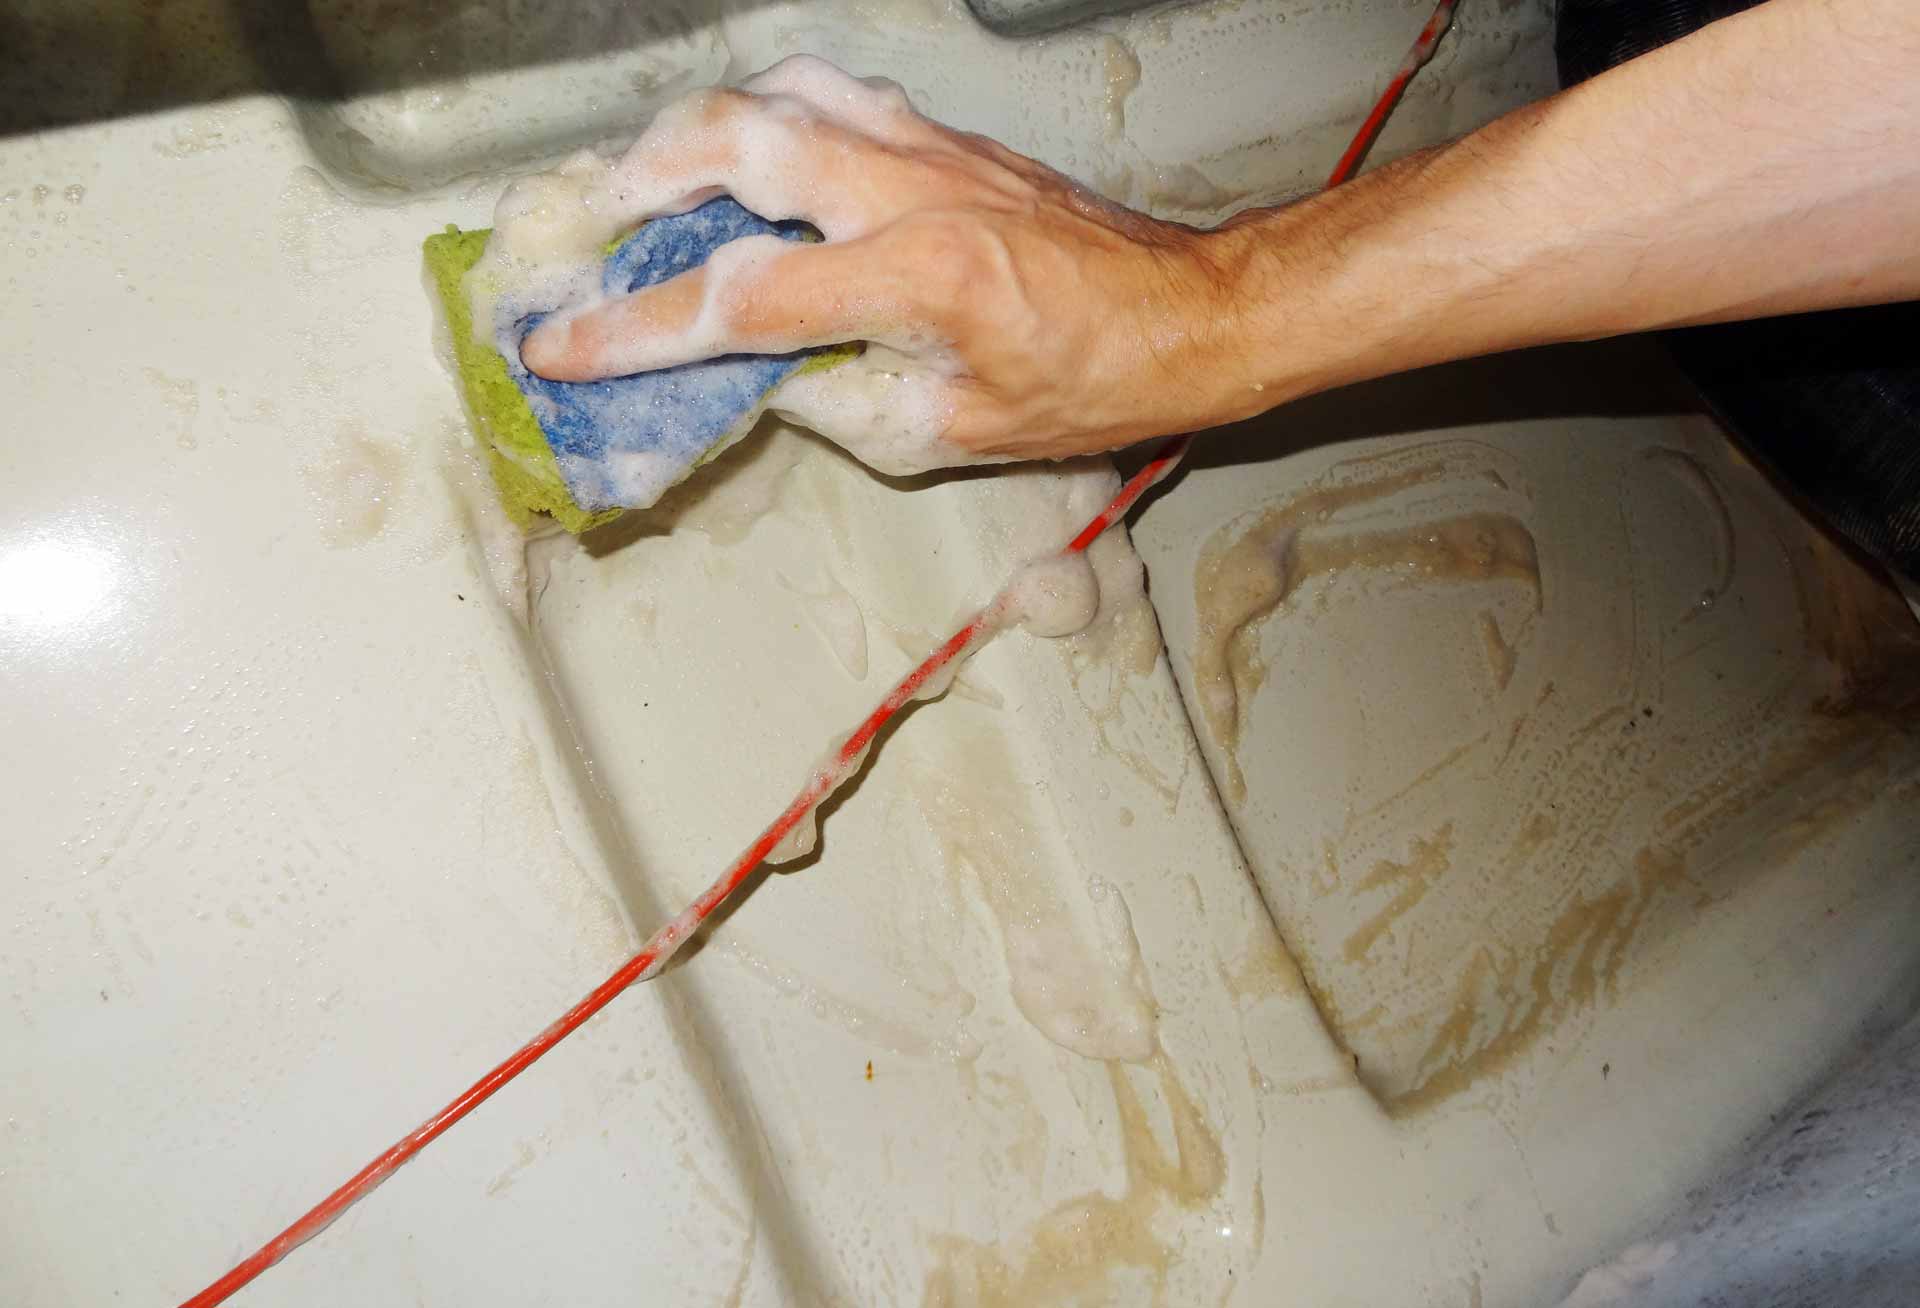
Utilizing Super Cleaner is a no-brainer. I opted not to dilute – as advised – the stuff but to have it applied in full concentration. I just splashed the rotten surfaces with some of the fluid and went on with a watery soaked wet sponge to steep the whole area. Most of the filth came off at an instant, coloring the water brown and black in a matter of seconds. After having started with the first stowage the whole bucket of fresh warm water turned brown in a matter of minutes. It was amazing! The Cleaner formed a thick layer of foam and I decided not to scrub instantly but to let the cleaner do its work for some minutes and went on to soak all the remaining surfaces of the stowage of my yacht as well.
What a fun work – well, despite the fact that I´d had to creep virtually into the hull through the small hatches to reach for the dirty down right next to the bilges (which reminds me of an article on step 1 of the bilge-refit). The foam doesn´t smell chemical at all thwarting the fact that this stuff is pure chemistry indeed. I didn´t wear gloves to protect my skin and must admit the hands were itching a bit after I had finished the work and was on my way home. But applying a rich moisturizer the itching disappeared and apparently there´s no leftover of the cleaner to be seen.
Scrubbing away the Scab
After some 30 minutes again I had a small break sitting in the sun and later dived back into the saloon for the next step: Scrubbing. I chose the rough side of an ordinary kitchen sponge and began to give the foam a thorough scrub. Again, it was a backbone-cracking job crawling on my knees and twisting myself to fit under the seating to reach for the far ends of the inner shell of my yacht´s hull. Bringing back a soaked sponge full of brown dirt, flushing it out in fresh water and scrubbing again. Two scrubs for each surface, my arms hurt like nothing some time later.
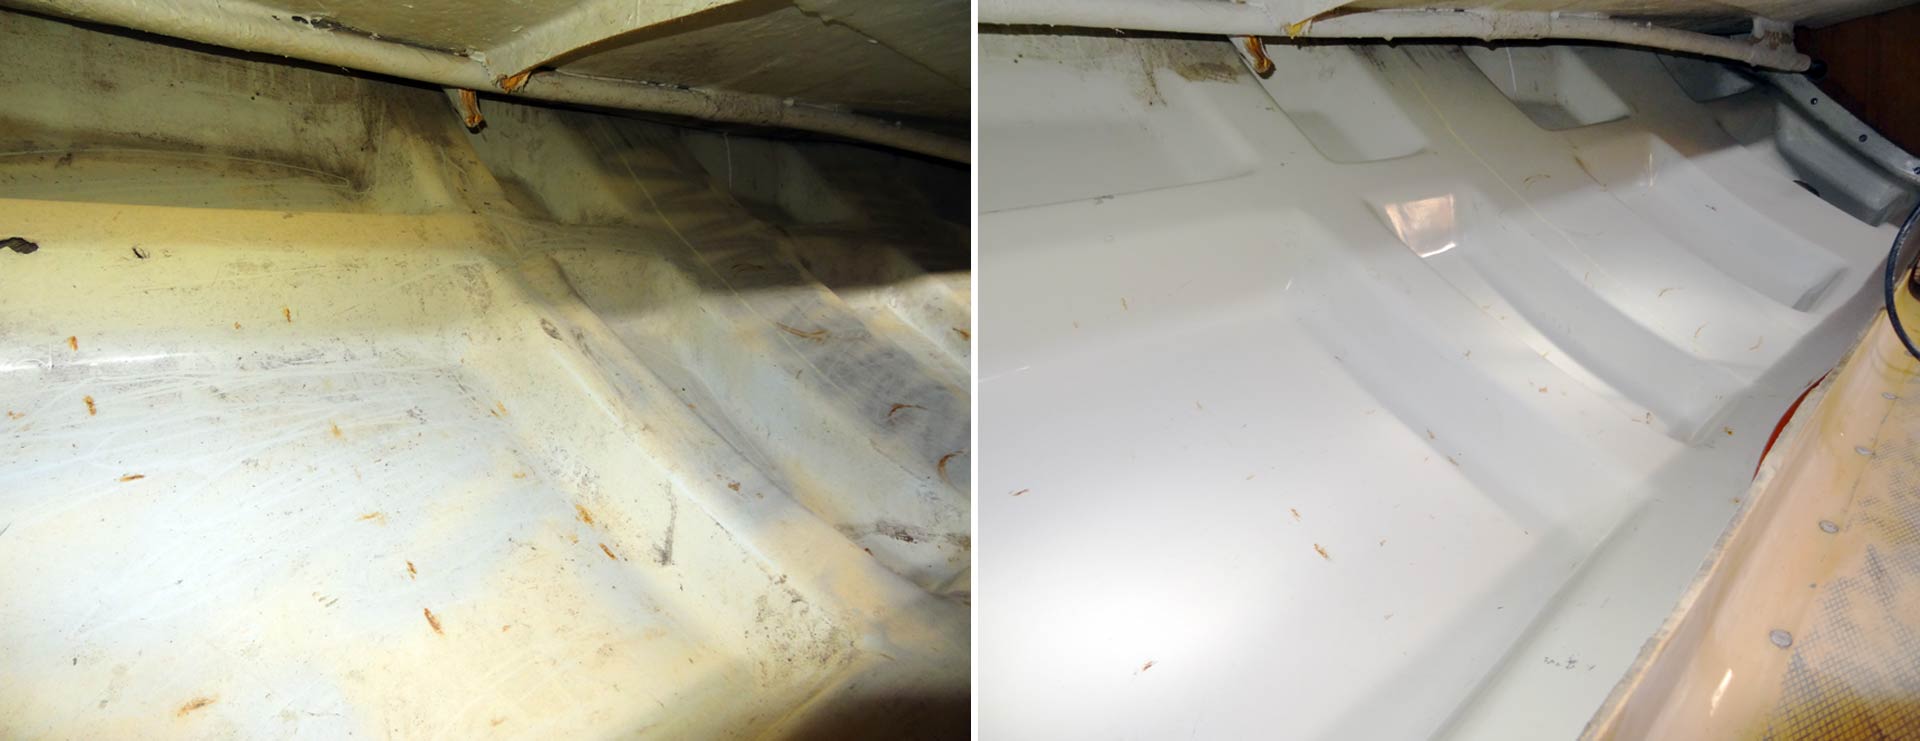
But it was worth it: I could watch the before matted, darkened and dirty hull become more and more white again, the flushing water turned from brown to not-so-brown over the course of the cleansing and above all, the whole ship was slowly but surely turning clean again. More than this: Not only that the Super Cleaner was able to remove all of the dirt, it also removed most of the rusty spots, leftovers of canned food once stored there over a long period of time and corroding into the hull. Chapeau, Super Cleaner!
That´s what I call a clean Boat
After I arrived at the quarter berth again and looked at my work – I had dried the slippery surfaced with kitchen paper towels – I was just excited! Seeing my ship this clean was a bit of a huge step forward after having worked for weeks inside this boat full of dust and dirt. Now, not just the visible surfaces I´ve sanded have been thoroughly cleaned but also the hidden ones. The whole stowage of my ship is now blasting in shiny white again and the stuff looks (apart from some tiny spots I wasn´t able to get cleaned up) brand new.
The best of it all: I do not have to paint these surfaces as feared which would have cost me some 4 to 5 weeks all in all, apart from the money to be spend on primer and paint. Cleaning all the hidden areas had another side effect which I would call very important: I was able to take a closer look onto the wiring of the ship, the gas pipe and the echo sounding equipment as well as onto the outboard valves and their proper seals. Such a Spring Cleaning is not only producing a feeling of pride and joy, it leaves you with a good feeling of having done something really important for the ship´s hygiene. And that is so much worth, having a good feeling of being on a clean ship.
Next up in my Kings Cruiser´s Refit
Had my wife not been calling me up on the phone to hijack me to a romantic walk in the sunshine I might have finished another job. I was just cleaning the bilge – recently pre-coated with a primer and now ready to be varnished with bilge-paint – to sand the surface in advance, clean it thoroughly with acetone and a special sticky towel to remove the rest of the dust and finally applying the first of at least three layers of bilge paint. Well, a well-balanced marriage has always priority …
Next to be done, I hope the upcoming weekend, is the first of the bilge-paint layers and the second and last layer of yacht-white paint in the fore castle. Slowly but surely all the remaining, now sanded, surfaces of the boat will be primed (two layers) and finally painted with white (three to four layers) over the course of the coming week(ends). After finishing this job, the second, big milestone of my King´s Cruiser Refit will be reached.
Which leaves “only” seven more milestones until the interior refit of this sailing yacht is done.
Oh my …