Wow, what a big chunk of work, there, right behind me! This week I´ve finished the first milestone of my refitting-plans for SY OLIVIA. Right at the very day when I first got to see her (read full article here) it was of no question for me, that I´d have to unleash a major refurbishing program for changing the face of that boat. Why? Simply because of three facts: First is safety. Knowing your boat inside out is of utter importance. A ship is not a car. You cannot pull over to wait for the towing. Losing control of vital parts of the boat and not knowing how to repair or circumvent the problem can be a matter of live and death. No choice here, I´m a father of kids.
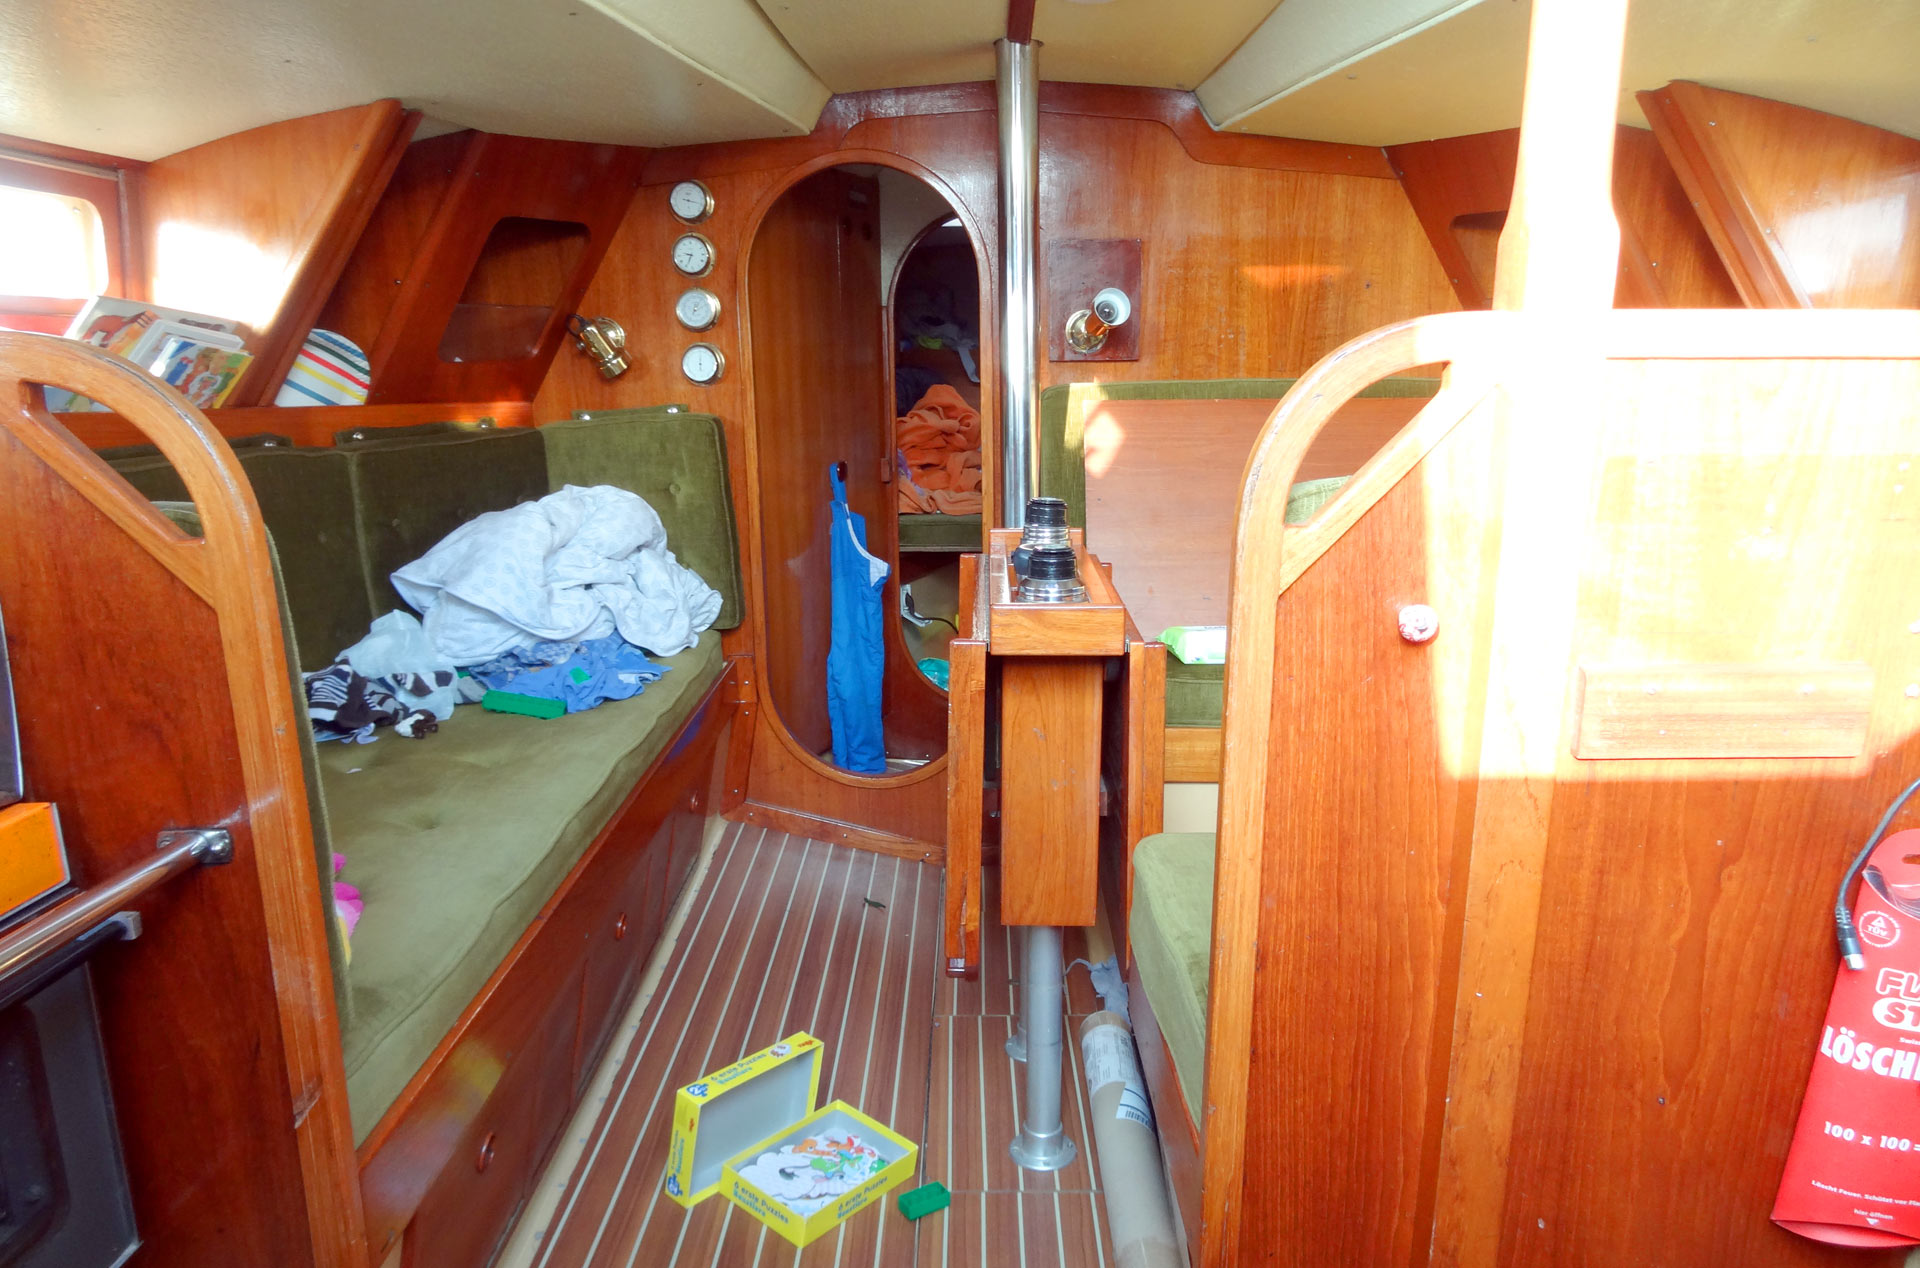
That´s SY OLIVIAs saloon prior refit.
Second: My yacht is an old one. Bought as third or fourth owner (still a bit unsure about that fact) the boat was built in 1975, exactly 40 years ago. Only by scraping off every little piece, taking away all panels and sneaking and sniffing behind every little corner I can get a clear and complete overview of the condition of the boat – also a matter of safety in the end. Has there been a collision? Major structural damage to the hull? Leaks or worse? My refitting the boat I am certainly going to look down inter her innermost depth.
She knows where she´s going.
Third but not least: I want to make the ship mine. After more than three decades a lot of holes have been drilled, wires have been installed and things have been done by the previous owners to make the ship more comfy for them. Now that I am in charge, I want to re-start the whole boat. A fresh new paint-job, shiny new woodworks, cosy cushion, new colors and equipment will wipe away the experiments of the past and override the old, dusty and a bit greasy stuff with a complete new look.
Is a do-it-yourself yacht refit a good idea?
Advertisement
This was certainly one of the most asked questions in my head during the last weeks. During stage one of my plan – emptying and cleaning the boat – I´ve had surprises and learnings with every piece I had removed, with every new screw taken out of the hull and with every panel I was taking off the ceiling: Had I overextended myself? Isn´t a yacht refit a job for a professional, let´s say boat-builder or at least an educated craftsman. Well, could be. But on the other hand, with every hour working inside the boat, with every clocking-off and every crossing off another item from my to-do list my self-confidence grew evermore.
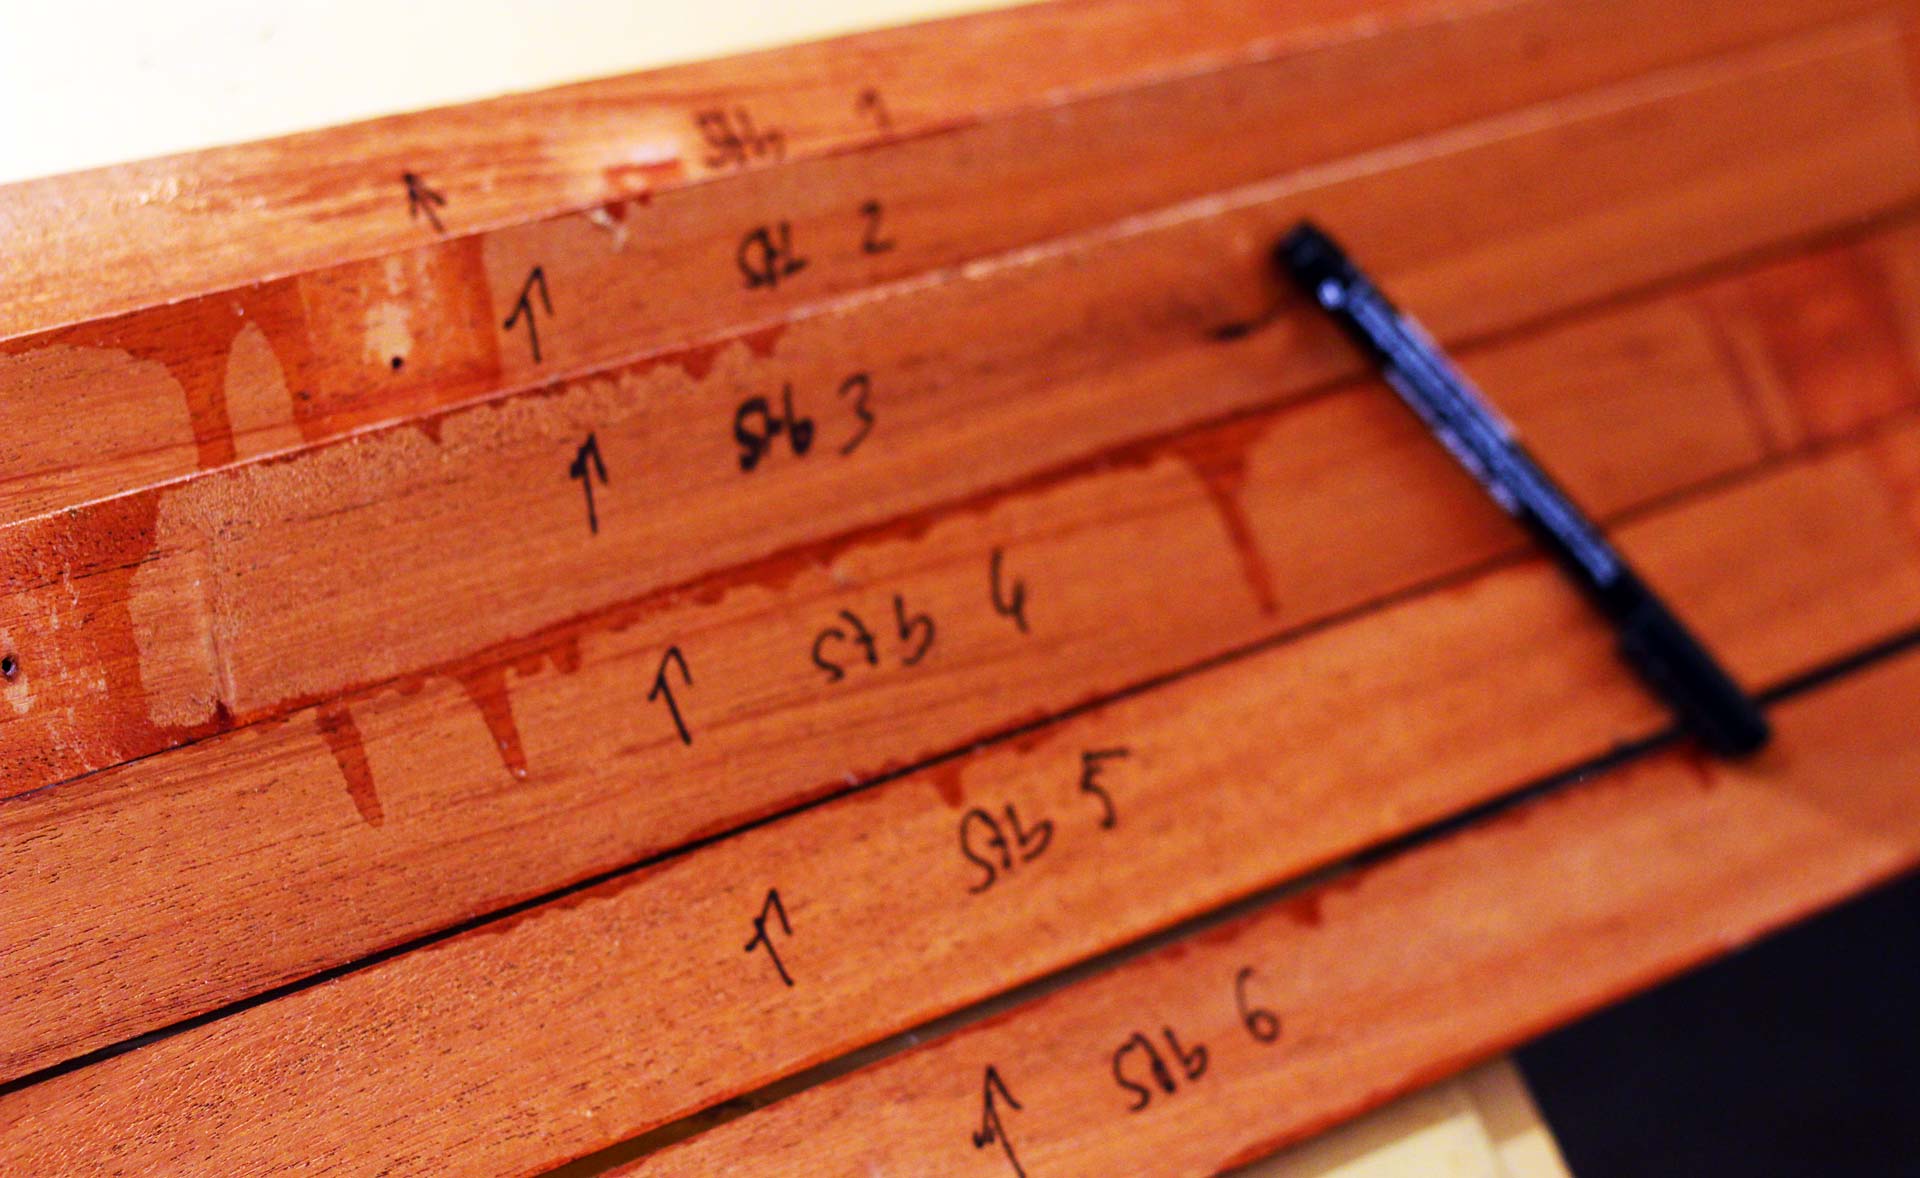
Remember to mark every little piece you take off the boat.
I tried to be honest with myself from day one onwards: Every part of this voyage that would be bigger than my own capabilities would be handed over to the pros. All the other things, I am more confident now than ever, can be done by myself. Since some 90 per cent of all to-dos require basic mechanical skills and accurate craftsmanship, that´s definitely a big chunk of work – but not impossible. Better so, since most of the work to be done here on my sailing yacht is only cosmetical – no opening up and laminating the hull or heavy duty stuff like this.
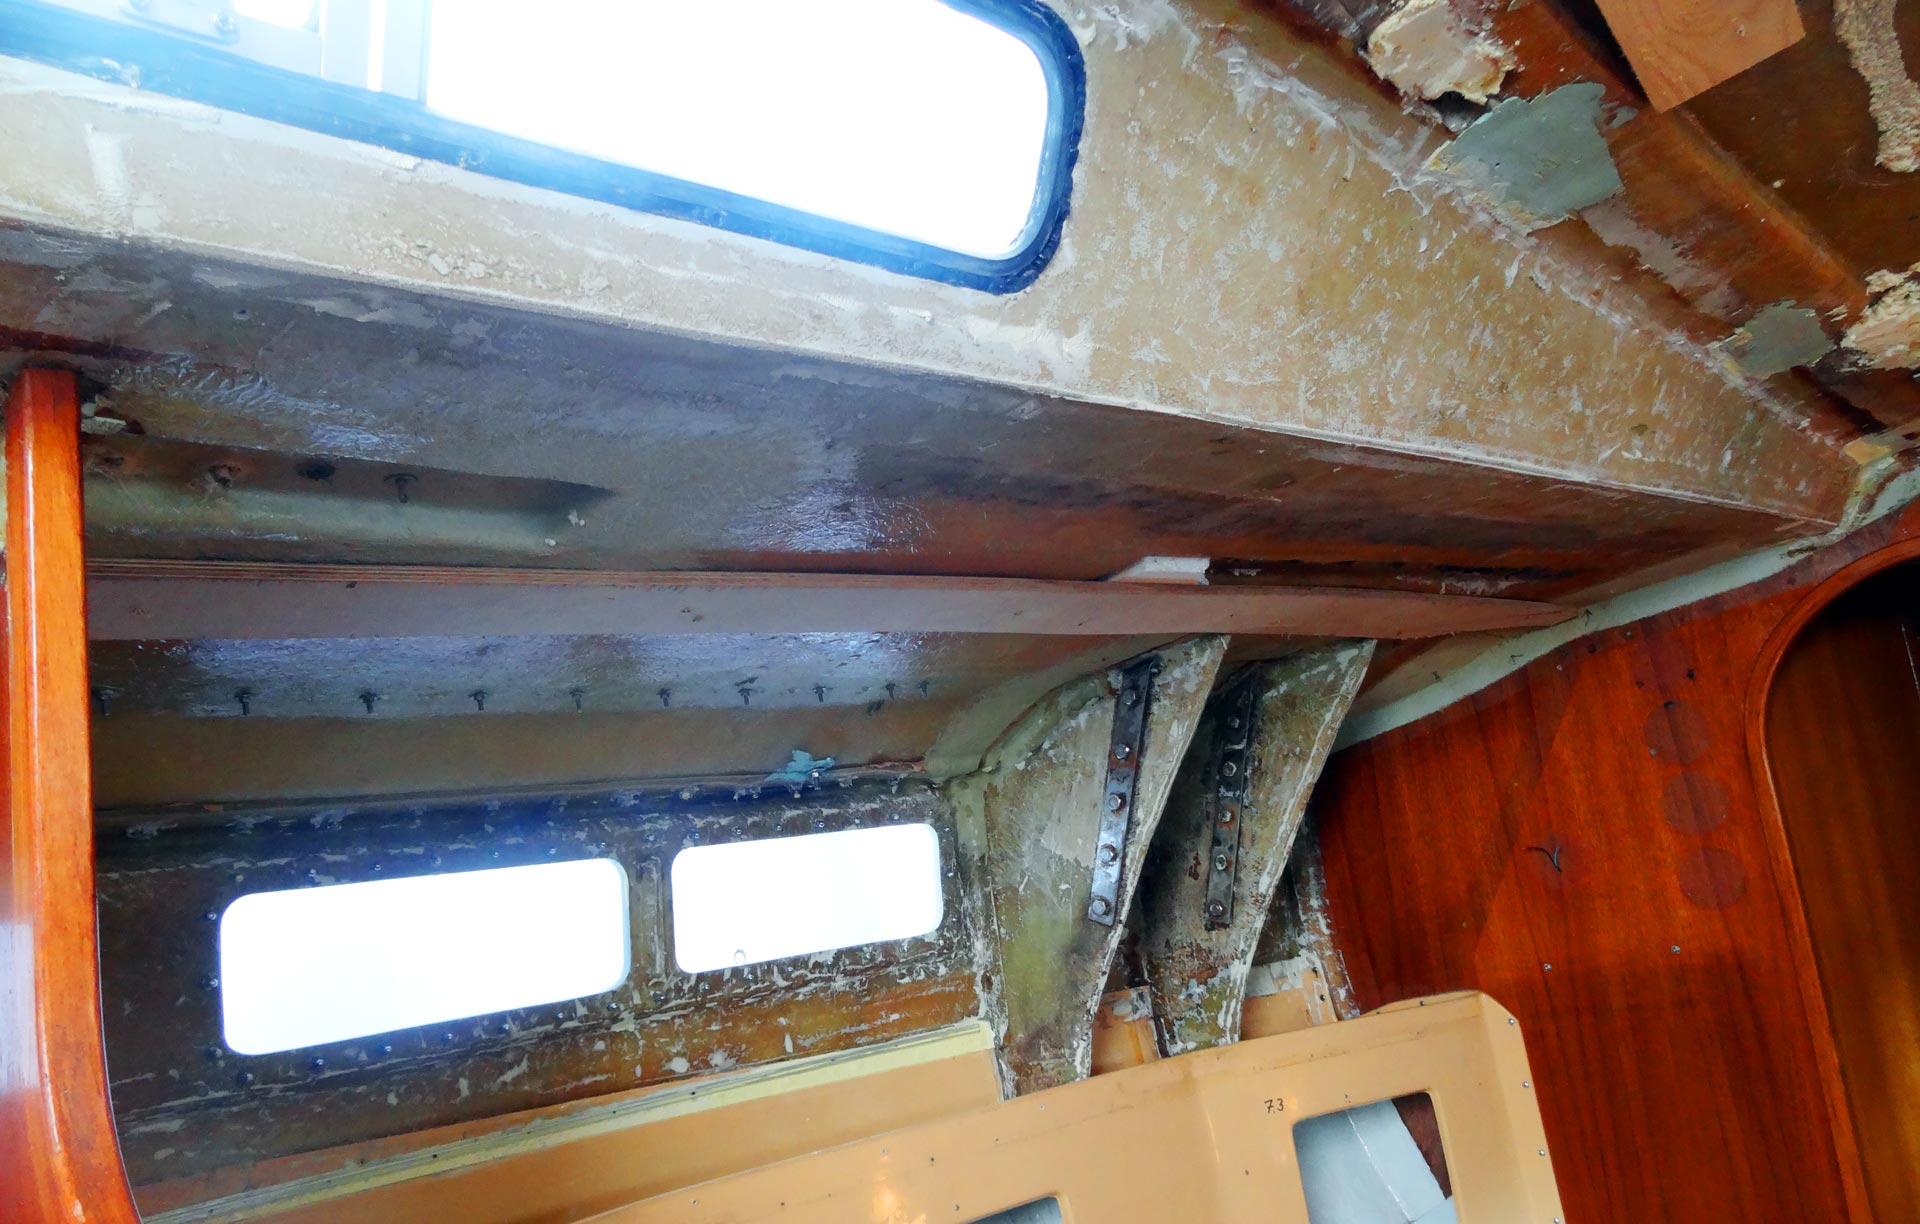
The chain plate-outlets are making water.
But is it a “good idea”? Well, depends on what you´d expect from being a boat owner. You´ve got to love the work. Got to be keen on becoming expert on grinding, scrubbing, hammering, glueing, varnishing and all that stuff. You´ve got to be keen on removing all the grease of 40 years, scratch of centuries-old slime out of the dark-gloomy depths of the farthermost edges of the bilge or working head-down in the cramped engine room with acetone in your mouth and nose. You have got to just love these lonely, sweaty, dirty hours. A clear vision, or let´s call it a dream, a visualization of your yacht, the finished project, shiny new white, even whiter sails flying proudly in the skies certainly helps.
Port side of the saloon is stripped off everything.
From a financial standpoint it´s an adventure as well. But as far as I can say by now, it´s far less expensive than feared. Time is the real currency here – it´s a time-eater. You´ll need some basic equipment worth a couple of hundred euros, the rest is a lot of time you will invest. A lot of time! It´s certainly a good idea to talk the whole project and the prospect of the coming months if not years through with your wife and family since they will also “pay” for the time you are to spend inside the GRP-hull. An here the vision helps again: It´s both you and your family who will eventually draw the most profit out of the whole investment: Precious, priceless time on board the new ship.
A nice surprise and not-so-funny discoveries.
Keeping that in mind I started working on SY OLIVIA following strictly a plan I´ve made after diligently inspecting the whole ship, taking a thousand notes and bringing to paper my ideas, formulating to-dos and prioritizing them, planning ahead the coming months. First big stage: Getting out everything which can be moved, drill down to the core of the ship and finally clean it all through. By doing so, I´ve made a nice discovery after the second working-day …
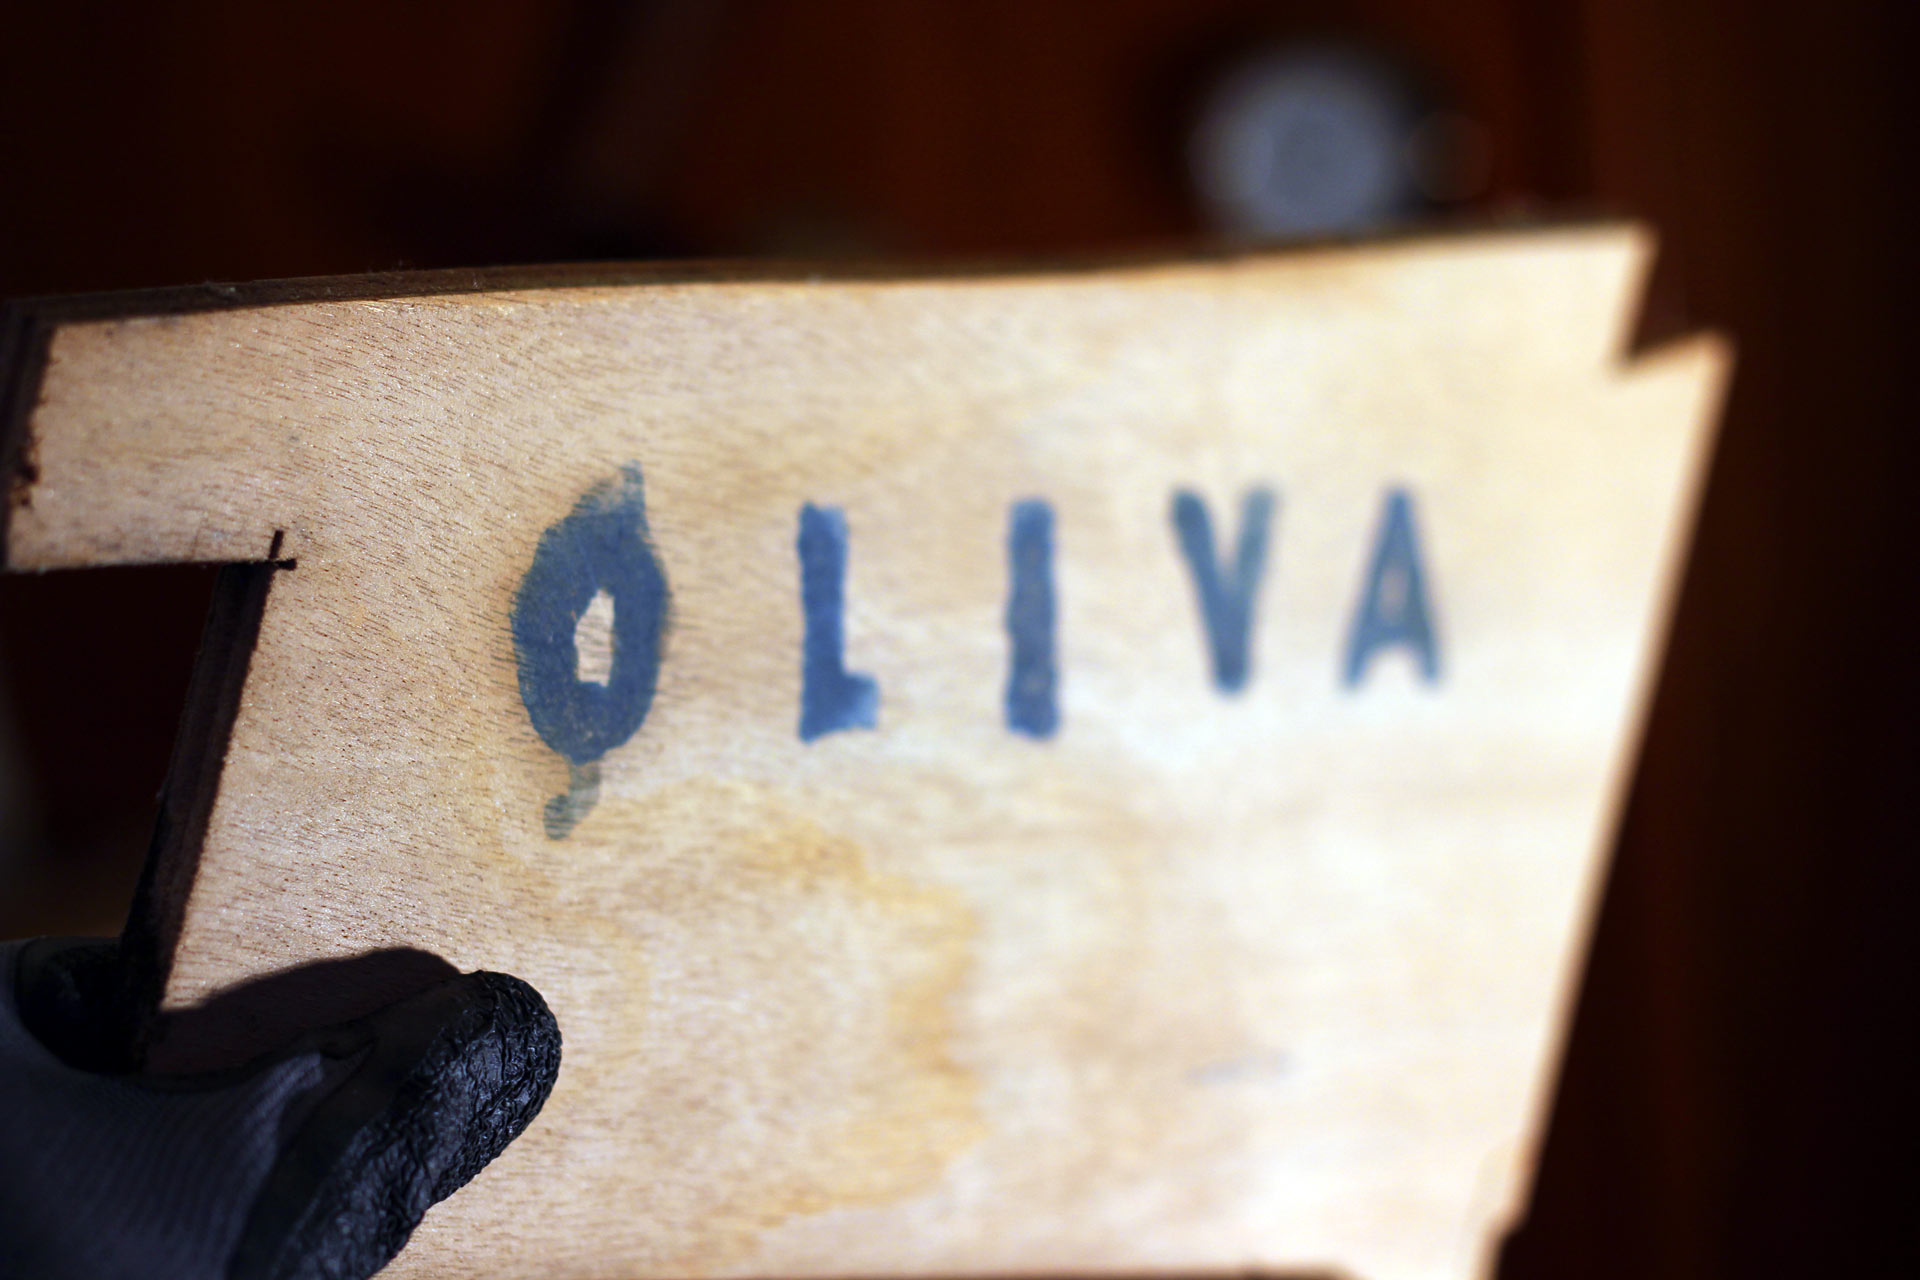
Underneath the panels – the christening name of my yacht.
After away the massive wooden coverings of the chain-plates in the ship´s saloon, it was the port-side plate-covering astonishing me: On the backside of one of the panels clear big blue letters have been stamped on to the wood – I guess that this has been made by the Fiskars wharf in Finland when serial number 133 was built I order to distinguish her parts from other ship´s equipment. Her true christening name was visible: Oliva. Now that´s interesting. And it suddenly fits the whole picture: Stamped on her radio, also “Oliva” and her old call-sign were clearly marked here. I misinterpreted that as a misspelling. So “Oliva” is her true name then. (Read full article on SRC-radio certification here).
Surprises behind shiny facings.
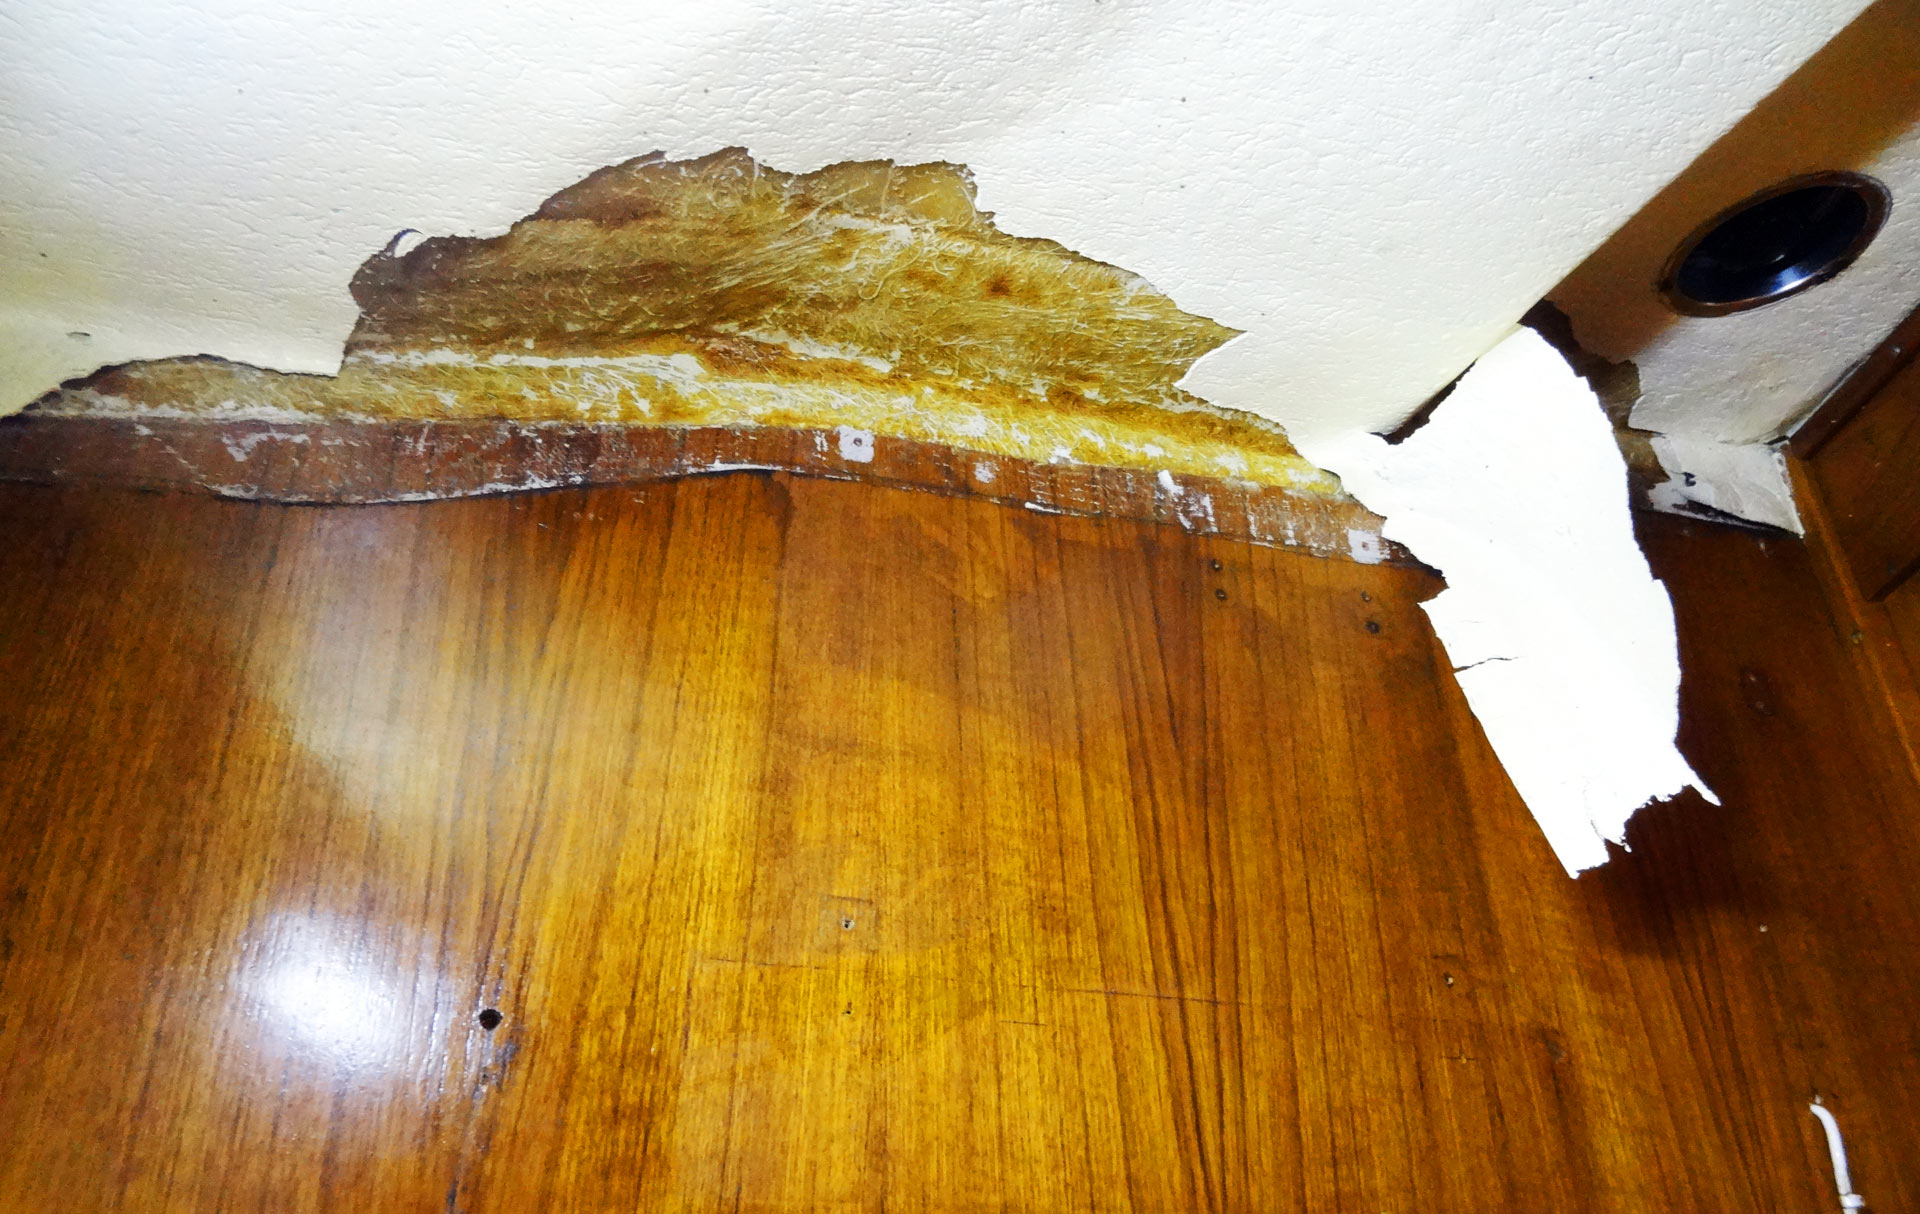
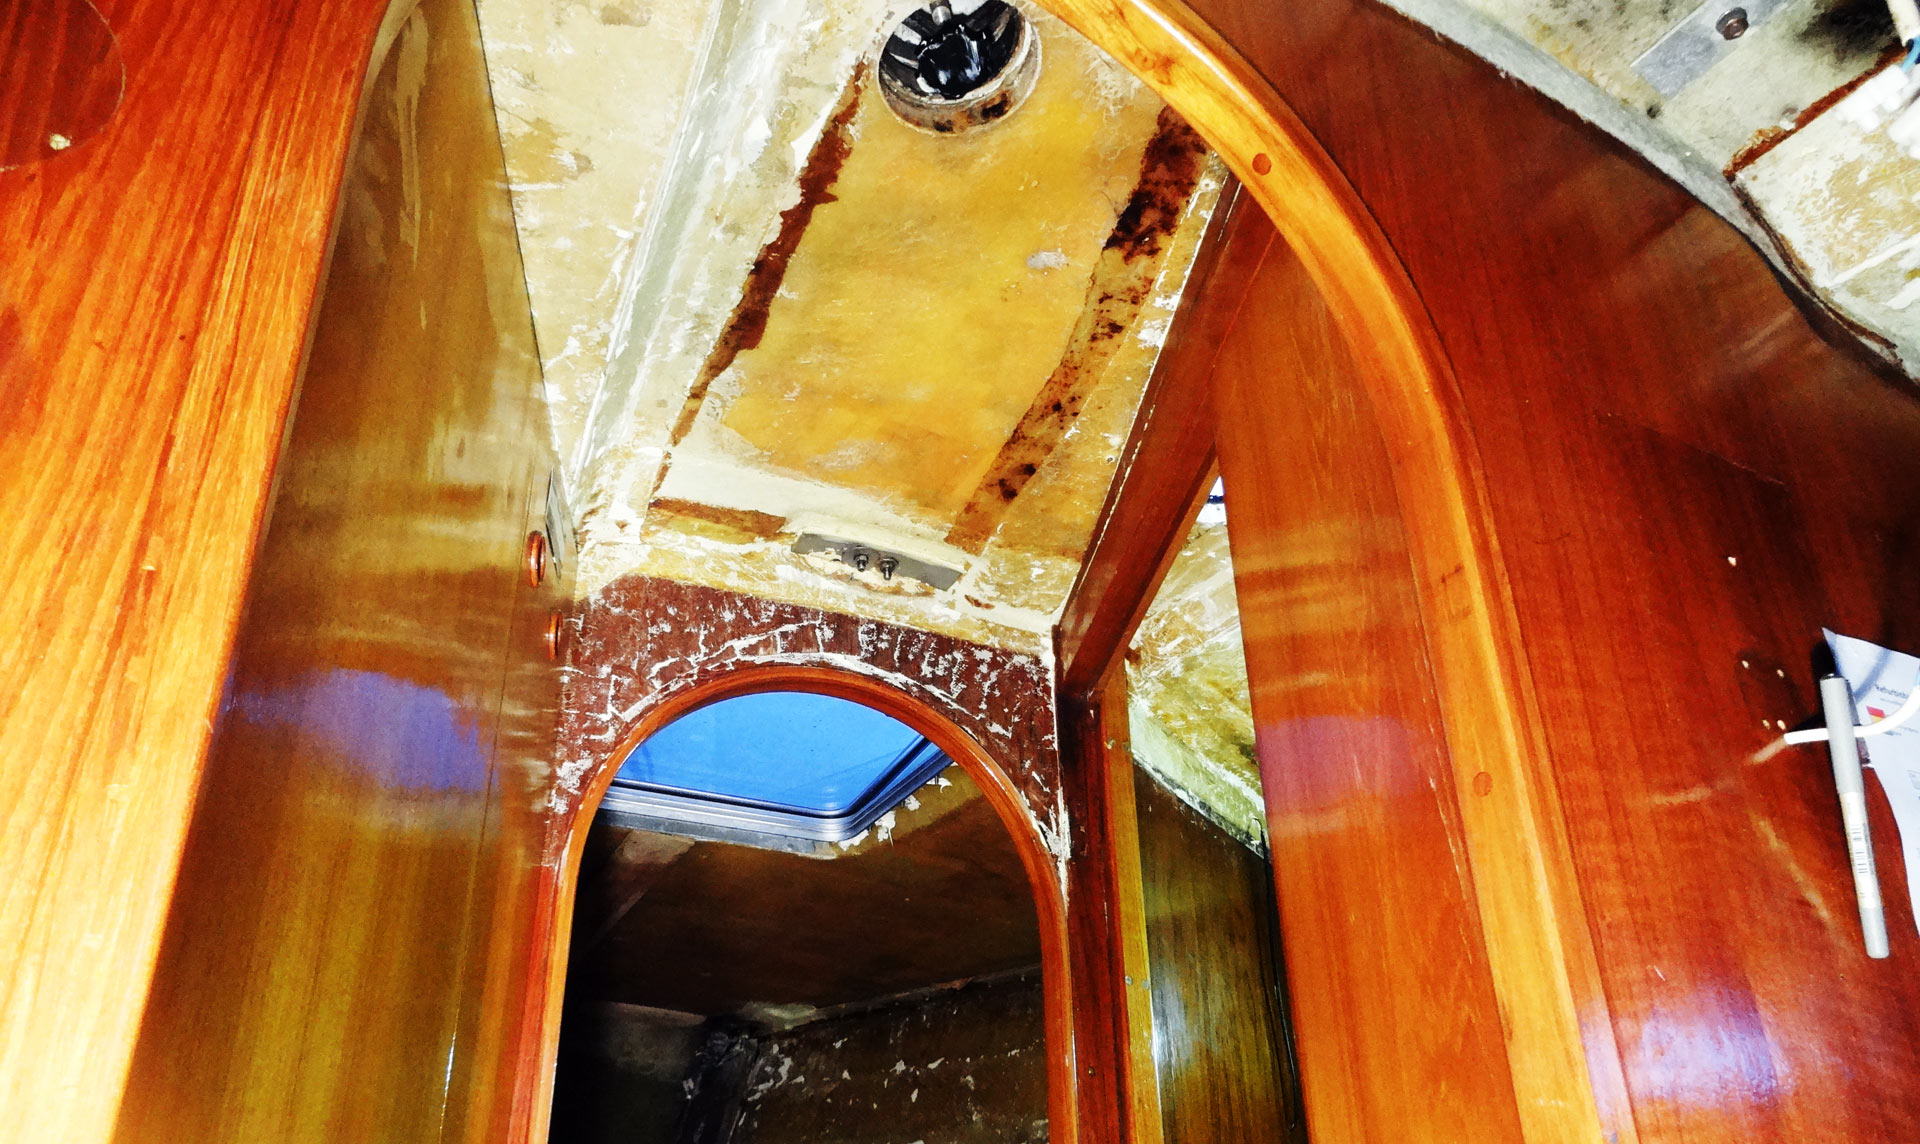
Other surprises were not so funny. “She is a real dry boat!”, was assuring me her pre-owner while on our inspecting-cruise some months ago (read full article here) and right he was: Even after sailing for a long time with 30 degress tilted position and having our portholes fully underwater, not one drop of water was able to penetrate her tight sealings. But other, not so evident pieces did had their leaks apparently: Having taken off the complete ceiling I noticed big damage on the inside of the panels done by … tiny drops of water coming in though a not so tight hole drilled for the wires going up to the mast-top. Good hint for my list: Check all outlets and seal them.
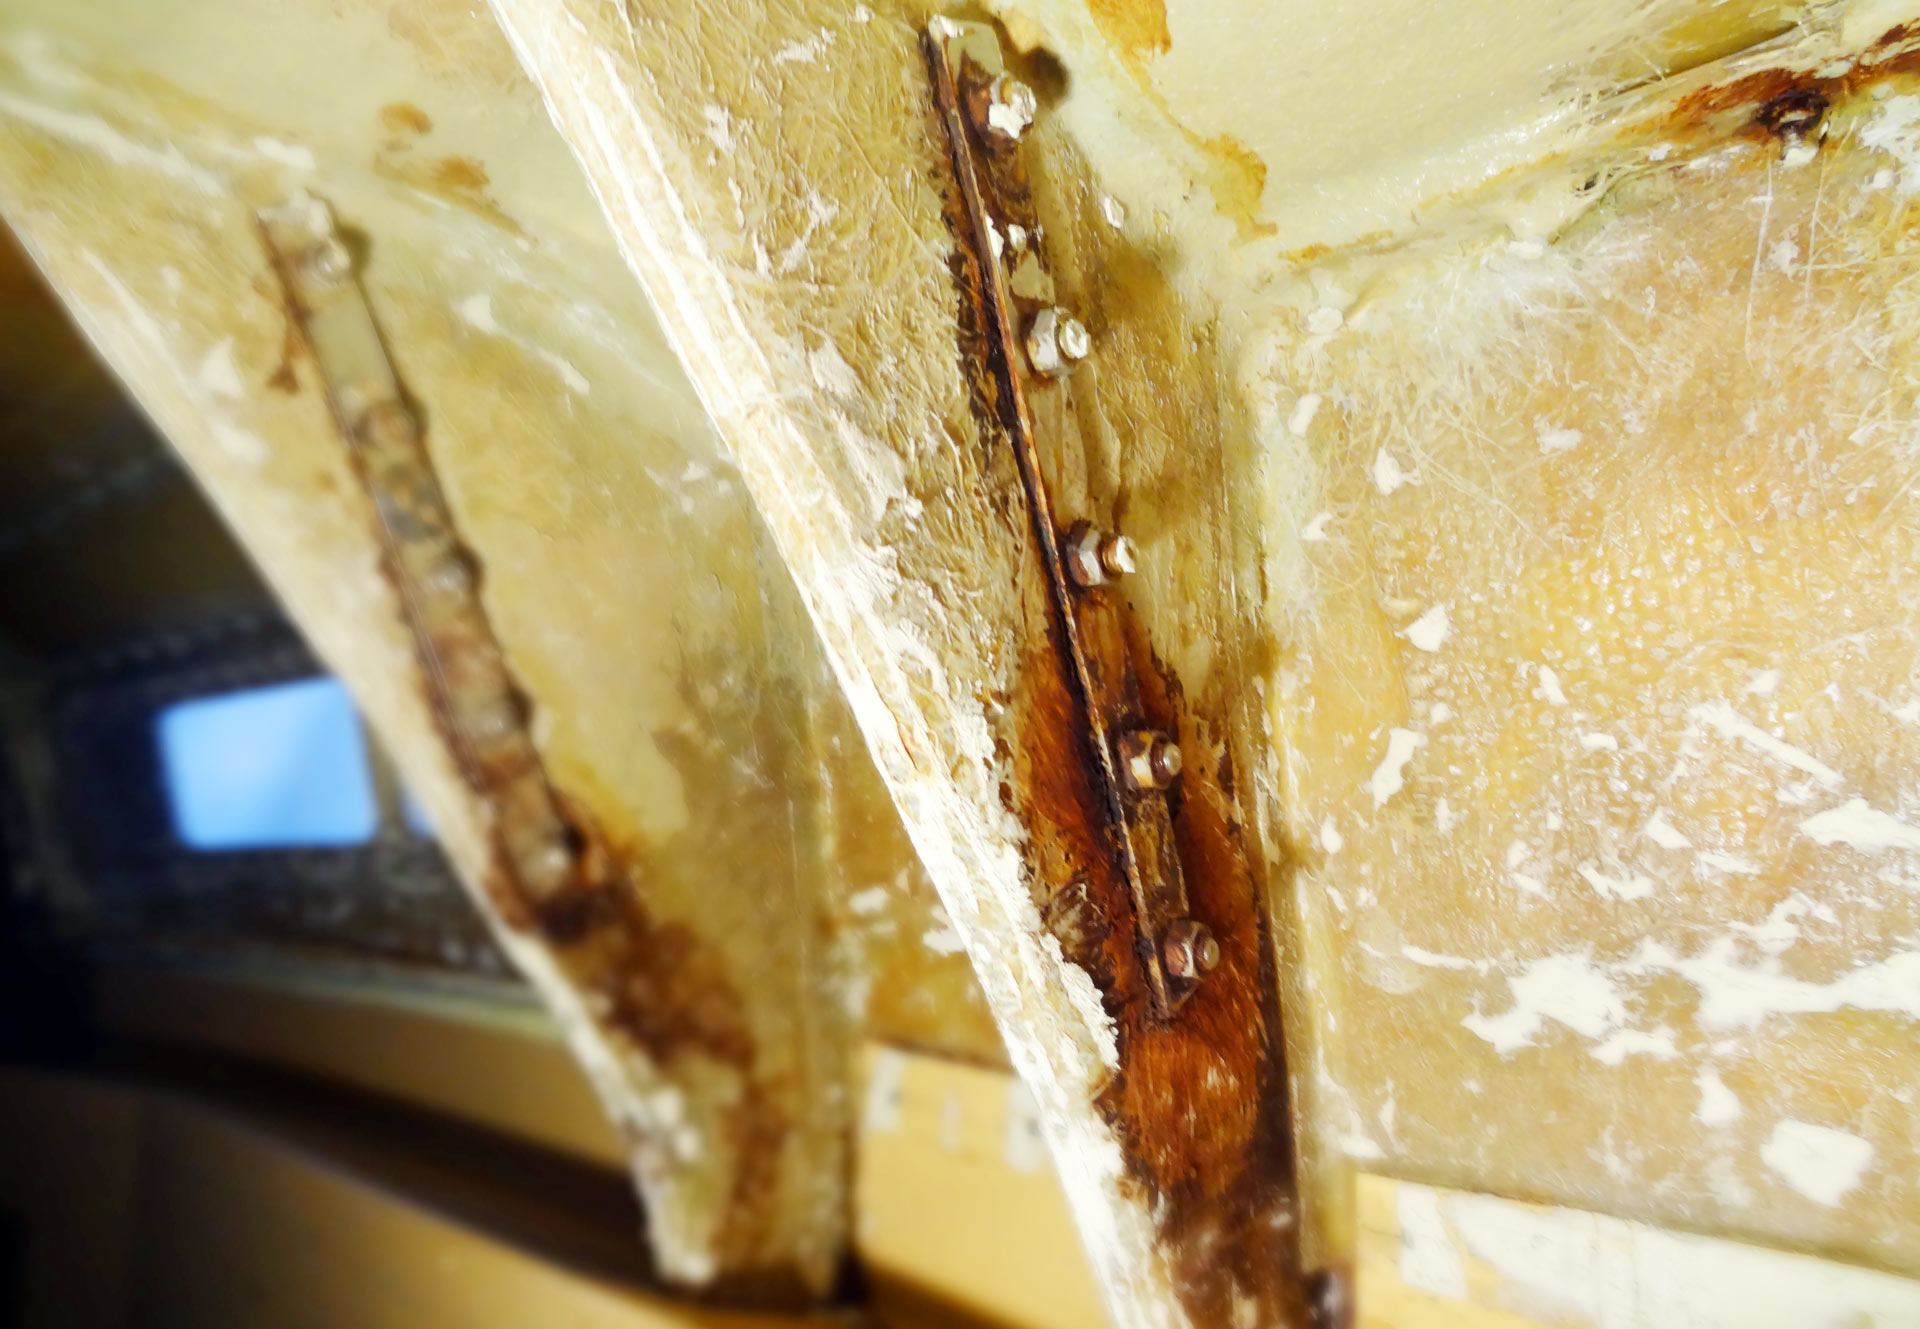
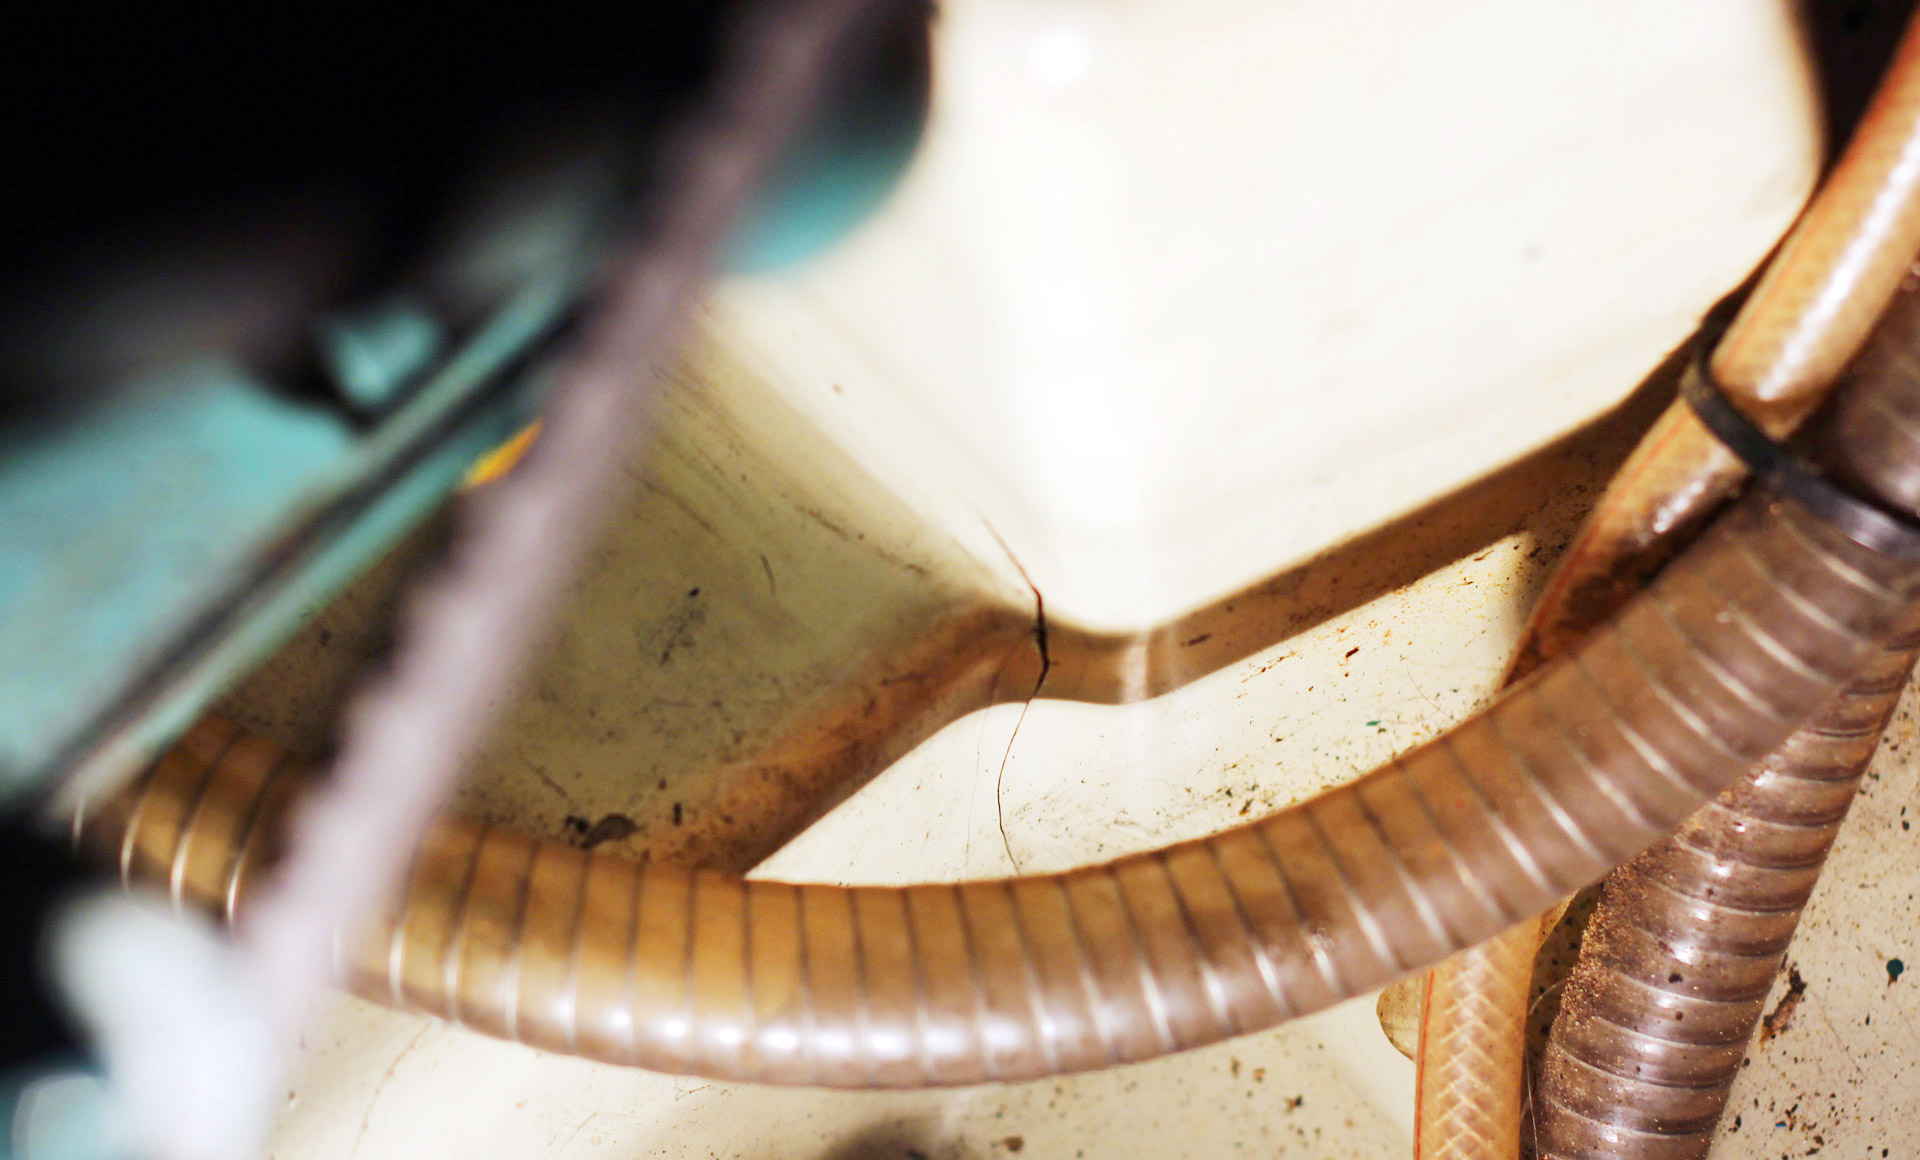
Not so amused: A crack in the engine basement.
I quickly decided to wrack the whole ceiling-stuff. Too far have the parts been in the stage of decomposition, no chance to refit them. More work ahead, but also the chance to give the ceiling-panels a whole new appearance – maybe with integrated LED-lighting? Another downer: A big crack in the engine footing and two broken rivets near the bilge, connecting outer and inner shell of the hull to each other. Definitely two jobs for the pros. But all in all, the substance of the boat presents itself without major glitches – just a leaking chain-plate and more destroyed wood on the starboard side, but that´s a part of the wooden design I wanted to change anyway.
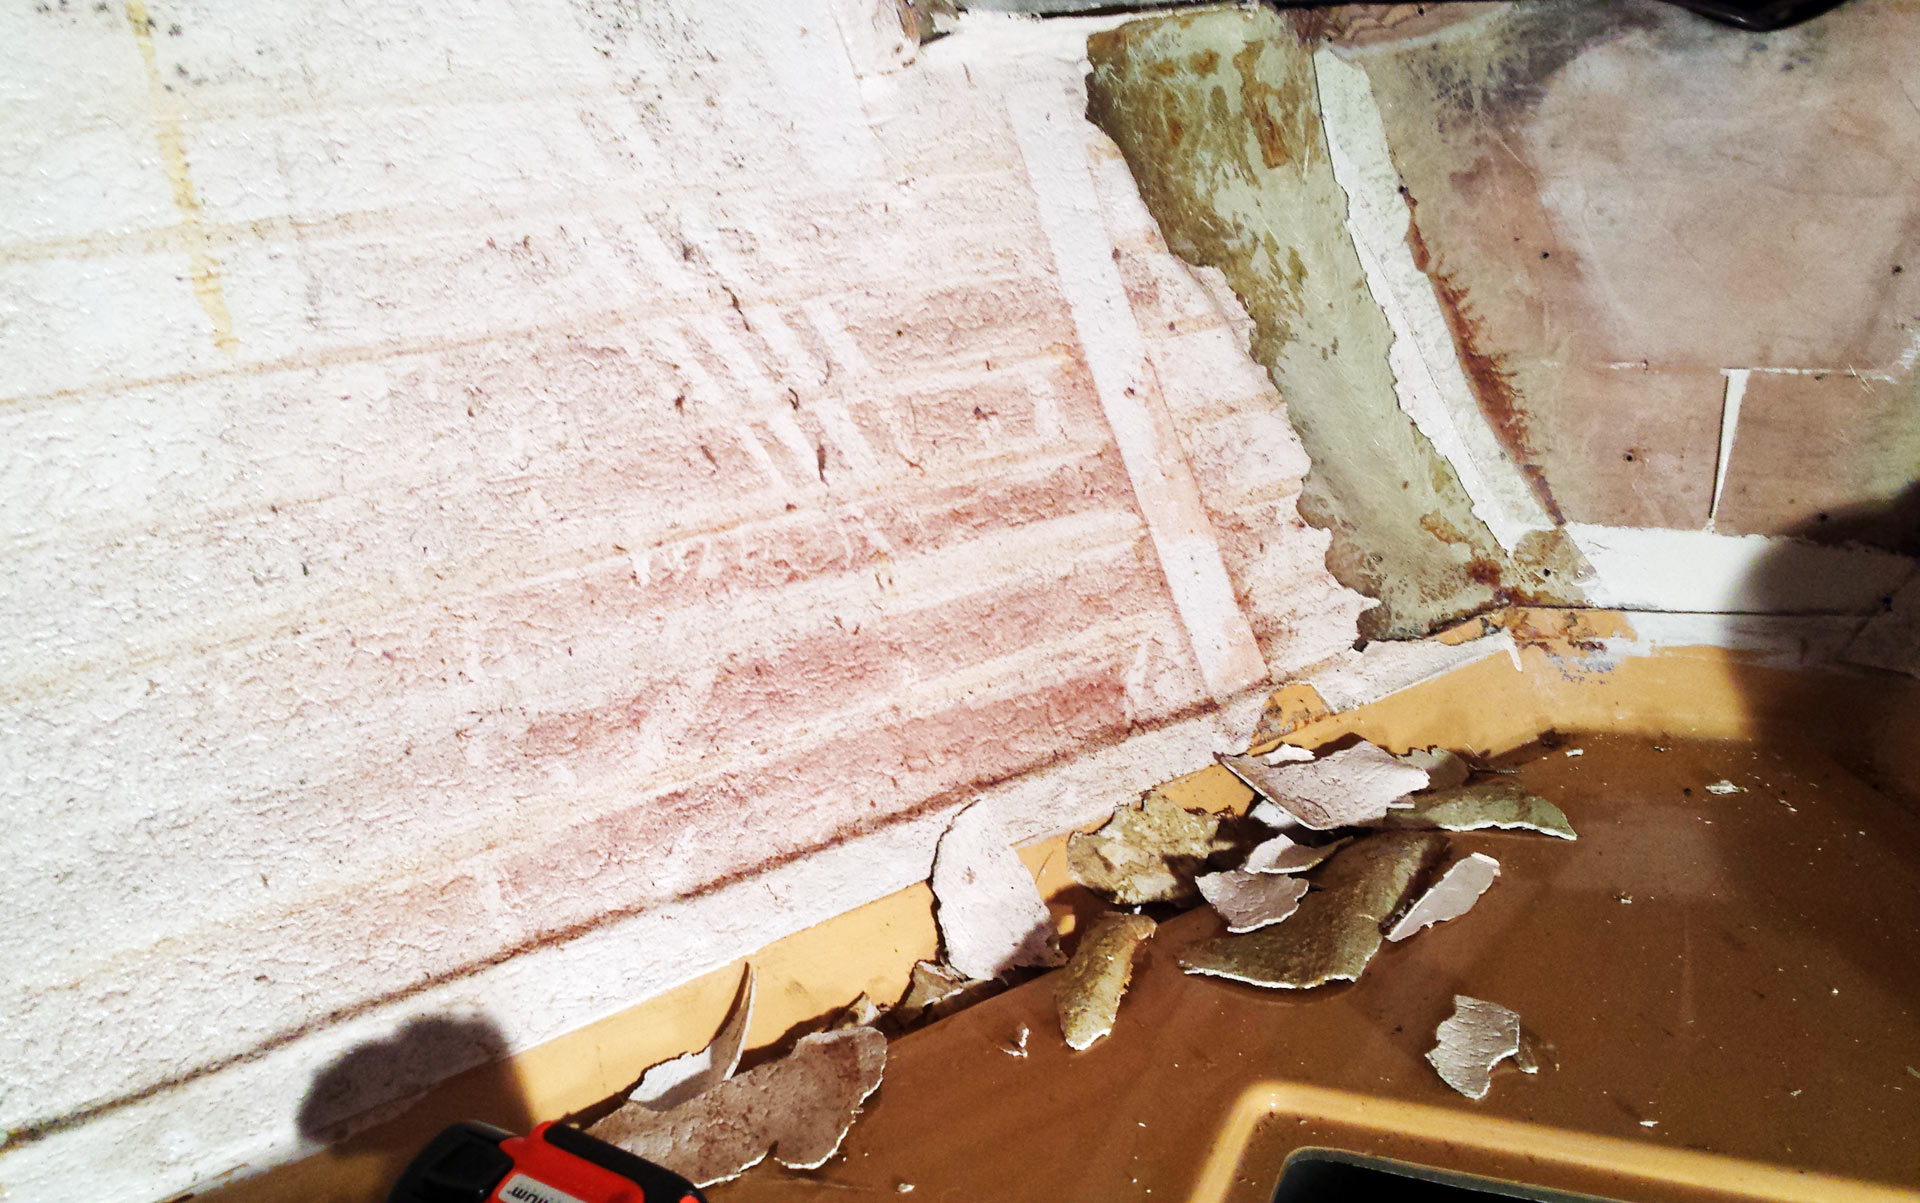
Taking off the wallpaper: Sweaty, dirty job.
The most annoying detail of my sailing yacht was the leather-like covering of ceiling and the forecastle-cabin. Sailors call that stuff “wallpaper” since it is applied in the same way as in our flats. In OLIVIAs case, the wallpaper has been varnished some years ago amateurish and frouzy, creating running noses of varnish and very nasty looking drops. Plus: the wrong kind of varnish has been utilized: Being years old, that varnish hasn´t dried out yet and every time you would tough it it created a glue-like sensation on your finger. Not very yachty … Apart from that, the colors they chose are, well, not 2015 and not 1975 either. Just an awful, sad looking pale egg-yellow. Away with it!
Removing the wallpaper in the forecastle-cabin.
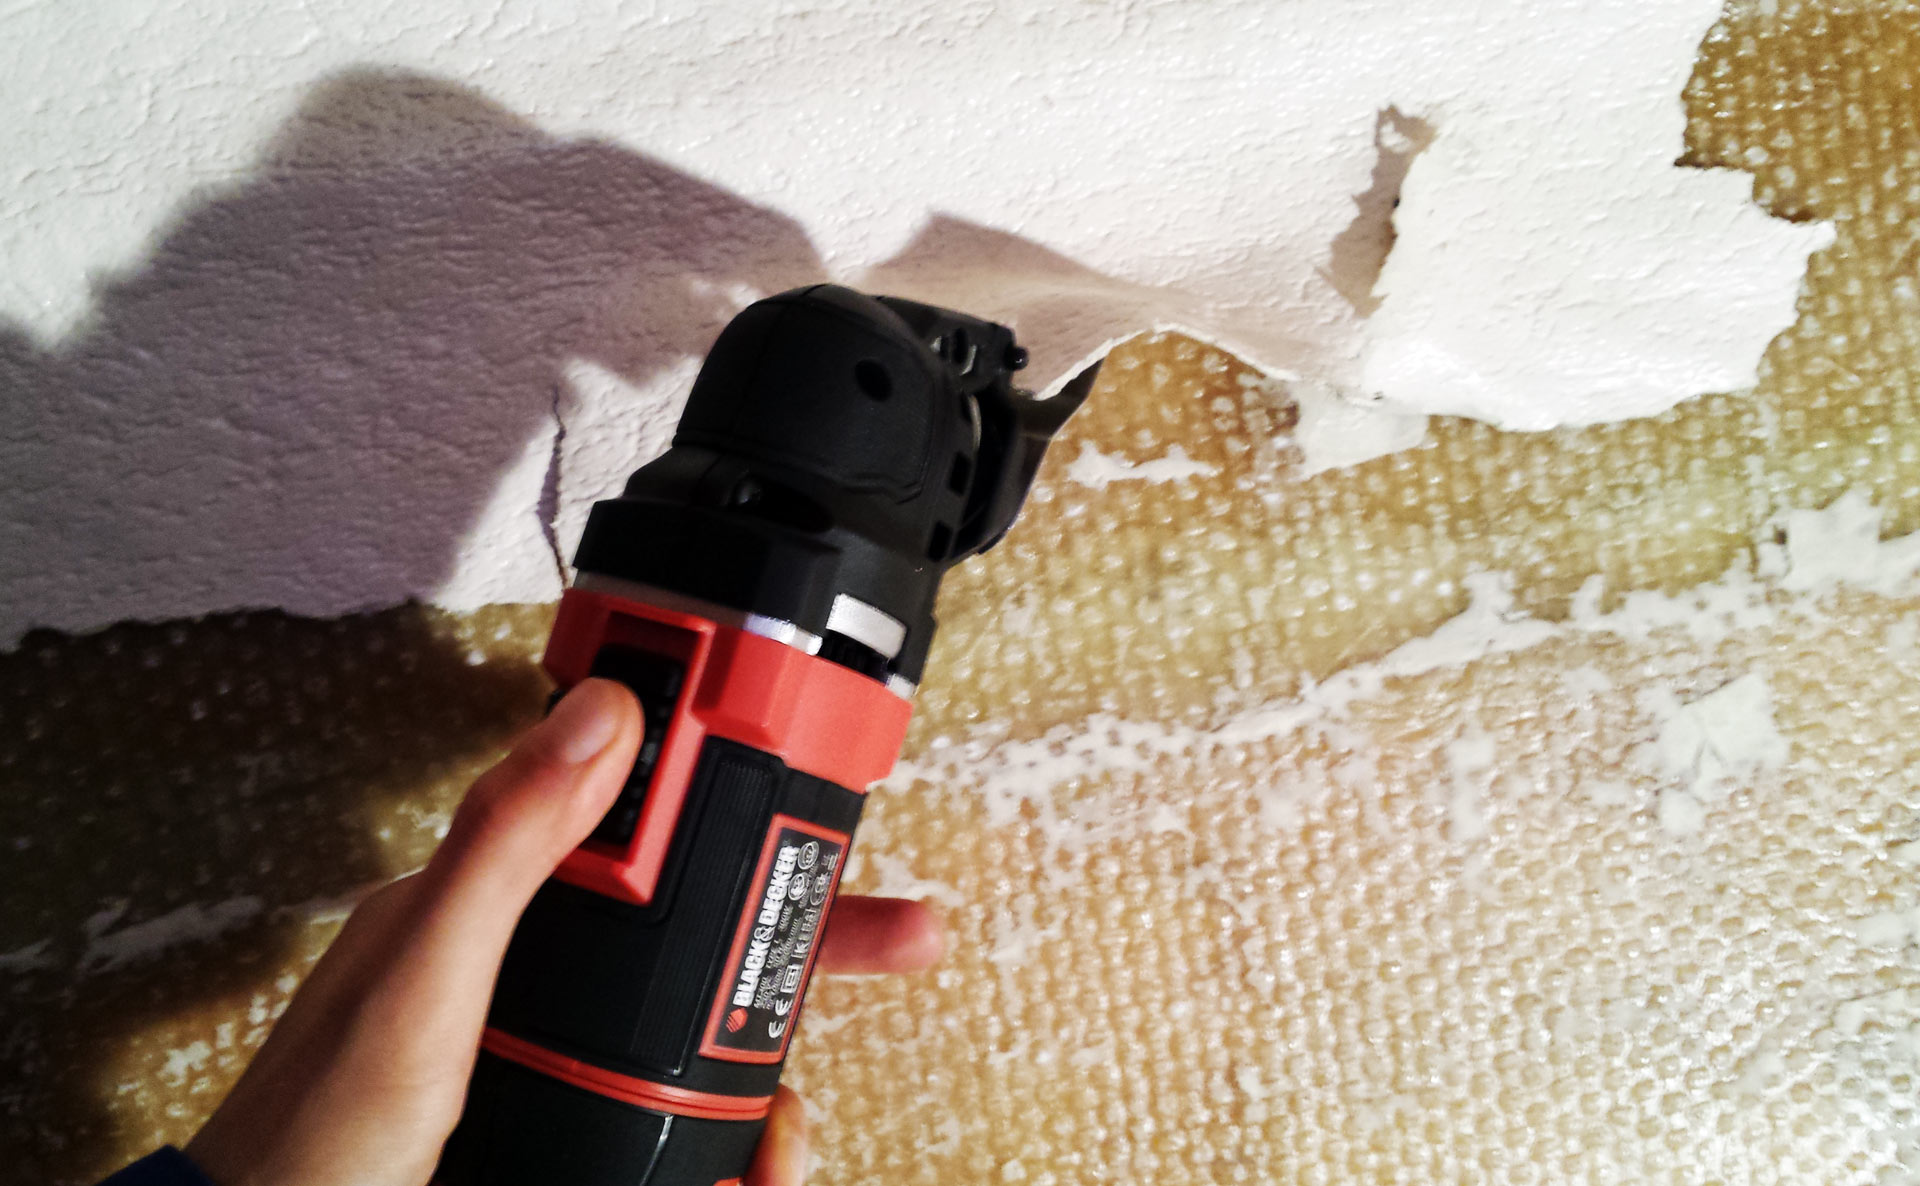
On the first day I tried to simply rip the whole stuff off. No chance: The wallpaper has been glued so tightly to the hull that my bare fingers had no effect at all. A rush to the home-improvement-store later I held blank shiny new metal scrappers in my hands. Better work now, but again: Just very tiny pieces of the stuff came off the GRP. In fact, the leather-like material seemed to work against my efforts. Trying to scratch off all the boat´s the wallpaper by hand and pure muscle-power, I assumed, would take weeks if not months if I didn´t come up with another idea. Simply: Machine-power!
Black & Decker oscillating grinding machine: Priceless!
And here´s my pro-hint for all of you future would-be yacht-builders and refitters: Get an oscillating grinding machine. That´s the powertool of choice, so versatile, strong and effective. It was pure joy when – after completing the second rush to the home-improvement-store – it plugged it in, installed the blank metal scrapper, aimed the tool and the machine just easily went through the wallpaper like the barber´s razor in the opening scene of “Full Metal Jacket” creating the bare skin heads of the G.I.s. A job of hardship turned into a thing ease. Just 10 working hours later I had removed all the ugly old wrong varnished wallpaper, giving way to an uncovered view onto the bare GRP.
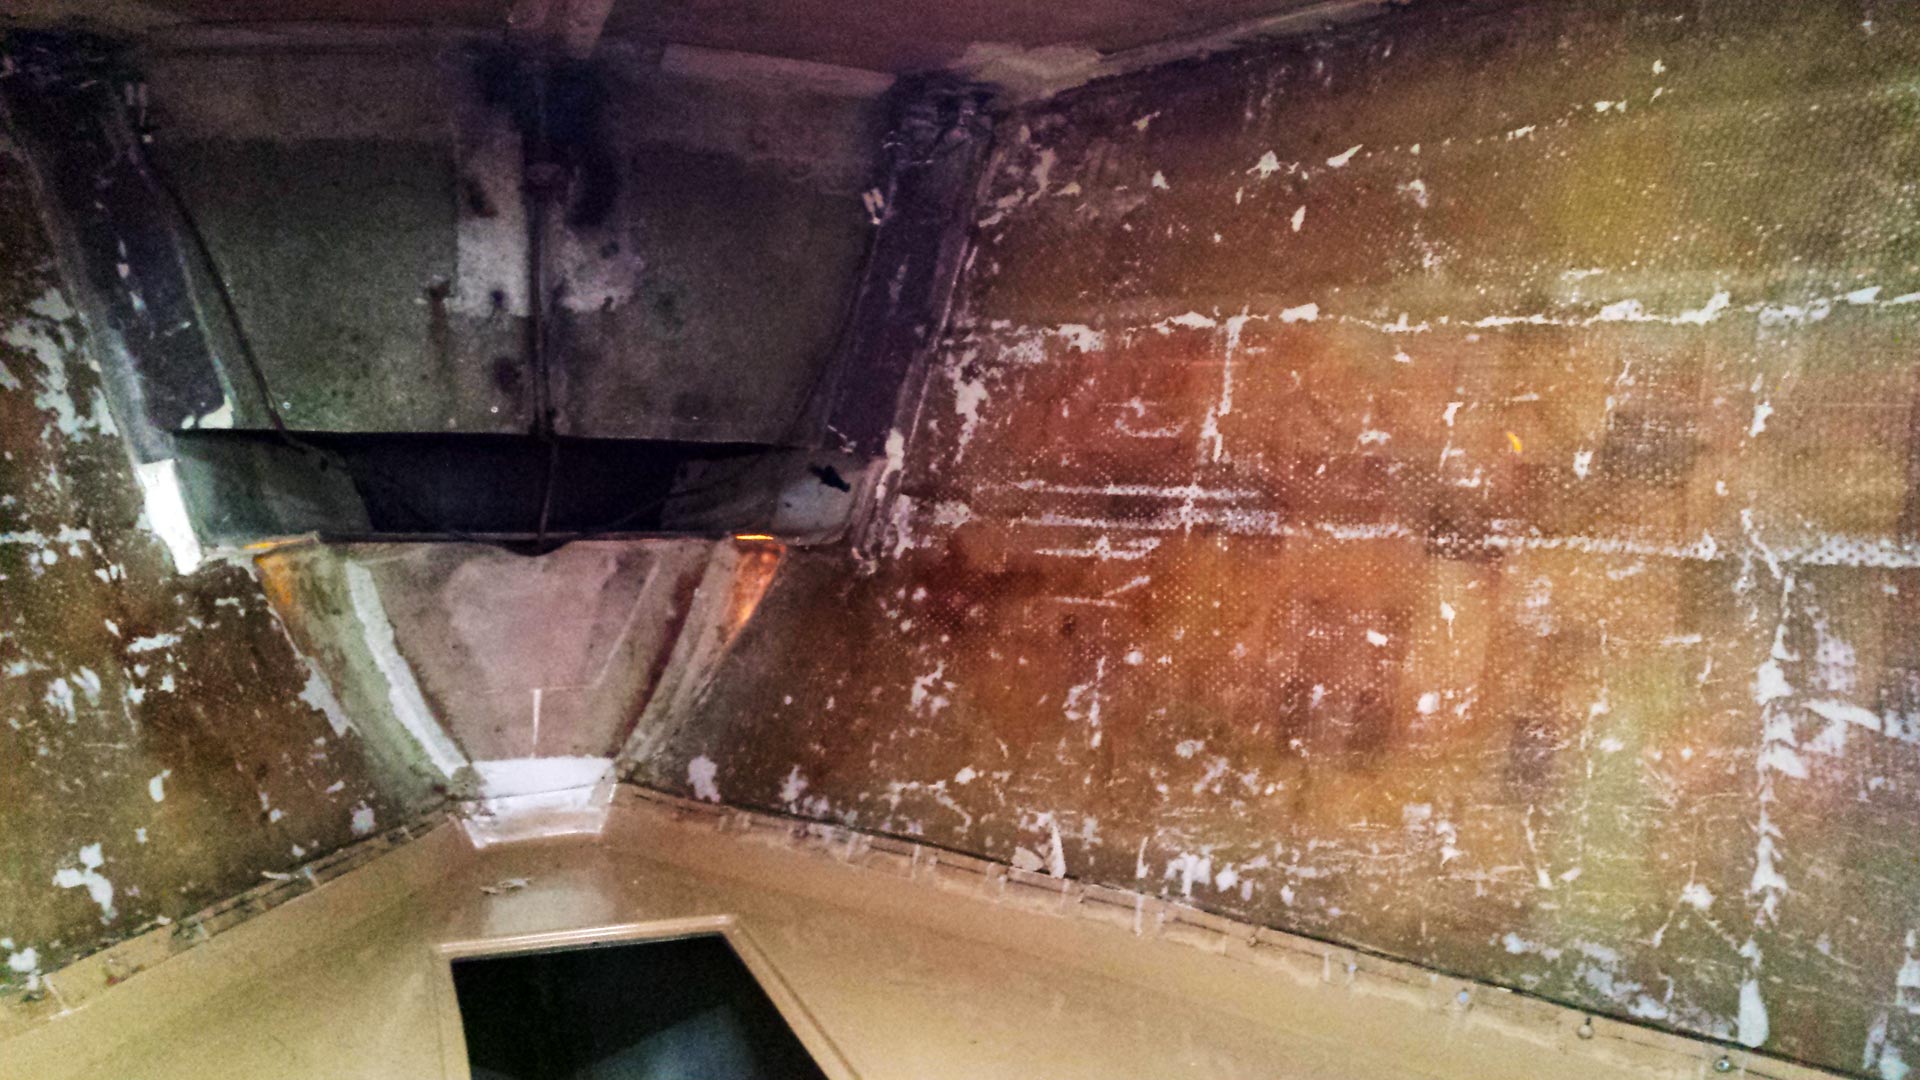
Away with the old stuff!
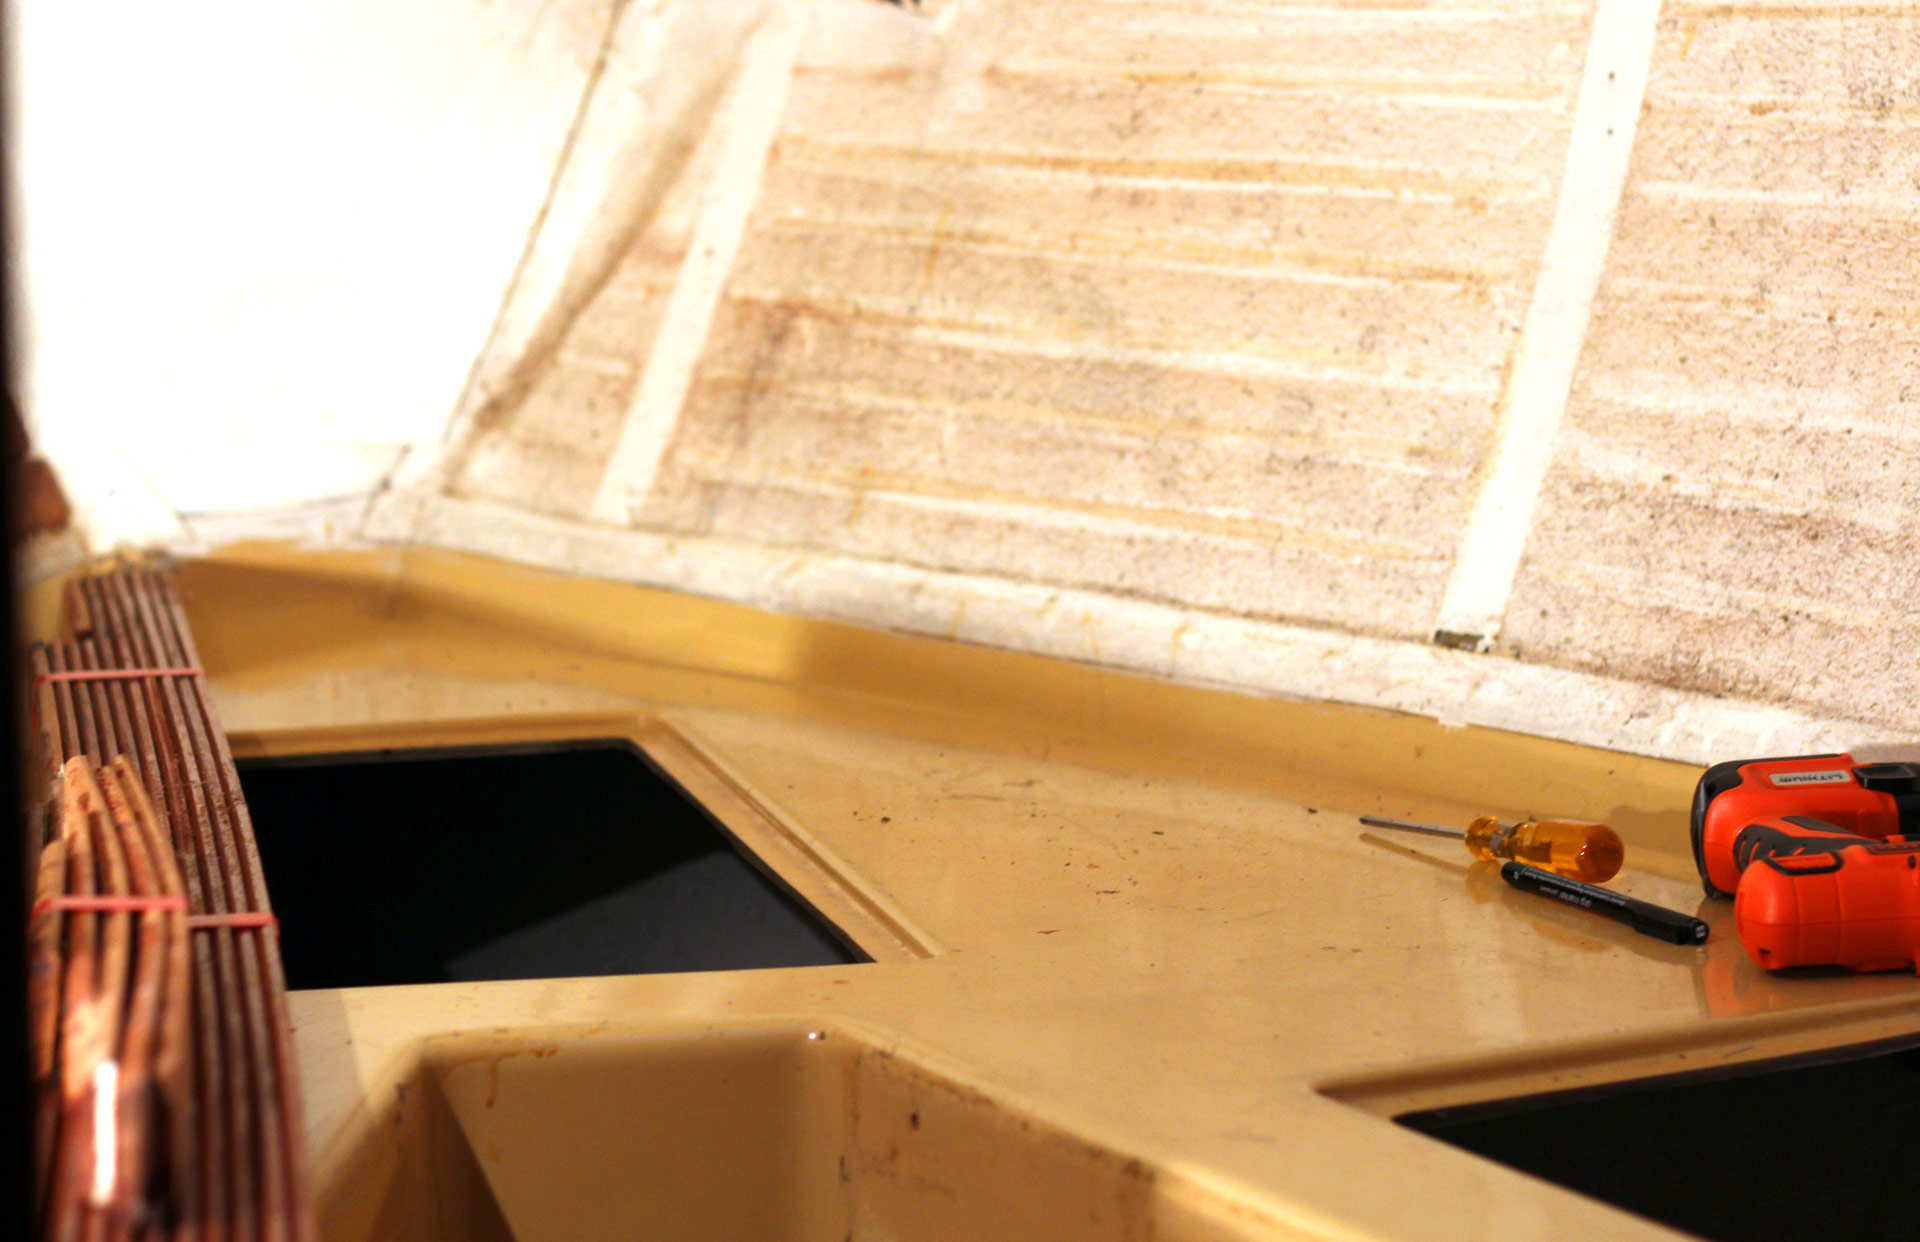
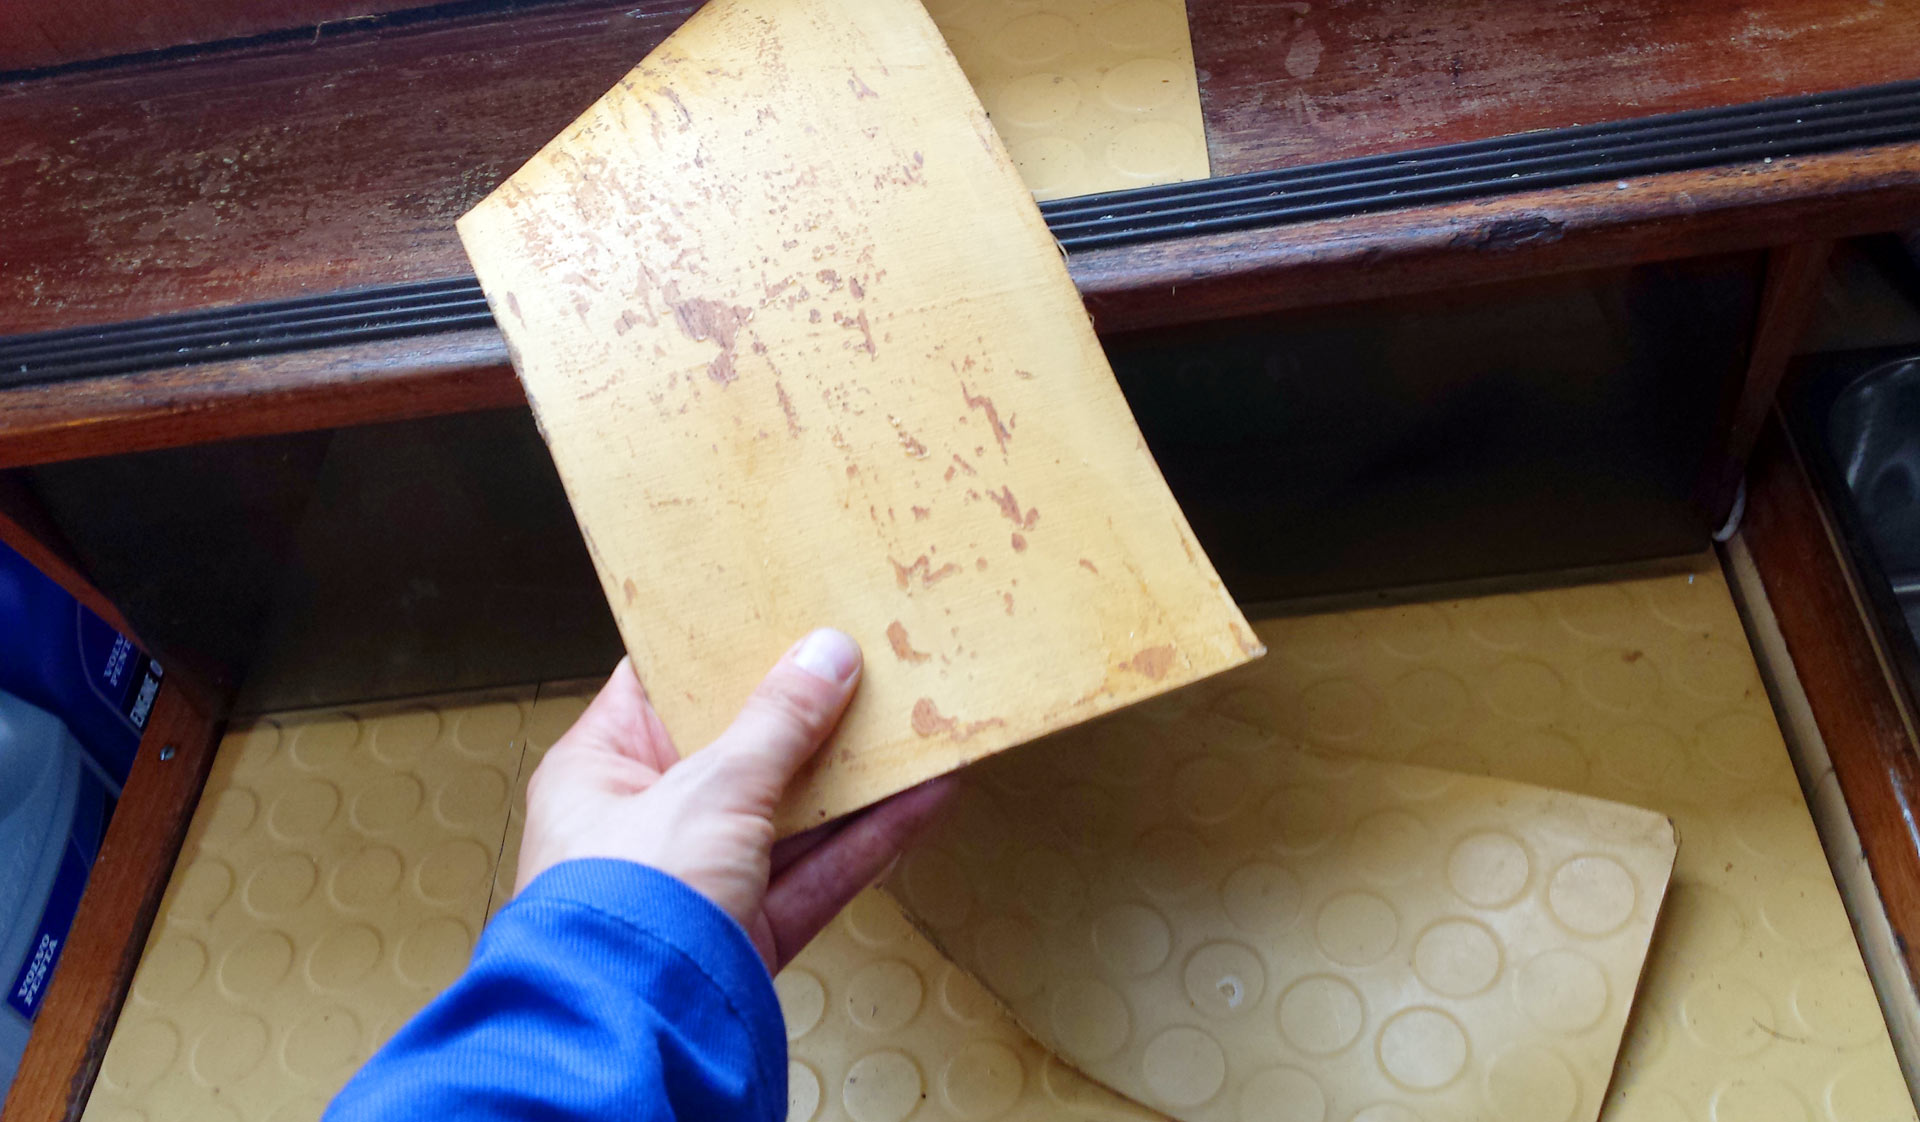
Remember why I wanted to do the refit by myself initially? To check the substance of the boat. In working my way through the wallpaper I uncovered interesting details, such as the sandwich construction in different corners of the boat. Between 6 to 7 millimeter thick GRP-layers a 1,5 centimeter thick layer of wood has been inserted. Everywhere I was able to check the sandwich, I couldn´t spot any water inside or a “soft” feeling, often read about when referring to sandwich-decks.
Getting the forecastle cabin ready for refit.
Why is the forecastle cabin the most important one of the whole yacht (if there isn´t a big cabin aft)? Yeah, right: It´s the place where your wife will likely have her basecamp during your future trips. This cabin just has to be perfect. No margin for error, sleazy work or unappropriate choice of material here. If it´s uncomfy for her, the whole time on board will be uncomfy for all. No question that I ought to invest a lot of time and effort in creating nothing less than an inviting home. Our forecastle is very spacious since the anchor-stowage has been significantly reduced by our pre-owners to get more space for the passengers. More than 2 meters long and full of cushion there´s plenty of space for wild dreams in distant marinas …
A view to the forecastle before I started working.
I first took off the wooden bars. Painstakingly assigning a number to every single bar, noting their exact position inside it wanted to make sure that each bar will eventually get it´s “home” position when I will finally bring back together the whole construction again. I checked the wood. Will it be a piece of junk again or can I re-use it after grinding, staining and varnishing it? I am still not really sure which kind of wood has been used here and I took a note to check for yacht-wood at a professional shop later.
Underneath the wood: Is that a fungus or just dirt?
Behind the wooden gratings the well-known wallpaper appeared here as well. Is that a fungus or just dirt? What a sigh, just dirt. Scrapping off the whole stuff was a matter of one or two hours, nice sharp work, no problem, no edged, no complex stuff – here it lay before me, the thick, sturdy outer hull the GRP-boats of the late 70ies are famous for. I inspected closely the structure – daylight shining through helped a lot – to spot possible bodyfiller-spots or painted-over remainders of possible collisions: Nothing. Good to know.
An empty forecastle ready to be fitted again.
Seeing the forecastle cabin now, completely empty, I sketched a pretty detailed plan of where I want to go here. After varnishing over the ugly yellow of the old Gelcoat two new layers in shiny yacht-white, I am going to apply new white wallpaper and leather-covered ceiling-panels with integrated LED-lighting and having wooden spars from the ceiling reaching down until some 20 centimeters before reaching the cushion. This area will covered by two stories of ceiling-like panels, covered with a thick layer of foam and stepped leather as side cushion to extend the cosy feeling of upholstery. I´ve taken off all stowage here, originally all the way forward to the stem. Here it´s a very simple solution of three cupboards – or let´s call it bags – made out of strong denim that will be applied. It´s going to be a big, roomy place for wife and kids to rest after a long sailing day, staring all the way up to a clear sky through the overhead hatch. Just simple and beautiful.
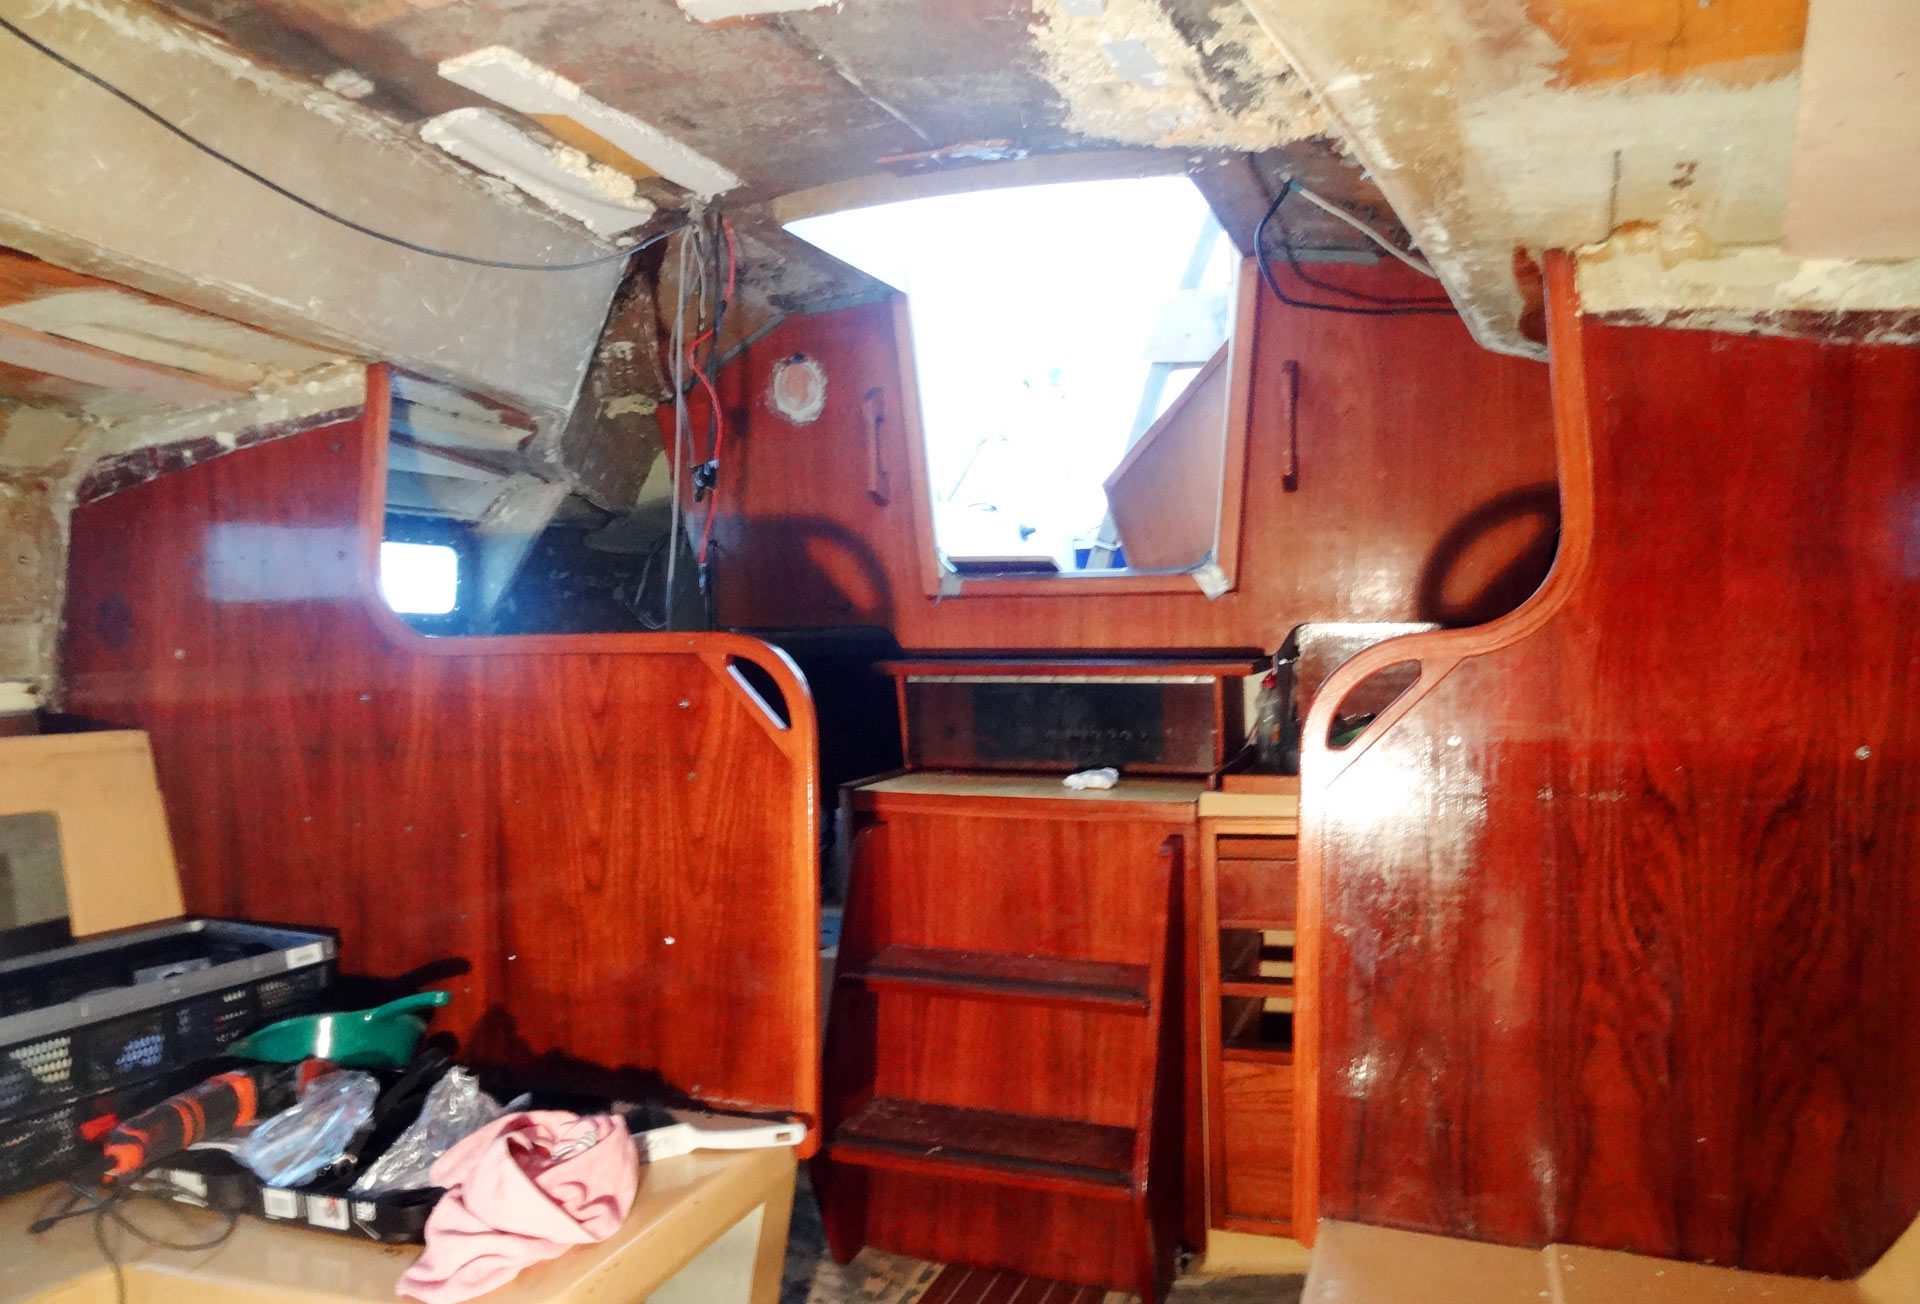
Yacht saloon refit: The parlor of every ship.
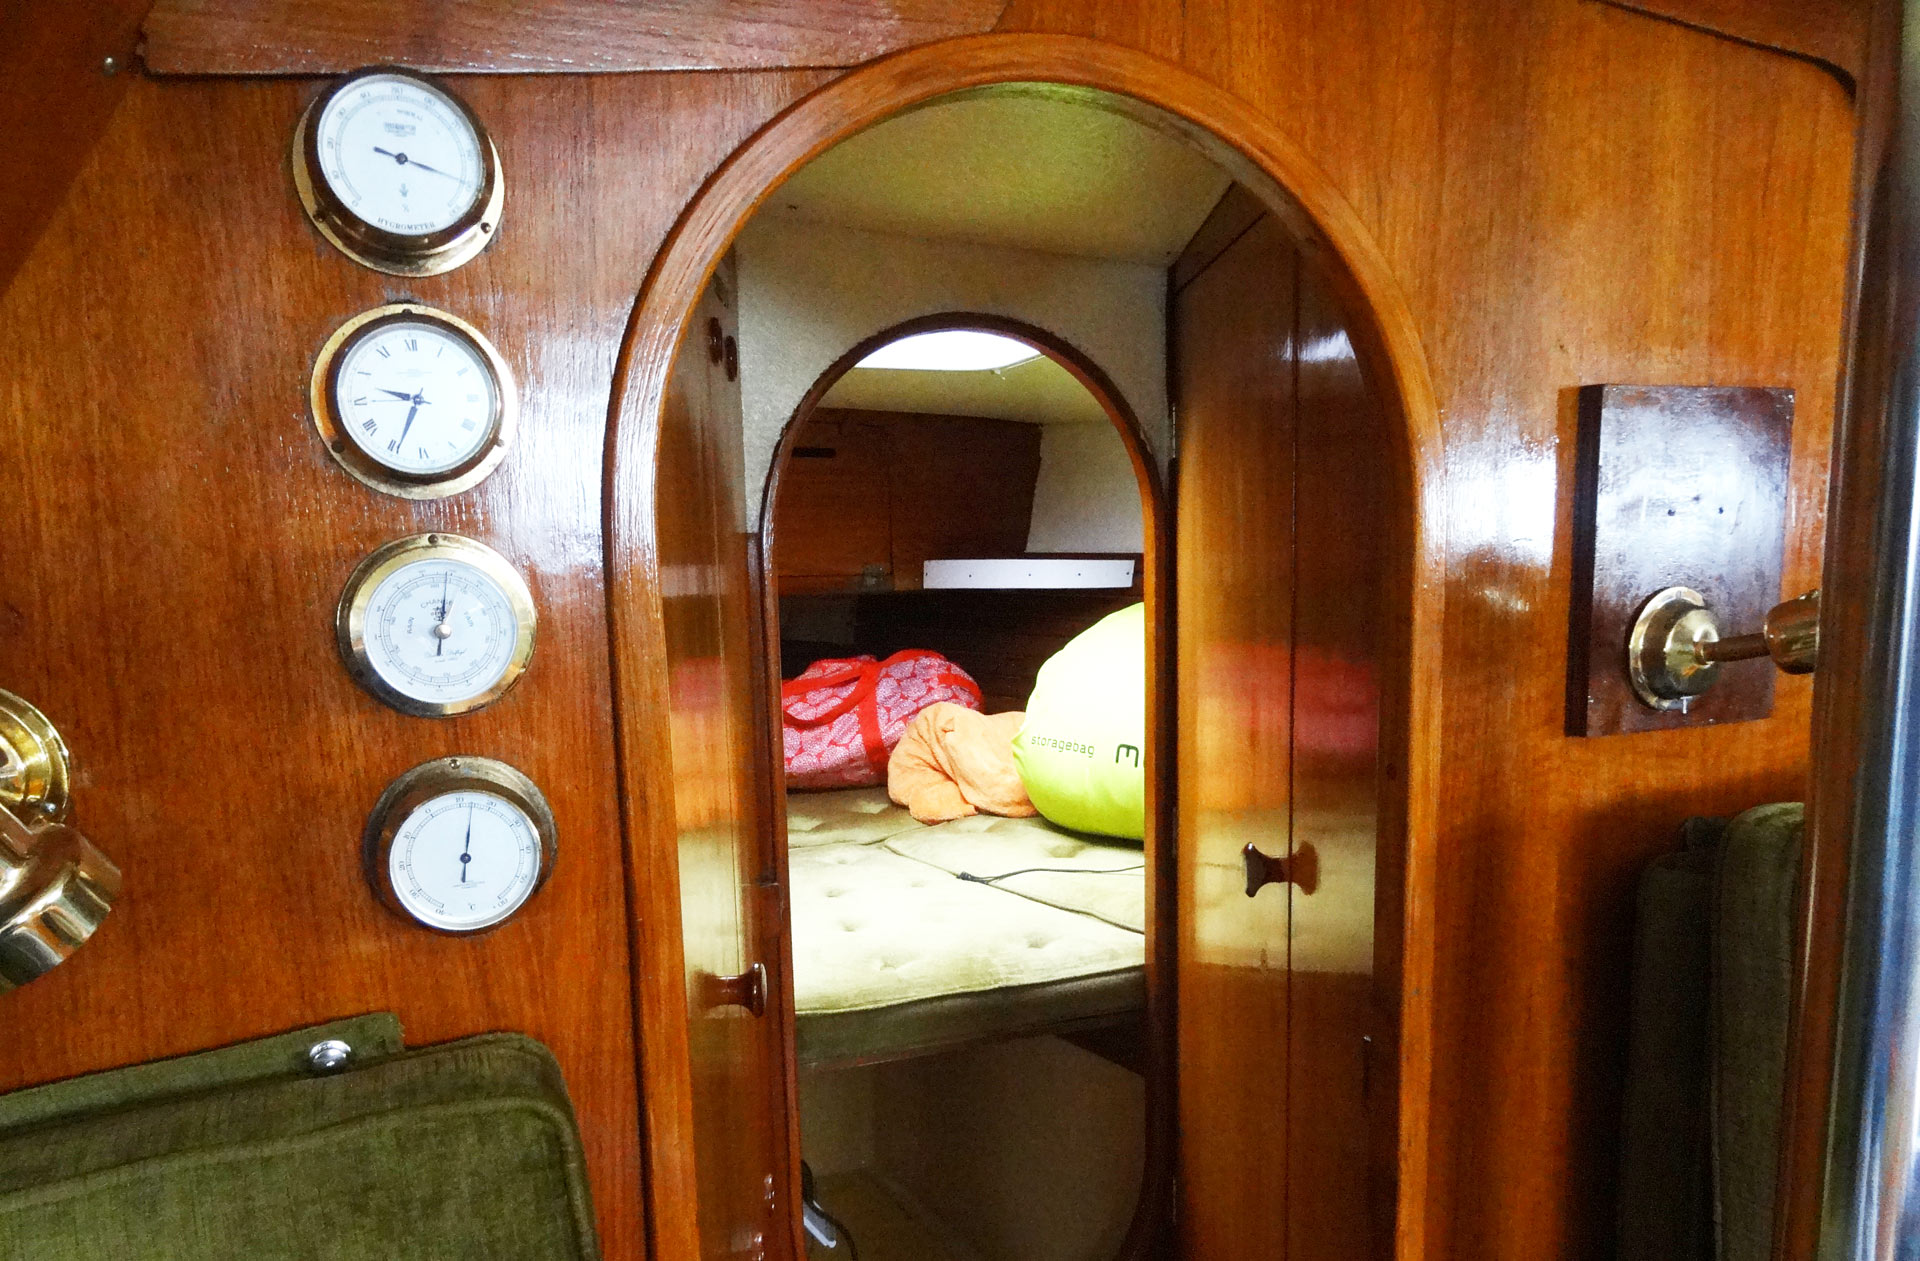
Oh yes, it´s the vcard of every ship. The parlor. The “gute Stube”, as we call it here in Germany. The Saloon. OLIVIAs cabin measures 3.12 in width and some 2.90 meters in length, thus creating a space of comfortable some 10 squaremeters of cosyness. All in all, 3 people can find a very good night´s sleep here: Two on the starboard-side of the ship, one in the port-berth. The big U-shaped sofa on starboard is the center of the saloon, seating is grouped around a large two-sided stable folding table rear of the chrome mast-base. The large sofa on the port-side is where I had found “my” place. When weather is bad or it´s too cold to sit outside, it´s this area OLIVIAs crew and passengers will spent most of their time – as well as most of the ship´s meals will be consumed here. Refitting this area is crucial – as it defines the heart of the ship.
That´s how I bought her.
Of course (as it can be read here) will we renew all of the cushion. The greenish-color is just too old-fashioned and besides, in my eyes there are only three colors allowed on board a yacht: Wood. White. And blue. So, cushion in blue is out of question. The bulkhead – along with all the other wooden parts – will be grinded, newly stained and thickly varnished again. Barometer, clock and temperature-gauges belong on every ship and will return to their ancestral positions port-side after undergoing a refit as well. Maybe we find a nice picture to hang them on the starboard-side bulkhead, but I don´t know yet. Certainly there won´t be any more lights here. After removing the old brazen reading lights I found it nice to look at the big clean wooden area. The ceiling will be completely redone in leather-covered plywood, separated by wooden varnished spars both laterally and at right angle to course. Integrated LED-Lighting in the ceiling, I think just 4 lights will do here and maybe indirect LED-lighting behind the seating completing the light-concept (more to that in an upcoming article) of the yacht´s saloon.
The yacht is ready to be cleaned completely.
Moving on towards the bow there is a entryway between the forecastle cabin and the saloon. Some 90 centimeters deep, it has the cramped lavatory on starboard and a big cabinet for sailing clothes on port side. It´s very neat, newbies on board will crack their heads here dozen times, it´s very narrow and chunky. But I like this space: Two doors – lavatory and closet – can also swing through to shut completely the forecastle or the saloon from the forecastle. Nice thing. When I was taking away the ugly wallpaper, I was astounded that here too underneath very nice wood came into sight: Something that will shine freshly new varnished in the near future as well.
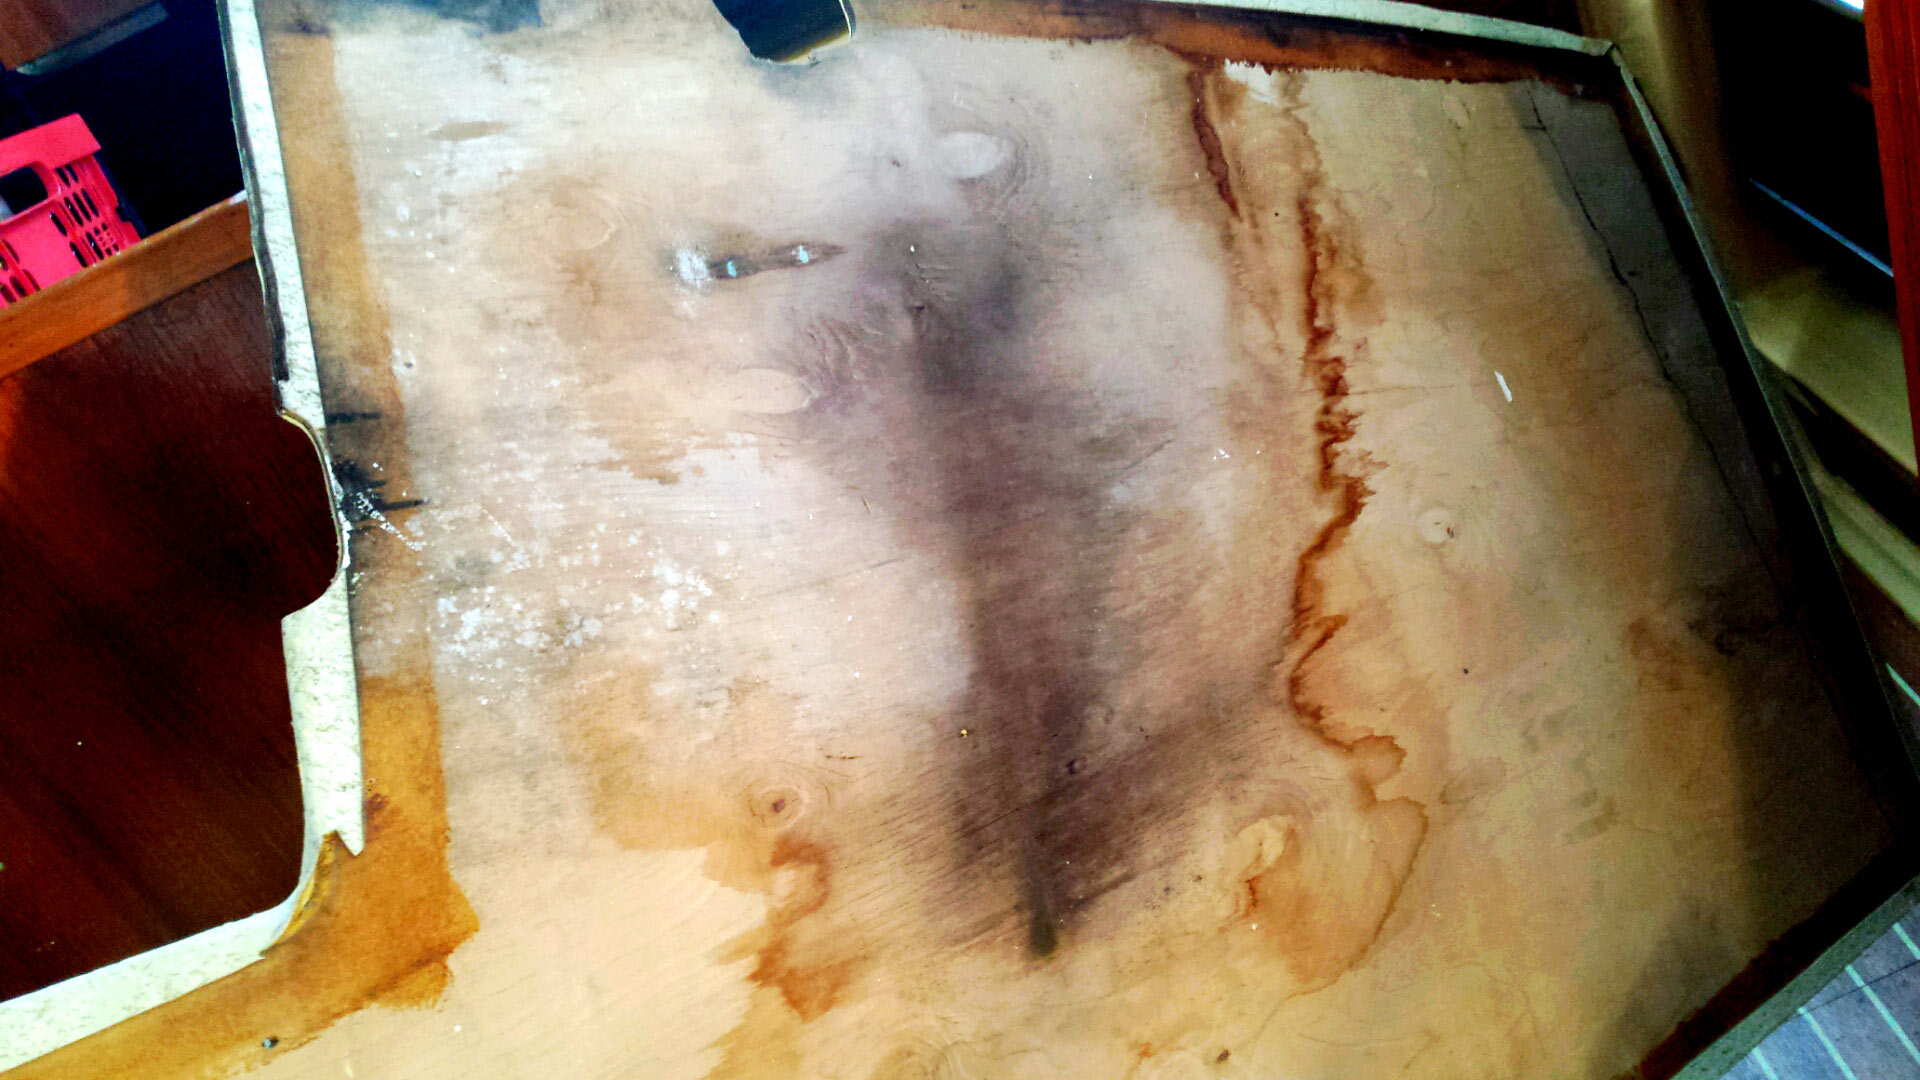
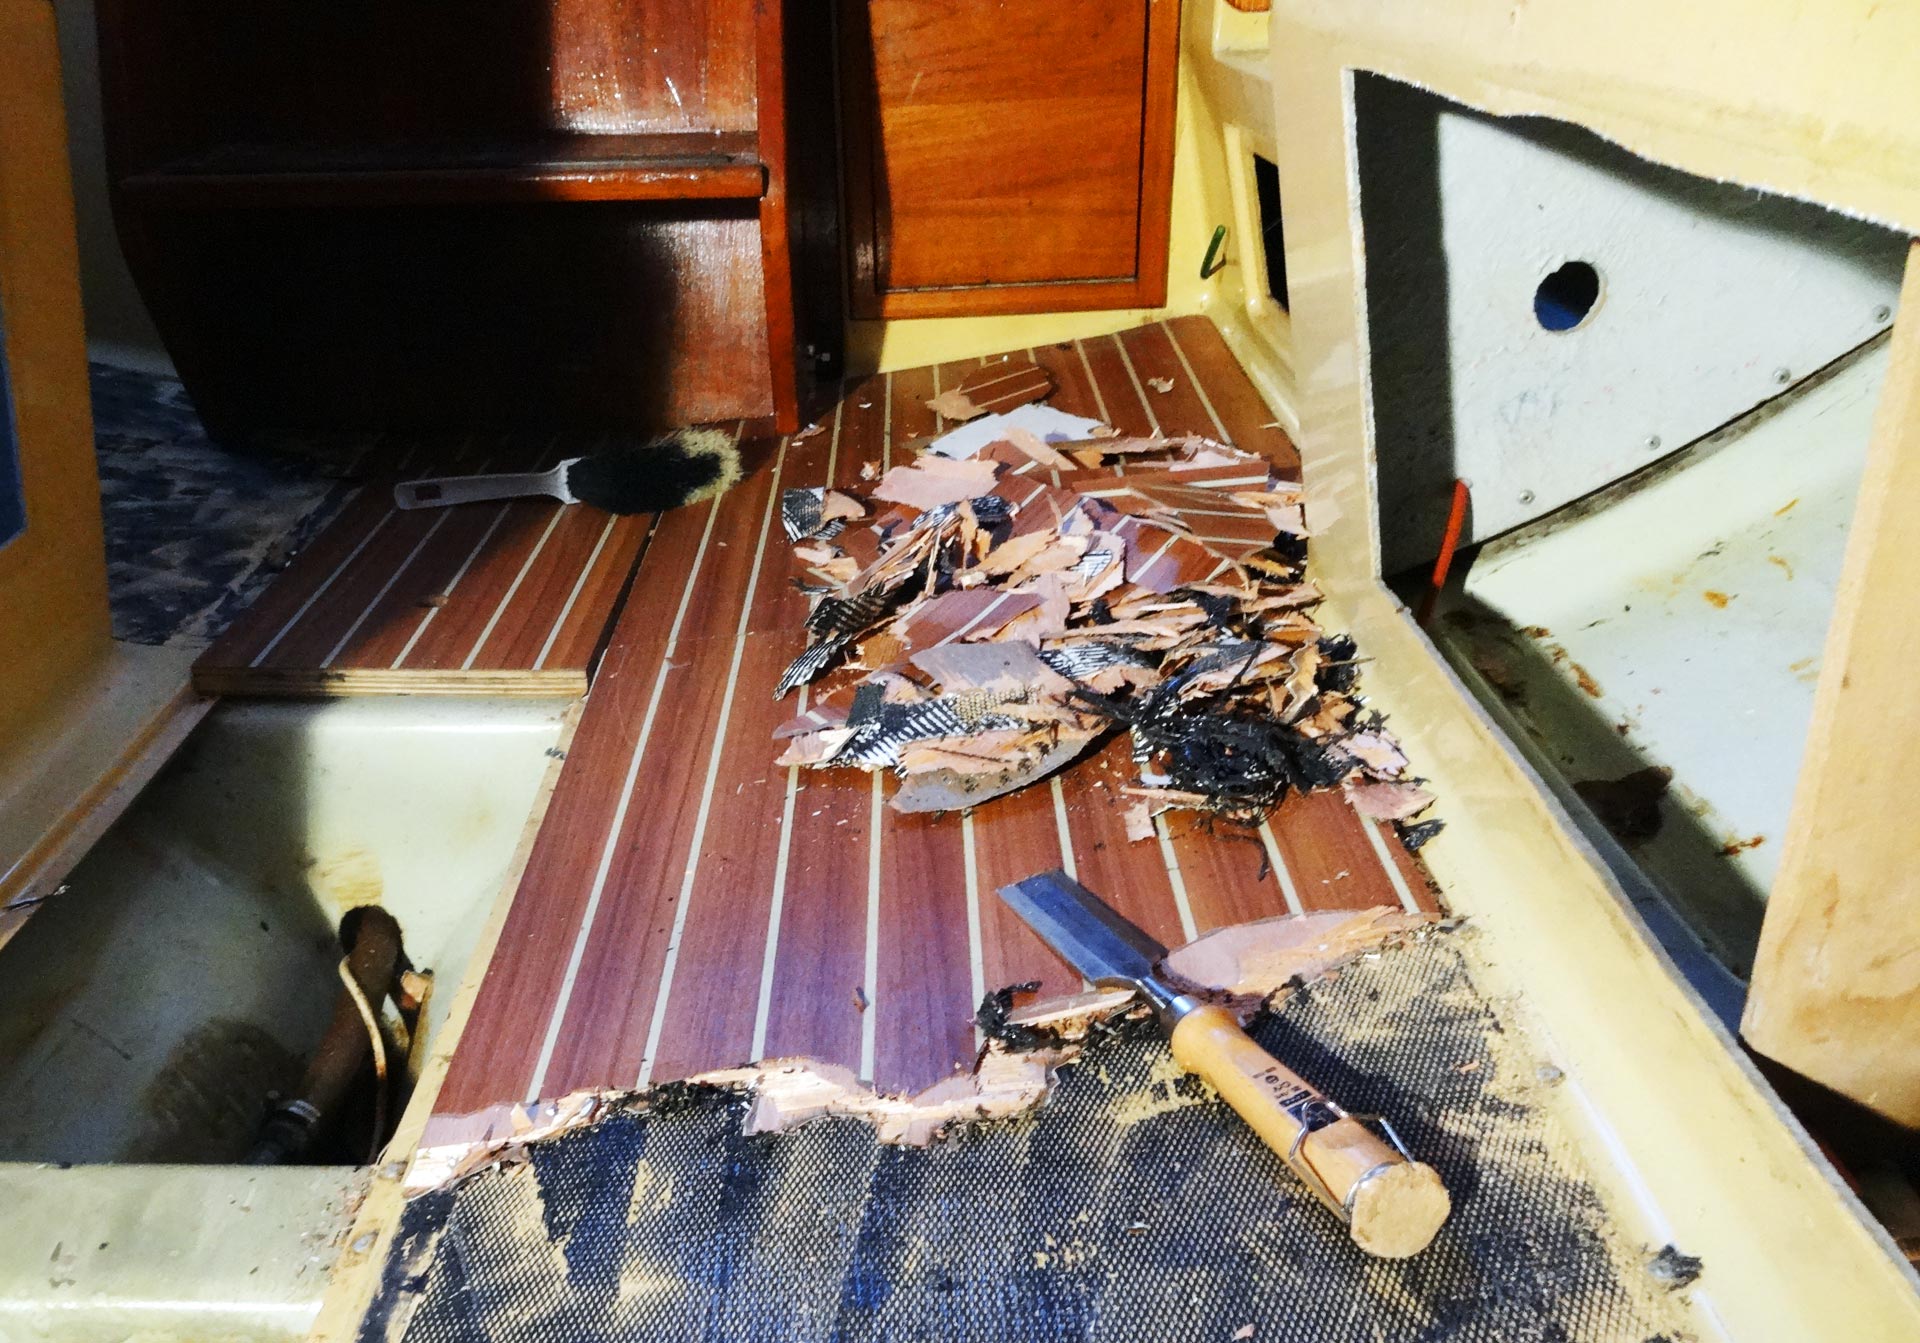
Removing the deck plating.
Oh what an awful job! Until now, this time-consuming and muscle-aching part of the whole first stage was the most stressful thing to be done on the yacht. The old deck wasn´t that old or worn out. I easily could have left it there for it has been applied seemingly accurate and – as I´ve found out later – in a very professional way. But I found the color of the deck inappropriate. It did not really match the overall color of the other – original – wooden parts so I decided to hammer it away. This time my Black & Decker oscillator was of no use at all. “Use a hammer and a chisel!”, the owner of the storage place advised so I bought one and began my work of destruction.
Sweaty work: Hammering away the deck.
The deck has been glued so tight and has been made of such a strong material that I really had to hammer a couple of dozen times to drive the chisel between the deck and the GRP surface. Then breaking out the chisel by applying brutal force and leverage. Only centimeter by centimeter came off the GRP. The hammering was so loud that after 3 or 4 hour-shifts my ears were aching badly, not no mention my big swollen right hand. Watch out! The chisel is that sharp, unevenly applied it will eat like nothing right into the GRP-structure doing harm to the surface. But have no fear, it will be sealed off when the new plating arrives soon.
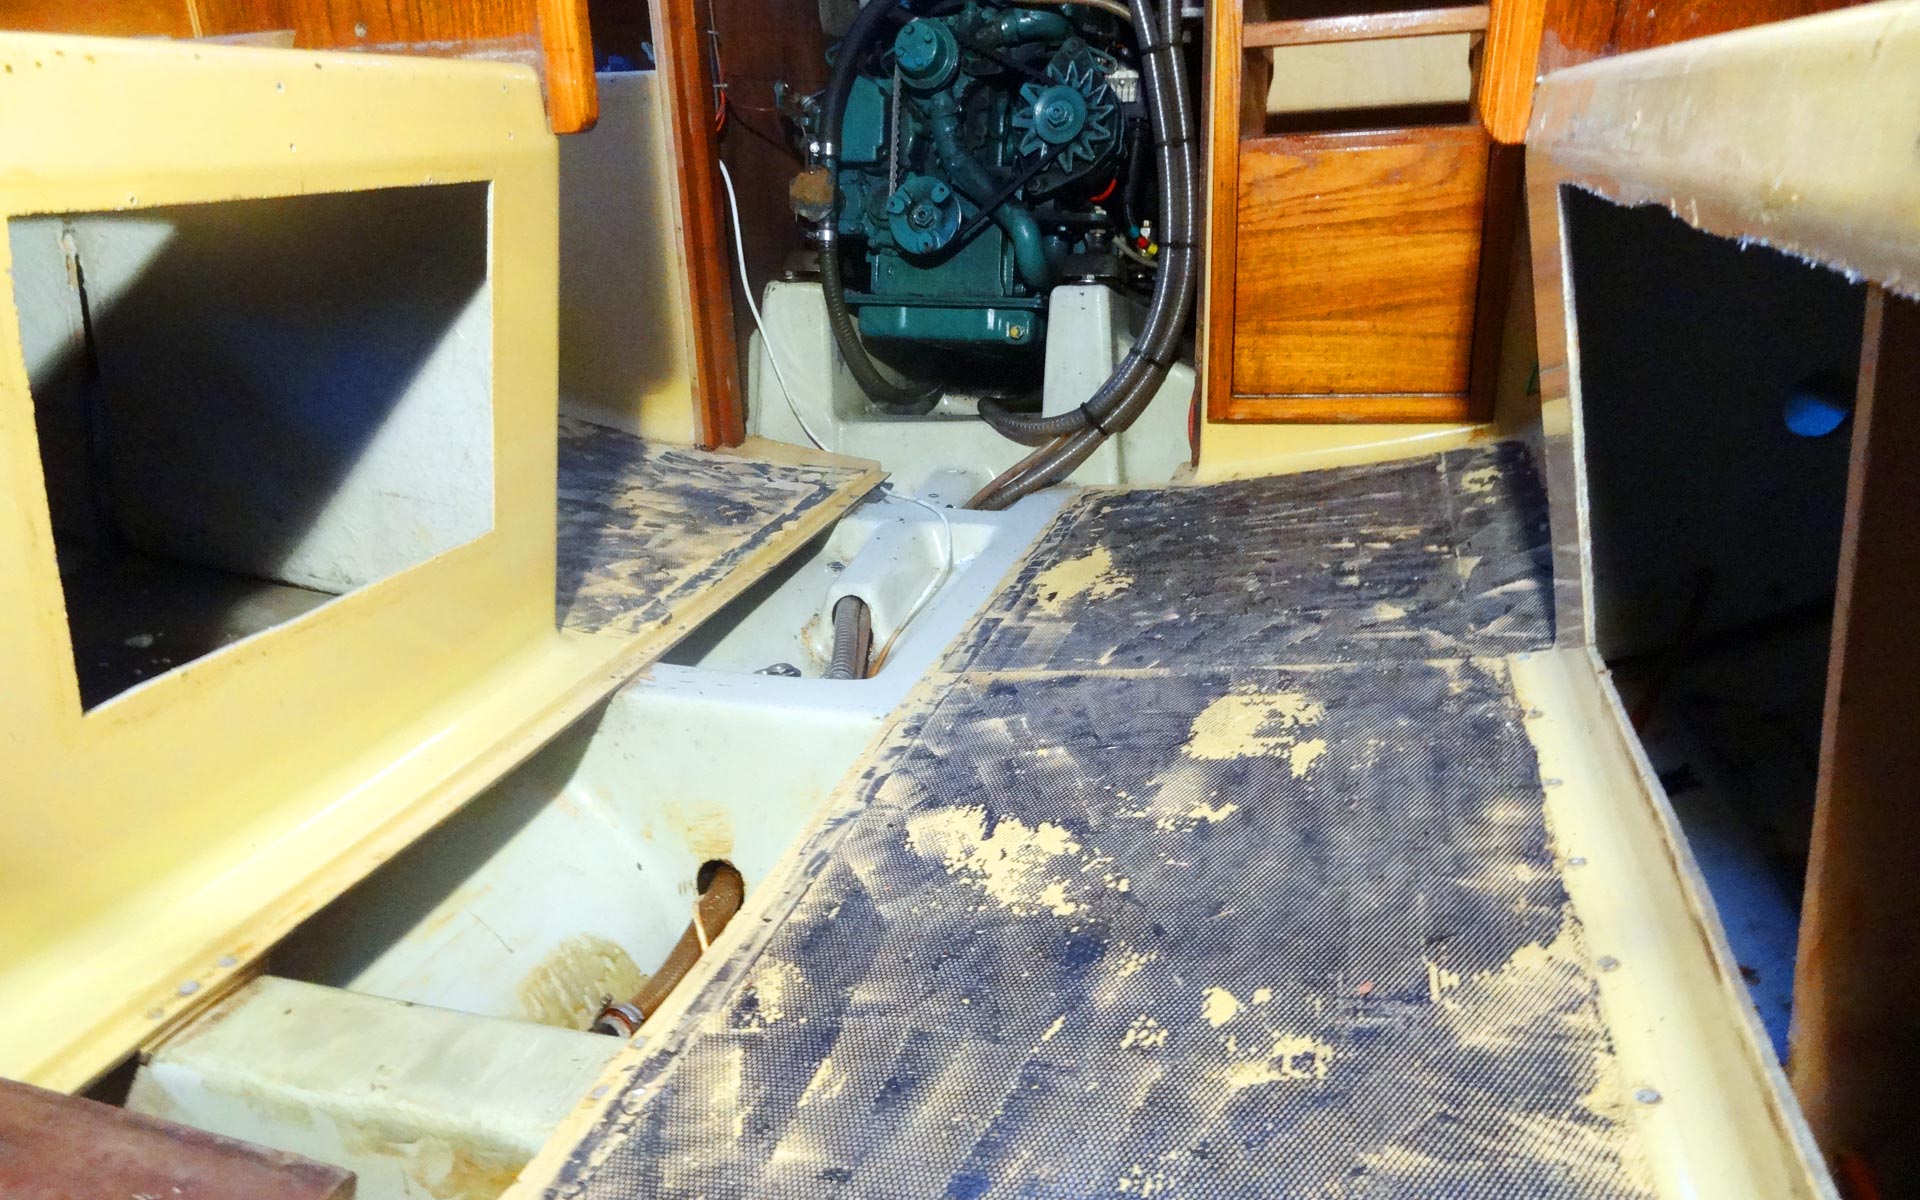
The deck plating is removed.
Finally, all work was done. I had removed all of the wooden deck plating within painstaking 16 working-hours, one hour more to grind off most of the leftover glue. Still unanswered the question for the new deck plating: Will I utilize the same material as previously used due to it´s sturdiness and proven durability? Or will I try out the PVC-based teak-imitation, which is of particular interest because my deck is not even and this material will adapt to the bends. We will see, still much time left until I will have to come up with an answer here.
Tight and bone-cracking: Working in the yacht´s lavatory.
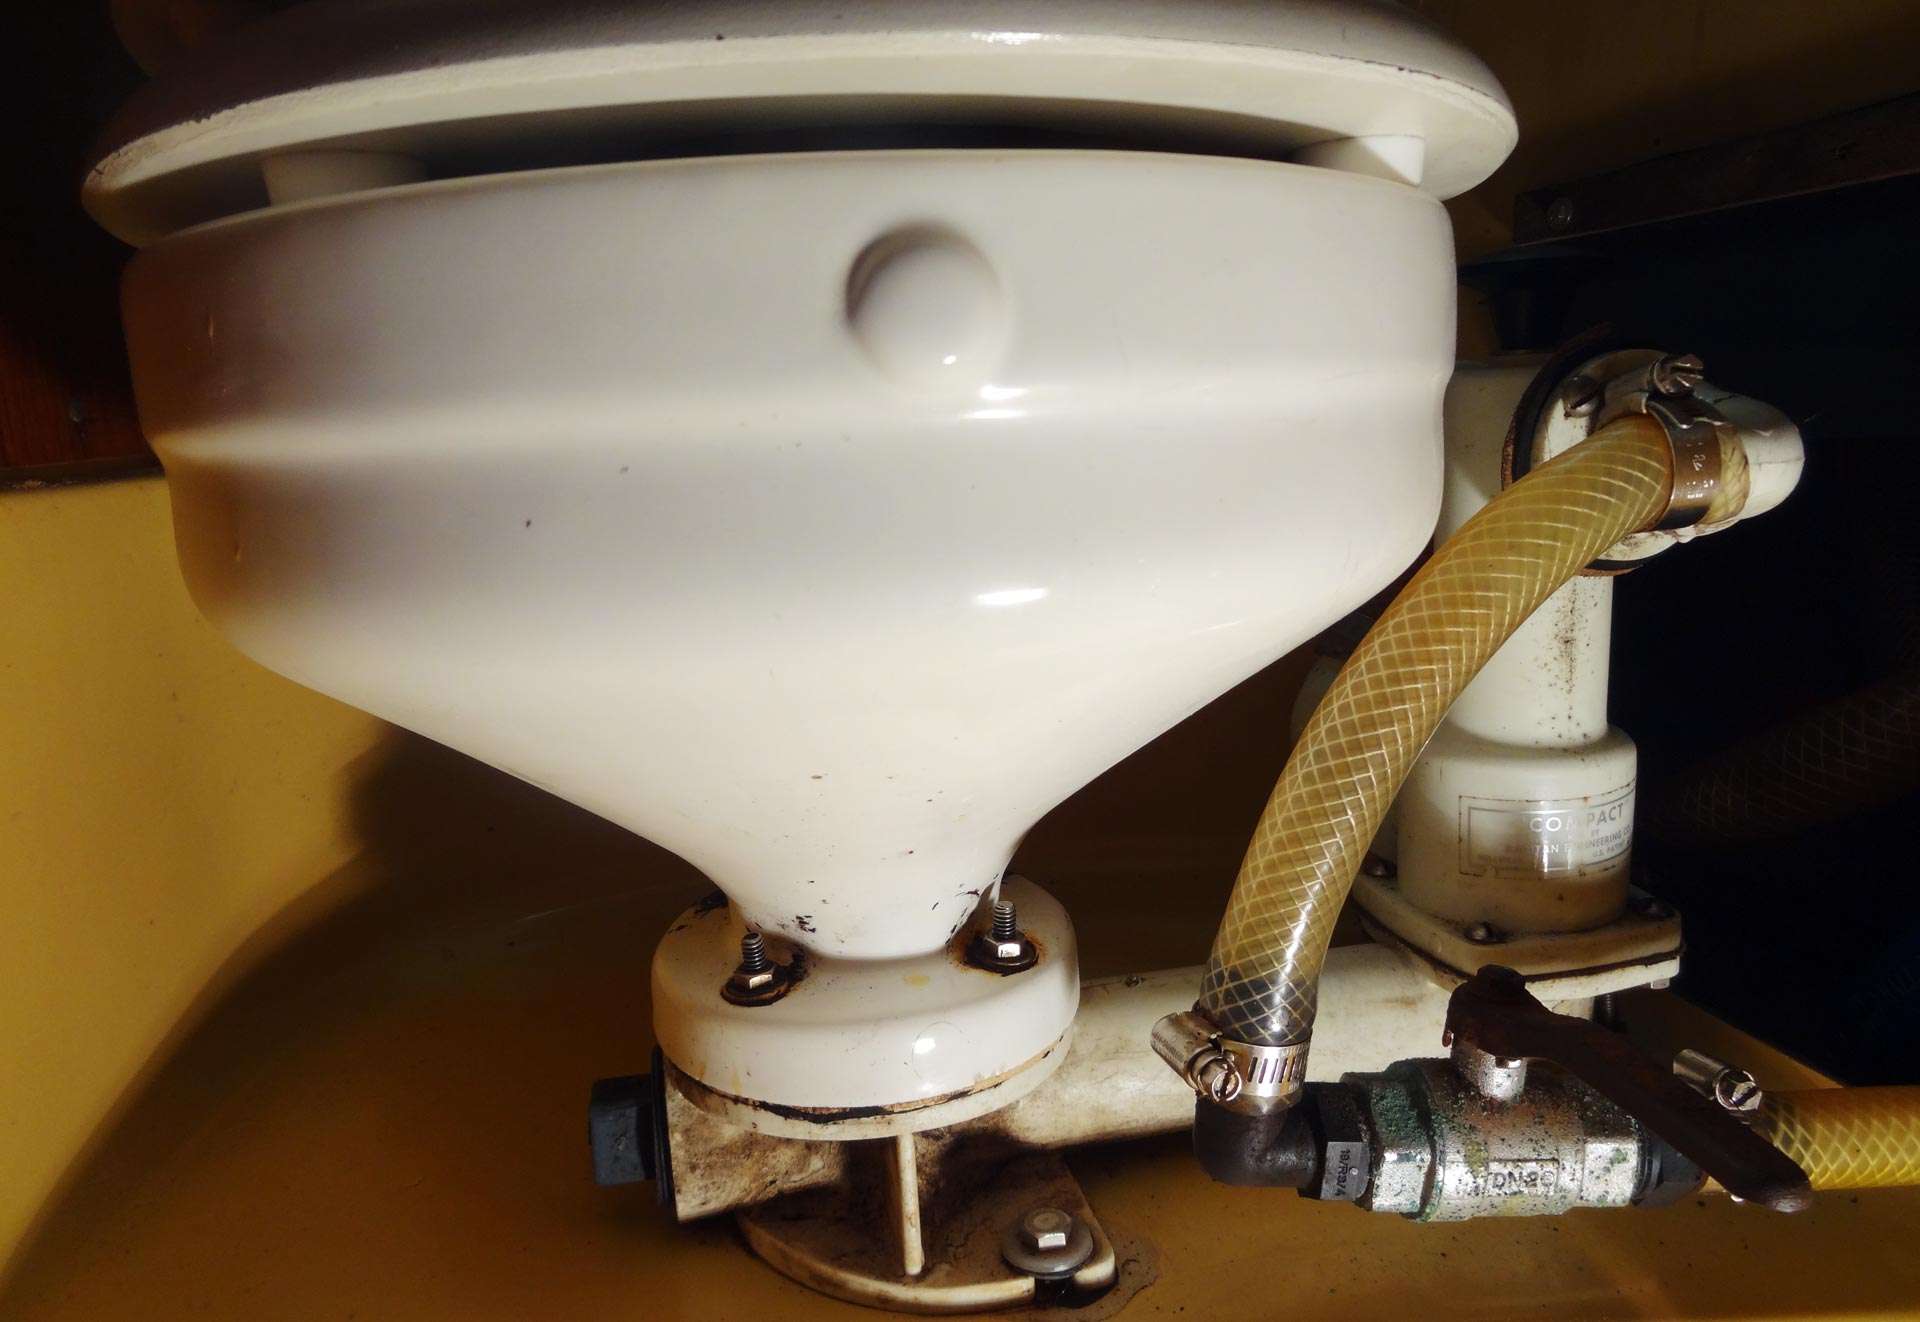
A true highlight at the end: The lavatory. OLIVIAs pumping toilet was working flawlessly when we took her from her previous owner´s site to Hamburg (read full article of the first of three stages here) but to be honest: The pot stunk. Being the second built in toilet here, it was 20 years old at minimum and I took it as given to change her with a brand new Jabsco. Same here: I can hardly envision my family doing their businesses happily here on that 20 years old ceramics. But that´s easy said: “Remove the toilet”. It´s just shitty business.
More than 20 years in service – time for her pension.
To spare you the details: In the end there have been three big bolts to unscrew. And two tubes to disconnect. Cover your nose because the smell is awful. Not of the odor you might expect here, it stinks different. But believe me, you wish to cross off that task from your list very fast. It took me half an hour to work my way through the three screws in that cramped space and I was successfully balancing the still partially filled toilet all the way through the saloon and up into the cockpit without losing one single drop of that creepy fluid – but it was virtually the last step that made me stumble and spilling myself with the filling of the ceramics. Day was done.
Looking back on stage 1 of my yacht refit.
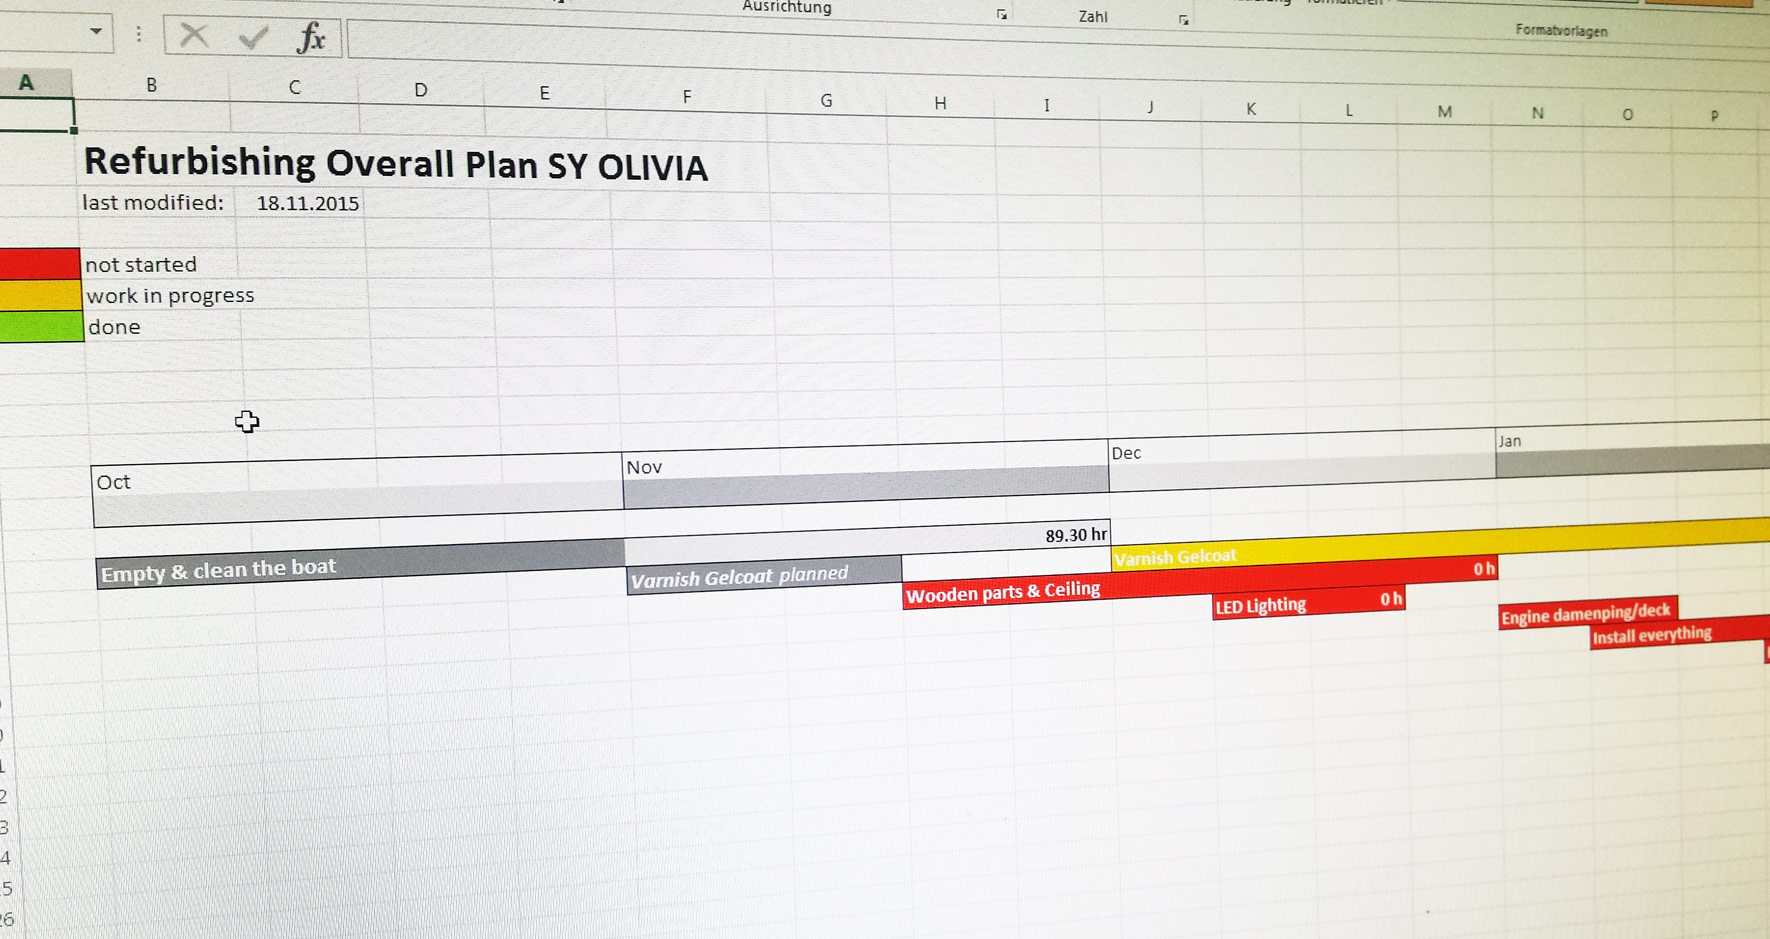
Now that the first major milestone is done, it´s time to reflect my work. The pure numbers are mind blowing: Calculating just 30 working hours for that first stage I was completely out of timing here at the end. Simply underestimating the hardship of working in those cramped conditions and not knowing what exactly was awaiting me here. In the end, I count some 90 working hours all in all to empty and clean the boat. Three times the time! Which brings me to the conclusion that it might be wise to change my overall and detailled plans from some 300 working hours in total for the complete project to a more realistic number of 900 to 1.000 working hours. Adding up significantly, finishing OLIVIA won´t be realistic until late August 2016. Bam! That´s reality my friend.
A case for the snakeman: Removing the wallpapers in the lavatory and alleyway.
I´ve had some nice and some not so nice surprises, but overall impression of the boat is a very, very positive one. Nice things have been the inspiration drawn from the Hanseboot fair (read full article here) which brought a lot of new ideas and even more solutions on questions that have been raised over time. I am looking very much forward to adding more wood to the boat, following the Scandinavian yacht builder-traditions such as Luffe or Hallberg-Rassy. In this tradition I will significantly re-do the porthole-section of the saloon (more wood!) and overall try to work out the “shiplike” style of the King´s Cruiser 33 furthermore by trying to revive her classic cruiser appearance.
Who does that?
Not so nice was the crack in the engine-footing, apparently somewhere in the aft rainwater can enter the ship´s bilge, the two missing rivets and two tiny leaks at the chain plates add up on the negative side. But that´s small stuff compared to other used boats I know of. I am still a bit fearsome of all the electric-stuff, but right now I am fading out this point on my list.
Advertisement
A load of work ahead: What´s next on the wharf?
There is a long and ever growing list of things to do. I have the feeling that whenever I can cross off one item two new item will appear. Nevertheless, after ending stage one I am more than ready for stage two: Originally planned was to grind off all GRP-surfaces to double-varnish them in shiny yacht-white but having worked triple time we are now entering the time of the year when temperatures below 15 degrees (and well below zero) won´t permit working with varnish since I cannot and will not heat the boat permanently. I will instead push up the phase of wood-working and to the varnish-stuff next spring.
A plan – is a plan – is a plan.
So, this weekend I activated the drying-bag inside the boat, closed all hatches to get it dry inside. I also began to clean the bilge – another upcoming article here – and will certainly have to work for another 10 to 15 hours until having this part done in a satisfying manner. Next up on the list is taking exact measurements of the wooden ceiling to produce exact replicas and getting ready for days and days and weeks of grinding, staining and varnishing the wooden parts of SY OLIVIA previously taken off. I hope, this time I will not have to work triple time as well. We will see.