After having completed the next big milestone on the big to do-list of my King´s Cruiser 33 refit (here´s the complete article on sanding and painting the internal GRP-surfaces in shiny new white) I began to switch to the next item: The woodworks. Since my classic 40 year old sailing yacht employs a load of wood from her bow to the stern I was looking for a job to test my capabilities: Sanding, varnishing and painting wood is different from working with glass reinforced fiber. So, looking into the saloon of my yacht I quickly found a smaller project to have everything tested: The stowage cover panels.
Why testing? Well, working with Balsa, massive Teak or fine Mahogany – I thought – may be different because it´s a totally different material. Which paint would suit best? Which brush to choose? How longs does it take to dry? What´s the best technique to sand the surfaces and last but not least a thorough test of my new bought tools like the padsaw would be perfect before I go on to refurbish the other wooden parts of my ship: Those one clearly visible. So the best thing to start would be to have the stowage covers refurbished.
Revisiting the Stowage Covers of my King´s Cruiser 33

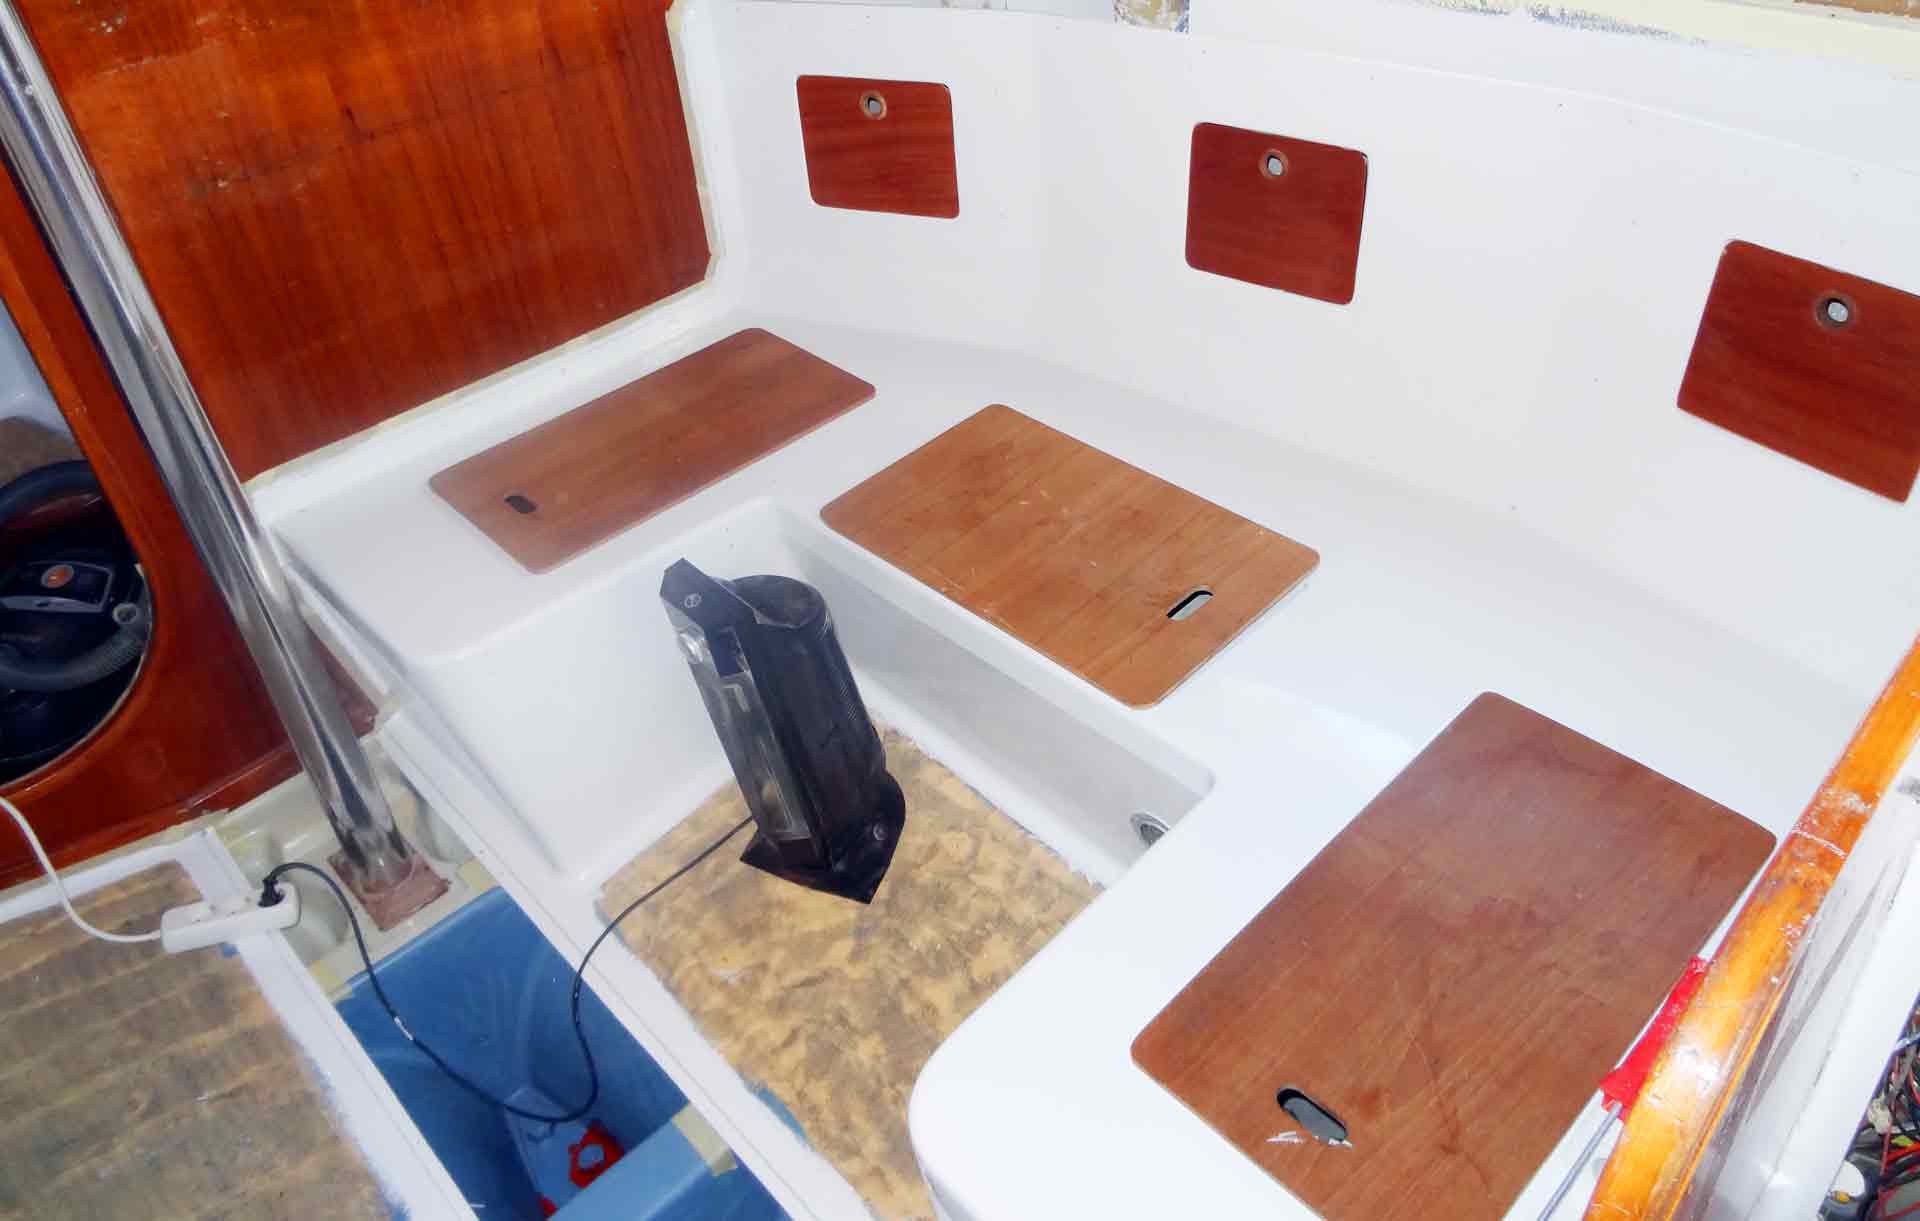
My sailing yacht has a lot of stowage to offer for a 33 feet ship and some of them are beneath the seating cushion or behind the saloon upholstery – they are normally not visible. I am roaming through the stockpile of wooden stuff de-installed from the ship in the first place and brought to our dry summer house. I do return with 14 stowage covers: Three of them beneath the mattrasses in the forecastle-cabin (here´s an article on how I plan to have this cabin refurbished, two more under the upholstery in the quarter berth.

Then it´s 6 panels with a latch for the saloon-backrests and three more for the stowage capacity beneath the dinette in the starboard saloon. Looking at the covers I find it´s much more than just a test – although the material seems okay in the first place, some of them are worn down and pretty greasy over the years. I guess my pre-owners didn´t cared too much for having them cleaned anyway. Some others do have some rusting screws and need a thorough facelift.
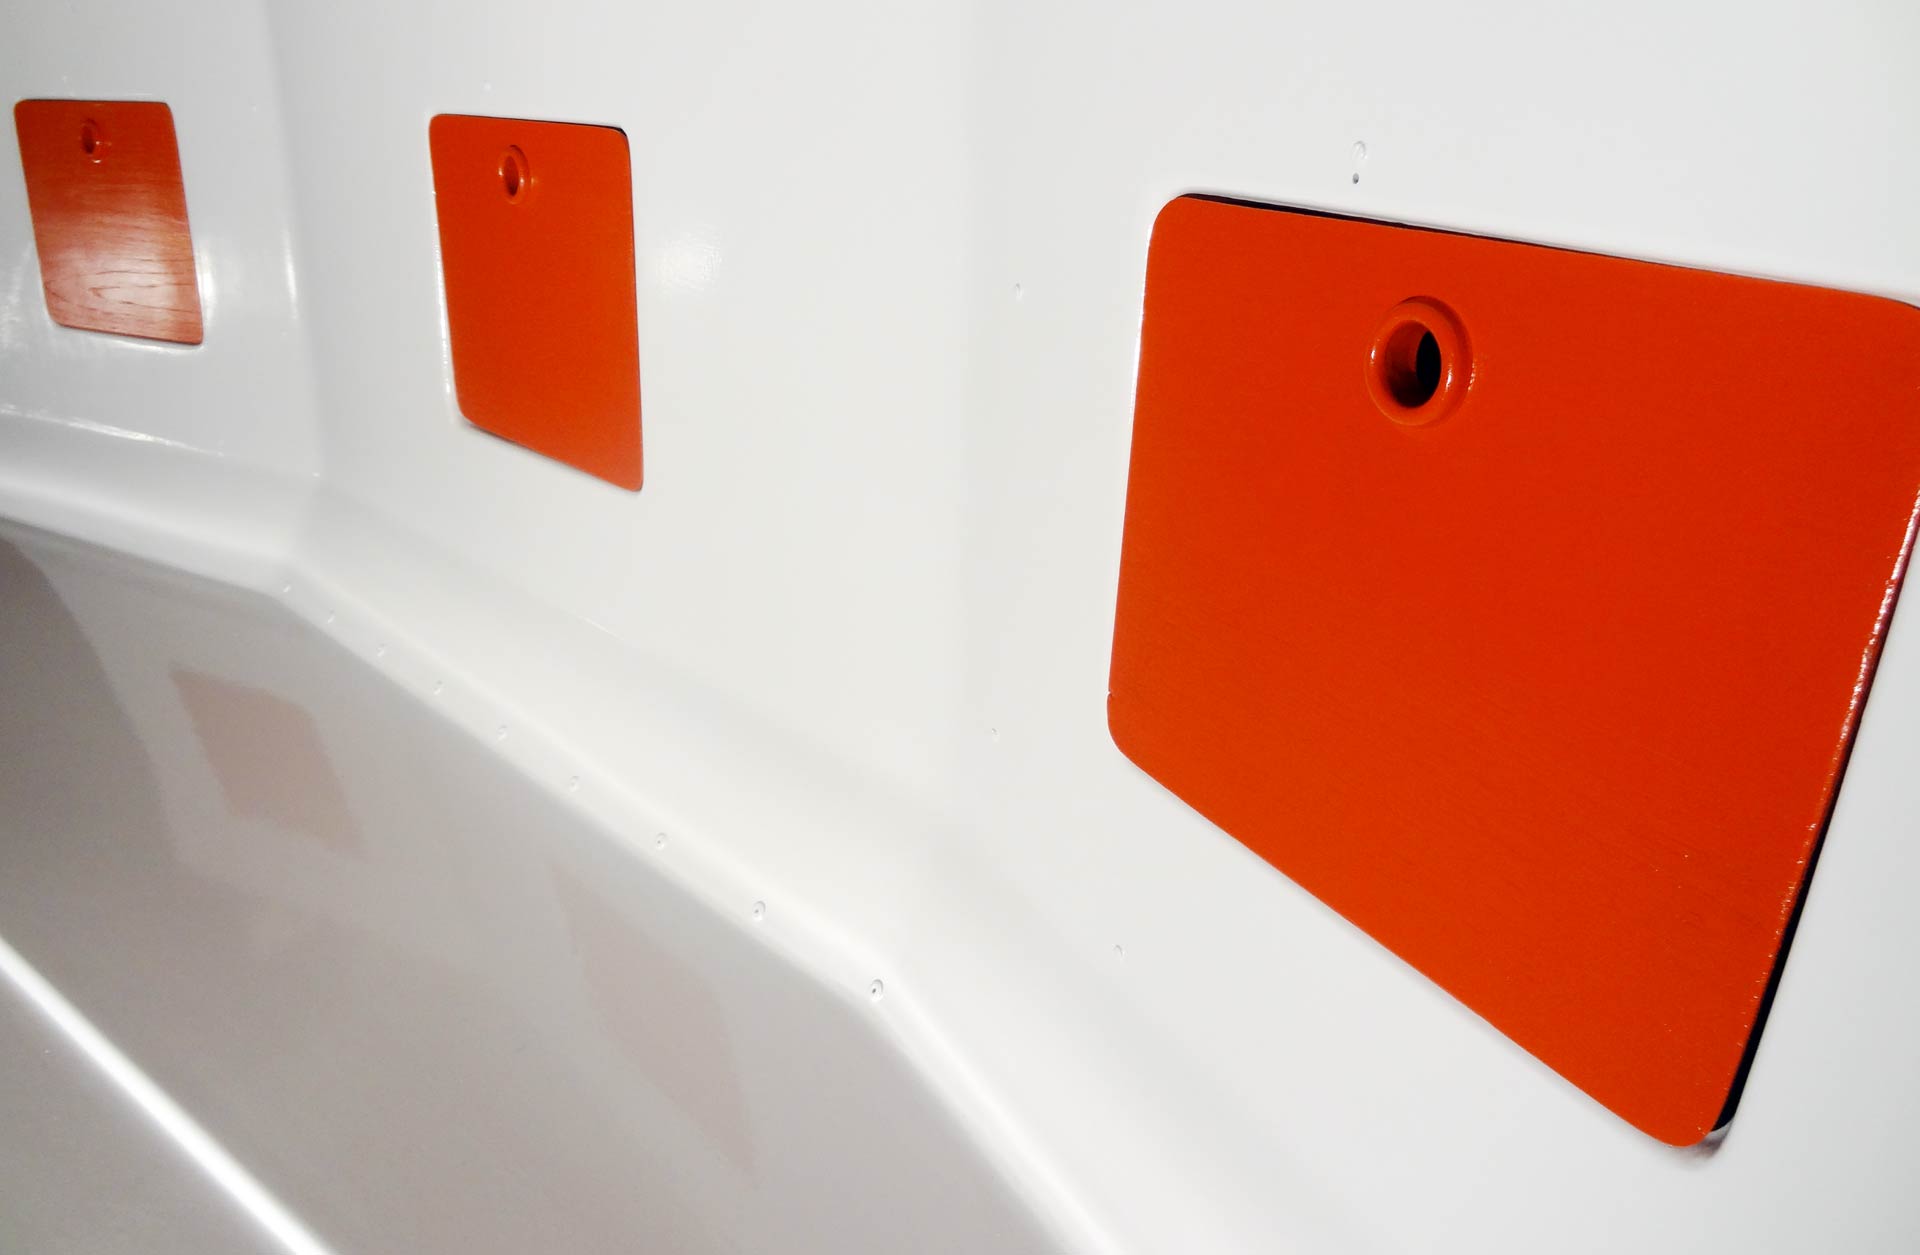
I also recognize that all in all I do have four different kinds of wooden material gathered here, which makes my test much more interesting: Painted hard wood (I still don´t know which kind of) in the forecastle and quarter berth which can thus be made very thin, a much thicker variant is employed in the starboard saloon, I find it´s much softer as well. Then it´s Mahogany-veneer for the port panels and balsa-wood for the starboard panels.
Sanding and Painting the Stowage Covers
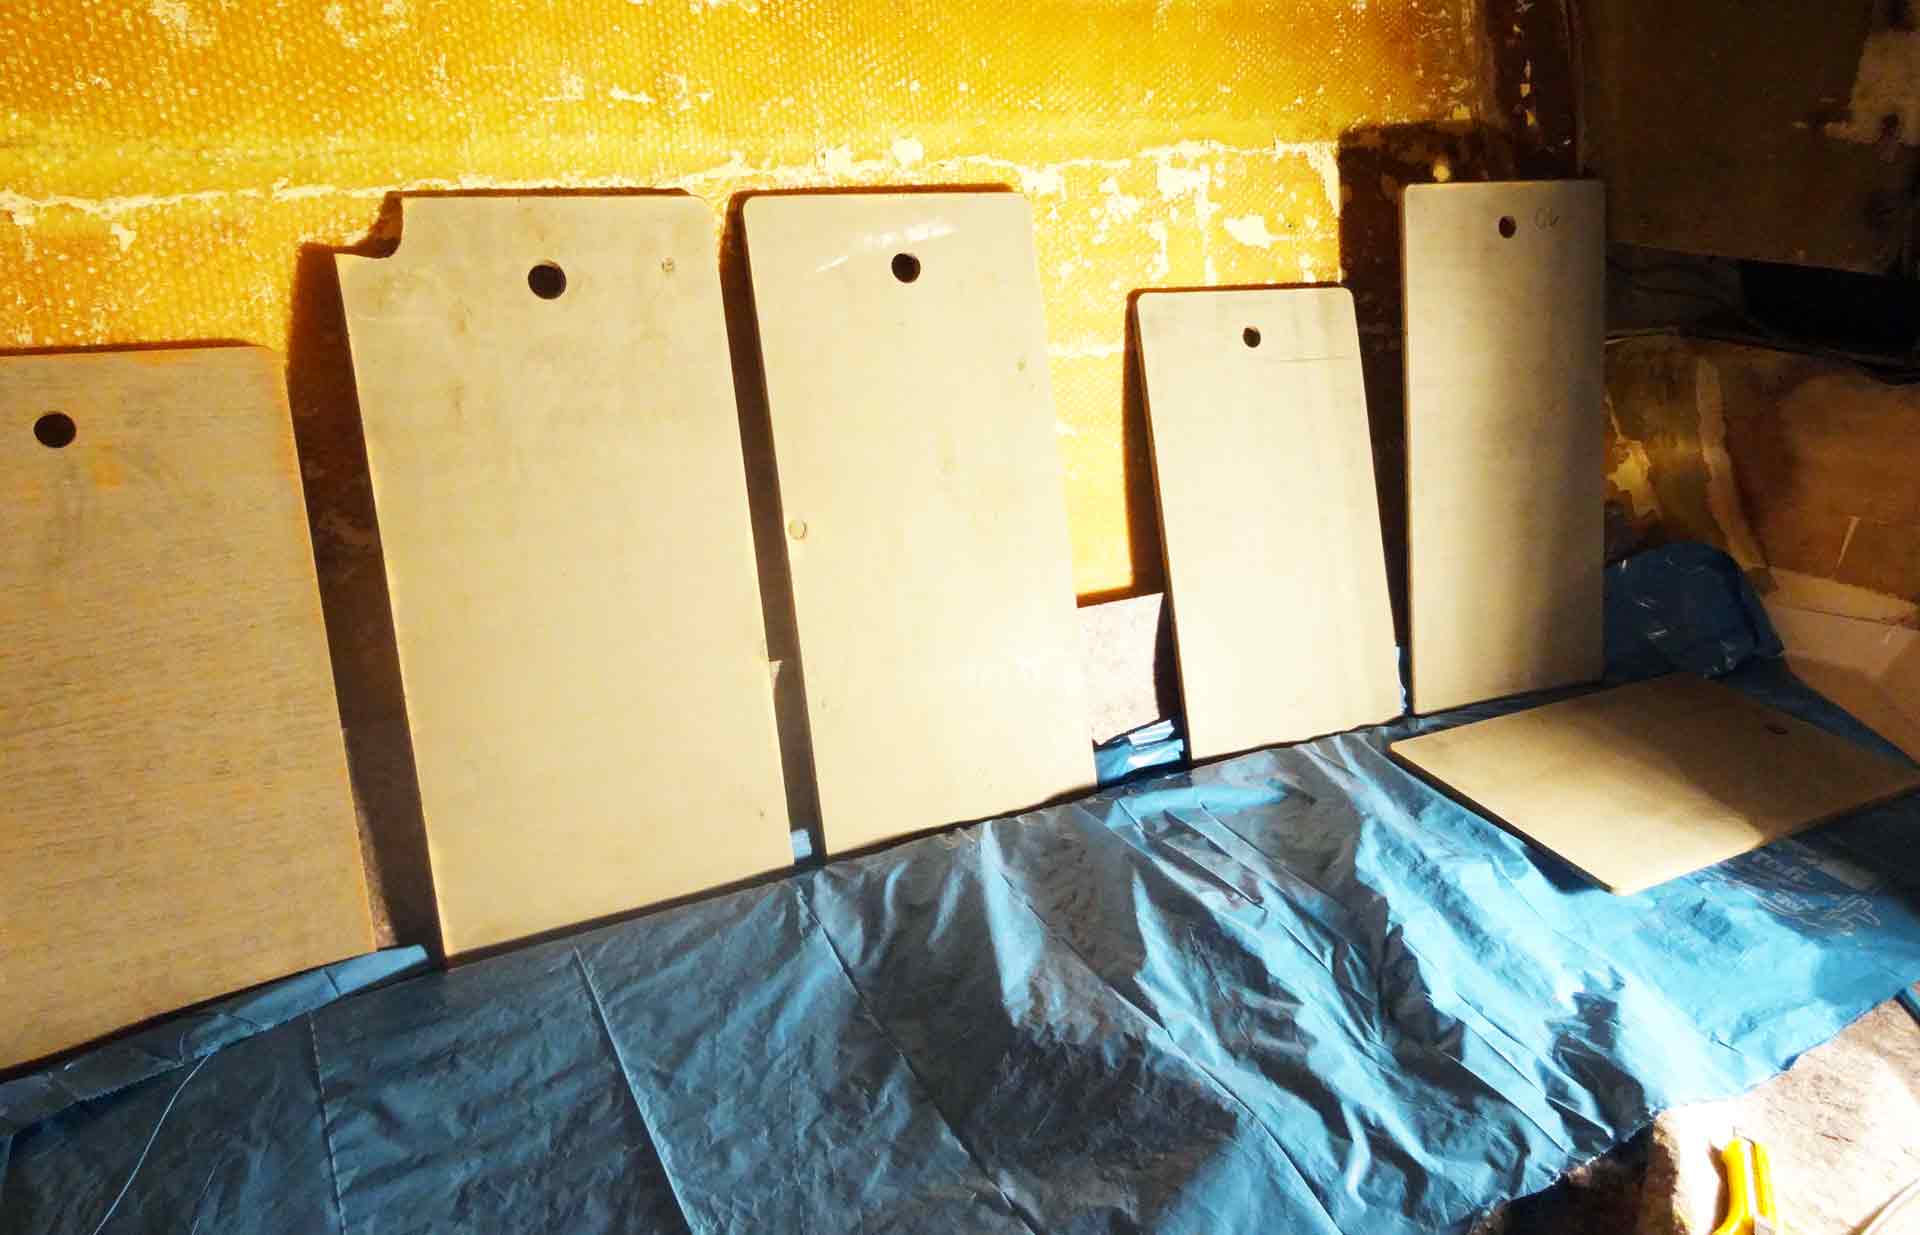
I use the orbital sander for the big panels to sand them. Some of the panels have been painted with grey varnish which I do sand off, but not completely. The other unpainted panels get only a rougher surface and I do sand off the grease of the past years. For the Mahogany and balsa-panels it´s a bit more complicated: Balsa wood, I quickly find out, is a very soft wood and I do have to be very careful sanding it because it´s within the wink of an eye and much more of the precious material is sanded away than I wanted to.
The panels made of Mahogany veneer aren´t that complicated though it´s advised to keep an eye on the sanding process because the thickness of the veneer is not very strong. Having sanding everything I do clean the dust away thoroughly and start to paint. I could test the varnish thoroughly – International´s Gold Schooner-varnish is my paint of choice – but I am opting against it. Another idea comes to my mind …
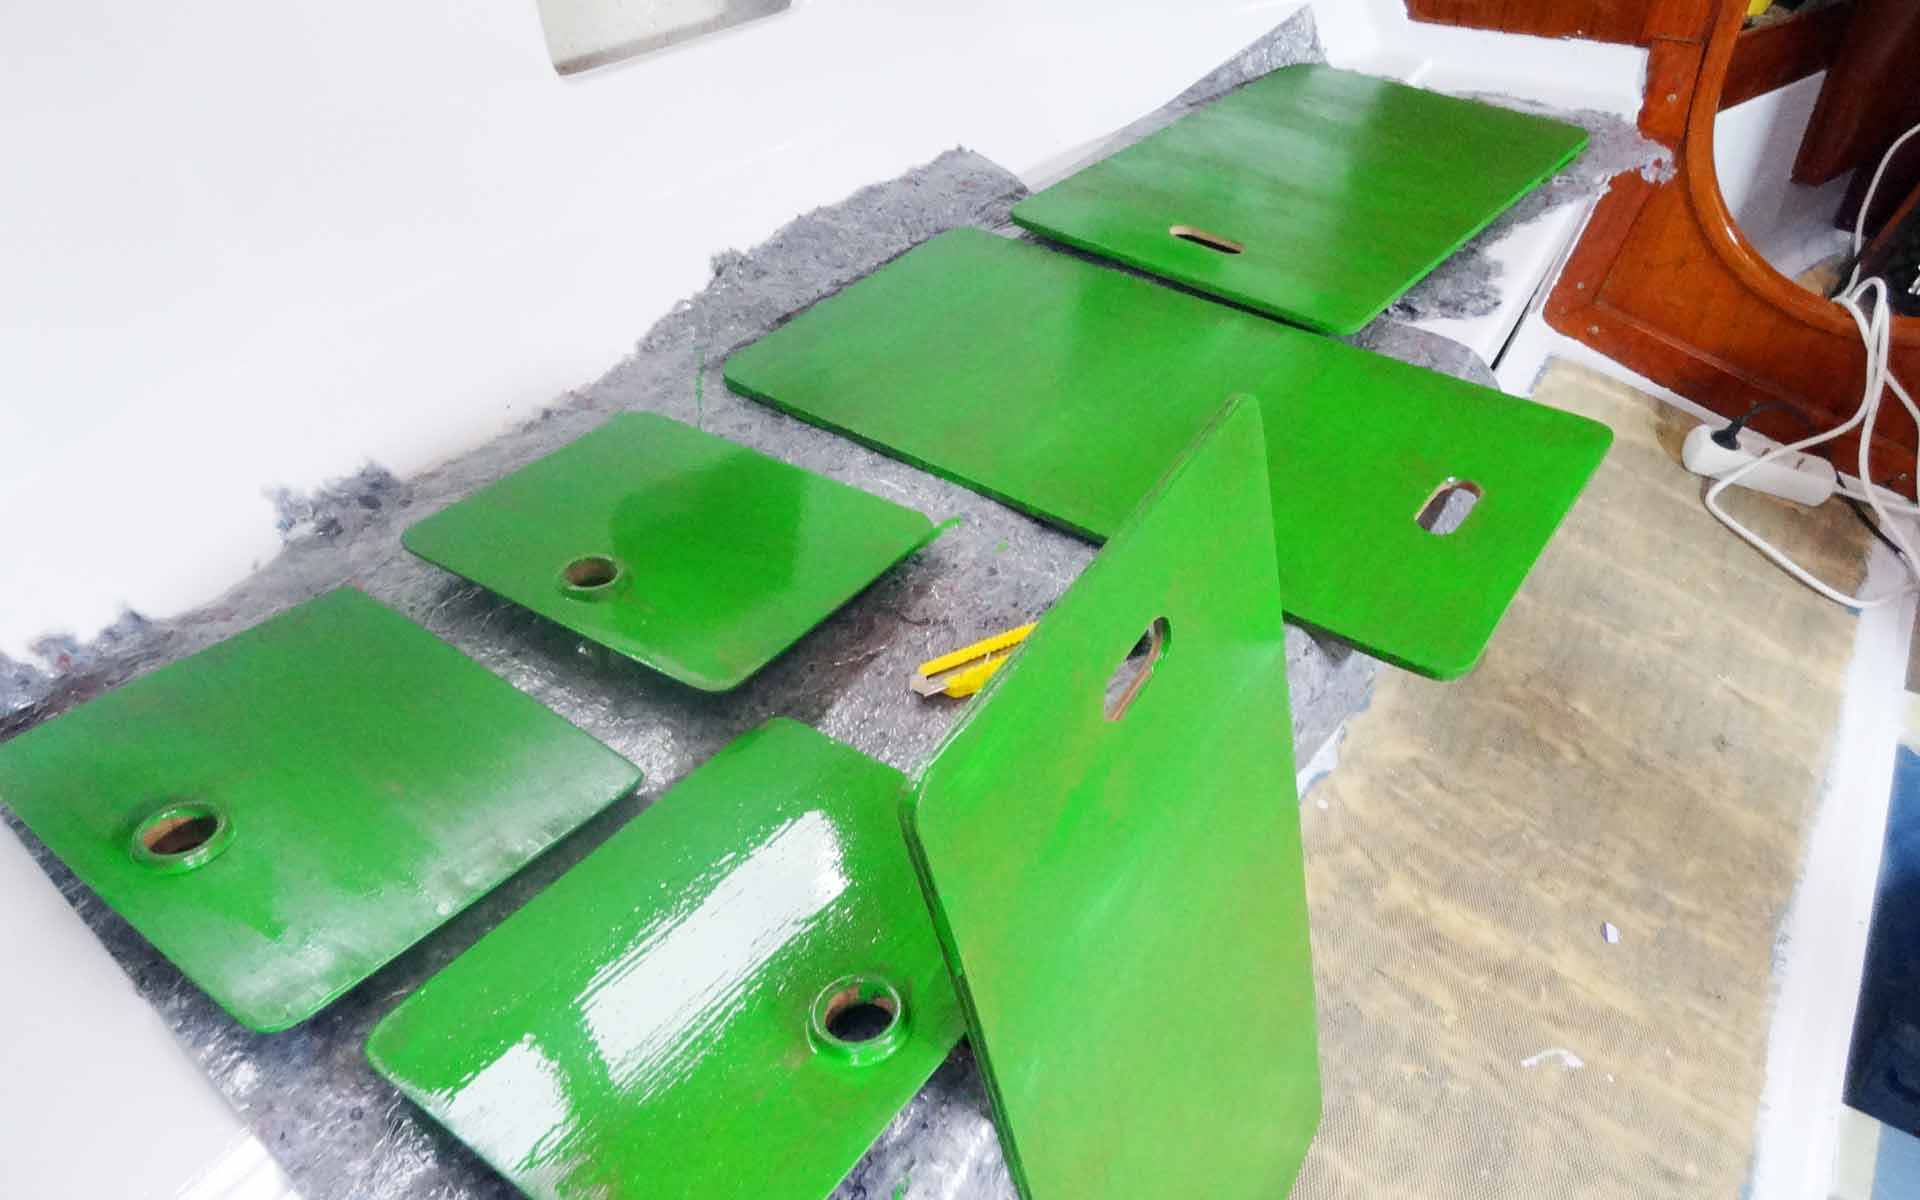
Green is for Starboard … right?
Do you have to struggle when back on board when “left” becomes “port” and “right” becomes “starboard”? Well, I can observe this struggle by myself when speaking and having to stop for a moment to recapture this fact and go on speaking. It´s a bit more difficult when “left” becomes “red” and right becomes “green” – especially living in Hamburg which is situated some 50 miles inland at the shores of River Elbe, knowing which color is for which side of the waterway. That´s crucial.
So I decide to have all port-side panels painted in red and vice versa all of the covers for my starboard stowage in green. It´s a simple 1K paint, a fresh happy apple green and the signal red tone which I am plying to the panels in 3 layers. I do need three layers because I discover that Mahogany and balsa – being a naturally oily wooden material – do not absorb the paint right from the start thoroughly. It´s the second layer that covers the whole wooden surface, the third and final layer makes the colors shine strong and fresh.

Next steps in my Yacht Refit
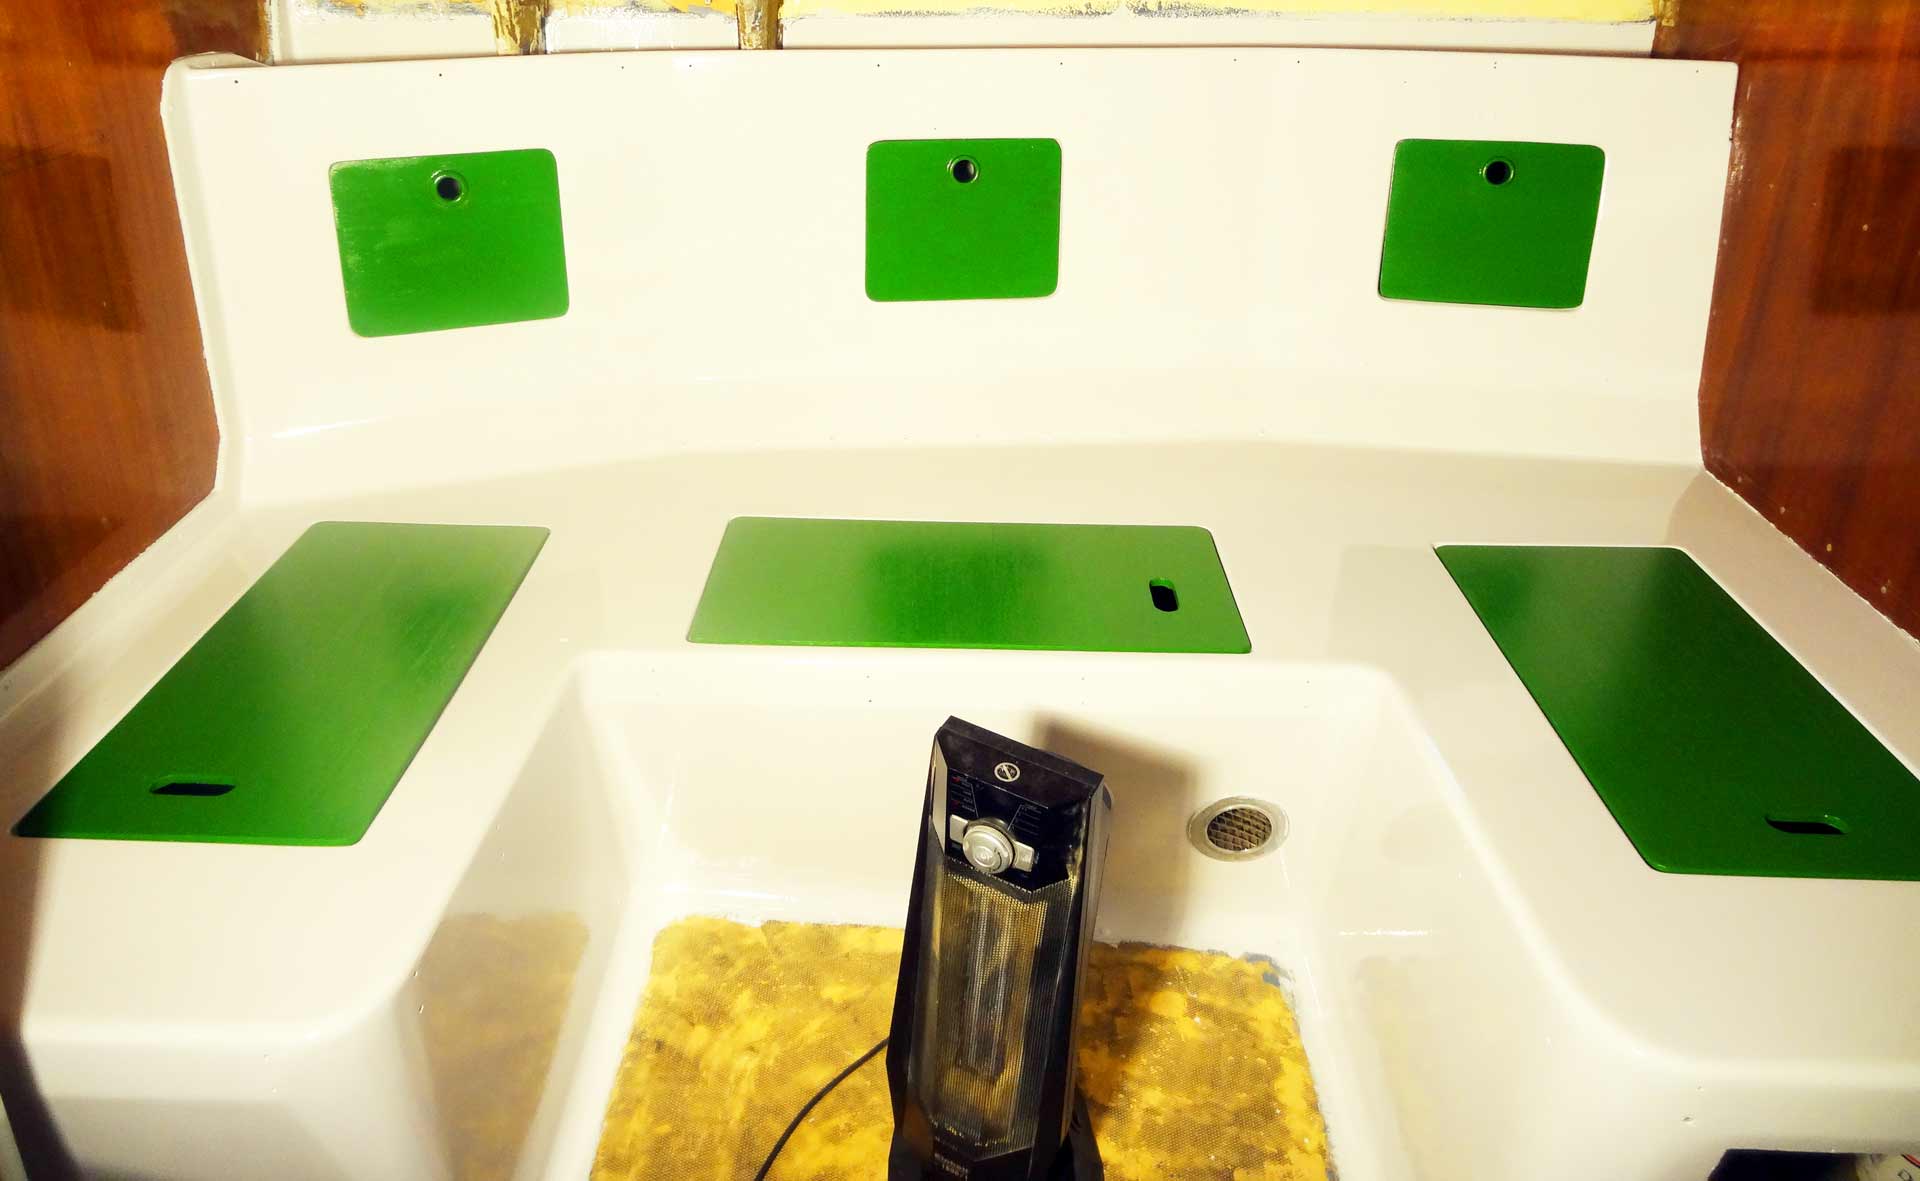
Knowing that green should be a forbidden color aboard a ship, I trade this risk of having the God of the Seas´ anger directed at me against a safer voyage: Every time from now on I am stowing away food or other stuff I will be reminded that red is for portside and green is for the starboard-side of my ship. How practical is that?
This was the fun part. Next weekend it´s the backsides of the panels I will paint green/red and I can cross off this item from my list. Next up is a much bigger part: I am going to have the bulkheads sanded and varnished completely new and – hoping temperatures will rise soon – all the rest of SY OLIVIAs wooden parts will follow.