Now that´s a big one: I get the feeling that most of the items on a boat refit list are so small that a visitor won´t tell the difference. Tiny project steps which in the end will (hopefully) amount to a big leap forward for the boat – such a moment is pending for my King´s Cruiser 33 refit. After making the Teak panels to have a nice classy facing of the ship´s hull in my saloon, it is now the roof I am turning my attention to: Making the roofing panels will significantly improve the look of the boat at once. Here´s how I do it.
Preparing the roofing structure

At first there´s some very important to think through thoroughly before wondering about the outwardness of the new ceiling panels: What will be behind it? As you might have read in my previous article on electric stuff, there´s a whole world behind covered by the panels, namely the wiring of the LED-lights and of course all the wiring that comes down from the mast. Having spoken about that topic before, it´s clear that I will need some spacing between the actual hull and the roofing panels.
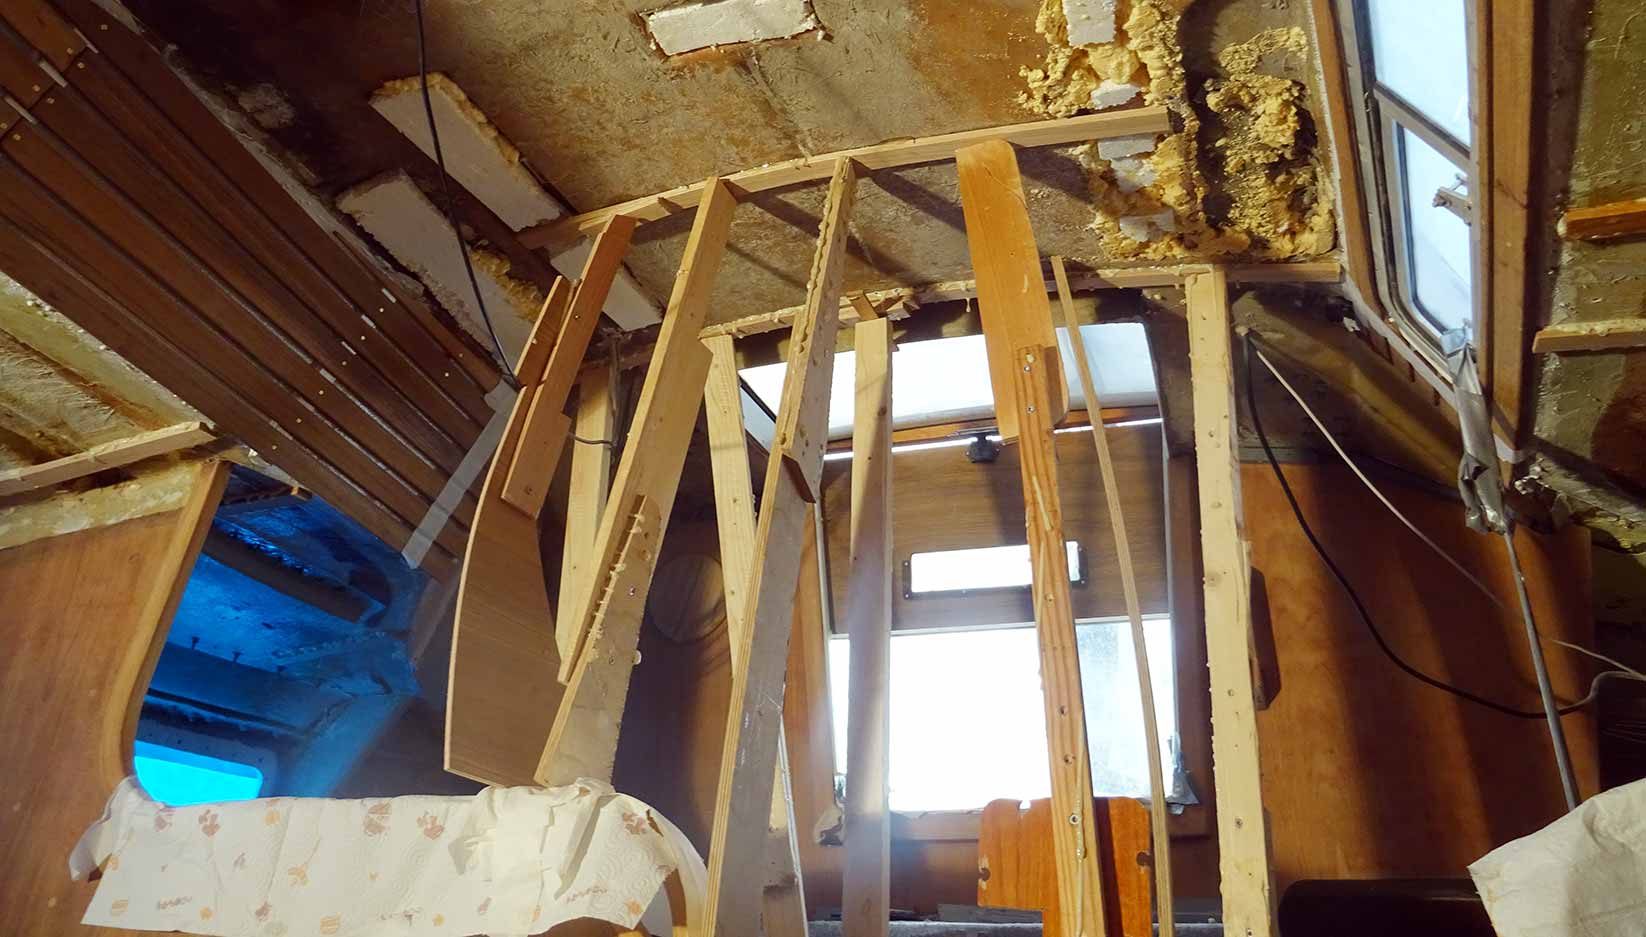
This is achieved by attaching wooden stringers to the hull. Since I have only good things to tell about PUR-based glue I went for this adhesive again and manufactured no less than 24 stringers from massive Oak which I brought to form a strong bond with the hull. Pressure is needed to achieve this outcome so this was some tedious work stretching over week: Maximum was three Oak stringers at a time with 24 hours drying time.
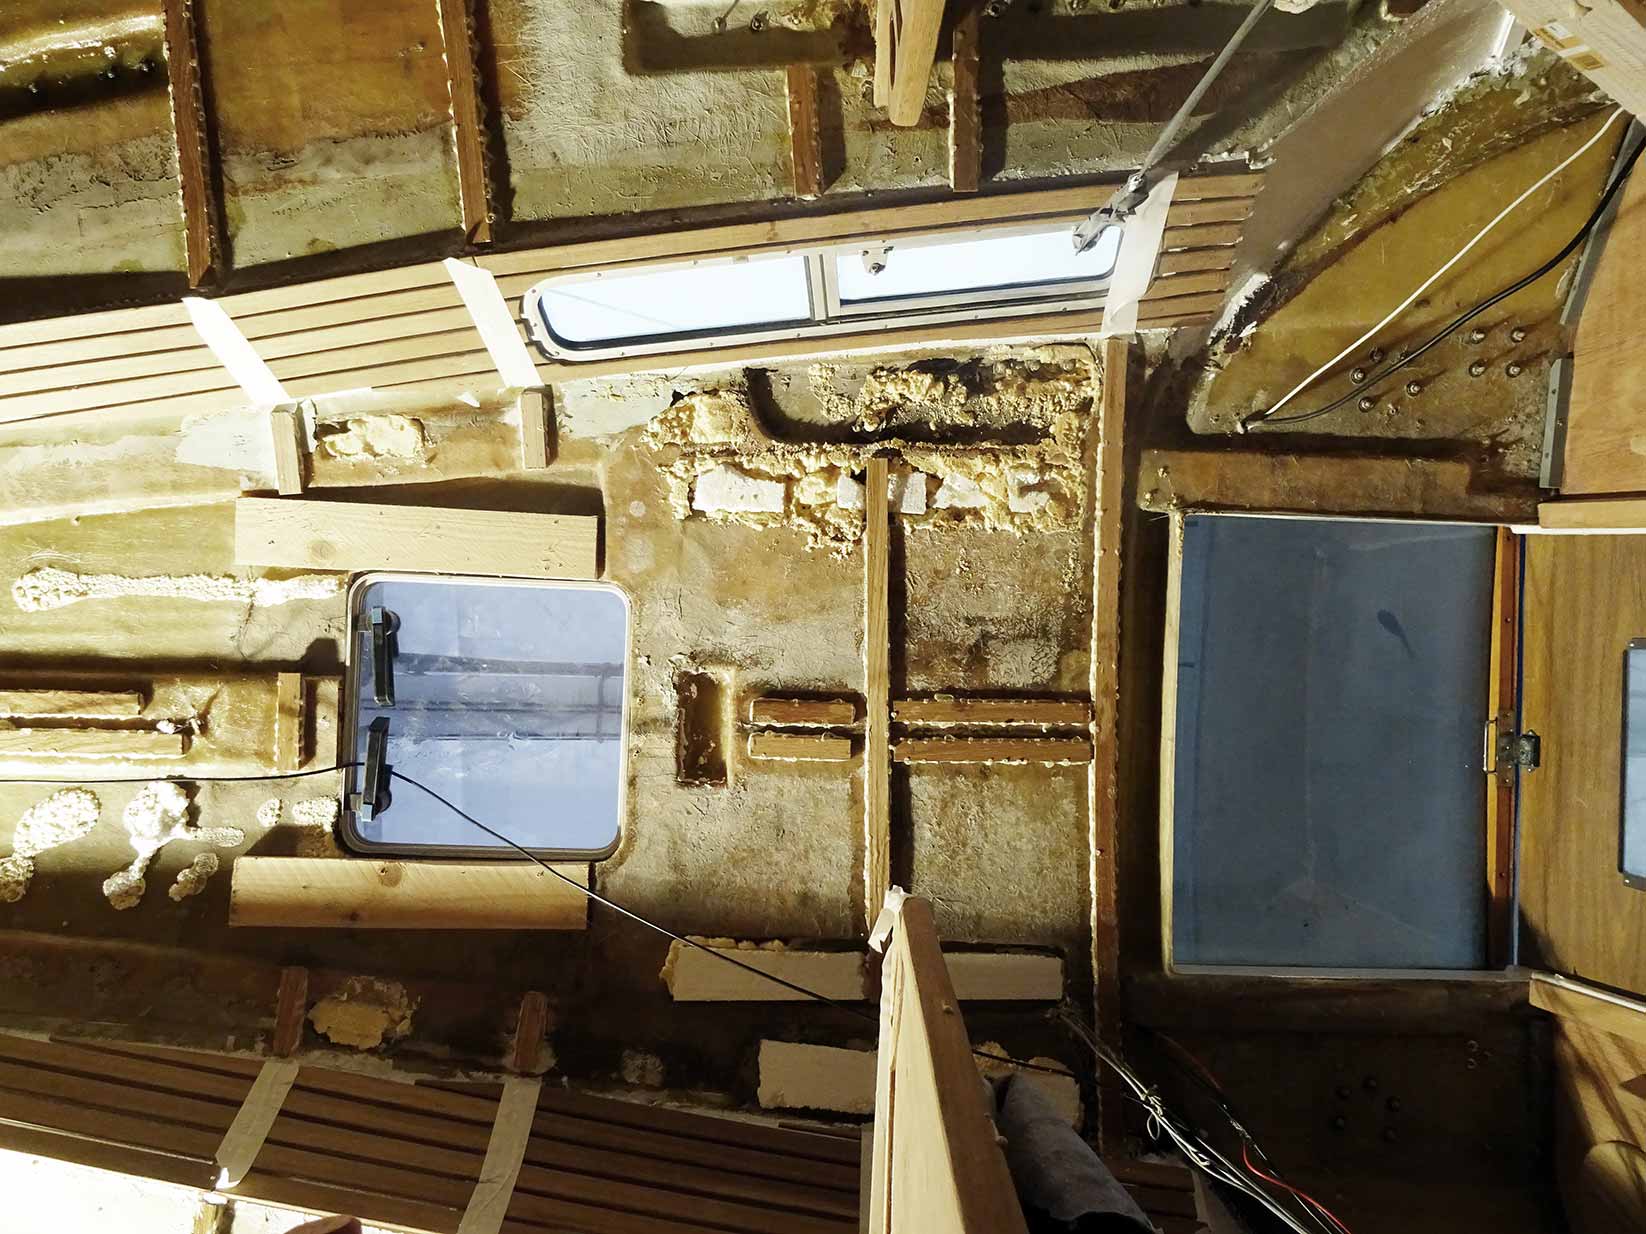
After glueing the stringers to the hull I chose to provide for additional mechanical adhesion and put in two stainless steel screws per stringer. After this, the whole construction has been sealed off against damp and moisture with epoxy resin. So I think this is the perfect basis to have the roofing panels attached to. I bought 4 mm Birch plywood which will be the raw material for the panels.
Making a roofing panel gauge model
I am not able and willing to use the old panels as role models for the new ones since I fear that by removing all of the covers inside the boat the measurements won´t be exact anymore – don´t forget, I´ve made new Teak ceiling panels for the ship´s sides which can change everything. So I´ll have to make new ones by trying to get the exact dimensions of each panel from the ceiling onto a raw model, out of the boat and onto the birch plywood.
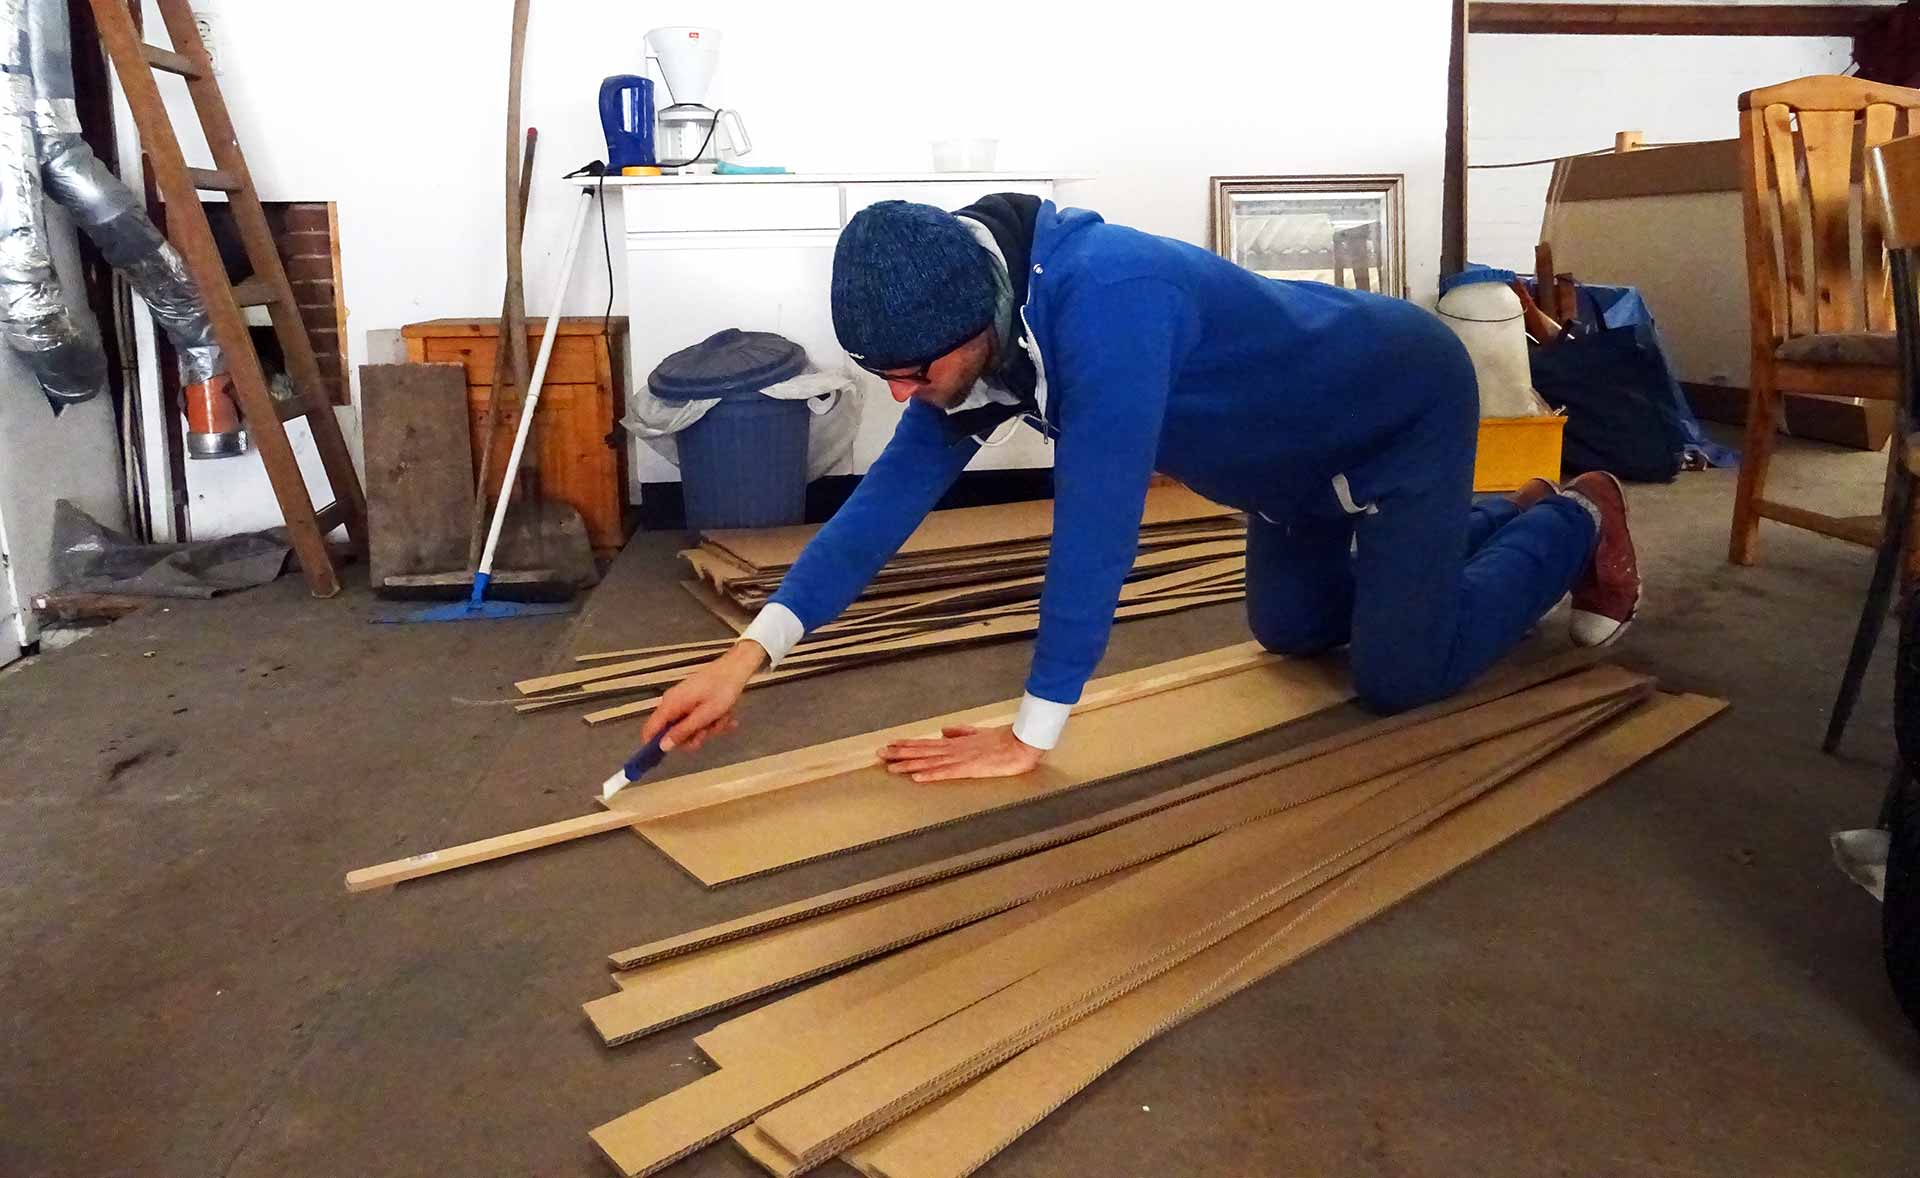
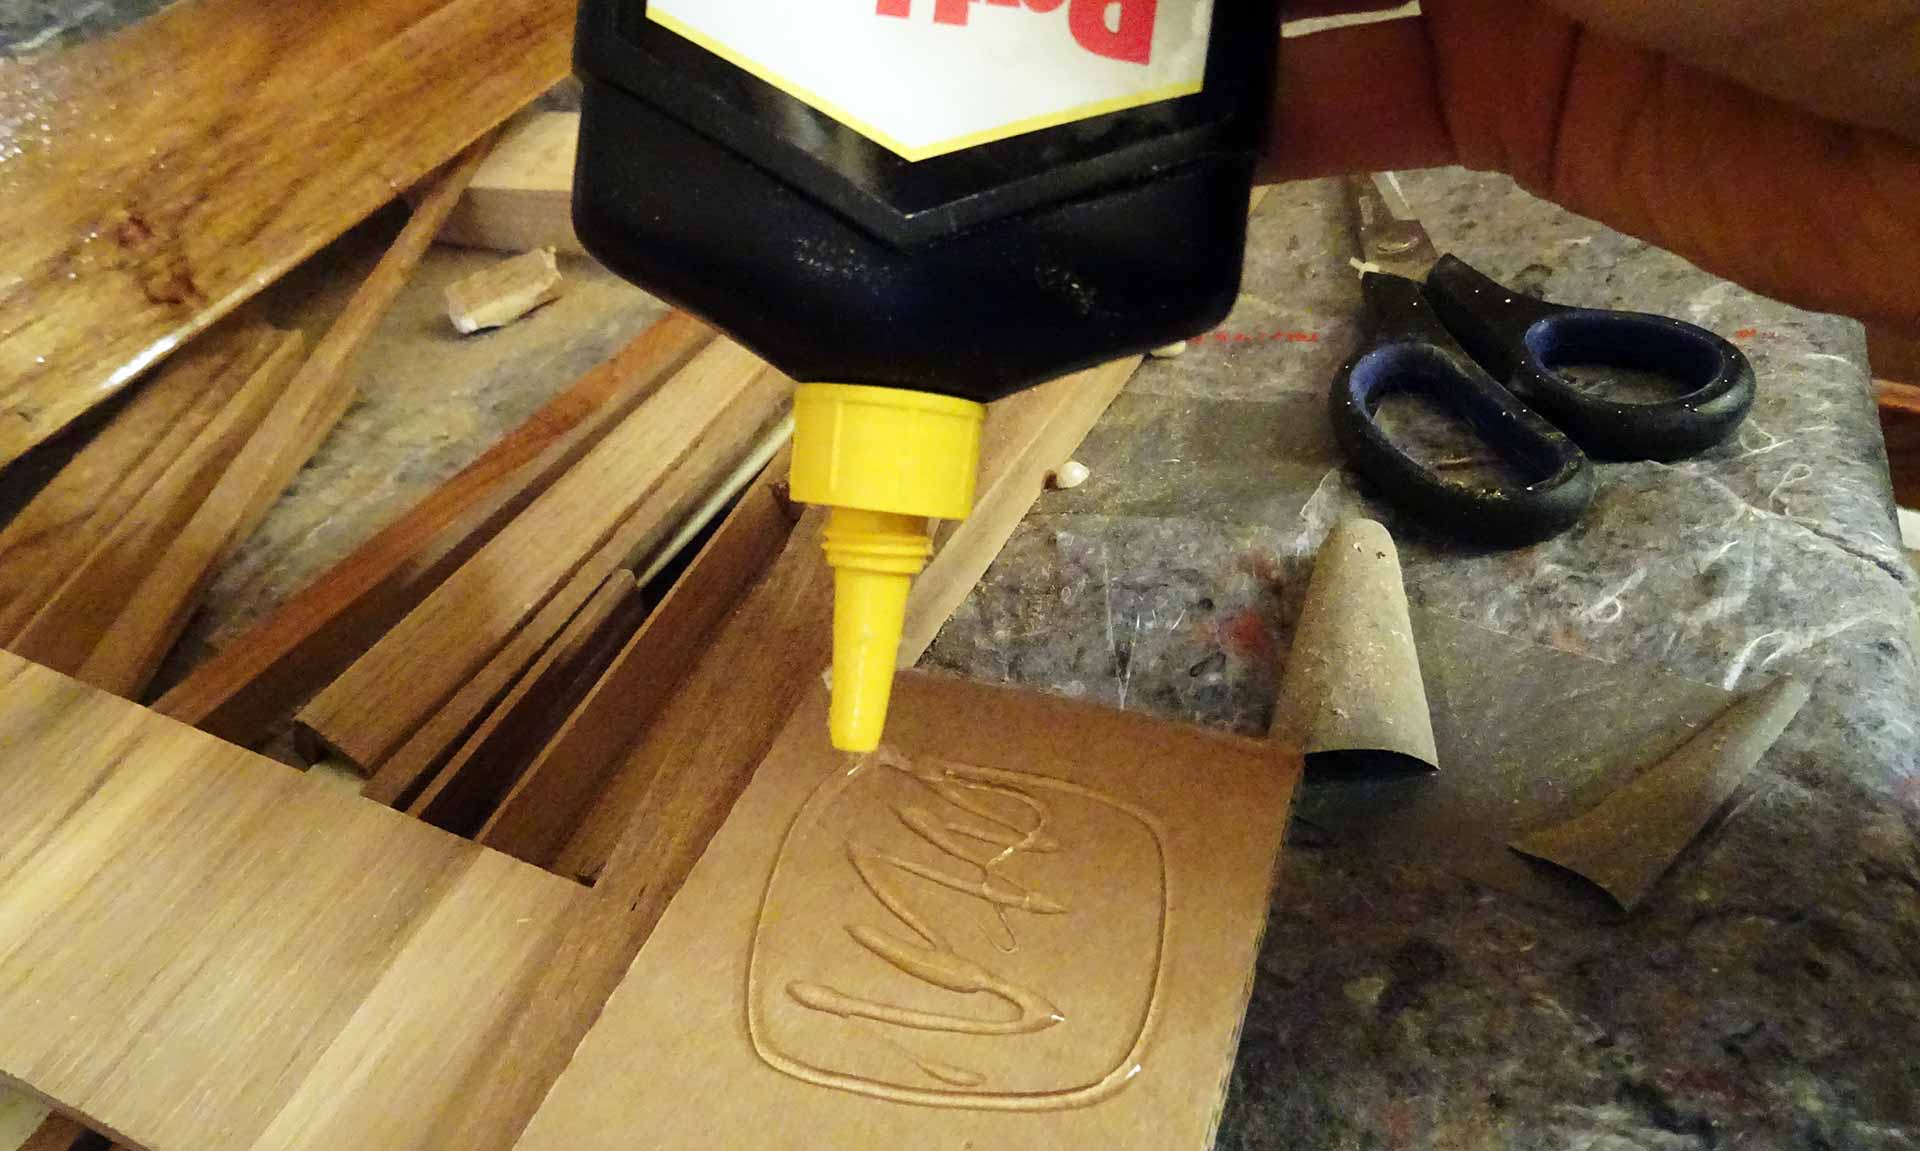
Taking huge cardboard boxes and going down to my knees, I was cutting precisely just strips of about 8 cm width with a carpet knife and took them with me into the boat. Now the fun began: Putting the strips to the ceiling I was trying to match exactly the outline of the panel. At first fixing the strips with Gaffer tape, drawing marks for additional cut outs, taking them off again, cut to size, fit and finally fix the strip to the ceiling with even more Gaffer tape.
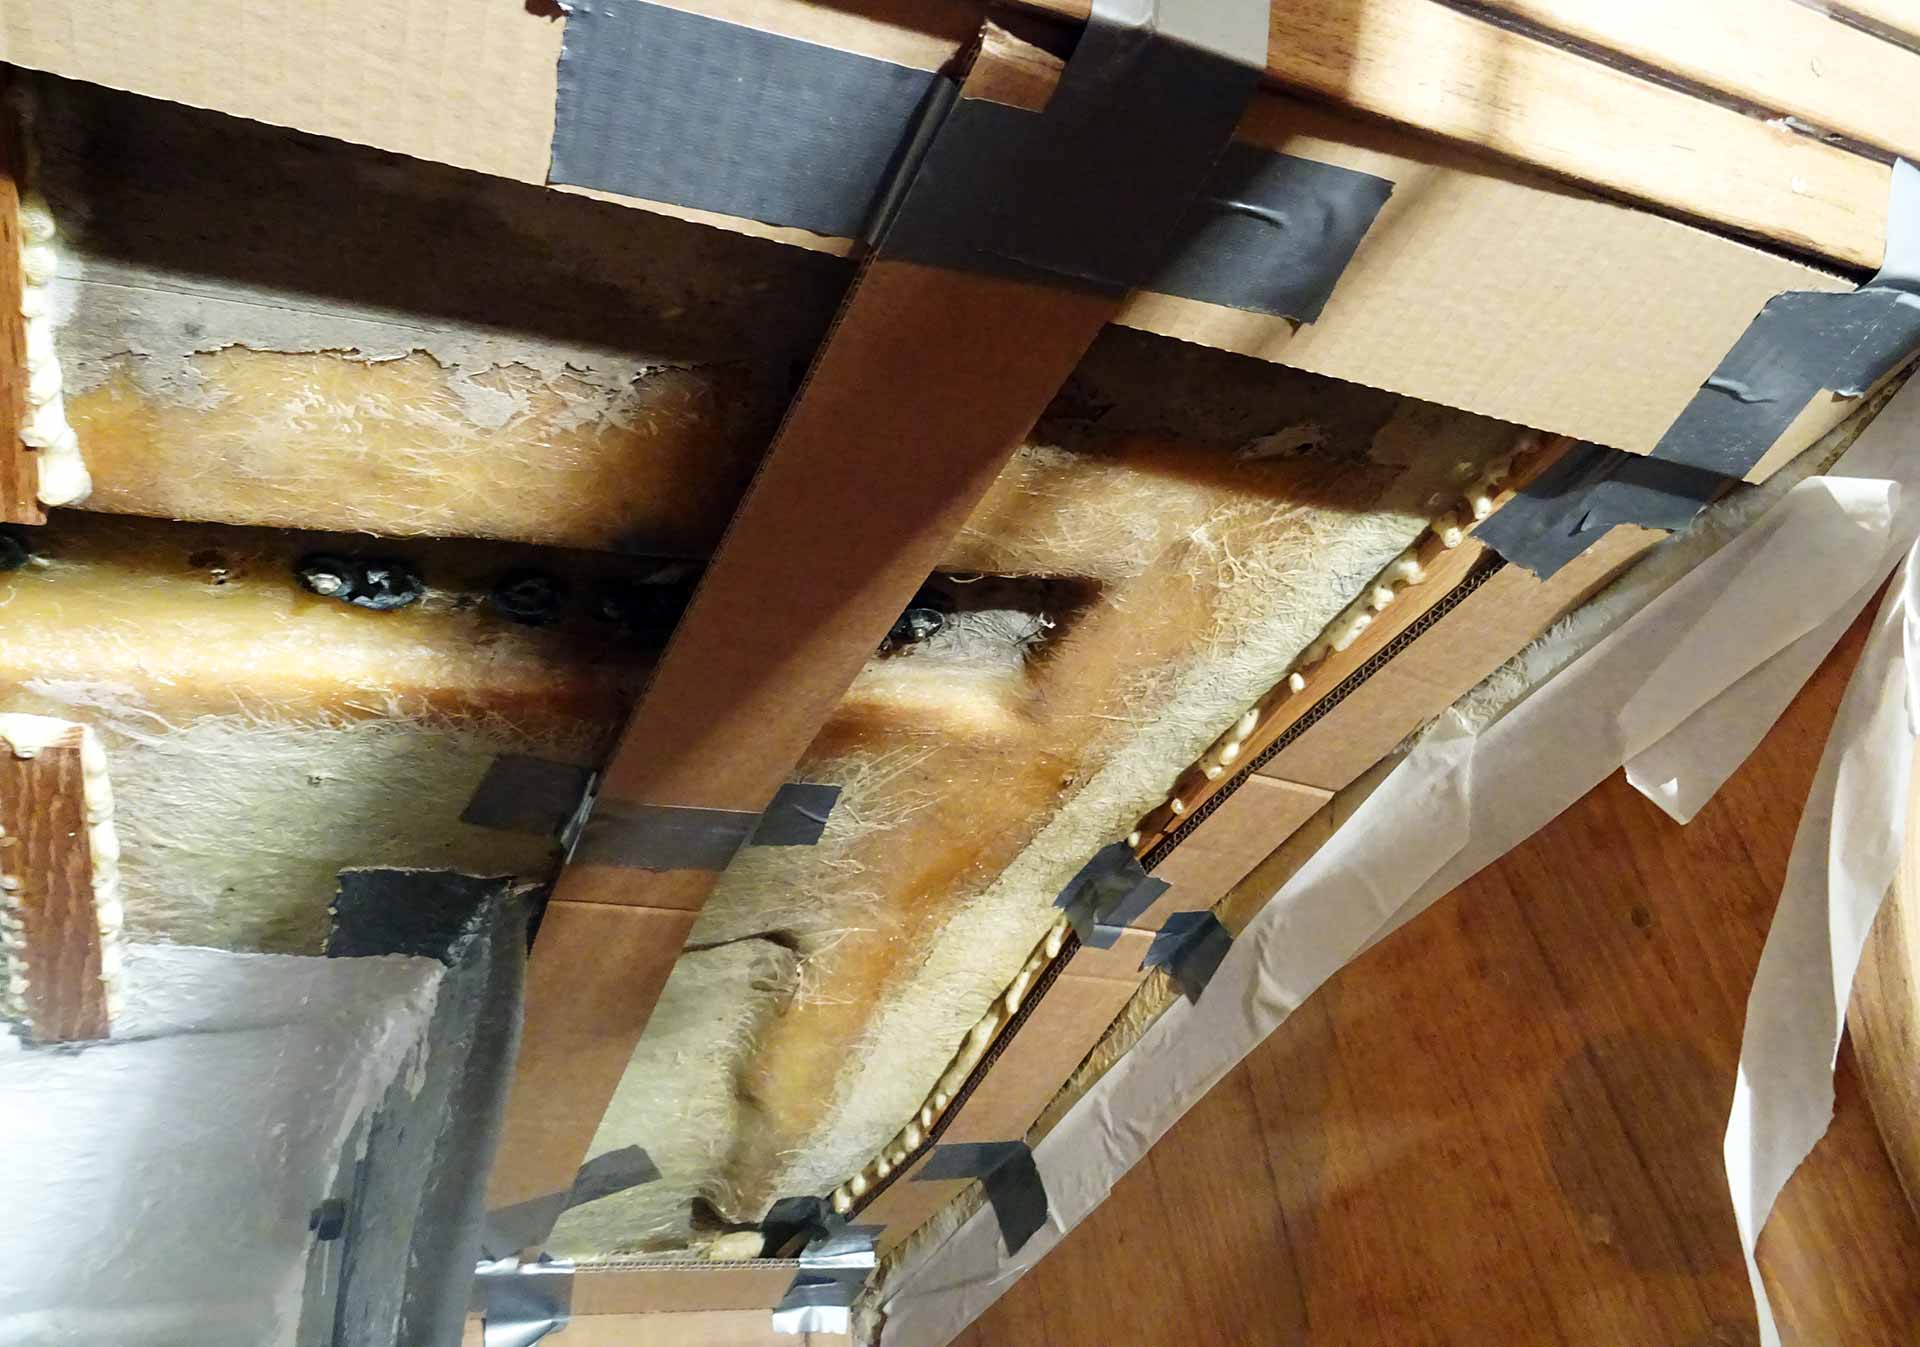
Strip by strip was then brought overhead which naturally took quite some time. Nevertheless, this technique enables me to achieve a pretty nice outcome – as far as I can see, I was able to match the outline dimensions of the panel quite exactly. When two strips meet, I will additionally use some all-purpose adhesive to bring them together.
Working over head is a mess to a near-40 year old neck and after some 2.5 hours of working I did was done with the first of at least 4 covers I´ll have to make for the saloon of my King´s Cruiser 33. There will be strips falling off from time to time forcing me to adjust them neatly again, sometimes glue will drop onto my glasses or – worse – into my mouth (I shouldn´t work with open mouth, I know) and sometimes taking off Gaffer tape to place a correction could destroy neighbouring strips. Anyway, I´ve done it and was quite at ease with my efforts.
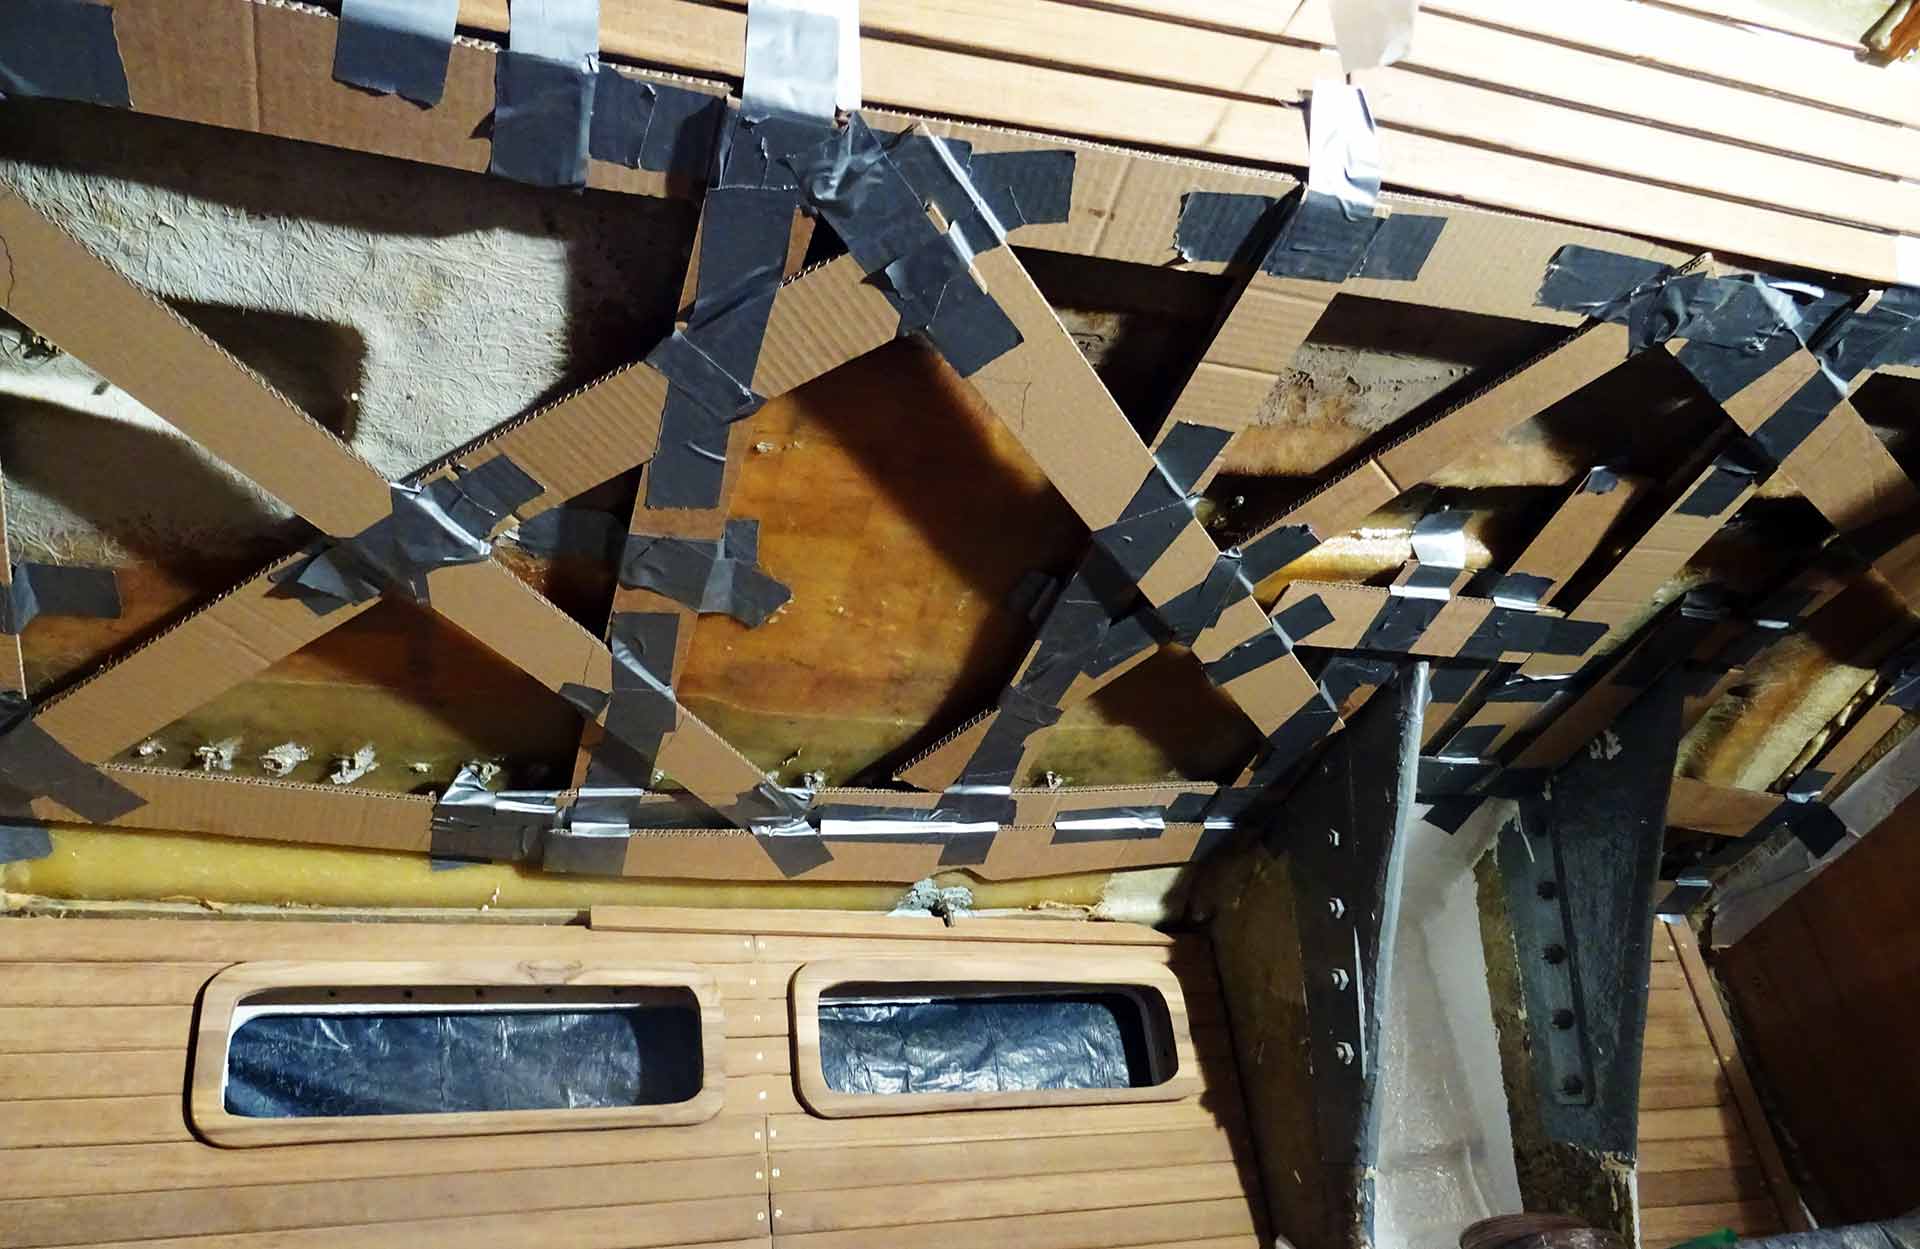
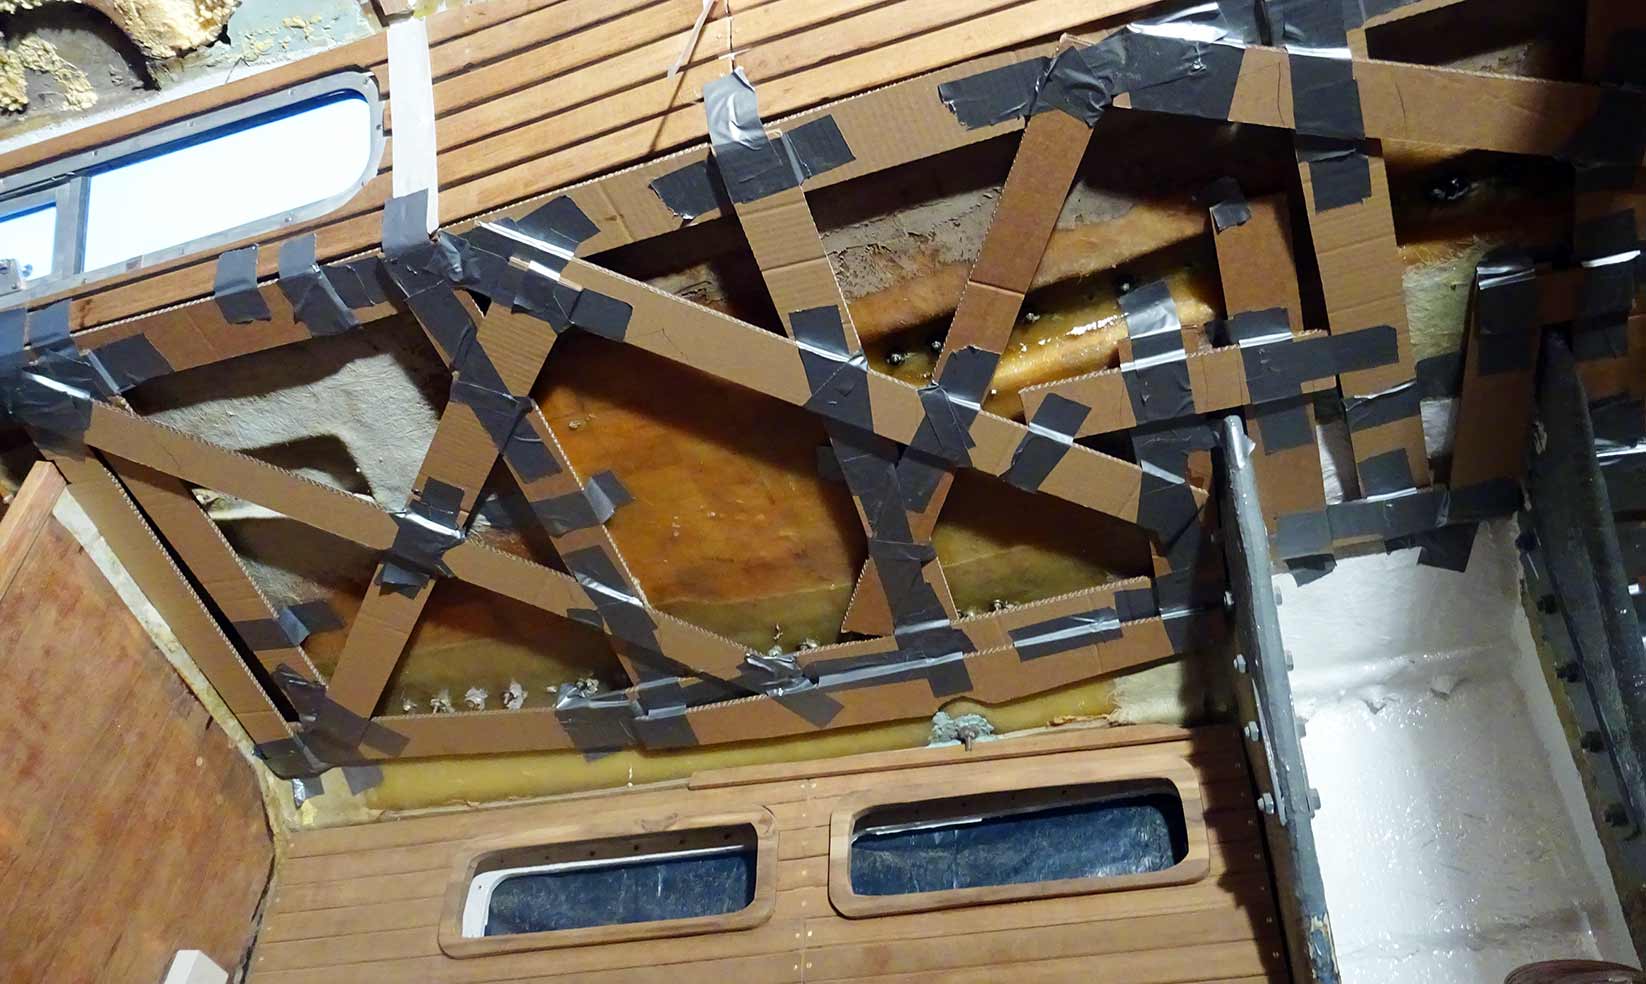
After having done the outlines, following every corner, every chain plate-stringer and exactly all along the bulkheads and the curvature of the deckhouse-structure I added stringers for rigidity crosswise. The whole bunch of cardboard and Gaffer will now be allowed to thoroughly dry before I remove it from the boat.
Leather lining: Should I go for it?
Thinking ahead two steps, I am now not so sure how to proceed when the panels have been cut out: The easiest way would be to have them again sealed with a layer of epoxy resin and then painted plain white. I love the colour I chose for the GRP surfaces some months ago and I think by doing so this will significantly improve the feeling of the boat´s lighting situation. Also, having a painted surface will be easier to keep clean and if necessary to repair.
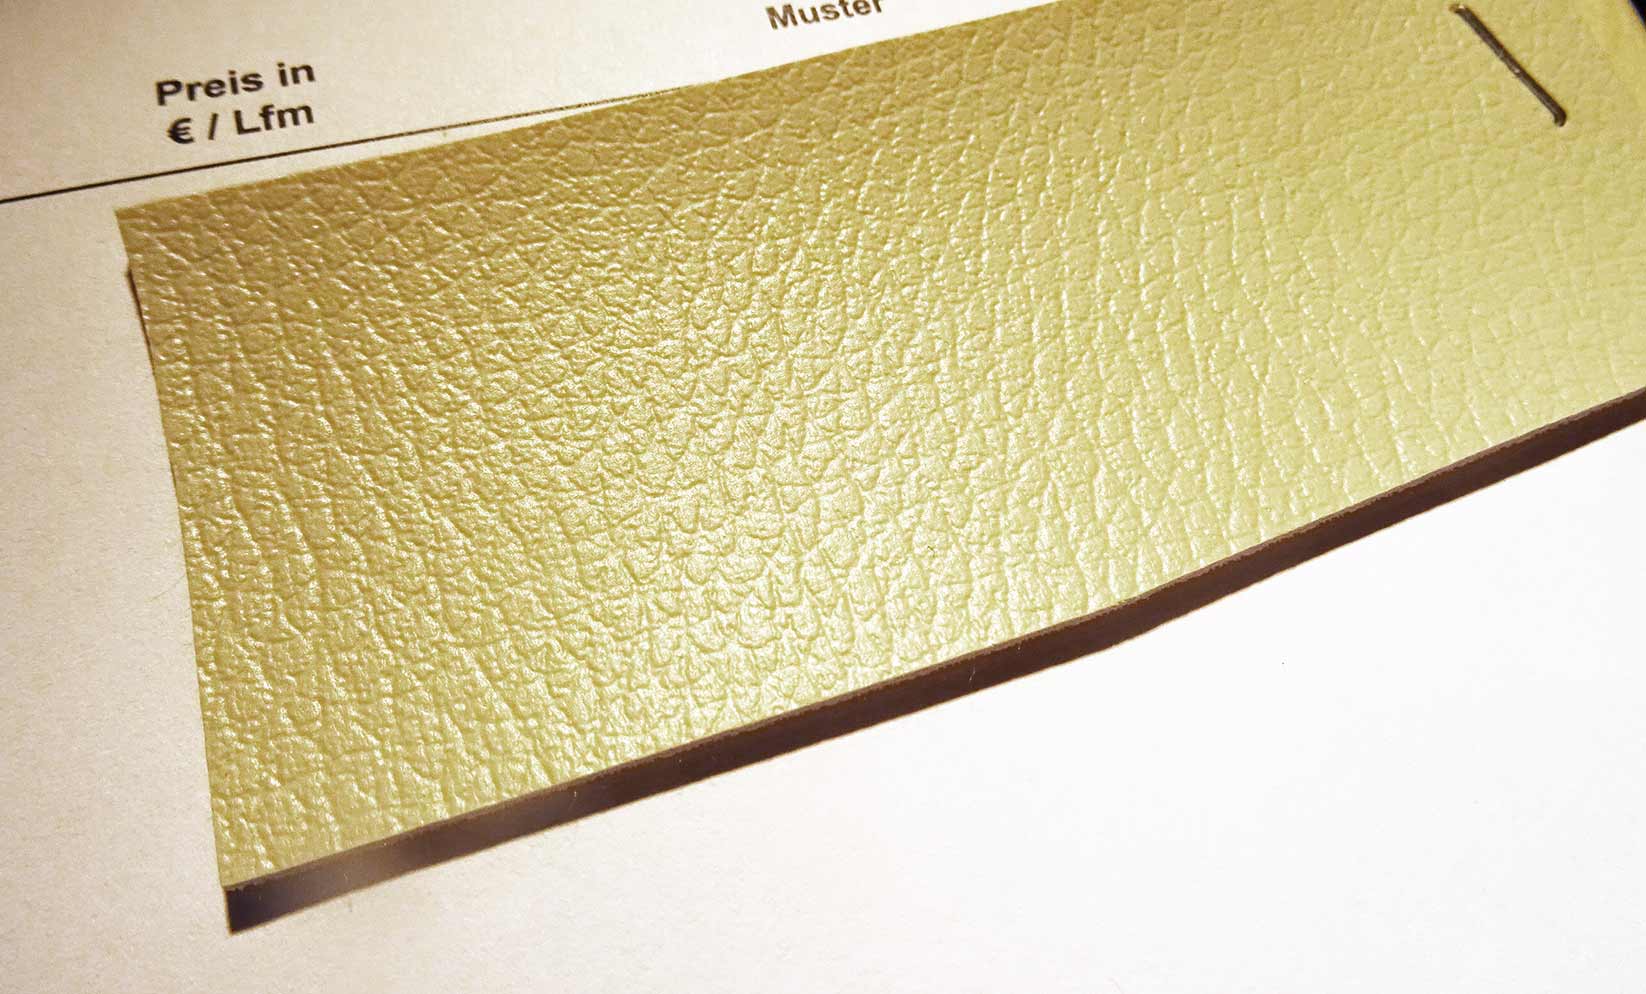
On the other hand: I love the leather covered panels of yachts for the roofing. I simply love it. Not for insulation but for the haptic sensation and the noble looks. I am investing an awful lot of money now into really expensive Teak timber for the ceiling and panels, wouldn´t it be nice to have a comparable classy look over the heads of the crew? Of course, real leather is out of question, but faux leather is relatively cheap, easy to work with and as well easy to clean. Repairing would be a mess on the other hand. Well, I will have some time to think it through before having to make this decision.

Next steps in the process
So, what´s next here? Apart from the fact that the described working steps will have to be repeated three times at least to make the models for the saloon panels, the already finished one will be taken out into the workshop and the outlines transferred to the birch plywood. Utilizing the saw the raw panel will be cut out, sanded and fitted to the hull again.
Along the hull´s stringers there will be stringers on the plywood panels as well to provide stability and to widen the gap between hull and panel to 1.2 cm. That´s the spacing for the cable tubes and the electric wiring. Making the holes for the LED light plinths and leaving a bigger hole for the mounting access for the mast-wiring will follow. This is when I will have to come up with an answer to the faux leather-question.
Quite some work ahead – but it´s increasingly fun to do it.
Other interesting articles:
Everything on the King´s Cruiser 33 by Fiskars, a GRP classic
“Half Way Round” – 3 young men on a Kingscruiser 33-trip (half) around the world
Galley ballet – preparing meals when it´s rocky outside