You know from a long list of now eight articles that roofing panels is a real big thing in a refit project. Each and every step of this item on my refurbishment list is a comparable complex thing and it takes a fairly long time to achieve the goal of having brand new roofing panels fixed – up until now I am working for more than 100 net hours on the roofing panels of my Kings Cruiser 33. One of the tricky things is to get the exact form of a roofing panel itself – because working over head on a bent surface is tedious.
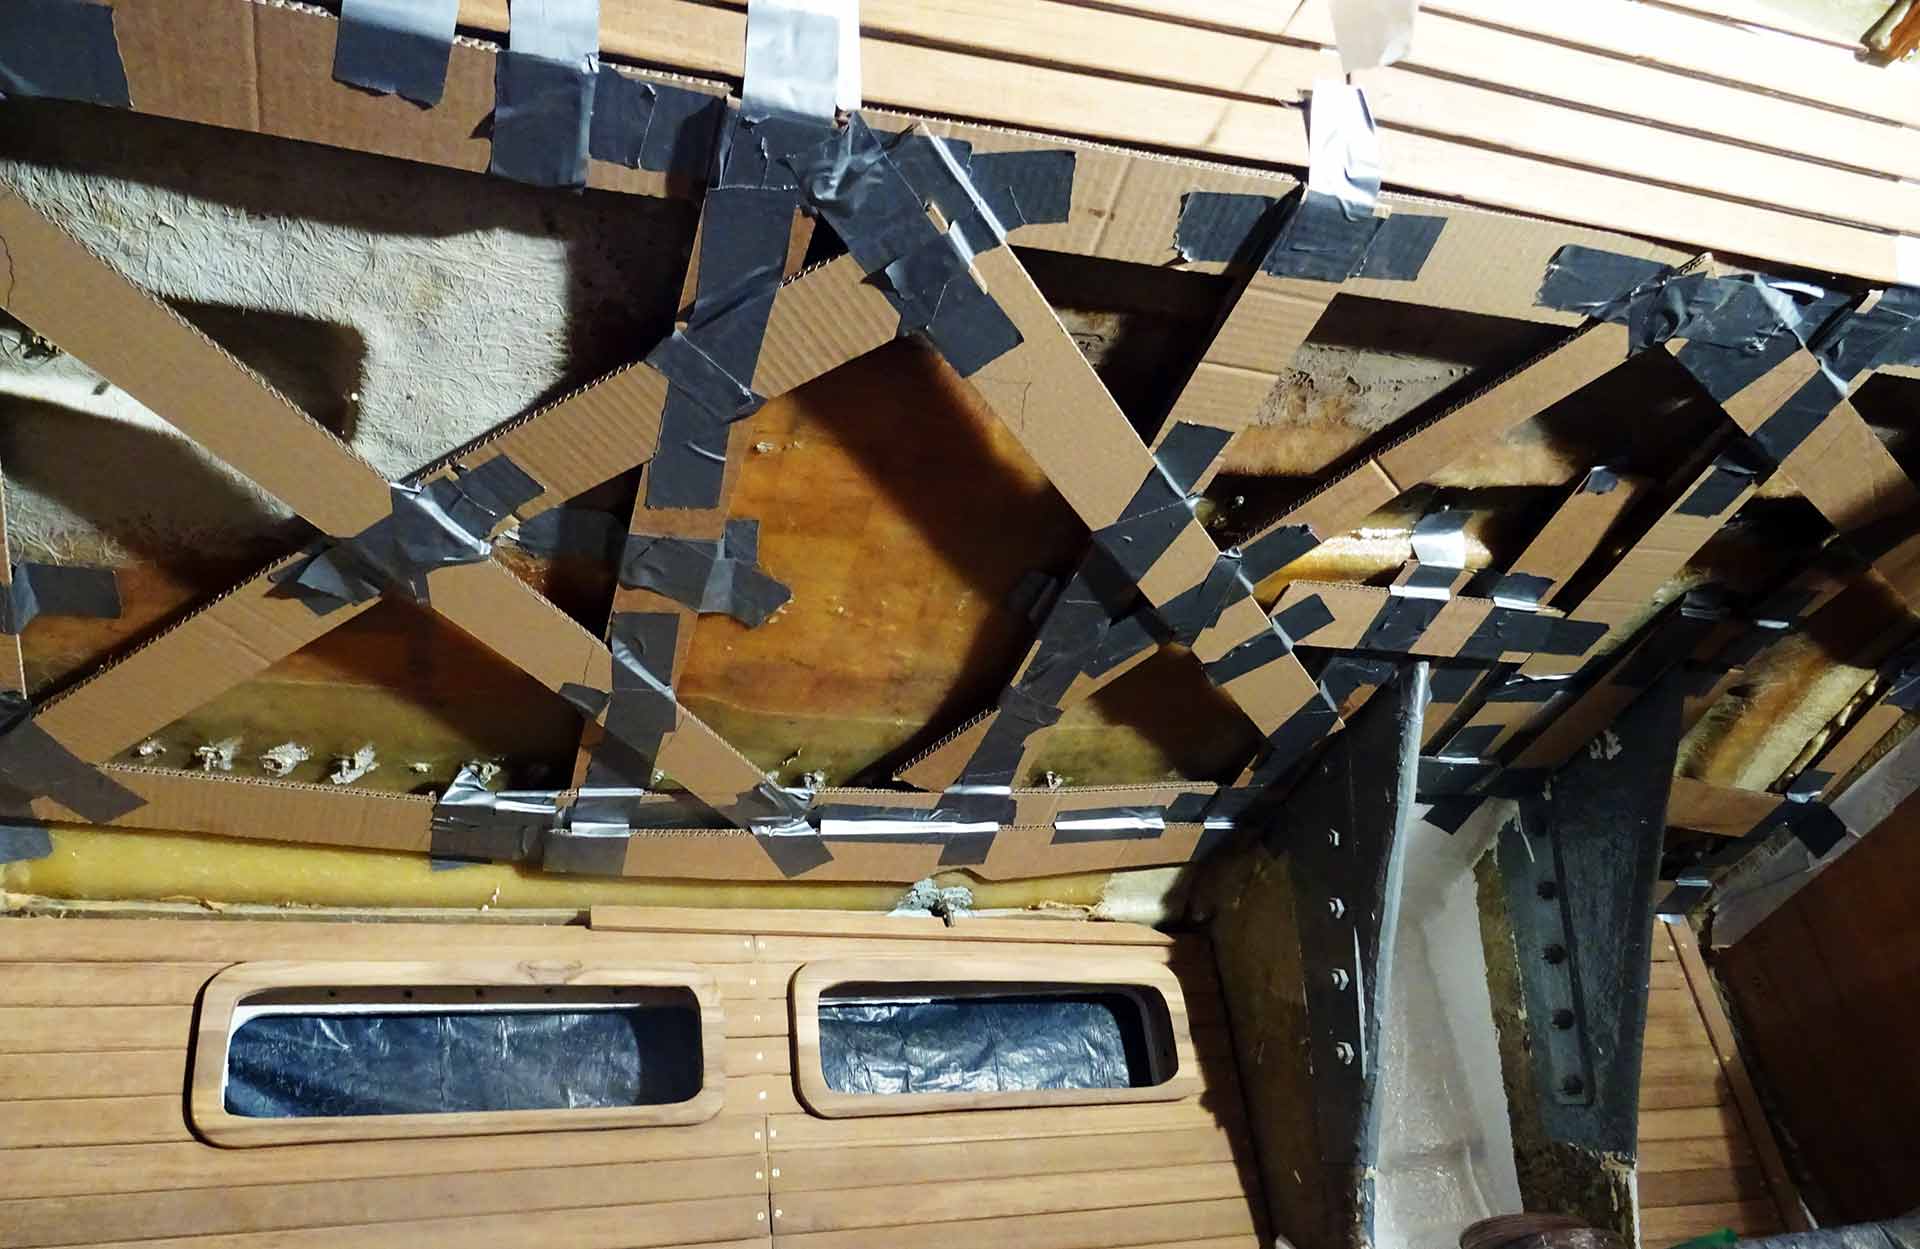
Up until now I applied a method of getting the dimensions of the panel right by making a gauge model of stripes of cardboard which I was pinning all along the outer edges of the roofing panel area. It worked fine but this technique also produced partially huge allowances and big seams between the panels. In short: This method isn´t that ideal for making a panel gauge. Last week the owner of a yacht who went through the same as I do, gave me a hint: “Try the spider gauge-method!”, he said and after he was explaining what that meant, I saw the great potential and tried it by myself. Here´s the spider-method of making a gauge model …
Preparing the Spider
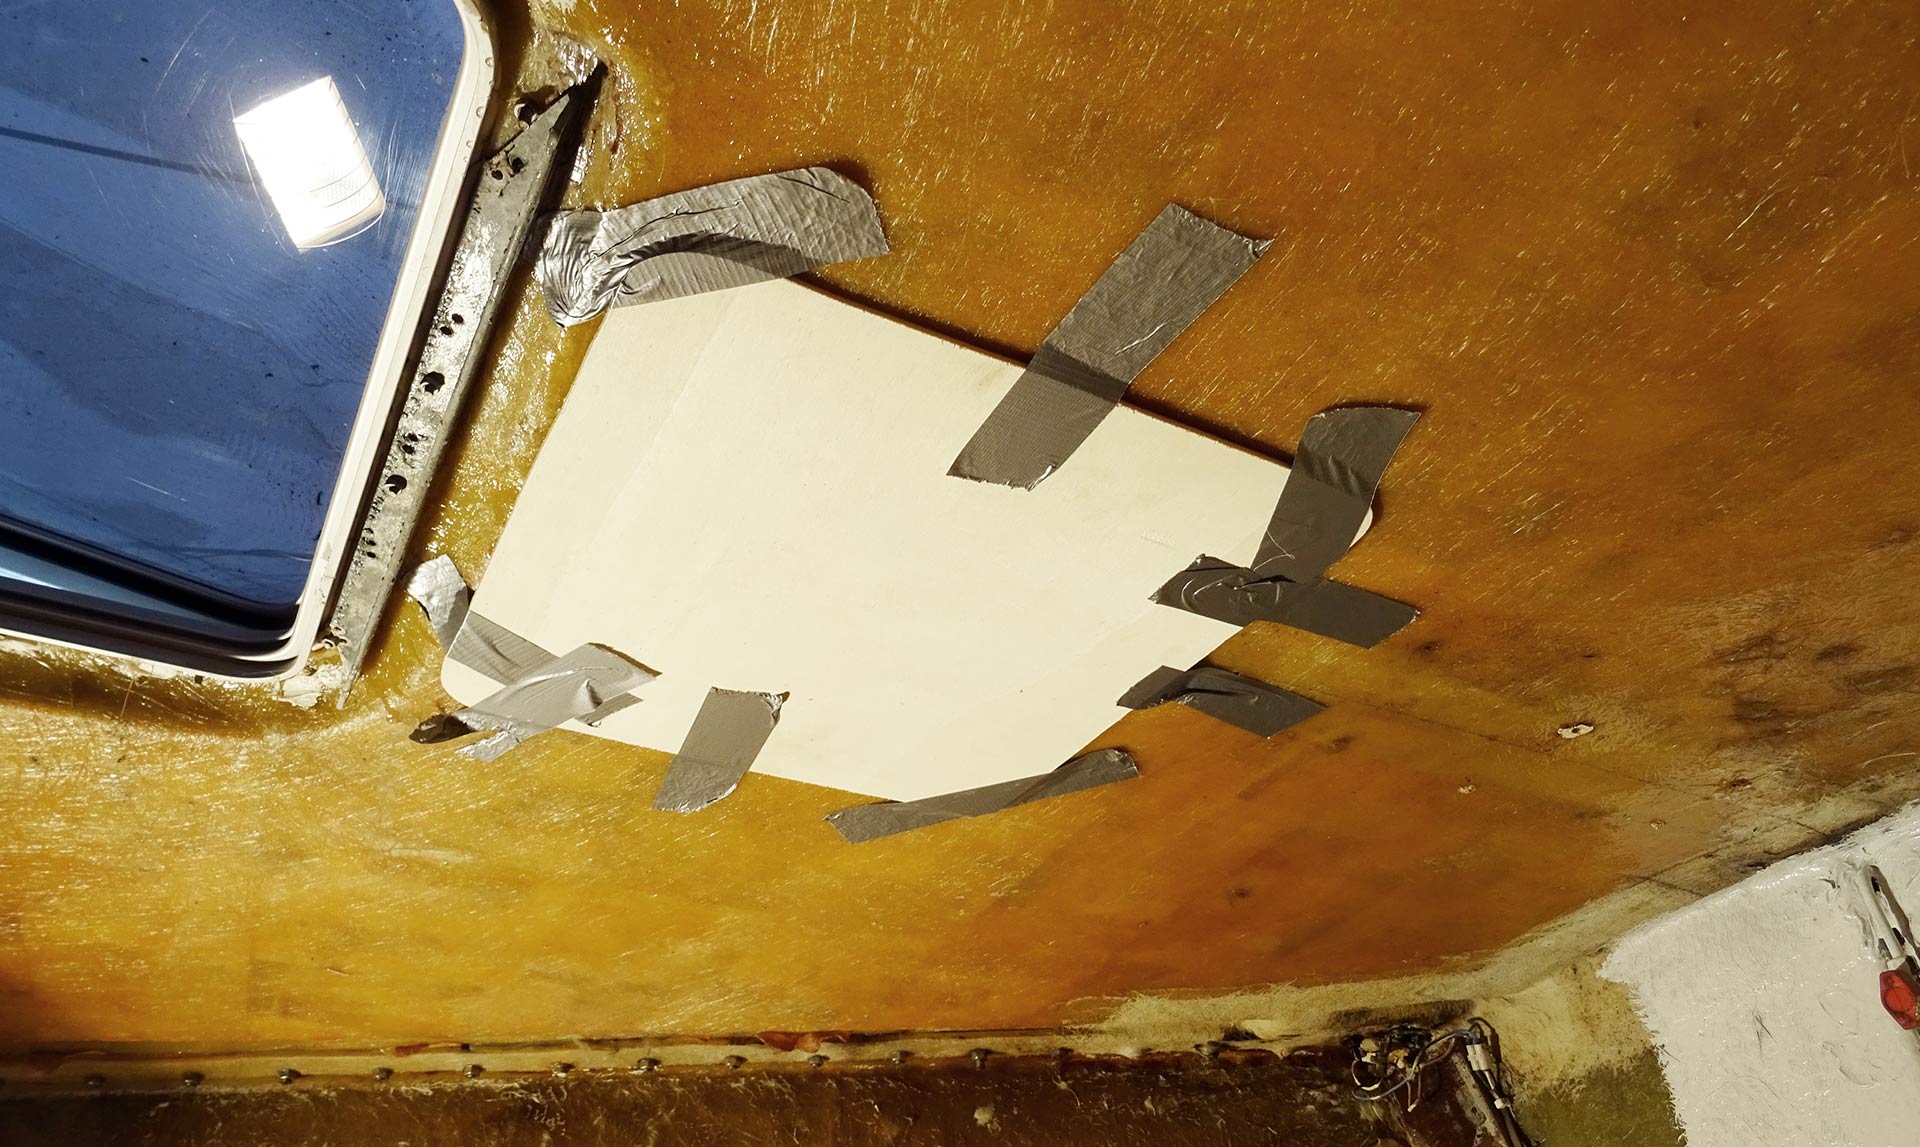
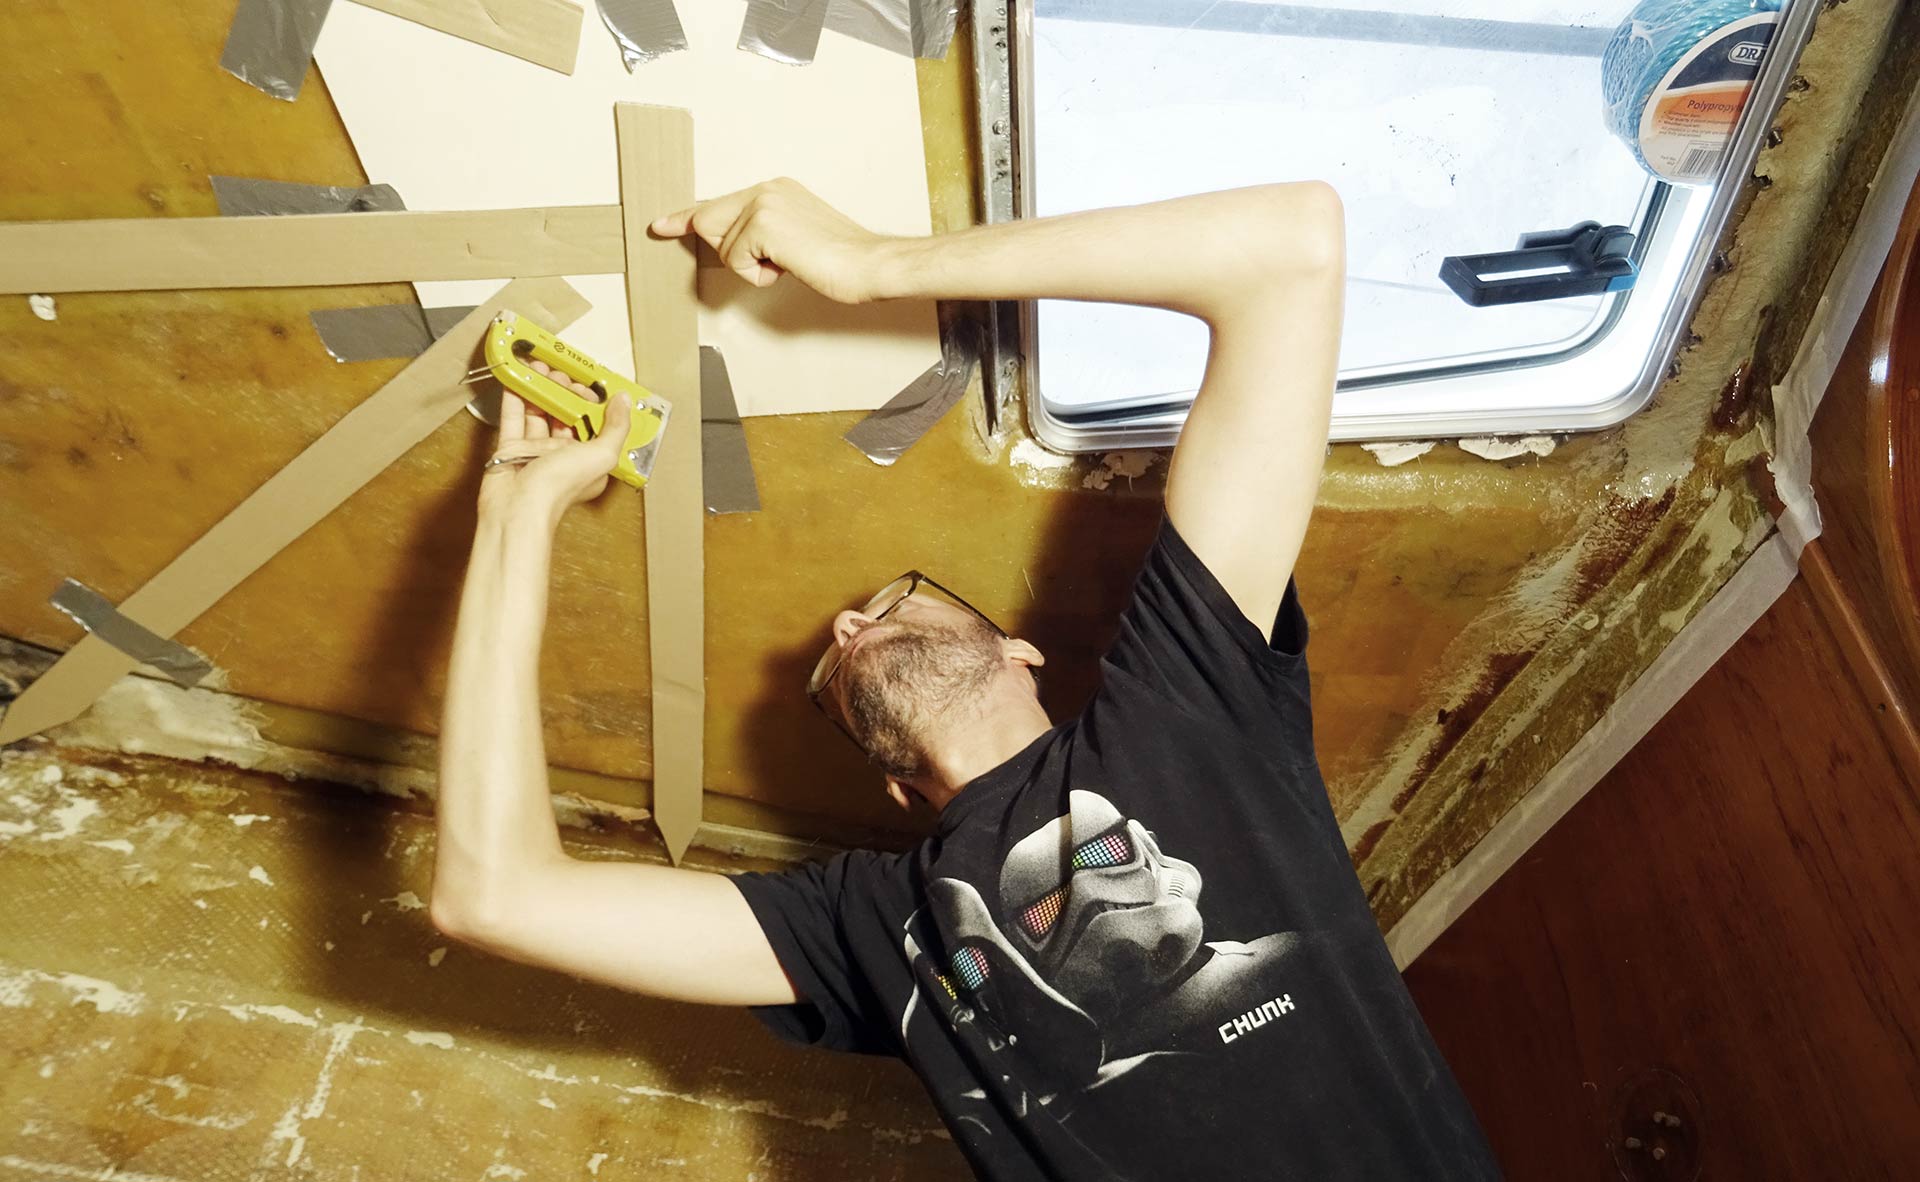
First of all you attach the “body” of the spider to the roofing. In my case it was a spare plywood-part left over from making one of the past roofing panels. I attached it to the ceiling by means of Gaffa tape. It doesn´t matter where you put the body, but it should be of sufficient size and must not move in itself. After doing so, it was time for the “legs”.
Like the method I used before, the spider-technique needs a number of thin cardboard stripes. You may also take plywood-stripes or any other material as long as it is thin enough to be stapled and thick enough to to befixed to the body of the spider. The edges of the cardboard-stripes don´t need to be even. One really important feature of the legs is that you will have to equip them with a sharp pointing tip.
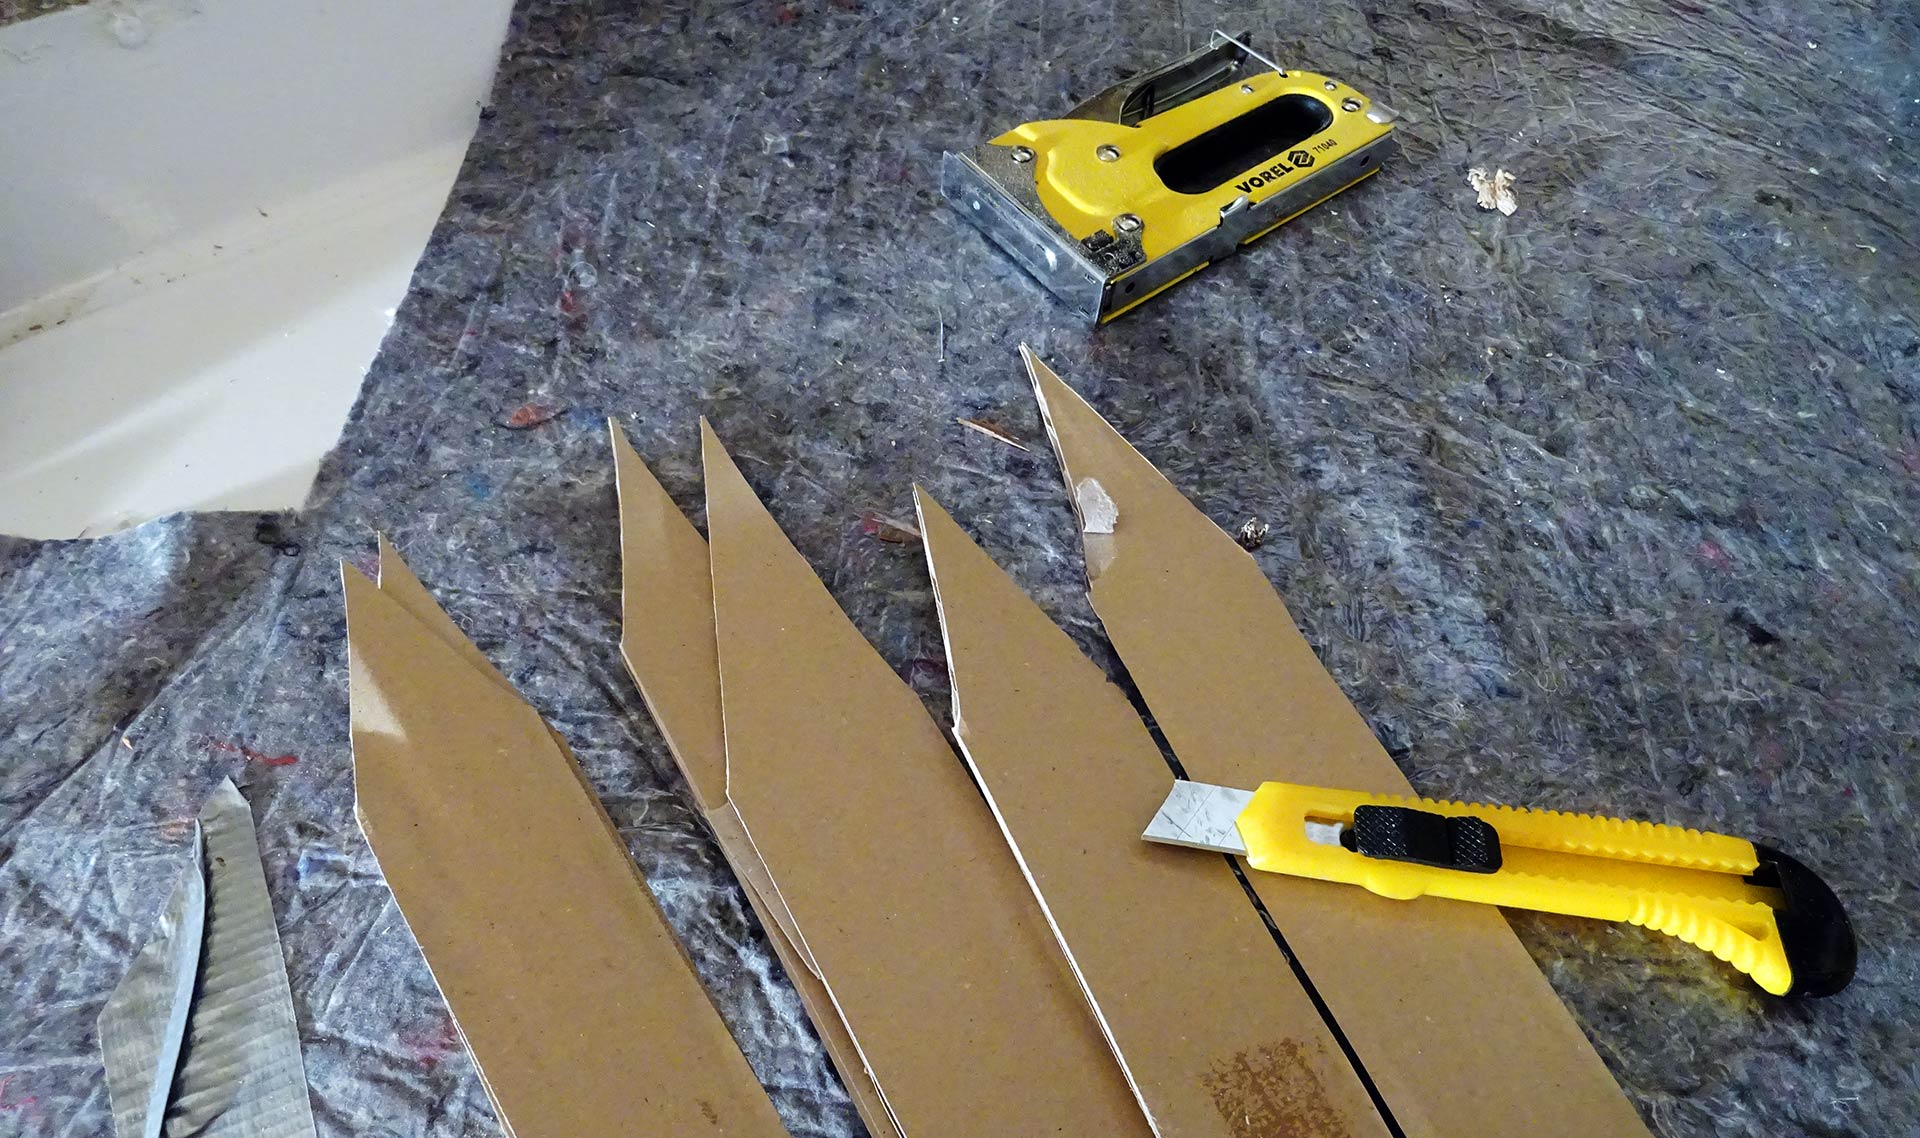
That´s nearly all you need to prepare for making the gauge model. It´s fast and easy, even faster and easier because you don´t need even stripes of cardboard anymore. I was lucky to having a staple gun at hand with a considerable amount of staples so that it was a question of minutes to move on to the next point: Attaching of the legs to the spider´s body.
Attaching the Legs of the Spider-Gauge
That´s a no-brainer for sure: The trick is to staple the cardboard “leg” to the “body” in a way that the very tip of the leg points exactly to one edge of the very form you try to emulate. So all I had to do was to hold the cardboard stripe to the very corner of the roofing area and staple the back of it to the body. It´s really just a matter of seconds!
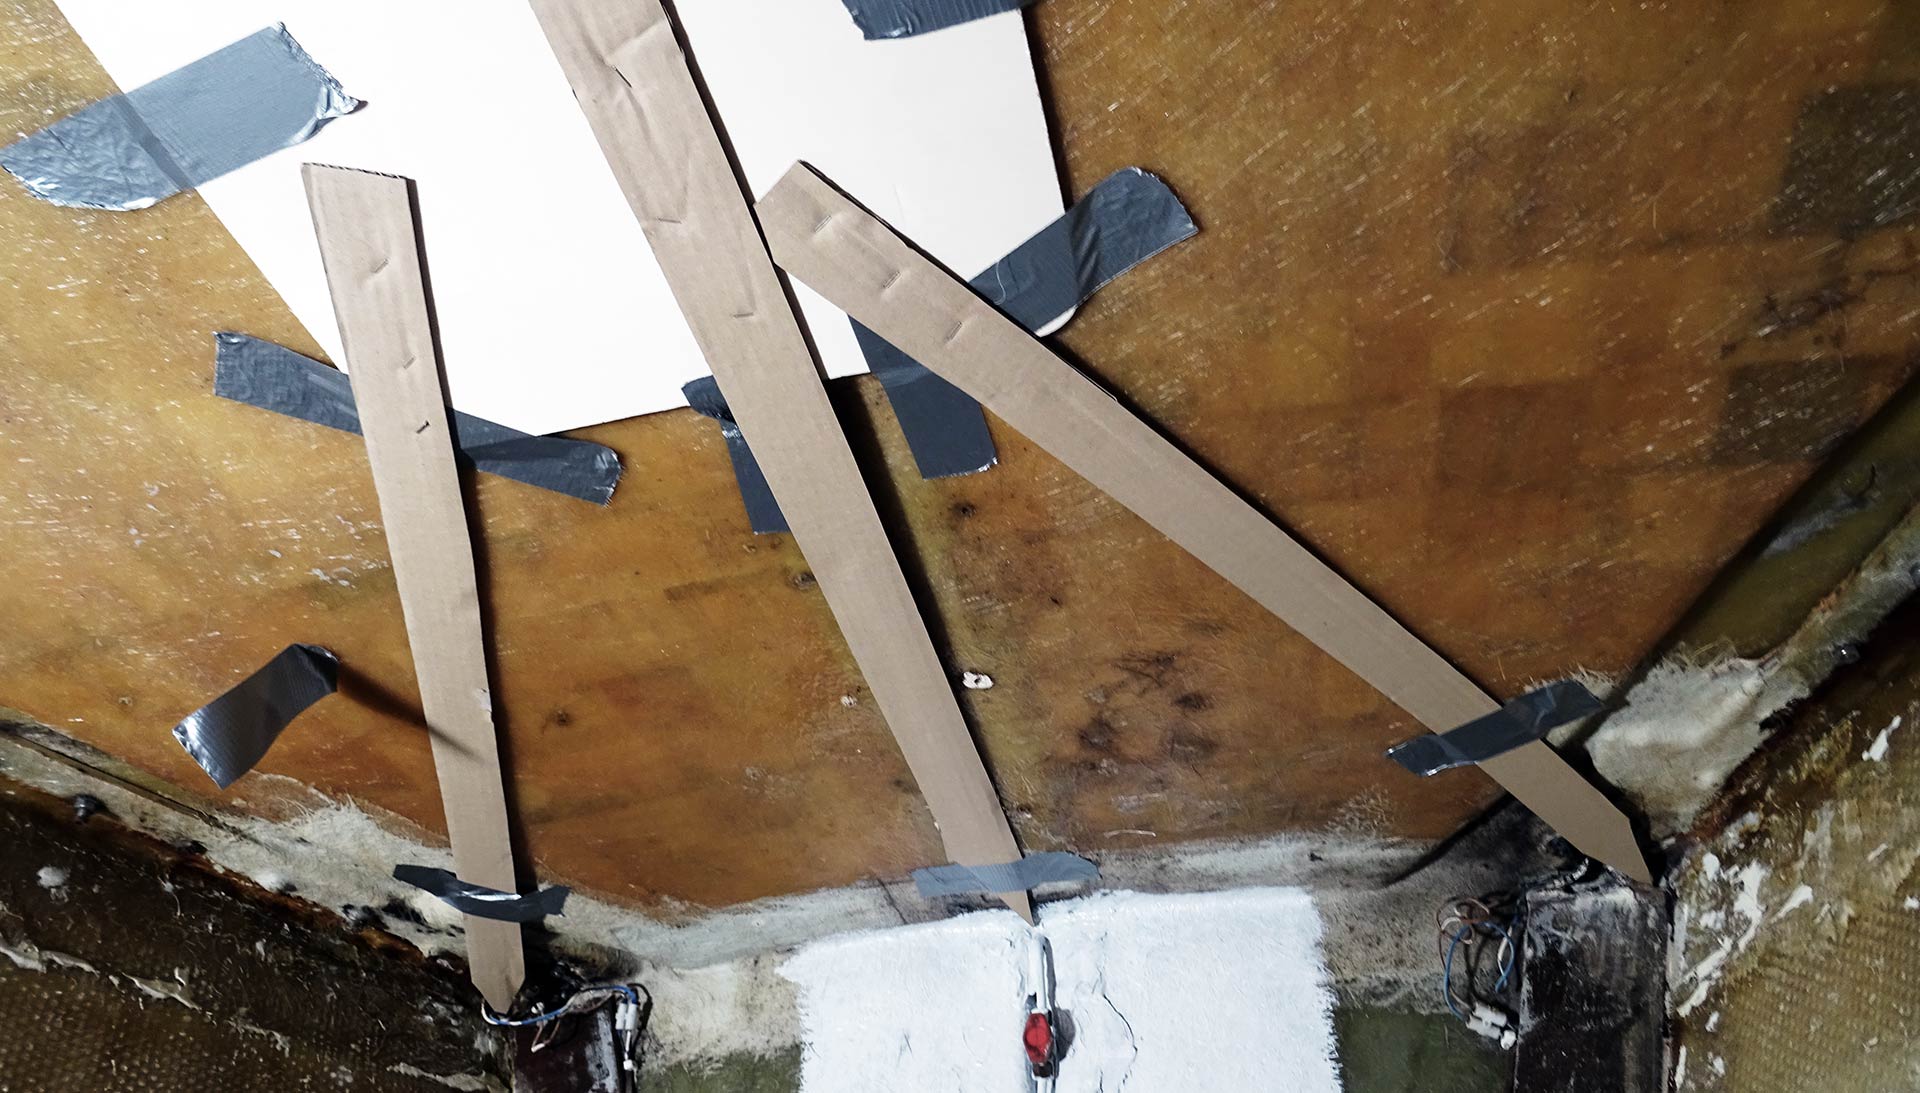
I also fixed the end of the cardboard stripe to the roofing for not having the fore cabin hanging full of spider´s legs. It´s a matter of minutes really, where I normally had to work overhead for a longer time to get the stripes cut to the right size and taped to the roofing. Not anymore – just take another leg, put the tip to one strategic point of the outline of the panel and have it stapled to the body.
It took me no more than 20 minutes to have all “legs” of the spider put to the body. One leg for each and every outward tip of the panel and four more which are marking the large emergency hatch in the roofing are of the front cabin. I was astonished and excited of how fast and convenient this method produces a very nice outcome. Thanks for the hint, my friend!
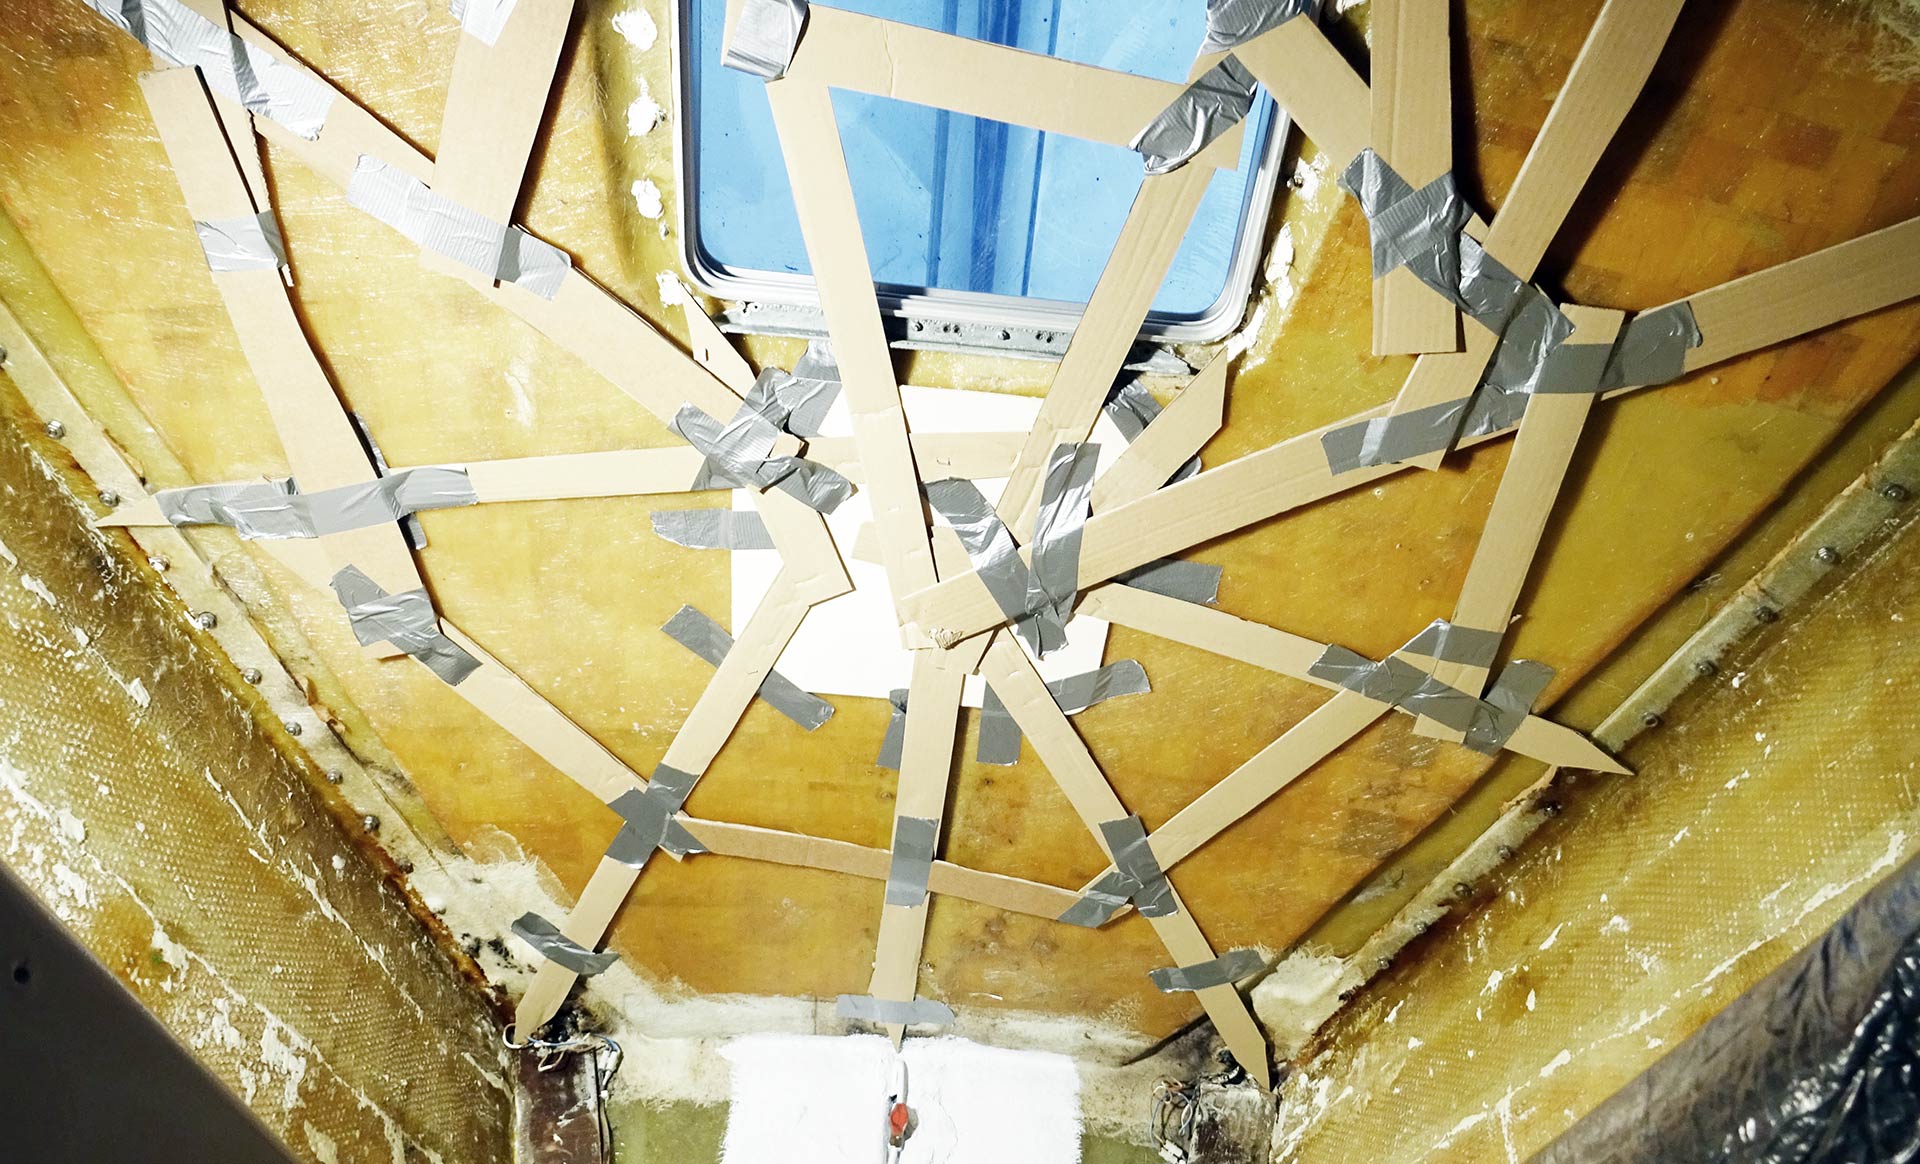
When all the corners have been fitted with cardboard “legs”, I attached a ring of traverse reinforcements of cardboard stripes to gain more stability of the whole gauge model because getting the model out of the cramped yacht means to have it folded to fit it through the narrow doors and up the entryway. All in all it took me no more than 40 minutes to have all of the roofing area of the whole fore cabin translated onto the new gauge model – less than half of the time I would have needed had I applied the old method. Great news!
Cutting out the new Roofing Panels for my Yacht
The rest is something I knew from making the previous roofing panels – After bringing out the spider gauge model of my yacht (which really isn´t that easy since the spider was considerably larger in size than all of the doors and the entryway up into the cockpit of the sailing yacht as well), I unfolded the spider and had it laying down on the ground on a large sheet of plywood.

All I had to do now was to place the spider in a way that the longitudinal axis of the panel would be exactly the middle of the cabin roof. Now I marked the tips of the spider-legs on the plywood sheet with a pencil, took away the spider and connect the dots with lines – Voila: The gauge model had been transferred onto plywood. After cutting out the panel and making a second one for the other side, I transported the raw panels back into the boat again to have them fitted.
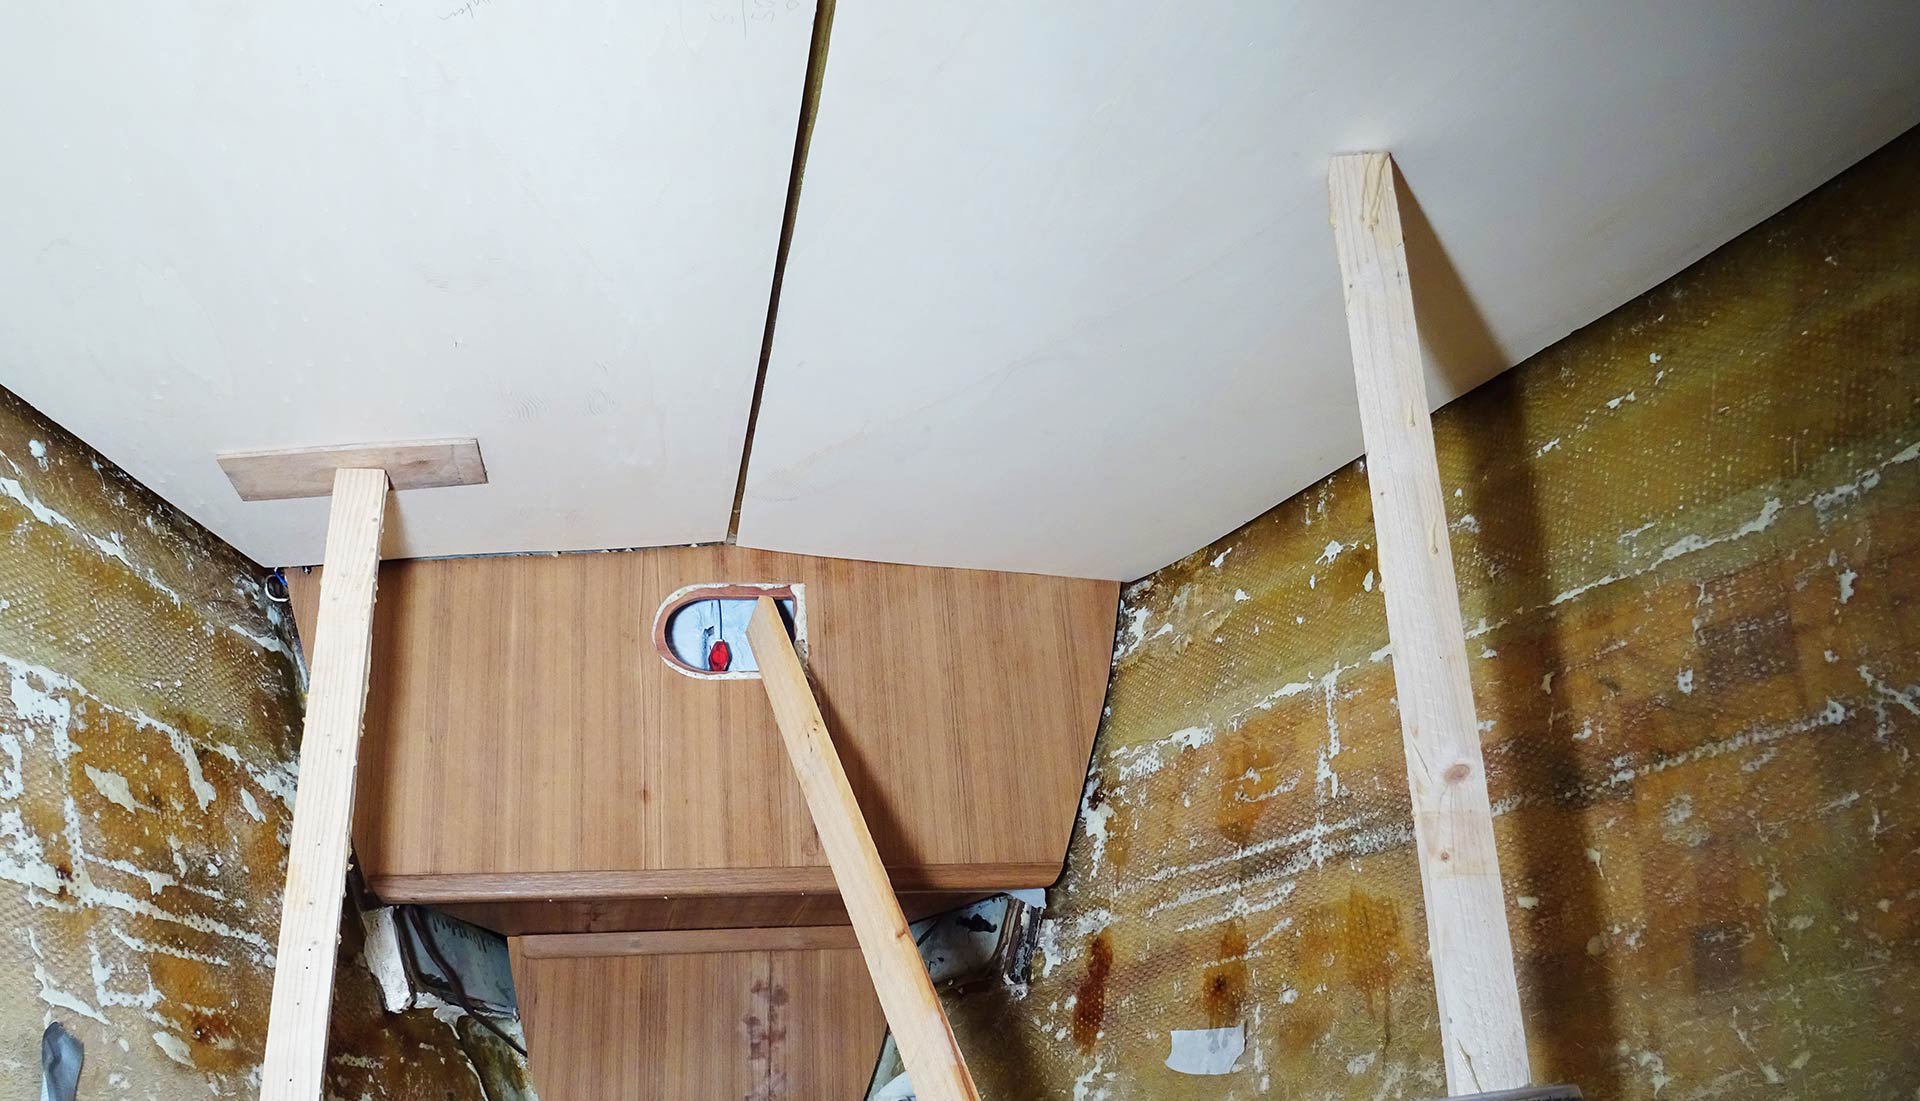
And what should I say? Other than with my previous panels where I had to fight with sometimes huge gaps and seams between the panels caused by problems in making the gauge model by the old technique, now the panels fitted just perfectly without any correction needed! It was so neat and without difficulty that I was stunned in the first place. Really, this “spider” gauge model method isn´t just the easier and faster way – it is also the more accurate way to transfer a complex, bent form to a gauge model. It´s now the method of choice for me!
Other interesting articles of this topic:
Making a Teak main switch panel
Building the perfect chart table
Chain plate refurbishment