Painting your boat with antifouling may sound like an easy task, but as I will have to experience during my self-experiment in DIY bottom painting, this is a far more laborious and energy-sapping than I thought: This is part 3 of the bottom paint series, where we delve deep into sanding, cleansing and preparing the hull, before we can finally start to paint the first primer layer.
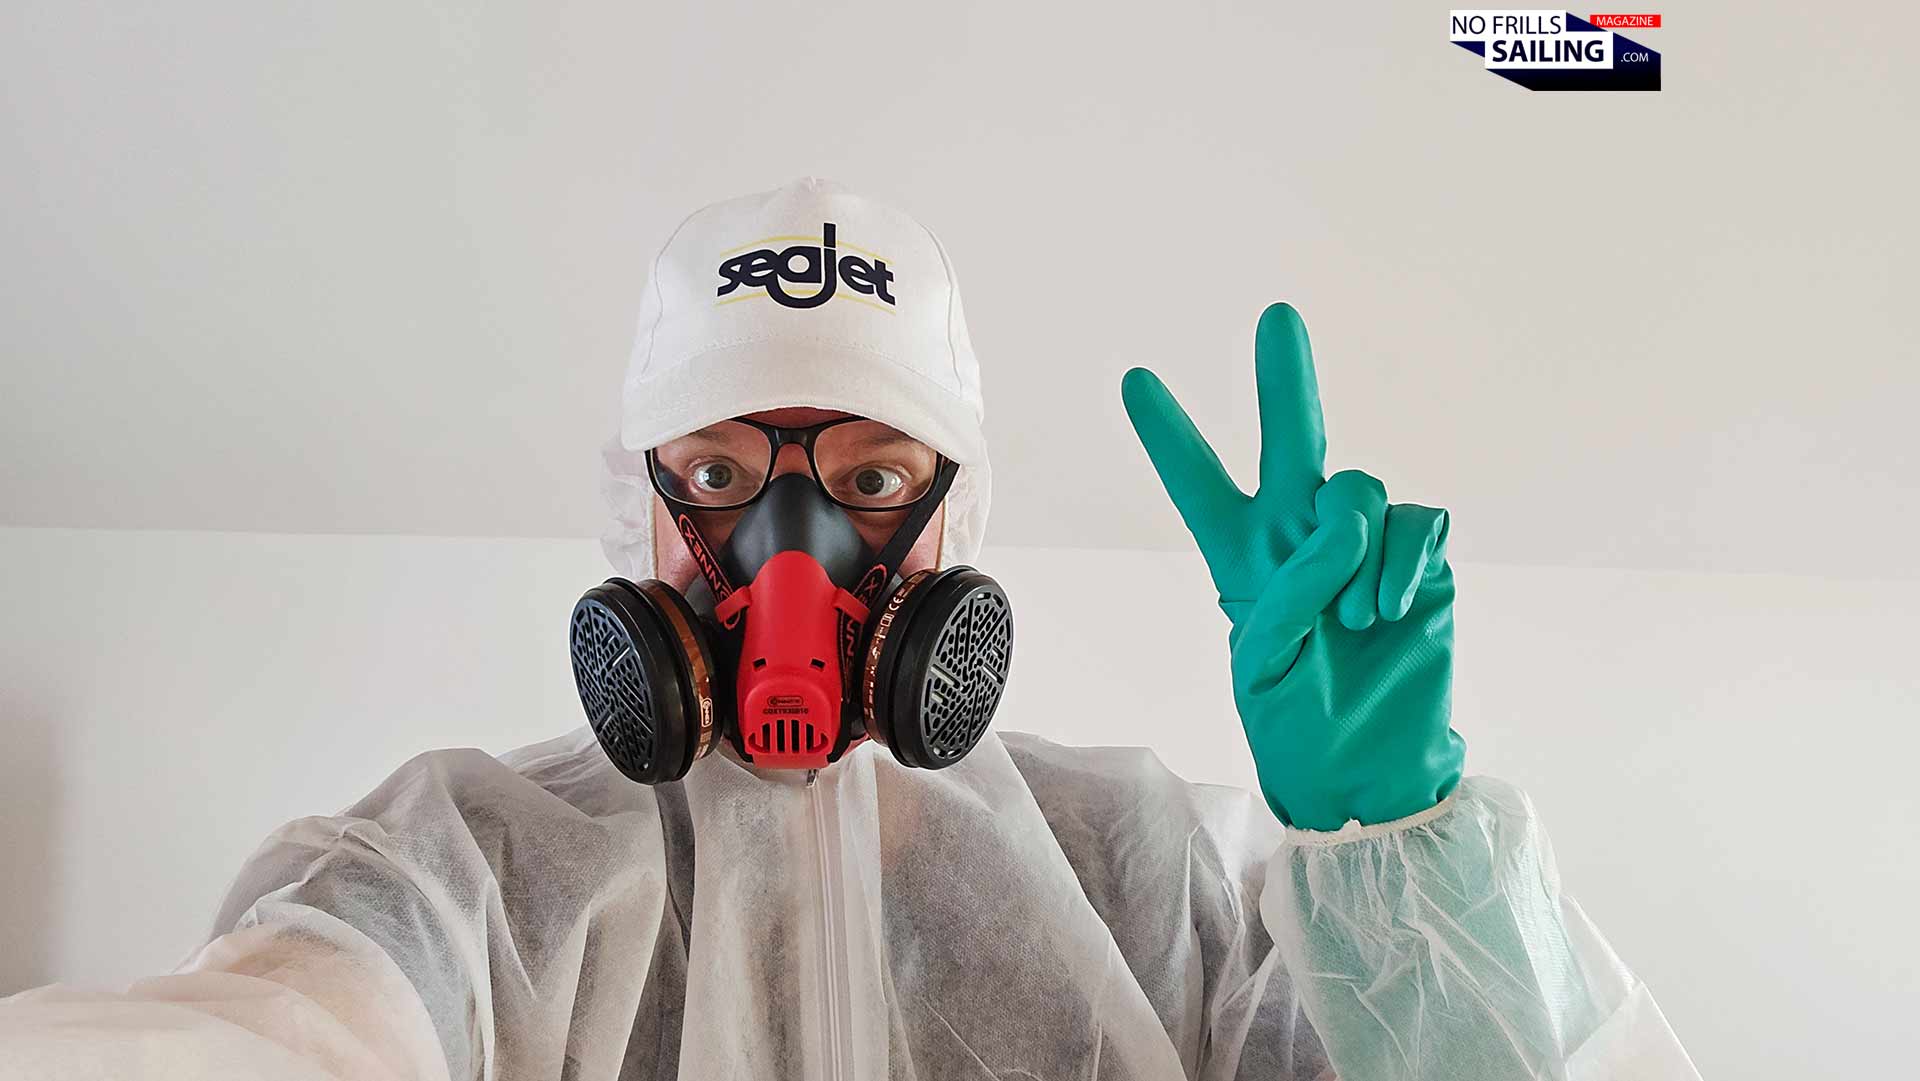
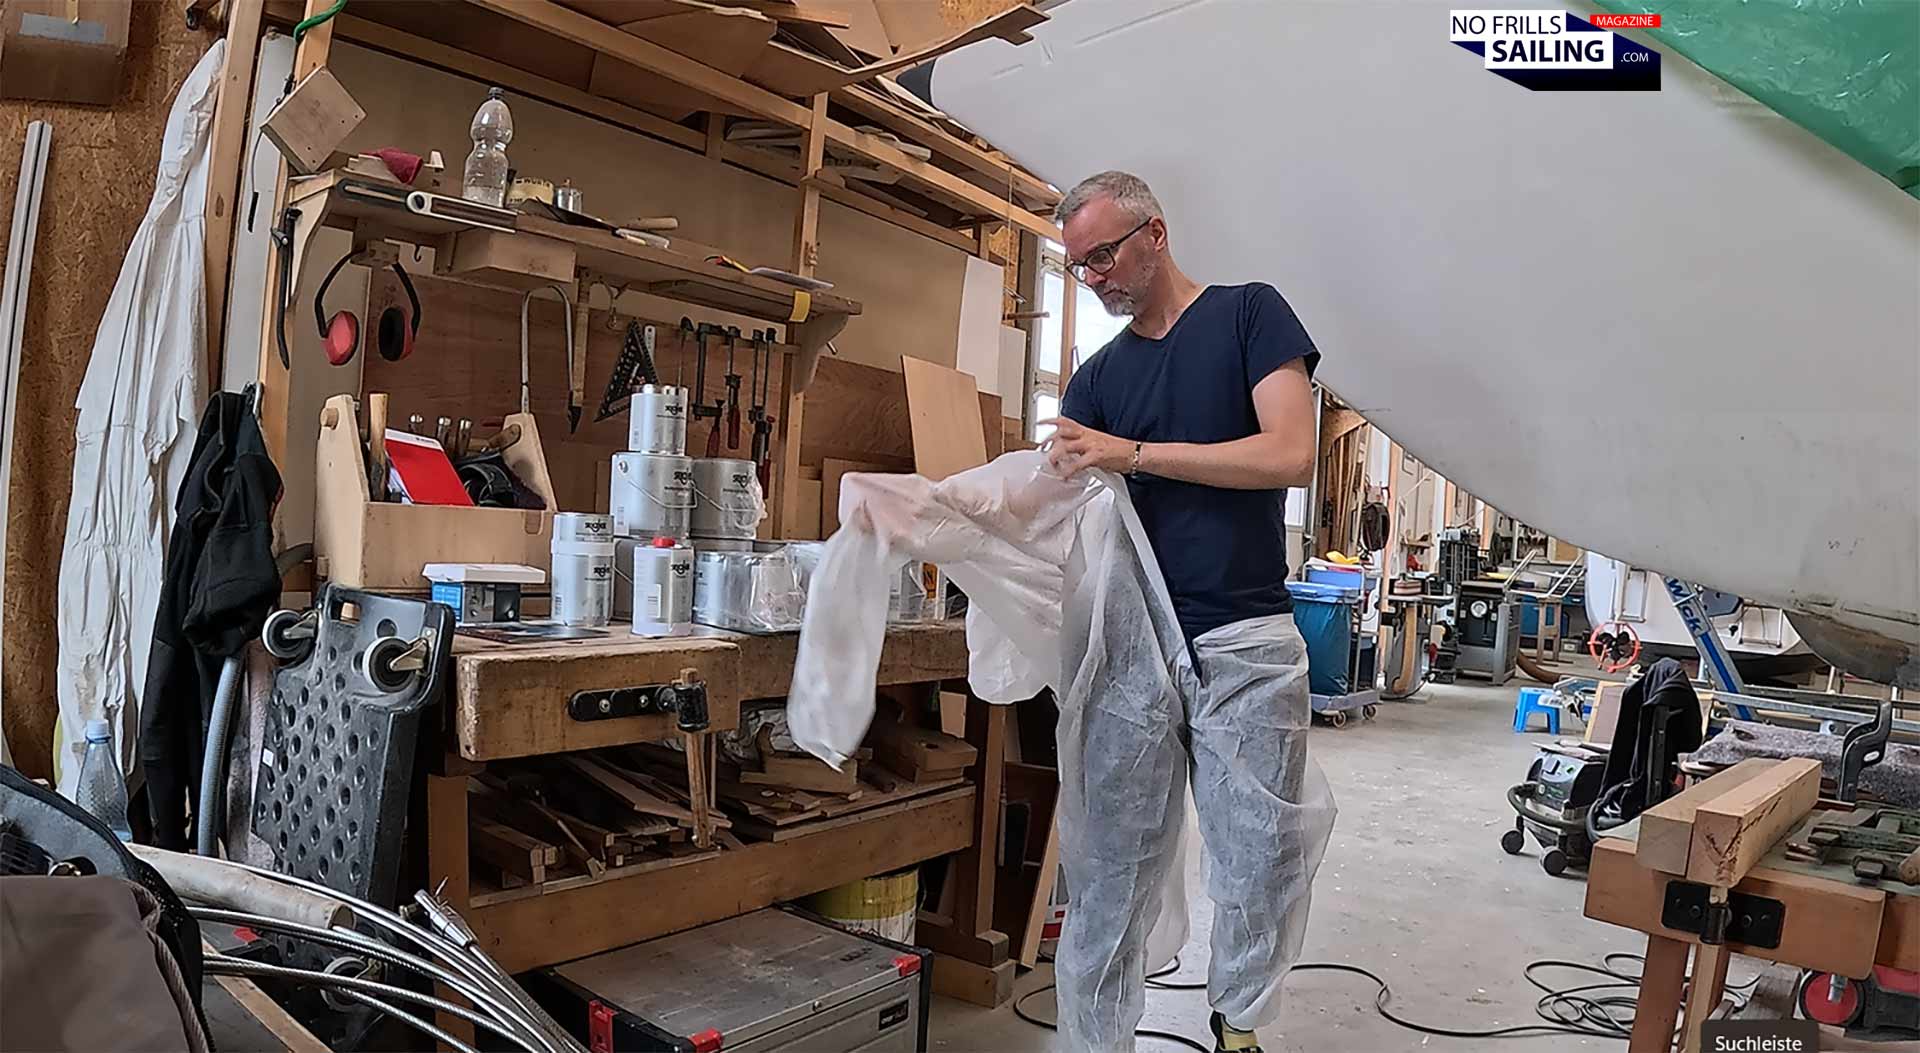
So here we are: Yesterday I moved in to the flat I´ve rented not far from the shipyard. It´s a nice maisonette-style loft where I can enjoy a beautiful view over Lake Mueritz, one of Germany´s biggest inshore water bodies and location of the building shed where my new Omega 42 is built. I´ve rented this flat for a whole full week: Six layers of bottom paint are to be accomplished, that´s six days right here. Just as a kind of joke, but also to check if everything fits, I indulge myself in a little try on haul: Protective coverall, breathing mask and special gloves. That´s what I am going to wear during the coming week.
Let´s go!
Why am I doing this? I´ve covered in my last article most of what motivates me to do it. First and foremost – and I guess this is what will motivate you to do it as well – is the budget-saving. By doing the bottom paint myself I surely save 7.000 to 8.000 Euros in labor cost! After having spent some 2.500 Euros for the material itself, another 450 Euros for the flat and some 250 Euros for the rental car, it´s still quite a sum. But it´s far from being the complete budget needed for a professional bottom paint. Secondly: I just want to do it once in my lifetime at least by myself! I´ve sold exactly 100 boats in three years. And with them, bottom paint packages. I´ve seen how it´s done many times and heard a lot of stories – now I want to get the full experience. Is this a good idea? Well … let me answer this question when we have arrived at the bottom of this page.
Preparing the sailboat´s hull for the bottom paint
Advertisement
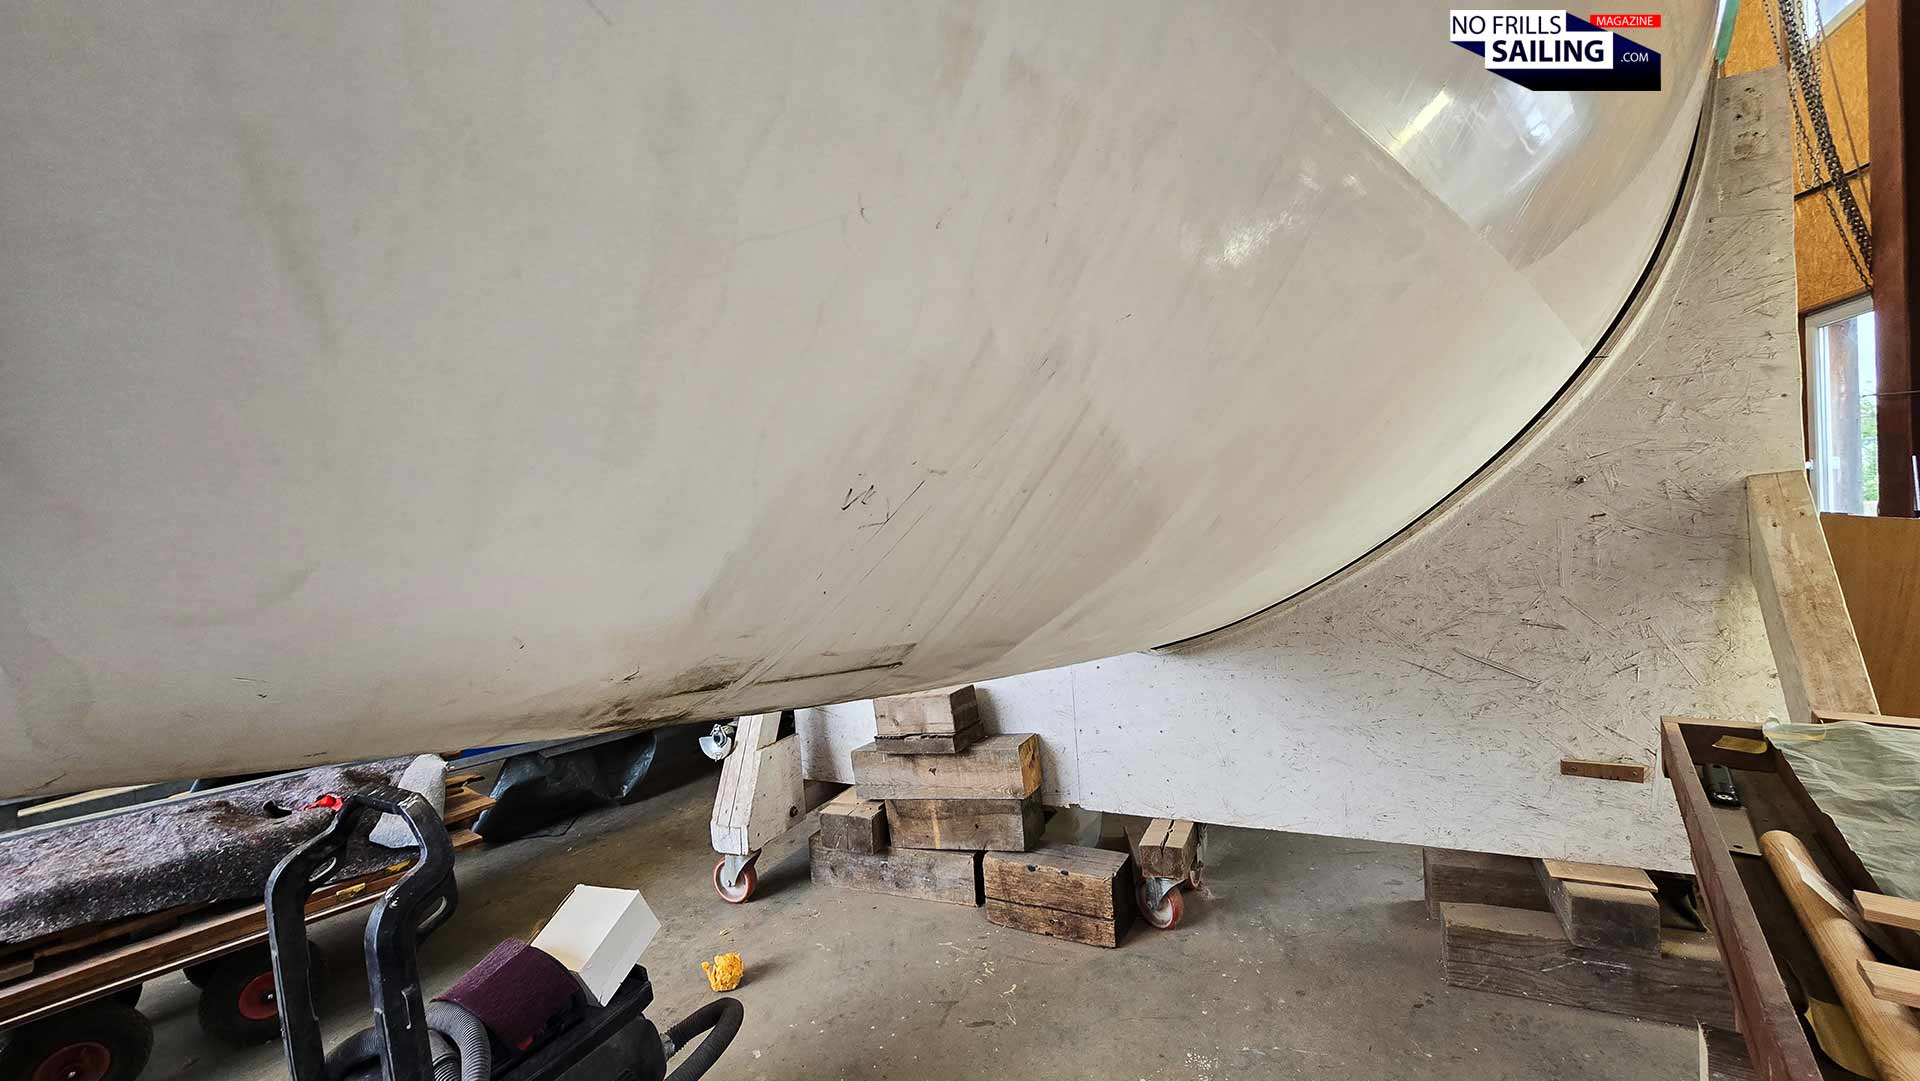
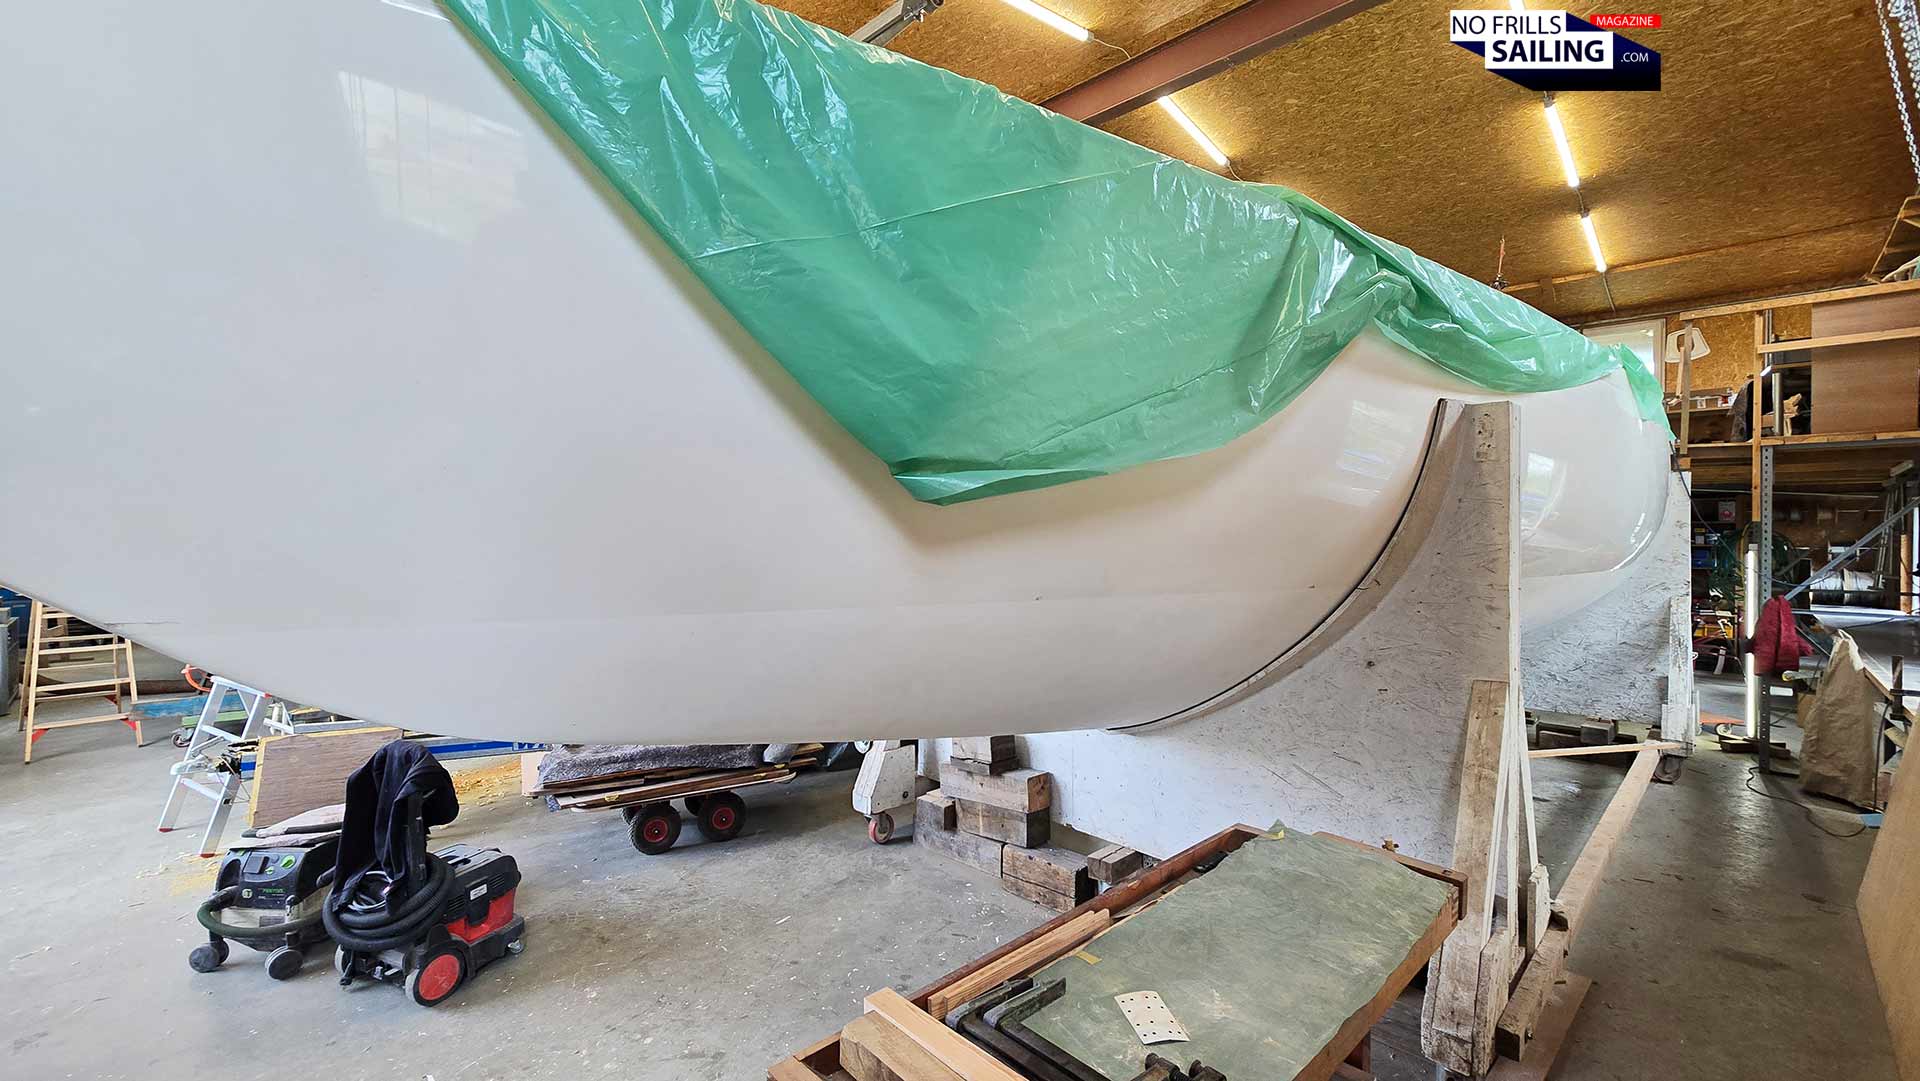
When I asked my shipyard about the possibility of doing it by myself, they had been very open from the beginning: That way, a lot of working man-hours would be freed for other, more important projects. They assured me that the “worst” of the jobs connected with bottom paints – the sanding of the hull – had already been done, so that after a little “activation sanding” I would be able to start right away. Well. Not so much: As it turned out, there were still a lot of unsanded areas, even more, when Jonas, the master boatbuilder, took away some jacks, uncovering a lot of beautifully “virgin” areas.
Oh my … that´s some work right there.
It is so very, very important to sand a brand new hull because otherwise there wouldn´t be a thorough bonding between the primer and the subsequent layers with the hull. This is largely due to the wax that is used when a yacht´s hull is laminated in its mold. This wax makes it easier to take out the finished, hardened hull of its mold. But this way, as the name implies, is so slippery that not even the chemical most active epoxy resin would stick. Hence the sanding. Many of my ex-colleagues and people who have already done it told me that this sanding was the worst of all parts of the job! Why? Because the separation-wax is quickly using up the sandpaper, even if you are utilizing a machine, up to three sandpapers for a few square meters. Jonas handed me the tools and the materials and briefed me: “There shall not be any part of the surface shining brightly after you are finished. Every little square centimeter must be wax-free and sanded down to a matte appearance!”
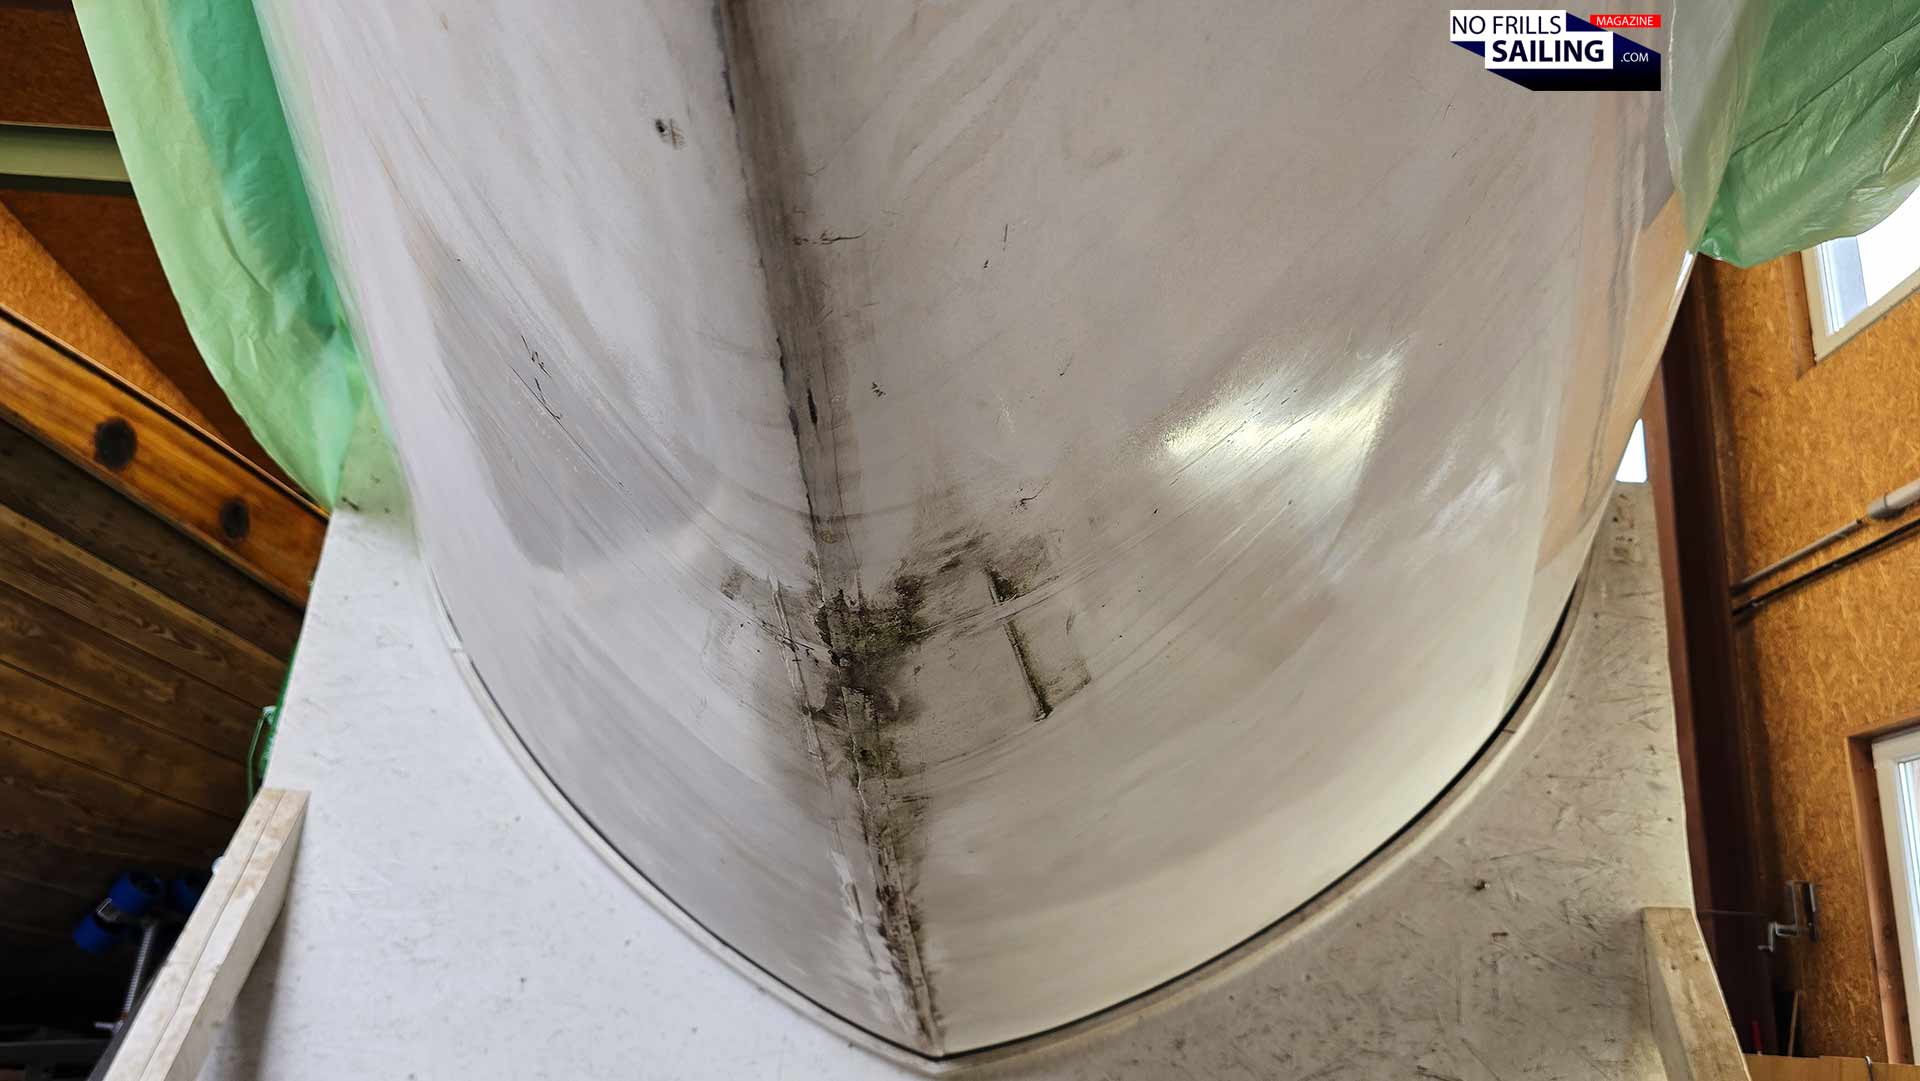
Untreated fresh gelcoat with wax.
Okay, let´s start! I first removed the old masking tape indicating where the waterline was. As, I would say, some 80 percent of the hull has already been treated with sanding, I would be able to work without the waterline indication. If you do it yourself, make sure you have a laser-aided waterline projected onto the hull or any other form of markings: Don´t sand off too high above the waterline, don´t do it too low either. Again: It´s the primer-layers which are essentially most important for the bottom paint, as these will protect your hull from osmotic water ingress and, ultimately, from osmosis.
Why protective clothing and breathing masks are so important
I jumped into my coverall, and there was the first disappointment: I know that a one-size-fits-all approach seldom works really fine, but no five minutes after I had been dressed with the coverall, it ripped open largely between my legs up to the crotch: From now on I would always sit in the dirt with my bare trousers. So make sure you either get a coverall made from real denim that is more robust, get one in your size or simply do not crouch, if this makes any sense.
Ready for work: Coverall is a must!
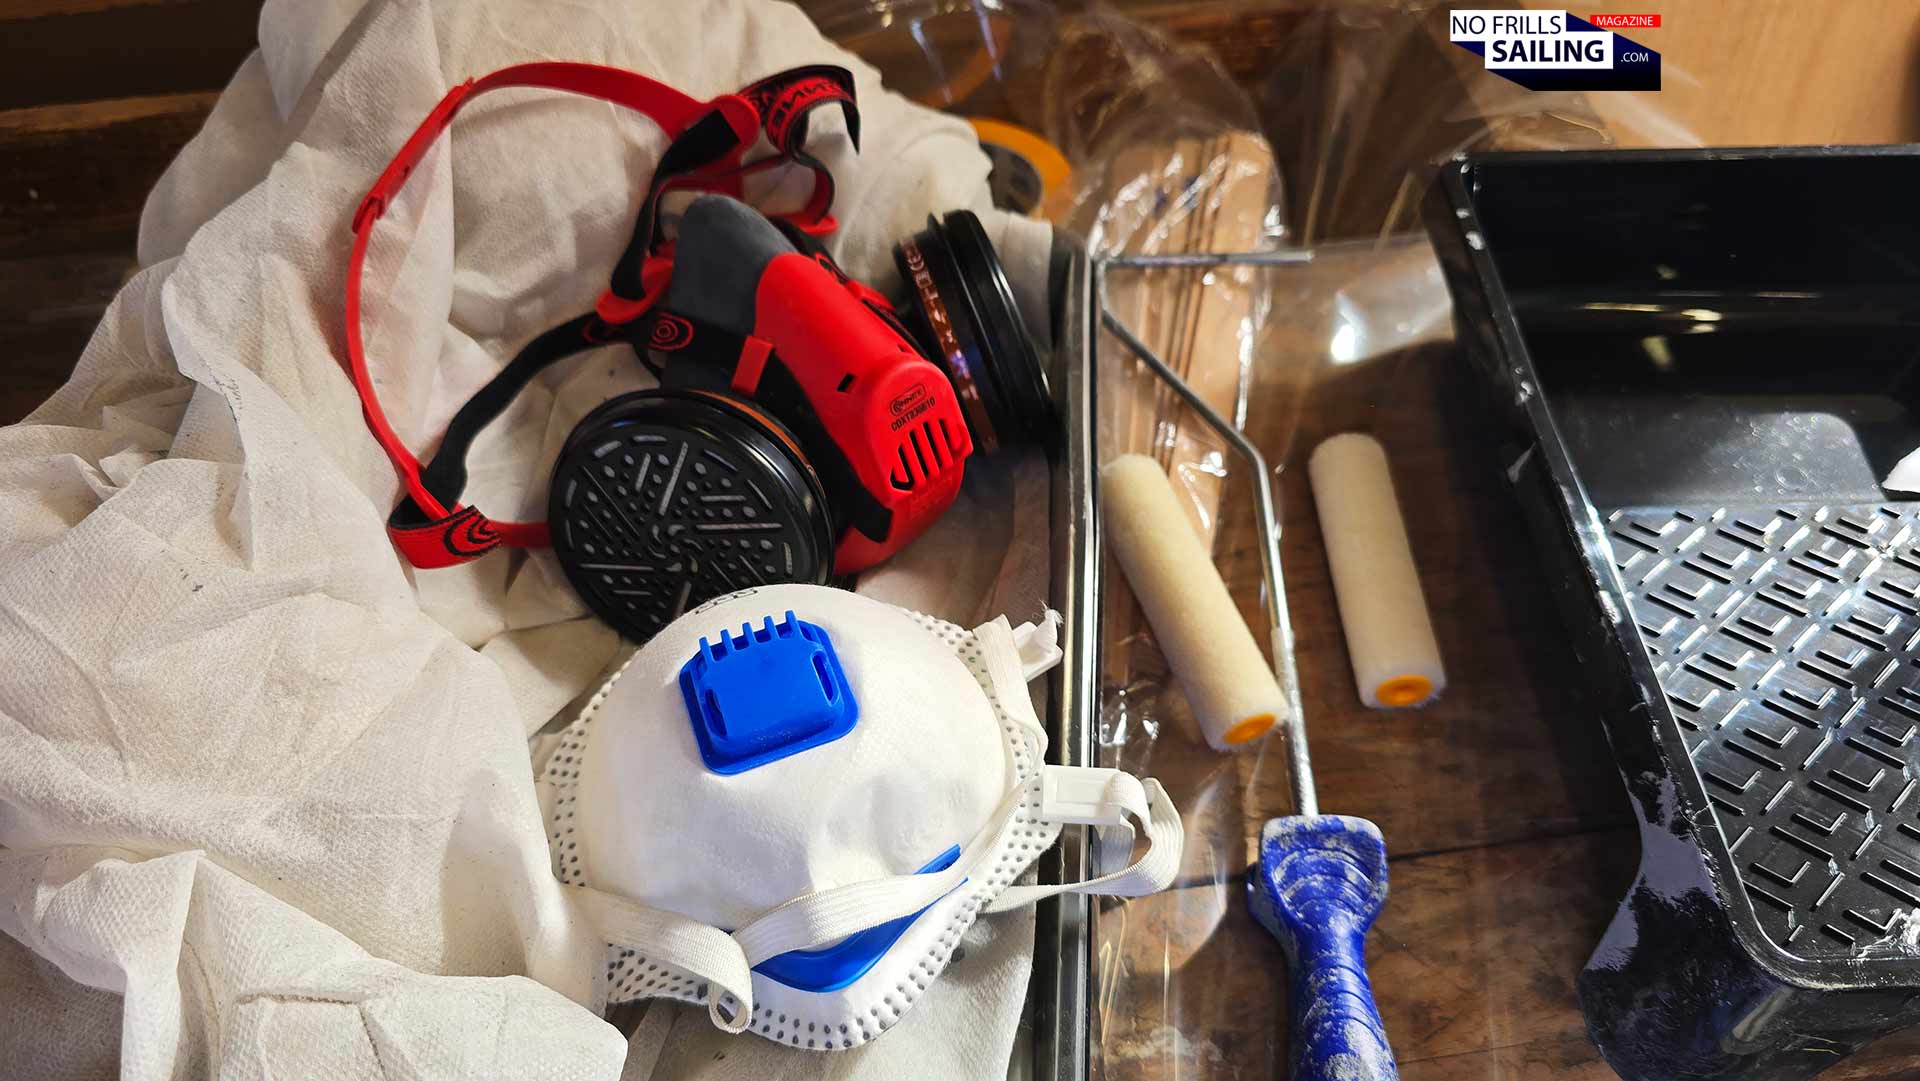
Other than that, I put on my brand new breathing mask, just to acknowledge that it wasn´t really suited for sanding. The mask I went for was rated A1, that´s most hazardous organic fumes, but not dust. I will filter out dust, but apparently there are more efficient masks. I was lucky working in a professional environment, so the guys gave me one of their FFP-masks which are rated to filter dust and particles, rather than gases. If you start your own DIY-bottom paint-project, make sure you have both types of masks at hand, depending on the job that you are tackling. Now, let´s rumble!
Bottom paint? Rather bottom PAIN!
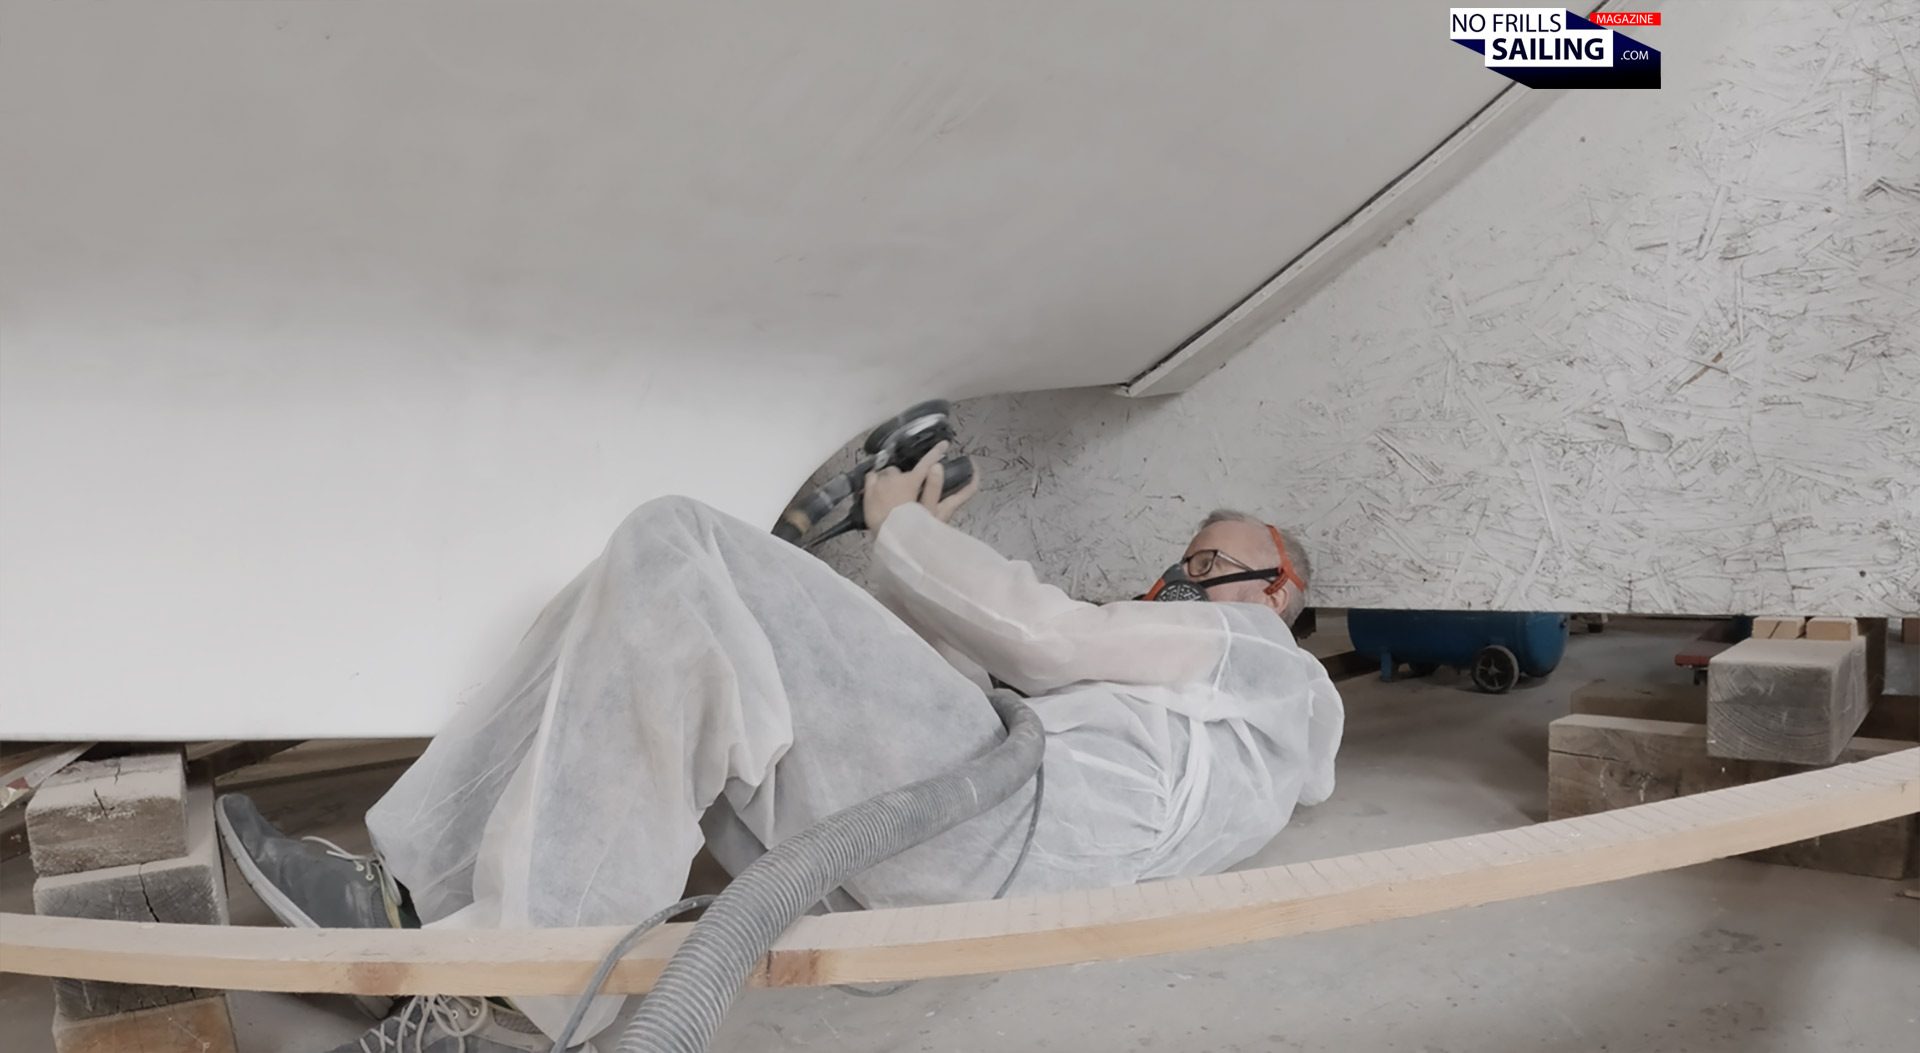
And boy did it rumble indeed! Mostly in my spine, because as it turned out, sanding a boat´s hull is a really tough job indeed! My ex-colleagues and friends who had already completed their bottom paint mission apparently have not exaggerated. It´s back-breaking, to be honest. Due to the fact the my boat does not have her keel fitted as of now, she of course lacked one meter or so in height. That meant that especially the midship and rear parts of the boat, where the hull is very full and round-shaped, I needed to go down low. Very low. Up until I was laying on my back.
That´s backbreaking work
Which in itself is not the worst. The worst is that you have to constantly work with your arms overhead, leading a heavy electric sanding tool that is connected via hose to a vacuum cleaner that is constantly sucking up most of the dust. It really starts to hurt your arm muscles. Well, okay, I am not the most schwarzeneggeresque type of man, but as an ex race-biker and marathon runner, I have a lot of stamina. I thought. It´s really the worst job, believe me! In all of this, you cannot just somehow sand down the boat. You need to have a system: Where have I sanded already, where do I have to sand next?
Tricky 3D-surfaces
Not too much, not too hard, we don´t want to hit the bare glass. But also, not too smooth as we want to scrape off the wax and open the shiny, slippery gelcoat surface for the epoxy to enter later. The bow section was easy and I finished after some 30 minutes on each side. But the midship-section broke my back. Oh boy! The guys in the shipyard where laughing at me, motivating me with “funny” wisecracks, but it soon started to hurt and I tried hard not to loose my focus. Luckily, it really weren´t all too many “hard” areas and I finished the machine-sanding after some three hours. In sweat. But I wasn´t at the end, not at all!
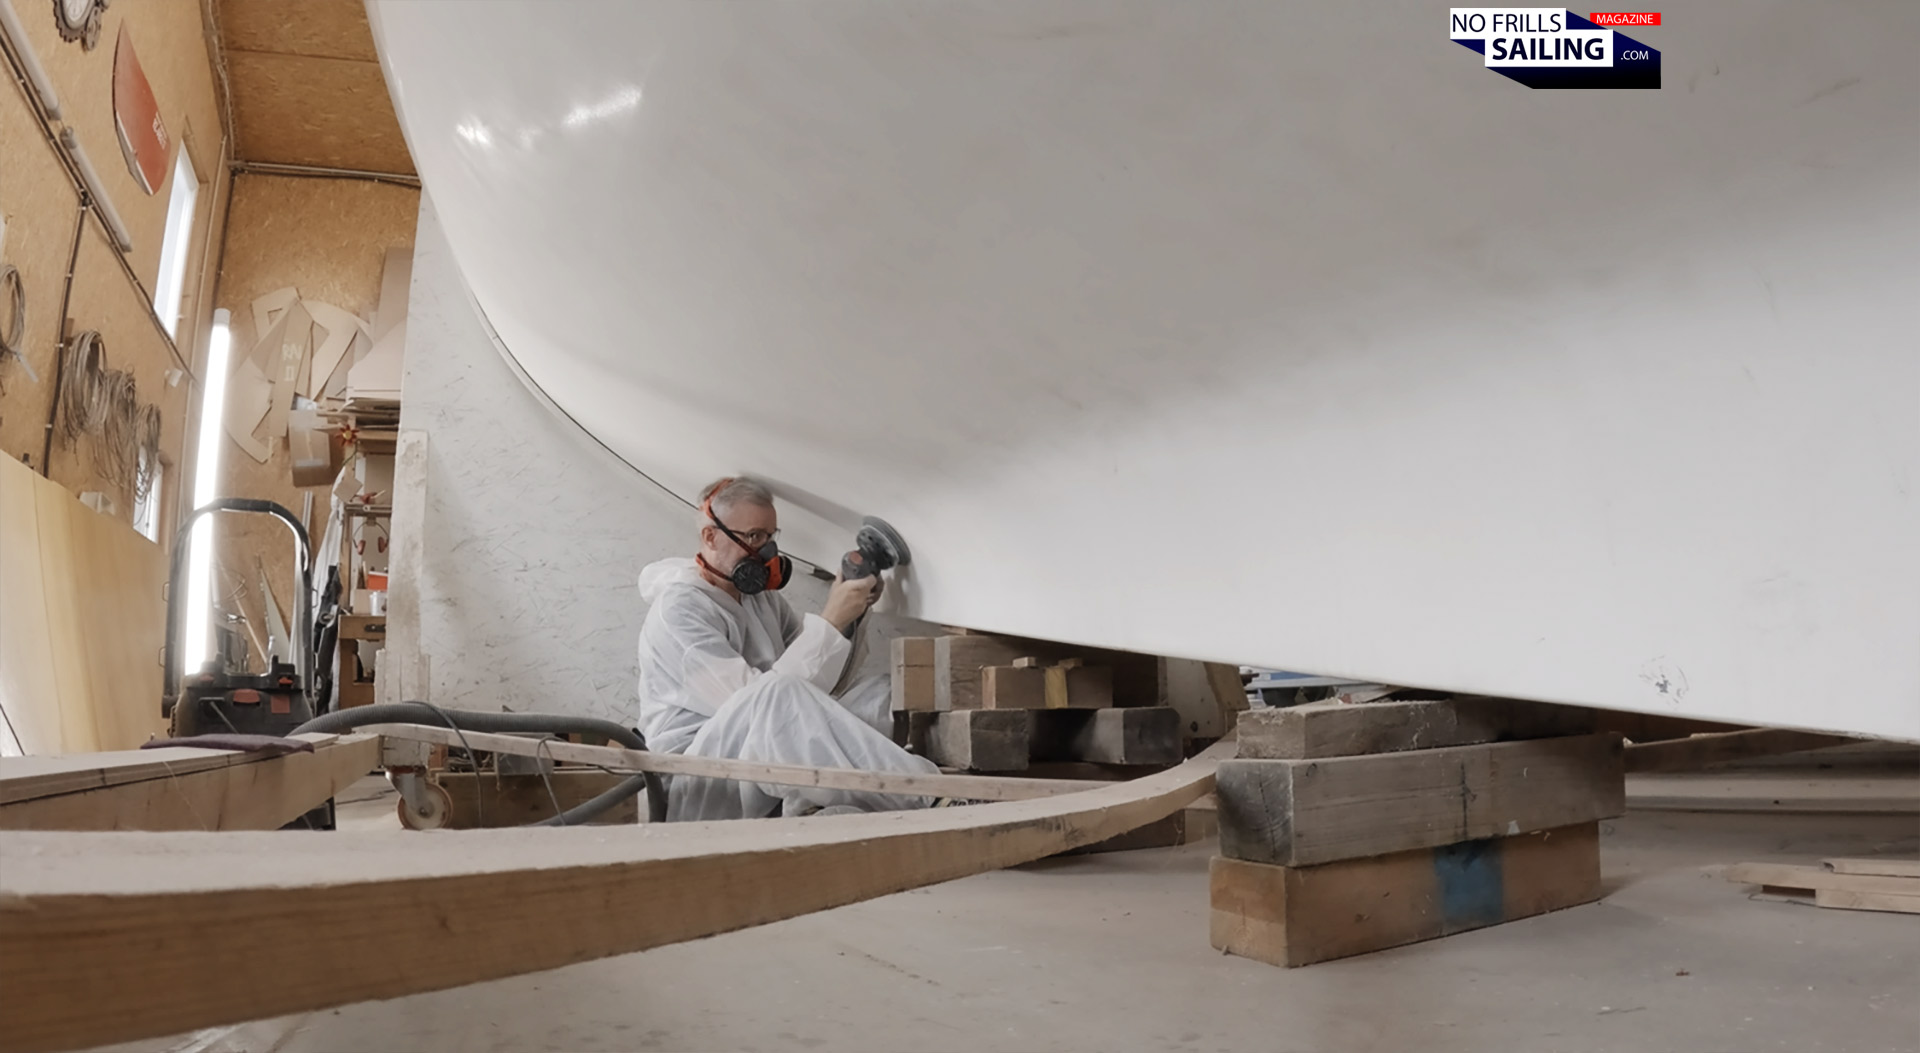
„Activation“ of the sailboat´s surface
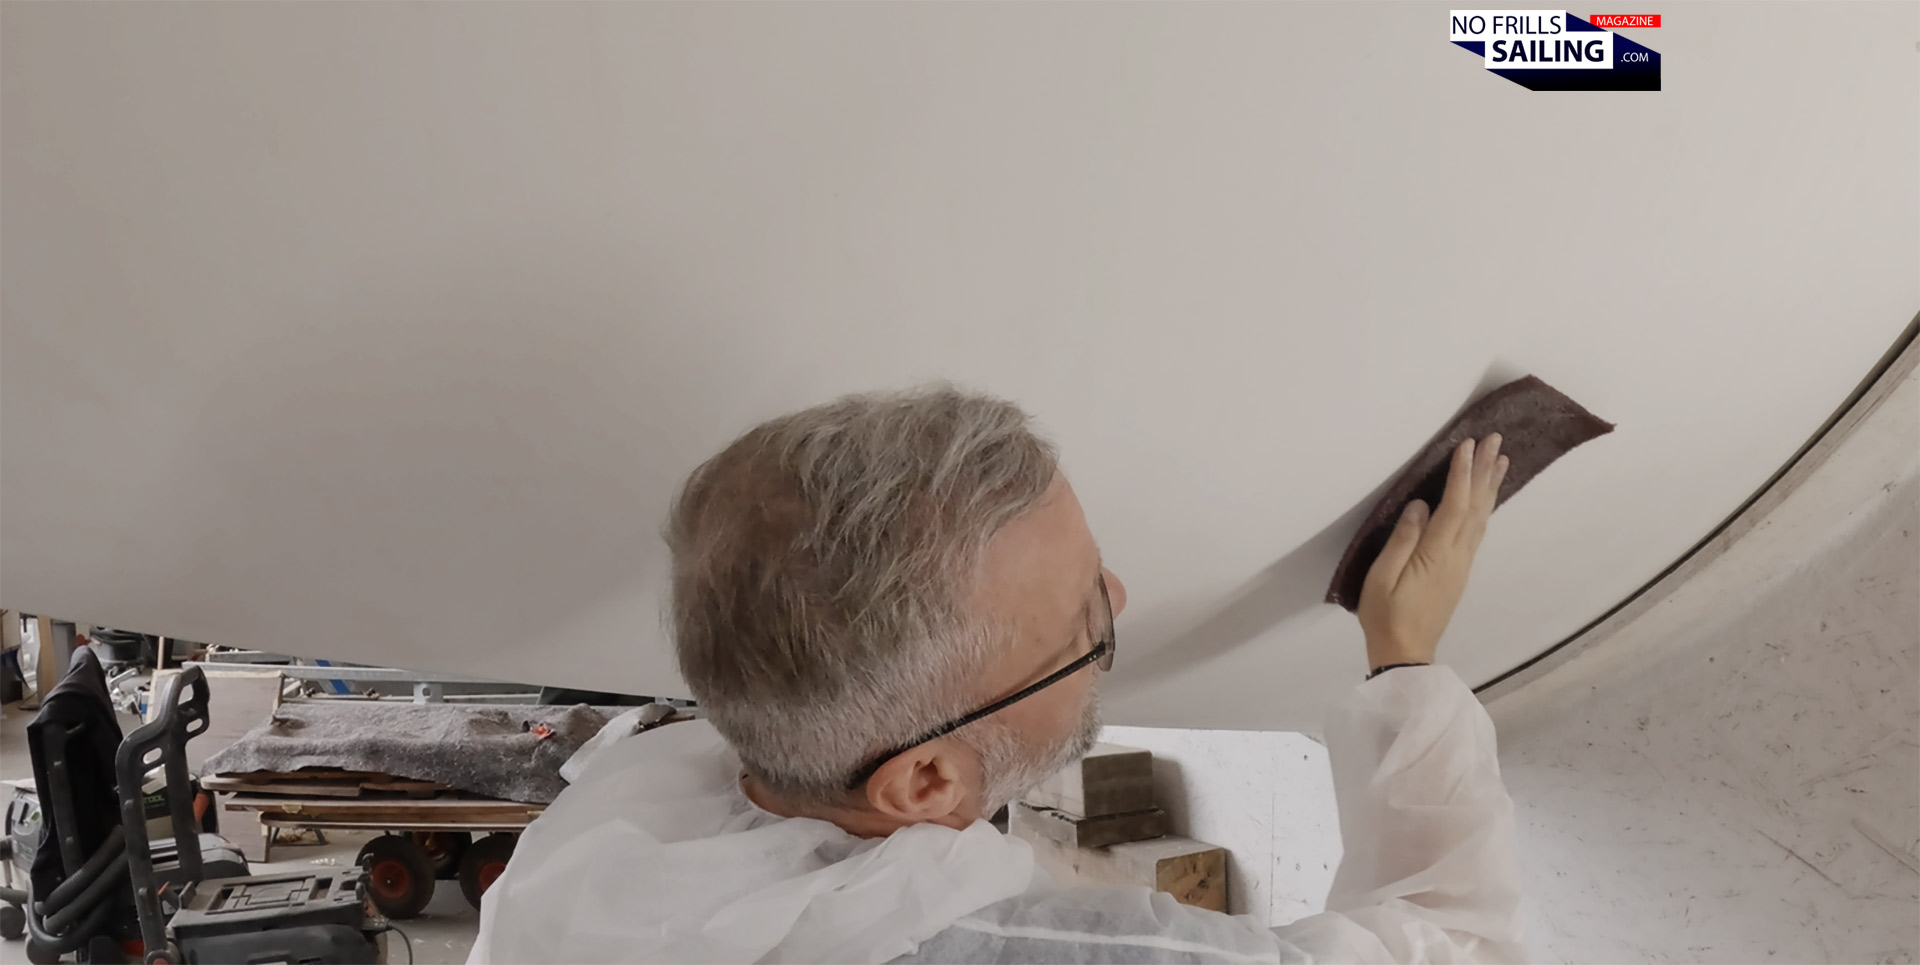
Even if the guys had sanded off all of the wax, my boat is now in the shipyard for almost three years. During that time, next to her in the building shed, dozens of other boats had been treaded. This means, a lot of dust of all sort surely had been travelling onto my boat, especially onto the more exposed side of her hull. So Jonas said that the whole hull would need a thorough sand down to “activate” the surface and tear off these unwanted dust particles from bow to stern. By hand.
Next up: Hand-sanding!
He handed me a sponge-like “sandpaper”, a not all-too hard 120 grain, and wished me fun. So, again, I started to rub and sand down the boat from the bow. Like the first time with the machine, the little area around the bow was no problem at all: I was able to clearly see the differentiation line between submerged and surface part of the hull and the finished outcome of the sanded bow looked absolutely awesome! As I had finished it, I really regret the fact that my antifouling-paint was not available in a clean white. I just love the looks of a white wetted surface area for the Omega 42. Now it will be anthracite, which is surely nice as well. But white … would be even better.
Give it all a thorough rub
Anyway. After hand-sanding the back-breaking mid-section and making my way to the rear-section, where the shape becomes even harder to follow because of the keel-fin and the mini-skeg leading to the rudder, after another 2 hours or so this part of the job was also done. In the meantime, my whole head (and hair!) was snowy white, because I forgot to wear the hood of my coverall. Even if I had, I surely would have sweated much harder – such a coverall may look very thin (and it indeed is!), but it also behaves like a greenhouse, boy was I sweating!
We don´t want to see any more shiny surfaces!
After every step had been finished, I asked Jonas or one of the other trained and very experienced boatbuilders present in the workshop, if my work was okay or if they would spot areas needing some reworks. Apparently happy that they did not had the questionable pleasure of doing it, they were very open in showing me those – luckily, my work was so good that they seldom found one. My arms had become really sore in the meantime as I felt like the Karate Kid being trained by Mister Miyagi, if you know what I man … and I again did not had reached the end of this ordeal.
The hull needs to be as clean as possible
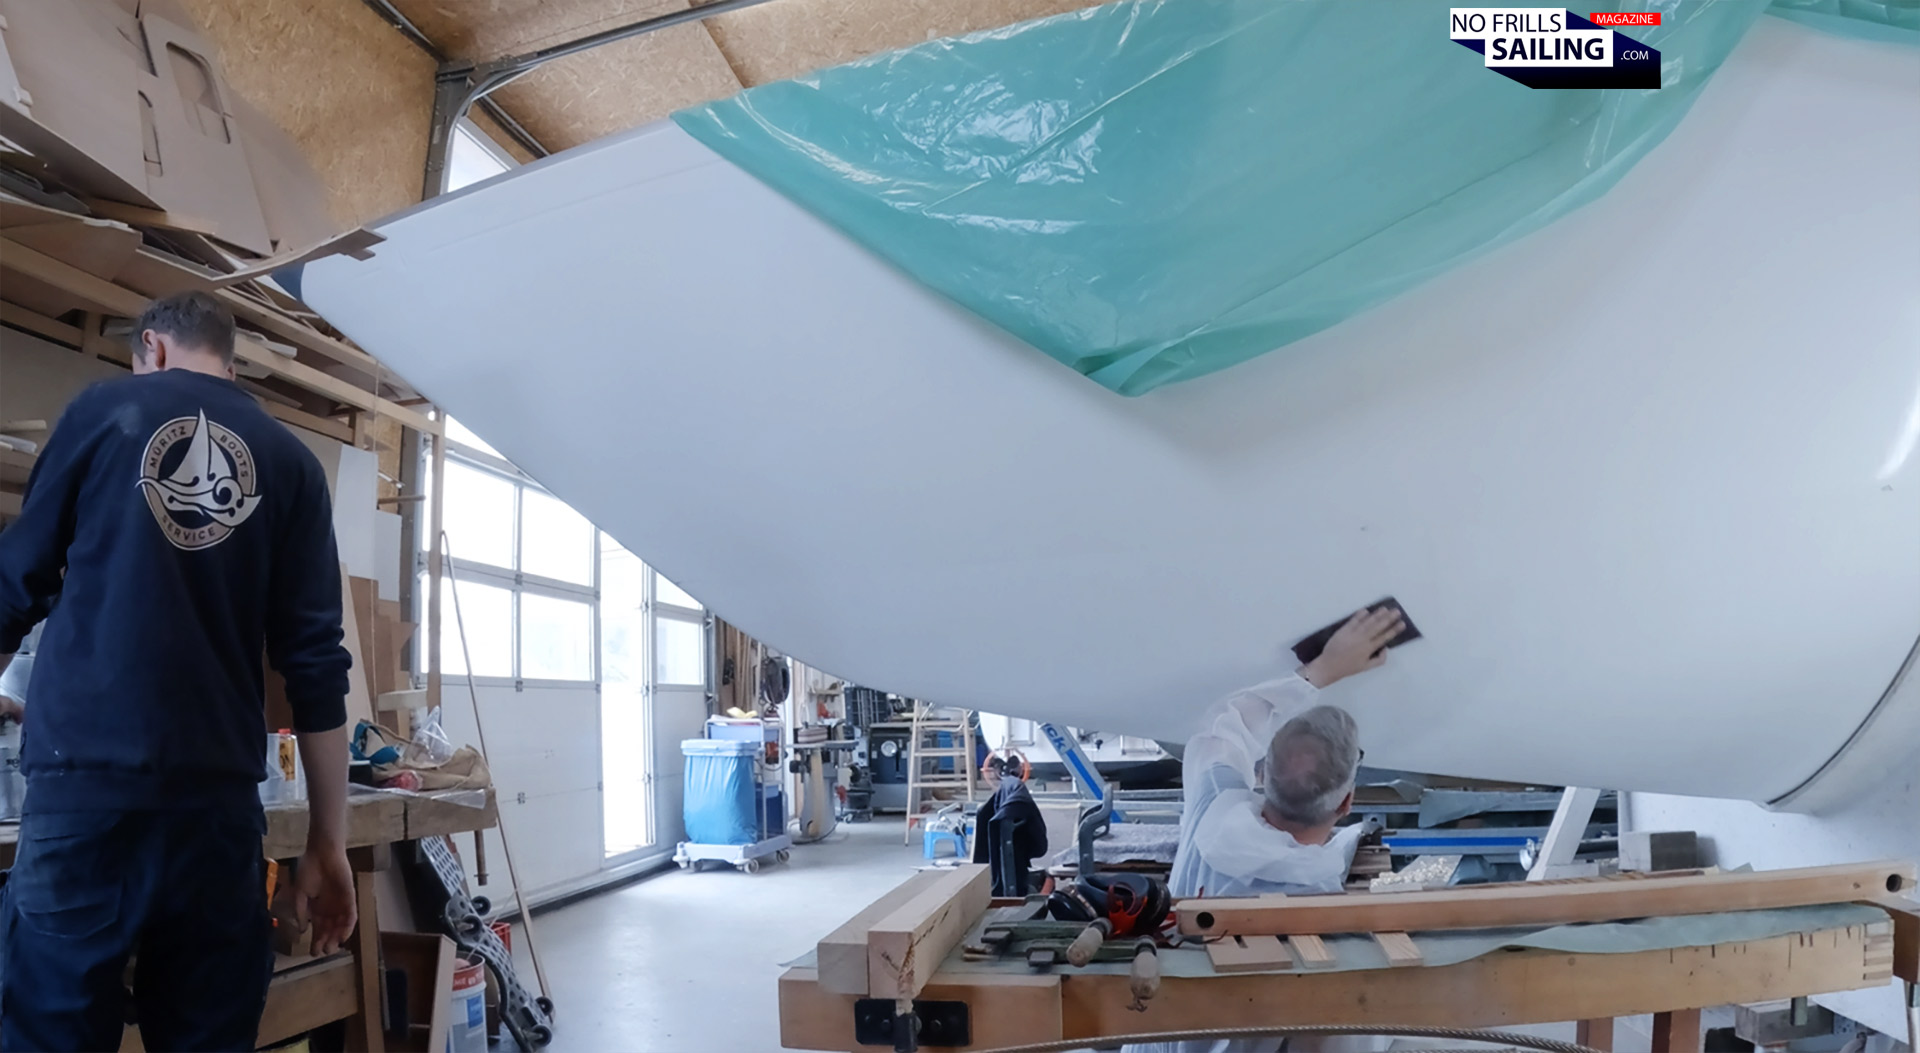
You´ve already guessed it yourself by now: After all this sanding action, I had added a substantial amount of dust and dirt myself to the already dusty boat. Normally, you would proceed now and haul the fresh sanded hull out of the shed and onto a washing place of some sort: Utilizing a hose, you´d give your yacht a thorough shower with fresh water, cleansing it by rinsing off all the dust and dirt. Normally. This wasn´t possible for my boat as the cradles weren´t made to be moved that much.
Now look at this: Beautiful!
So I had to get a basket, fill it with clean water and rinse the boat myself. By hand. You can imagine what kind of work this was: Not so tiresome and brutal, but still, it acted on my already weakened arms! Besides, you should not just cross-cross the hull and wash it as if you were in a shower. The guys suggested a certain technique, where I would start at the uppermost part of the hull and wash it down to the keel. From the upside to the downside. Every stroke. This would make sure that the water, together with gravity, would take down most of dust particles. And it really worked! After a few square meters the once clear water in the basket had turned bright white: That´s the dust from the gelcoat-white of the boat! On the other hand, the constant up and down – not unlike squats in the gym – turned out to be a true hard training for my legs! Up and down, dozens, if not hundreds of times. I couldn´t wait for the “pause” another run to the bathrooms would bring to get new clear fresh water, what a relief!
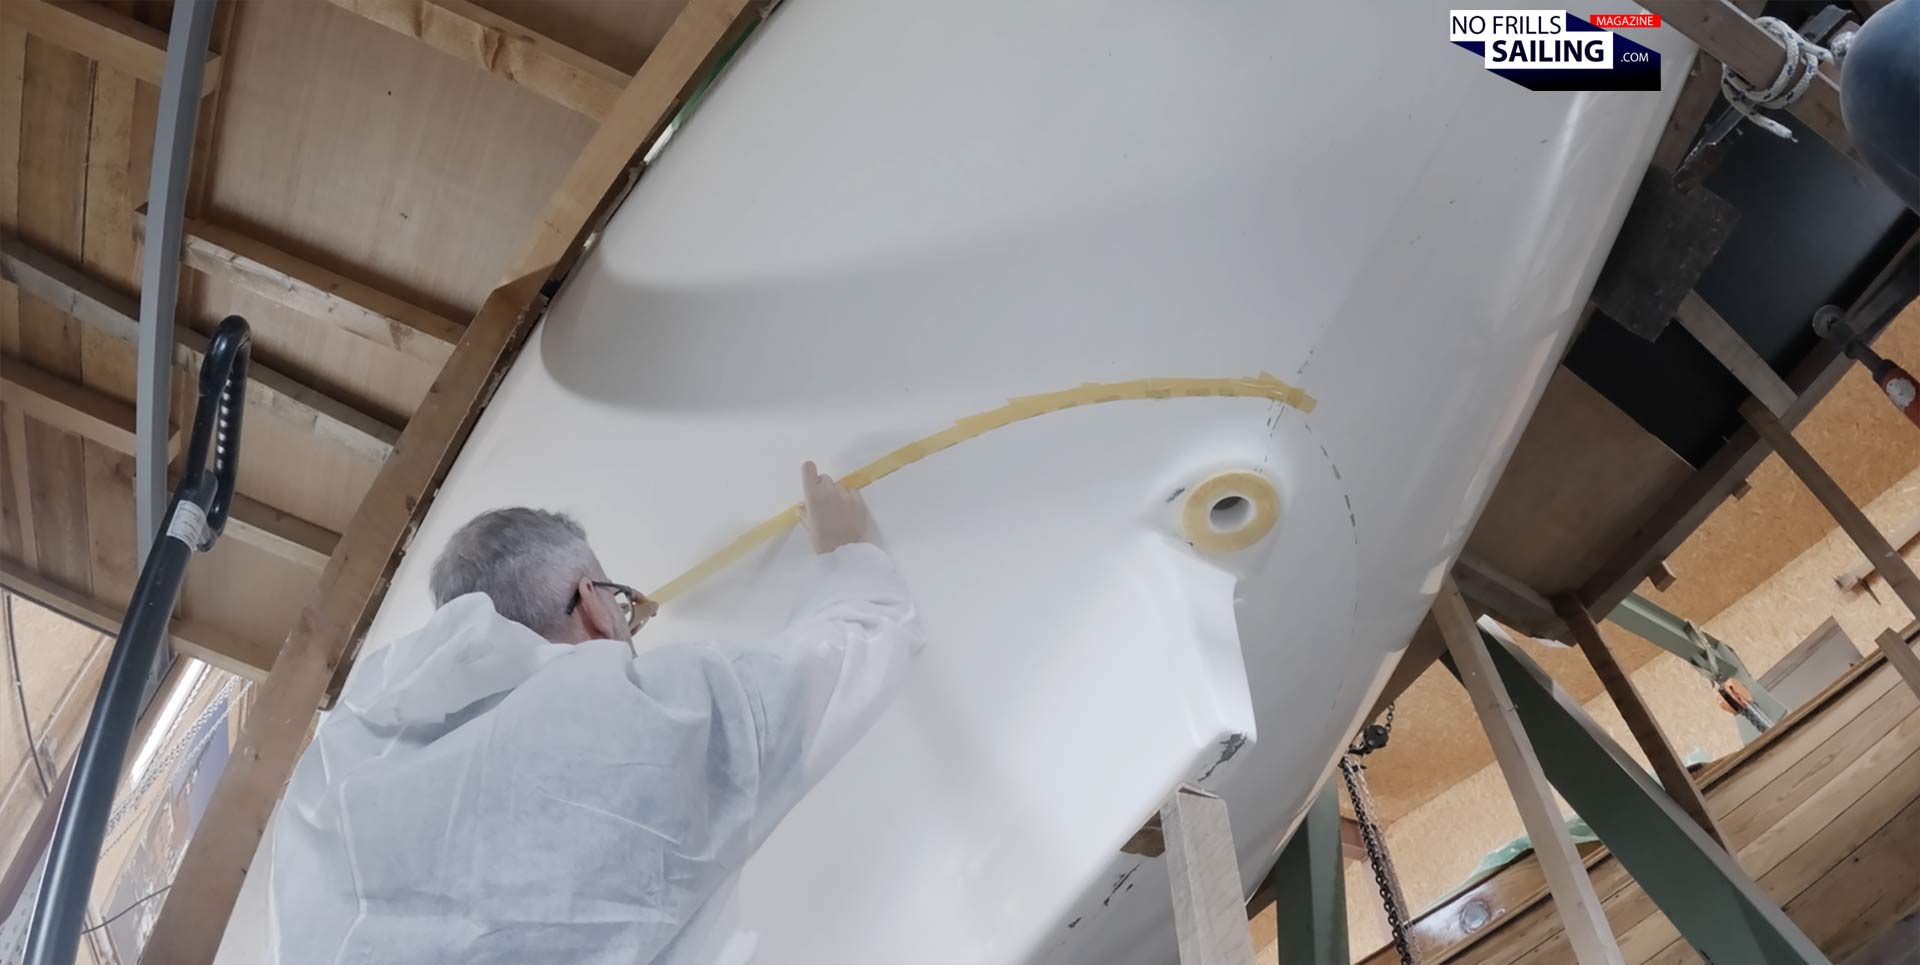
Making a new waterline-marking
It took me about 45 minutes to rinse the whole boat from bow to stern. Then I repeated the whole process, washing the boat again a second time. This time, the water showed to become much less white. And if this wasn´t enough, I did it a third time – with acetone. Whilst I kind of eerily “like” most chemical stenches, I despise the stink of acetone! This grease- and fat solvent is too strong for me, so I wore the mask again. And as if this wasn´t enough, my shaking, empty arms, needed to be steady and calm – I had to put on a new waterline masking with the tape. With shivering arms it often took several attempts to achieve a smooth, consistent waterline. But it worked. Just fine. This hole preparation process took me more than five hours!
Working with epoxy primer for the first time
I would have never thought that almost a full working day would be passing full of hard labor before I could even open the very first can of epoxy! So, if you are planning a DIY bottom paint project and you also have to sand down a brand new fresh hull: Plan two full days at least for prepping before you can think of painting! I´d also suggest you seek for professional gear and equipment, especially the sander should be attached to a vacuum cleaner – otherwise you will be literally buried underneath a layer of gelcoat and GRP-dust! But here I was: Finally, able to apply the first layer of epoxy primer!
This all must go onto the boat
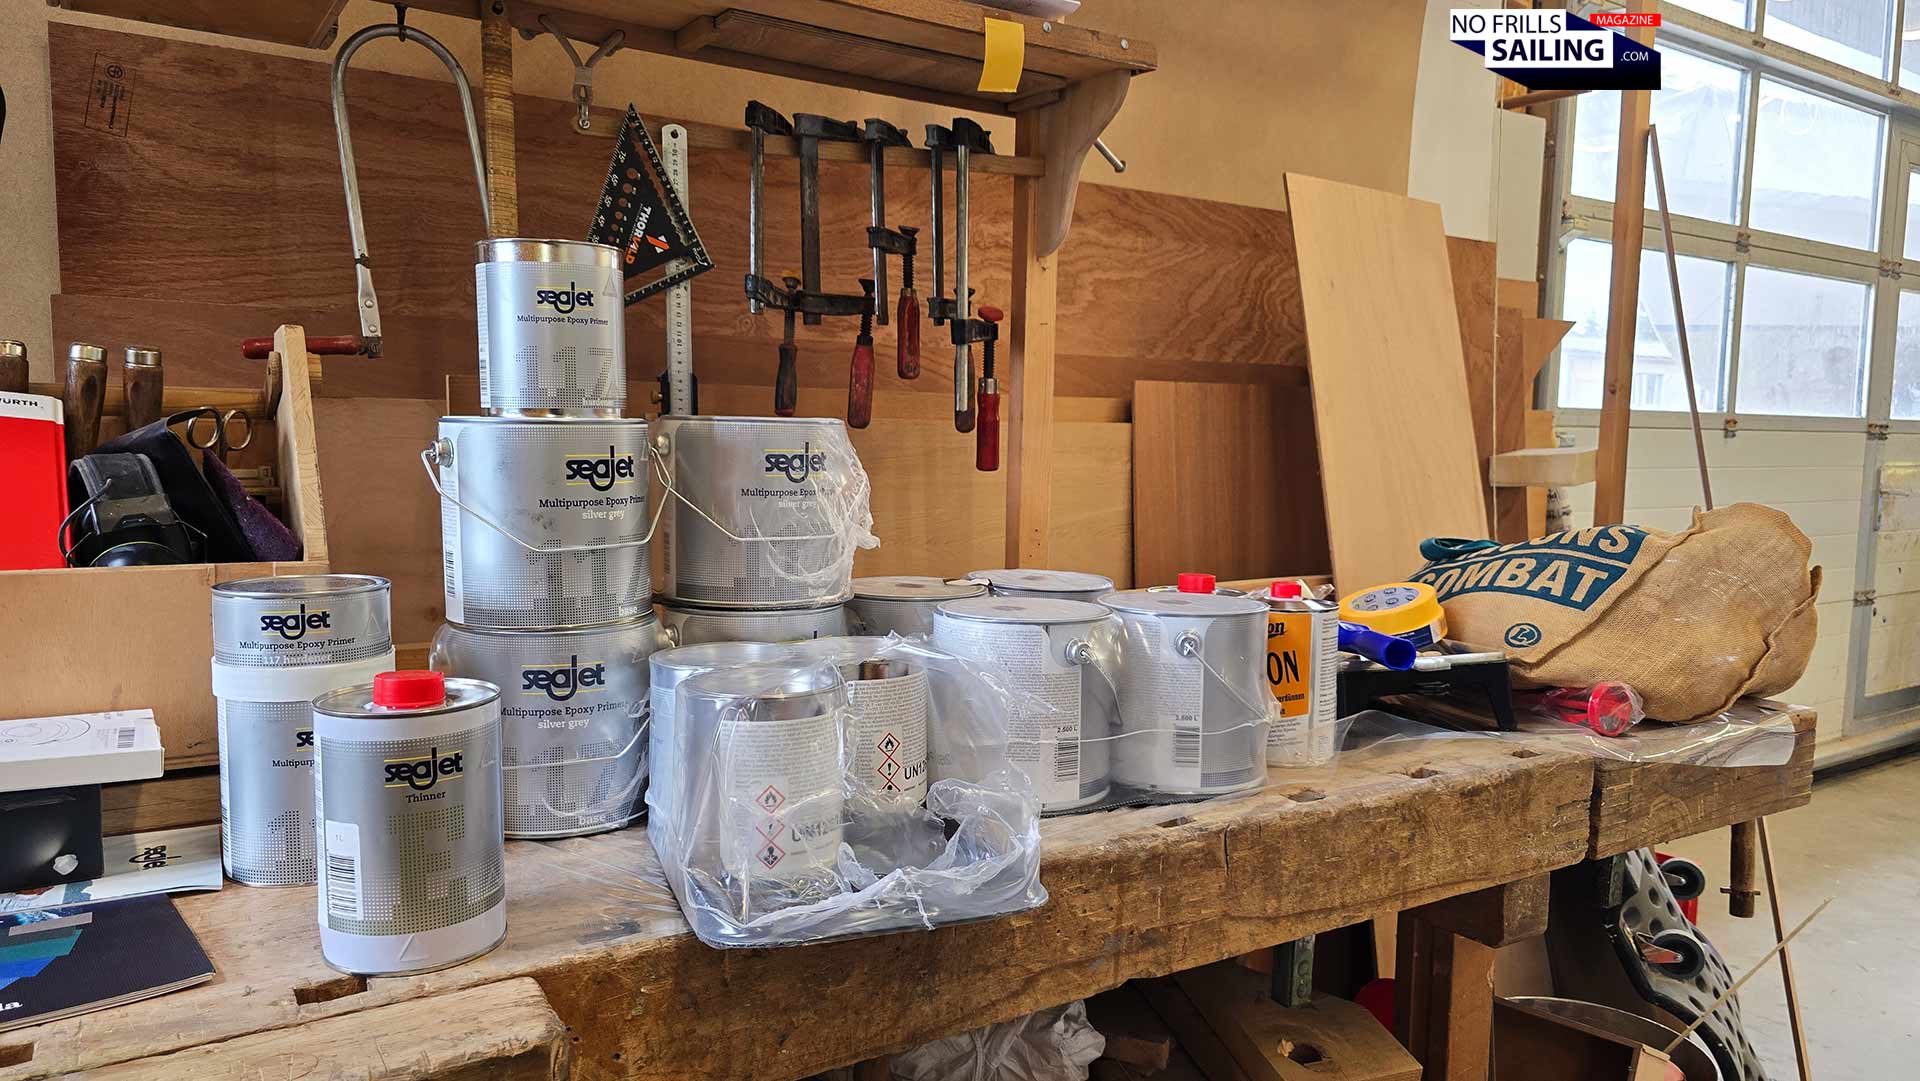
I´ve already had multiple contacts with epoxy-resin, most during my refit of the King´s Cruiser 33 back in the day. But back then, I was repairing my deck, filling in some cracks or impregnating roofing panels. This time, it was the epoxy-primer layer for the bottom paint: And after receiving the thorough briefing by Dirk at Yachticon, Germany´s wholesaler for Seajet bottom paints, I was well aware that accurate measurements and thorough mixing of the two components was of utmost importance. But firstly, I was surprised after opening the first epoxy can …
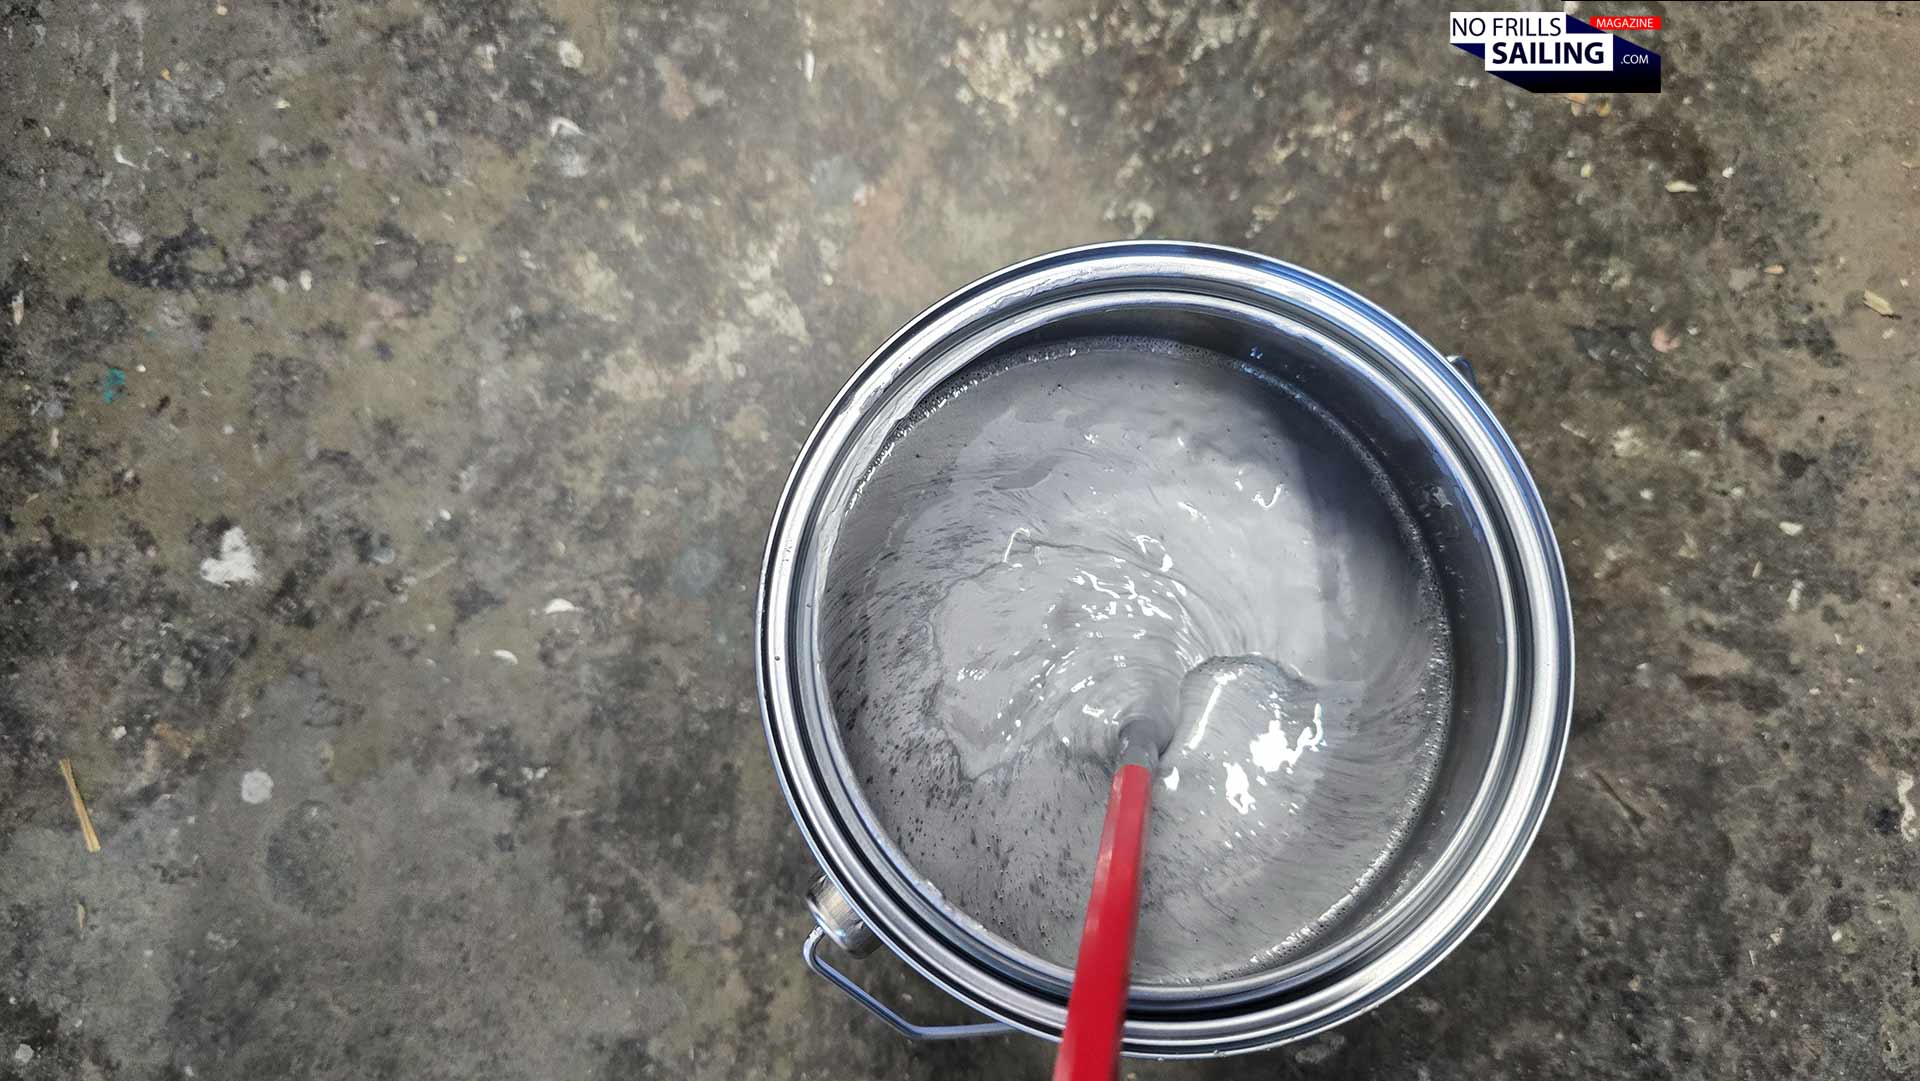
Stiring up the epoxy resin
… because the content did not present itself as a unison “resin”-type of fluid, but as half liquid, half solid. Almost half of the can was filled with a very “hard”, viscous but “stubborn” material. Which is totally normal, as the guys in the shipyard explained. Again, I was lucky being in a professional, well-equipped shipyard: They gave me a beater and a electric screwdriver, making me able to mixt and “fluid up” the whole resin. By hand, this would have taken 15, 20 or more minutes – and my, as you remember, were just sore at this moment. So I mixed the epoxy by electric means and it went just fine, after five minutes or so, the resin appeared to have entered a ready state.
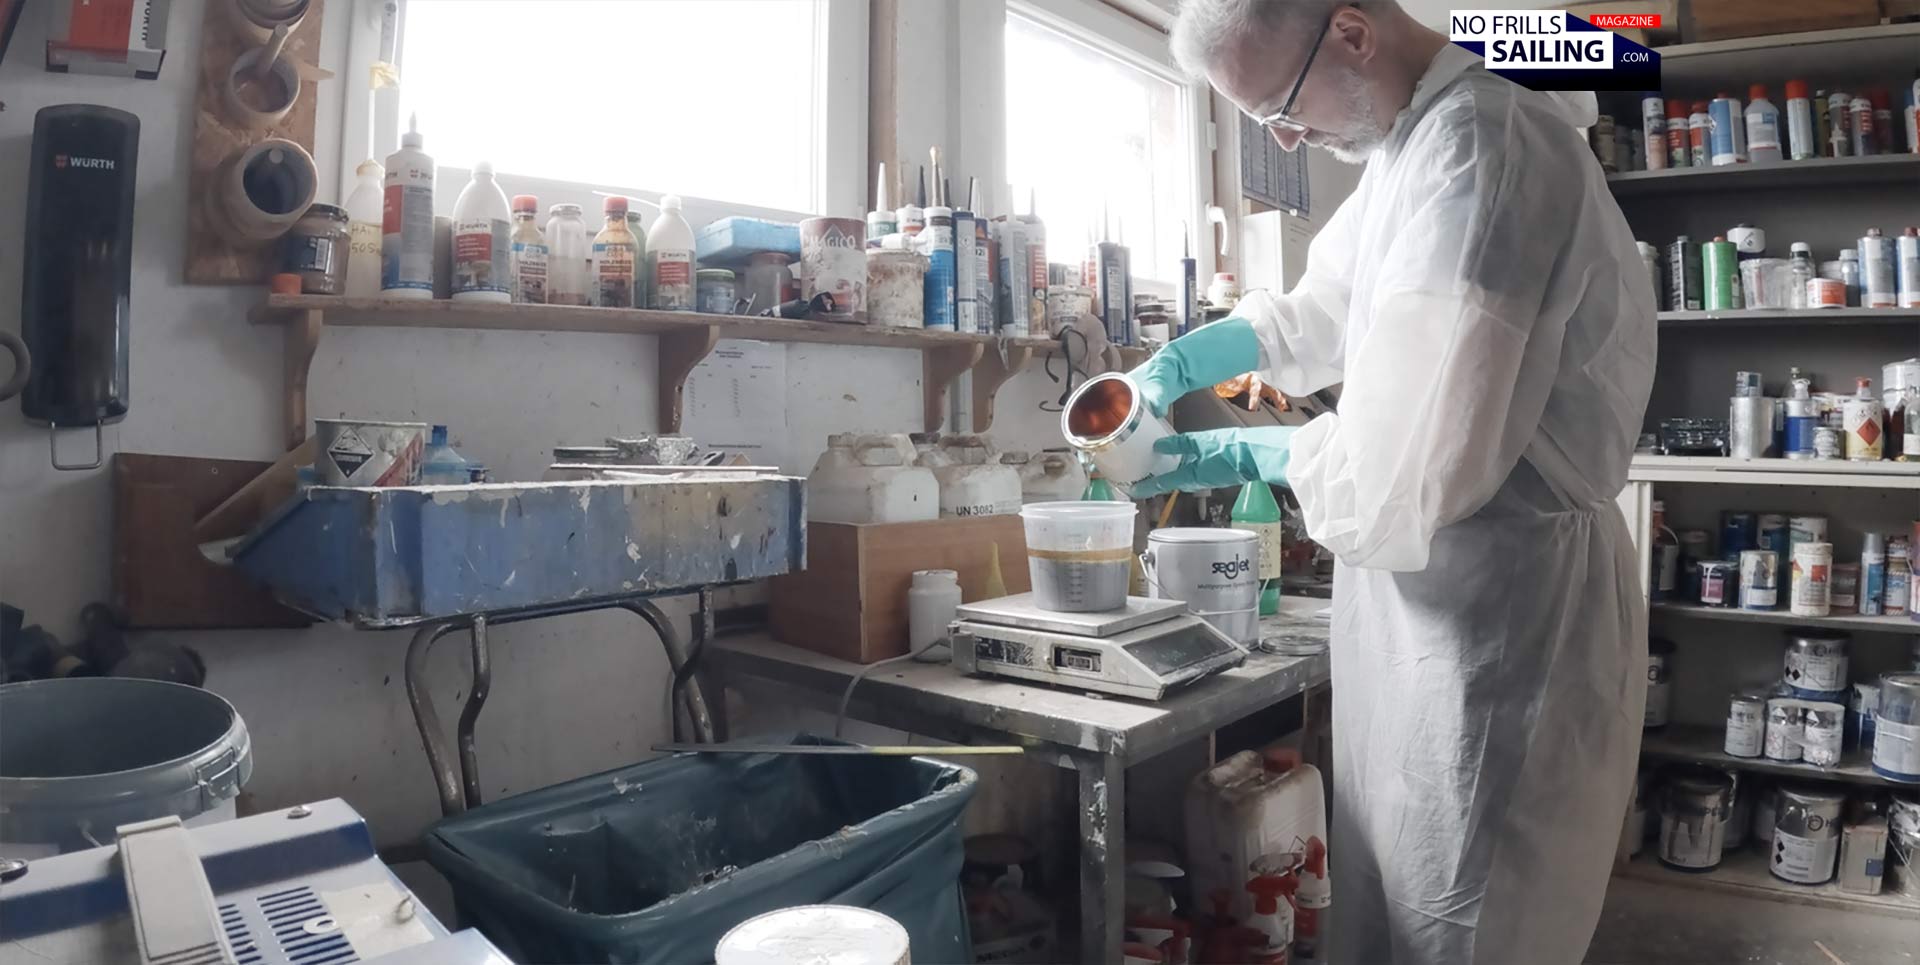
As accurate as possible: Epoxy and hardener mixing ratios
I don´t know why, but the mixing ratio of this very antifouling primer is very odd. Usually, you would try to have whole number-ratios, like 1:2, 1:3 or something similar. The ratio for the Seajet 117 primer is (by weight) 73:27 or, (by volume) 68:32. This means you cannot utilize one of these very practical mixing-cans where most of the ratios are conveniently printed on the side. So I placed the mixing-can on the scales and started to pour in 730 grams of resin, just to add 270 grams of hardener. This way it is not hard to measure the right amount of stuff you need. One gram more or less won´t kill it, but it´s more like baking, not cooking. Make sure you have a solid scale at hand as well!
Mixe it: Accurate to the gram!
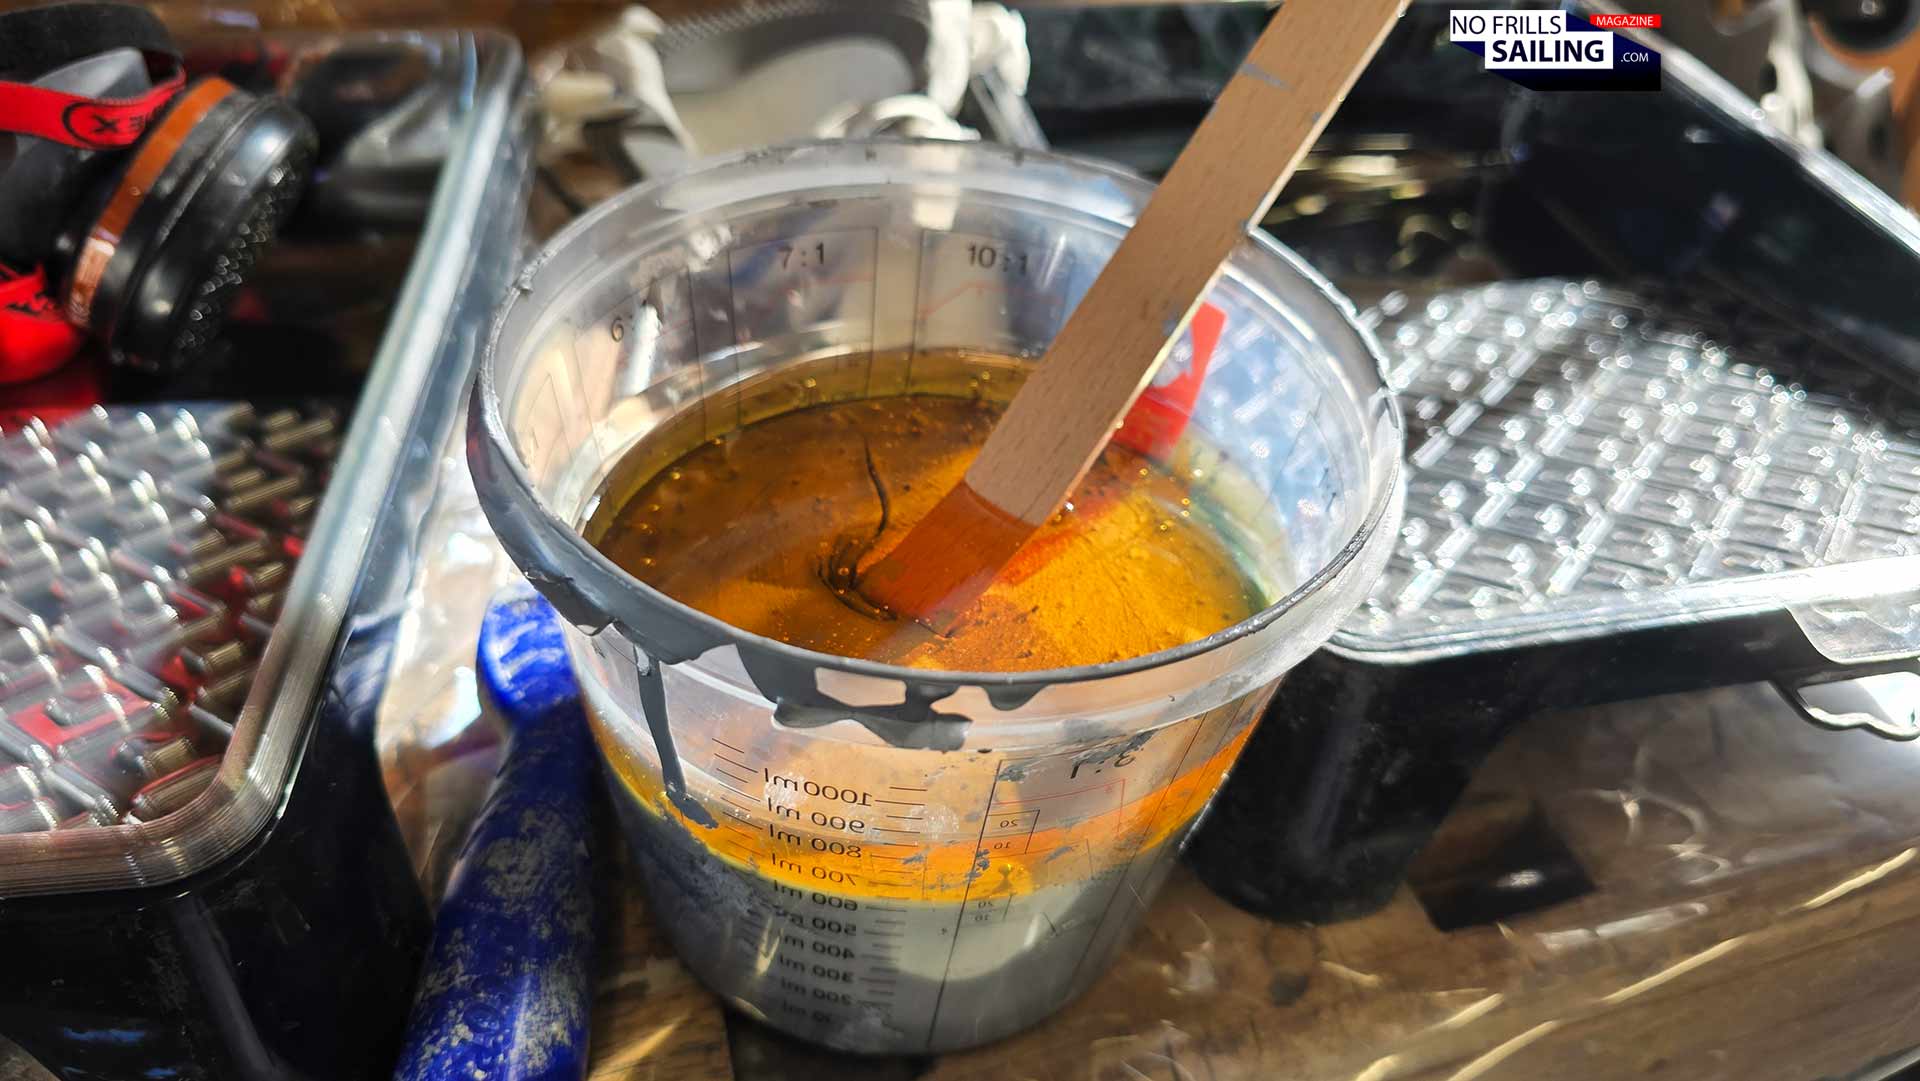
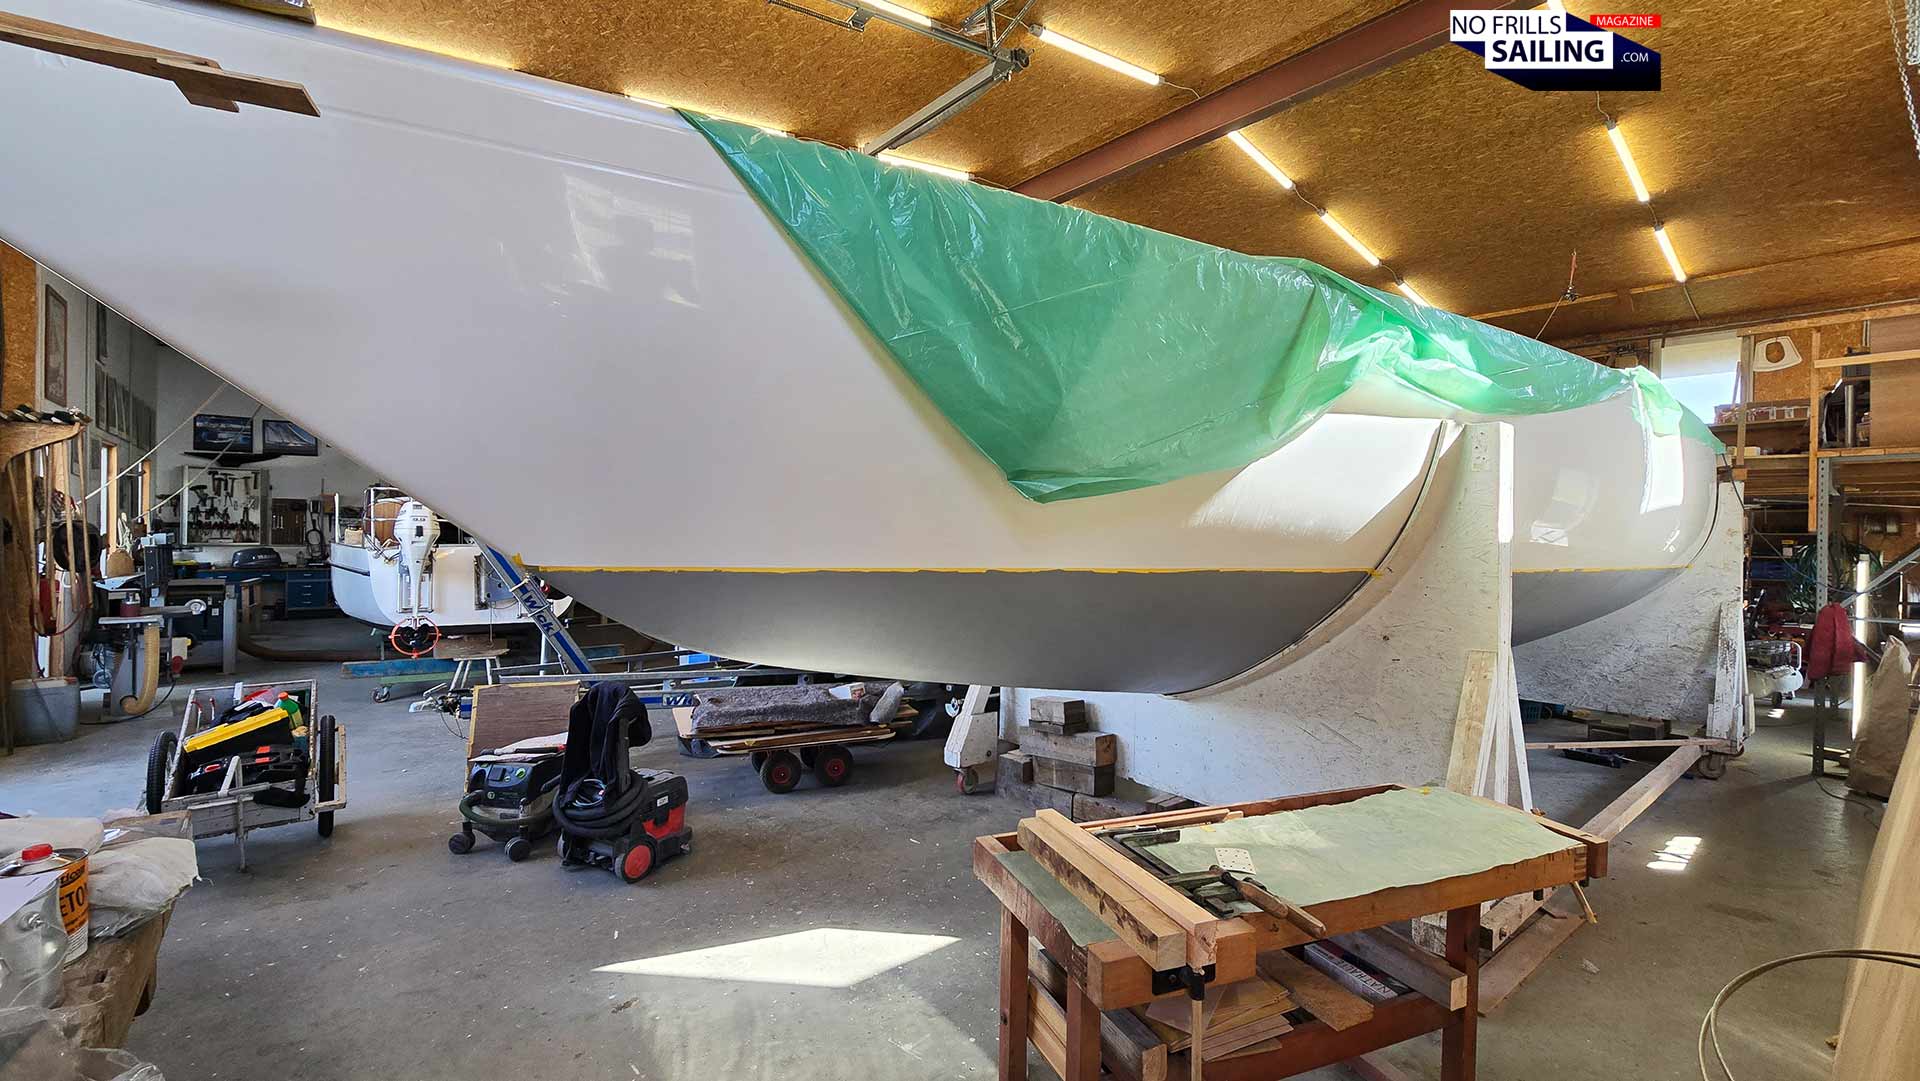
I could have poured the whole amount of hardener into the epoxy-can as well: The manufacturer has left just the right amount of volume free. And this was supposed to happen in the first place, making the scales and the accuracy gratuitous. But here´s the catch: Apparently, I will not be able to paint the whole boat during this week. As you might have already seen, she is still positioned into two wide cradles. There is no way to take her out. I will have to paint the unpainted parts including her rudder (which is still in the making) and her keel afterwards, shortly before undocking and launching. This can take up to 2-3 months and, worst case, can even be postponed to next year. So better save on the precious material!
Before stiring.
In the end, to paint the whole boat (excluding the said areas), I will later have to utilize 1.690 grams of mixed epoxy-primer, saving a substantial amount for later. Apart from this, we do not want to waste such precious material, neither for the money it costs nor for creating chemical rubbish, right? After some six and a half hours of preparation, my epoxy primer-mixture was now ready, finally I would be able to do what I came here for in the first place … paint!
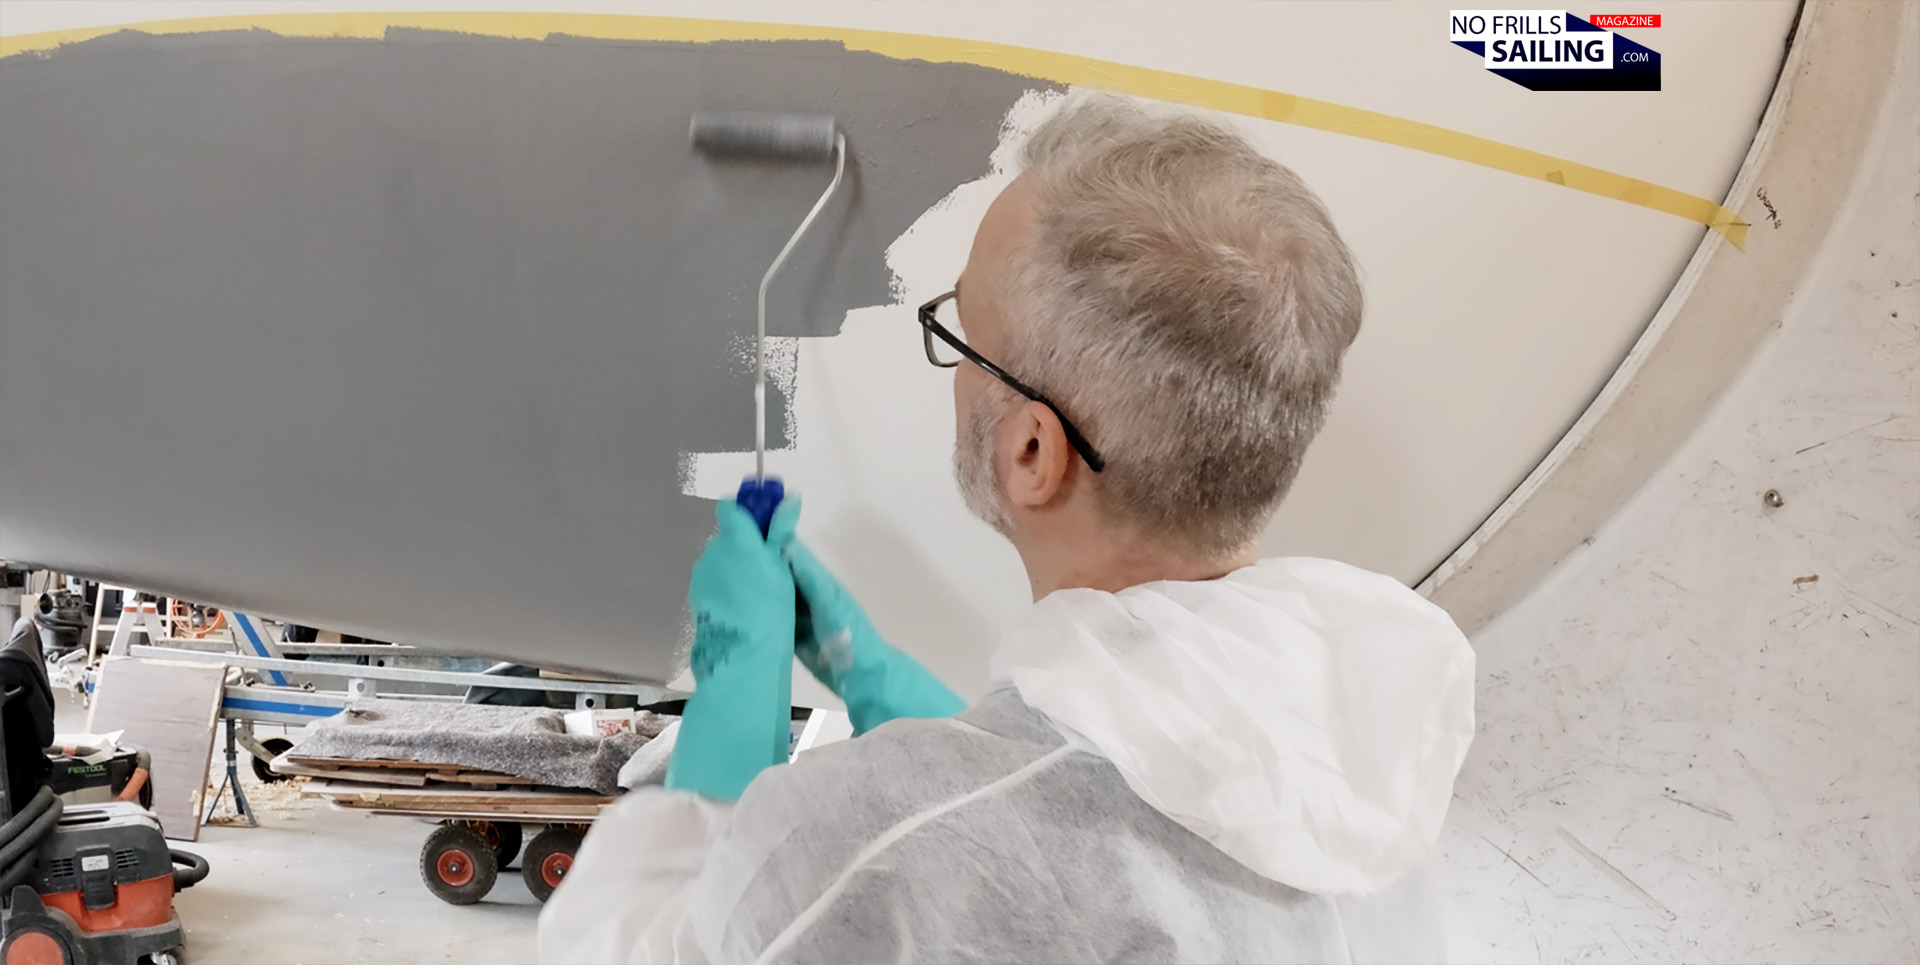
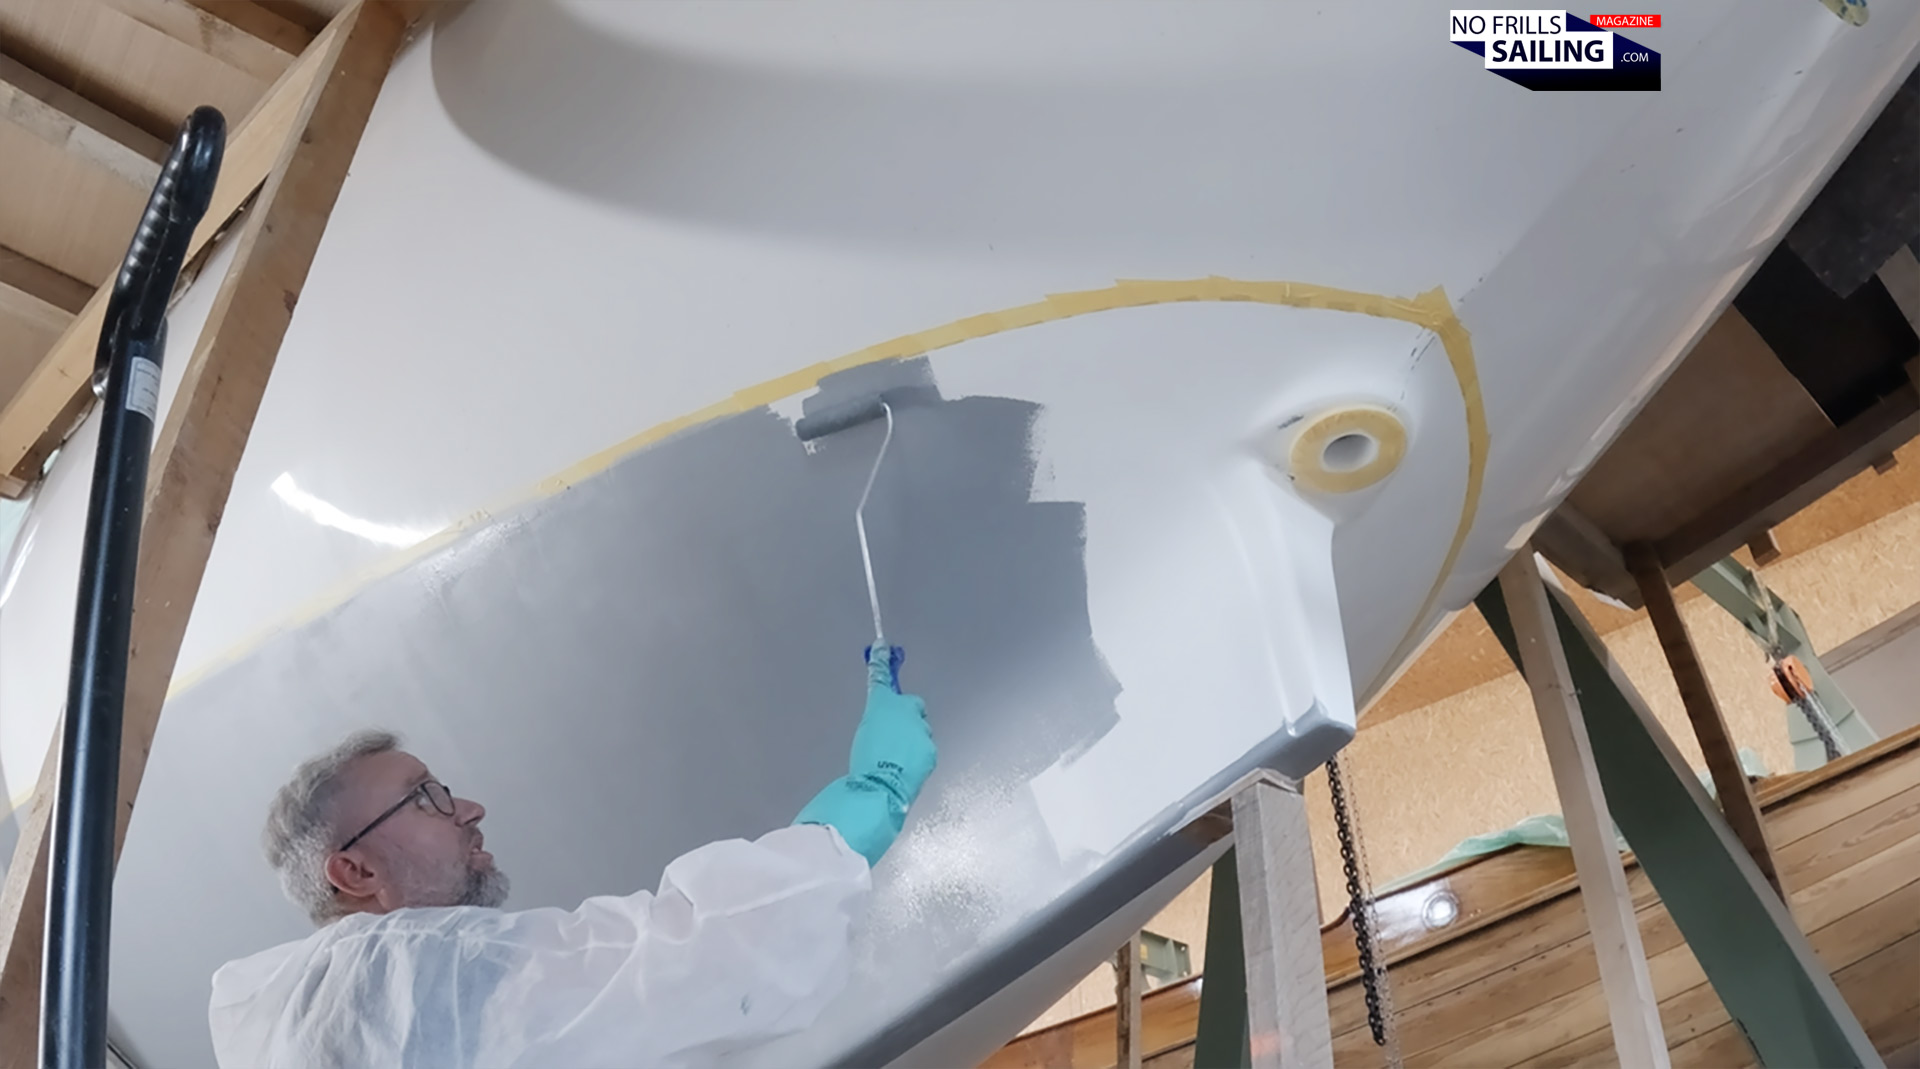
Rolling the epoxy primer onto the boat´s hull
And this is not as easy as it sounds. First of all, I want to achieve a smooth, uniform surface. I want an even dispersing and distribution of equal amounts of primer-agent over the whole hull. Which is not as easy: At the start of the process, the primer is pretty nicely liquefied and it is quite easy to roll it out in a way so that you cannot see the individual strokes afterwards. What sucked was the frequent loss of fringes in the first 20 minutes when working with a new painter-roll. Those needed to be scraped off the freshly painted surface, needing re-paints. But after some 45 to 60 minutes, the epoxy primer would solidify ever so slightly.
It´s more tricky than it seems …
Now I would end up with thicker lines to both sides of the roll after each stroke if my pressure would only be a little bit too hard. This needed many, many correctional rollovers to smoothen them out again. As it was my first time working with this paint, it took me half of the hull´s length to accommodate. But finally, I had found my rhythm as well as uncovered the little tricks here and there how to deal with the roller and the paint itself. Not to myself: Next time (if there is one …) I would go for one size wider masking tape: In the act of painting I found it hard sometimes not to fully paint over the yellow tape. You need to be very accurate and awake when painting!
Not too less, not too much
As it was the case with the sanding part of the job, the same pattern occurred again now: The bow was very easy as there is least area to cover and you can stand upright, no bending, no back-breaking. The midship part required a lot of squatting, standing up and going down again and, for the keel-flange, literally working down on my knees, bowed down with my face almost hitting the floor. Not funny! But the trickiest part was the stern section with its intricate hydrodynamic shape, the keel fin and the mini-skeg. Sometimes I would take a simple brush as even the slim roller would work on these three dimensional surfaces. By the time I reached the aftmost part – finishing half of the boat – the guys from the shipyard called it a day and left me alone: Overtime! That´s another fact when doing the bottom paint: Once started, you have to finish it!
42 feet? 3 hours!
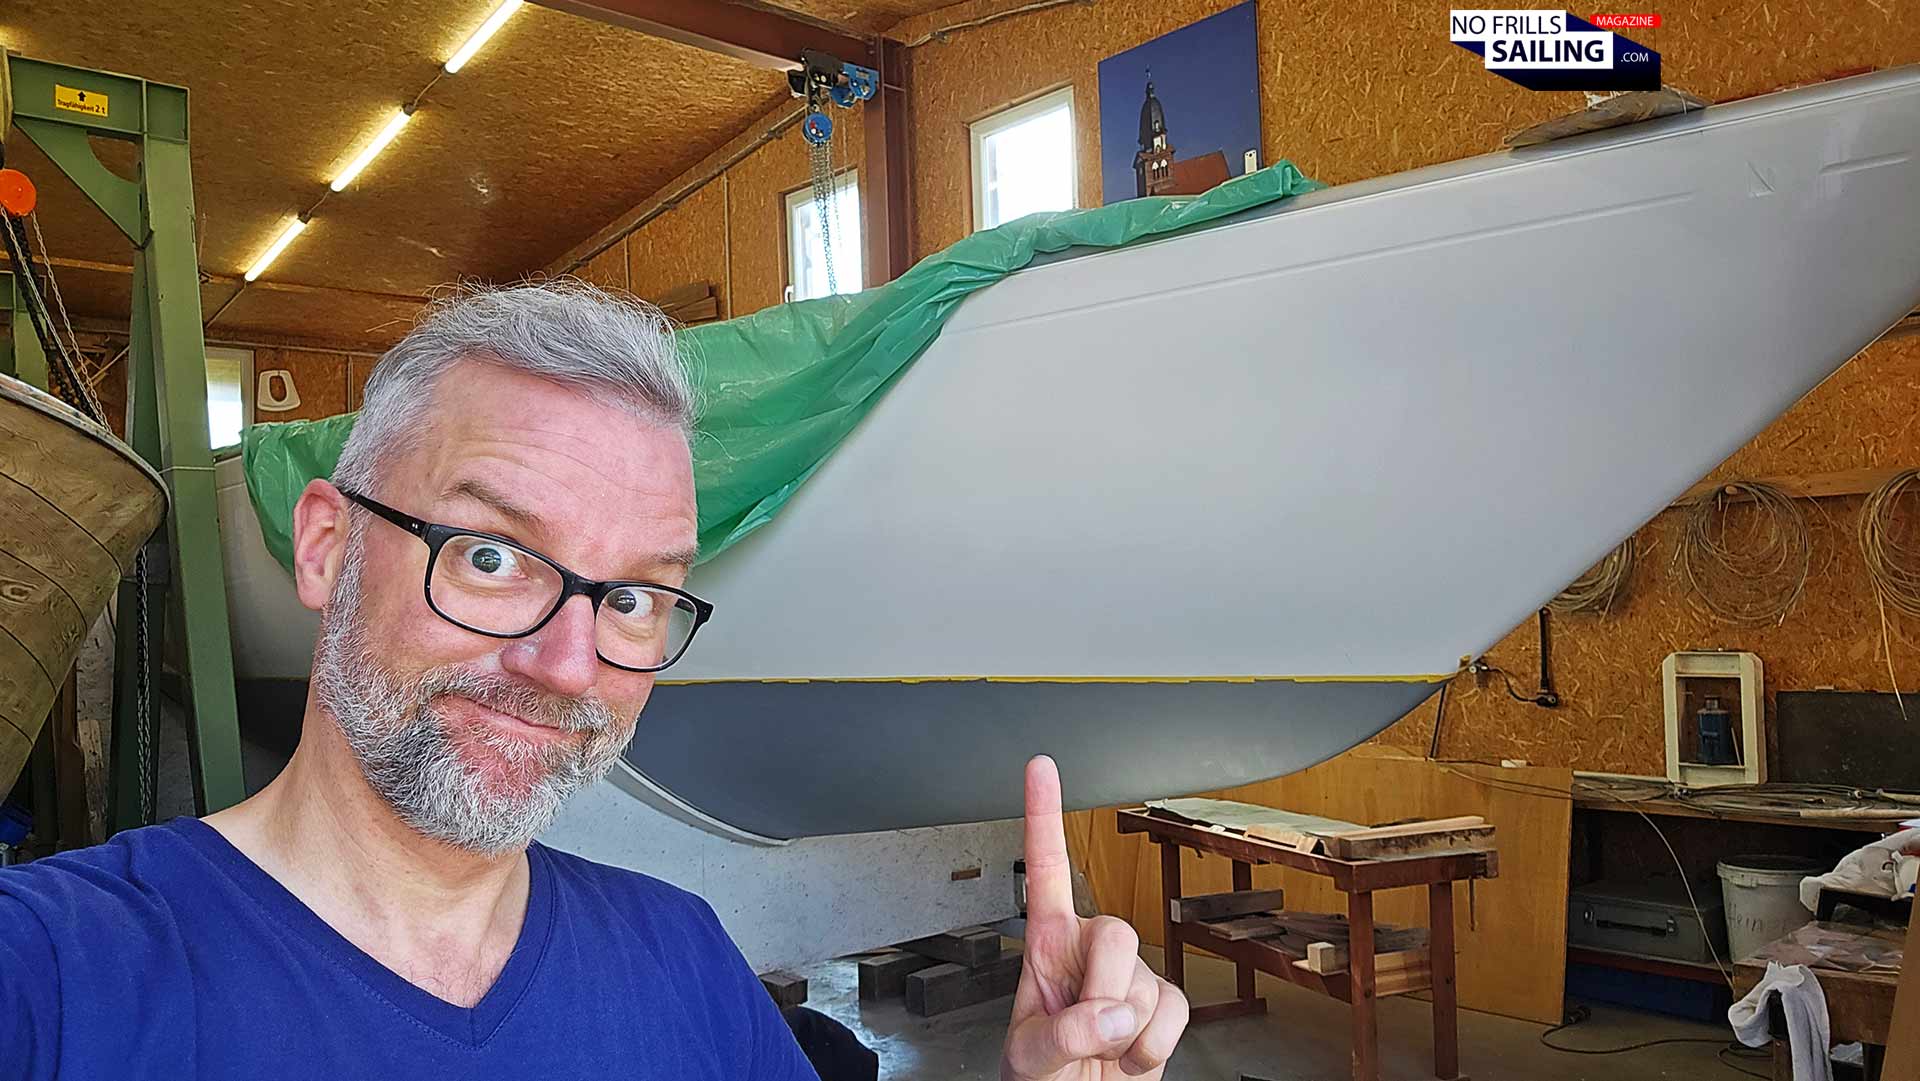
In the end, literally on reserve power, I finished the other half of the yacht too. The whole layer of the 42 foot long boat (except for the unpaintable areas), took me about three hours to fully cover. When I applied the second layer the next day, this time has been confirmed. Looking at the outcome of my work, I was quite happy and excited: Man, it looks awesome! Now you can really see the ship´s lines and appreciate Peter Norlin´s design much better that a unison white hull would do. Sweating all over my body, covered in dust and offset resin, my hands were littered with epoxy sprinkles, as was my glasses and even my camera.
Finally: The first layer is applied!
This first day amounted to almost 10 full working hours, minus two minutes each for a banana-pause. It´s surely better to work with two persons or to have a day pause between sanding and cleansing of the hull. But for me, having only so many days left for this project, there was no choice but to do it in this one first day. Taking off the already beaten coverall (I don´t know how in the world this thing should last a full week!), cleaning my tools and removing the rubbish, I prepared the work for tomorrow, for the second layer. This way I will apply a total of four layers of epoxy-primer for osmosis prevention, before the antifouling will follow in a few days.
A one in the eye after day 1: My head aches!
A quick word on labor protection, hazardous chemicals and work ethics: I admit I was so stupid and did paint without wearing the breathing mask during the first day. This was because of the fact that when wearing the mask, my glasses wouldn´t fit and thus I would not be able to paint accurately. Secondly, for some reason, the stink of the epoxy primer turned out to be significantly less dominant than I initially thought. And lastly, absolutely no one in the shipyard did wear a mask. I usually don´t care if someone would call me a pussy, but maybe this somehow did have an effect too.
Never again without!
What looked like easy going at first turned out to be a grave mistake later: Arriving back home, after taking a shower, enjoying an ice-cold beer (aaaawwww, that was the best!) and having dinner, a sever headache set in. It kept we awake up until 2 in the morning, of course I didn´t had any painkillers nor other means of treatment. Laying in my bed, awake, I noticed a very high heartbeat and a kind of “burning” sensation in my lungs. It all disappeared by the morning – and of course I wore a mask thereafter anytime I painted! – but I really suggest you do not play around with your health: Better be a pussy than vitriolize your lungs!
And since we have arrived at the hints & tricks section of this article, let me remind you that it is also a good idea to subscribe to my monthly newsletter! It is completely free, of course, and features all articles of the past month so that you will never miss any one of my stories. If your haven´t already, be sure you become a part of the mailing list!
Advertisement
Next up: Finishing the primer, starting the antifouling paint
As I already mentioned, the day after I returned and checked the outcome: It´s a smooth, nice and perfect surface. Of course, here and there are tiny imperfections, but these are only visible to those who know where and what to look for. In fact, Heiner, boss of the shipyard, looked at me after his inspection of my work and simply said appreciative: “You can join my team any time!” I think this was a compliment. So, what happens next?
Stay tuned …!
After the second layer applied, tomorrow will be the third layer. Nothing of particular interest other than again trying to achieve a smooth surface. It will become exciting again on Friday, day four of the undertaking: After having rolled the fourth and last layer of primer to the hull, I will not wait until the next day, but rather return after 4-5 hours to directly start with the first of three layers of antifouling, which needs to being rolled onto the still “wet” primer. That´s two painting-missions on one day. So, stay tuned for the next article, showing exactly this, how I realize differently colored indicator-layers and a thorough mounting for the bottom paint of my boat!