Another big, big milestone has finally been reached. What a day, I can cross off another huge chunk from the to do-list of my King´s Cruiser refit-project: The bilge of my boat is finished. Refurbished. And I can state this with pride – it looks just awesome! Looking back to the very first days after purchasing SY OLIVIA and inspecting the bilge I´ve found it to be solid dry – but therefore encrusted with inch-thick layers of old paint, greasy-oily stuff and not the least kilograms of disgusting stinky filth.
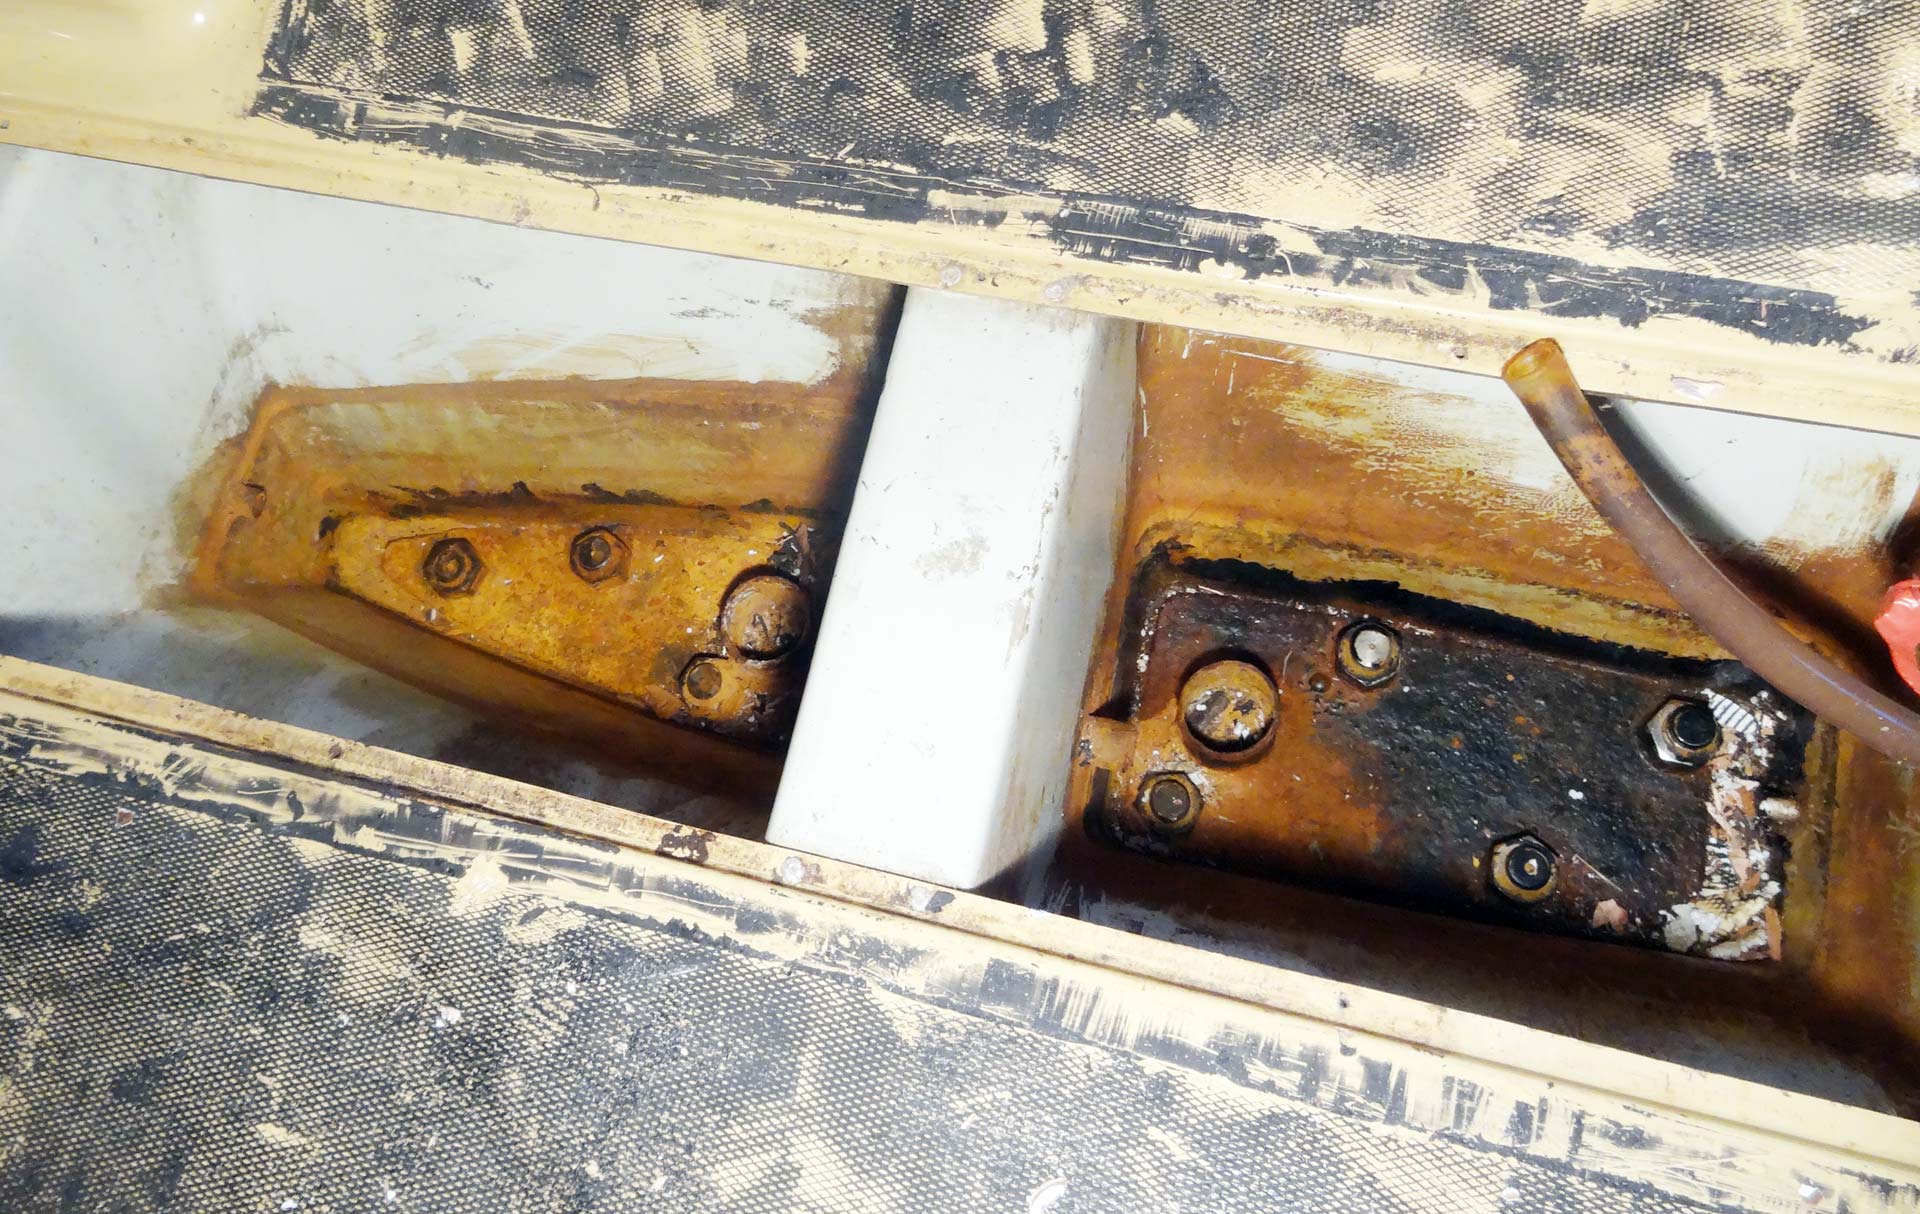
So, for me cleaning the whole mess in the first place to be able to go for the next steps was of great importance. Undertaking a huge effort in the course of the events worth it. This old bilge had to be removed completely! In the end I did had to employ both chemical and mechanical treatment and the utilization of different techniques to remove the encrustation at first in order to be able to refurbish the bilge from scratch to have her clean and watertight as well as freshly new painted.
A Flashback: My previous Work in the Bilge

The previous work was in fact two steps: Cleaning the bilge and freeing it of all the stuff took me some 12 hours of net working. You may read the whole article on these efforts here. After the bilge was as clean as I could get it I checked for the keel bolts and the counterplate distributing the force of the tightly pulled bolts evenly and went on for the second step: Sealing off the bilge. Starting with the keel bolts and the counterplate, I began to apply three thick layers of anti-corrosive paint.
You may also browse to this page here to read about the following steps: After sanding off the gelcoat and first old layer of glass-reinforced fiber I´ve applied two layers of International Pre-Kote paint as a primer where the very bilge paint could grasp a thorough hold onto. Unfortunately winter was returning after some two weeks of incredibly high temperatures of well over 9 degrees Celsius outside, making it a no-brainer to head the ship´s interior to 18 degrees Celsius. But now it was freeing again and I was terrified to discover a huge glitch (read here about it). But eventually temperatures rose again and three weekends ago I resumed working in the bilge: The final steps.
Danboline: The all-time Classic.
When it comes to bilge paint it´s a complete mumbo-jumbo when trying to get to know which paint would be the best suitable. 1.000 of opinions roam the various forums in the internet. Even when asking two different counsellors in a boat shop I´ve got two different suggestions which brand to use and even how to apply the paint itself. I simply gave up. One guy said: “If you have made good experiences with a particular paint, a certain brand, how the paint behaves, flows and dries … well, stick to it, don´t change.” And that´s simply what I´ve done – since I have nothing but praise for paints by International – you may be interested in reading this article on painting the complete internal GRP-surfaces of my yacht).
Bilge paint by International is called “Danboline” so I went for it and bought two cans which I thought would do more than good. Some other people sent me to look for Hempel paint which say said would be “best suitable” and because of the fact that it was Made in Germany of superior quality. Others suggested to simply buy ordinary Hammerite varnish in the next home improvement store which will do as well and the next fraction insisted in buying Epoxy-based paint. Well, folks: I have absolutely no clue about paints. And I don´t want to make an exam in chemistry. So. Danboline. Period.
Bilge Paint: White. Or Grey?
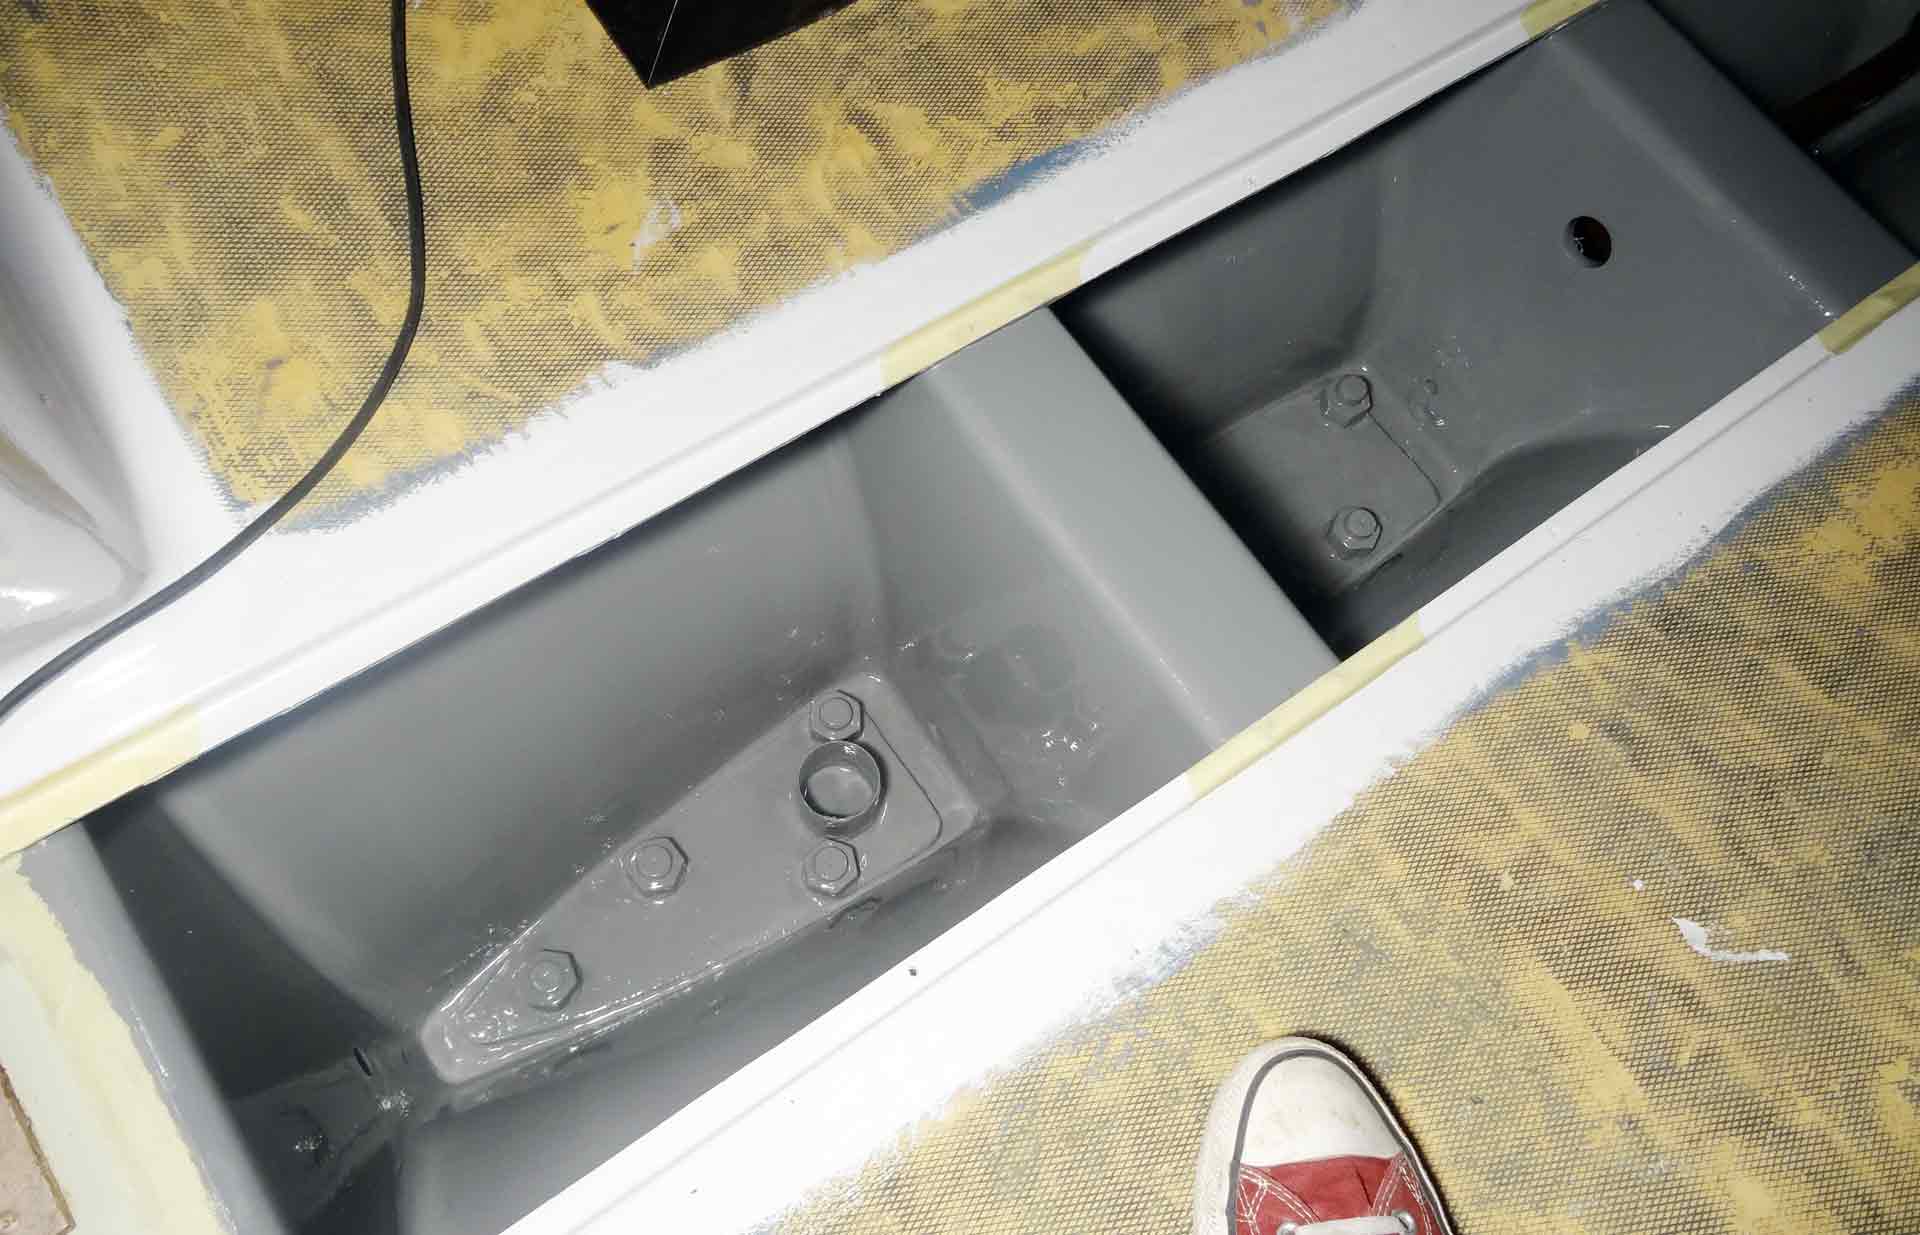
A question of considerably more interest was which color to go for. I love having a clean boat with a clean look so I found favor in white itself. But I remember to having seen some boats when roaming the Hanseboot fair last year (find a complete article here) with bilges in grey. And I think it looked awesome as well. So one of the cans I´ve bought was Grey the other White. I decided to have the first layer of Danboline in Grey and when it looked decent I would go on painting the other layers in Grey as well. If not I could change color and go for White in time. What I´ve noticed when applying the first layer was that the covering power of Danboline was completely different from all the paints I previously worked with: Opacity especially at edges and corners was poor. I was able to spot the blue primary paint in these areas when the paint had dried.
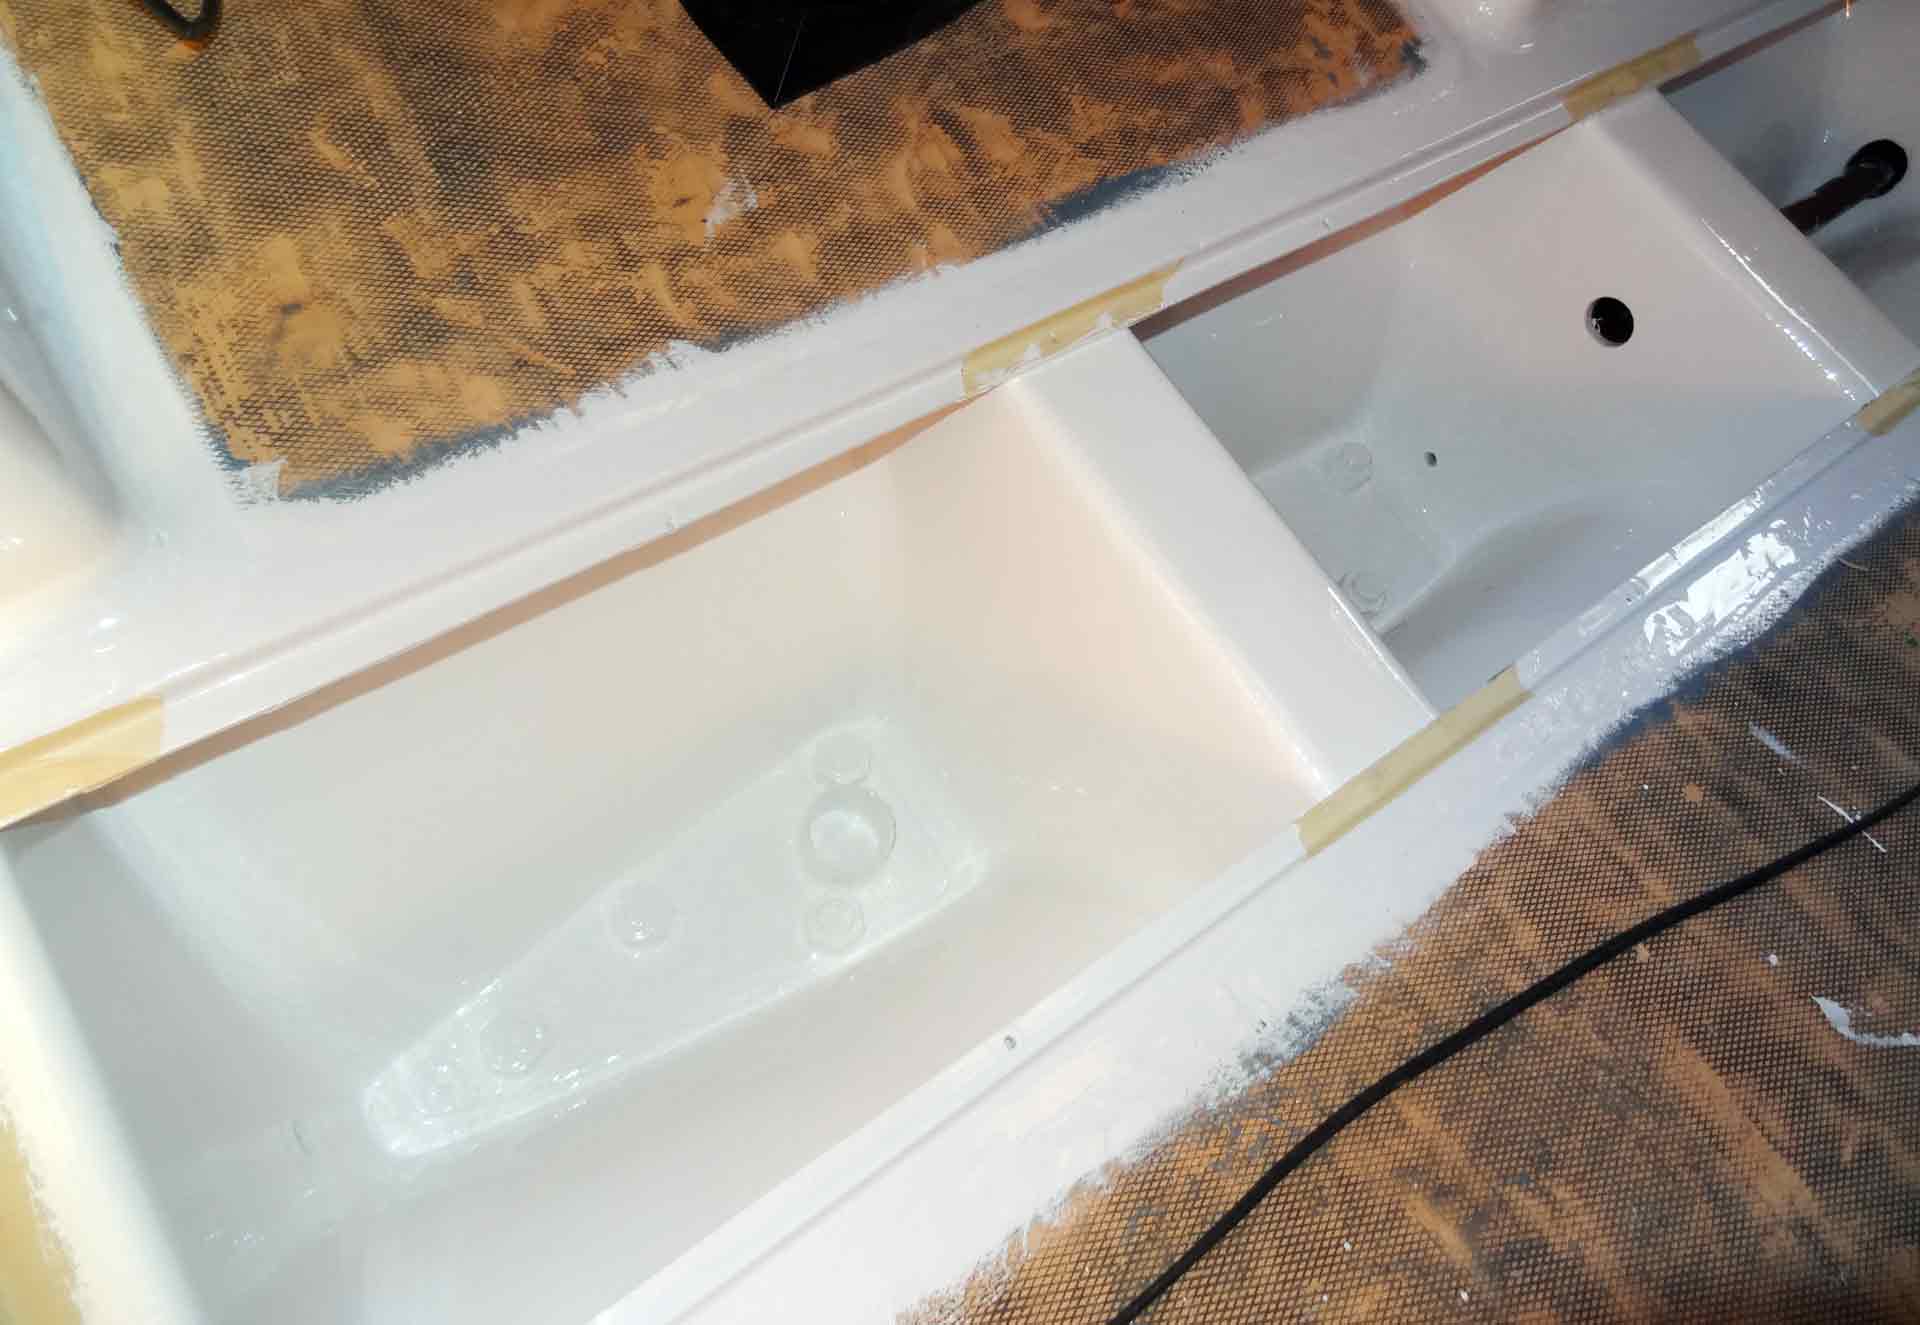
On the other hand I was astonished by how fast the paint dried: After half an hour the paint has hardened to a state where I could touch the surface without damaging the paint. Some two to three hours later the paint has dried to be touched safely. One day later the first layer was done. Eady to go for the second. But taking a look at the finish I instantly judged it appearing too depressing. The Grey suddenly didn´t appealed to me so I went on to paint the rest of the three layers in White which I thought was the better decision in terms of design.
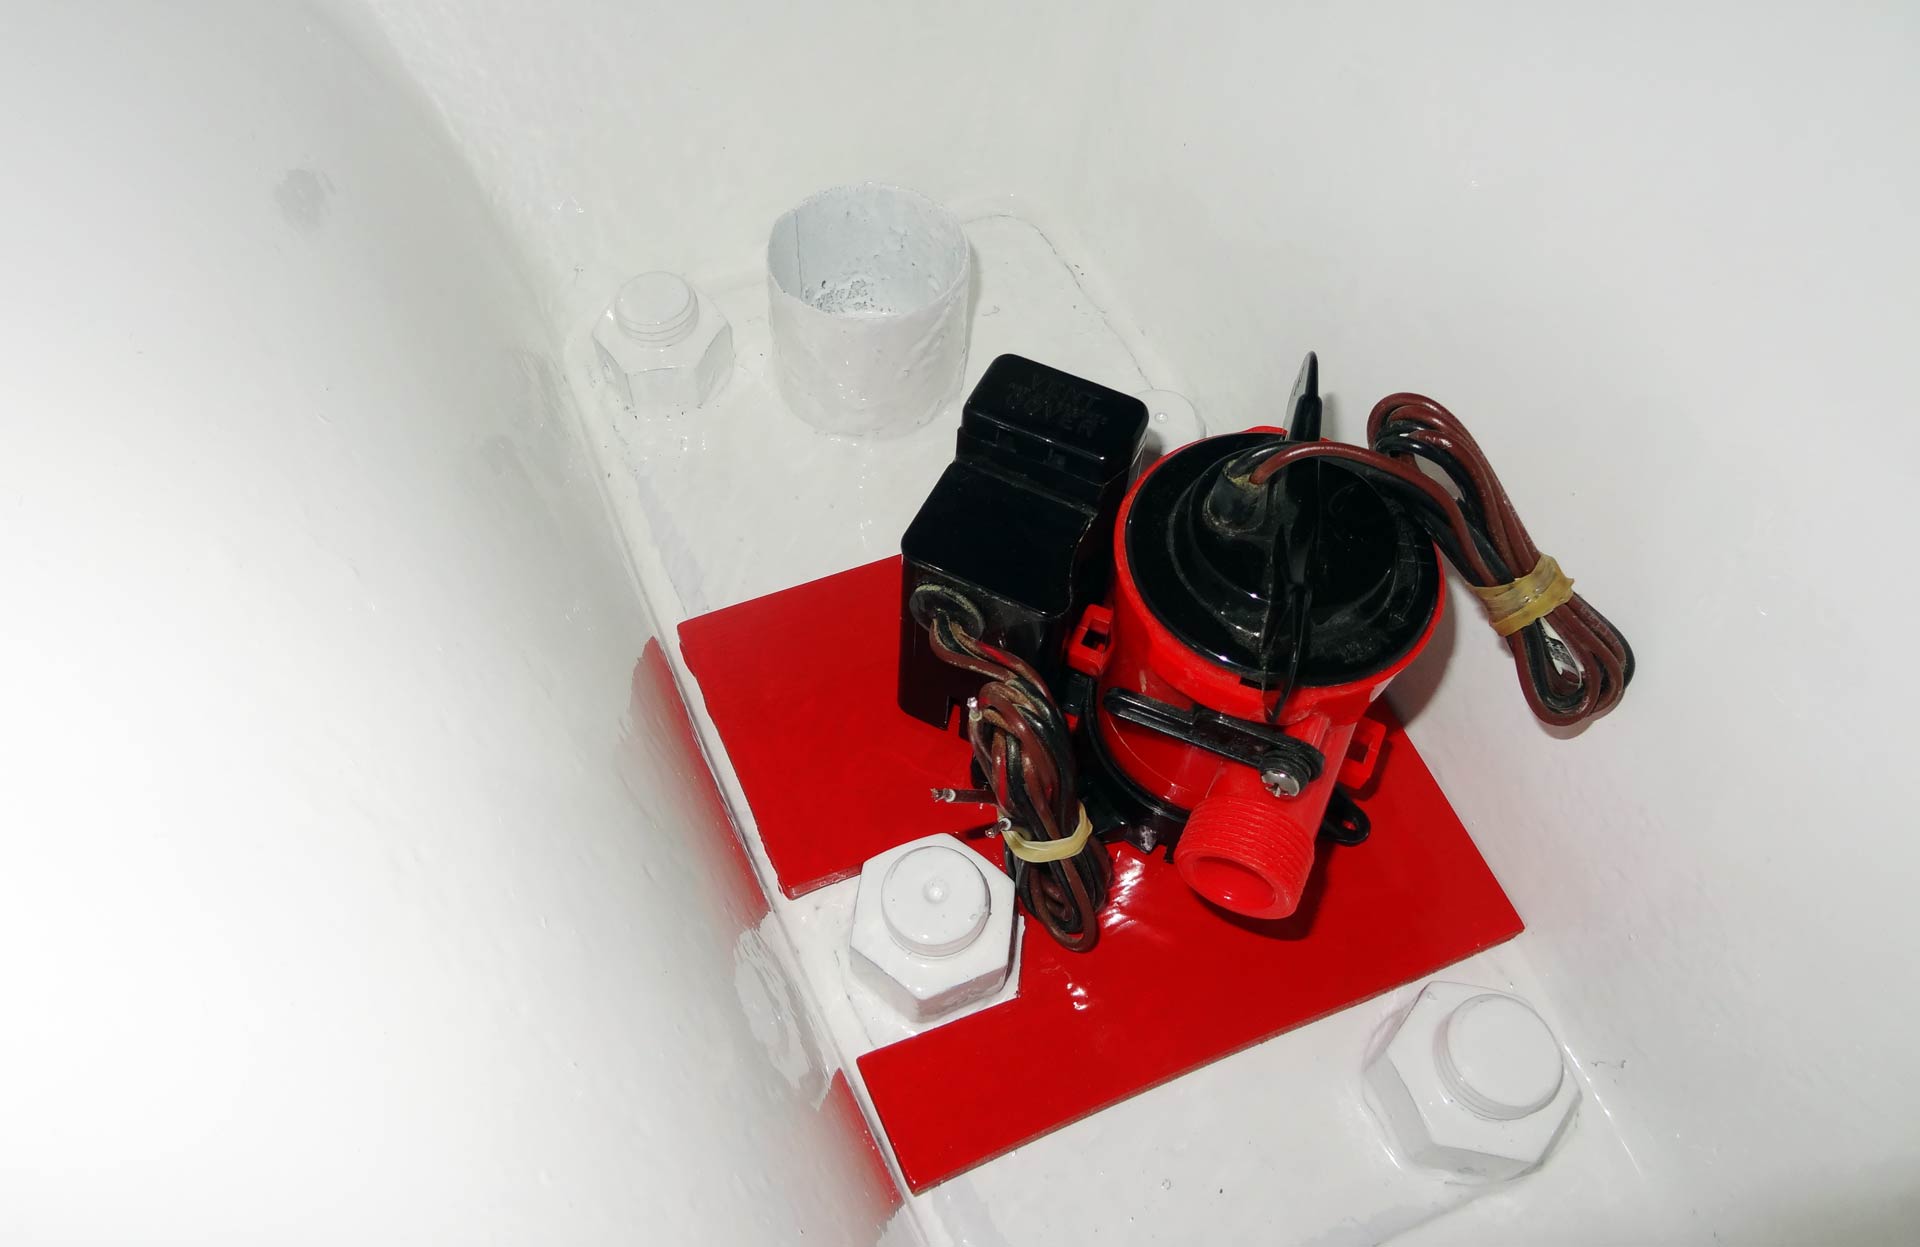
Bilge Drainage & Pump by Johnson.
Speaking of design it was a concern of importance to find a solution for the drainage of the bilge. My King´s Cruiser 33 has three separated bilge-chambers connected by tubes. I disposed of the old ones and got new pipes – step one. Secondly, the pump. OLIVIA has been outfitted with an electric bilge pump one had to switch on via the main panel. But this pump, I thought, was too small sized with its 30 liters per hour. I doubled that figure and bought a brand new bilge pump made by Johnson capable of doing 60 litres per hour. The new pump works automatically triggered by a float gauge which I think is better than having to switch on the pump manually. I think of additionally wiring a signal-horn to the gauge for an alarming signal when water fills the bilge and the pump starts working. (here´s an article on my plans for the electric refit)
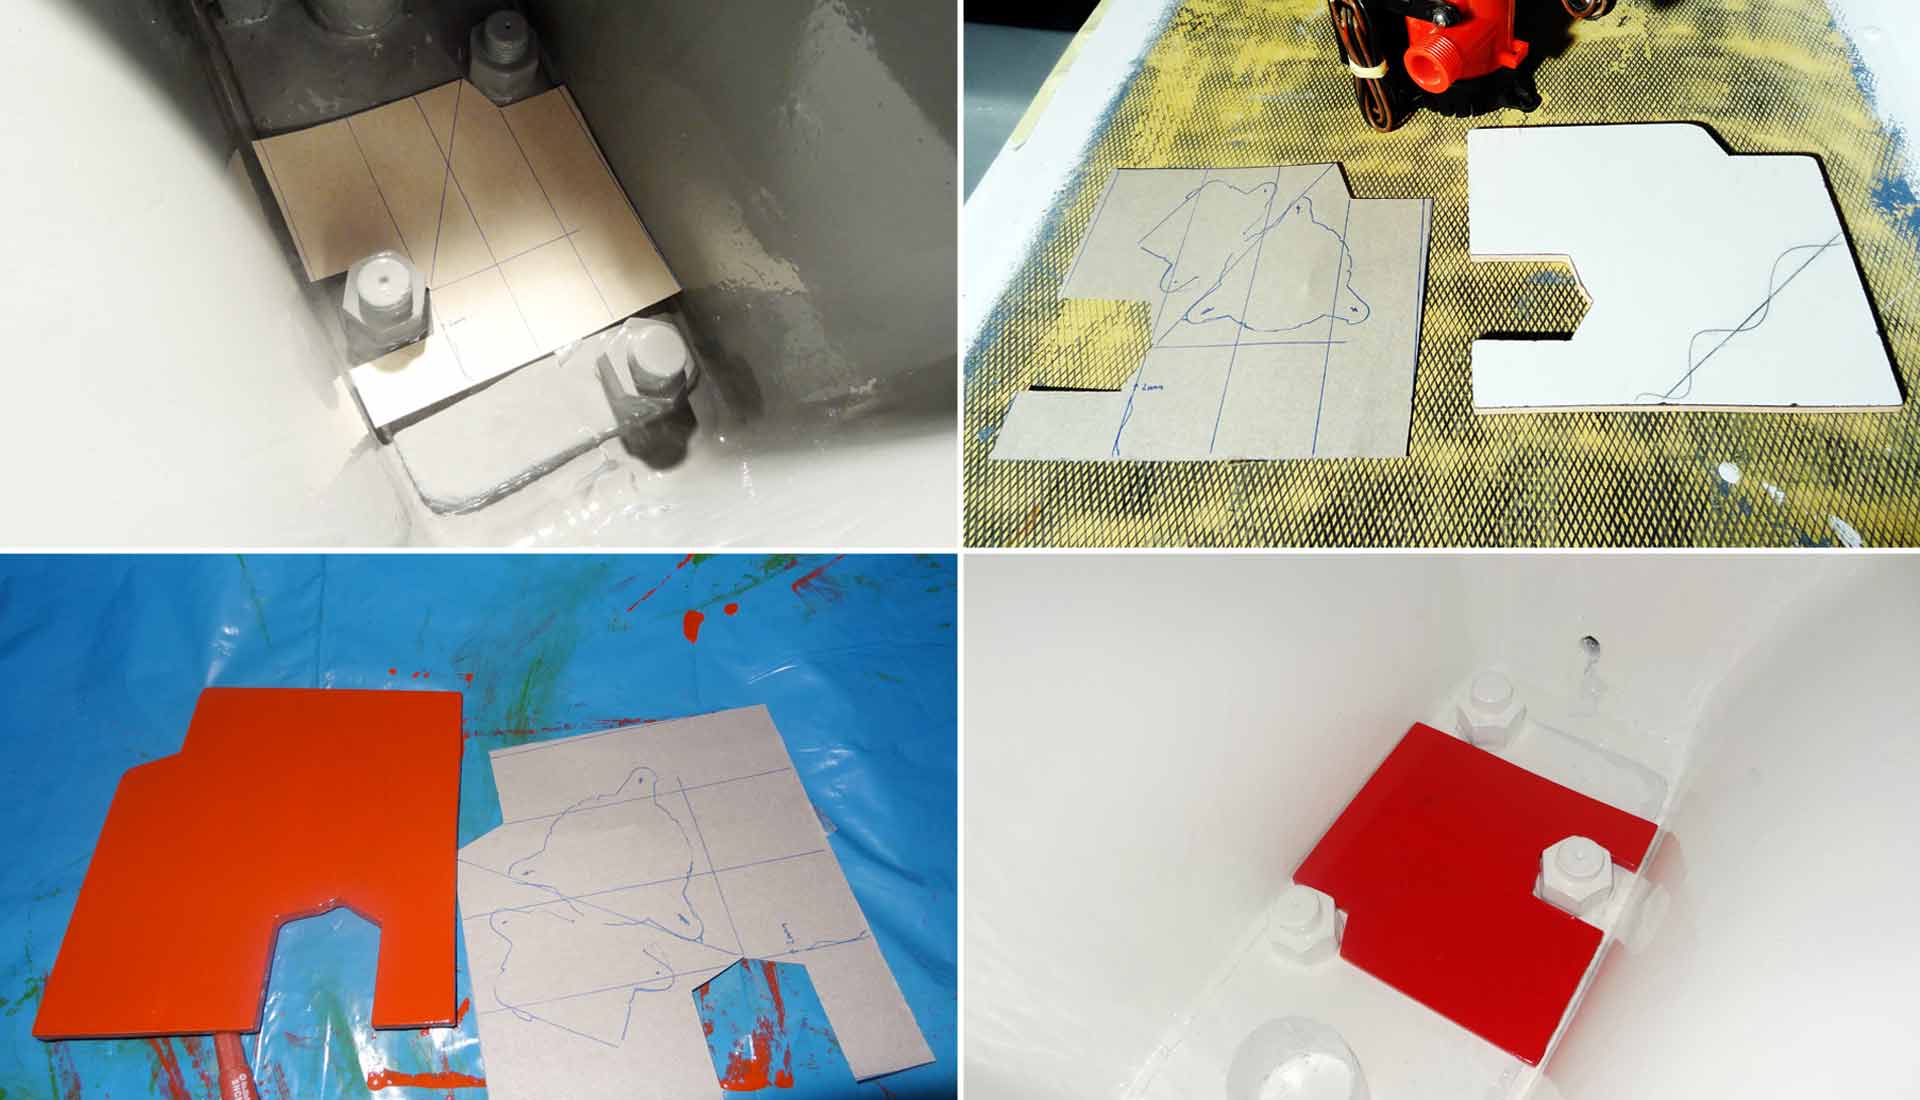
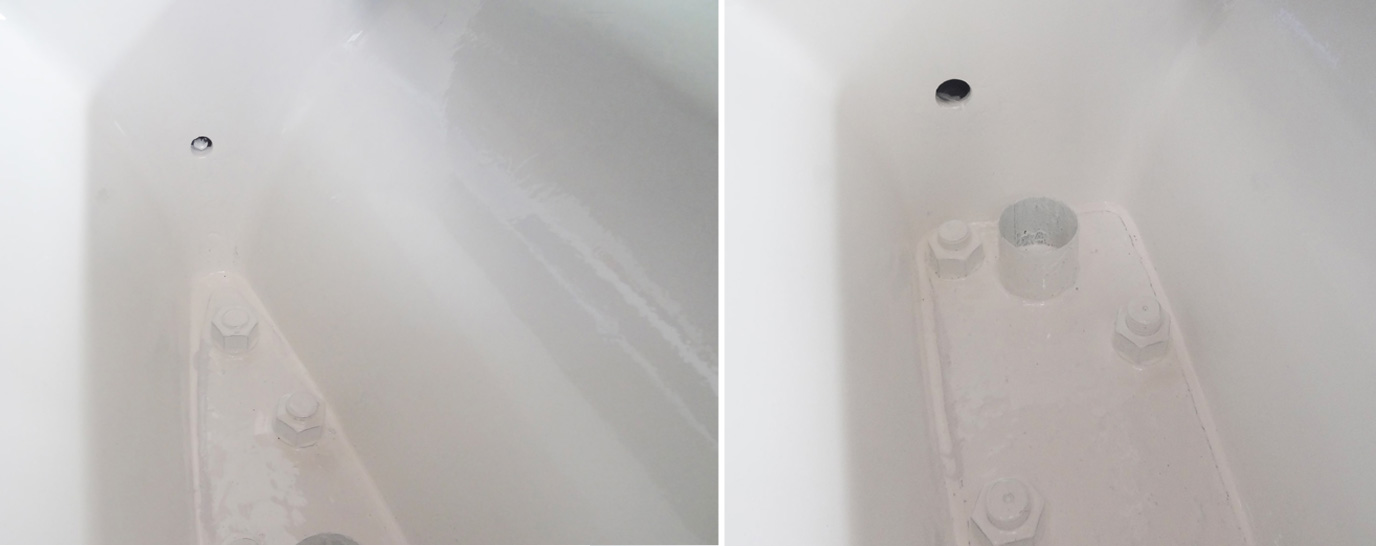
What was bothering me all the time when I was sailing SY OLIVIA in the past was that when heeling and riding the waves the bilge pump has been thrown around inside the bilge due to the fact that it hadn´t been fixed in some way to the bilge – it was just hanging at the flexible pipe swinging with each wave and making noise. To stop that, I decided to make a base to mount the pump onto. At first I constructed a pattern by using cardboard and scissors and placed it directly on the keel-counterplate between two bolts.
Cutting a solid piece of wood and painting it in alarming red I can now mount the pump onto and place it safely right in the deepest point of my yacht – no cling clang when cutting the waves anymore. Besides, when thinking of the drainage system I will add a manual bilge pump to OLIVIAs arsenal and inspect the old manual pumping system (which I think I cannot revive anymore) and additionally have four or five solid buckets for emptying the boat when everything else has failed as well.
Another Refit Milestone is done. What´s up next?
So. In the end, it has taken me some 17 net hours of working time spreading over a dozen weekends to get OLIVIAs bilge cleaned, primed and painted. In the end, the outcome is worth all the efforts: The bilge looks brand new, it smells like the boat has been built just recently and it fills me with pride to see my work shiny white.
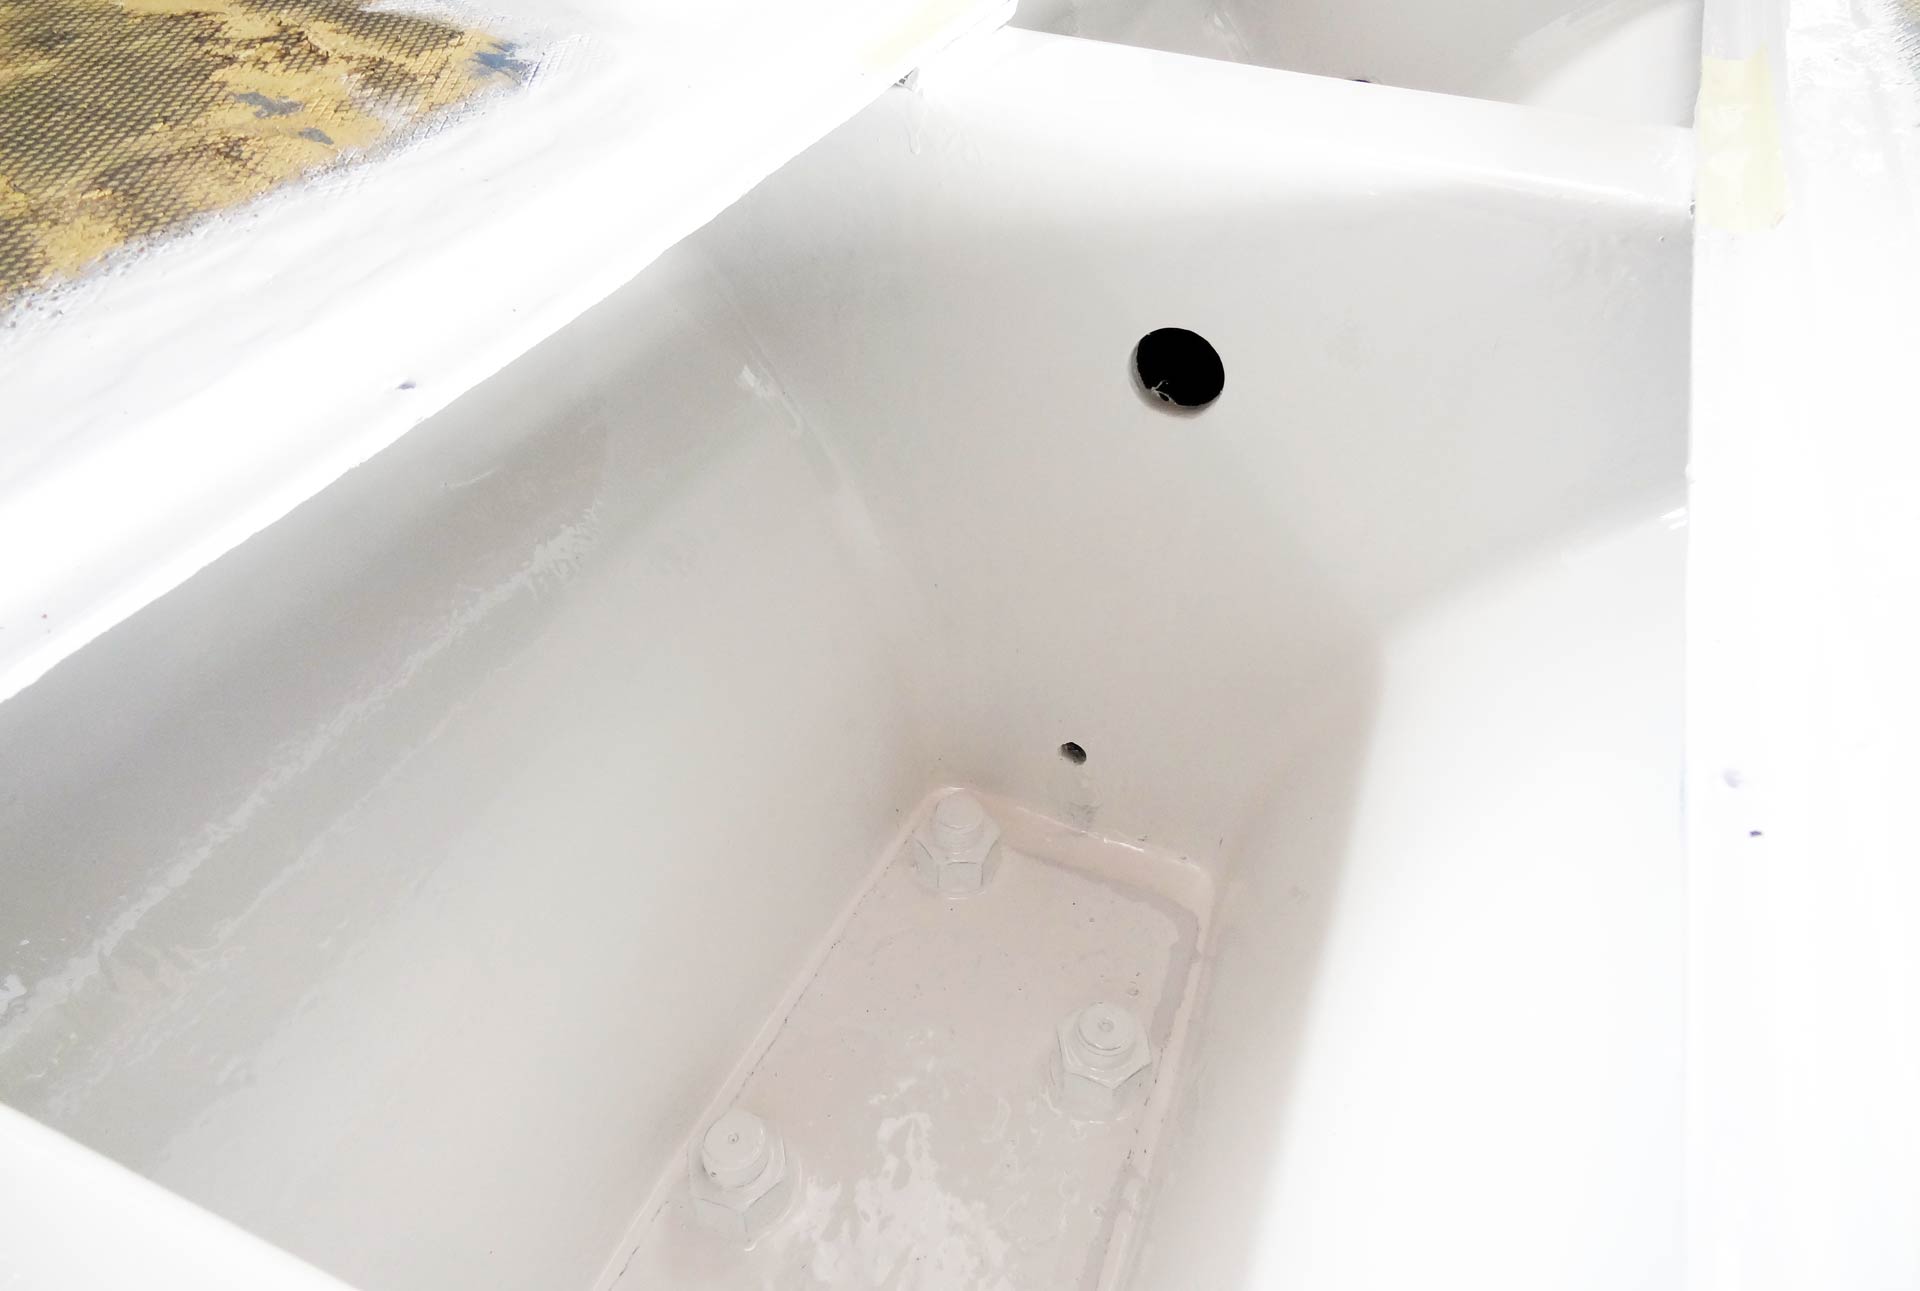
Nevertheless, that was just a small point compared to the work ahead: Currently I am working my way through the last items of the task “getting everything white inside” by installing new locks for the stowage cover-panels, doing the first woodworks in the head and bracing myself to go for the next big thing: Sanding and varnishing all the wooden stuff of the yacht. Surely work for months ahead. But today I look at the bilge and just say to myself: “Well done.”
Refitting a yacht is fun, exciting and very instructive. Besides: Here´s an article on another refit project, a retrospective on refurbishing SY ZIRKON.