Refitting an old sailing yacht is a tedious task: One item off the list, one another will emerge. That´s why one should triple the scheduled time and double the planned budget, as a saying goes. Up until now, the saying turned out to be true. Here´s an example. It´s just a detail, a tiny thing, not worth mentioning, one could argue. But … you know, that´s the problem with ideas: Once in your head, you cannot erase them. If not turned into reality, they´d taunting me forever.
Status Quo: What the Pre-Owners left undone

When I bought the King´s Cruiser 33 it was instantly clear that I had to do a refit. Not the heavy stuff like engine or structural things. As the pilot who was bringing SY OLIVIA to her new port of call near my home in Hamburg was saying: “It´s just cosmetic work.” Well. It might be just refurbishing surfaces, veneers, wood and painting GRP but … you can also get lost in it. Like this one: The small head´s porthole. One of the mere uglier modifications done by one of the pre-owners of my yacht.

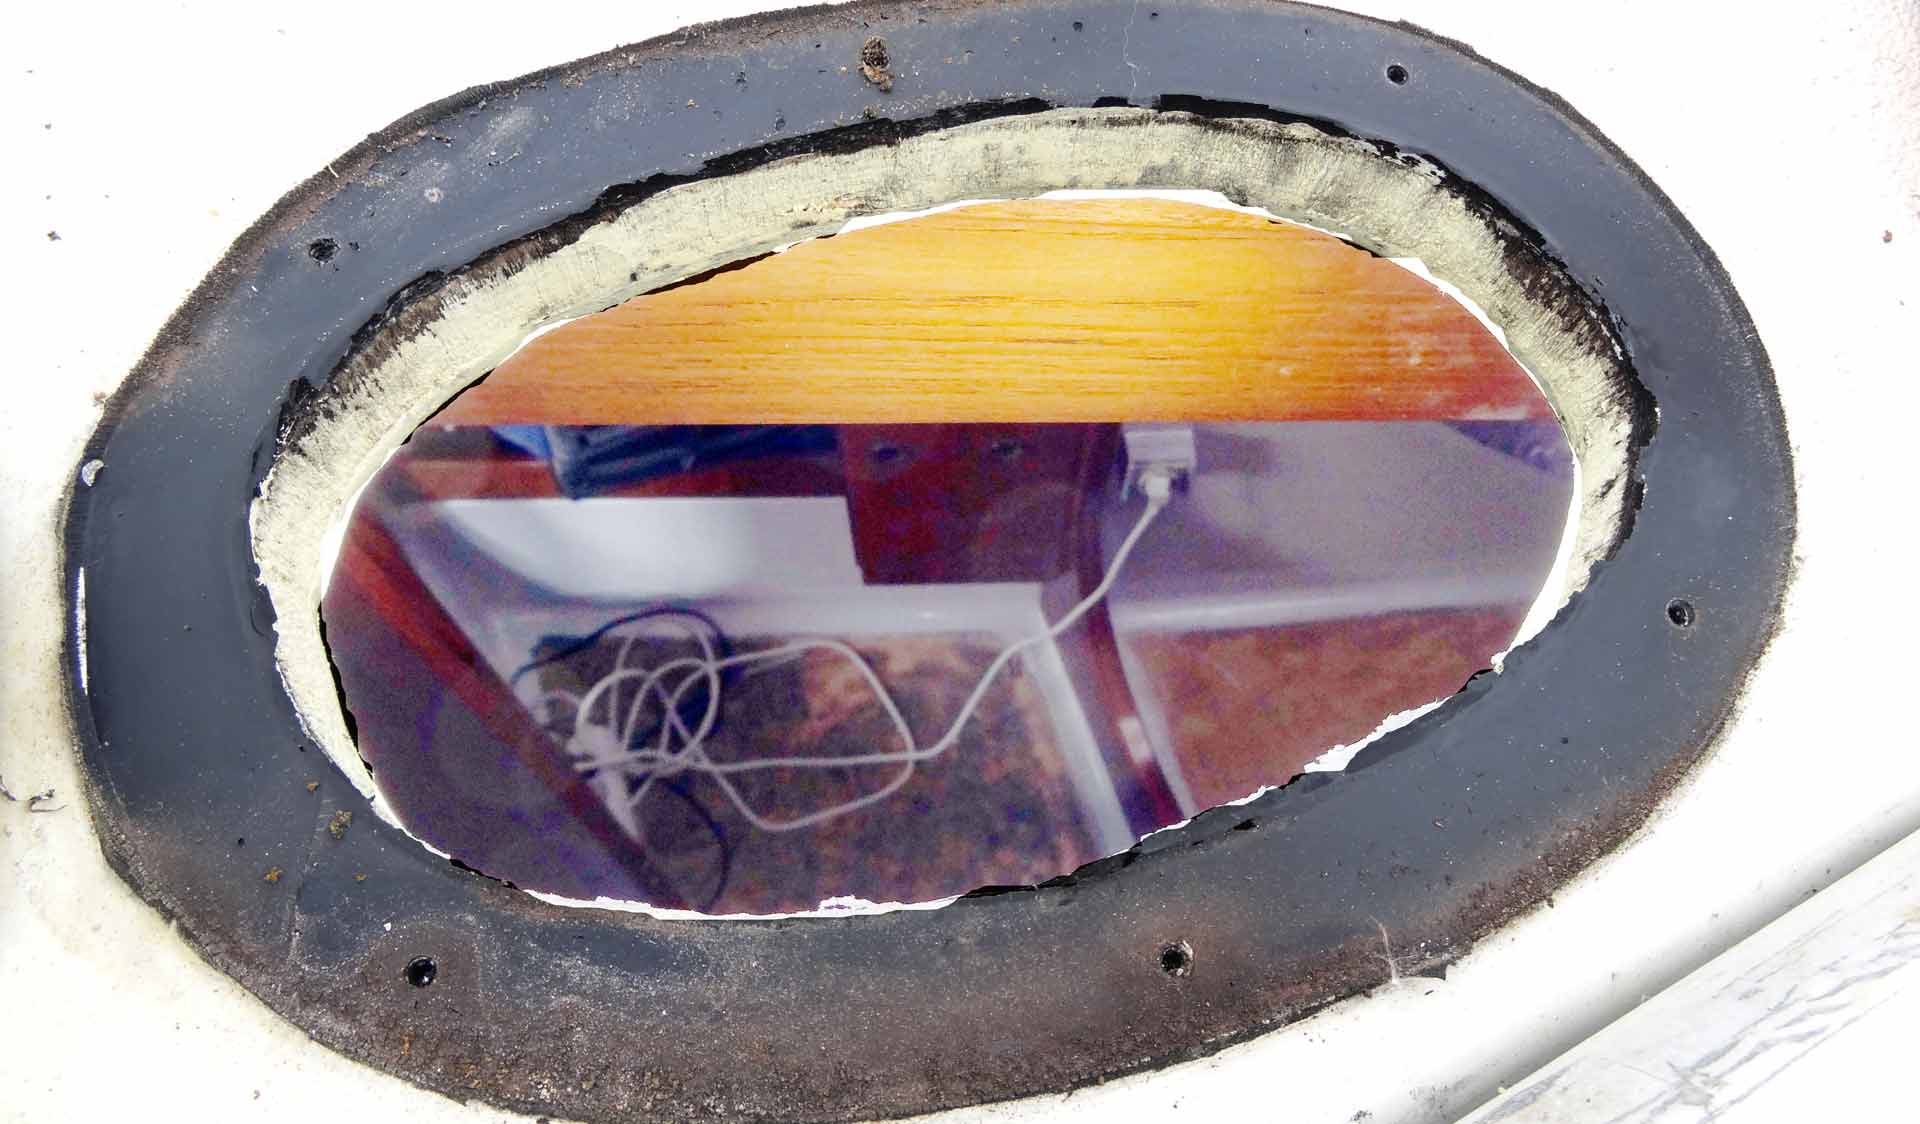
The original configuration of a King´s Cruiser 33 by Fiskars does not feature a porthole for the small head. Which is understandable, the head is cramped and tiny – why should someone spend more time here than necessary. Anyway, it was decided to add a porthole. Well: Instead of going for a real porthole and trying to fit it to the hull, they´ve just bolted an oval piece of plexiglass to the deck.

Despite the fact that now, some 20 or more years after installation of that thing the glass is ruined, it really looks … let´s call it “awkward”. Or to state the truth: It´s damn ugly. Also, the effect inside in the head is marginal: Since the plexiglass is milked, the amount of light coming into the head is not that overwhelming. What bothers me most: By cutting through the sandwich deck and just painting the cut white one has a clear view on the GRP/Balsa-core layers which also adds an unprofessional, ugly note.
I have to change that!
Making an oval Teak Veneer for the Porthole
At first I was trying if I could widen the porthole to fit the smallest available which unfortunately turned out to be impossible since the hole is placed 1.5 centimeters too much to the right hand side right into a bending in the hull: I would have to manufacture a very elaborate construction. And I am not as elaborate as I would have to. Next consideration was to simply close the hole and go for the original no-porthole configuration of the King´s Cruiser 33. Which I skipped as well since my OLIVIA is sailing with her ugly porthole for many, many years now and who I am to close it? I want to preserve her character as much as I can and this opening in the head is part of her appearance. Well, so I decided to refurbish this construction.
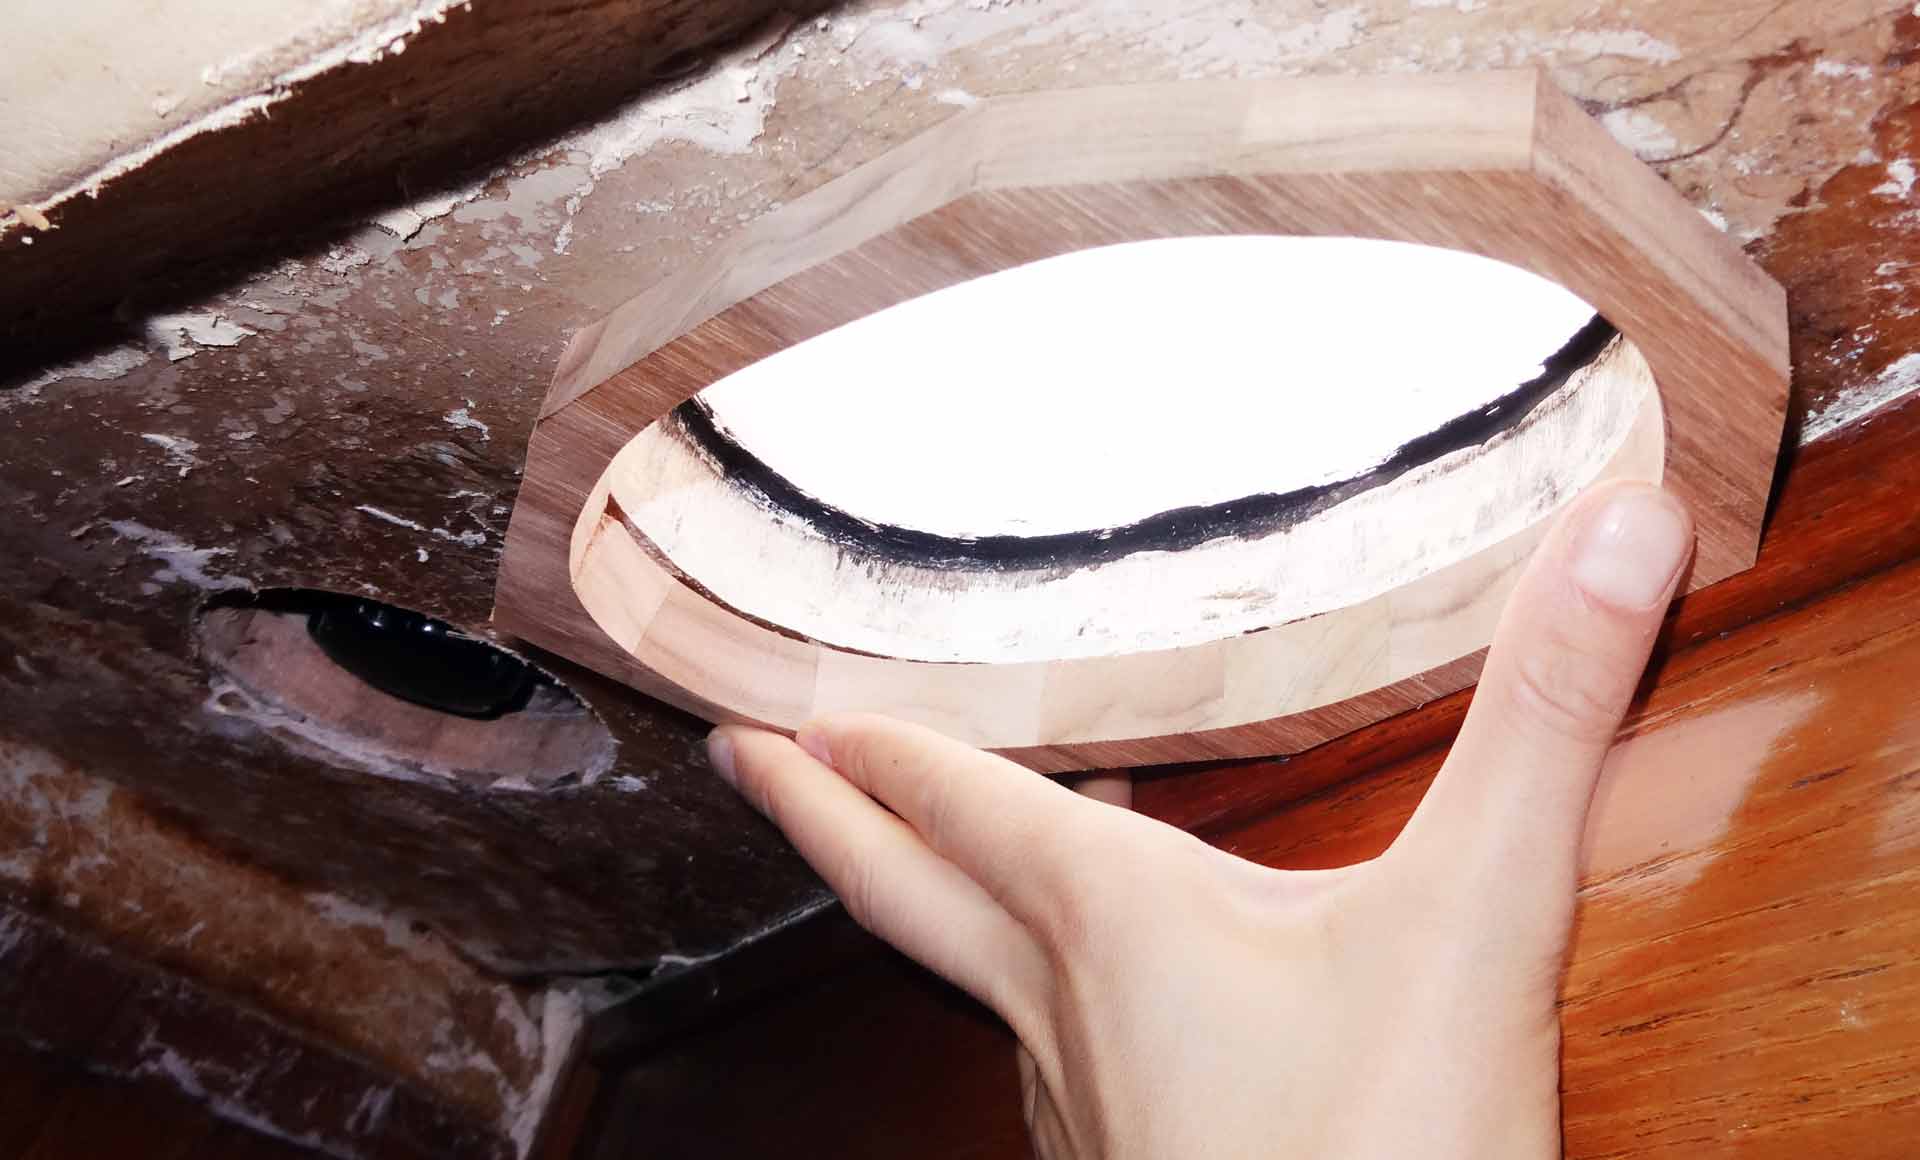
As I have a lot of surplus offcut massive Teak left from my woodworks done for the head and the chart table I was making a master plate of the oval form of the porthole´s size and cut by means of saw a ring of Teak. Placed it onto the hole to see if it was right – it was – and smoothed it´s outward edges.
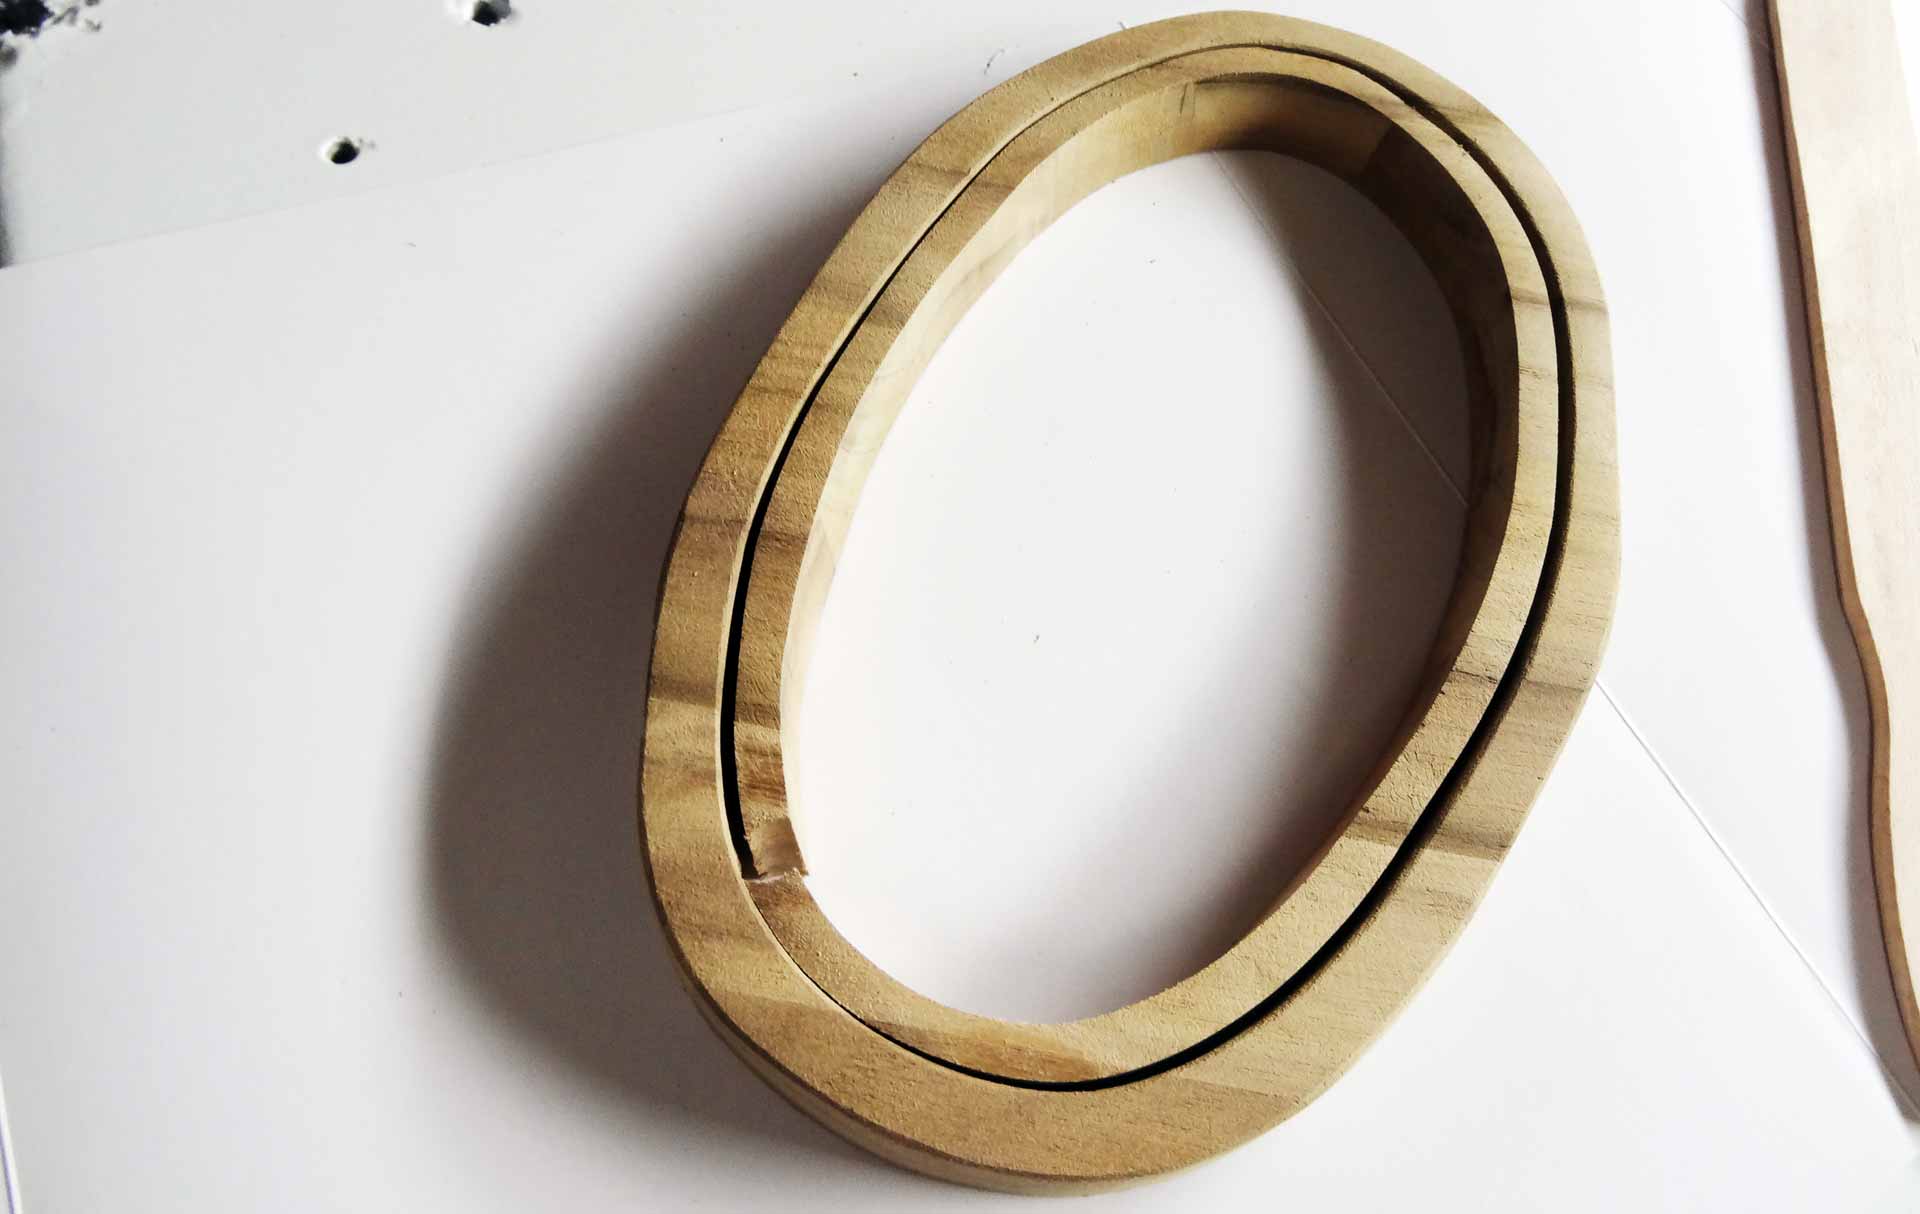
Then I cut out another ring – the inner one that would act as veneer for the sandwich core – and also smoothed the surfaces of both rings. I am astonished that the rings seem to be stable although they are just made of many individual glue laminated parts of Teak. By cutting out a 0.6 millimeter wide ring I wasn´t so sure if the glue would still hold together the parts. But it does. That´s what I call high quality material! By the way, here is where I do buy the massive Teak boards, of course with FSC-signet. Using two rings has another advantage too: The diameter of the porthole will be smaller thus enabling me to use clear plexiglass: This will maximize the light yield and minimize chances for somebody to have a quick, forbidden look into the head.
Varnishing the Teak Veneer and adding a Final Touch
Next is a quick check of the inner ring to see if the fitting is right. The ring itself has a height of 1.8 centimeters – that´s unfortunately some 3 to 4 millimeters less than the thickness of the sandwich roofing construction, but I think I will be able to have the ring set in in a way that the seam could be filled with Pantera or Sika-compound.
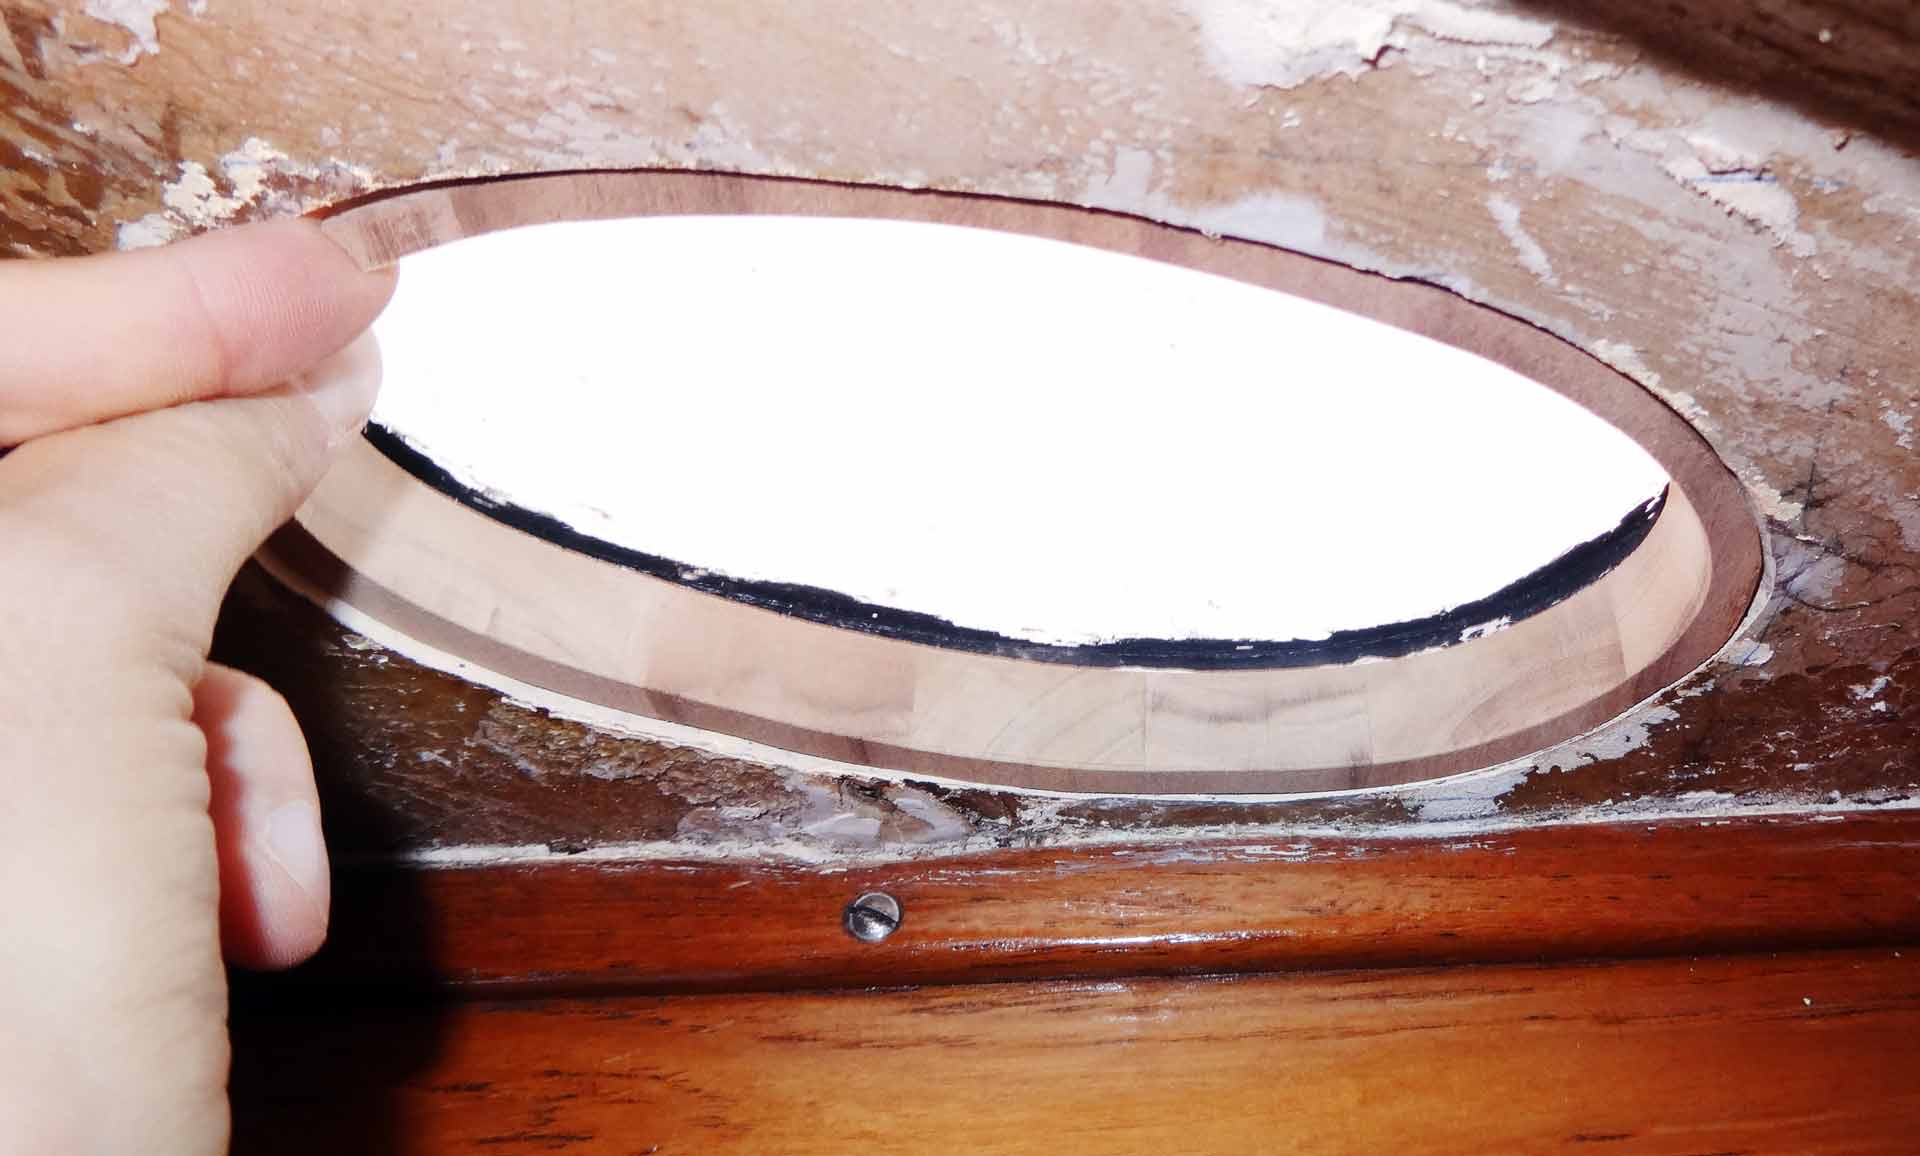
It looks awesome! It´s just a tiny details and one could ask why I make such a fuzz about this very unimportant thing. But as I said earlier, this spot was an eyesore from the first day on and now I´ve come up with a solution for that. Besides: By mounting the two rings I can test my proceedings in refurbishing the ceiling construction in this small cabin rather than in the forepeak or saloon.

Last step is varnishing the Teak fittings to achieve the spectacular look by teasing out the texture and true color of the timber. As it is the case with the veneers and fittings of the pumping toilet of the head, I guess the porthole will be a tiny but nice detail to have a look at when spending some time sitting in this all-new cabin.

What´s Next in the Yacht Refit?
Next steps will be of great importance: I am going to ready all the wooden surfaces for varnishing. That´s no less than 10 bigger parts of integral wooden fittings of the boat, all in all 10 steps to get the bulkheads sanded and readied for varnishing – starting with the head for the big test. After that, along with a new ceiling construction (of which I still don´t have a clue how to make it best) will be done including the new porthole.
And then, I guess it´s a three to four week work, the smaller wooden fittings like panels, cupboards, lockers and stuff will be sanded and varnished and re-installed to the boat, new ceiling and wall-panels as a follow-up job, new decking and – voila – it´s time to finally go for the new electric wiring.
But that´s still future talk.
Black Hole Refit? Here´s an interview with a skipper´s girlfriend on their huge yacht refit project
This is how it all started: Buying a second hand yacht and what should be considered
All articles to the Kings Cruiser 33 refit can be browsed here