What happened up until now? The old navigation station of the King´s Cruiser 33 was a kind of worn down when I´ve bought the ship last year: Although the original chart table of SY OLIVIA has been already replaced by and elaborately made folding table, it sadly was not more than a shadow of its glorious days back in the Seventies. I had to replace it.
So I´ve bought a huge board made of massive teak, 1.60 x 0.75 meters all in all, of course legally cultured and FSC-labelled, untreated nice 1.8 centimeters thick and flavorsome Teak. Step one was taking measures of “my” perfect chart table and sawing the tabletop. An initial fitting proved that I initially went for just the right dimensions. (Here´s step 1 of building the perfect chart table)

I abstained from having another foldable table for I don´t think that I am going to use the quarter berth all too much: No need for such a mechanism. Keep it simple. Anyway, there are some different plans how to utilize the space of quarter berth so that there was no need for the folding stuff.
But as good as the tabletop was looking, I haven´t been all too happy with this configuration as there was something missing: Doesn´t this lone tabletop appear a bit piddly? Well, this article shows how I´ve built my perfect chart table including a chart-compartment, binoculars rack and boxes for pencils, rulers and dividers.
The Perfect Chart Table. My Plans.
At home, one evening when nothing really exciting was in TV (as always) I am scribbling with my pencil and think I´ve found a shape for the new chart table that would perfectly fit into the King´s Cruiser 33 sailing yacht. To draw some inspiration I browsed the internet for chart table-solutions on other yachts and found some very nice examples by Luffe yachts or Faurby yachts, two Danish brands I absolutely admire for their high quality interior design.
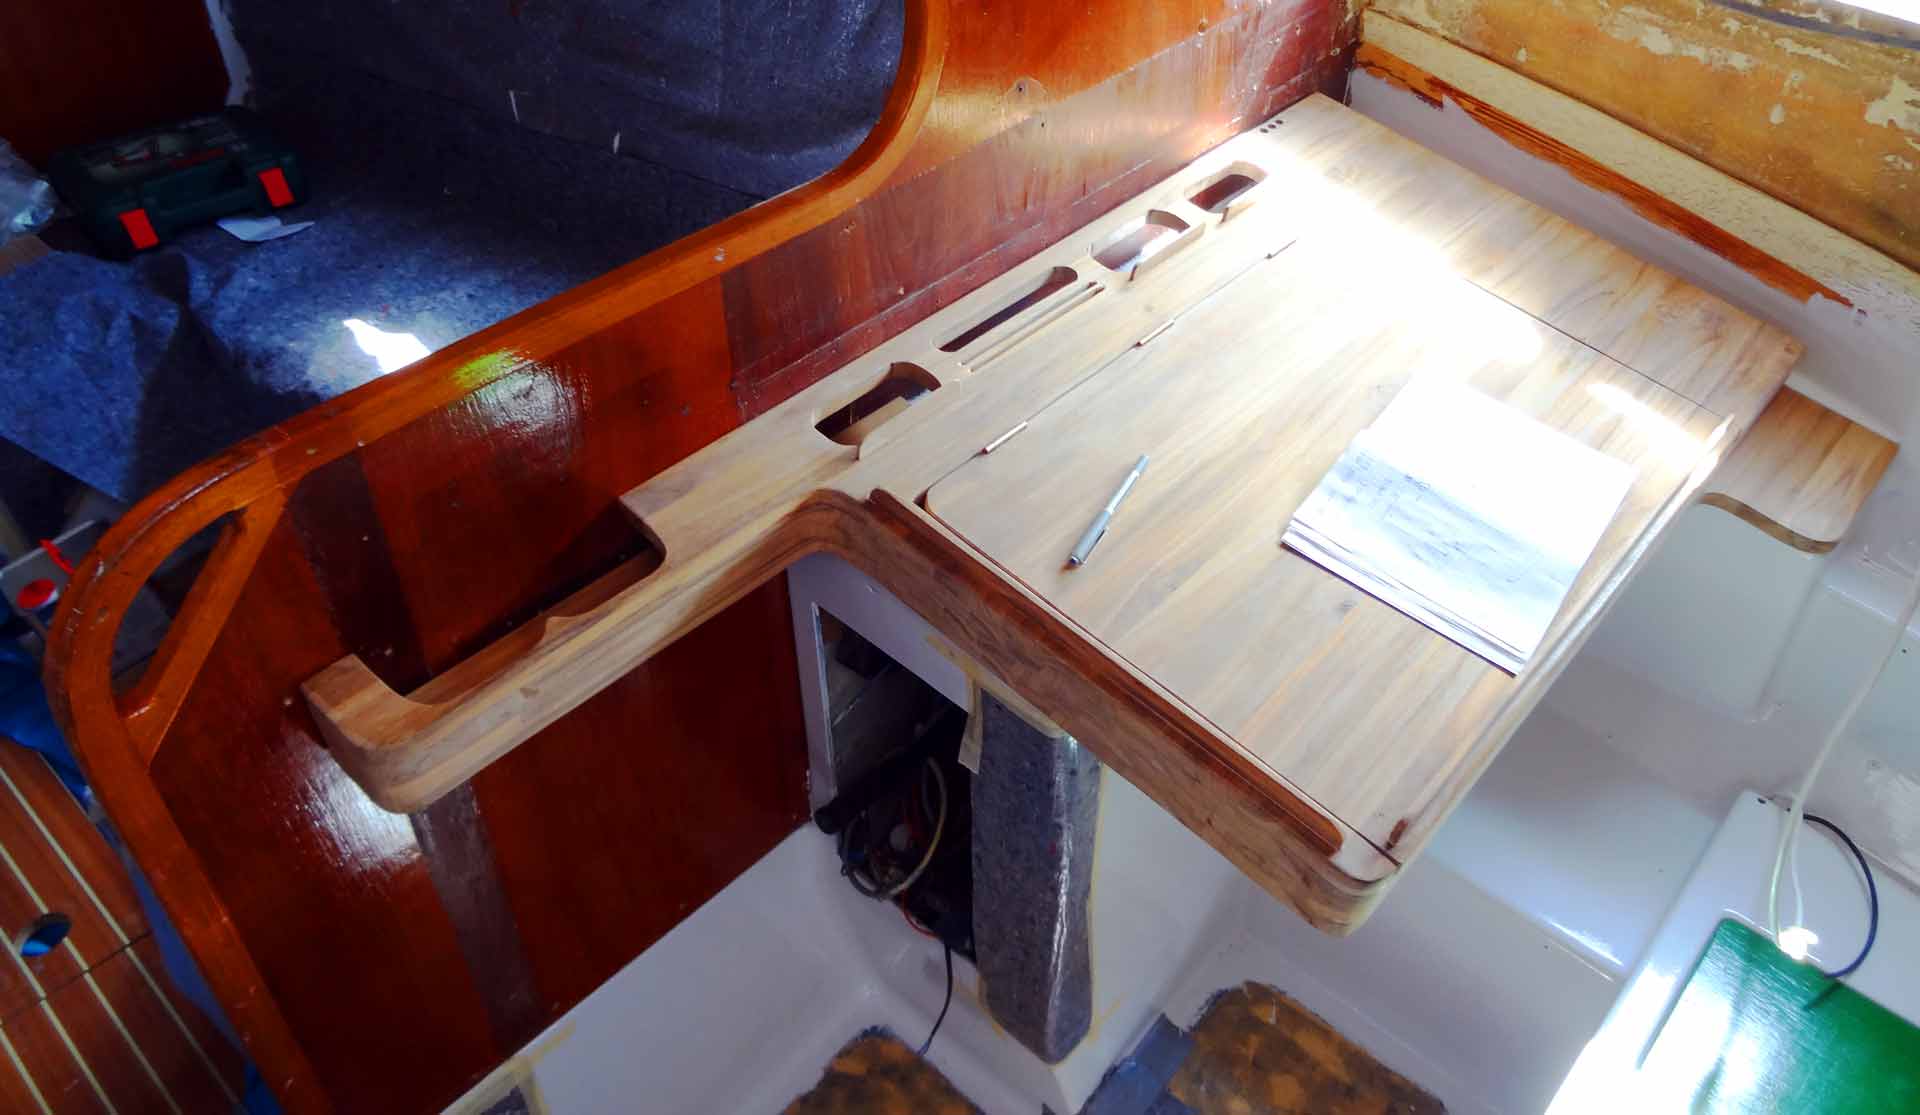
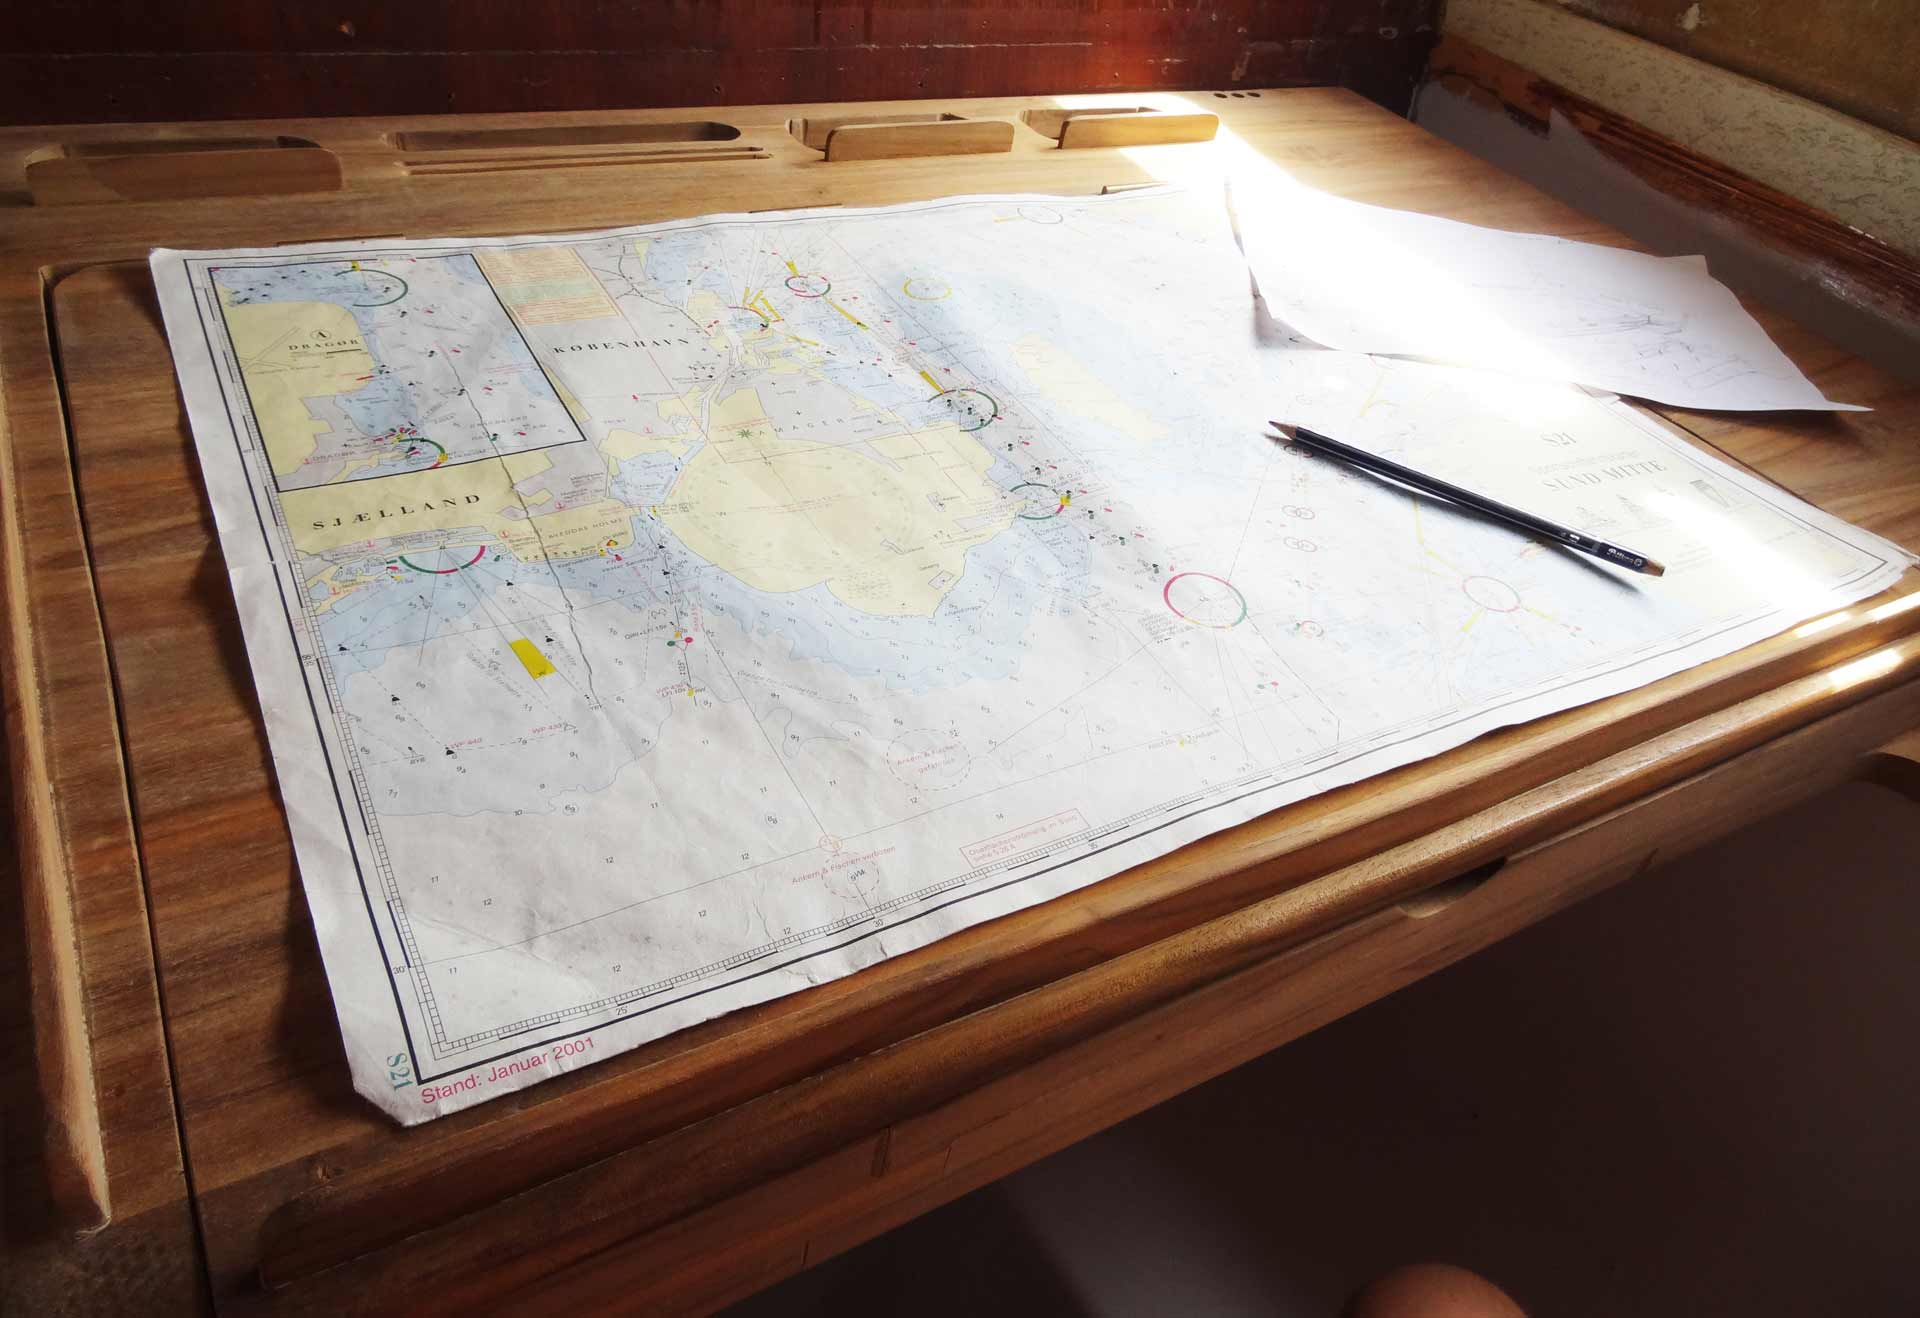
I´m sketching a chart table that would attract me: There´s a big cover in the table top, foldable, to open the marine charts rack underneath. Measuring some nautical charts I do have stored at home it was clear which size I´d have to go for.
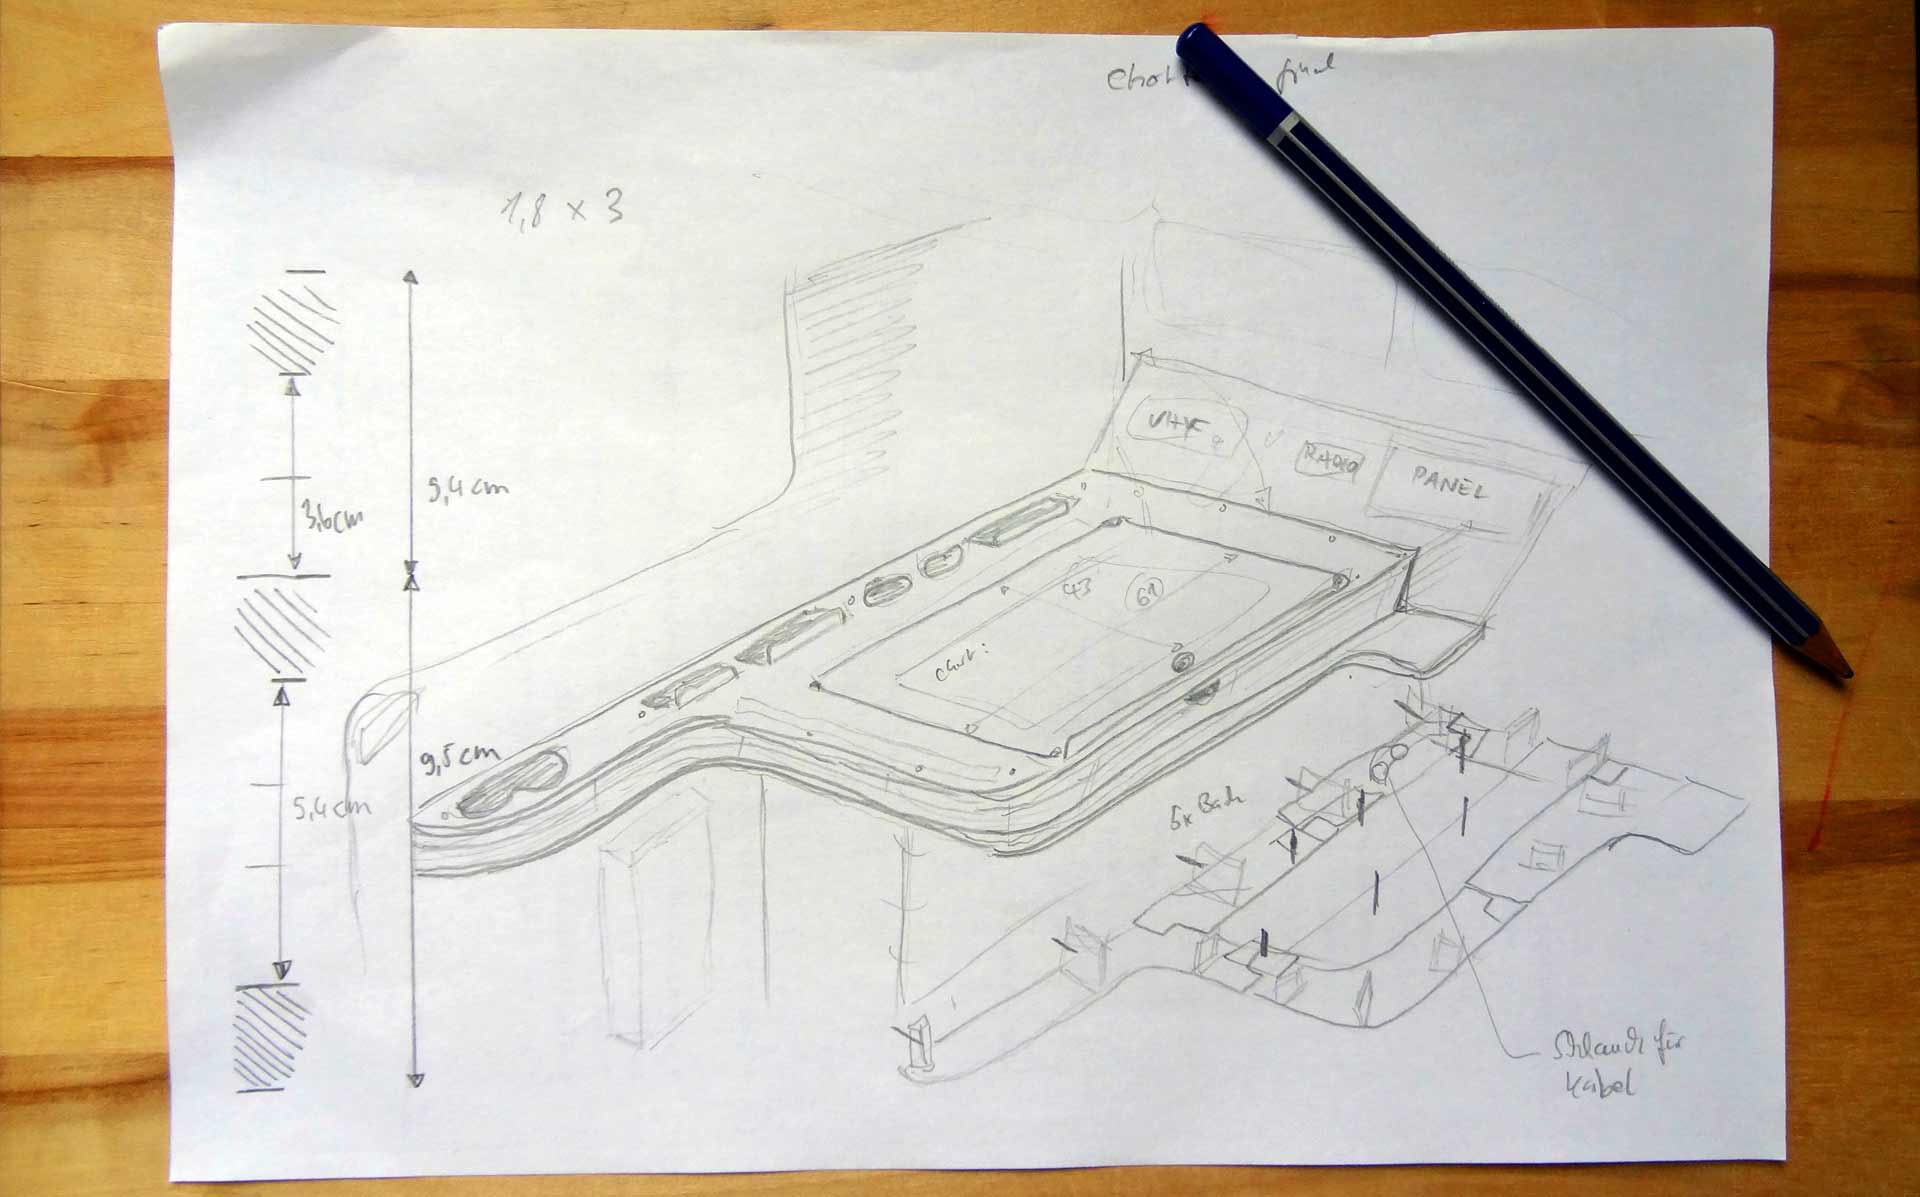
On the left end side there´s a wide arm reaching nearly one meter from the original tabletop all along the saloon bulkhead: It serves two main purposes. First, I want to have a rack for storing the ship´s binoculars. That´s just the perfect spot: Safe but easily reachable when in need. Secondly, this arm will function as transverse strengthening for the thin saloon bulkhead. I am going to bolt the bulkhead onto the arm of the chart table to achieve more stability (this was initially done by a large upright wooden column, but I judged that this column destroys the roomy effect of the whole interior). An then there are a lot of small boxes and slits to put away pencils, rulers and dividers for the navigational chartwork.
Taking additional measurements the main question was: How high would I have to make the whole construction? A nautical chart isn´t that thick and even a whole set of charts won´t be piling up higher than 1.5 centimeters. Given that I´d like to have a marina guide stored here and maybe another guide on sailing directions on that area, let´s say a height of some 3 centimeters for the chart rack will comfortably do. Having a material thickness of 1.8 centimeters it´s two of them on top of each other which will create some 3.6 centimeters space. That will more than do.
A nice sketch. A great plan. Let´s go to work!
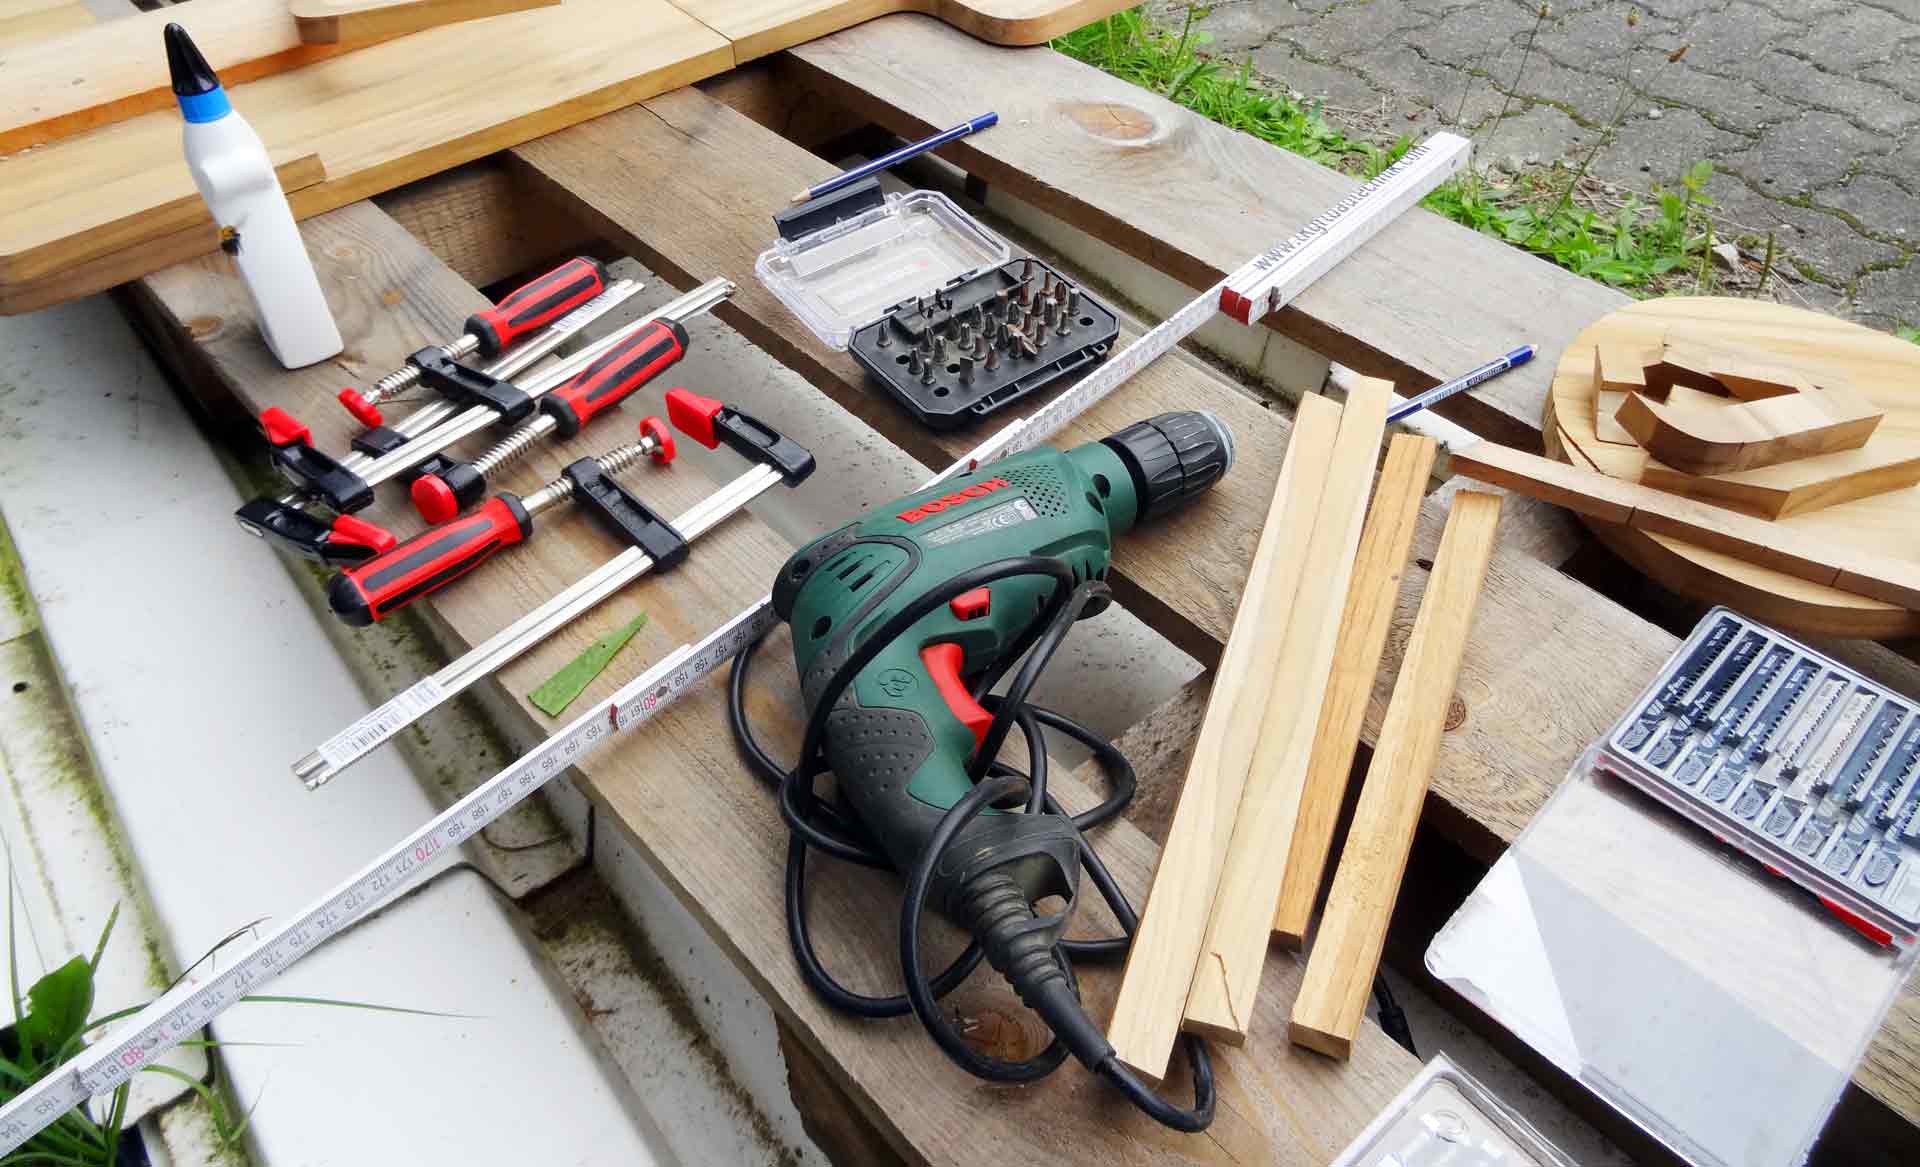
As I arrive at my yacht I am preparing the tools: Pad saw, drilling machine, sander, some bar clamps and high quality wood glue are the key tools to work with here. Some stainless nuts and bolts and the cordless screwdriver complete the stack of tools here. At first I am just transferring the lines of the tabletop onto a second one that will act as base for the chart table. Sawing it and removing the flashes and here we go: Two tabletops. Now the tricky part is on the list.
Making Round Edges
All interior fittings on ships should have rounded edges. Why´s that? It´s a safety feature: When heeling of in heavy moving seas there´s always the possibility of losing one´s balance and being thrown off feet. Then you don´t want to hit a sharp edge with your ribcage or worse, your head. So rounded edges is a must. Besides: It just has a classic, awesome ship-like look. But how can I manufacture rounded edges out of a plate of massive Teak?
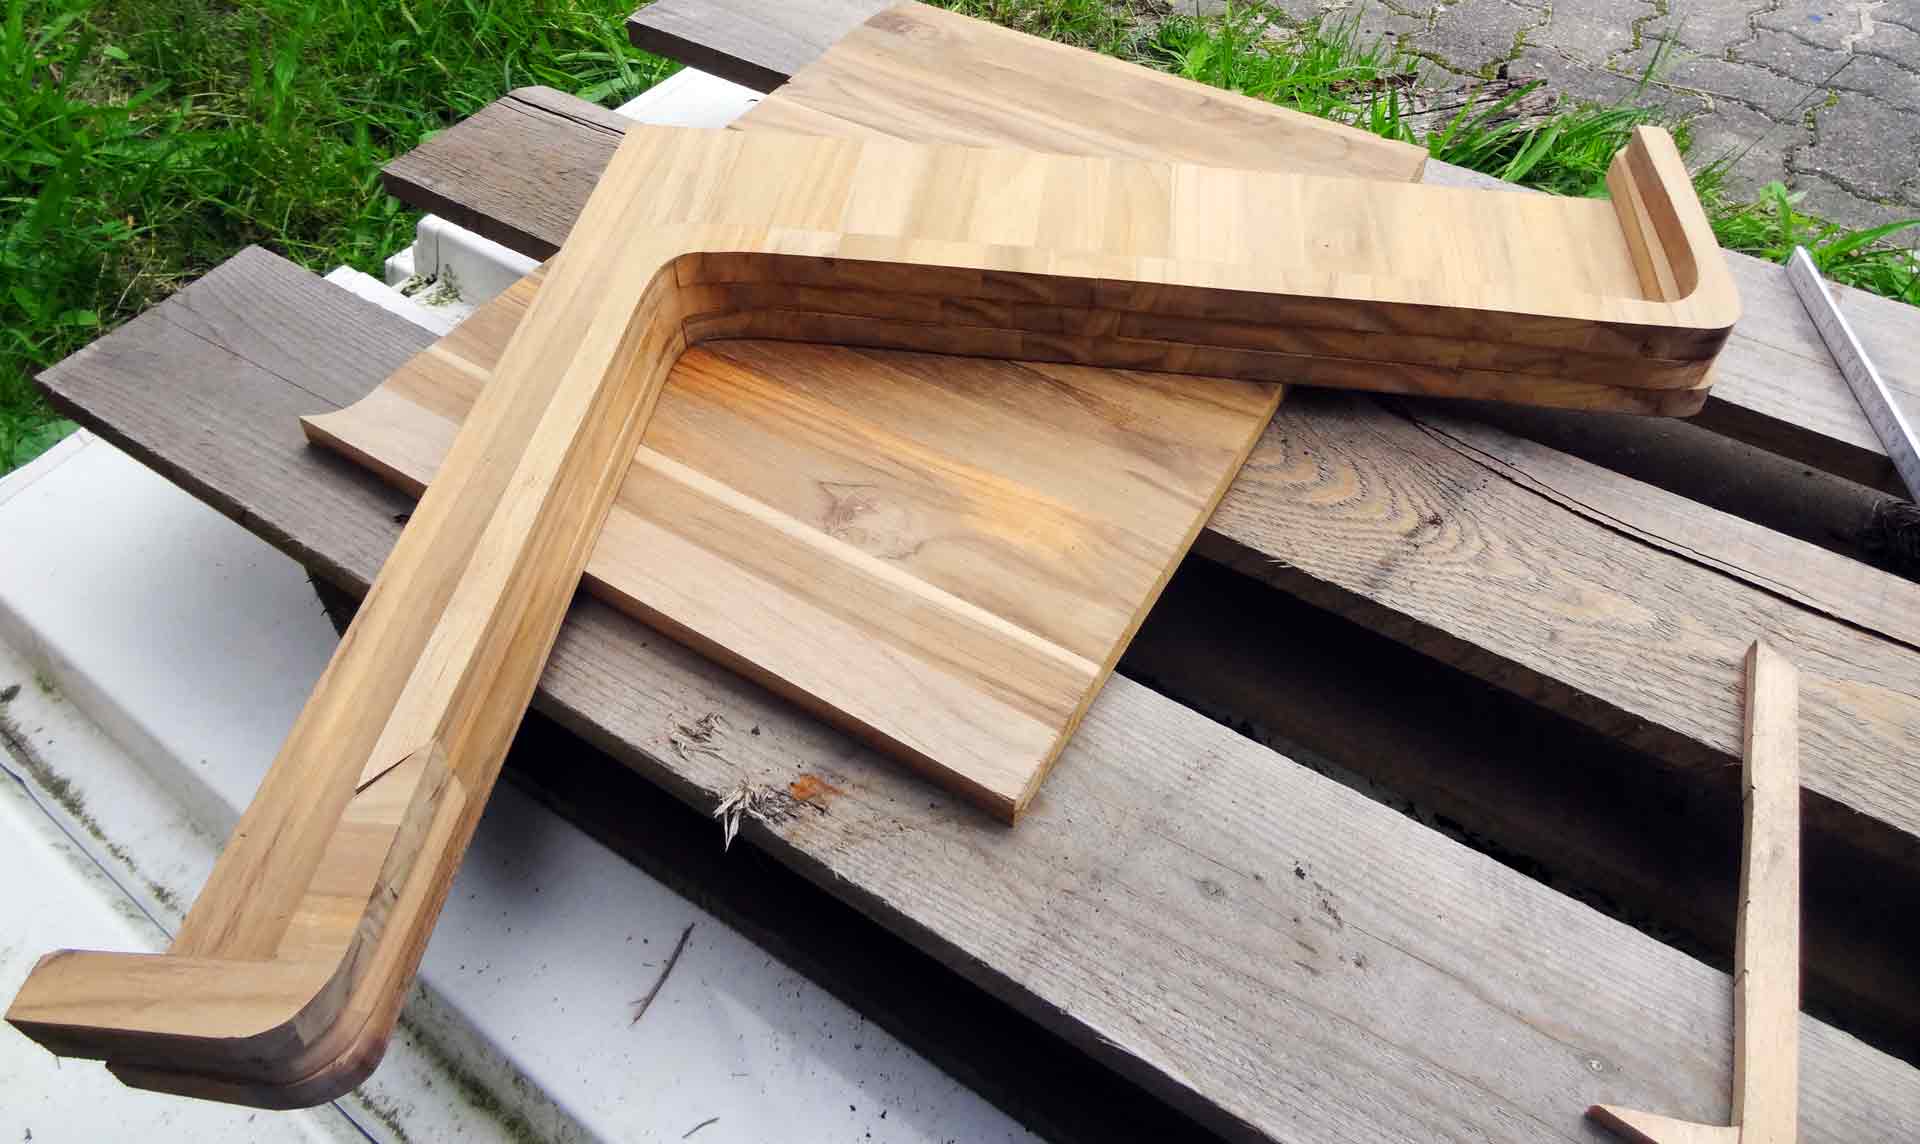
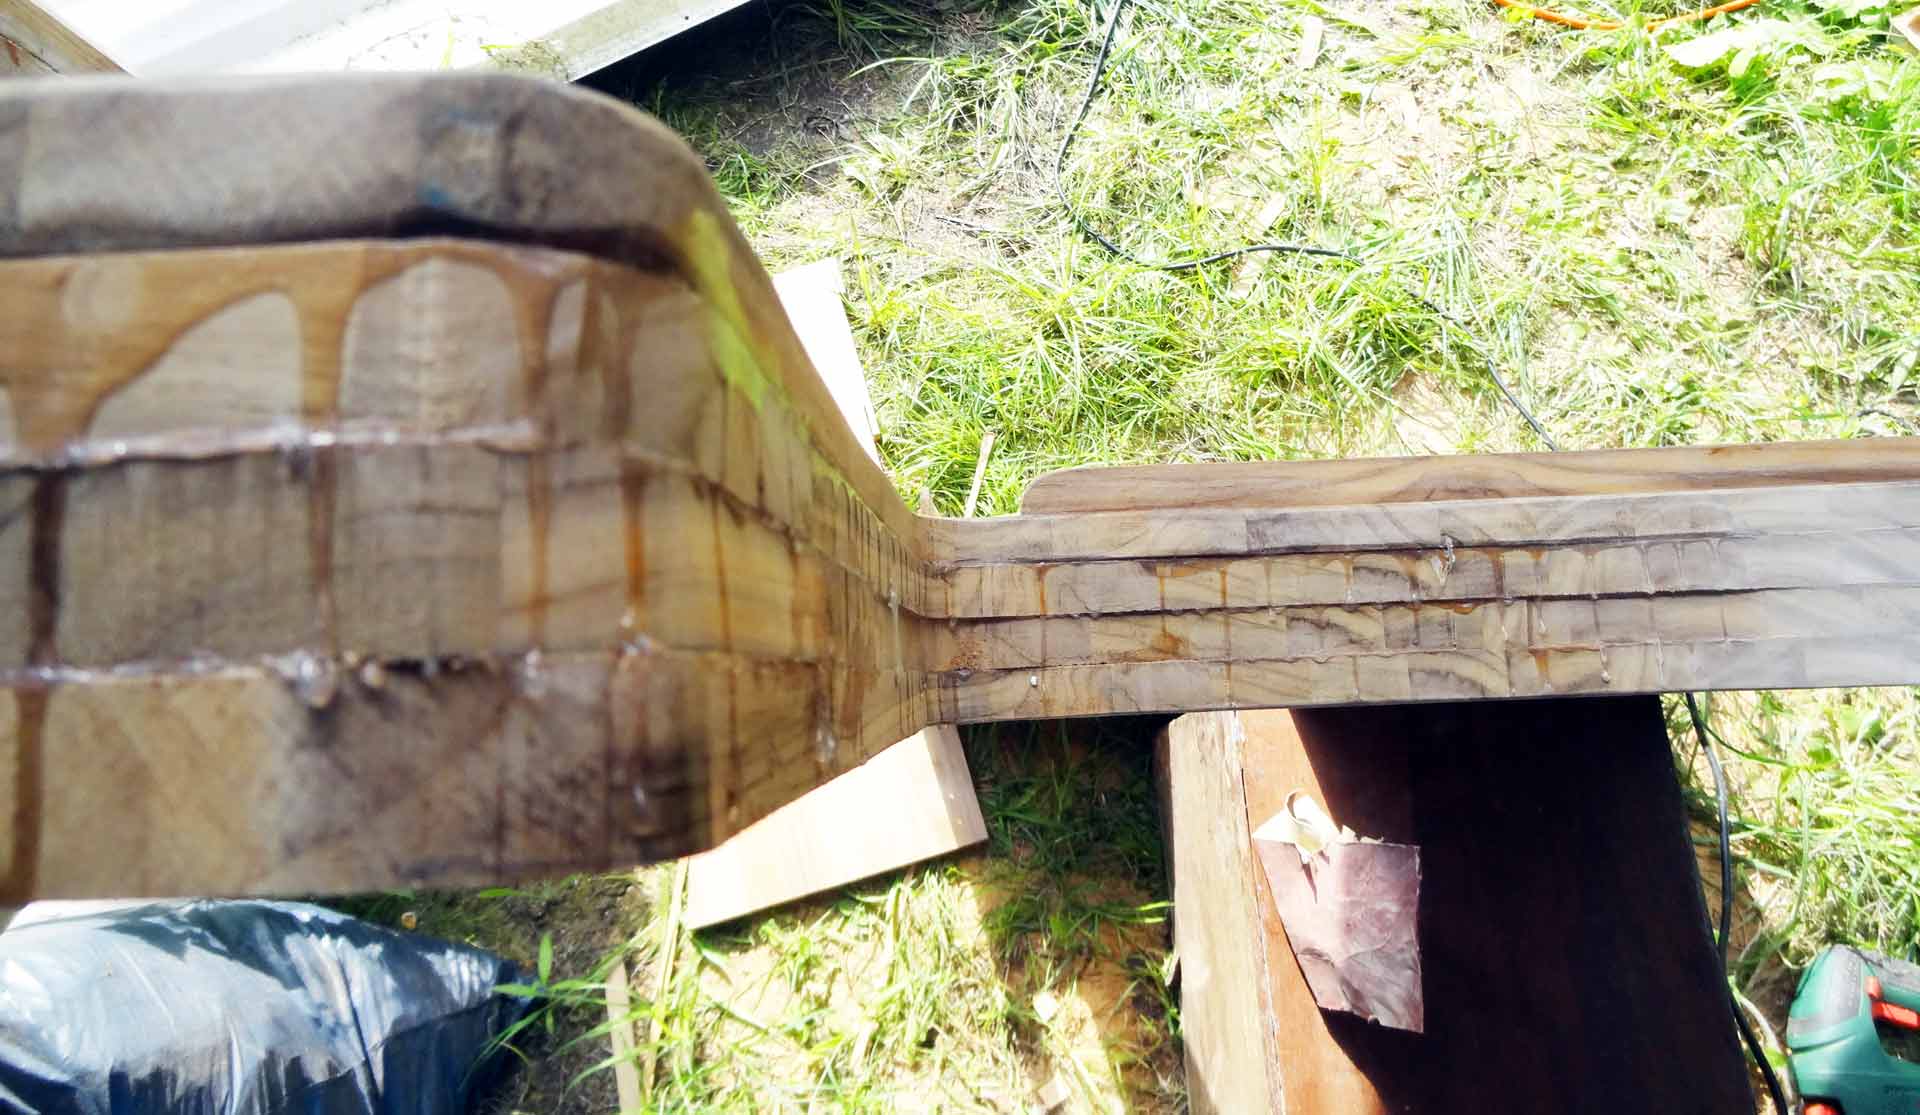
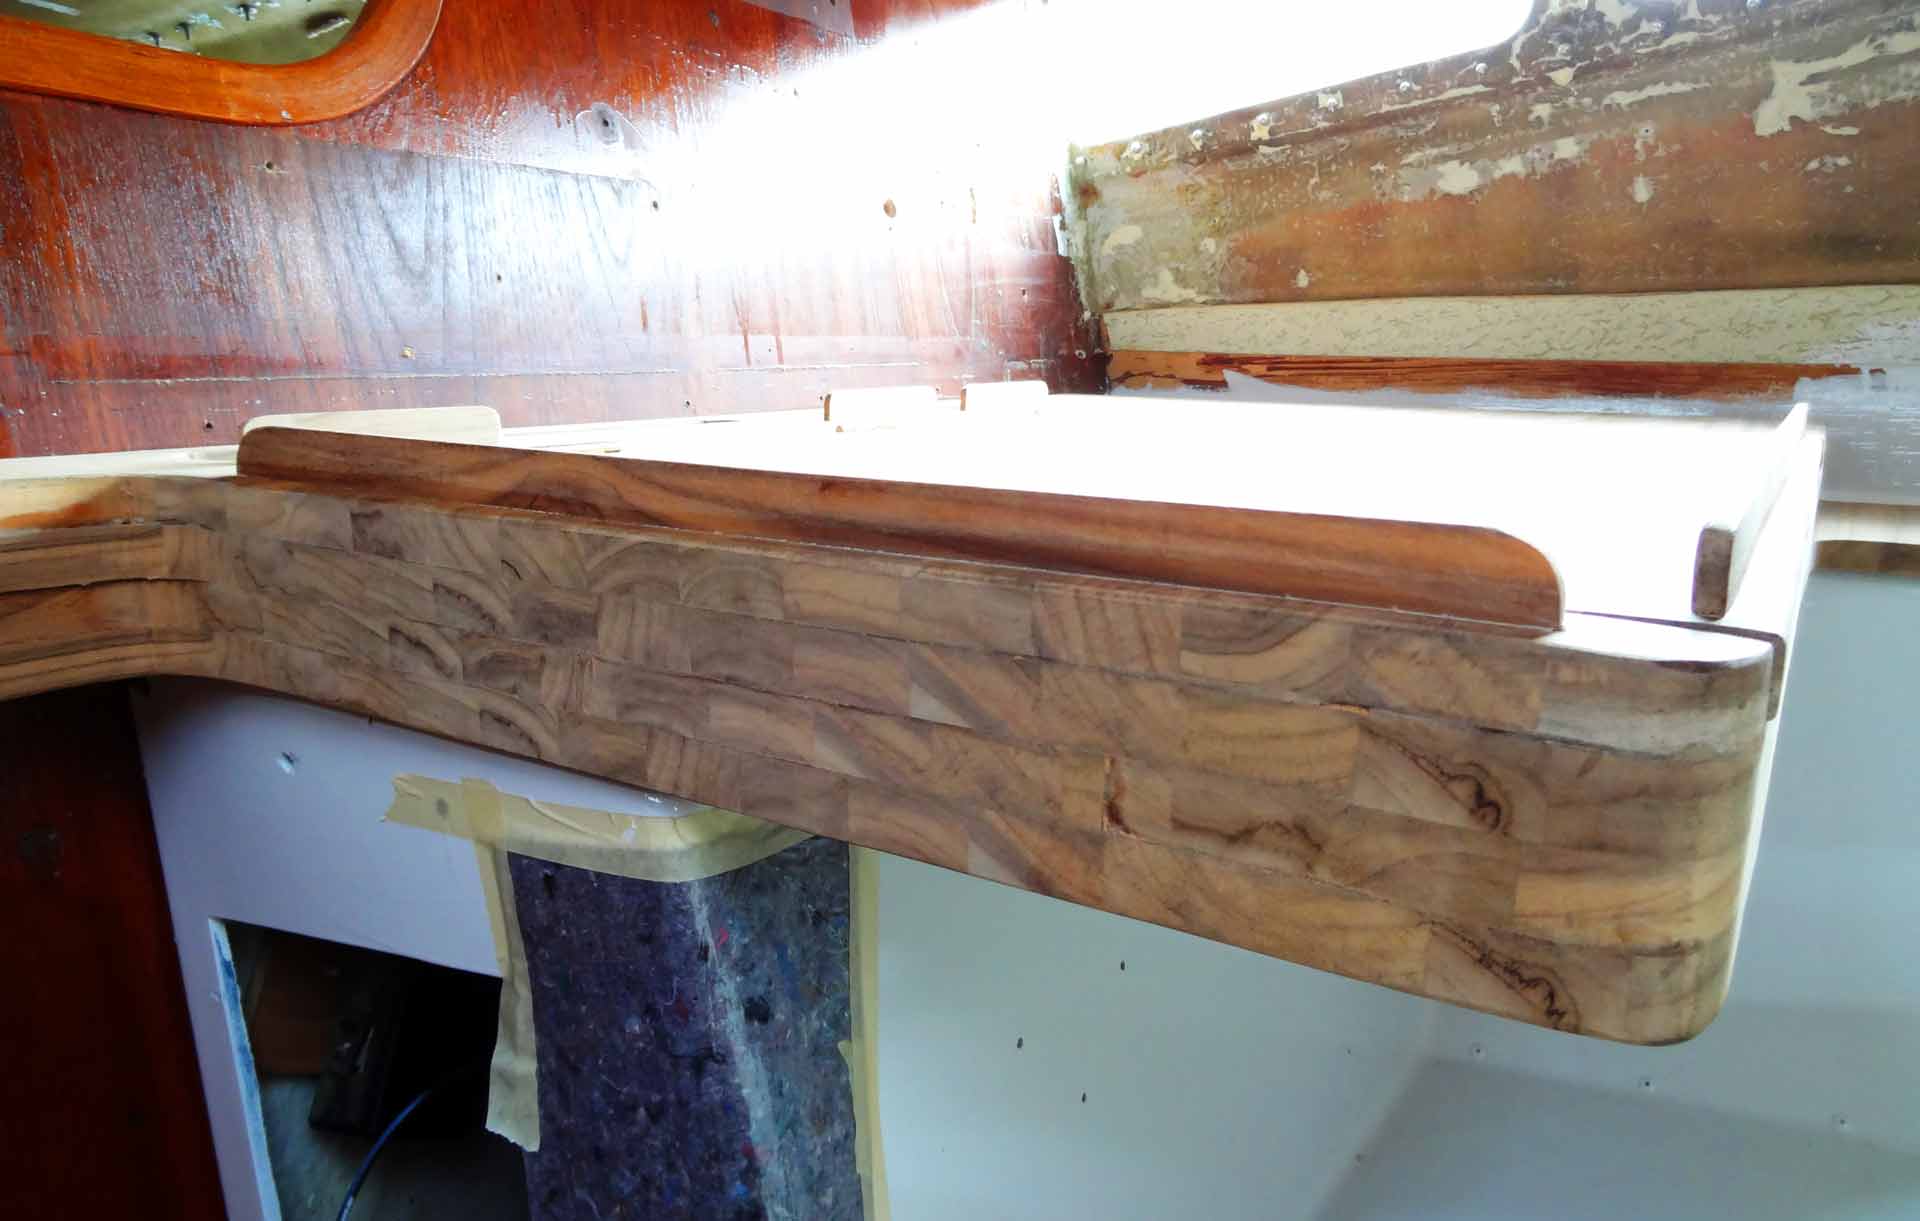
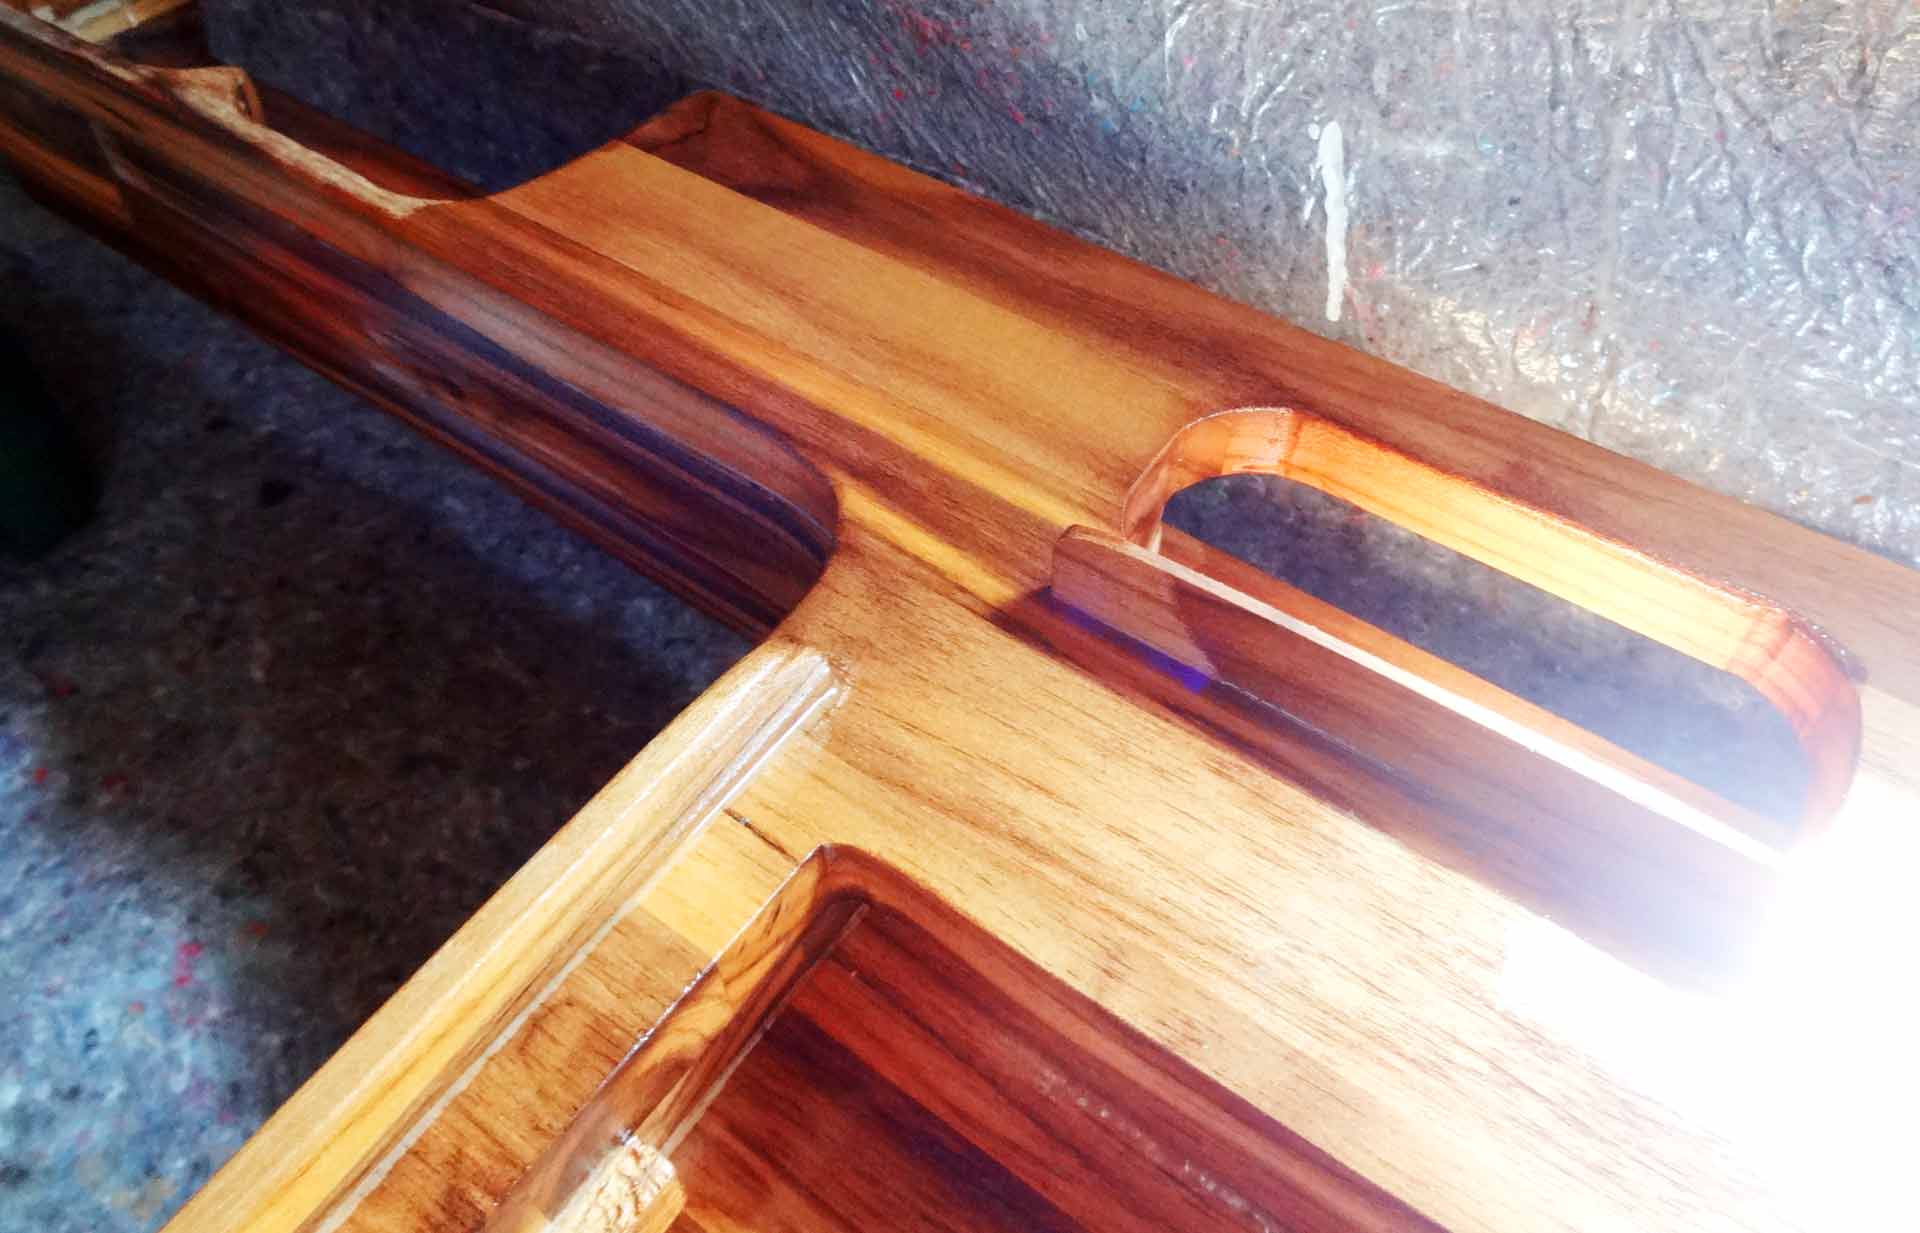
Bending with means of hot water-vapor is out of question since the plate is glued from different massive strips of Teak. I go for a different idea: Again transferring the lines of the edges onto the plate I am beginning to saw two layers of Teak with a material thickness of some 2 centimeters. Put on top of each other these two cleats would form the outer face of the chart table – the material thickness is needed to insure maximum integrity of the glued strips. Sawing was a no brainer and although I had to manufacture the second strip out of multiple parts the outcome was promising.
Fitting the strips was the first moment of massive heartbeat: Buying a Teak plate quite is an extensive spending. Some 250 Euros have to be invested in just one plate. You simply don´t want to waste a single inch of precious wood here. I just couldn´t forgive myself an error here. By fitting it to the base mounting I was satisfied with my work – although sawing the round edges won´t produce a 100 per cent superimposable finish.
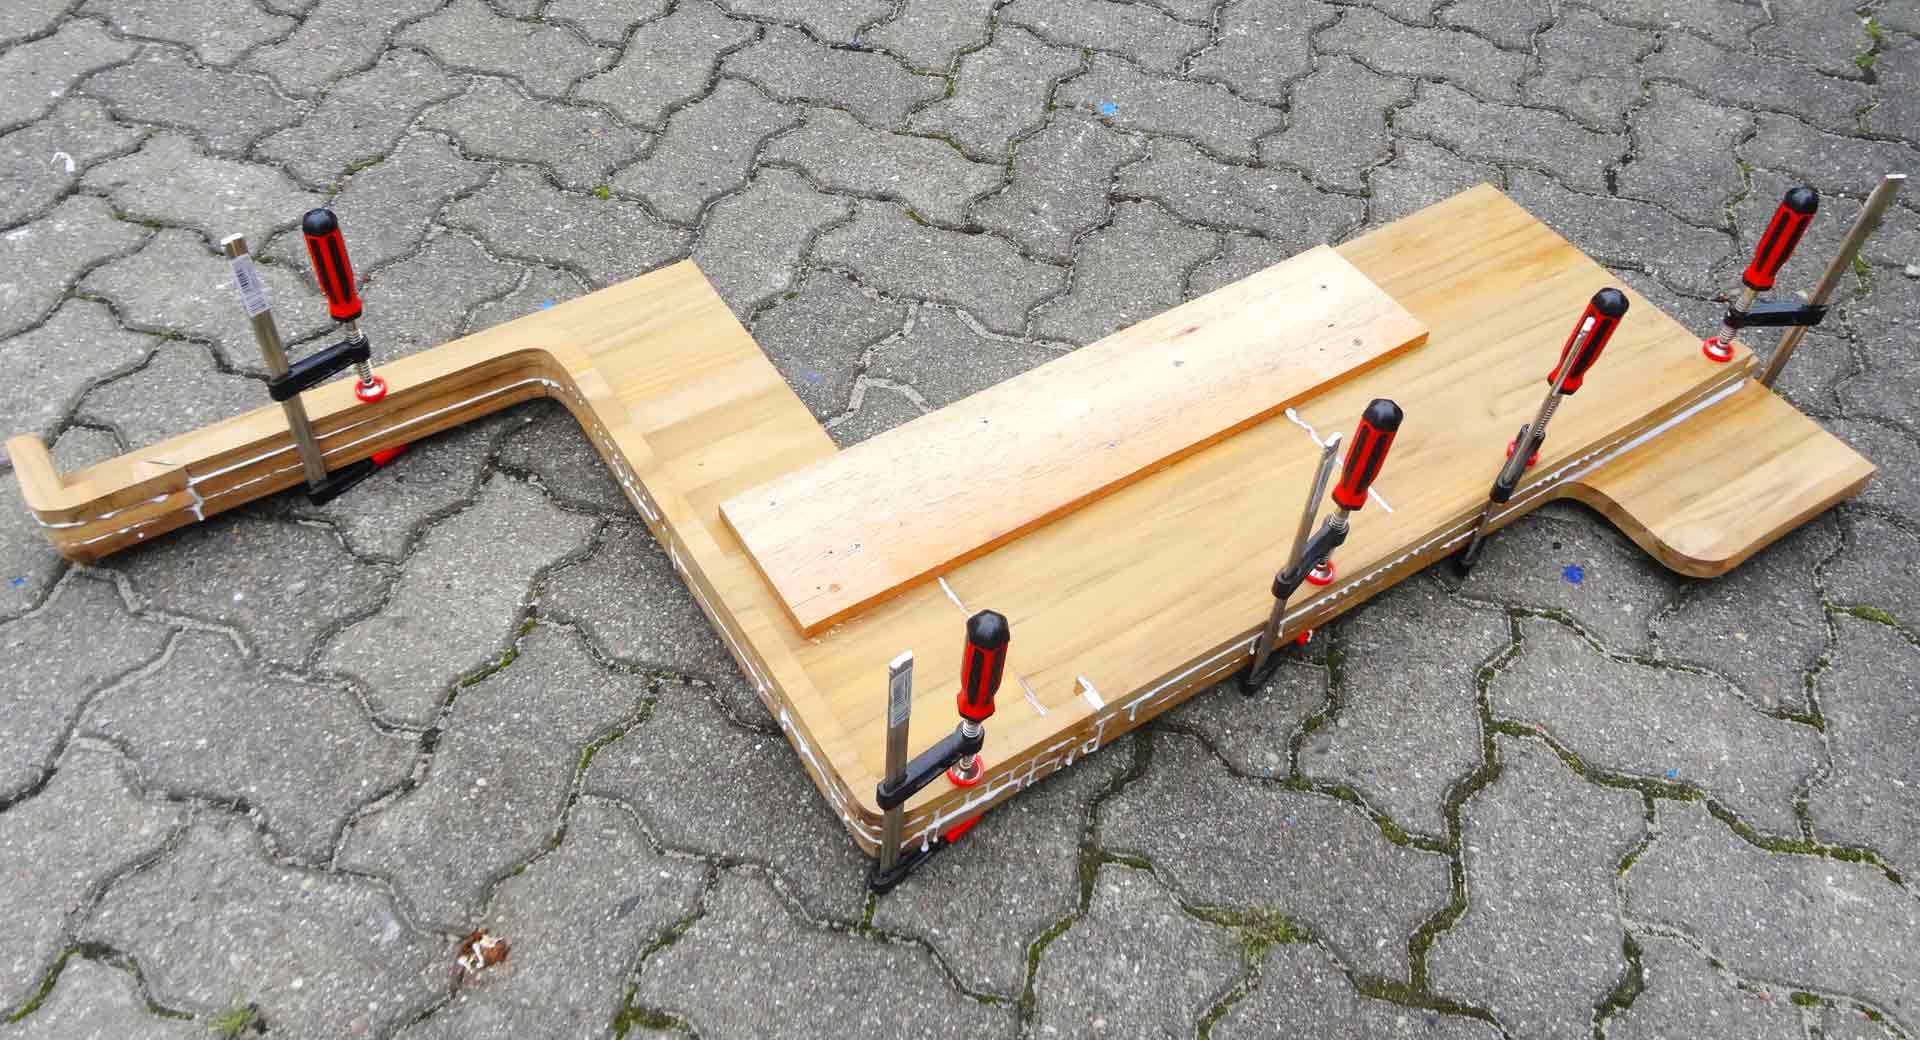
After sawing all the edges and fitting them loosely I went to applying wood glue to have them fixed. At first I cleaned the surface of sawing dust and brushed both sides with glue. Wood glue will produce a thorough and permanently firm connection if applied with a lot of pressure. And here´s where the bar clamps come into play. Having one clamp every 20 or so centimeters and having them pushing hard until excessive glue will be pressed out between the sheets: Don´t bother, we´ll sand off the glue later.
How to glue Teak?
And which is the best glue to utilize? Well, Teak and Mohagony are the best timber suitable for marine utilization because of two major characteristics: This kind of wood is very dense in terms of fiber-structure and – above all – it´s very oily. And this high amount of oil make Teak and Mohagony particlularly interesting for marine fittings. In short: Teak won´t rot in a wet environment. That´s for the good news. Bad thing about it: Teak is a horror to glue, according to most internet sources. It´s the dense structur in combination with an oily saturated wooden material which prohibits the glue to penetrate deeper into the material to form a tight fitting. Most ordinary wood glue will fail, if I´d believe in the sources.

After some research it´s Polyurethane glue which should be best suitable for a tight and lasting connection of Teak. Nevertheless, that´s a knowledge I – not very clever! – gained after having done much of the glueing work. And again not very clever, I chose to utilize a normal wood glue for the time being. Nevertheles, after releasing the bar clamps and checking the quality of the connection I couldn´t identify any problems nor could I weaken or break the glued parts. I used ordinary Ponal Super wood glue, as it said on the package “suitable for every kind of wood” with a lot of pressure. Besides, I added not less than 6 deep penetrating screws to have some mechanical cohesion as well. For now, I can only hope that Ponal Super 3 will do the job … but I think it will work, since the chart table won´t be put to mechanical stresses nor will it be submitted to regular wetting or other wear and tear. But for the upcoming woodworks, especially the making of bulkheads, ceiling, veneers and her stuff I will definitely switch of professional PU-glue of category D4.
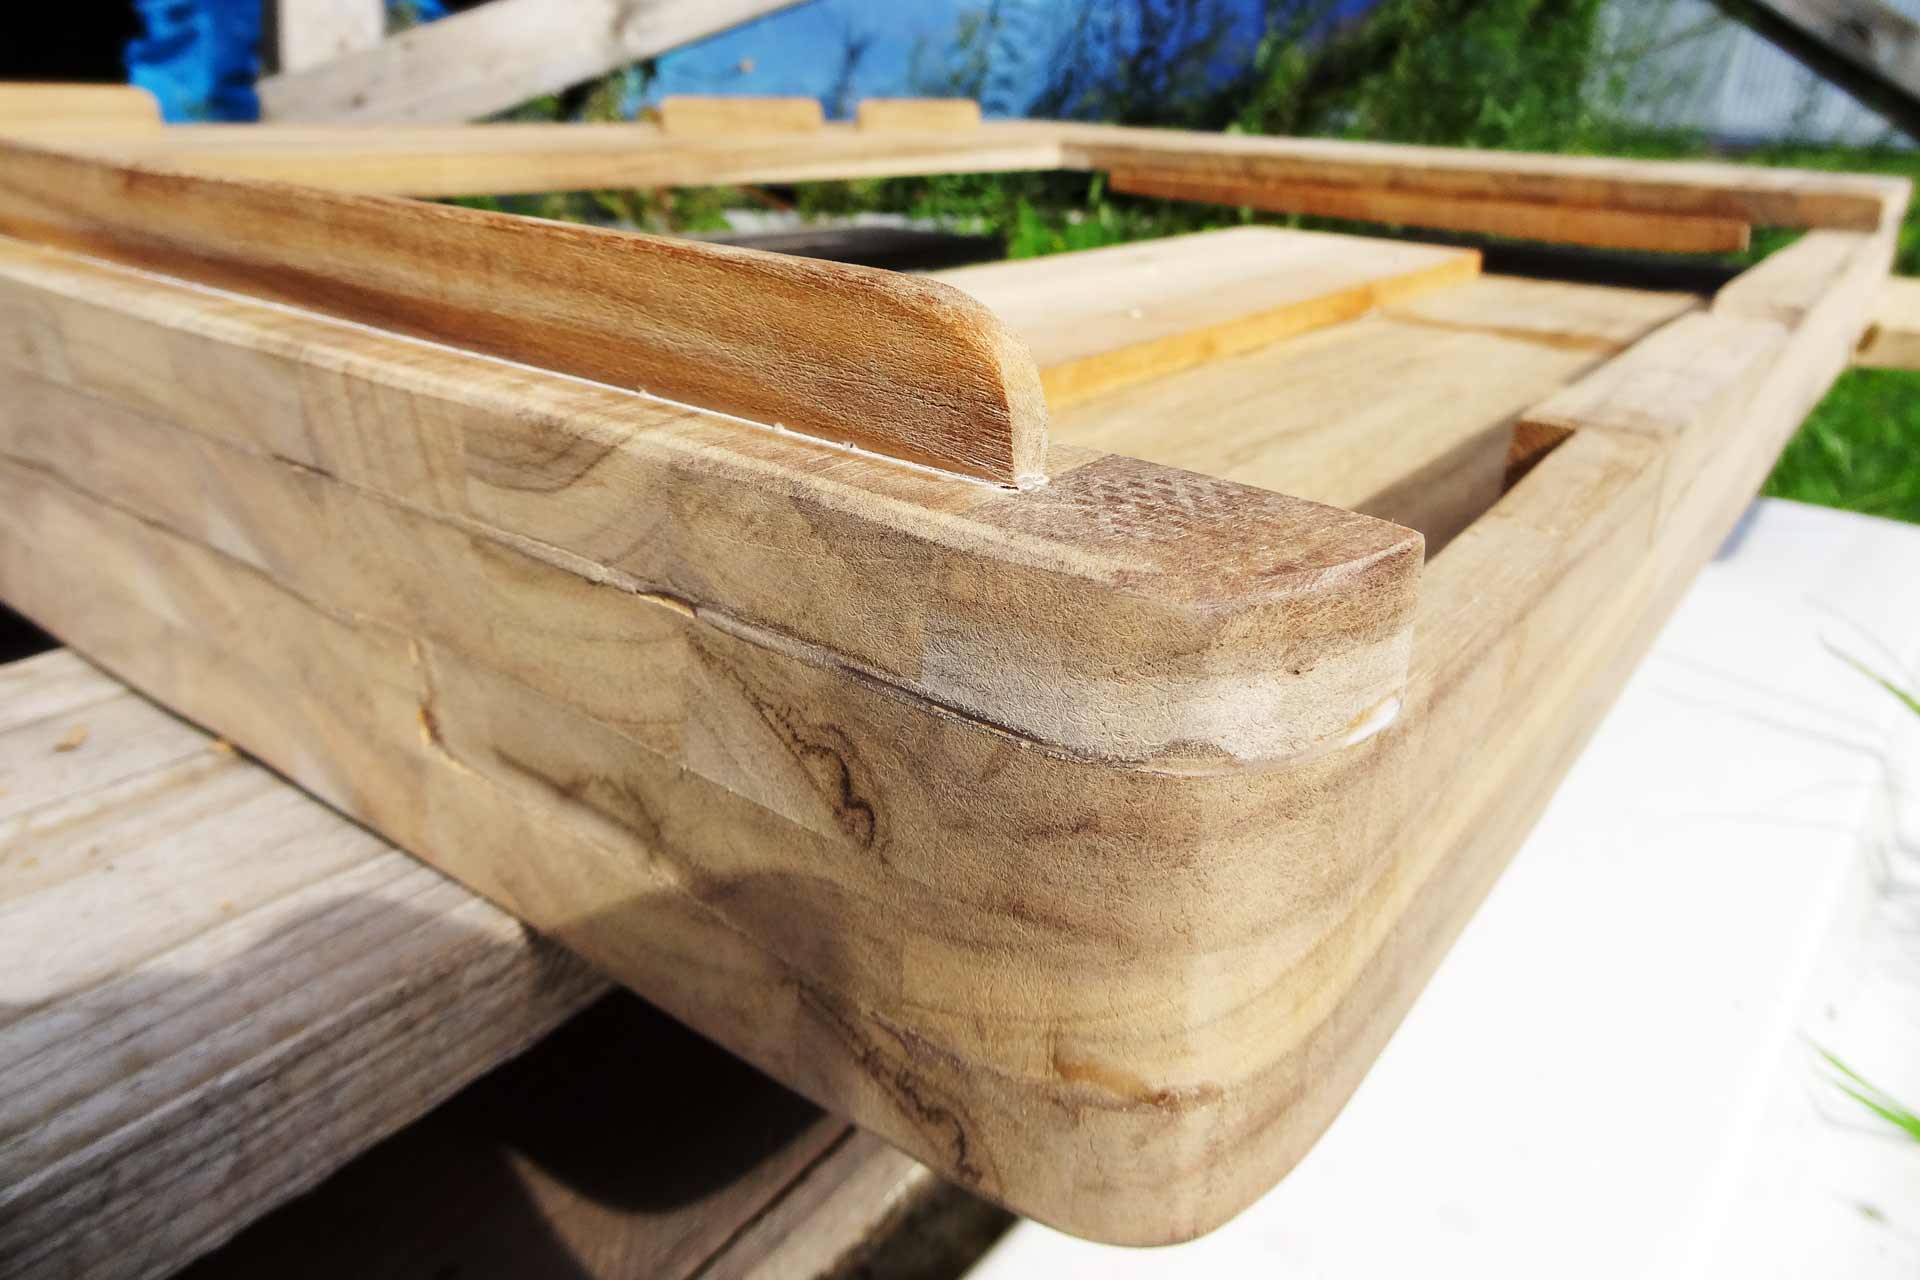
Trays for Pencils, Ruler and Dividers
When I was doing my SKS certification (comparable to the RYA Coastal Yachtmaster) there has also been a chapter on doing chart work. Sailing on an X-442 I loved sitting at the chart table and do some cross bearings, deviation calculations and rendering courses and waypoints on the nautical chart. What was bothering me all the time: There was a massive disorder amongst the stationary, rulers and dividers. The stuff was just flying around between the charts in the rack, some biros already dried out, some fineliners loosing ink on the charts. What a mess. I´d like to have that changed for my own perfect chart table.

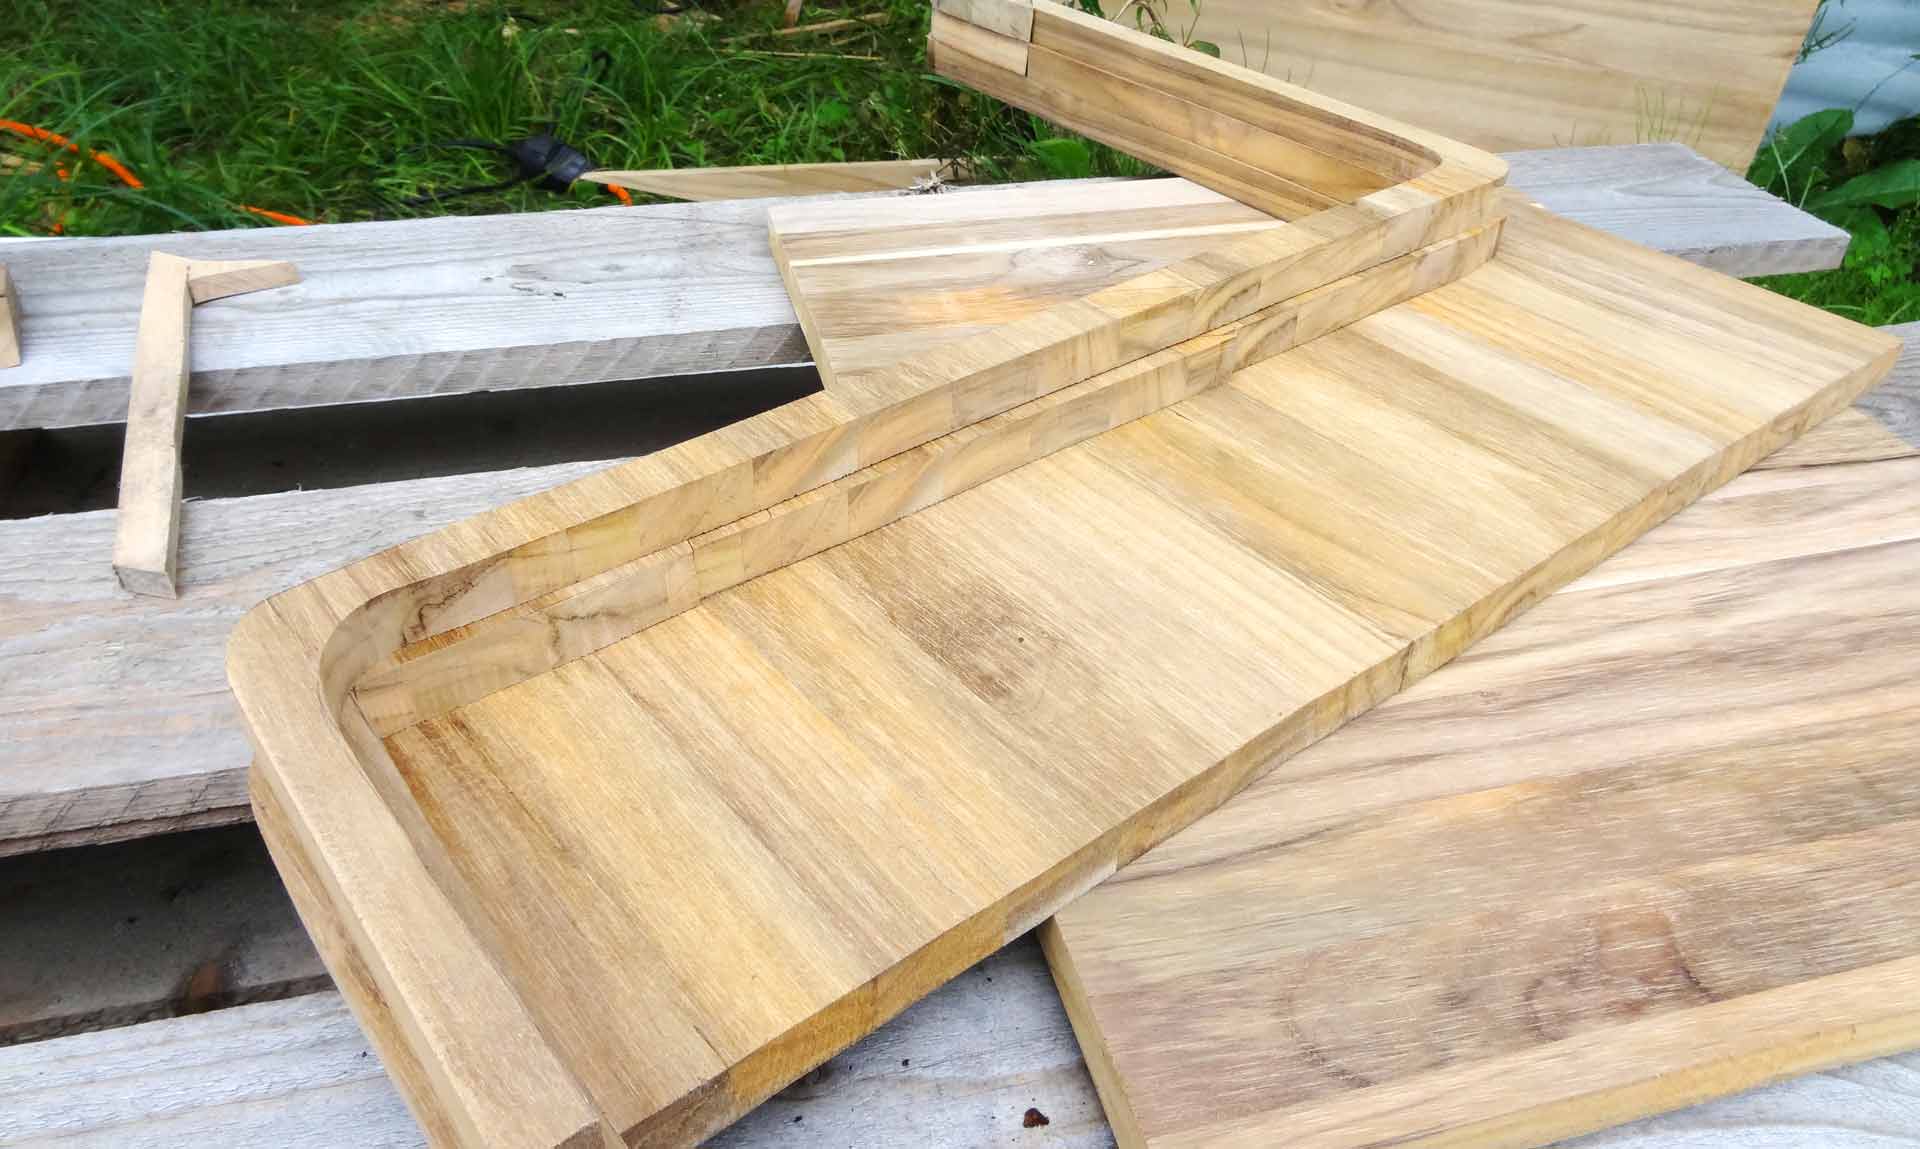
So I decided to have no less than three small boxes to house the stationary, two slits for the protractor triangles and a bigger but slimmer box for small additional stuff. Plotting the lines onto the tabletop, boring holes in each corner to have the swinging saw inserted and sawing the openings for the boxes was a matter of minutes – though one should be cautious when sawing for not messing up the whole tabletop.
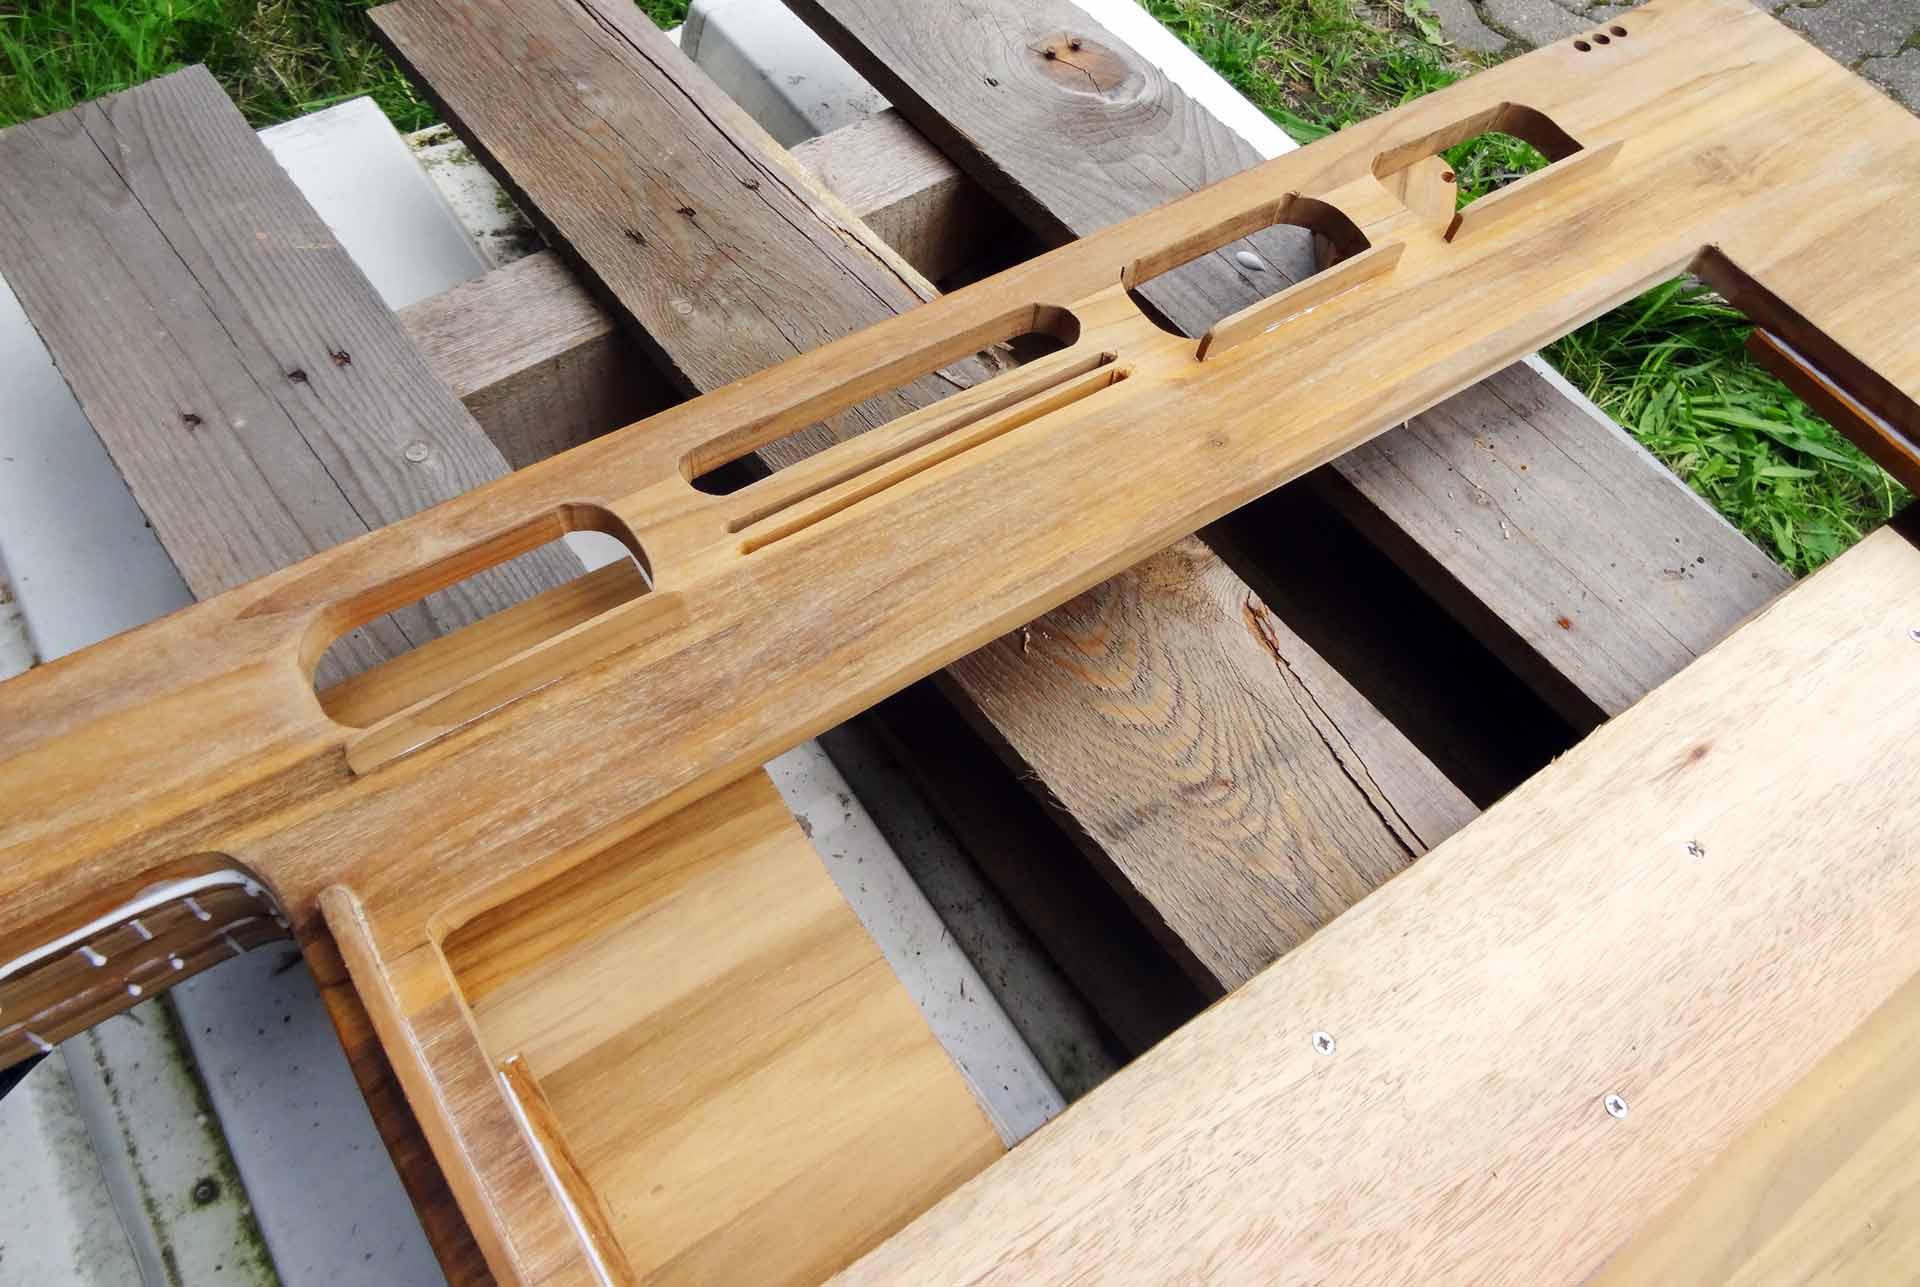
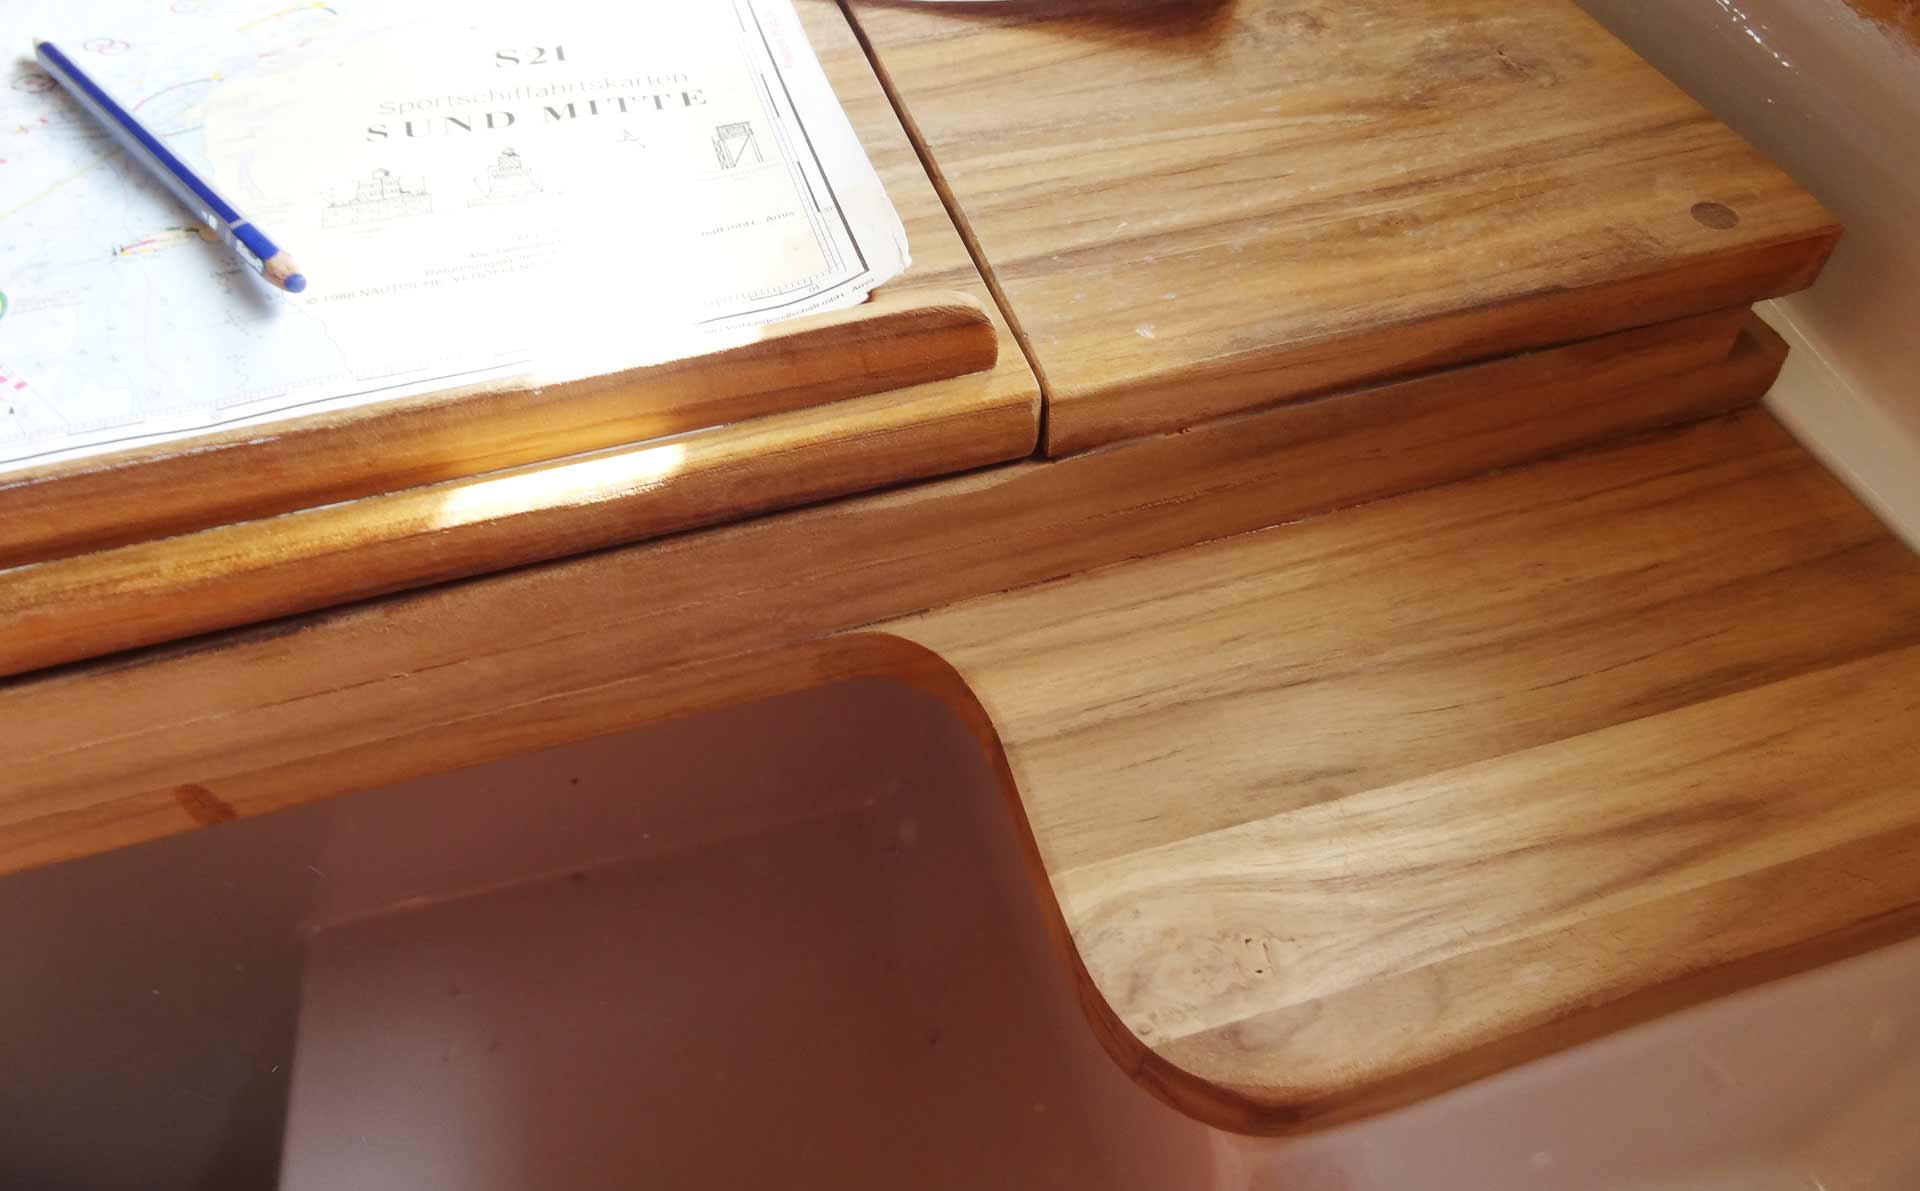
In the end the openings have been deburred and I glued a rolling cleat in front of the boxes for cosmetic reasons: It just looks awesome. So I took the tabletop into the ship to have a final fitting and it proved well. Now the tricky part comes: Fitting the base construction to the tabletop. If messed up, the whole chart table would have to be redone.
Raw Construction of the Chart Table
I again cleaned all the surfaces of sawing dust and sanded off the surface to open up the wood fibers as I could imagine that a rough surface would be offering better conditions for the glue to find grip here. Applying the tabletop to the base construction was kind of a mess because of the size of the whole thing: The new chart table is as wide as 1.24 meters – my hands were full of fresh sticky glue when I finally did fit the top to the base.
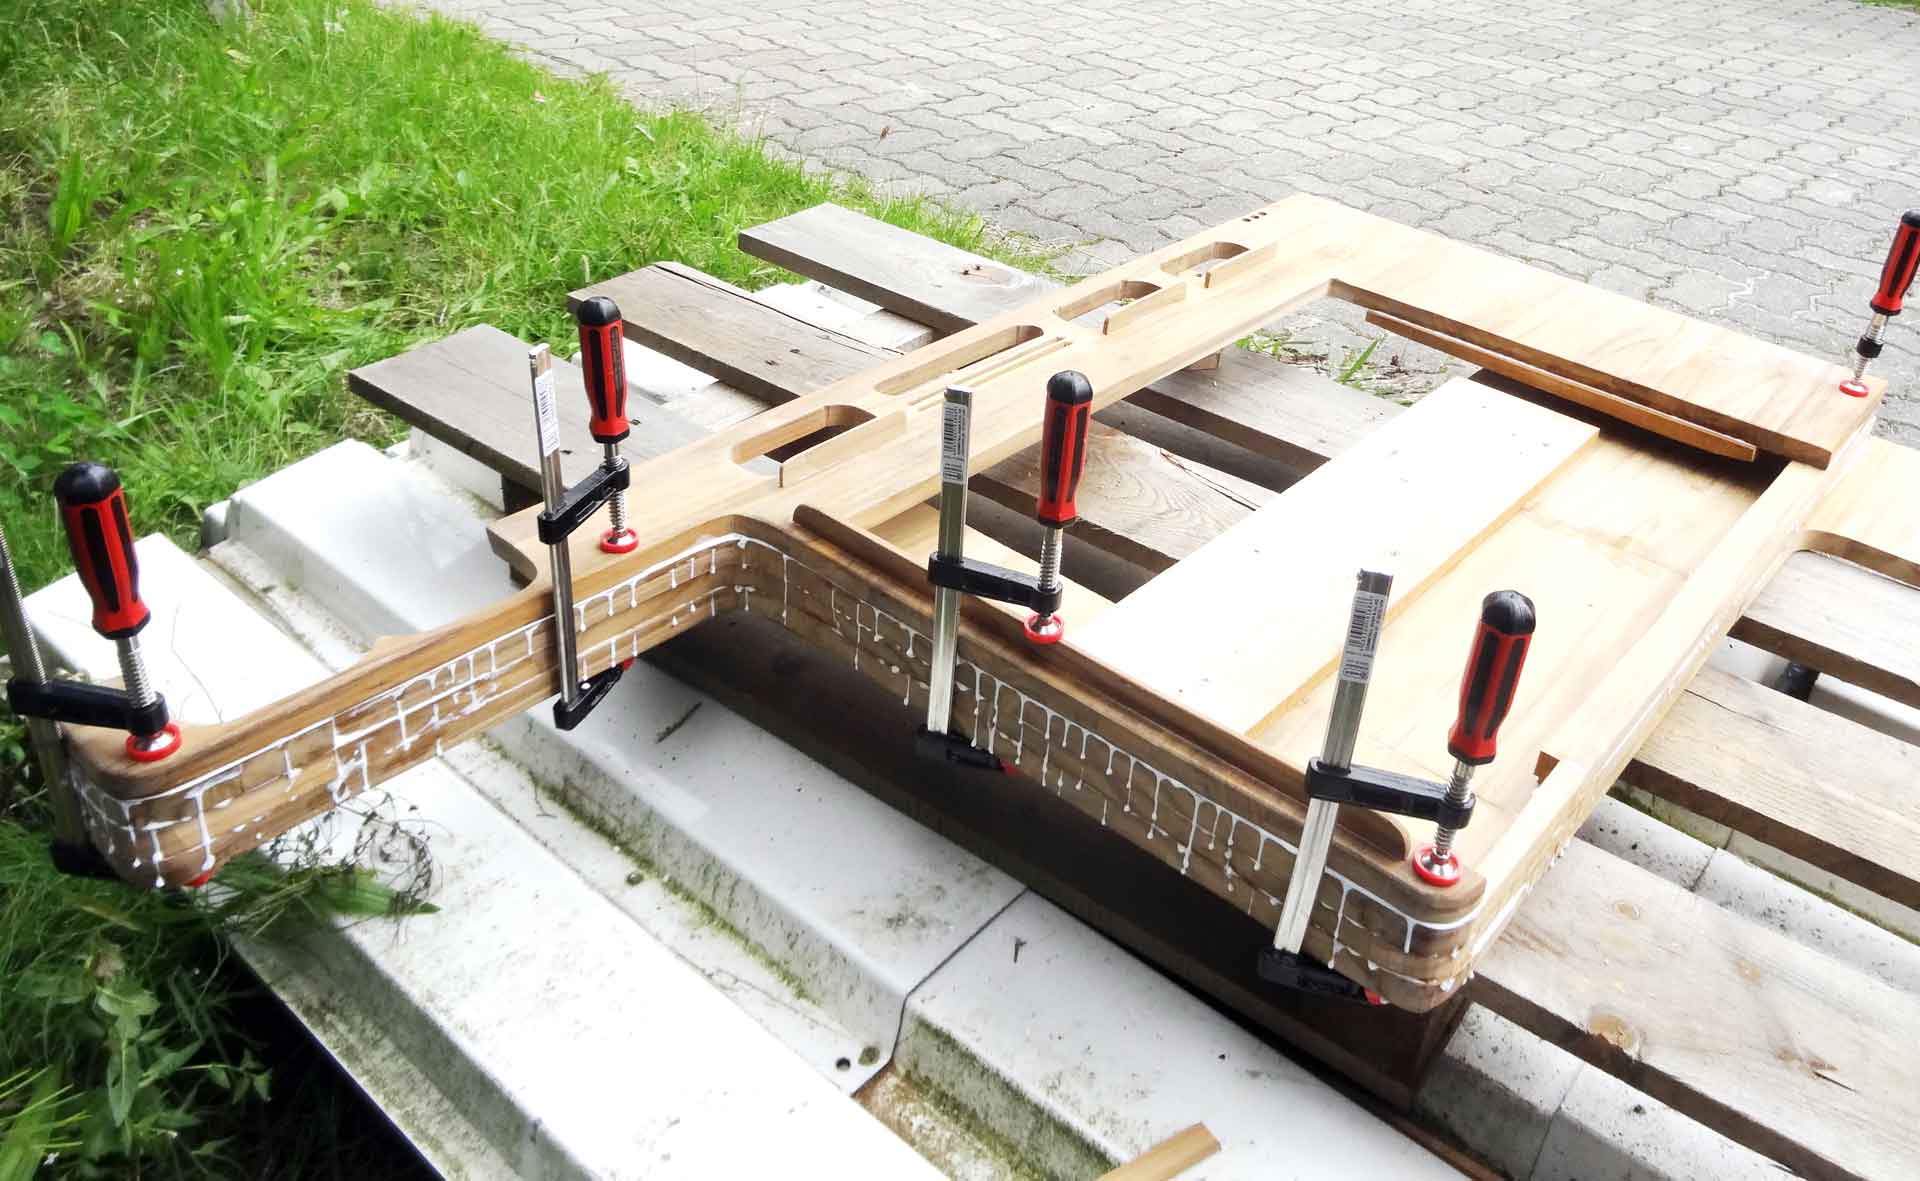
Having the bar clamps pressing the whole construction together some minutes later I applied as much pressure as possible before leaving ugly drag marks on the wood. Again excessive glue was pouring out between the wooden sheets. I would now allow the chart table a full week to thoroughly dry with bar clamps still in place.
By storing the rough chart table in the big winter storage hall of the wharf where my boat has its rack I ensured a well vented, dry and warm place. Perfect conditions for drying. I later placed the folding tabletop-flap into the raw construction and found it looked well for the time being. Five days later, the next weekend, I returned, took off the bar clamps and I was satisfied with the whole construction.
Sanding the Teak Chart Table
We love having Teak in our ships for this timber is very oily. This making it more resistant in the wet environment of a ship. Teak is not a soft, fast splinting timber as many other timbers are – but it´s on the other hand not too hard. It´s just a perfect material to work with. So sanding Teak is again a no brainer – though one should be aware that it happens quite quickly that too much pressure whilst sanding would take away too much material.
At first I wanted to grind off the dried noses of excessive glue. I chose a 60 grain sanding paper for the orbital sander and started working. Taking off most of the glue I switched to grain-size 80 for sanding down the whole surface of the chart table sides to achieve a smooth and nice finish. Because The quality of the outcome is far better than expected: I was able to sand a near-to-perfect smooth facing.

Best thing: As the sides of my new chart table aren´t made from just one single bent piece of wood but from a wide range of wooden sticks as I have sawed the edges out of the big plate, there are so many different wooden textures visible. That´s just a very neat visual effect and I can´t wait to see it when varnished properly …
After completing the sanding I looked to the work and I was satisfied that much. The rounded edges come out just fine, the whole chart table construction has a unique massive appearance – just the effect I originally wanted to achieve. Again I took the chart table to the inside of the boat for a quick fitting: Perfect!
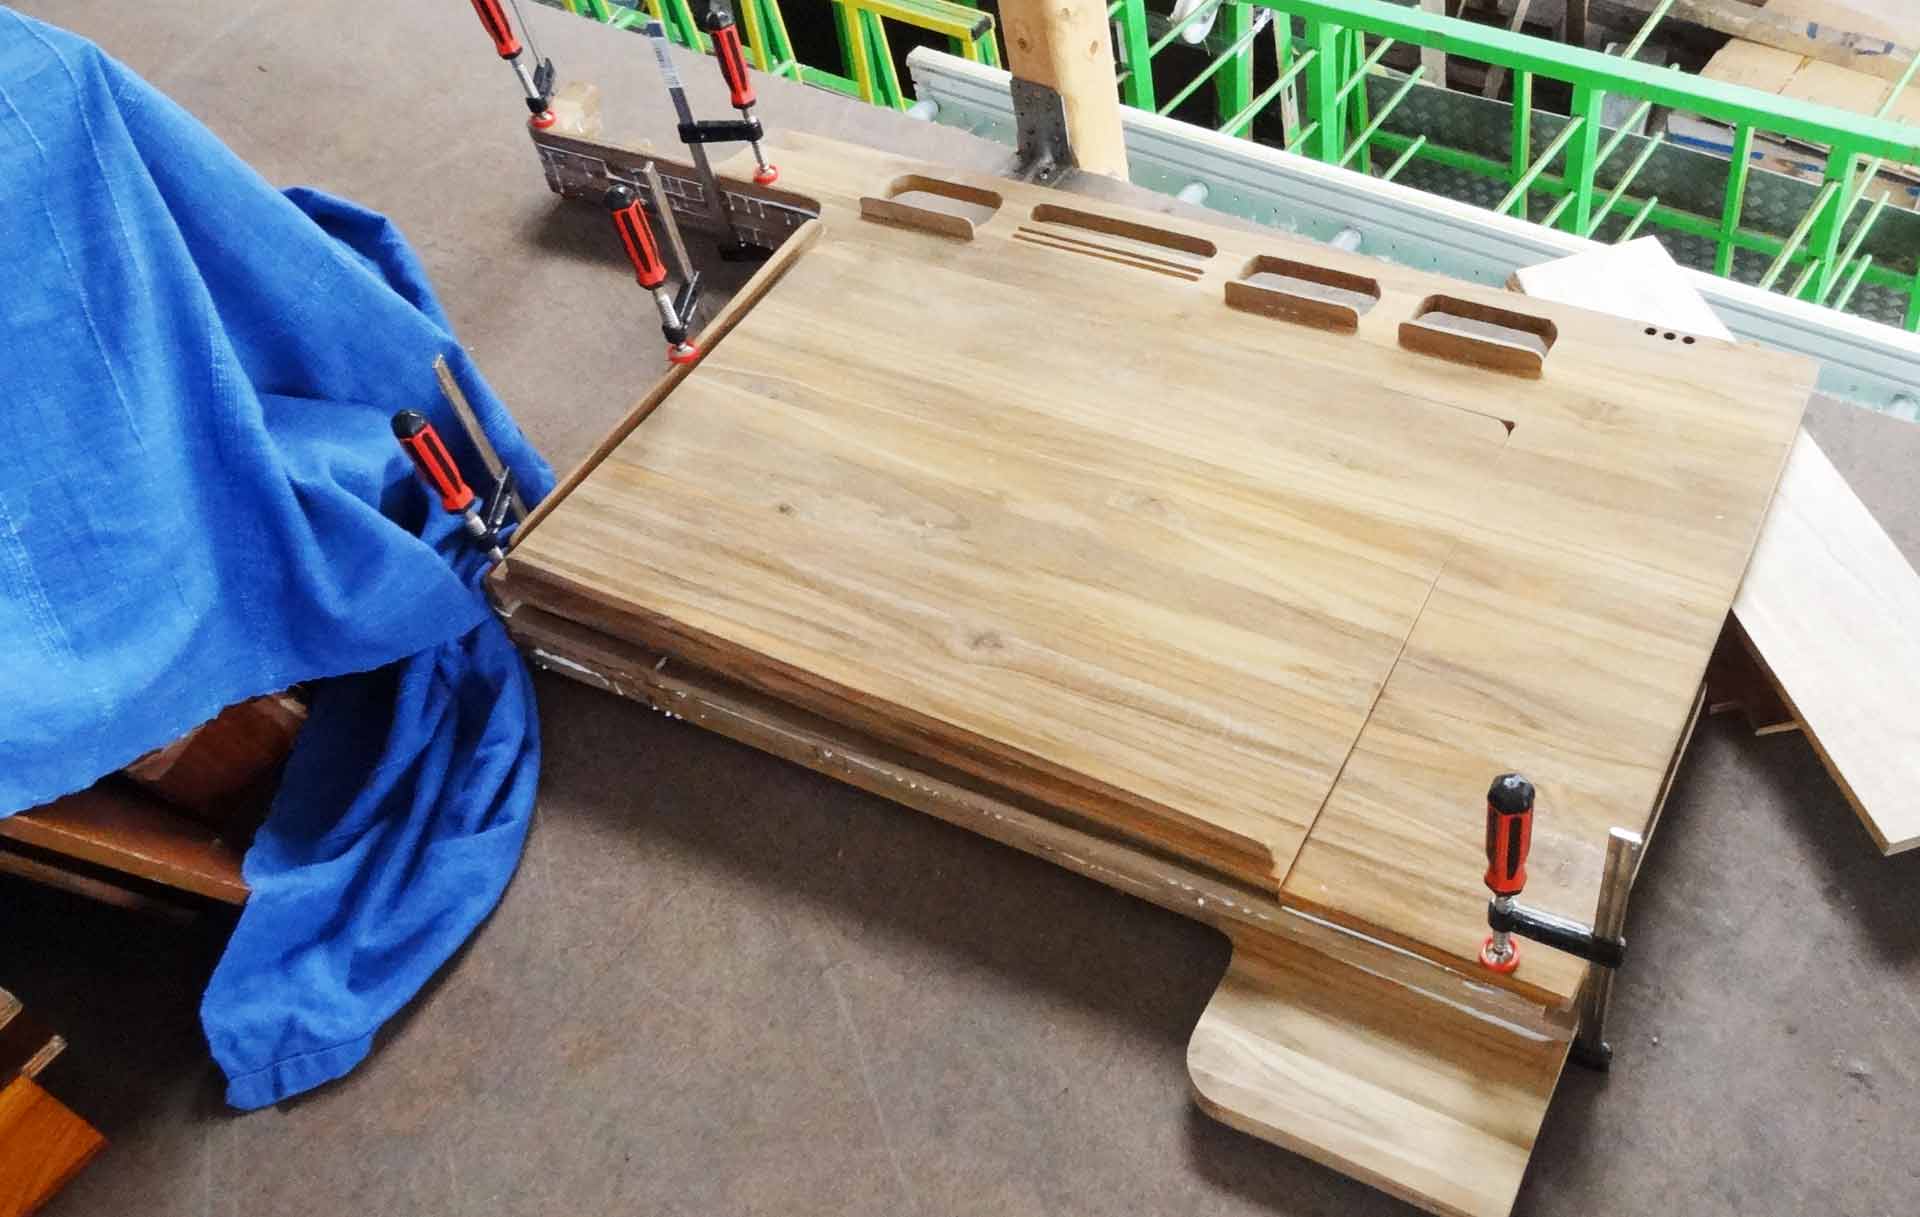
Hinges for the Chart Table-Top
As I want to “hide” surplus charts and have a clean chart table all the time when underway I added a chart rack underneath the tabletop inside of it. In order to reach for the charts this tabletop has to be made foldable. I was puzzled when I´ve bought the brass made hinges: Some 35 Euros for the three small parts! Wow.
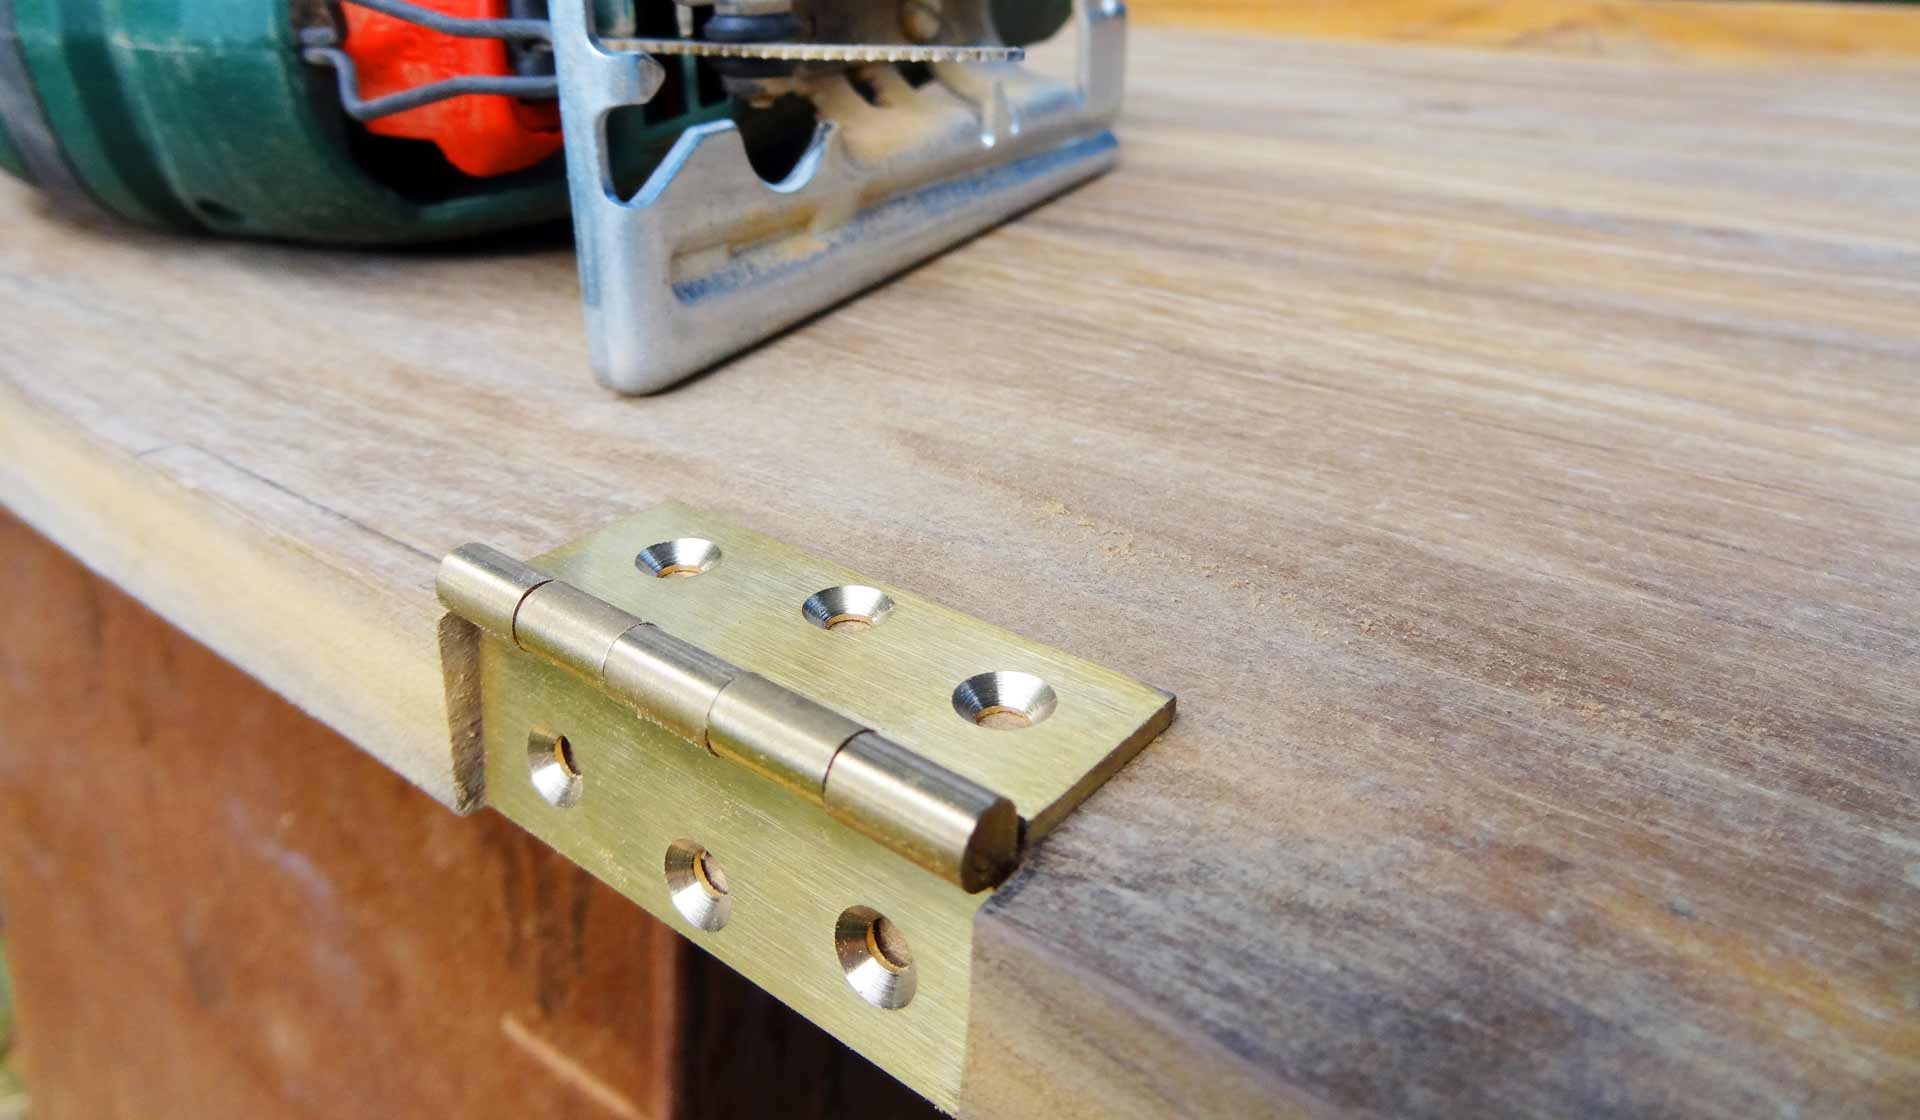
Fitting the hinges is a bit tricky since I want the seams between table and folding top as neat as possible but avoiding scrubbing of the moving parts. So that was kind of precision work – having three hinges applied in special made slots. But it went just fine. Fitting with screws is another thing: Material thickness is just 1.8 centimeters and I want to avoid splinting of the wood at all costs.
So in any case one should bore a drill hole where the screw is going to go into the wood for at least half the length of the screw to avoid splinting. Using the screwdriver to have the hinges fitted was then no problem, no splinting at all and another near-heart attack was avoided. I just did fit the hinges to the basic construction but not the folding top for that´s going to happen after varnishing everything properly.
Fitting the Chart Table to the Yacht
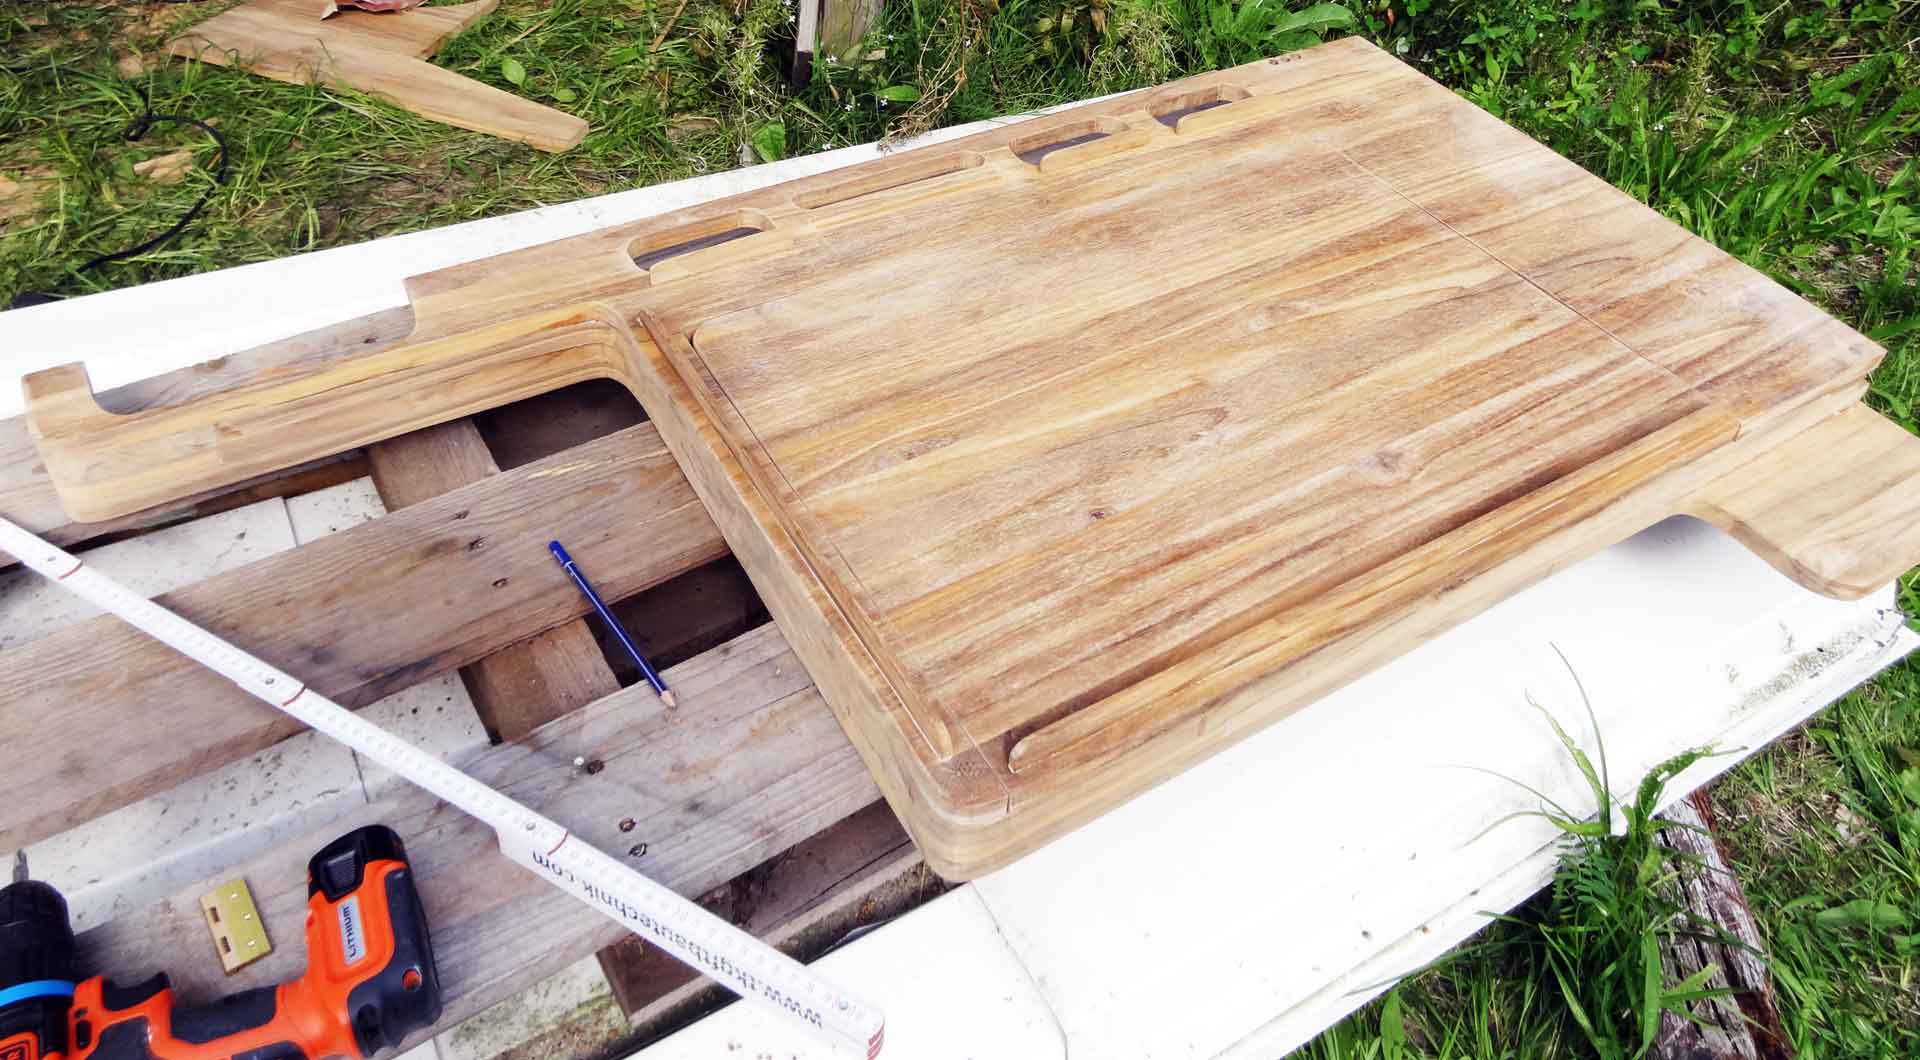
As everything was done like this I was so eager to have the chart table transported into the yacht to have it clear: How does it look like? It was quite an act to get this – surprisingly light but nevertheless somewhat bulky – thing into the boat. But once inside I put it into its place and there we go: I was puzzled. What a gorgeous look! I was so excited. At last all the work was producing a first real impression of how the new perfect chart table would look like.
Of course there are some minor inaccuracies when it comes to seams. It´s rather impossible for me to saw this accurate for that there wouldn´t be any gaps between the new chart table and the bulkhead for example: In order to do so one needs a stationary saw, not a hand-guided one, and above all, one needs to be a joiner. Anyway: I can live with 1 millimeter clearing for I will add small stripes of teak to cover the seams.
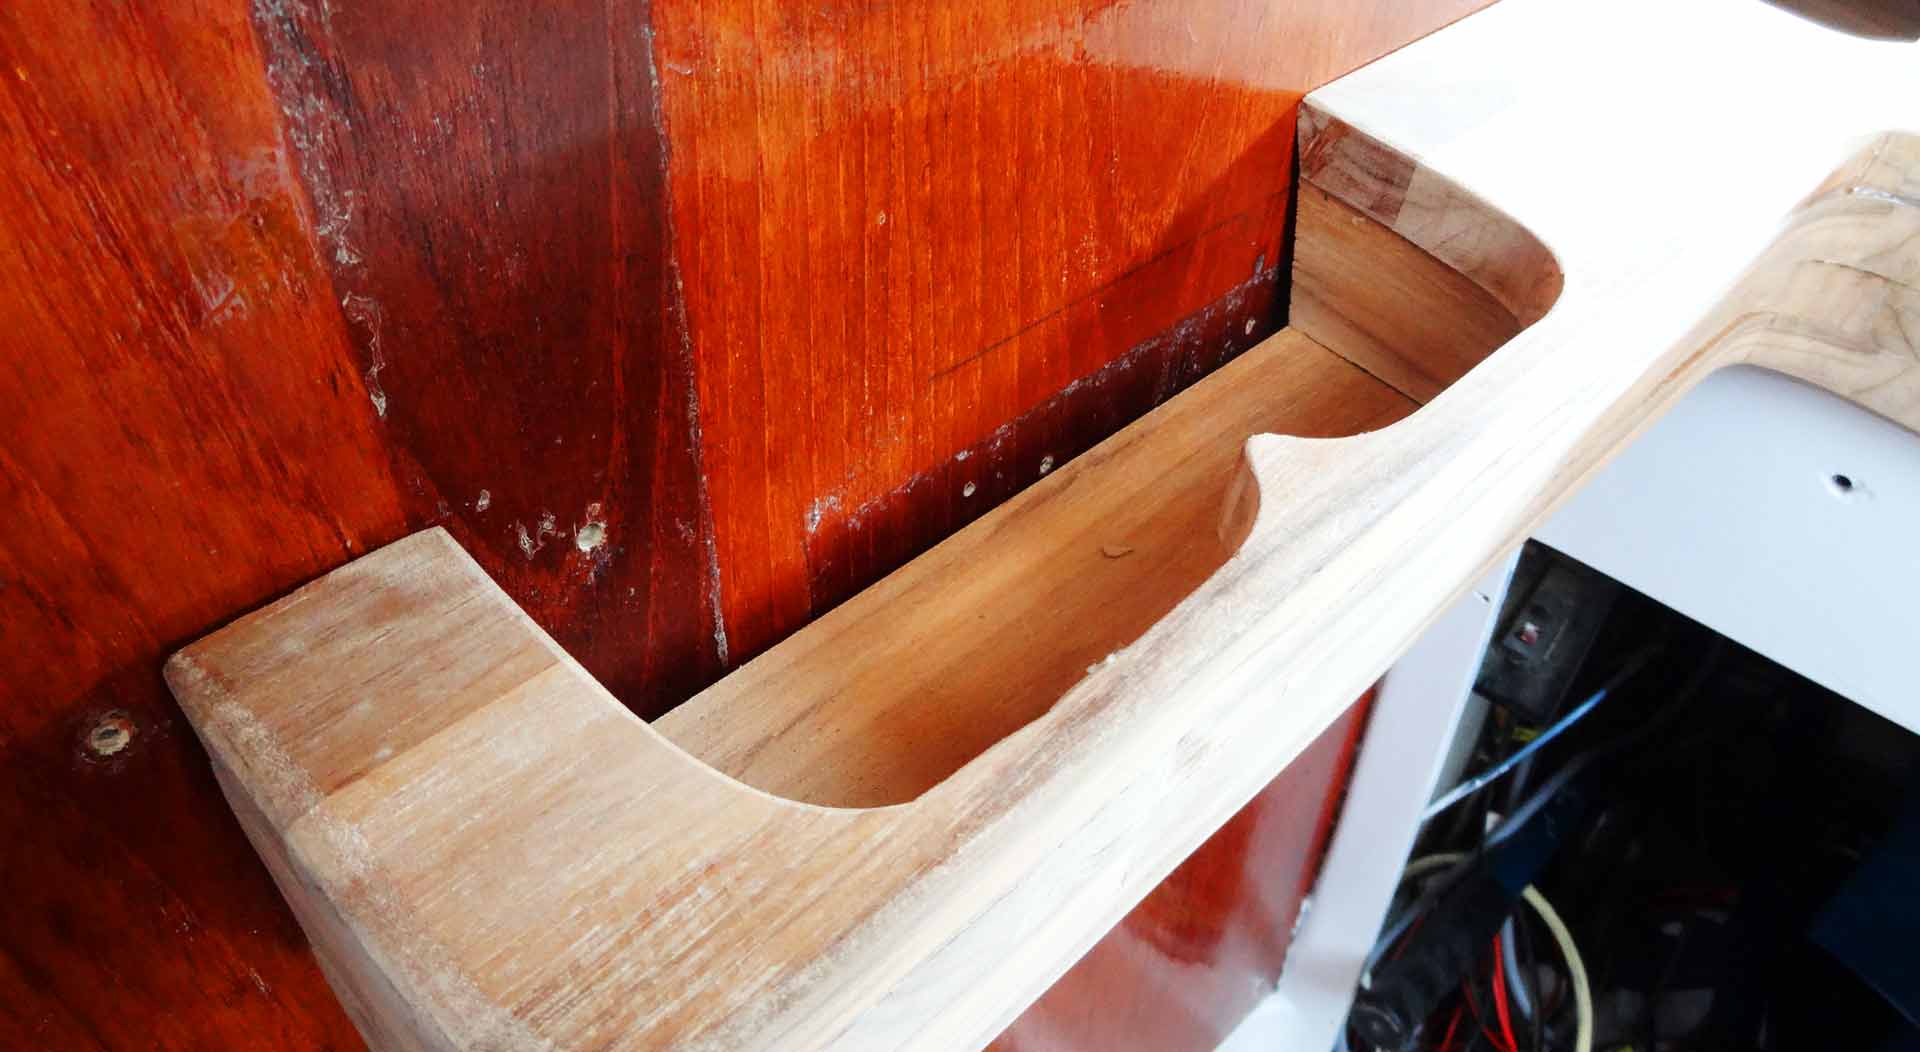
It was a brilliant idea to have a rack for the binoculars integrated. I can imagine this device stored here, ready to be taken out at any notice to have a proper look at things on the horizon. This “arm” where the rack is does have a secondary function as well: As described in one of my previous articles about a yacht´s safety concept I am planning to have at least one fire extinguisher and a fire blanket stored here at this bulkhead in case of a galley fire. Right underneath this arm is the perfect spot for this arm will function as a kind of little roof for those two tools.
I am especially proud of the round edges and the overall finish of the details of my new chart table. I am able to achieve the very effect I had in mind when planning the table: It should resemble a professional look and take on the design of classic ship´s interior. I guess I´ve made it, haven´t I?
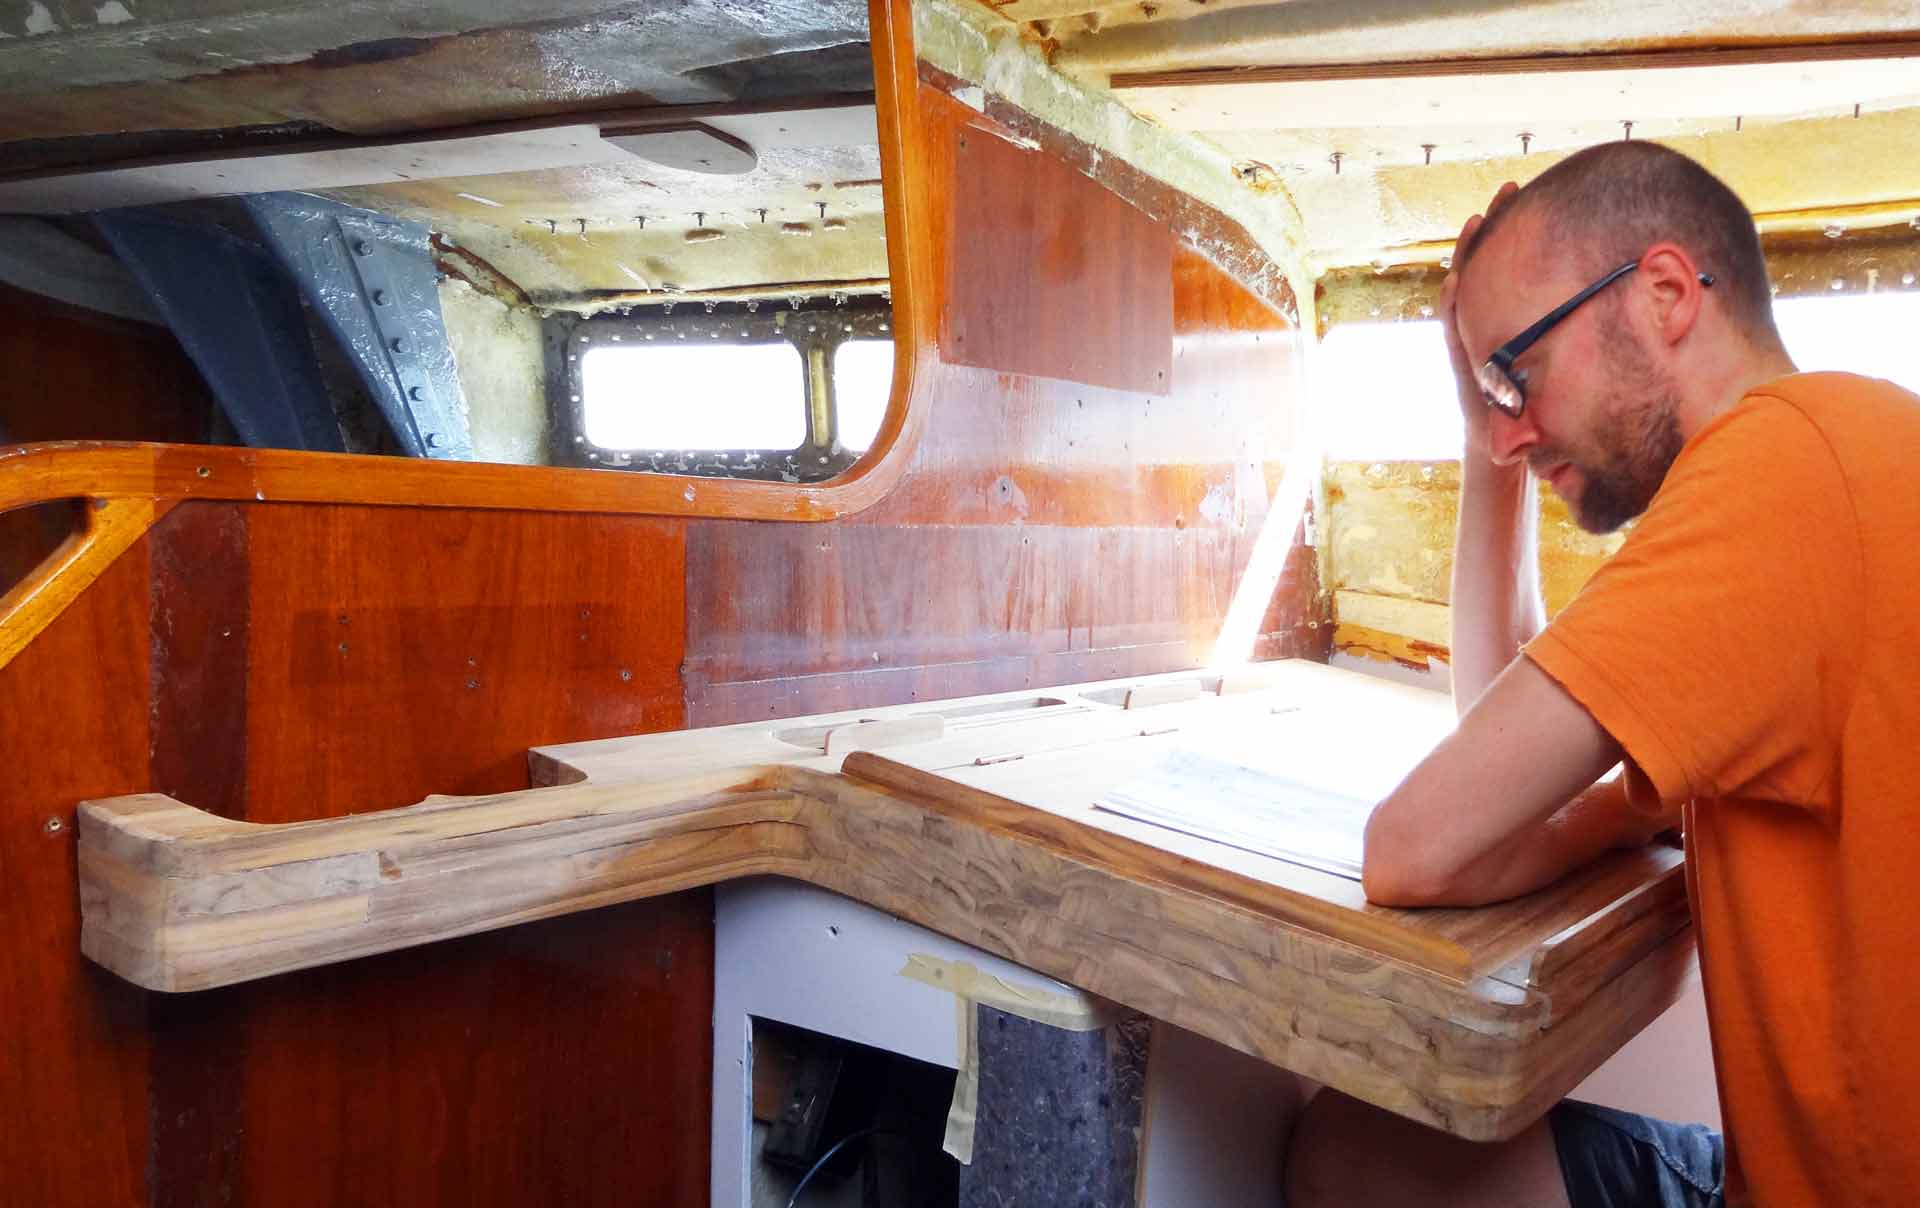
At last there came the seating test. I placed myself on the forward facing navigator´s seat and checked if the new height of the chart table was still suitable for everyday´s skipper´s work. And it was! I can read easily and for the fact that the tabletop is now some 3.6 centimeters higher than previously it´s a bit easier to do accurate chart work. Leaning back and having a recap: It definitely was worth all the work!
Applying Varnish & Adding some Details
I also tested working the charts and brought an old nautical chart of the Danish South Sea, some dividers and triangle. The chart rack has just the right size to house a pile of charts, setting waypoints and working out right courses is no problem on the new chart table. I am so happy!
I also added a small detail on the right hand side of the chart table: A kind of small platform is incorporating the lines of the chart table´s arm on the left side and resembles the design to have it balanced. I kind of don´t know what to do with this small platform for now: Maybe I will have a cup holder for skipper´s morning coffee here or something else, I don´t know yet. It´s mere a design element.
Then it was time to apply varnish to the Teak. Teak will unfold it´s true effect when varnished properly. As I have gained some first experiences in working with massive Teak from building some veneers for the Yacht´s head (read the article here) I knew how to make it: At least 5 layers of varnish have to be brought onto the wood by brush. Starting with a light 10 per cent mix of varnish/thinner that was applied right on the very first day after finishing principal joiner´s work.
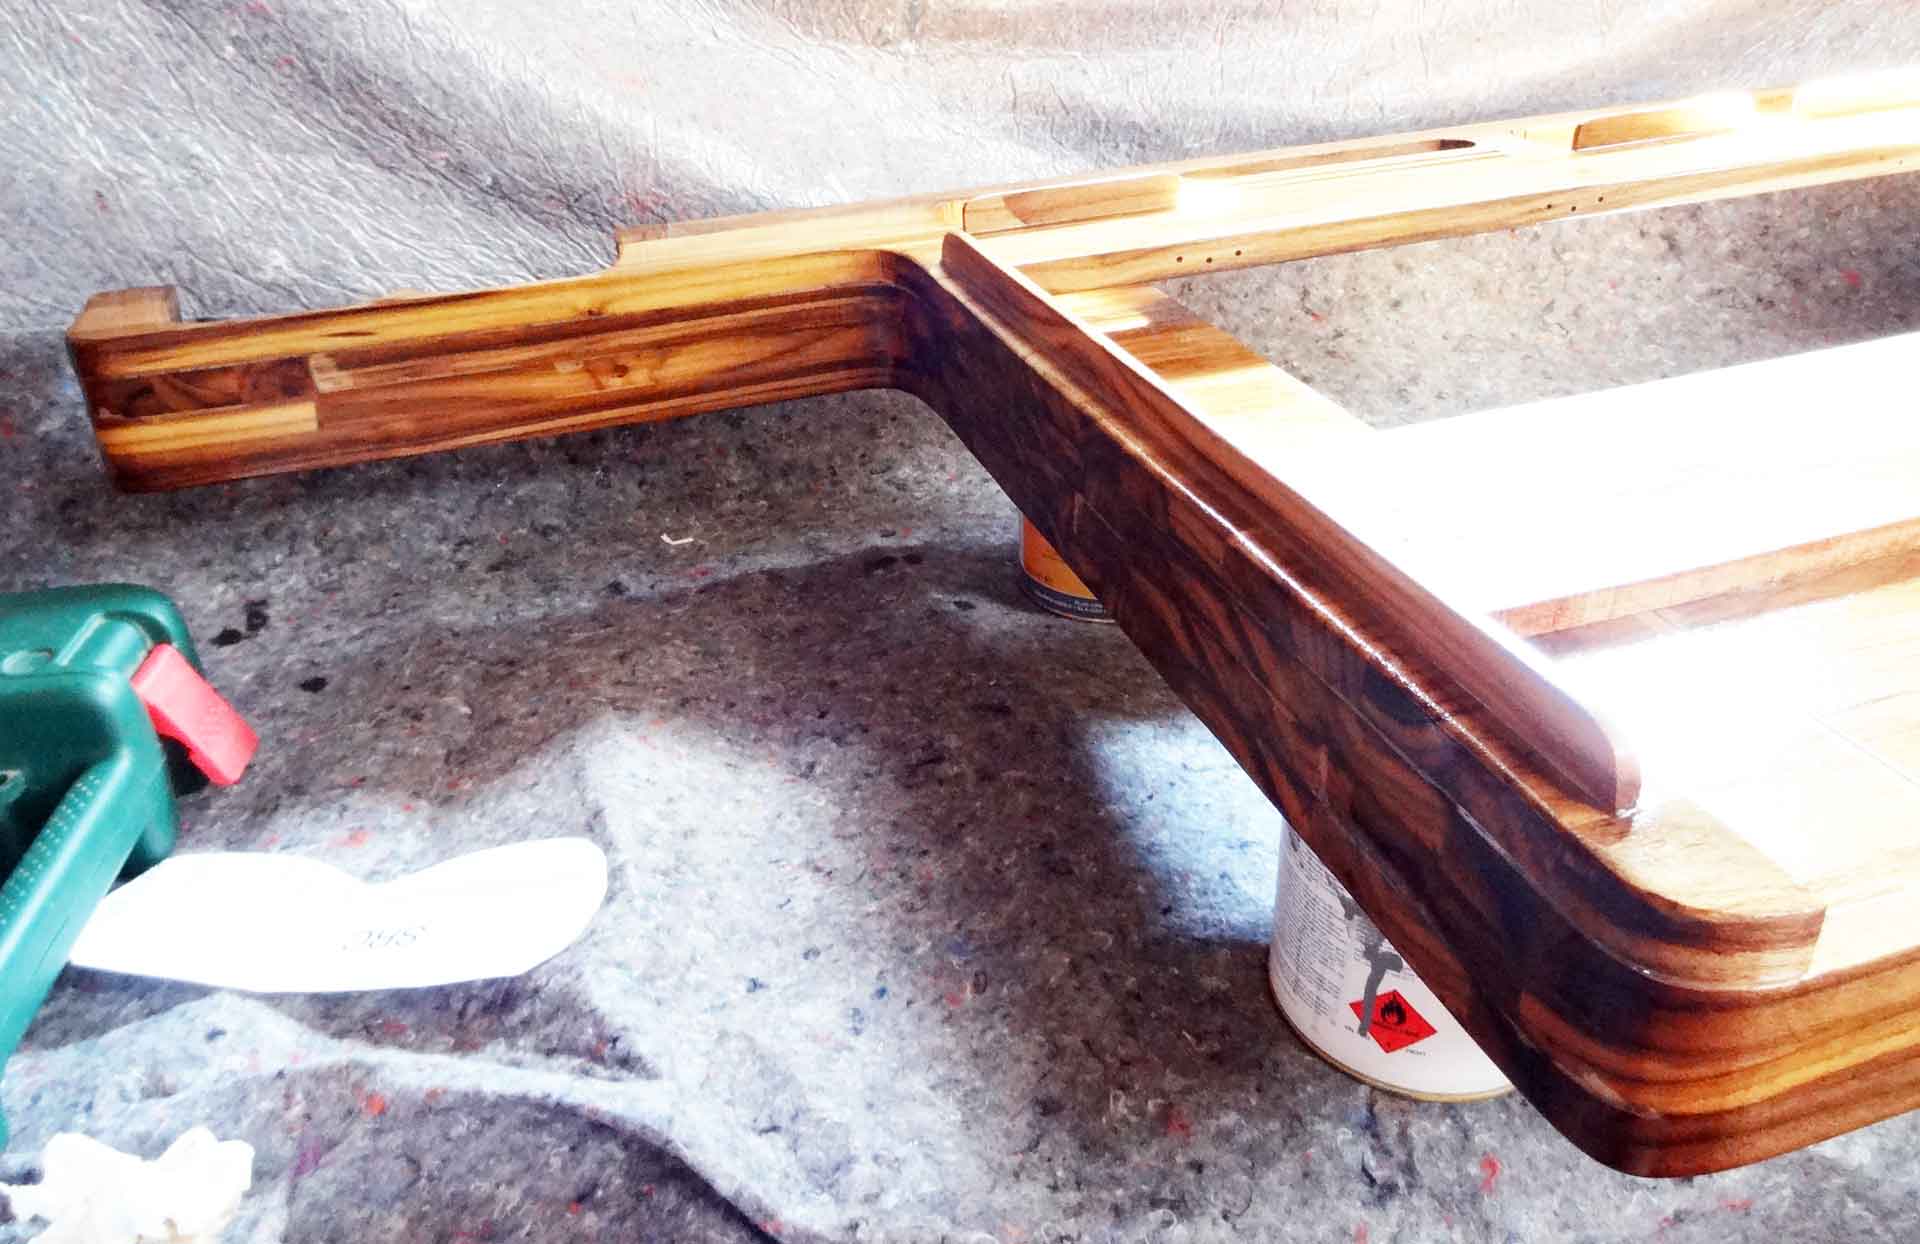
This first layer alone instantly produced an awesome picture: The wood grain came out instantly and was boosting the appearance of the chart table onto a whole new level. I couldn´t have my eyes taken off the side face of the table for there was kind of an explosion of visual effects of all the interacting wood grain. Marvellous!
Next Steps in my Sailing Yacht Refit Program
So next steps are clear: Applying the next layers of varnish will take at least five days of work with sufficient drying time to have the chart table resembling a perfect finish. When everything´s dried through properly, I am going to drill some holes through both table and the GRP base to bolt the table to the ship and have everything mounted properly. There is a principal outlet for wiring still missing that will be done after final fitting of the table: The main electric panel, VHF and some other electronic equipment will be fitted to the left side of the table and I need the cables to run through the table as well.
Finally, preparing the bulkhead onto the table will be screwed as well is another item on the list for there are numerous older bore holes I am going to cover with small round Teak plugs and have it varnished properly as well.
So a load of work still ahead – with the new perfect chart table now entering it´s final phase of construction. Up until now some 11 net working hours and approximately 500 Euro (for the massive Teak and some tools) have been invested in building it.