As now summer is approaching and temperatures reach their yearly highs, I can now think of removing the filthy and ugly garbage bags which I had utilized to cover the gaping holes which once had been the large broadside portholes of the proud boat – time to cement the windows back in place. This will be a major leap for the whole refit project because only after mounting the portholes I will be able to put in place the large interior Teak-made panels in the salon. But this is a big operation, I fear, and so I´ve decided to do a dress-rehearsal first. With the head´s bulls eye.

One of my previous owners had cut out a small porthole in the cabin roof all through the bal of the boat and glued an elliptical piece of Plexiglass to it. Additionally, six stainless steel screws had been drilled through both to secure it in place. Over the years (or even decades), the salt water, constant stepping on the window and UV-rays have worn the Plexi down: Scratches all over the place and a not very nice to look at yellowish colour made me removing the old piece. The perfect learning object: Not too big nor too important. But first: Teak time!
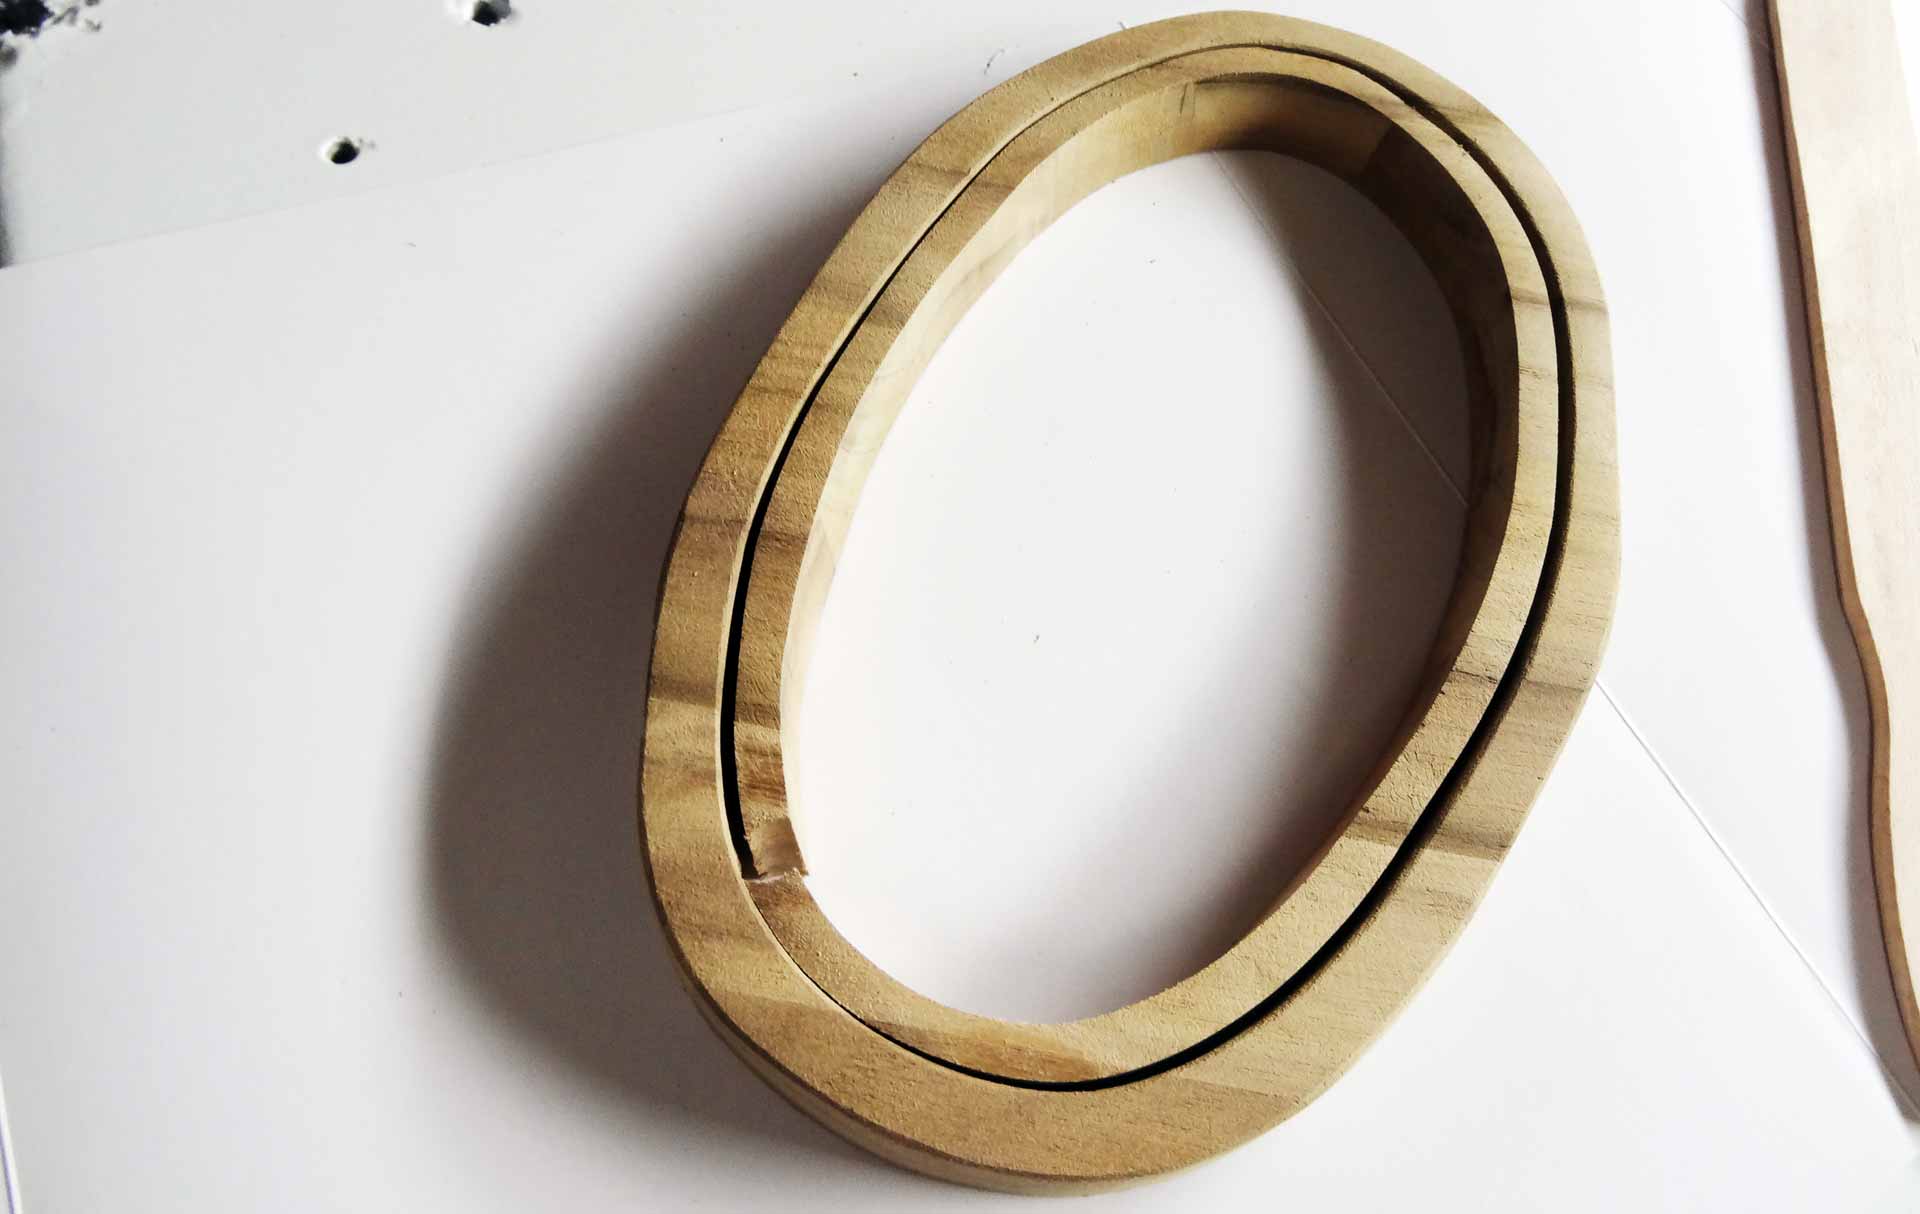
As you know, I am dressing the boat with Teak interior and since I do not like looking bare GRP and Balsa, I had cut out two rings from Teak and already varnished them. I do not know right now if I should apply the same time and effort to make a roofing in the head like I did in salon and fore cabin and I am thinking of priming the bare GRP-ceiling with Epoxy and painting it plainly white – no substruction, no panels. Nevertheless, the porthole should be looking nicer.
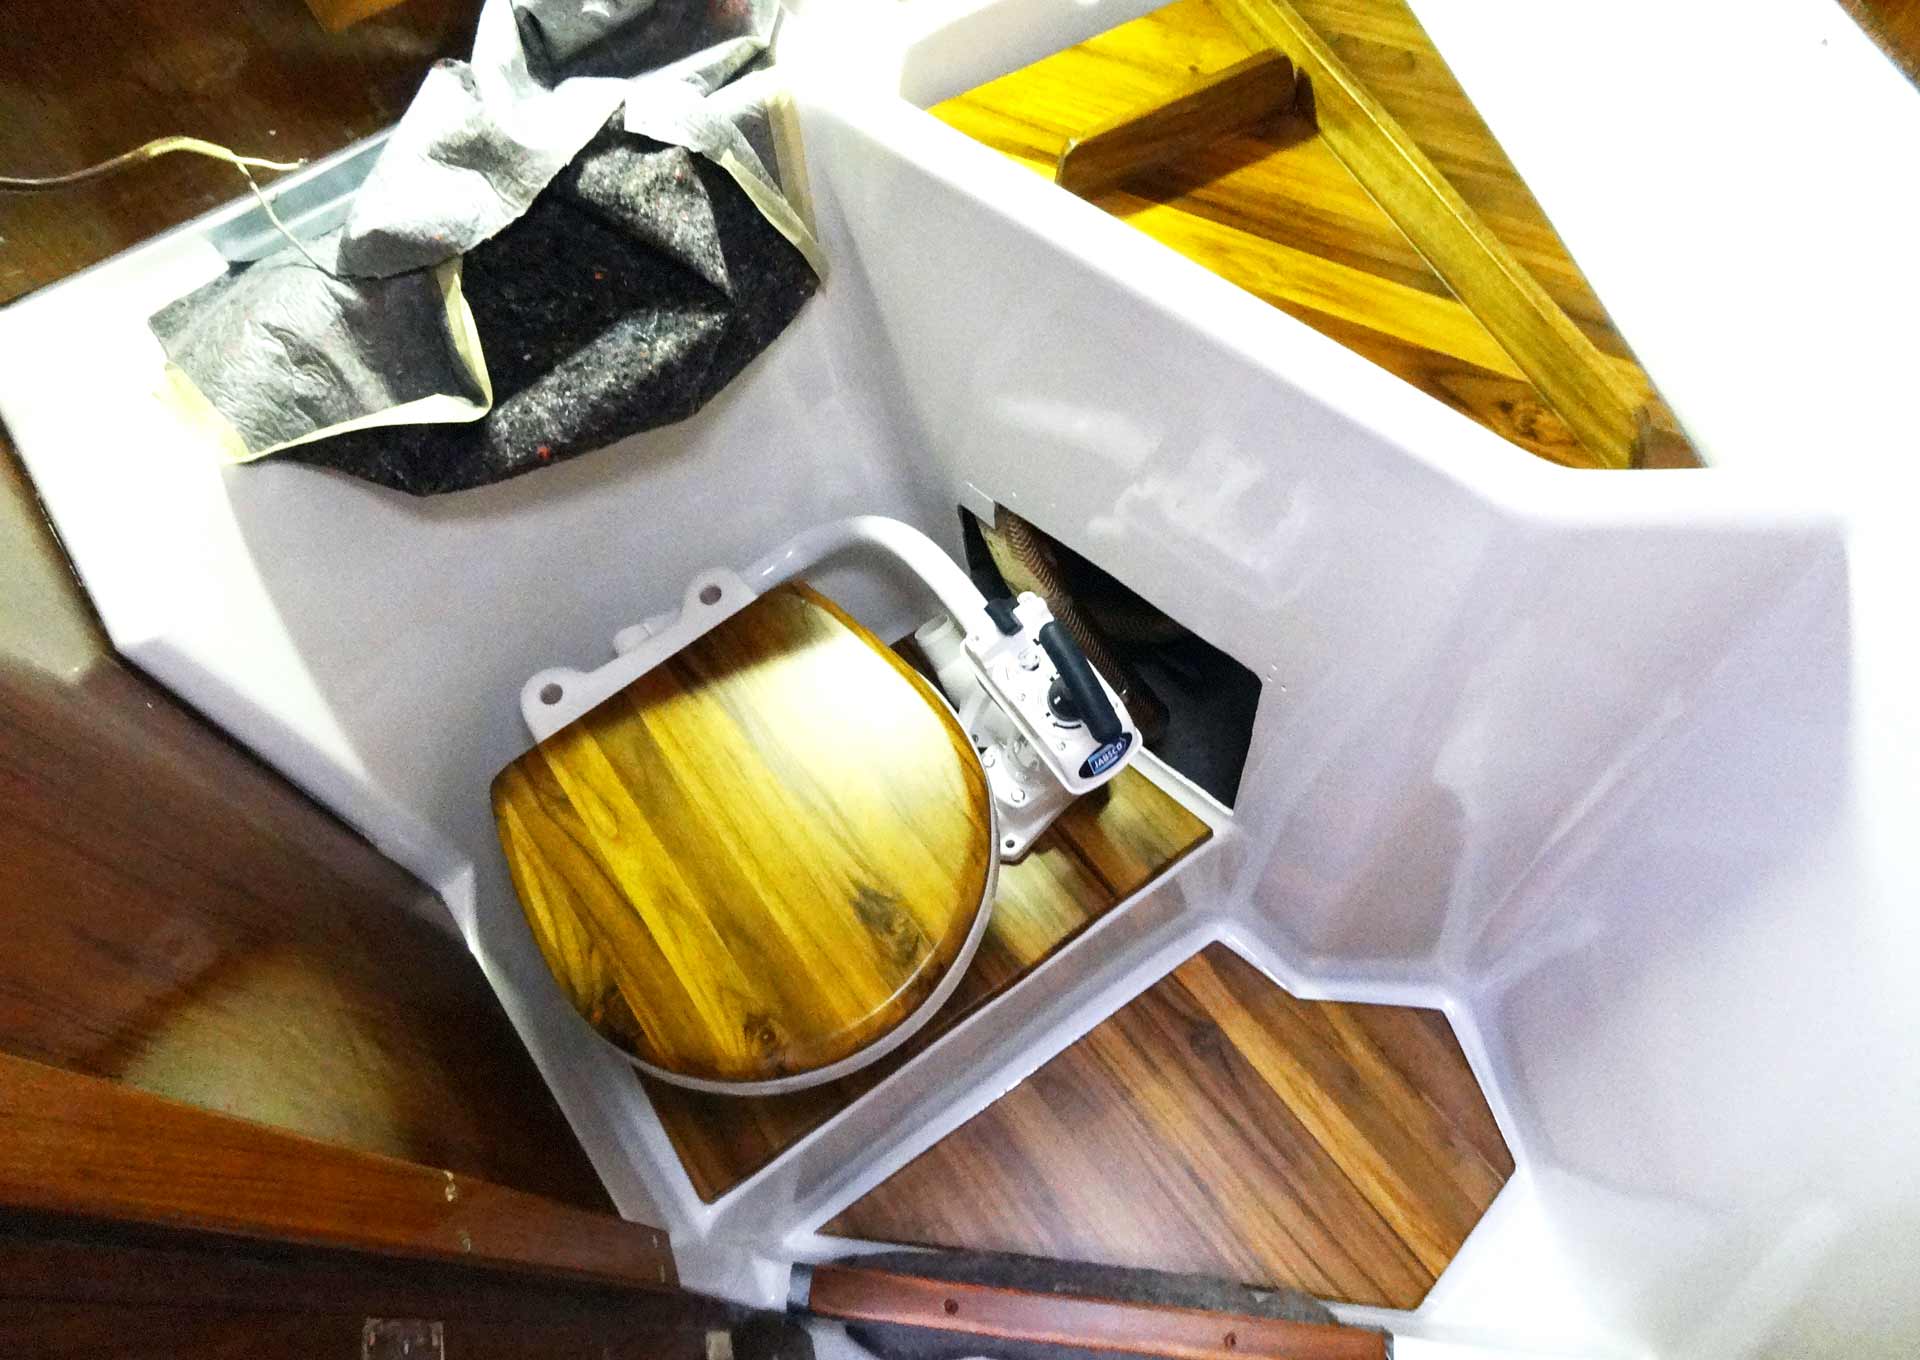
Also, upon starting my refit efforts two years ago I was also re-designing the head of my boat by incorporating some Teak applications as floor-panels and the base mounting for the toilet itself (read the full article on head redsign here). I think, the white-painted ceiling (without any complex panels) will be a very nicely looking counterpoint here.
Teak is everything (in my boat)

After plugging the open Balsa core with Epoxy, I screwed and glued the Teak framing into the hole (by using Pantera) and I loved the outcome. Since sitting on the new Jabsco-toilet will naturally take some time here in this small cabin, where else than above to where the light is coming from should the occupant be looking to? So, applying this small detail is indeed improving the overall look of the head.

Pantera is the tool of choice. It is both a great glue and sealing-stuff to work with and I increasingly work very well with it. Concerning the Teak frame it again did serve me well. Two brass screws additionally provide mechanical fit to the frame although I would have preferred to have screwed in more but the very, very narrow mounting situation prohibited it.
Products used for cementing the windows
During last Hamburg boat show I went to a specialist in this matters and got a nice training on this specialty. The company called Saba Adhesives (with their products called Sabatack) has specialized in sealant and cementing agents and so I agreed to buy their products. In fact, there are three steps when cementing a new window to the GRP-surface: Priming, UV-protection and the cement itself. First, of course, is sanding down a bit the surface and getting it clean.

Cleaning is meant by a special thinning solution (although I guess ordinary thinner will also do just fine). The stuff has a sharp stench and there are numerous warning signs printed onto the bottle – God beware when working inside with this stuff … Second is priming with a UV-protecting solution. And here, everything went suddenly went wrong …
Idiot of the day …
I don´t know if it was for the sun that was burning down on me during the whole day but I got it completely wrong – but didn´t realized it until it was too late. As I was applying the thick, black varnish-like pint onto the cleaned surface of the boat all around the area where the old Plexiglass window had been mounted, I couldn´t see that it was the window I should have painted – NOT the boat!

Which is perfectly logical because the sun will be shining through the window-glass directly onto the glue if not prohibited by the thick, black primer. But now, with having primed the GRP-surface and not the glass, this could not be done properly. But I couldn´t see it and thought this was perfect … don´t know what has happened to me in these minutes. Worst off, I went on working.

Applying the cement to get the window glued and sealed off against spray and water on the deck, I was happy to having finished this task when suddenly my brain was switched on again and I realized what I´ve been done: Apart from being upset because of the wrongly applied UV-protection I could also scream because I didn´t masked the area around the window so that now a thick black curb surrounds the window: I will have to sand this down again with a Dremel.

Learnings for the upcoming real job
Apart from the very annoying fact that I´ve gone wrong on the mounting of the window, the window itself is working just fine! Looking from outside the dark grey colour prohibits any insights into the boat itself (especially with a head privacy is a must have here!) and from the other side round there is still more than enough light coming through through it. I am really happy to having chosen this coloured Plexiglass!

So, next up will be the real stuff: The mounting of the four big hull windows. This will – of course – be done in the proper way. I thought I will cut out some 4 centimetres off of the protective foil all around the window, apply then the UV-primer and have the cement also not just pumped out of the cartridge but levelled with a putty-knife. Of course, the outside will be masked, I don´t want to have black stains on the nice blue gelcoat-strip running all along the King´s Cruiser´s hull. The only thing is – I´ll need another person to help me out here as each window is secured by some 20 screws. Impossible to have them screwed alone. We´ll see …
Yacht refit: You may also like to read
Refurbishing a dirty filthy bilge – Parts 1, 2 and 3