Wow, that´s cold indeed. Temperatures drop below zero degrees now regularly and that means yacht refit program has to be adjusted accordingly: Painting and all works related to chemical reactions come to a virtual halt now since most varnishes and paints need more than 155 degrees Celsius in order to harden thoroughly. Thatswhy I stopped working on the new windows as well and I won´t be able to finish the newly made Teak panels in my yacht´s saloon as well.
Nevertheless, there was a window of opportunity during the last days as temps climbed to 5 degress above Zero and my ceramic heater was able to power the inside´s atmosphere well above 15 degrees. So I took my chance to start to cross off another item of my list: The roof-ceiling of the saloon. First step was to prepare the ground for installation of the Teak battens. This is how I´ve done it.
Mounting the subbase battens

I first decided to add no insulation at all to my yacht. That´s because I won´t sail in winter time and since sailing is an outside sport (like hiking or camping) there won´t be any insulation material to be found in tents and other outdoor-sports equipment. Besides: To insulate a yacht thoroughly wouldn´t mean to just have the insulating material applied above the waterline but below the waterline as well. That´s a hell lot of work. Effortless, in my eyes. That said, my only task is to figure out how to apply the Teak batten ceiling to the roof.
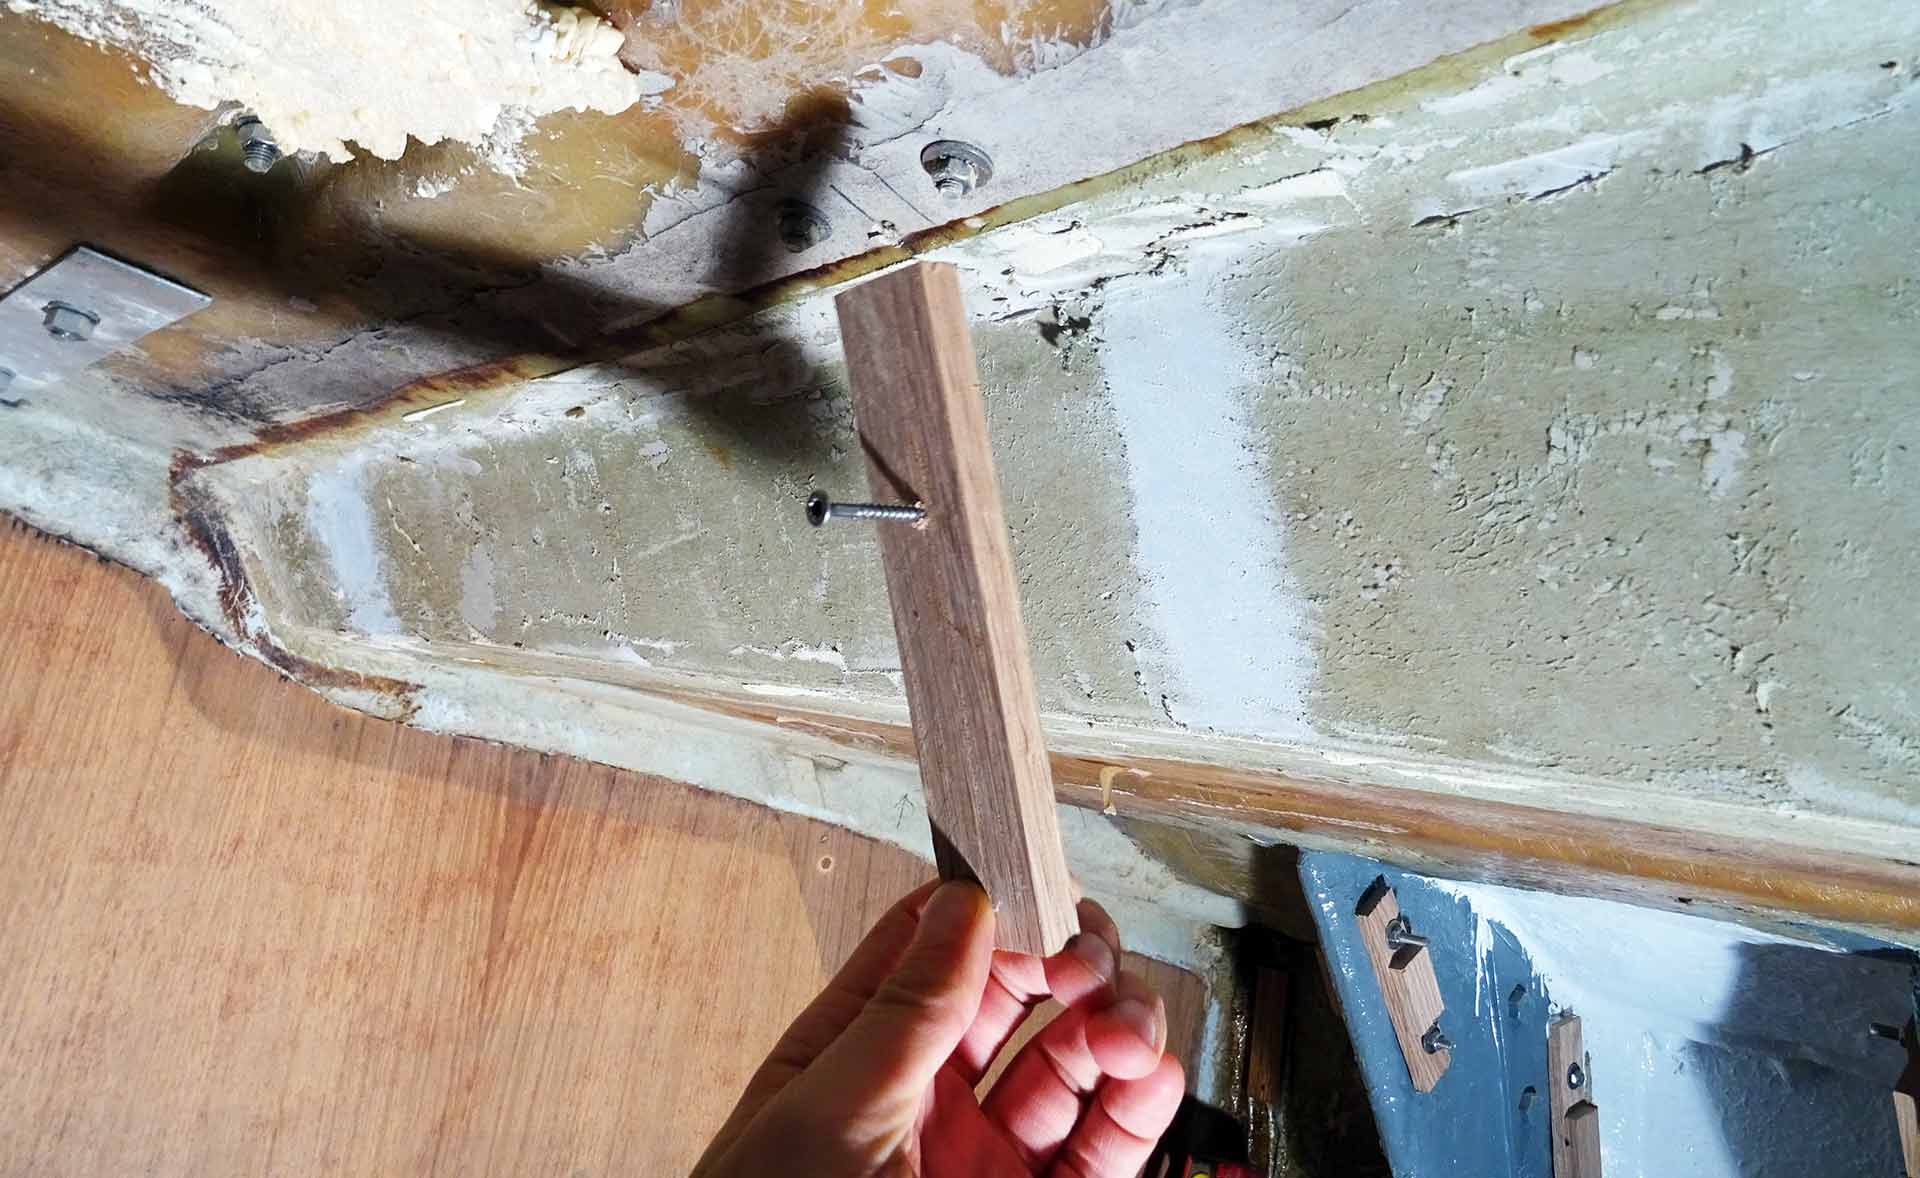
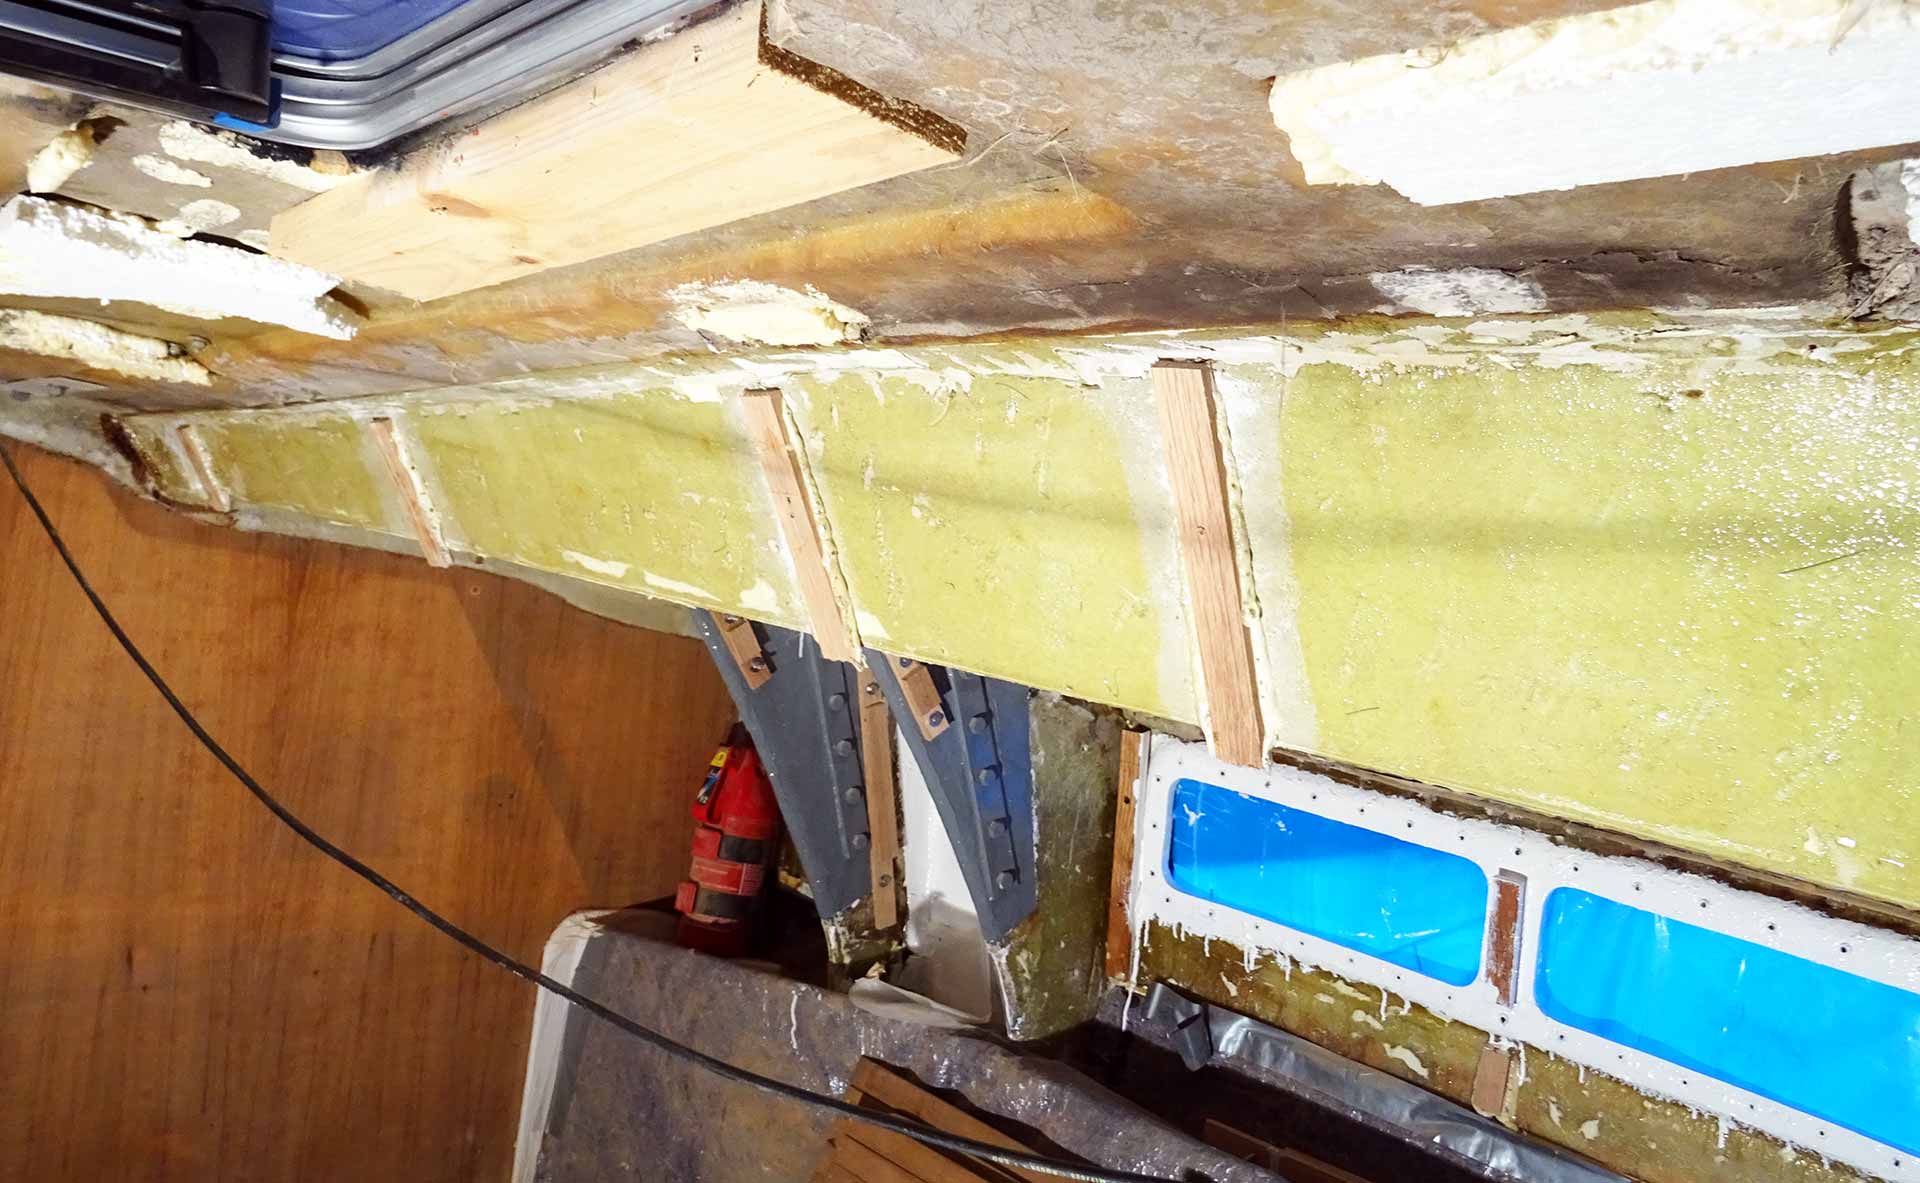
I decided to have Teak batten ceiling to be mounted to all vertical ceiling structures and classic white painted veneers to be fitted to the horizontal surfaces. I am lucky that the superstructure of a King´s Cruiser 33 is near flush so that there´s no need to buy large amounts of (financially intensive) Teak timber. At first I cut out Oak cleats to size which would fit every 70 to 80 centimeters all along the ceiling. One screw halfway through will serve as joist for the stamps.
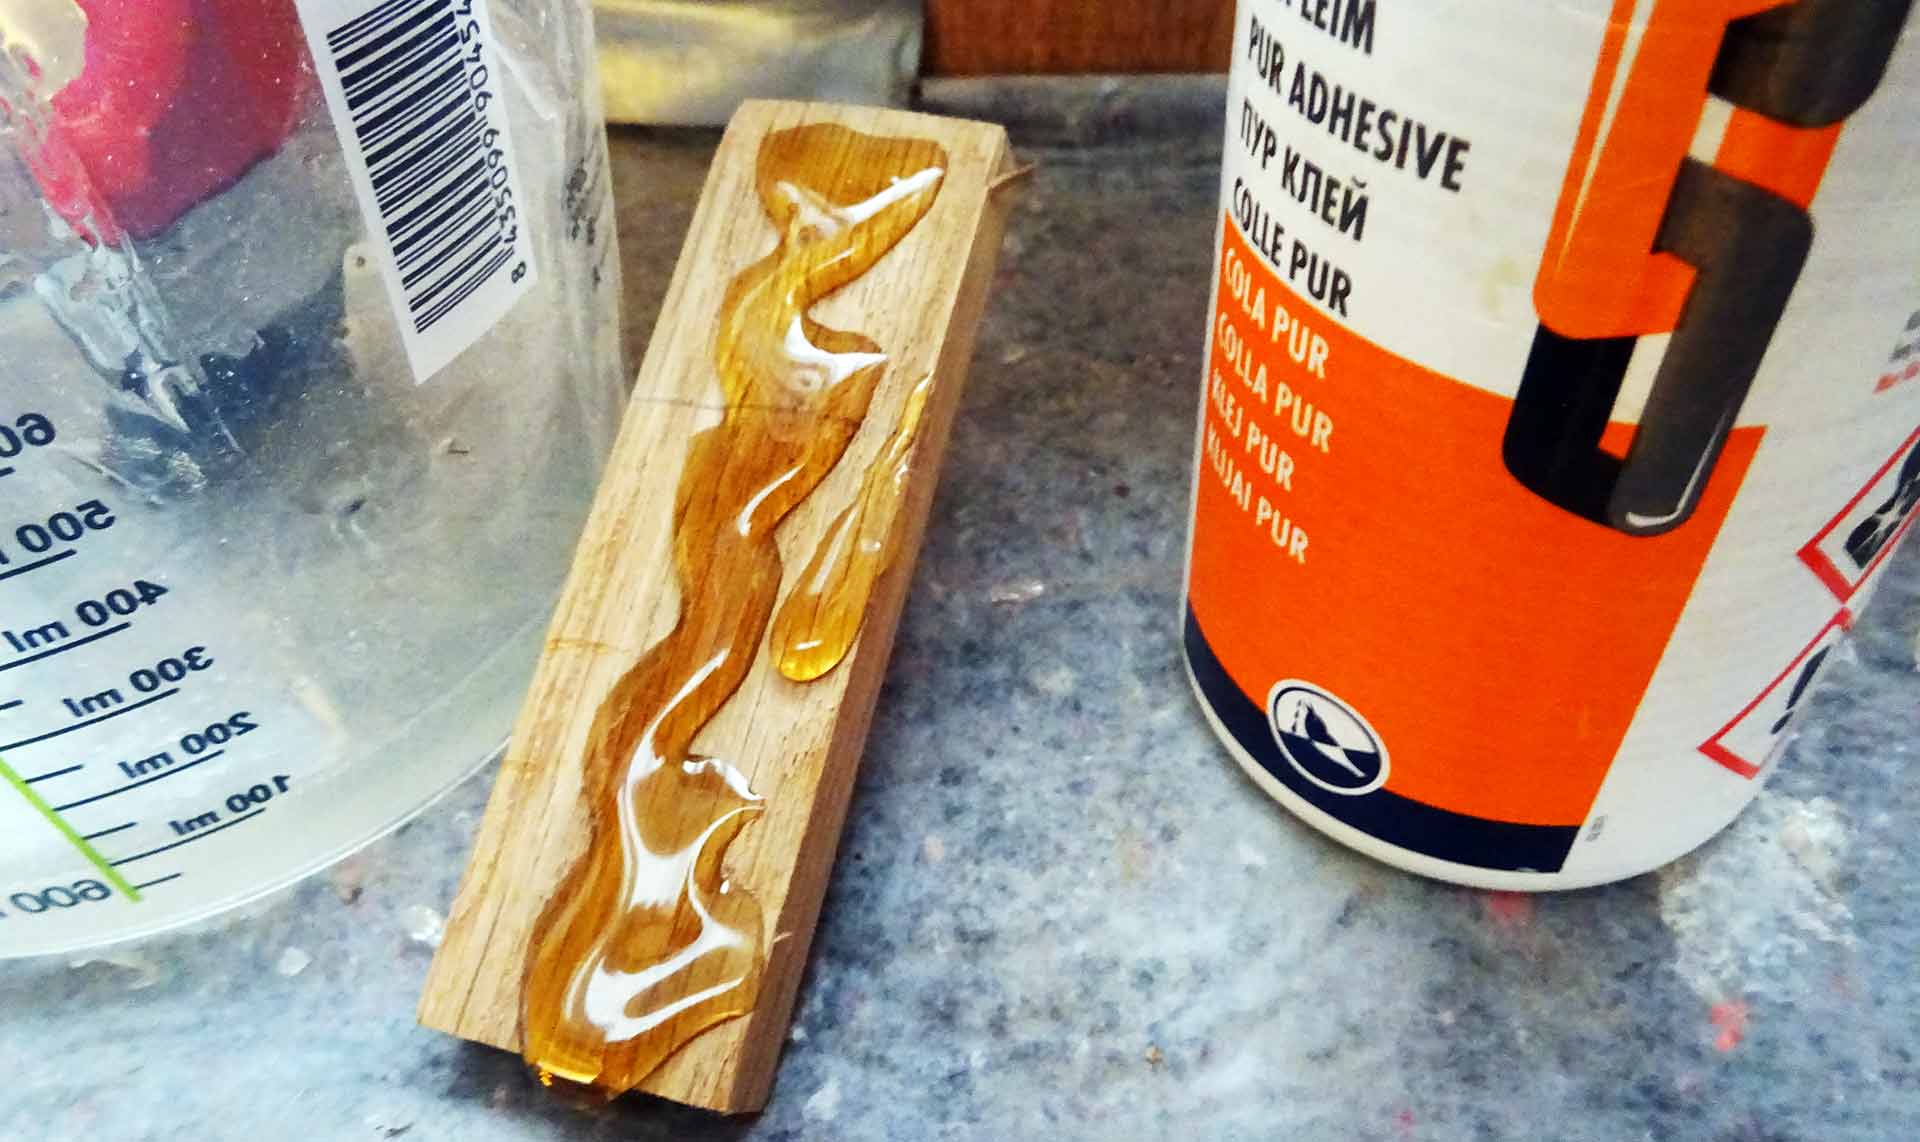
Since I have very good experiences with PUR-glue I opted to not apply the cleats mechanically but by matters of glue to the GRP surface. Working with PUR is a bit tricky – if not messy – but the outcome is very satisfying. The glue will form a very strong bond if applied accordingly. That means, by pressure. Cleaning the GRP-surface from all residues, dust and old agents as well as sanding the Oak cleats will do as preparation. Applying a comfortable amount of glue and pressing the cleat to the surface: Now it´s time to act quickly!
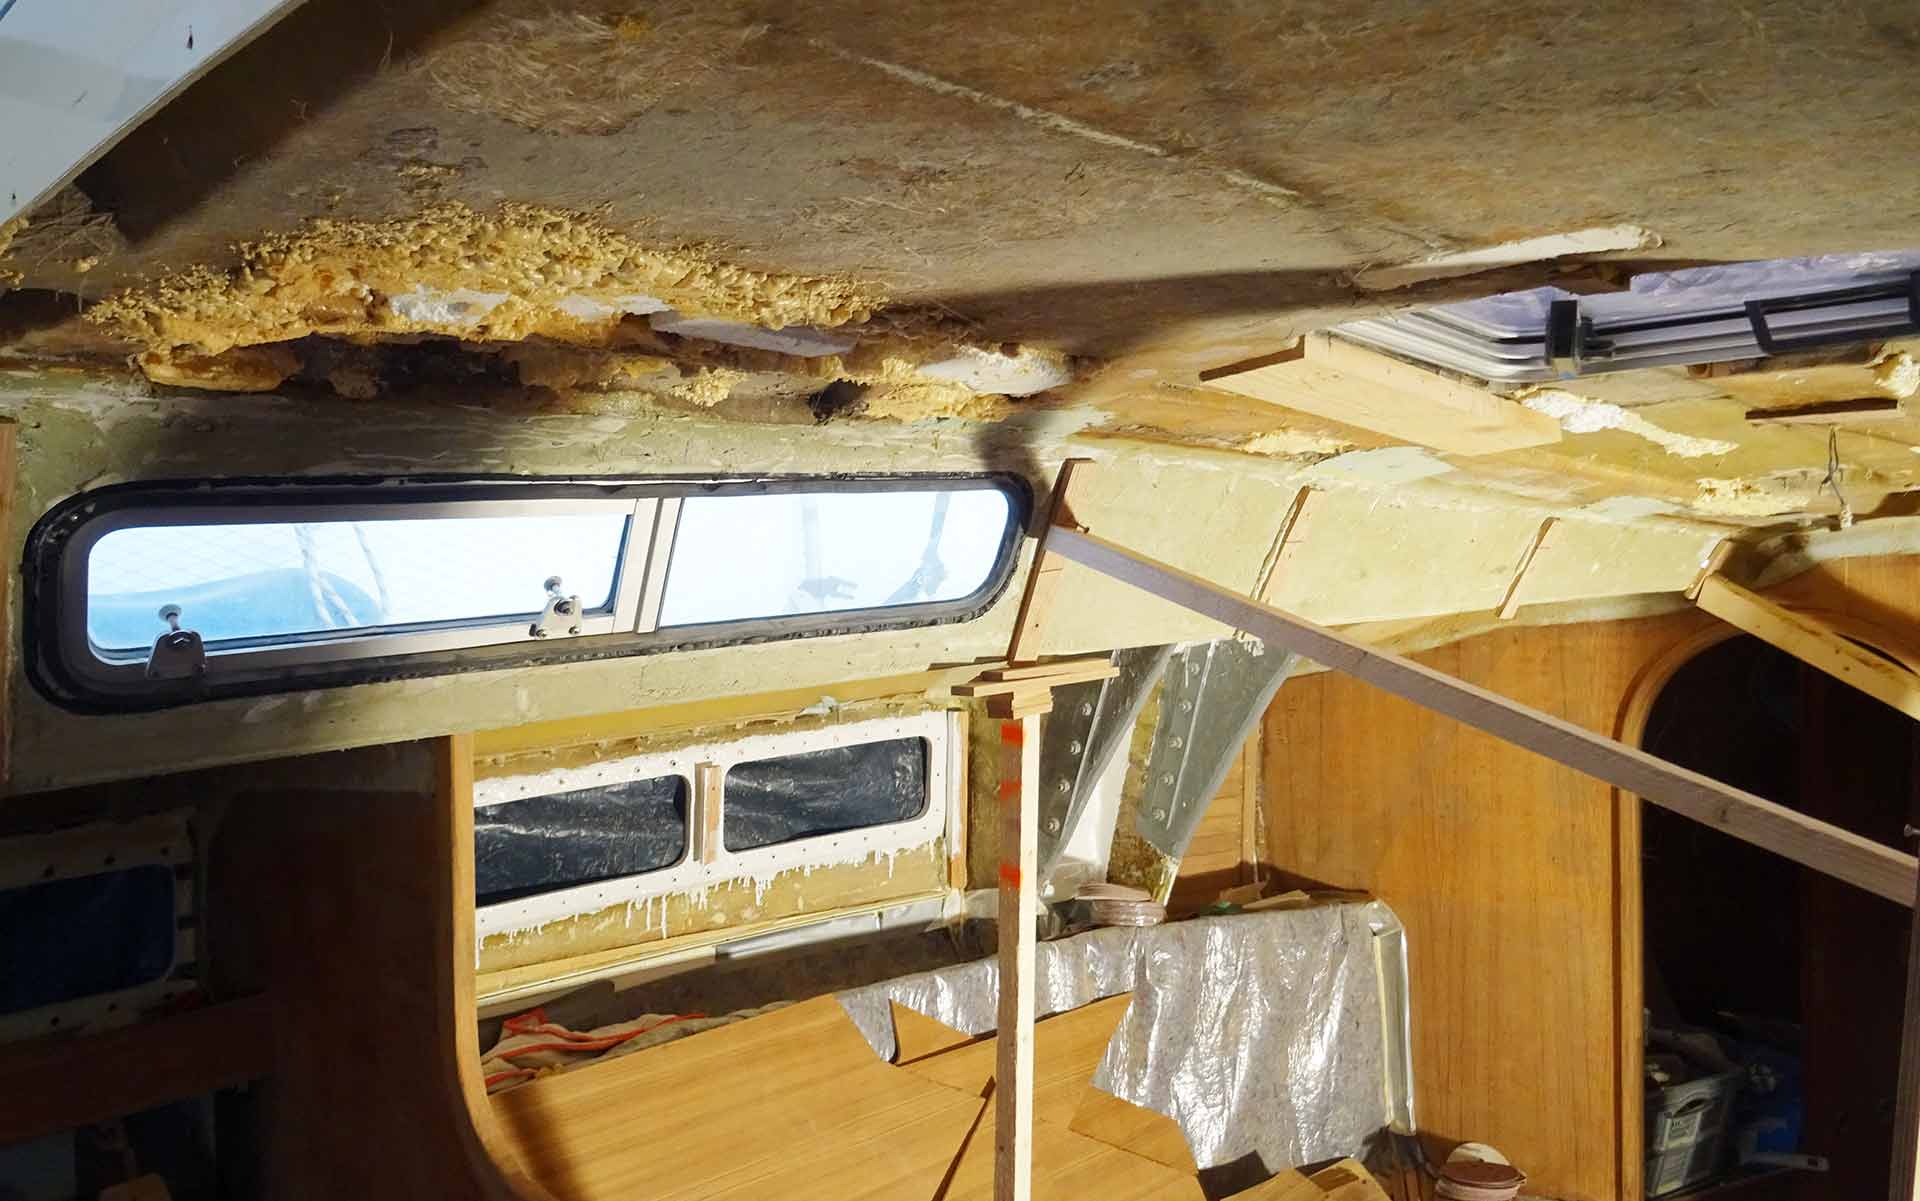
I made stamps of wooden battens which were put in place and built up strong pressure because PUR glue will only form a bond if pressure is applied thoroughly. Making the stamps was one thing: Having them in place is yet another story. It needed no less than three attempts to have them sit properly and fixing the cleats in position. The glue tends to act like lubricant and if the pressure is pointed just slightly to the left or to the right the cleat will slide in this direction causing the construction to fall down (and mess everything up in glue). Eventually I did manage to have 6 cleats applied to the roof on either side.
Painting the substructure
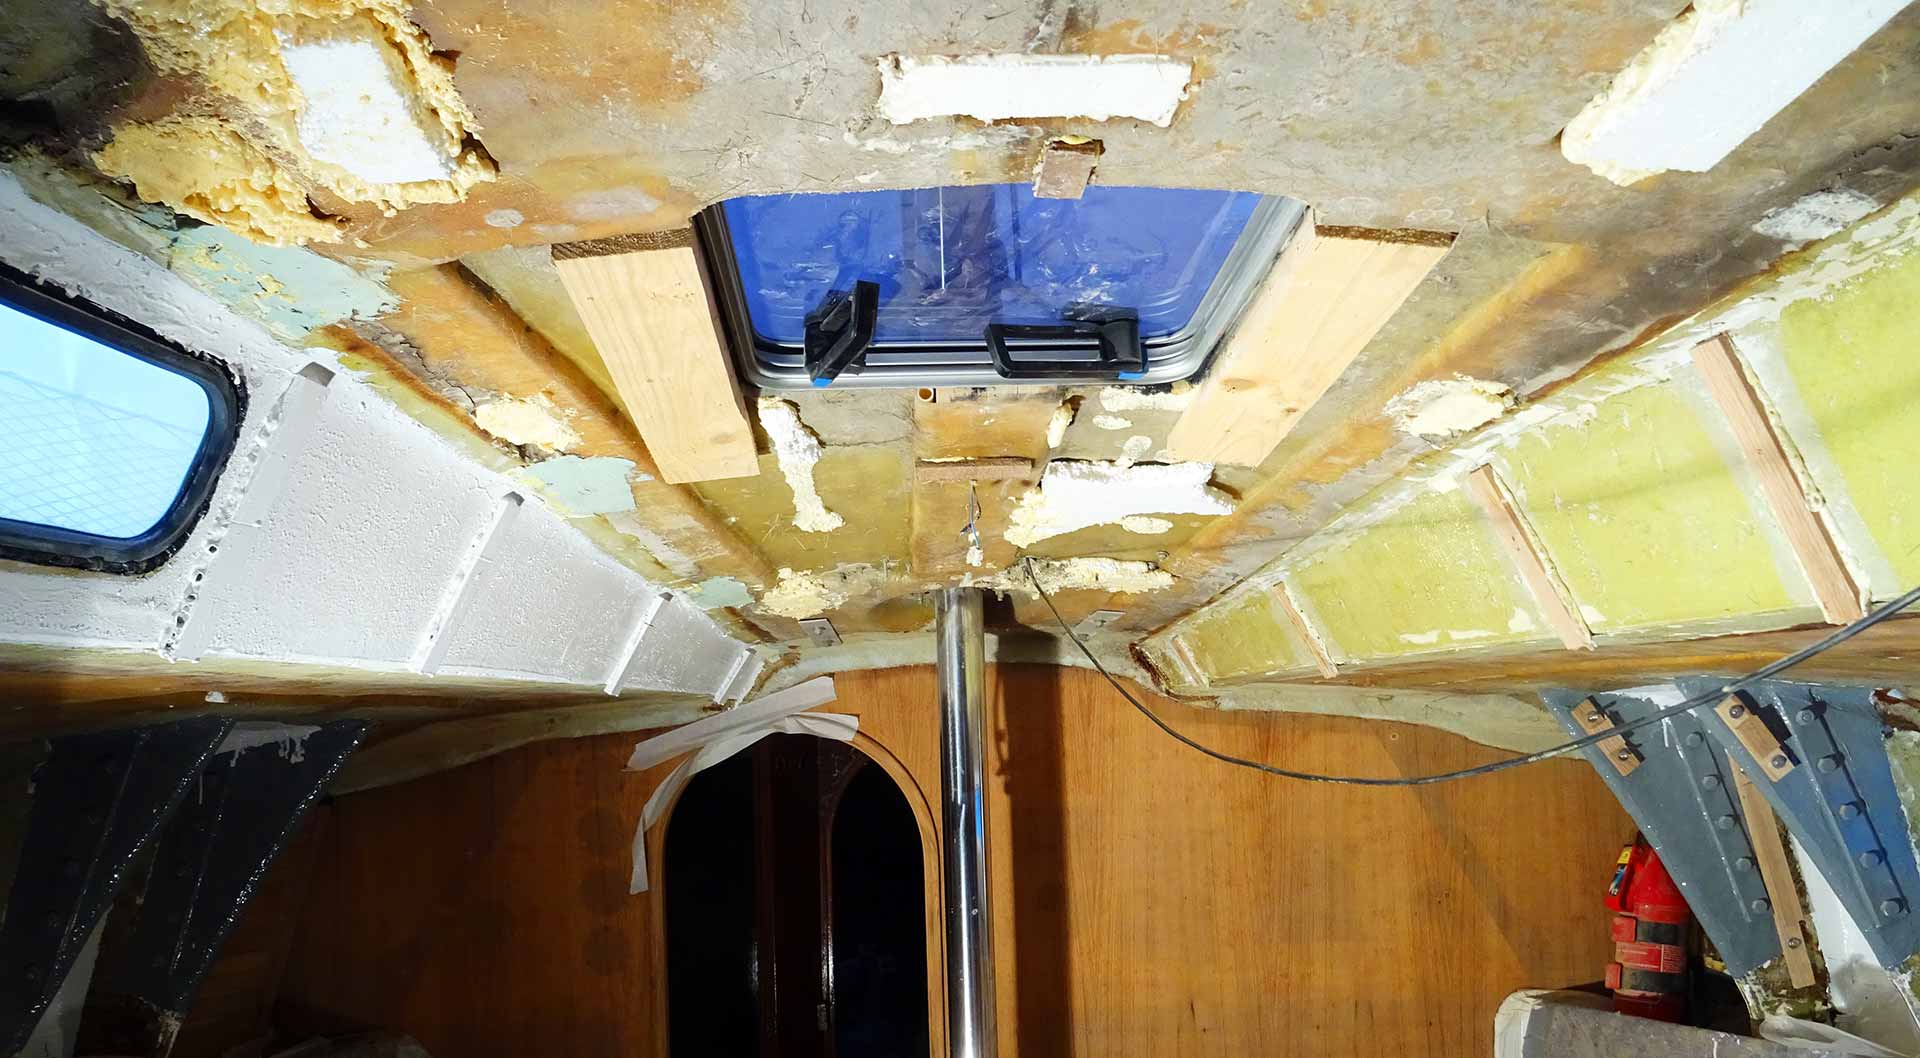
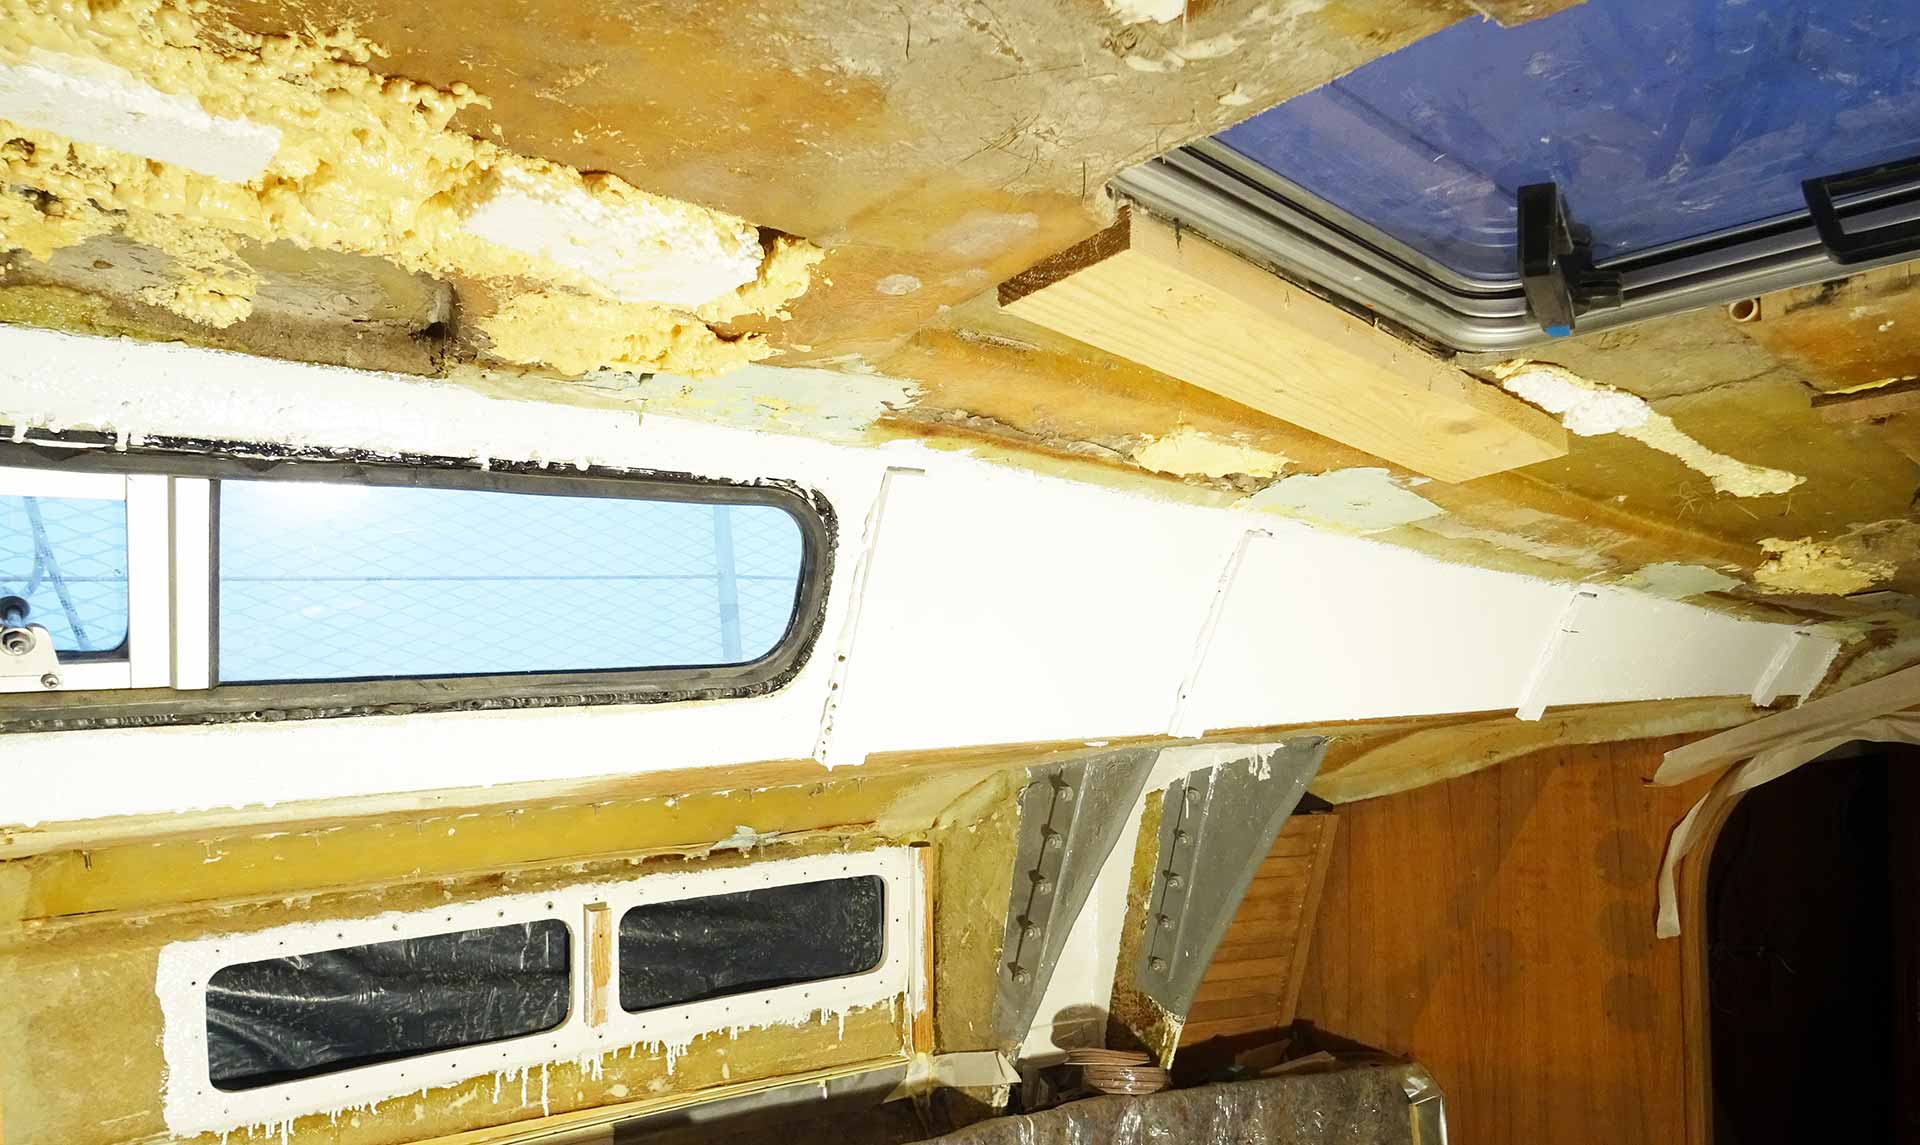
Due to the tricky circumstances it wasn´t possible to mount more than two cleats per day. So it took me nearly two full weeks to have the roof finished with cleats. Since the glue didn´t really lathered into every little gap between cleat and GRP surface I went on to cover all of the cleats as well as the surface between them with Epoxy resin. That created a hard surface, sealing the whole surface and anew it.
I began to paint the port side of the roof ceiling in yacht-white, two layers will perfectly do. My plan is to apply Teak battens to the cleats and have them screwed onto the wood. Since the roofing veneers will be painting plain white and the already finished Teak panels are seamless and thus very dark in color, I thought it might be beautiful to have the ceiling battens mounted with a 2 to 3 mm gap in between, letting shine through the white color underneath.
Now it´s time to have the starboard side filles with Epoxy resin and painted white all over as well, wait a few days and then to go on to Part 3 of Making a Teak Ceiling: By preparing the battens and having them mounted onto the cleat substructure. I am very much looking forward to doing so and I hope temperatures will remain that moderate at least around 1 to 5 degrees above Zero allowing me to carry on that work.

Next Steps of the Yacht Refit Program
Up to now it´s a bit confusing since there are so many unfinished items waiting for completion. Due to the low temperatures applying varnish and glossy paint to the Teak made fittings is forbidden: I simply do not want to risk to have fissures in the coat when temperatures rise again. So all I can do now is to have the wooden fittings prepared for next spring. This is: Sanding all the wooden surfaces, much alike the bulkheads, where I am halfway through the boat and making all the wooden parts to have them stored through winter time.
Upon finishing mounting the Teak battens at the vertical parts of the cabin roof, the next big thing will be the roof panels themselves, which I want to pretty much look like I once saw inside the Biga 270 (read it here and scroll down to the very last part of the article). Nevertheless, I am looking forward to finish the saloon´s rough work within this year´s time.
Interesting Articles on that Topic
Winterizing your Sailing Yacht
Cleaning a dirty filthy Bilge
Interview on “Black Hole Yacht Refit”