Finally my colleagues of our in-house yard had been able to finish the gelcoat cracks/GRP-cracks project on our small First 27 SE sailboat. You may have read the first article about the first couple of days. I am happy to have a skilled GRP-pro in our team who worked many years for the Meyer Werft Papenburg, the one big plant that puts out those (awful) big-ass cruise liners.
Olaf is our wizard when it comes to laminate, glass fibers and epoxy resin. I trusted him with a warranty claim on the boat where we detected serious cracks around the base of the starboard Genoa winch. At first it seemed to be hair-cracks but upon a thorough check (which for him lasted just a few seconds staring at the white laminate) it was clear that this would be a bigger operation.
Smoothing out Gelcoat

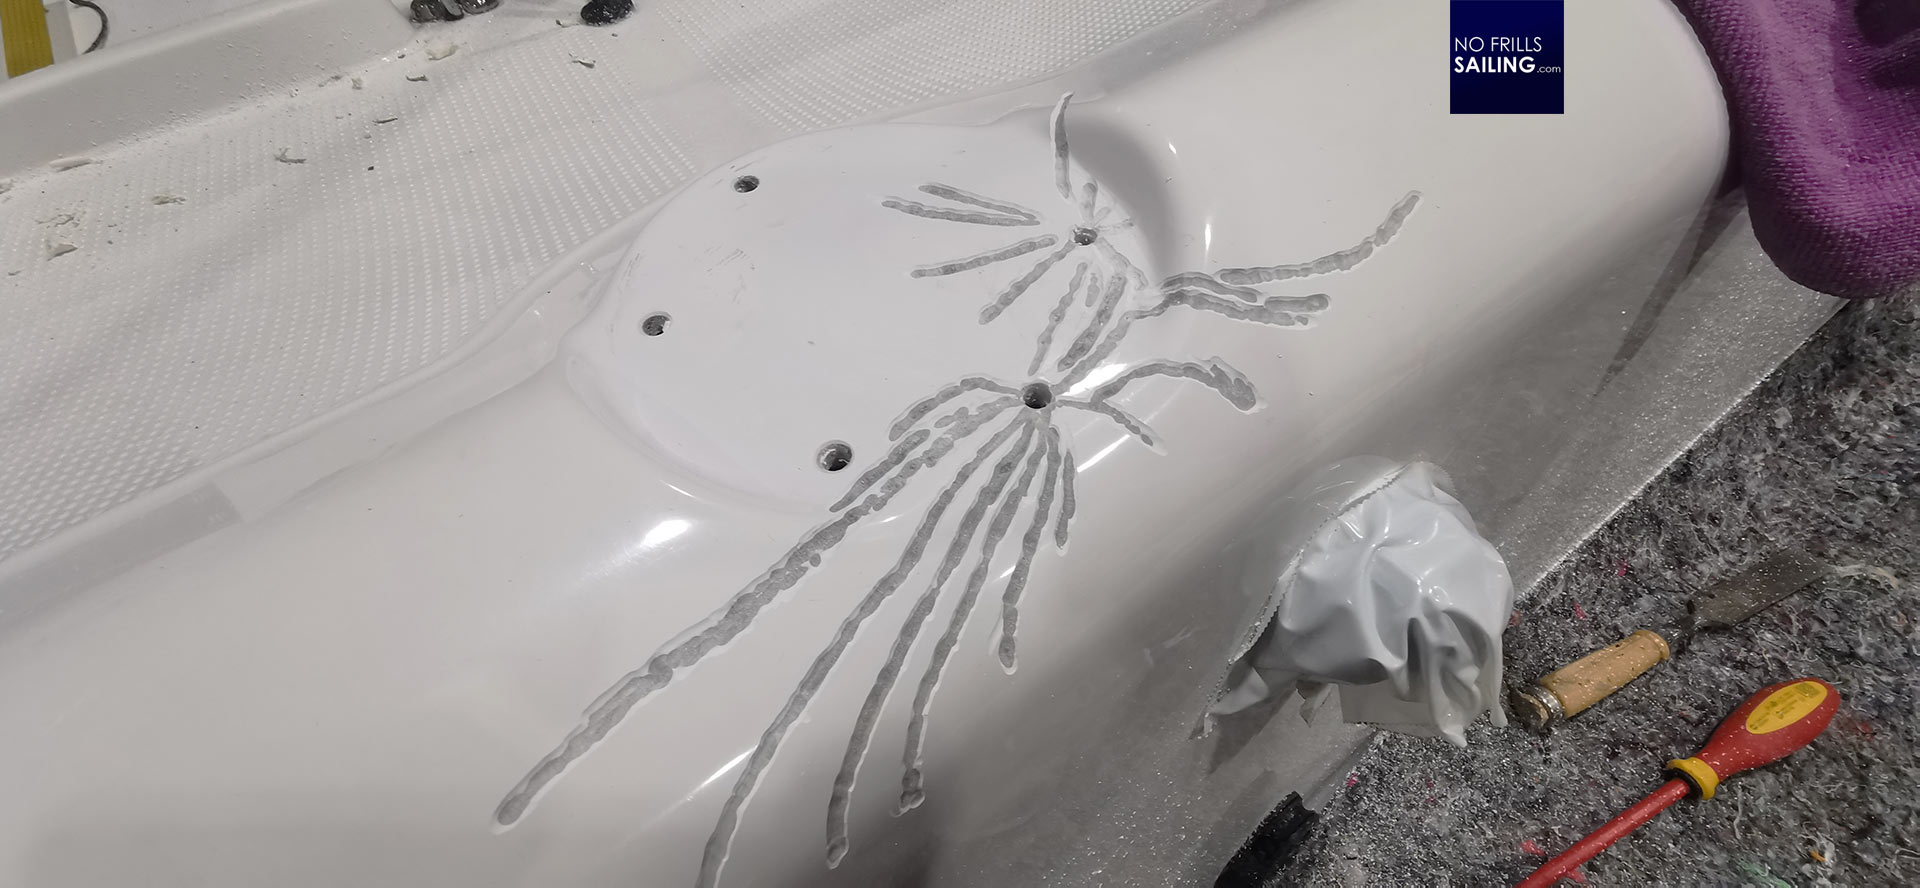
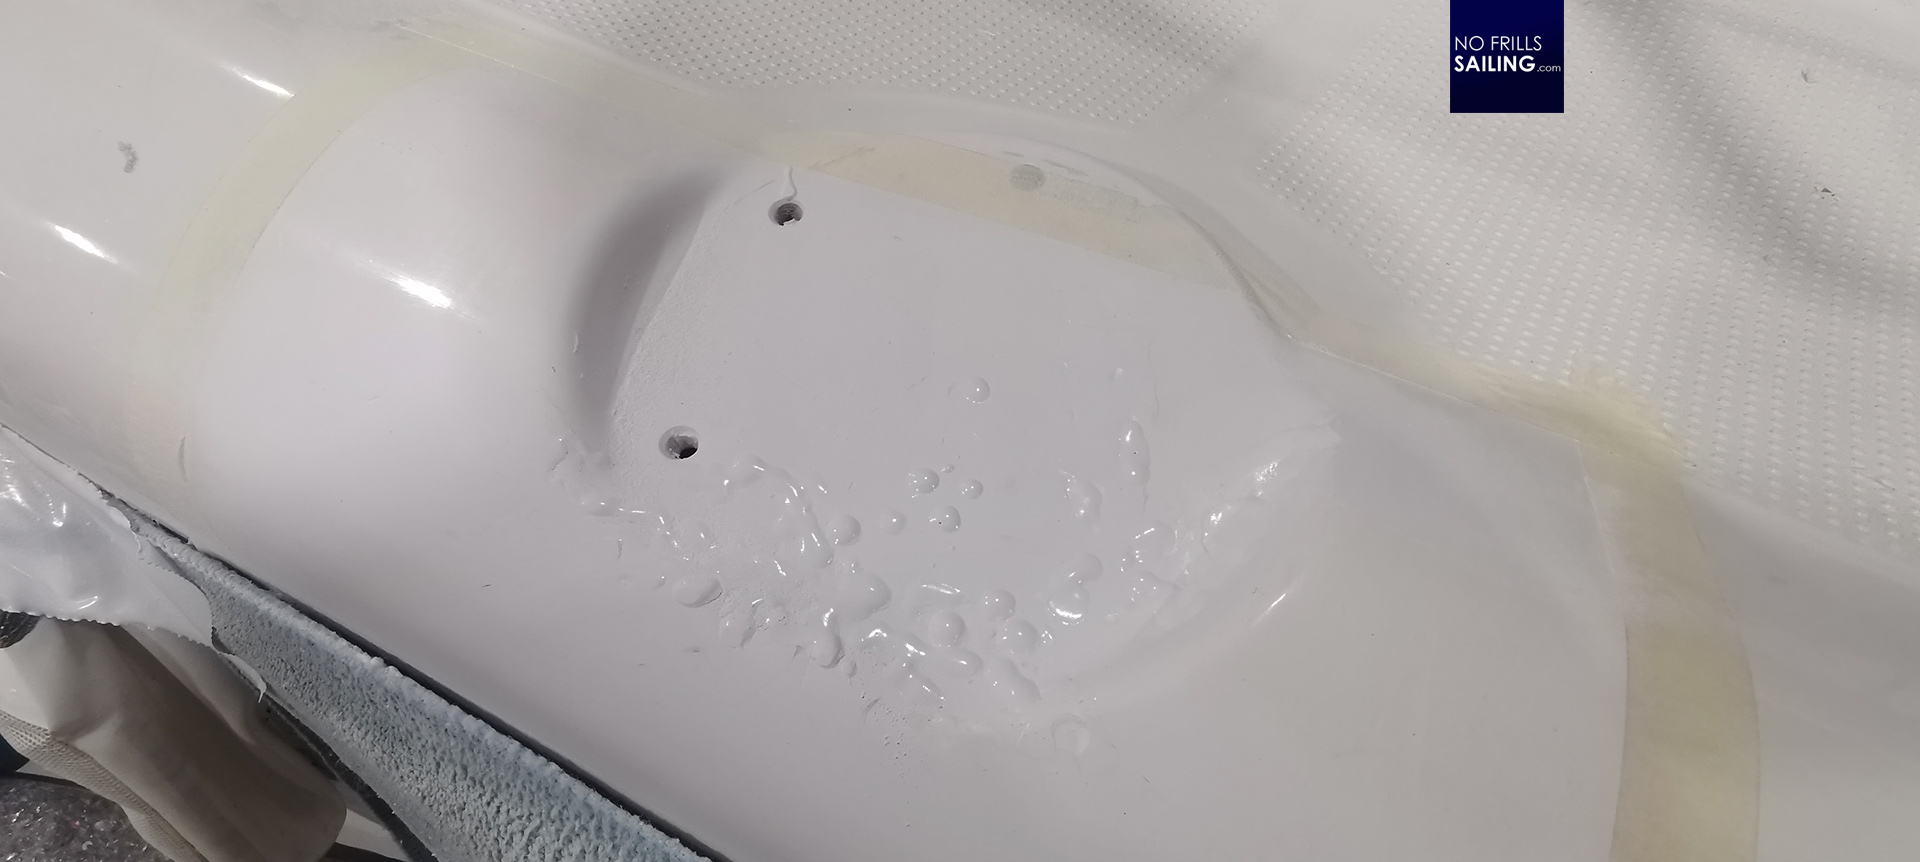
After Olaf had filled the “trenches” as I call the spider´s legs with a mixture of Epoxy resin and glass fibers, sanded them down just to re-fill them, it was now time for the last layer. Or, let´s say, the last layers: Gelcoat! We had ordered and received original Gelcoat from the yard, sending the RAL-code to Slovenia.

Gelcoat is a sealant for Polyester surfaces to block suctions of water and protect the laminate against osmosis. The Gelcoat itself is a relatively rigid material, unlike ordinary paint or glossy paint. That´s exactly the problem: If it bends or contracts too much, cracks are inevitable. So Olaf´s first and foremost task was to achieve an even and nice surface – without making it too thick.

His second task was even more delicate: The color. Even though the RAL-code was the same as the one originally used to make the boat in the first place, and even though the chemical properties of the Gelcoat were the exact same as the one used in the yard some 2 years ago … it wasn´t all so sure if the color would be the same.
Filling. Sanding. And repeat.
Not to forget, a boat, two years out in the open elements, is suspect to a harsh environment: Aggressive UV-rays, saltwater, constant changes of temperatures and of course mechanical stresses. That´s a lot for any material. With sun comes yellowing which will also make for color-differences between freshly applied Gelcoat and the original surface. A lot to consider here …
Olaf achieved a pretty clean picture with the second layer of Gelcoat after sanding. I found it incredibly satisfying and interesting to watch. As I stated in the first article, just as a talented dentist: There may be good doctors who can make a thorough filling, but only a few can achieve a perfect blend-in tooth crown in terms of matching colors with the other teeth. Olaf is such a doctor.

In the end, after the third and last layer, all holes and “canyons” had been filled and smoothly sanded by him thoroughly. He then told me that he was going to “take off” some of the shiny white glossy look of the freshly put on Gelcoat by a special technique using fine sandpaper. Roughly speaking: He re-enacted the effects of 2 years in nature. I was so excited to see the finished work!
Going the extra mile
But before this is revealed, we went for the extra mile. The damage to the coamings on which the winch was mounted could be deducted to brute force: We were able to rule out am impact because the winch is placed well inboard, so the only explanation was the force executed by a sheet, maybe in harsher wind conditions or foul weather .

Looking from below we could see why: The winch, which takes on tons of load, is attached with five screws which are bolted through the laminate. These screws are countered from inside by nuts. Small washers divert the loads evenly into the laminate. So the plan. Apparently, this setup proved to be too weak, at least for this boat. Olaf says, maybe (some of) the screws haven´t been properly tightened.

In any way, this was the concordant verdict of our boat builders, the washers are way underdesigned. More so in view of the racing character of this boat and quite realistic use case in rough conditions being sailed at the limits. Olaf found a gauge model of the base of the winch, made of plastic, and had an idea: Let´s manufacture a “superwasher”!

Next door to our yard a company specialized in metal construction is situated. We regularly have special projects for them: This company made for my GEKKO a custom designed counterplate for the Torqeedo drive section which is working perfectly. Two days after the order these guys delivered two shiny thick stainless steel super-washers.

Olaf attached the washers with Epoxy-filler and re-attached the winch. Everything is properly sealed off against water and comes with Olaf´s personal 100 years warranty. Nice! After all in all five working days the laminate cracks have disappeared and the winch – and of course her sister on the opposite side – have been secured by rock-solid heavy metal washers.

Finished. Let´s go!
The finished work is just awesome! Not only is none of the damage apparent anymore but the applied Gelcoat cannot be told apart from the original material. Just amazing! It will take one more season out in the sun for the last shades of white to blend into each other, but the initial cause of the whole mission is just disappeared.

Great work, Olaf, the owners of this boat and myself thank you. A great example for skilled craftsmanship, passion for detail and a dedicated team working their asses off to accomplish the best for our customers. The boat will leave our shed within the coming days and be handed over to her new skippers: And I hope they won´t even remember that at some point a little spider´s web was visible at the starboard side winch.
You might also find interesting to read:
Smart Repair, Part 1
Pumping WC repair
Black hole refit?