Chapters in this post
I am now working on SY OLIVIA, a 1975 built King´s Cruiser 33 by Pelle Petterson, for nearly two years now and by looking at the current count of the net-working hours I can surely state that the woodworks I am now in the midst of is the biggest chunk of them all: Some 182 hours on the gauge and still counting.

I suppose there will be another 150 to 200 working hours until this big chapter has been closed. At least 200 hours. Because, as with everything during a yacht refit of such an old boat – you will always find new jobs upon closing one other. And of course, due to the fact that I am far from being a skilled or trained craftsman, my sometimes clumsy work produces even more work. For hiding glitches for example, as to seen today.
Assembly of Roofing Panels

First of all, today was a day of rejoice as I was able to fit the last of the six big ceiling panels of the main saloon of my yacht. Suddenly there´s space inside the boat again, I can walk freely without having to look for a large panel and without stepping on something all the time: Yepp, they´re up and mounted right away!
Today the large main panel and the two panels of the starboard saloon were fixed. Not without trouble, although this time I was able to fit the parts fast and neat because I learned how to do it in the first place the last time (read it here), this time I got confused (again) with the wiring plan for the LED-lights of the yacht. Again I lost oversight as I was conveniently losing the wiring plan. It took me some 30 minutes to draw a new wiring plan and – back at home – I determine that my re-drawing is different from the initial plan.

However, the new wiring plan is better, I think: The switch for the starboard lights will be hidden behind the teak-made shroud covering furniture as I suppose that these lights won´t be switched on too often, only in case of a late-night dinner. Speaking of cables: Drawing the wires through the plastic encasement was a tricky job, but worth it as the wires will be better protected now.
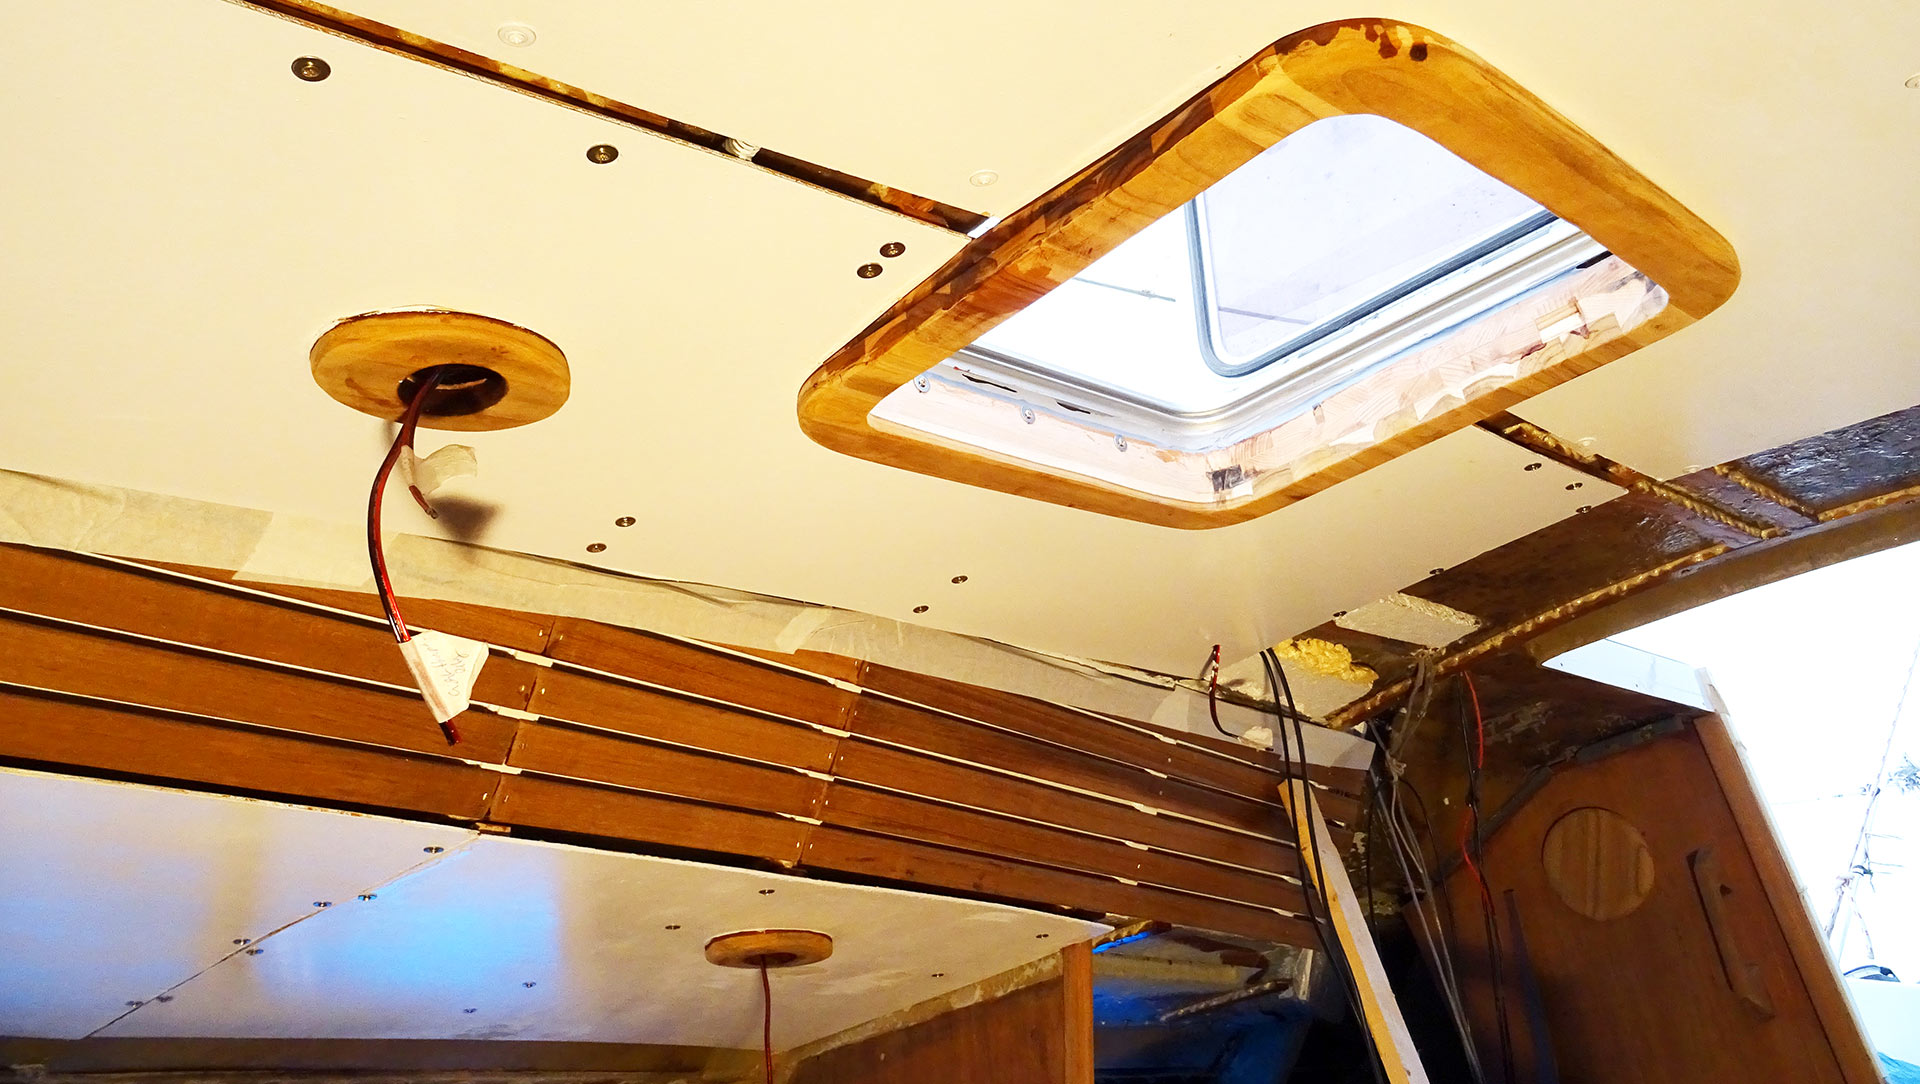
Mounting the Hatch Frame
I also mounted the hatch frame made from massive Teak as substitution for the old worn out plastic framing. Here comes another example for “1 job done, 2 new on the list”: As I was fitting the hatch framing to the panels, it struck me that given the cabin has a somewhat rounded ceiling, the panels will as well be rounded. As a matter of fact, the hatch framing is not and as such there has been a large triangular gab as the result.

So I went outside to grind and sand down a proper piece of Teak, cut it to size and fitted it almost 15 times to find the perfect shape to glue (and later screw) this between the hatch frame and the panels. Now we´re talking business: It looks amazing. But still there are so many things to do, apart from at least four large panels to be mounted in the aft section of the main cabin.

Next weeks to come
After fitting the last pieces and hopefully (!) not screwing up the whole wiring – because the panels cannot be taken off all too easily – I will have: At first paint all the panels a last time in yacht white, secondly, the large seams in the middle and the adjoining edges of the panels have to be covered with 3 cm Teak batten, the transverse boltings will be covered with thin batten. Third I have to cume up with an idea to cover the very large openings at the Teak ceiling between the lowermost batten and the panel (probably an L-shaped Teak batten will do here).

Then the plywood veneers will have to be fitted. I am not so sure about whether or not I should use them as the wood stain “Teak” does not bear the colour of Teak. It´s simply a very strong red tone that can barely match Teak. I don´t know yet what to do. I will possibly prepare a test-veneer and glossy paint it to see if the color changes. What was really exhilarating to see on the other hand was that the Teak plinths made to house the new LED-lights and their allocation throughout the yacht really peas off. So – loads of work ahead, some setbacks experienced, but I do learn a lot every day here. Stay tuned.
Other interesting articles on that topic:
Substruction for the roofing
Making the panels from birch tree plywood
Cable wiring for the LED-Lights of the yacht