This sounds quite like a never ending story – mostly to myself – but this weekend I´ve finally managed to make a huge leap forward in my yacht refitting project with the mounting of the first new roofing panels. This was quite a time to have a little celebration since I´ve spent dozens of working hours on this particular item. I must admit, I didn´t think that it would be that complicated. But let´s take a look at my work.
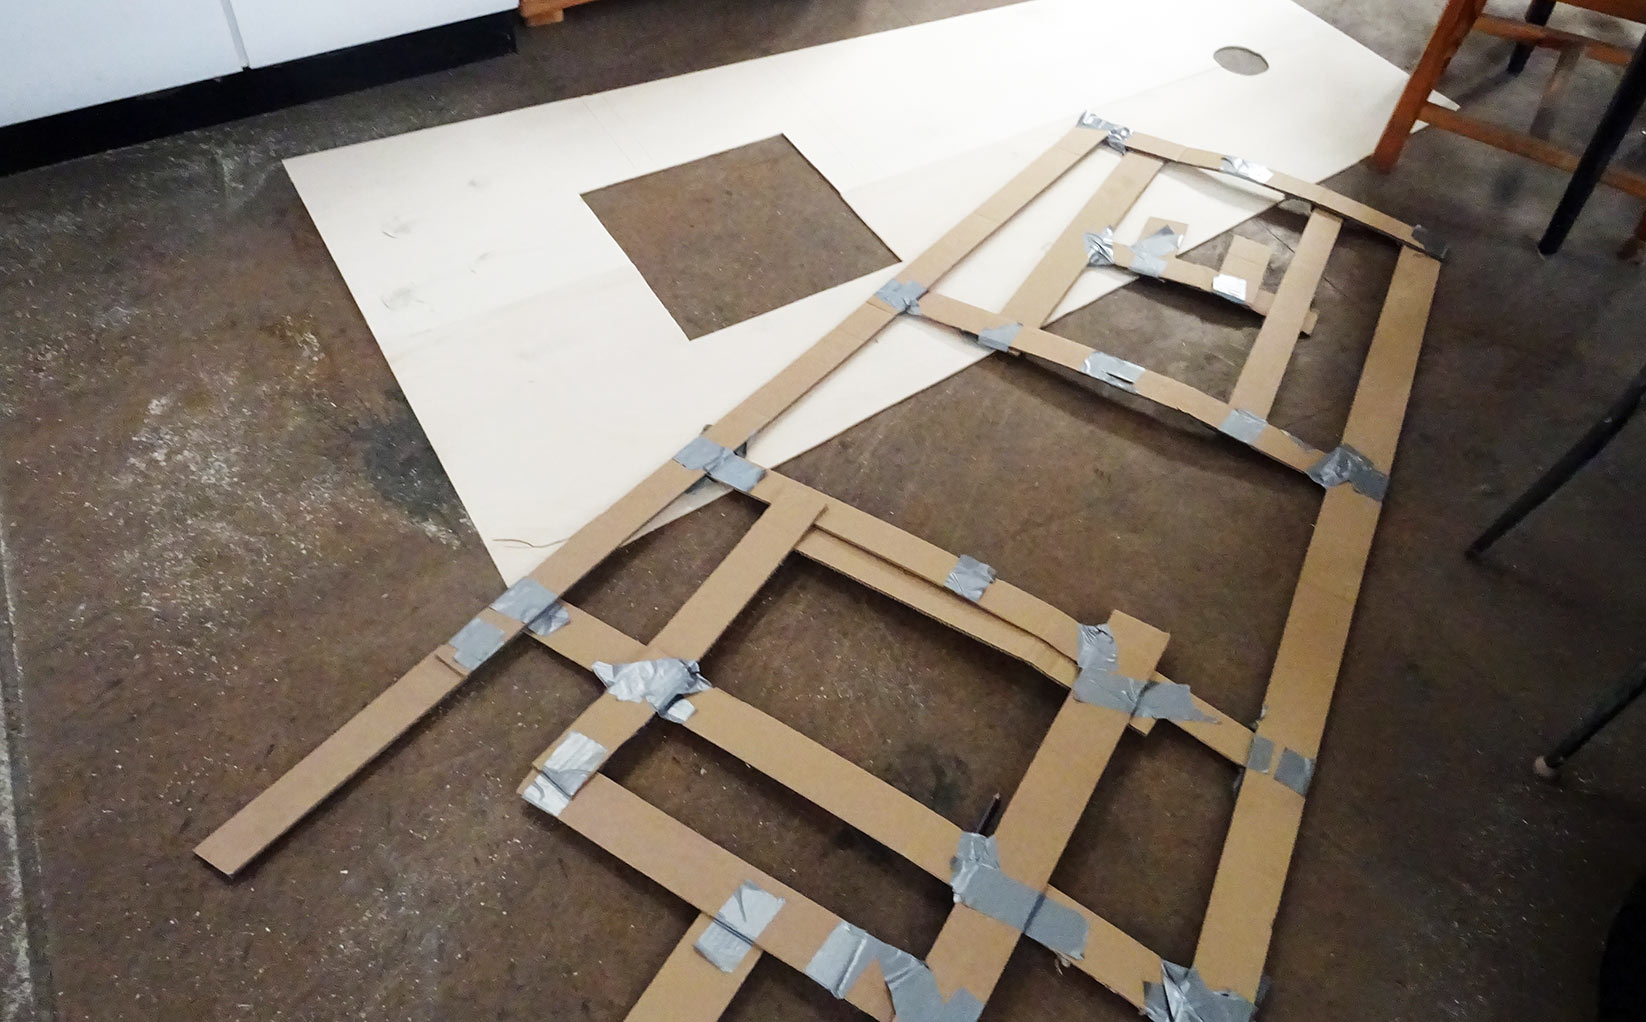
After taking some measurements of the ceiling area by means of cardboard paper calibers I´ve cut out roofing panels from birch tree plywood and tried to have them fitting properly. Since this is handcrafted work, I didn´t expect the panels to fit 100 per cent as do laser-cut CAD-based roofing panels in modern day production cruiser will. I was quite satisfied with the outcome although I knew that there would be huge spaces and allowances left to be covered with yet more Teak. But that´s for later.
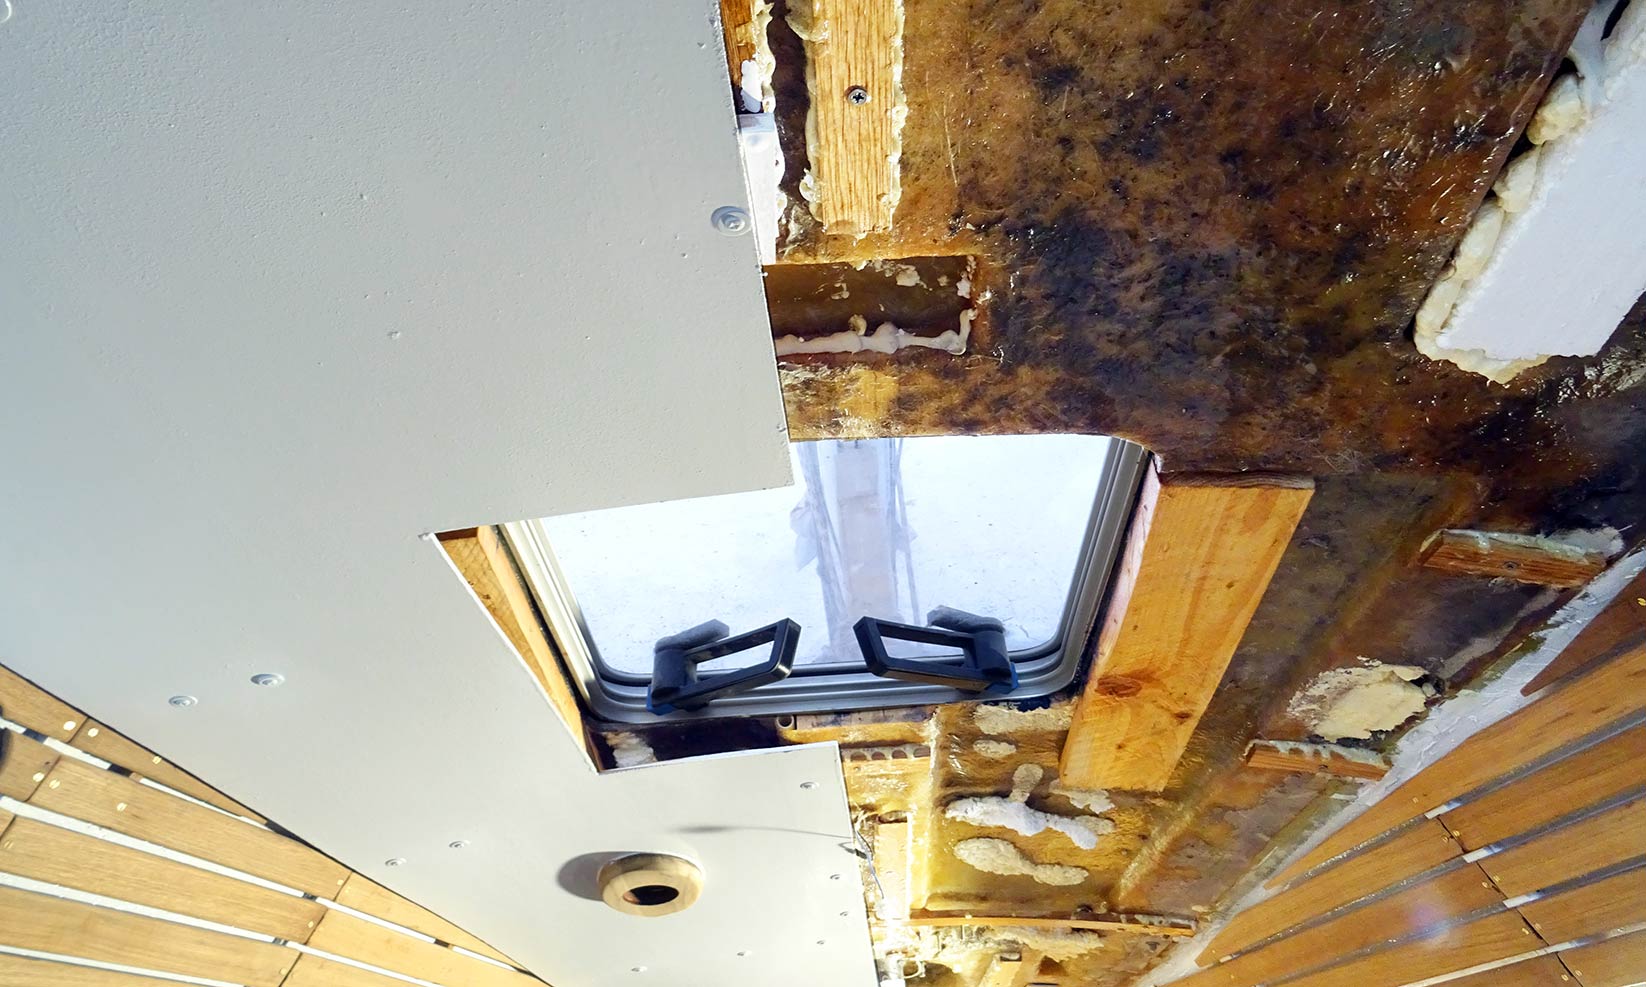
Getting the new Roofing Panels to fit tightly

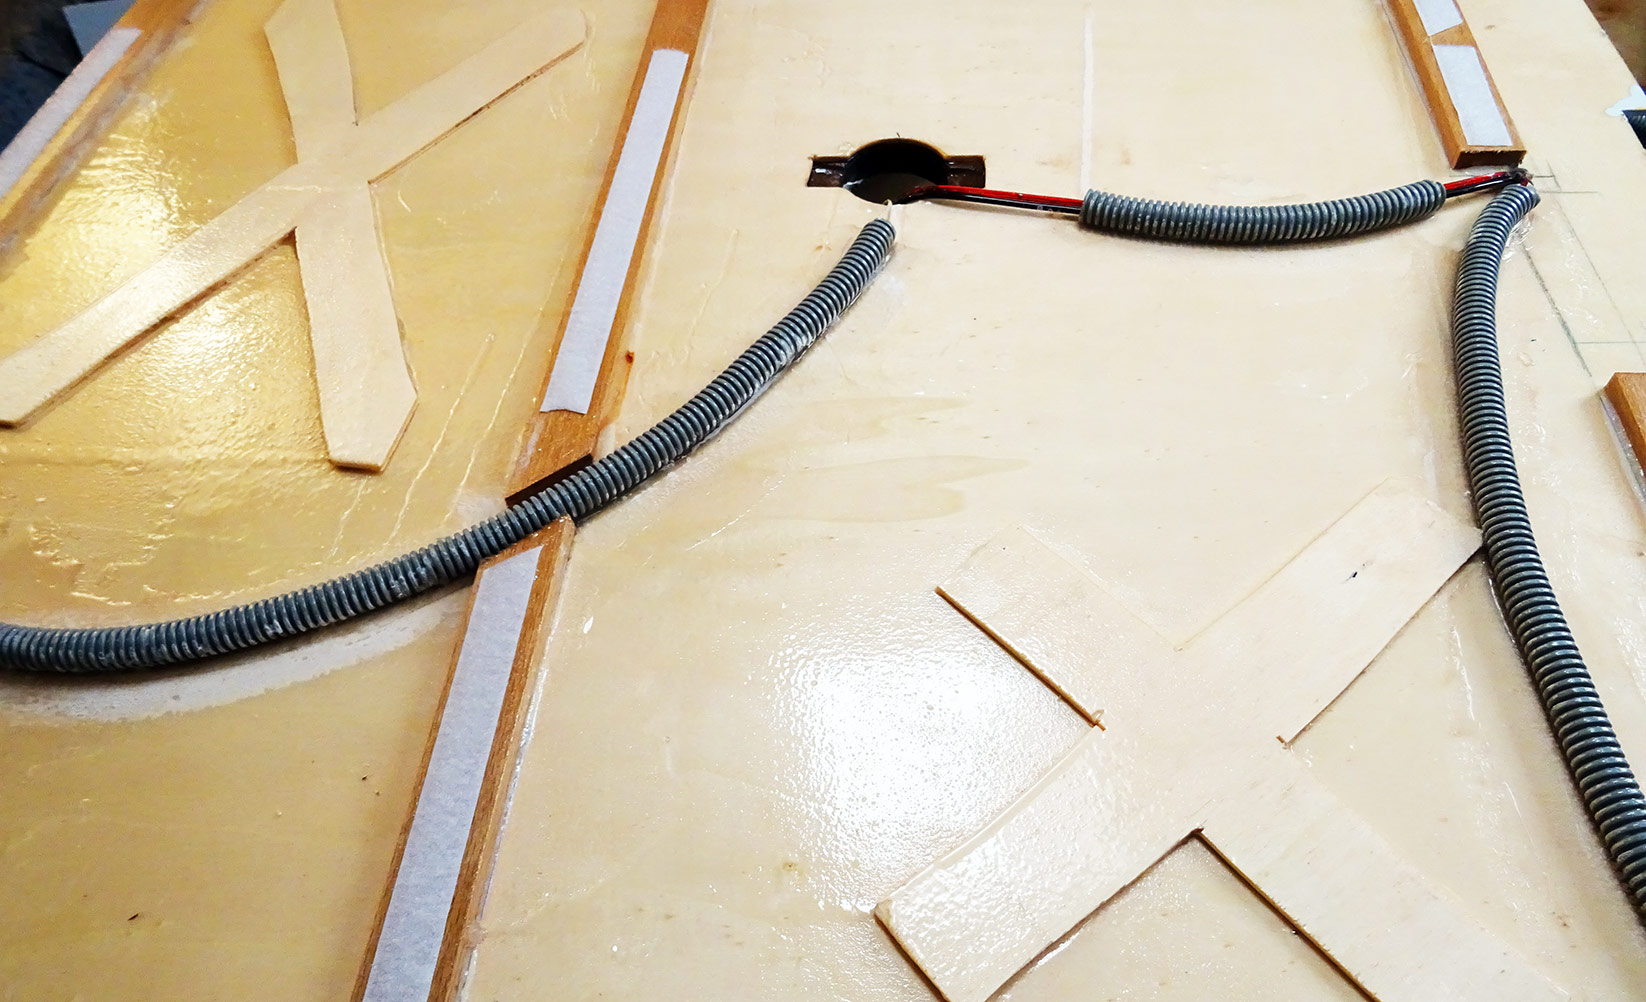
I´ve Epoxy-glued cable ducts for the new LED-lights of the sailing yacht and finally painted them all in shiny new yacht white three times had had them drying properly when I started working today to have the first of the panels mounted to the ceiling. But how to do it? The panels are kind of huge and very hard to handle by myself alone, so I got myself inspired by RM Yachts I visited in La Rochelle lately where I saw a kind of nice little helper: Velco Tape!
I placed both the soft and the hard counter parts on various spots of the substruction on the ceiling as well as on the wooden base frames of the panels. Since my Velco came in with self-adhesive abilities I wasn´t quite so sure and additionally stapled the Velcro to the wooden framing. Now it was time to see if all the work of the past weeks was to pay off: I took the first of the panels and put it over head to fit into place …
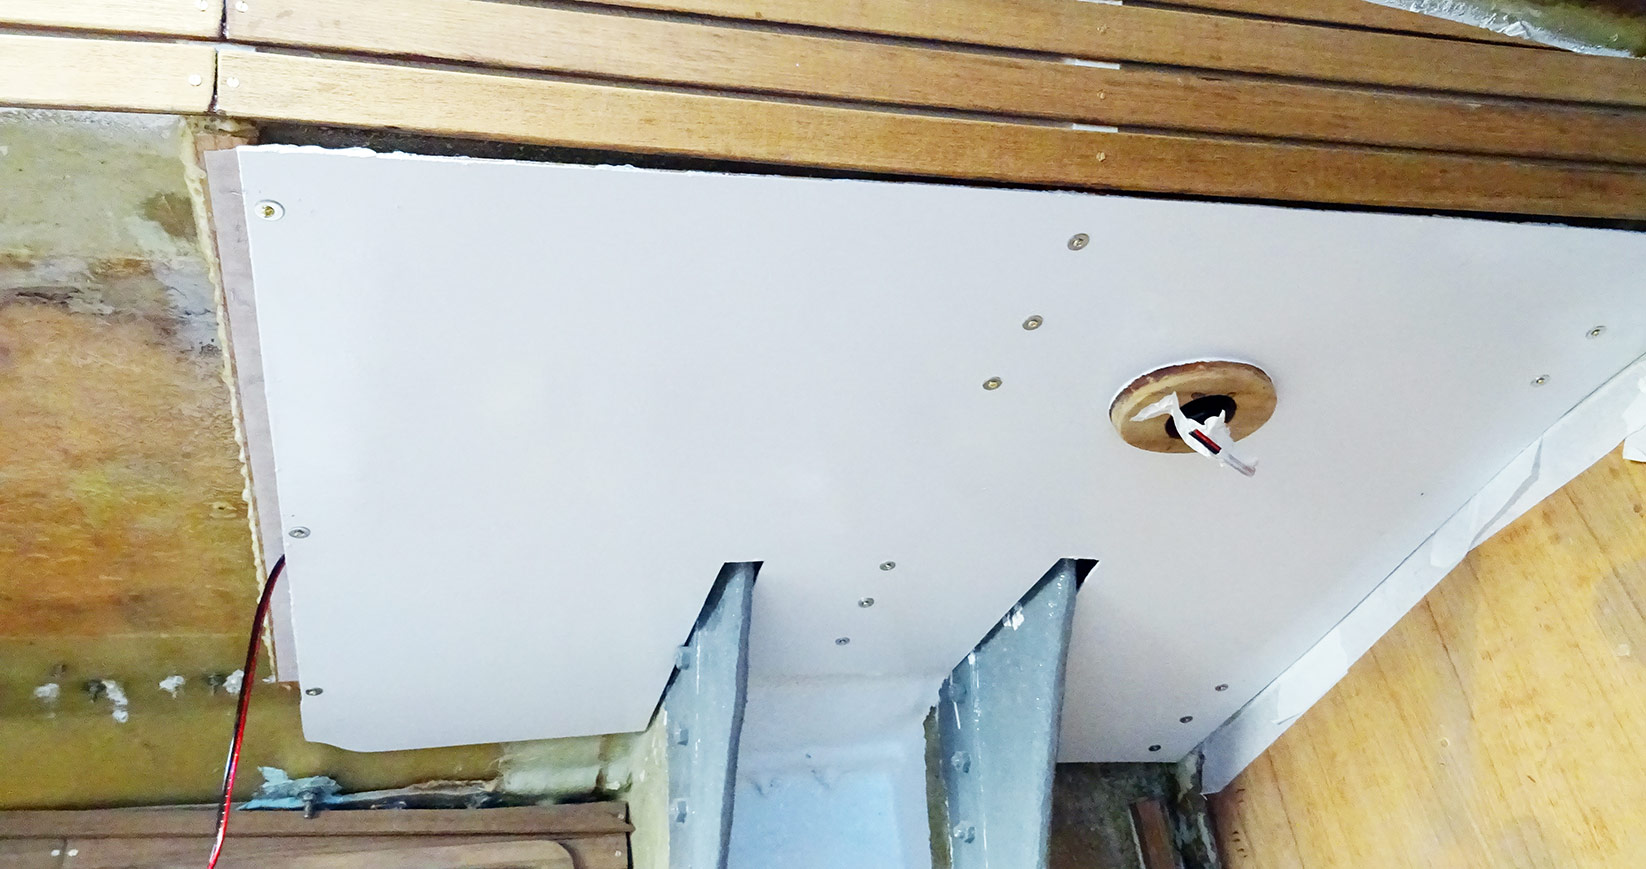
And it did hold on to the framing structure! I was so relieved. After having the panel pulled tightly and checked for the proper fit, I put the smallest drilling bit into the electric drill and began to drill tiny holes through both panel and into the framing. I´ve made the experience that wooden parts won´t splinter or split into halves when pre-drilles small bore holes guide the screws into the wooden material. This was what I did next. I know that these are way too much screws to hold just one panel, but I want to have it “bomb proof”.

The screws are stainless, of course, with flat washers for each of the screws to improve holding capabilities. And after I´ve fastened the second, the third and the fourth screw I gained confidence that the whole plan of how I wanted to make the whole roofing refurbishment happen is going to fine after all. I was so proud!
After having mounted the first smaller roofing panels under the port side berth it was the large port side central panel. I could have done more but I ran out of Velcro tape (3.50 meters are just way too less for the whole saloon). Even the fitting of this heavy large part was a no brainer and mounting took no more than 15 minutes. After all, a fast job! Now I checked all screws before having them painted white – also a precaution against moisture. Since I couldn´t go on mounting the rest of the panels, I switched for another nice task.
News from the Teak made Hatch Cover
As you may have read in the previous part of the roofing project (Part 3, read it here) I began to re-think the whole ceiling project upon realizing that by making new all the wooden parts of the roofing itself I couldn´t go on to mount the old, ordinary and kind of worn down plastic hatch framing again. I decided to have a new one made: From massive Teak again.
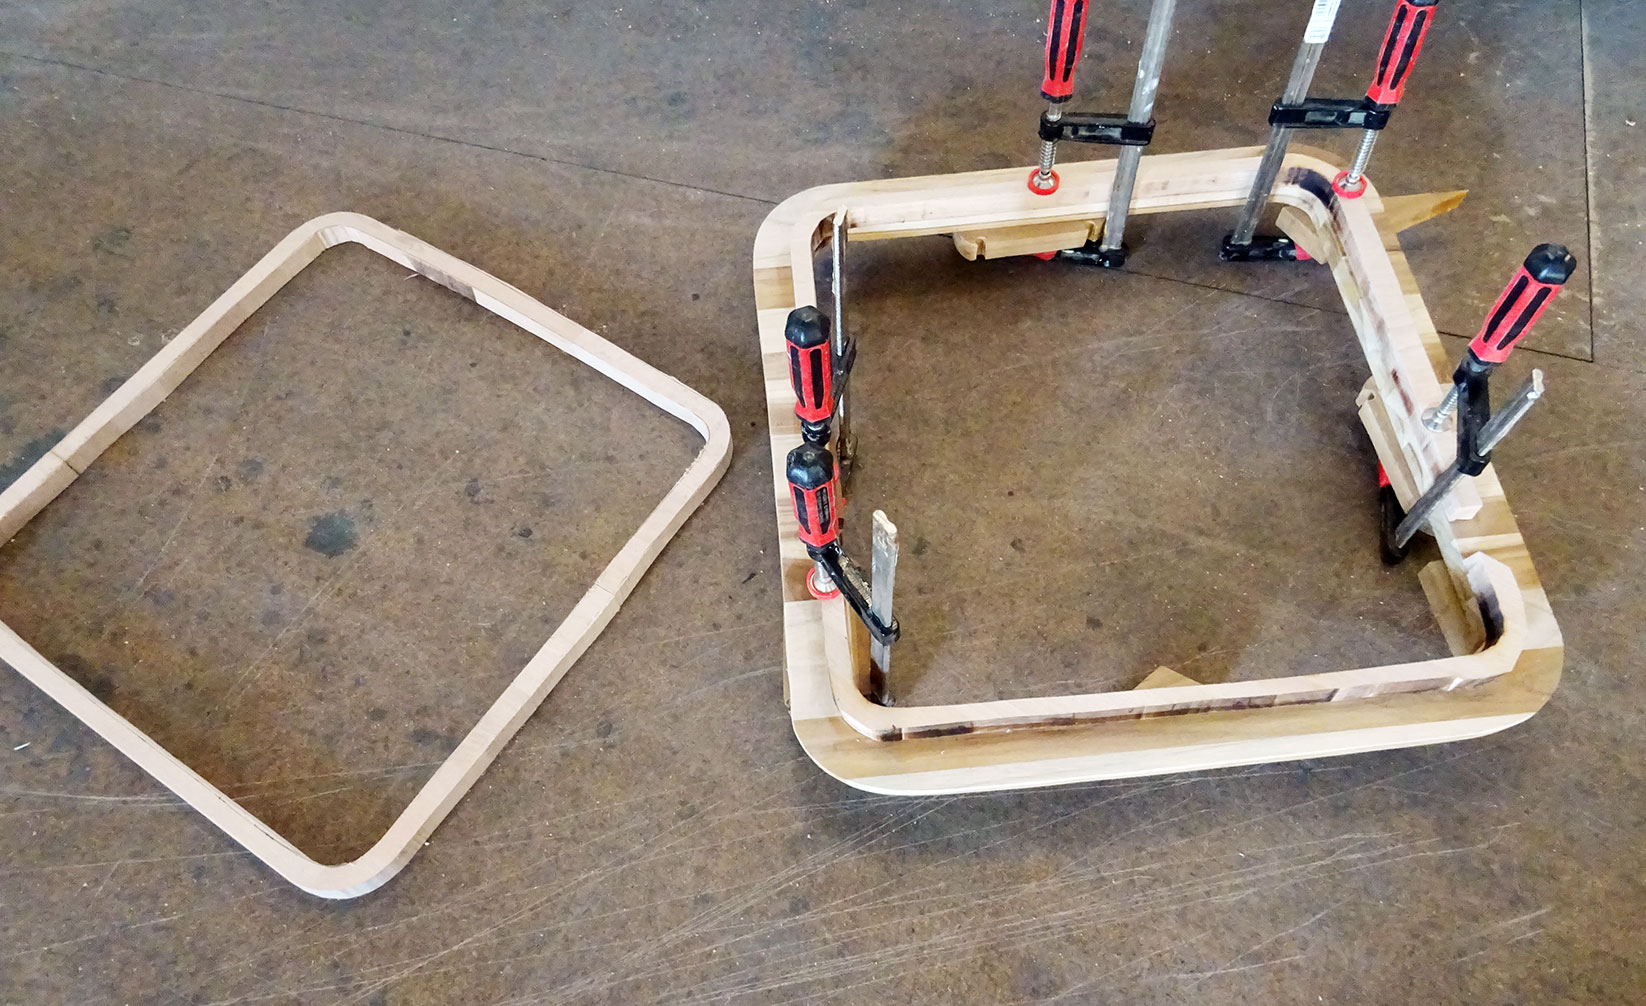
Now, this hatch cover is a beauty, but an quite expensive and very elaborate one too! The most visible part of the frame is made of Teak. But the hatch framing bears some 5 centimetres of wood to cover the inside of the hatch. I had to saw this from inferior – but harder – timber. I didn´t want to have Teak wasted on this but on the other hand I didn´t want to expose “soft” wood to this kind of moist area, prone to rain and spray. In the end, everything went just right, but the surplus frame of hard wood was way too thick as I couldn’t have sawn it this thin in fear of making it break.
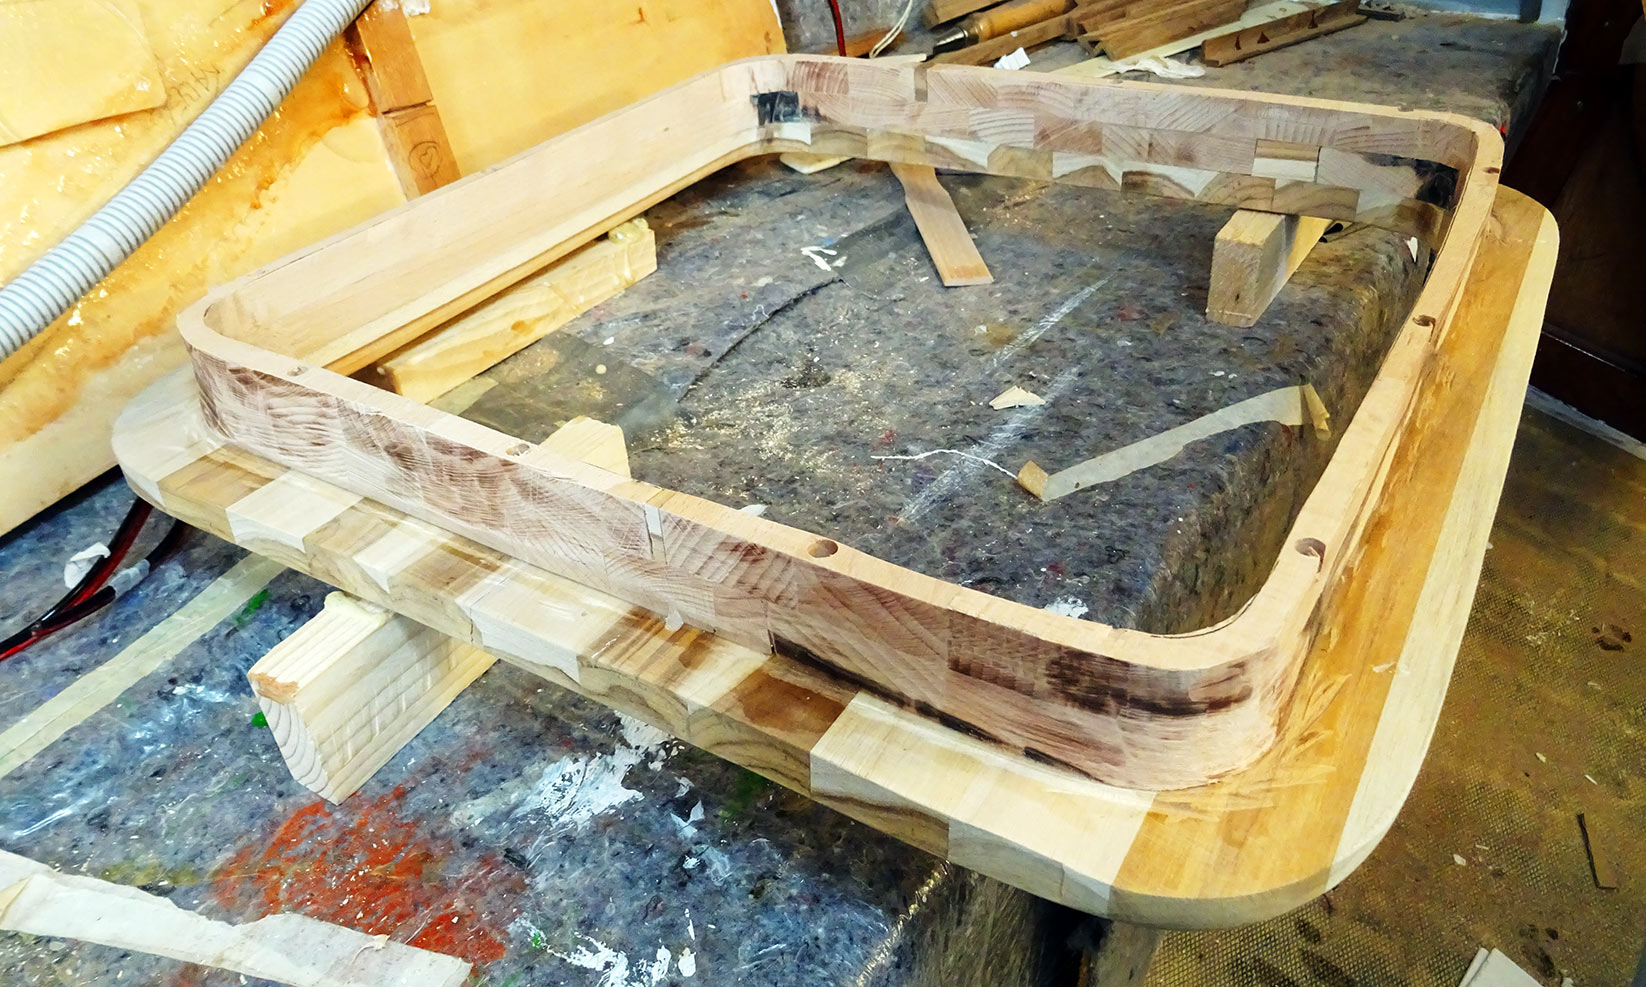
So I took the grinder with a sanding tool attached and began to sand down both outside and inside of the wooden framing. And it went just perfect! Time and again trying to fit the hatch into place, it was a matter of millimetres in the end but it fitted just neatly and I was kind of proud again by the quality of my work here.
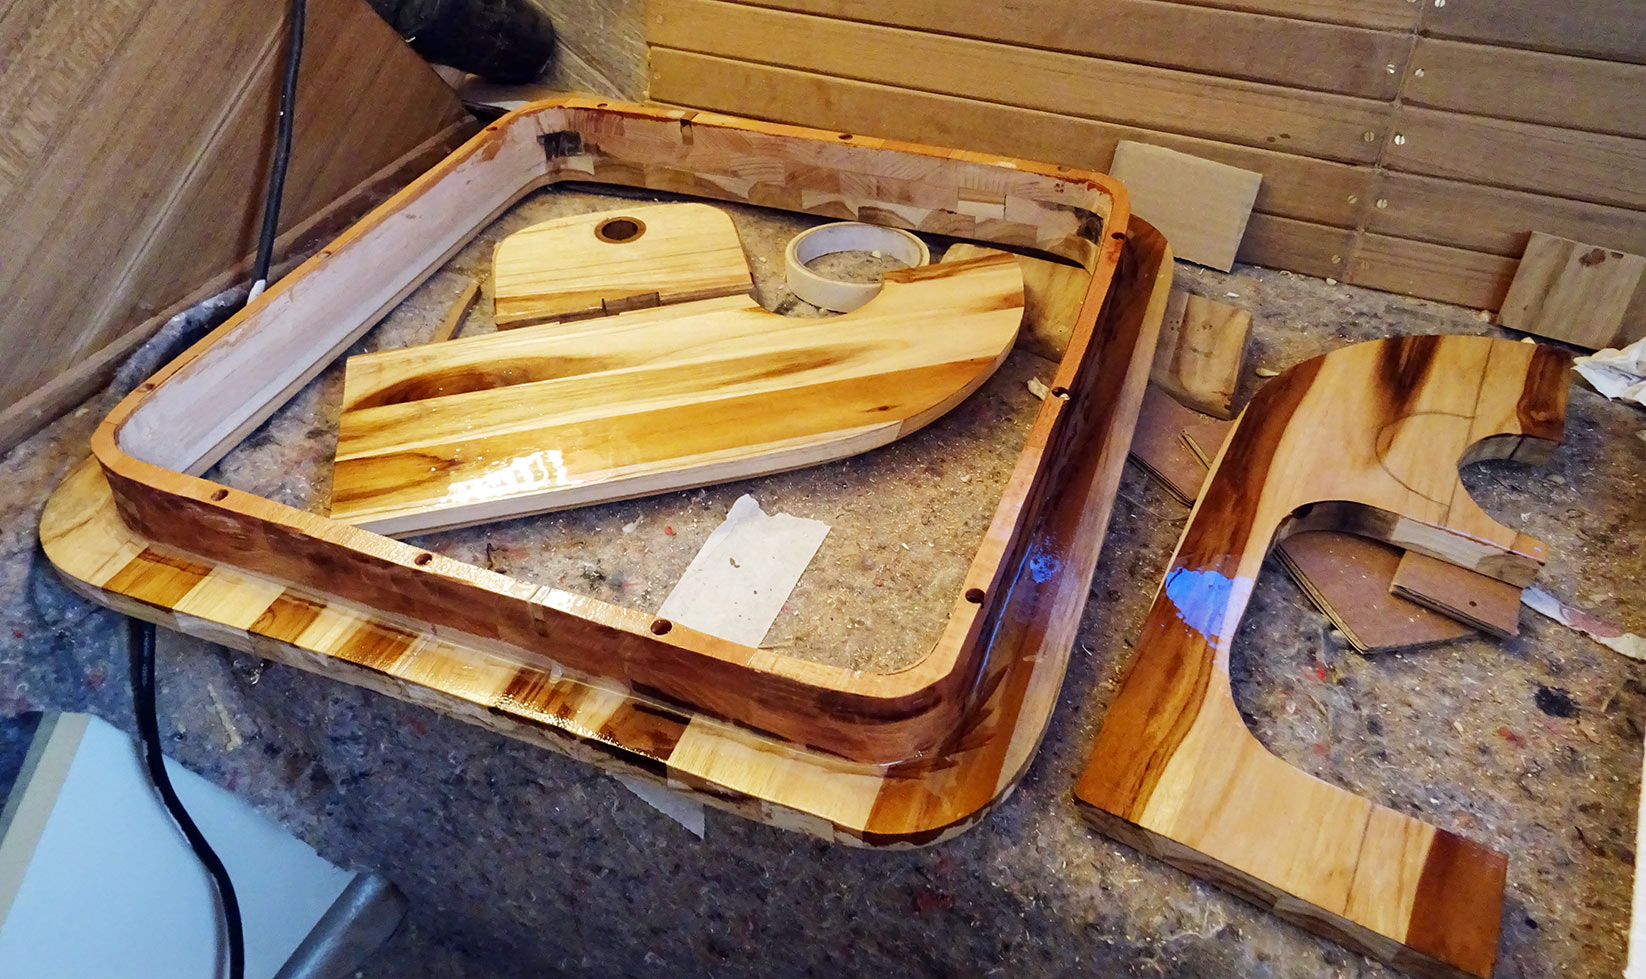
Making the outside – invisible – parts of the new hatch cover water resistant was a matter of minutes afterwards. After cleaning the wood of dust, I painted the whole outside area of the frame with Epoxy resin as this is the best material to get it sealed against water and moisture and at the same time even having it hardened. Epoxy is a perfect tool for boatbuilders, indeed!
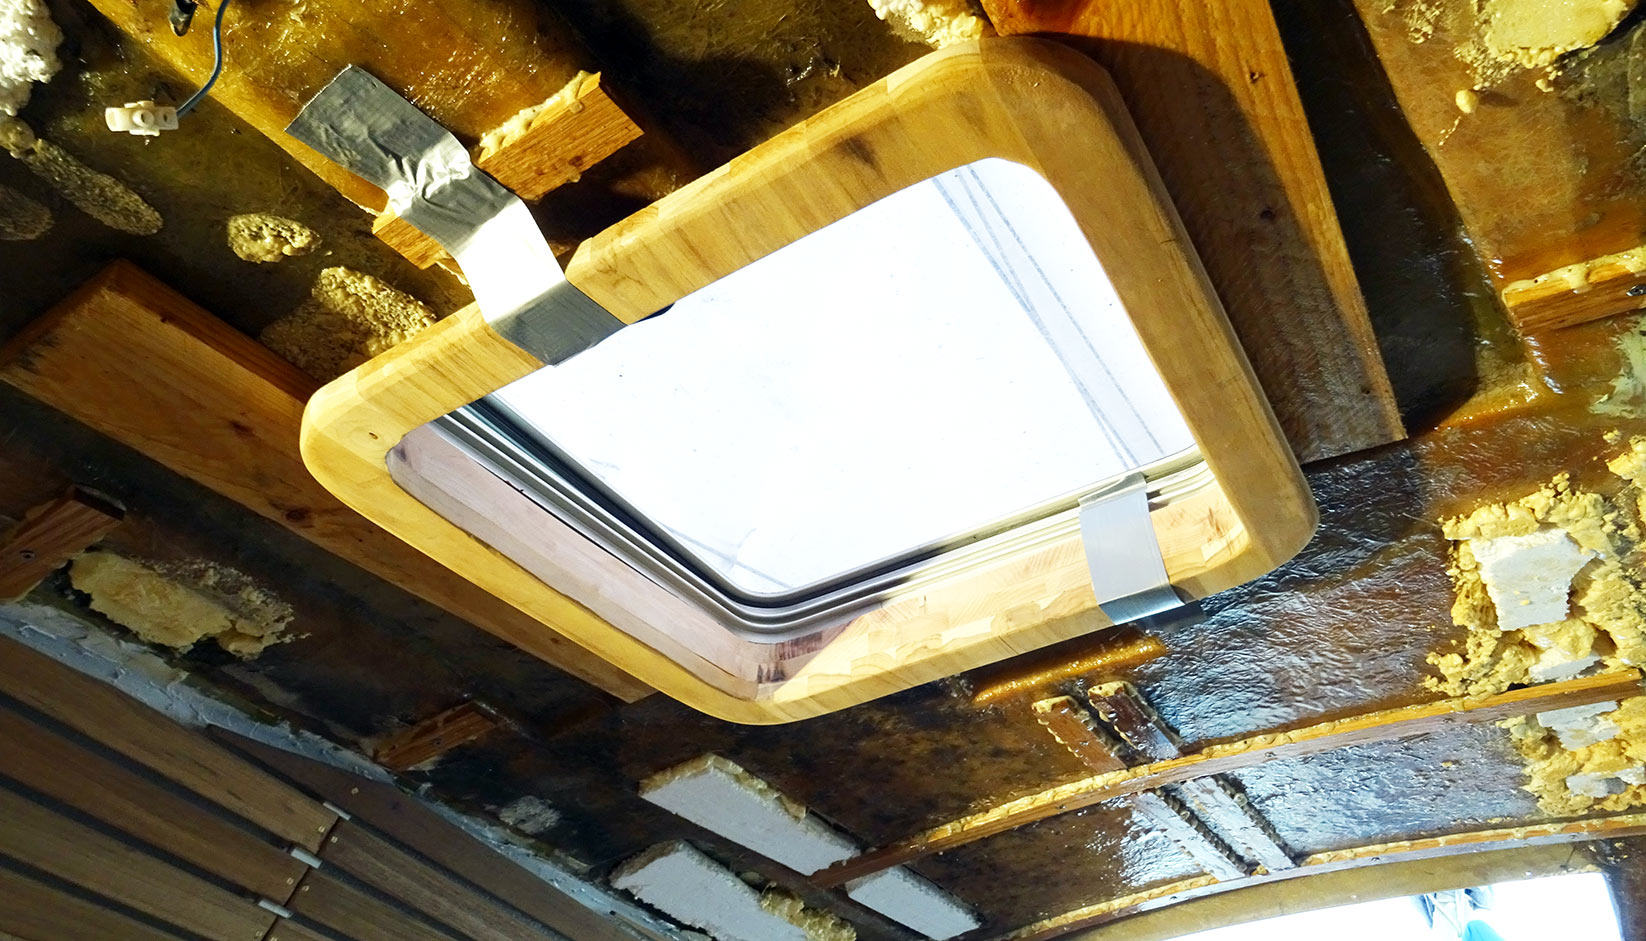
Now, the hatch framing looks awesome, doesn´t it? I can´t wait to have it mounted when the second central roofing panel is screwed tightly and I can finally fit this nice part to the ceiling of my King´s Cruiser. I think, the working hours begin to pay off very nicely.

Next Steps of the new Ceiling
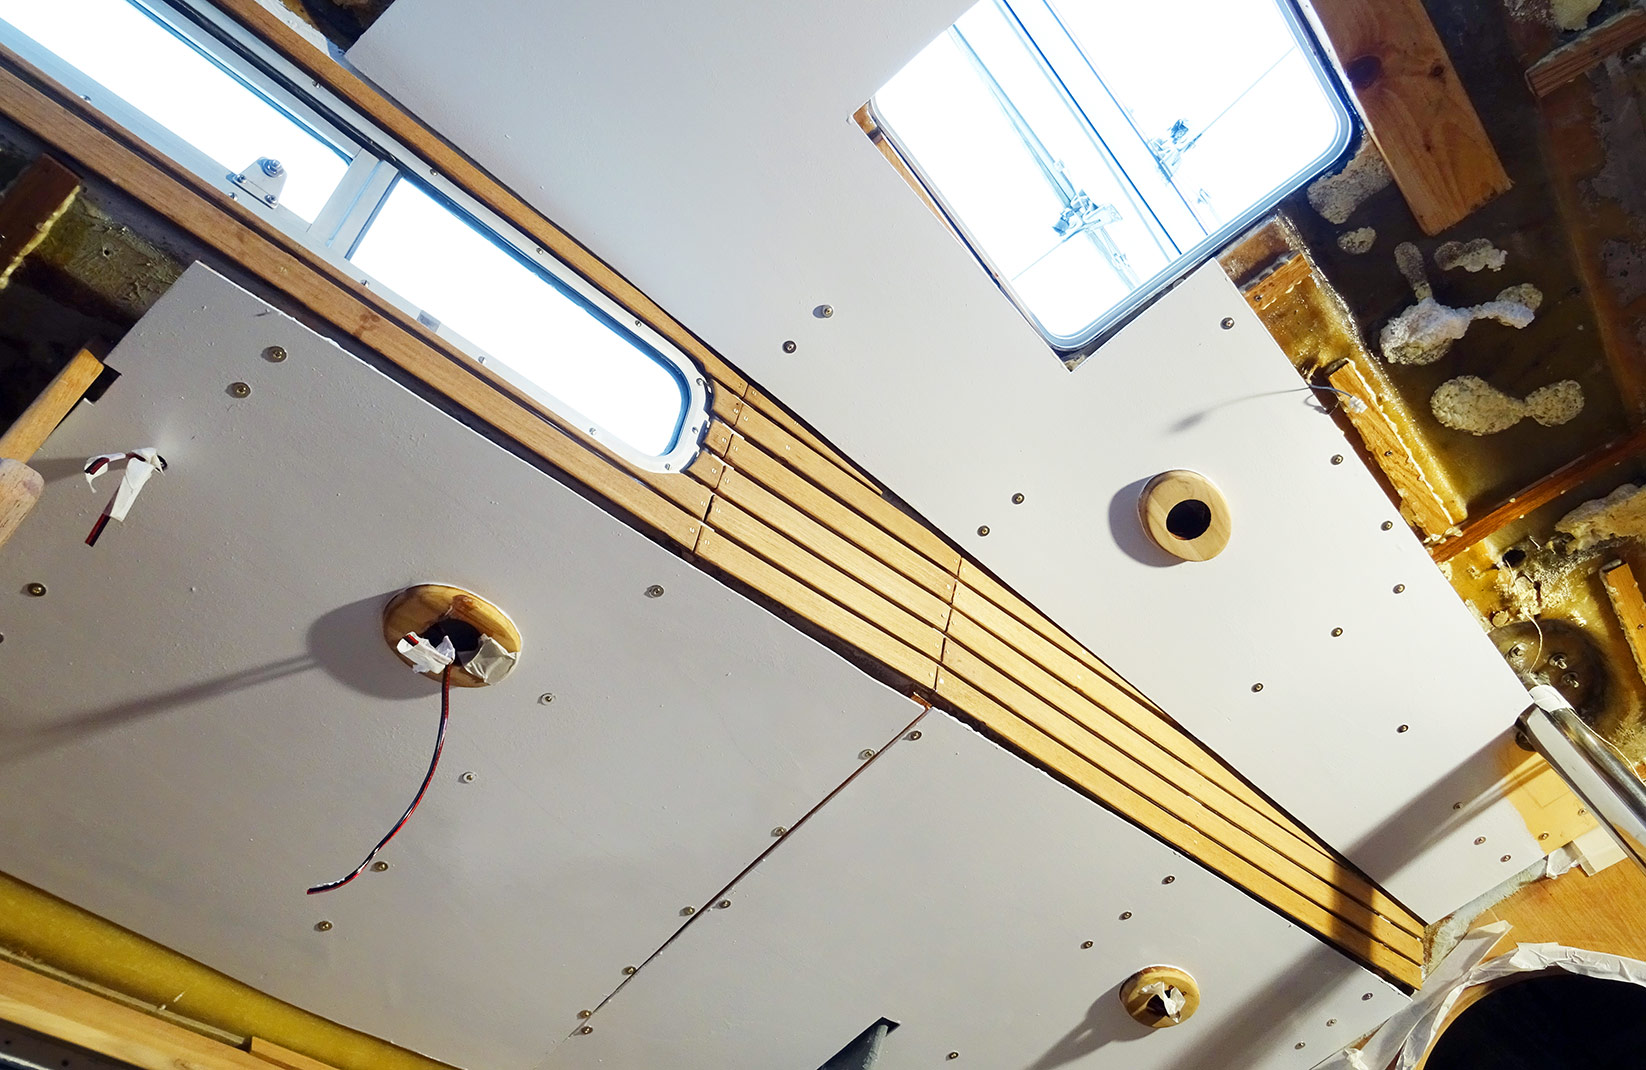
Anyway, there´s plenty of work ahead: Some seven roofing panels will have to be mounted to the saloon´s ceiling area before this item can be crossed off the list. As I mentioned before, due to the fact that this isn´t laser-guided precision work (and I am no boat builder or skilled craftsman) there are quite big allowances between the panels, some of them up to 4 millimetres. I have to cover them with veneer Teak batten, as well as the screw-heads which will be completely covered by Teak as well.
Then there is an area between the Teak side panels and the roofing for which I don´t have an idea how to get it covered yet, but I´m working on it. I fear that there will be also a huge gap in the middle all along between the two large central panels – again, no idea yet how to get this covered nicely. But I´m sure that there will be an idea up and ready to be implemented when needed. For now, I am kind of satisfied and exhausted by a full day´s work.
Related articles on that topic:
Roofing panels: Making the substruction
Making the roofing panels from plywood
Teak furniture in yacht refit