Boatbuilding fascinates me: The techniques and capabilities necessary to bring together different materials in different shapes my different means to form a seagoing hull is what humans do since they erected from the apes. Making a boat and sailing the Seas may be as old riding on a horse´s back. Even today this fascinates me and so one of my favorite things to do when I am on vacation is to seek out where the nearest yard is located to ask if I may have a look: X-Yachts, Luffe or RM Yachts only to name three. To look at the half-finished hulls is like watching a great operation in progress, it simply grabs my mind.
Alex Lang is a Berlin-based young man who began the undertaking of building his own sailing yacht and since then I am currently watching the status quo of his venture. As one-man project, he builds a pre-fab Dudley Dix Class Mini sailing boat in his shed, that is a yard in small with everything needed to fulfil the huge task of making a seaworthy boat. Here´s the latest development of his project.
The current state of the Mini 650 build

Lars Reisberg | NO FRILLS SAILING.com: “Alex, good to see you again. Tell me, what is the current status of the Mini-build and what have you been doing since our last meeting?” Read that article here
Alex Lang: “Hi Lars. Nice to have you here. Well, as you can see, the hull is now completed. That means that all of the outside panels are finally attached, smoothly sanded and covered with a few layers of primer. Not the least, the hull has been turned right side up now. I am now working on the inside of the boat.”

NFS.com: “How exactly did you attach the plywood boards which make up the hull to the structure? Describe the process, the used tools.”
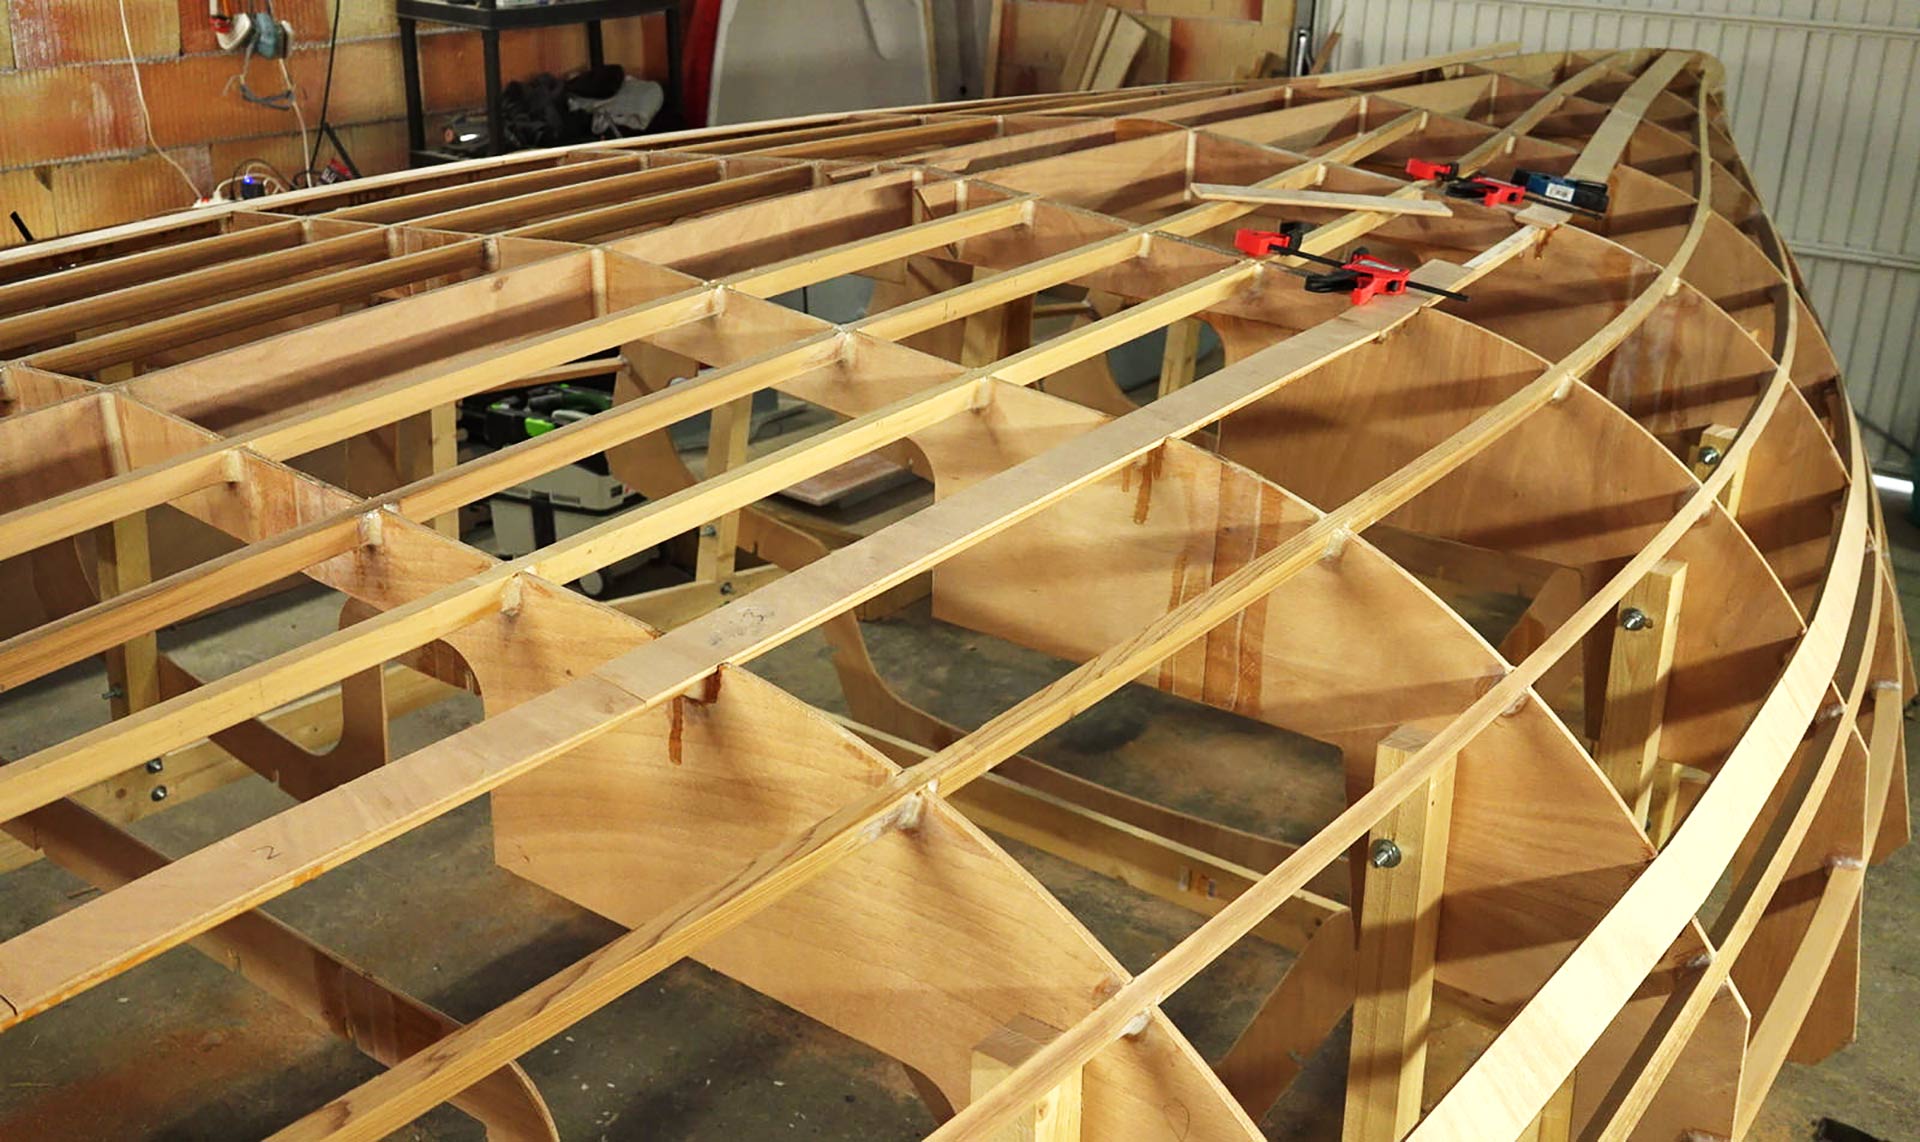
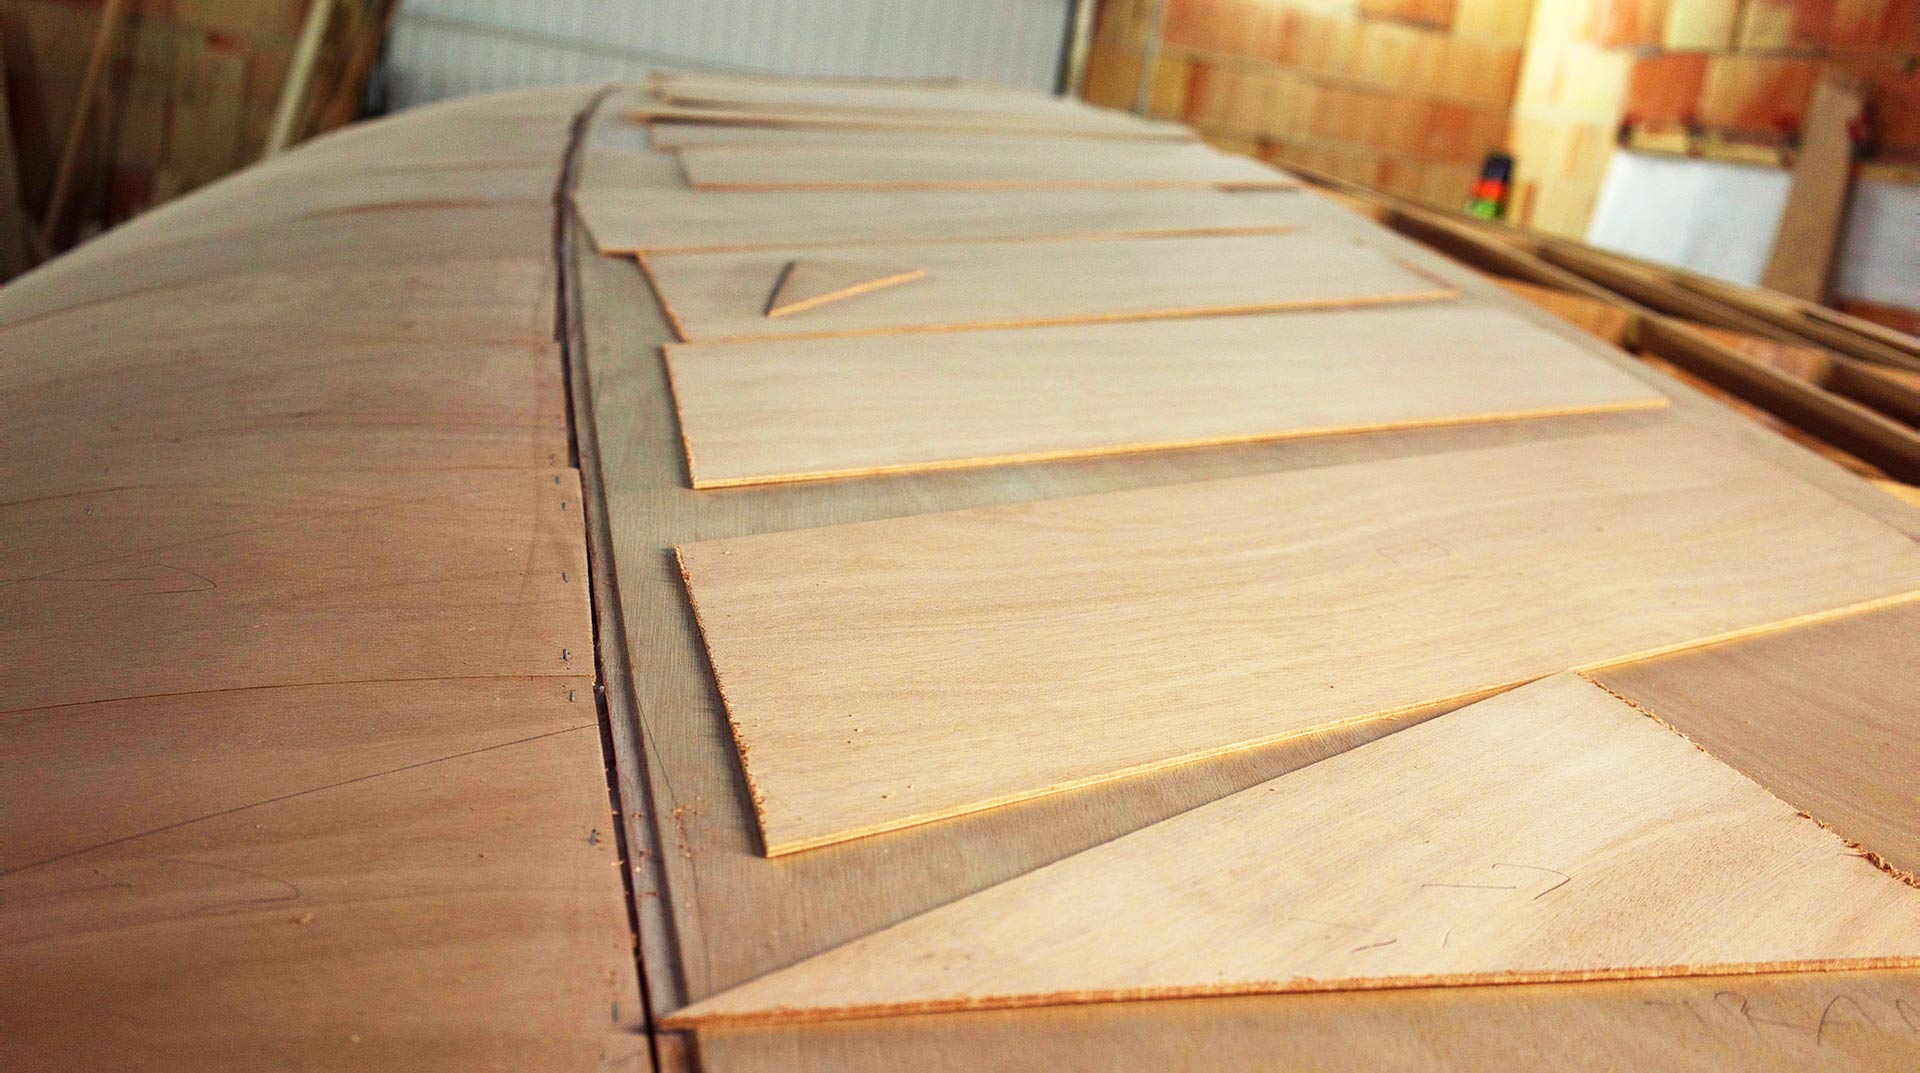
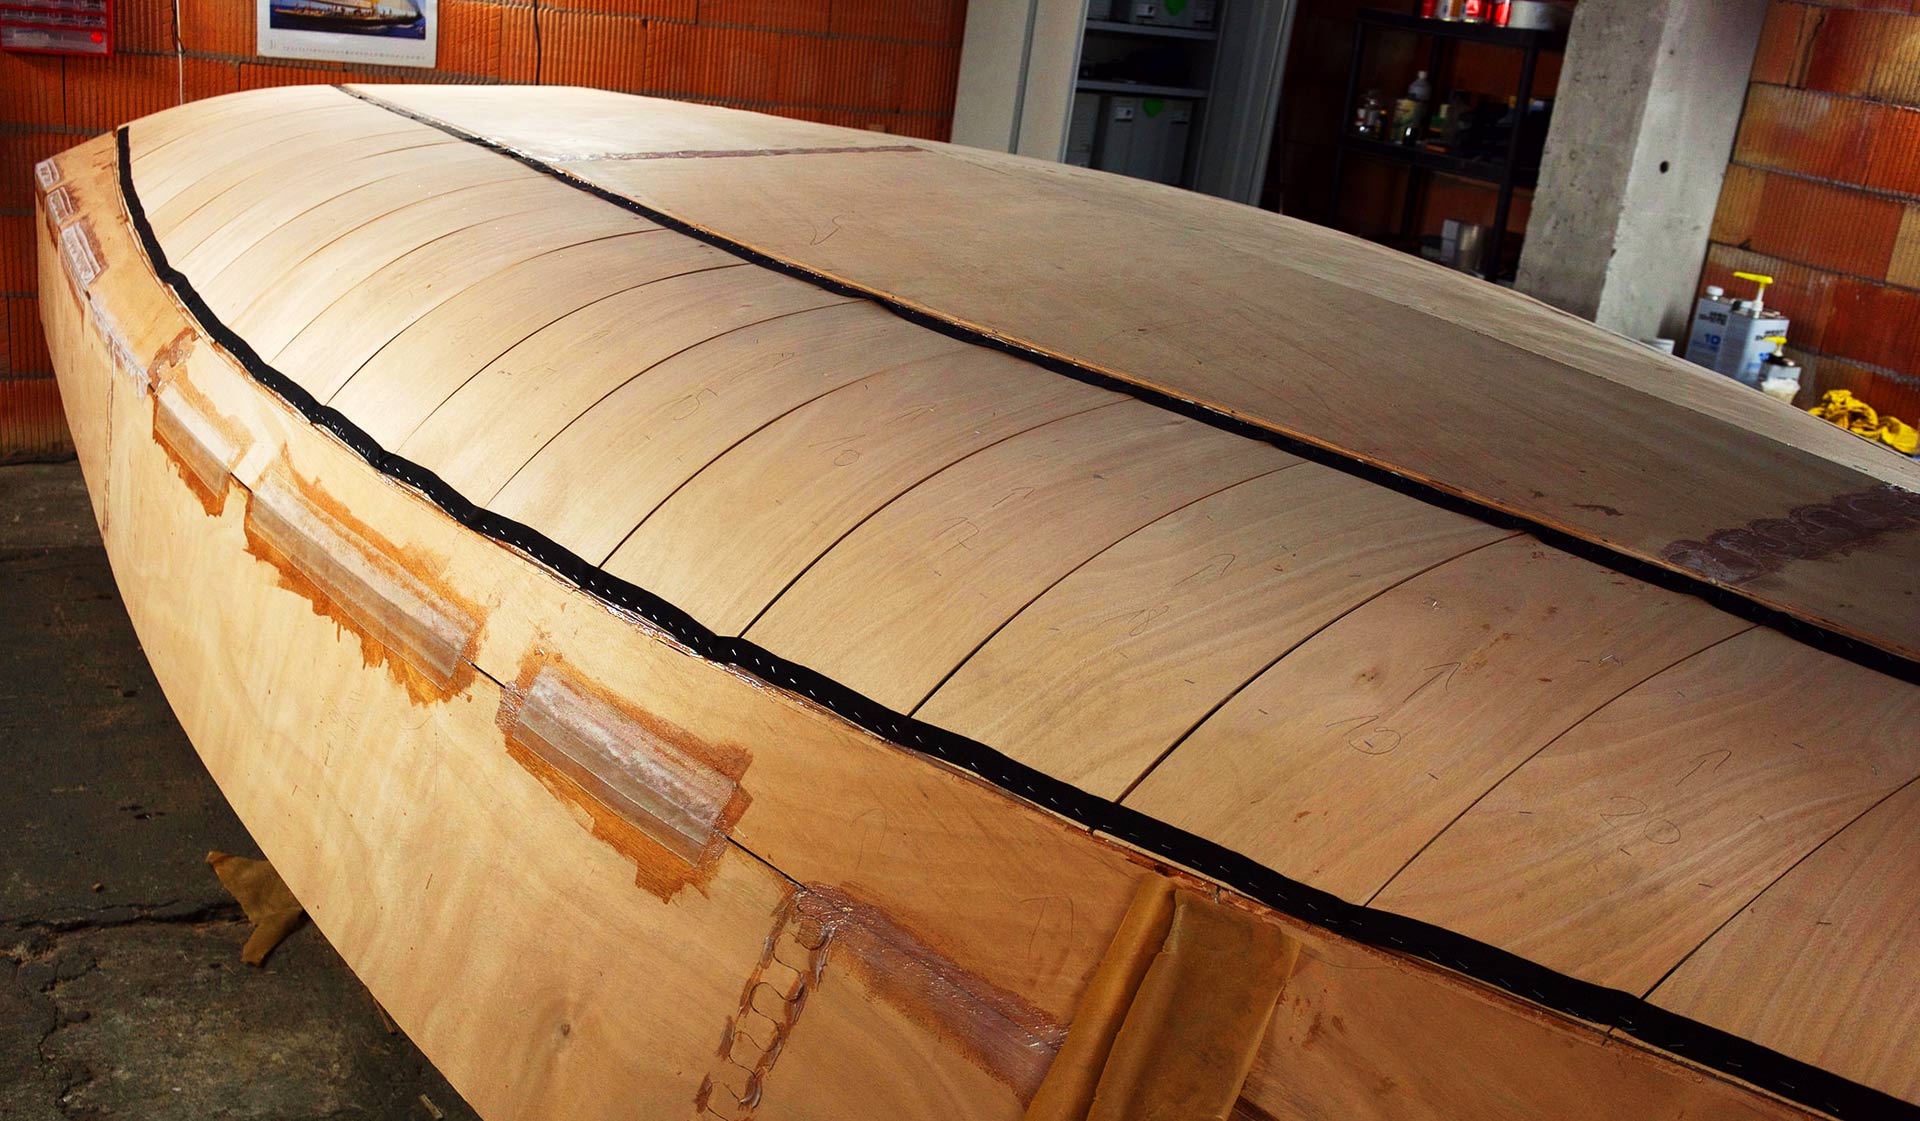
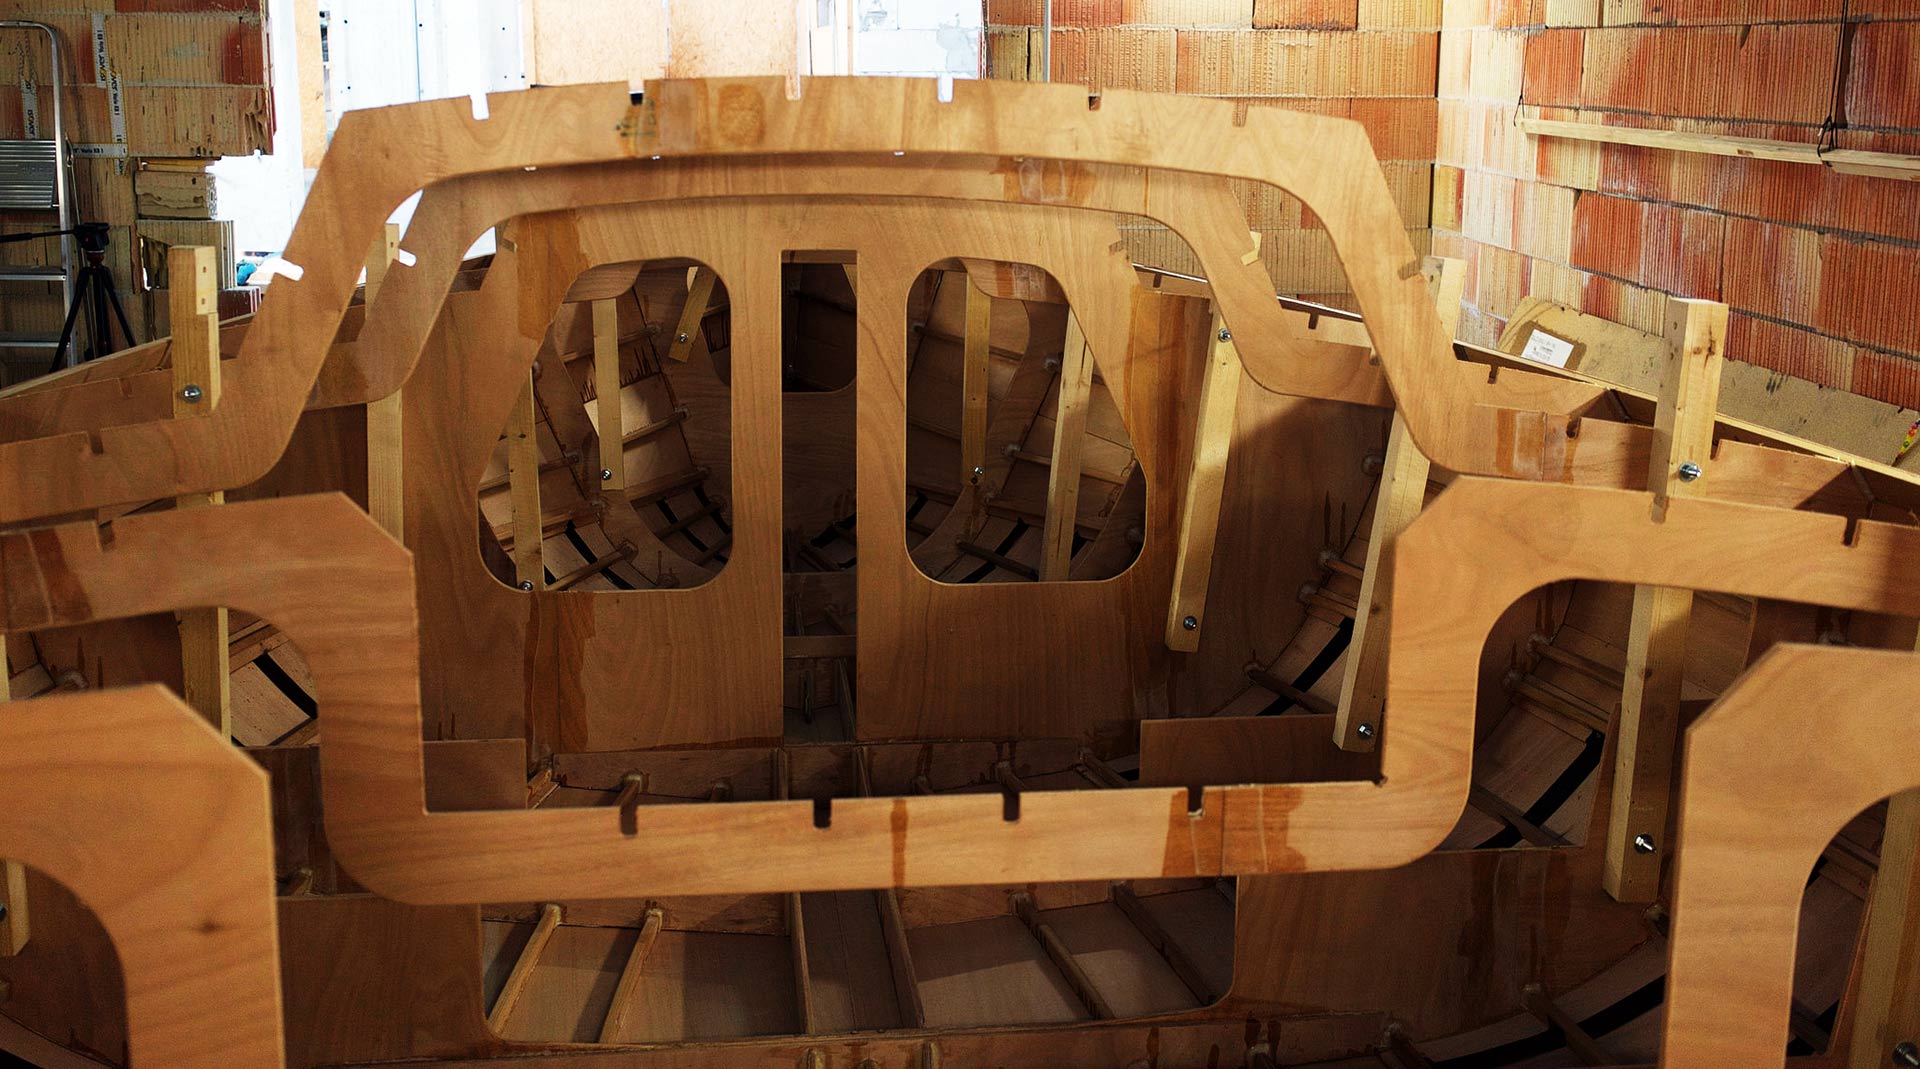
Alex: “Well, basically the plywood is glued to the boat with Epoxy. The process in achieving this goal is a tedious one: First of all, the hull panels came pre-cut with the Dudley Dix boat kit. Since one panel is obviously too small to cover the entire hull, multiple panels have to be joined together. In my boat, this is achieved using so-called puzzle joints, which in fact really look like puzzle pieces indeed. The trick is to align those puzzle pieces as good as possible when gluing the panels onto the skeleton structure of the vertical frame and the stringers.”
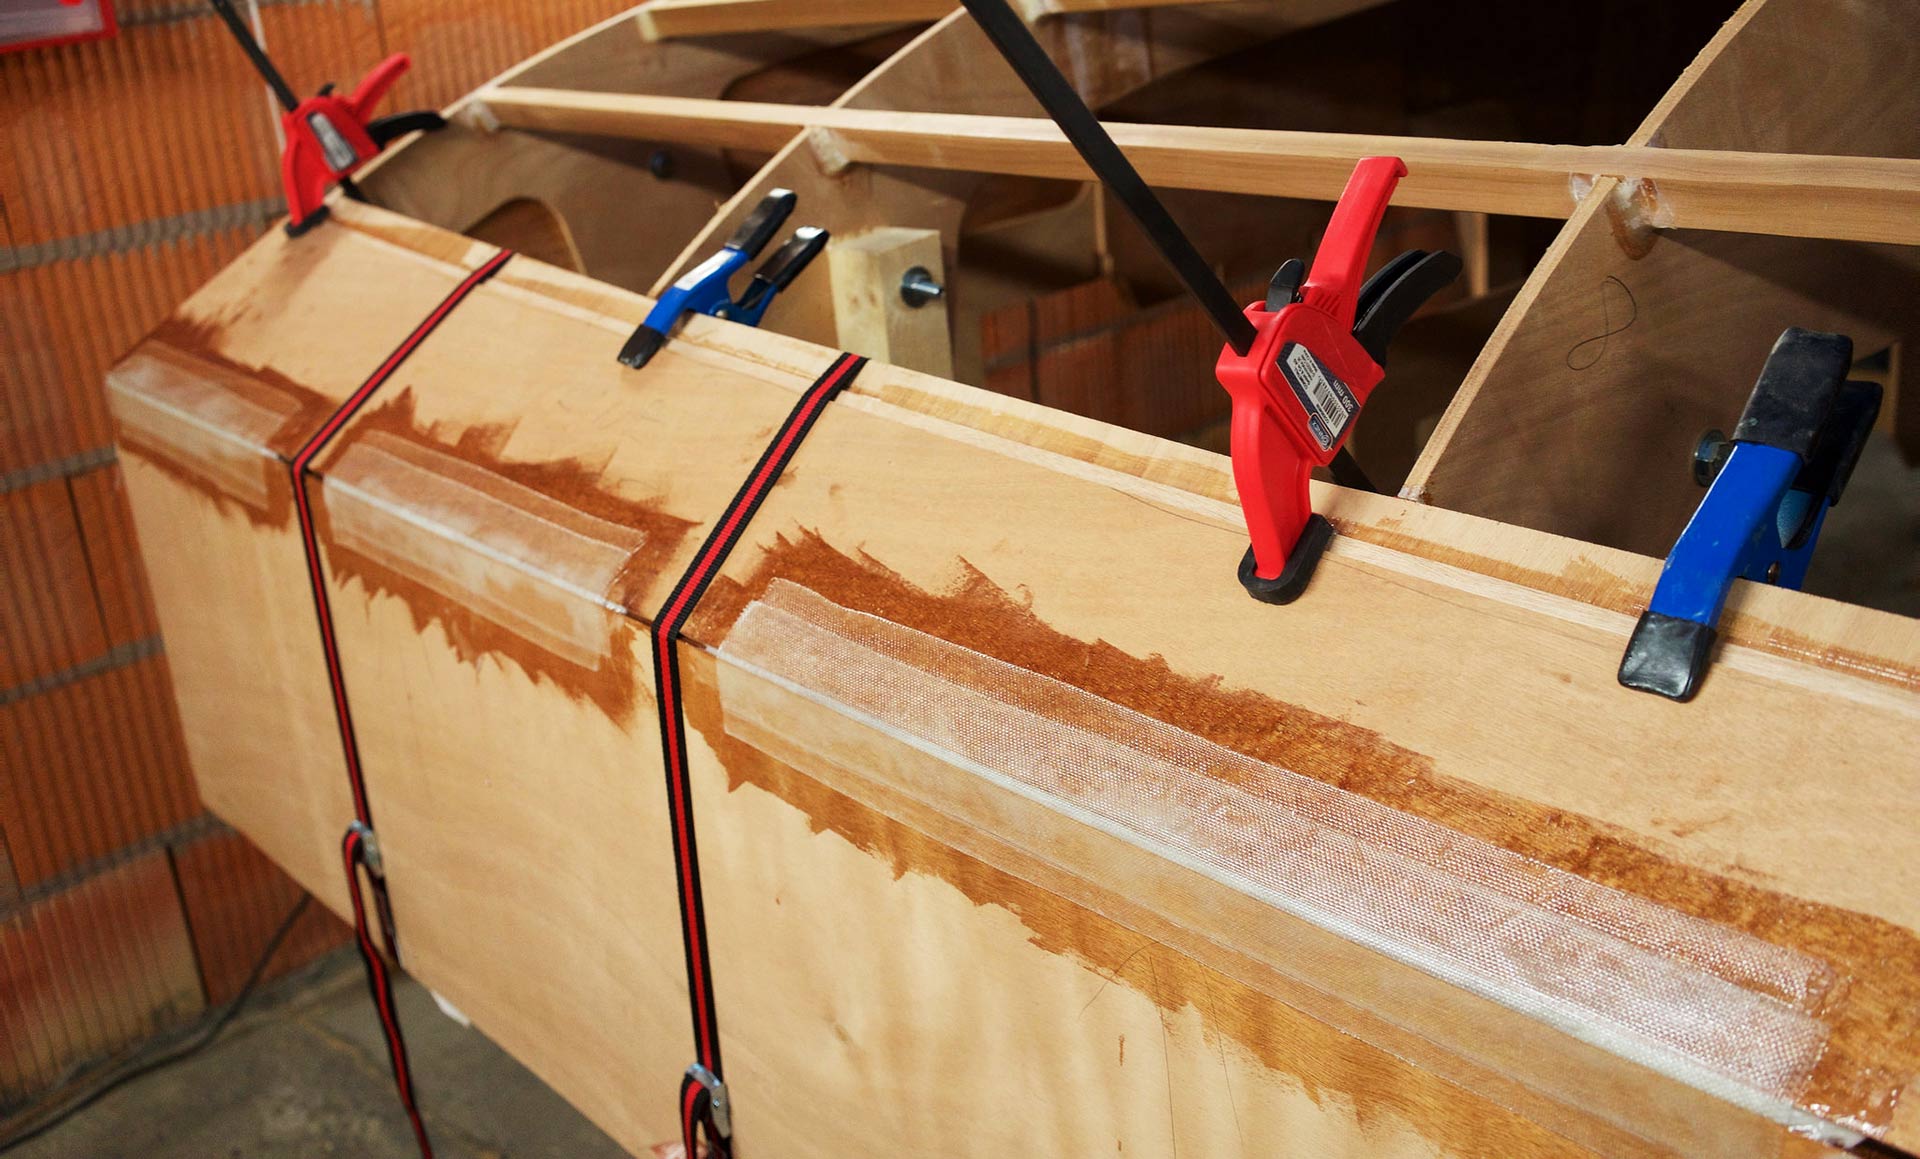
Alex: “Basically you put thickened Epoxy on the stringers and the sides of the bulkheads and then the fitting panel is attached. The problem here is that the panel has to be bent around the hull but it must not move. So I tried various methods to push the panels onto the boat by trying to keep them in place: Clamps of all sizes, weights, webbing straps, wedges and even staples. Most turned out okay, but I slightly messed up the alignment of a few. Lots of sanding and even more Epoxy always help in this case.”
NFS.com: “By this simple technique you achieve the nice bent round hull?”
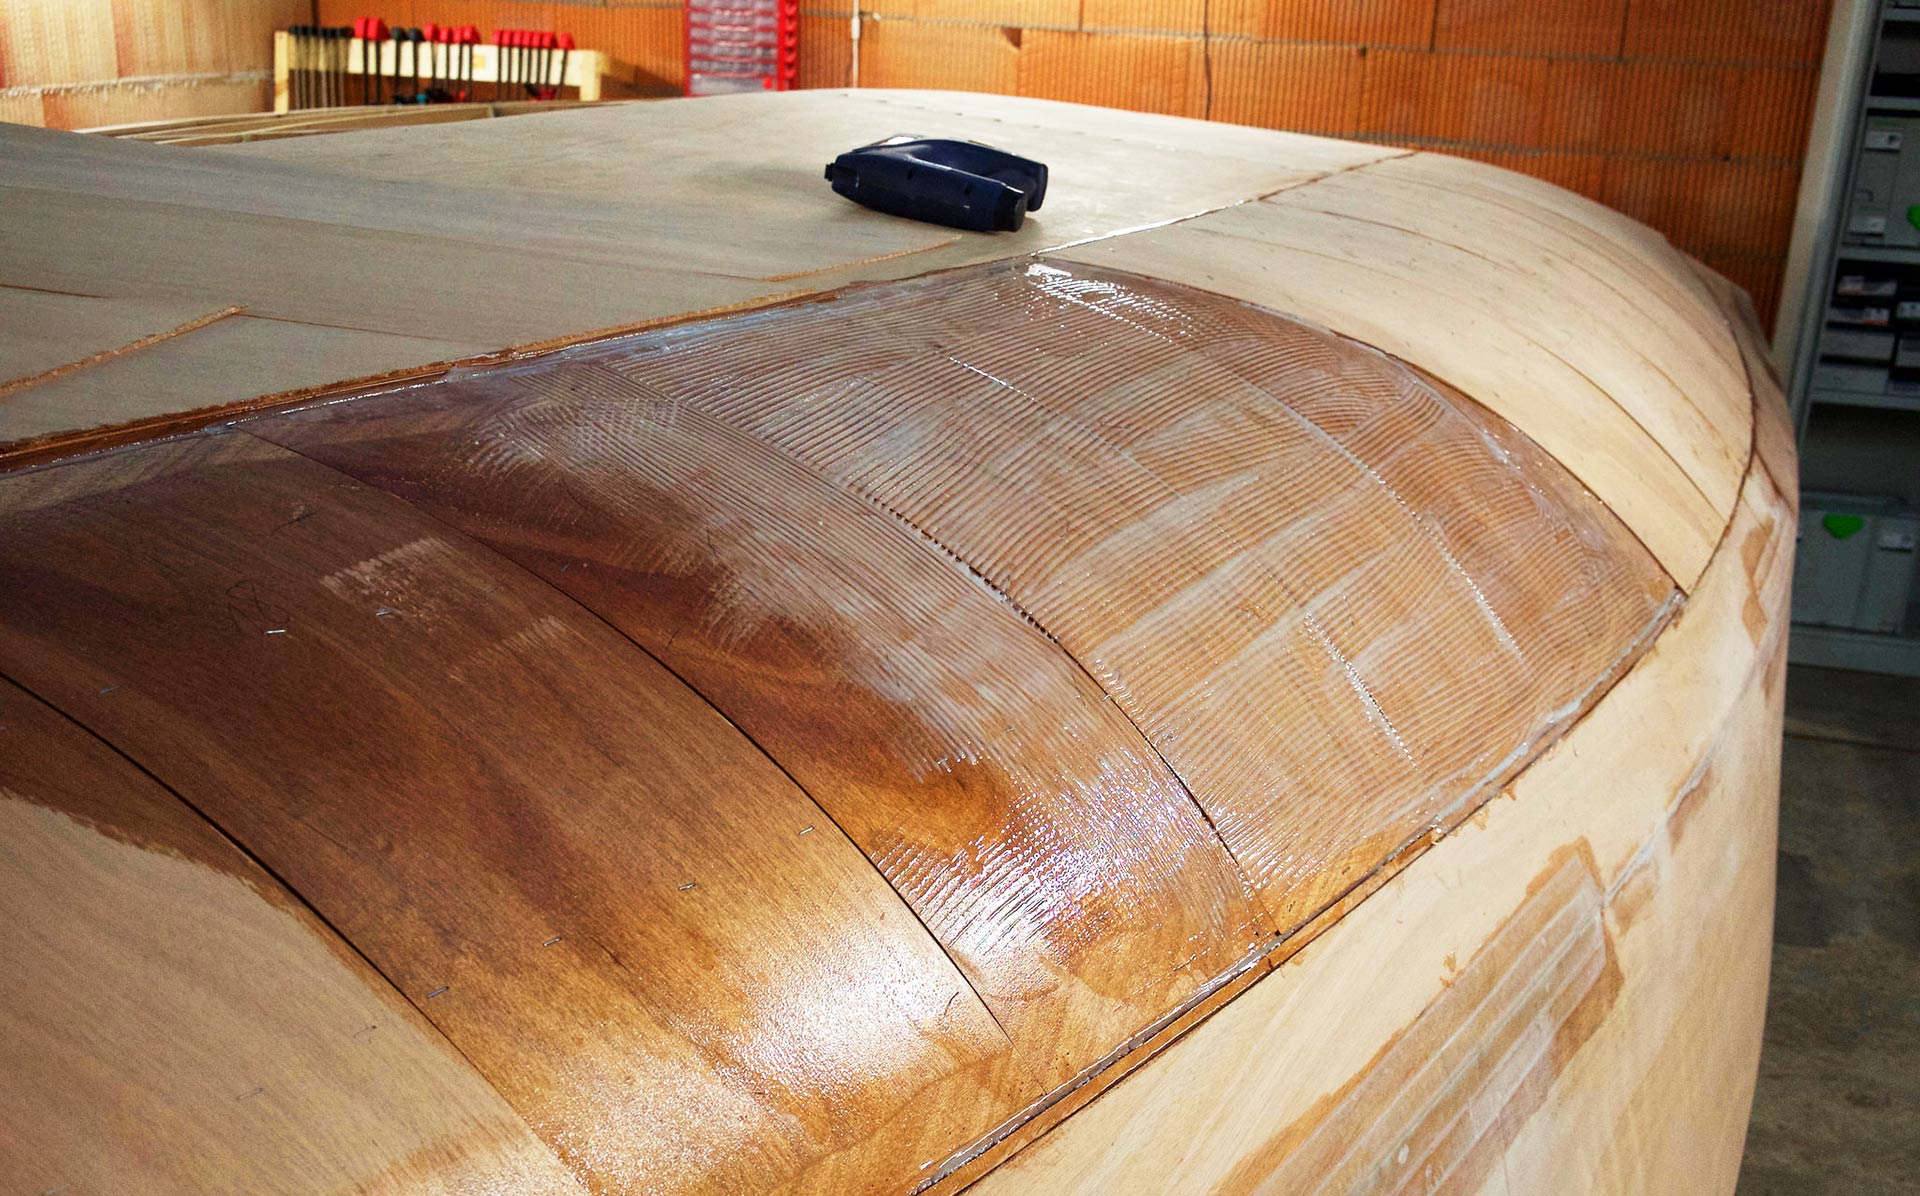
Alex: “This is a design which is a so-called “rounded chine”. Normally, wooden boats have multiple hard chines, because you can only bend the plywood panels that far. In my case, the panels have a thickness of some 6 millimetres. To overcome that, the section between the bottom and the sides is made by using two layers of smaller 3 millimetre-panels which can be bent around a tighter curve than it would normally be possible. Of course, those panels I had to buy and cut myself. Each is only 25 centimetres wide, so I ended up with over 20 panels per layer and side, which makes around 100 self-made panels in total. The first layer is glued onto the stringers like before, the second layer is glued to the first one.”
Alex: “One tip for prospective builders: Do not use metal staples – at all! They are a pain in the ass to get out again. Besides, filling all the tiny little holes they leave behind is even worse. If you need staples, use the plastic ones that you can just sand down.”
NFS.com: “Talking of the pre-cut planks of the boat-kit: What´s the quality of those parts in terms of fitting and seams? Did you have to re-do those parts in order to be able to attach them to the hull?”
Alex: “Well, yes, I had to sand the puzzle joints quite a bit before they would fit. You want a loose fit so you have some wiggle room when aligning the panels with the boat. The way they came, they wouldn’t even fit together. Same with the notches cut into the bulkheads to take the stringers. By the way, when reading your post about your visit to RM, I was very intrigued to hear that they laser cut their panels. They have probably optimized it to a point where no sanding is needed at all.” Read the article on plywood performance cruisers by RM Yachts here

NFS.com: “What was the trickiest part in attaching the planks? What went through without any problems?”
Alex: “Well, as I mentioned before, actually getting out the staples again and filling the holes took the longest, so that was the worst. When putting them on, the tricky part is to get the alignment right and make sure the panels don’t move before the Epoxy has dried. The fact that the panels sort of swim on a layer of Epoxy doesn’t make this process too easy. With the rounded section I had to be very careful not to break the flimsy 3 millimetre-panels. It happened a few times anyway.”
NFS.com: “In attaching the plank-boards, how many kilograms of Epoxy did you utilize?”
Alex: “Good question. Not too much so far, because I only had to add a bit of it between the stringers which was only 32 millimetres wide and the panels. Definitely less than one pack of some 5 kilograms of Epoxy I would say. I’m using up a lot more now in step two, where I’m adding Epoxy fillets around all the stringers and bulkheads. This is what will really hold the boat together. At least 20 kilograms of Epoxy I would say.”
NFS.com: “When the hull has been completed in terms of bringing on the planks, what did you do to seal the seams?”
Alex: “Every gap in this boat is filled with Epoxy and then sanded smoothly. In the end, no gaps or seams will be visible. That stuff is pure magic.”
How it feels to build one´s own sailing yacht
NFS.com: “What have been your feelings upon seeing your boat fully planked?”
Alex: “As you can imagine, I was very relieved that it all worked out that good. And of course … a bit proud of my work too.”
NFS.com: “Please describe the process of flipping the boat.”
Alex: “That was an interesting one. I was under a bit of time pressure as I had to move out of my old shed. I send an email to Dudley Dix and read a blog about how to actually flip the hull. Dix recommended to bolt metal pipes to the bow and stern, which would have allowed me to put the boat on two stands and turn it around like a pig on a stick. I didn’t like the idea because I don’t have any experience with metal and it would have meant to drill a few larger holes into the brand new hull.”
Alex: “So I came up with a simpler solution. By myself: I erected two wooden posts – one in front of the bow, one aft – and tied them down like masts with 5 millimetre Dyneema. I then drilled two tiny holes into the hull to attach 6:1 pulleys I also made of Dyneema and low friction rings. In the end I was able to lift the boat alone, and turn it with one hand, hovering in the air. That was very satisfying as you may imagine.”
NFS.com: “There are pics showing the boat coated with white stuff: What was this working-step exactly? What kind of filler did you utilize? How many layers in which thickness have been applied?”
Alex: “This is an Epoxy based primer by Nemo Coatings. This one is called HB Porefill, so it’s used to turn the rough surface of plywood into something smooth. I think I must have applied 4 or 5 layers. I did mess this up quite a bit though. When I applied the white paint I discovered so many pinholes from the hundreds of staples that I had used before.”
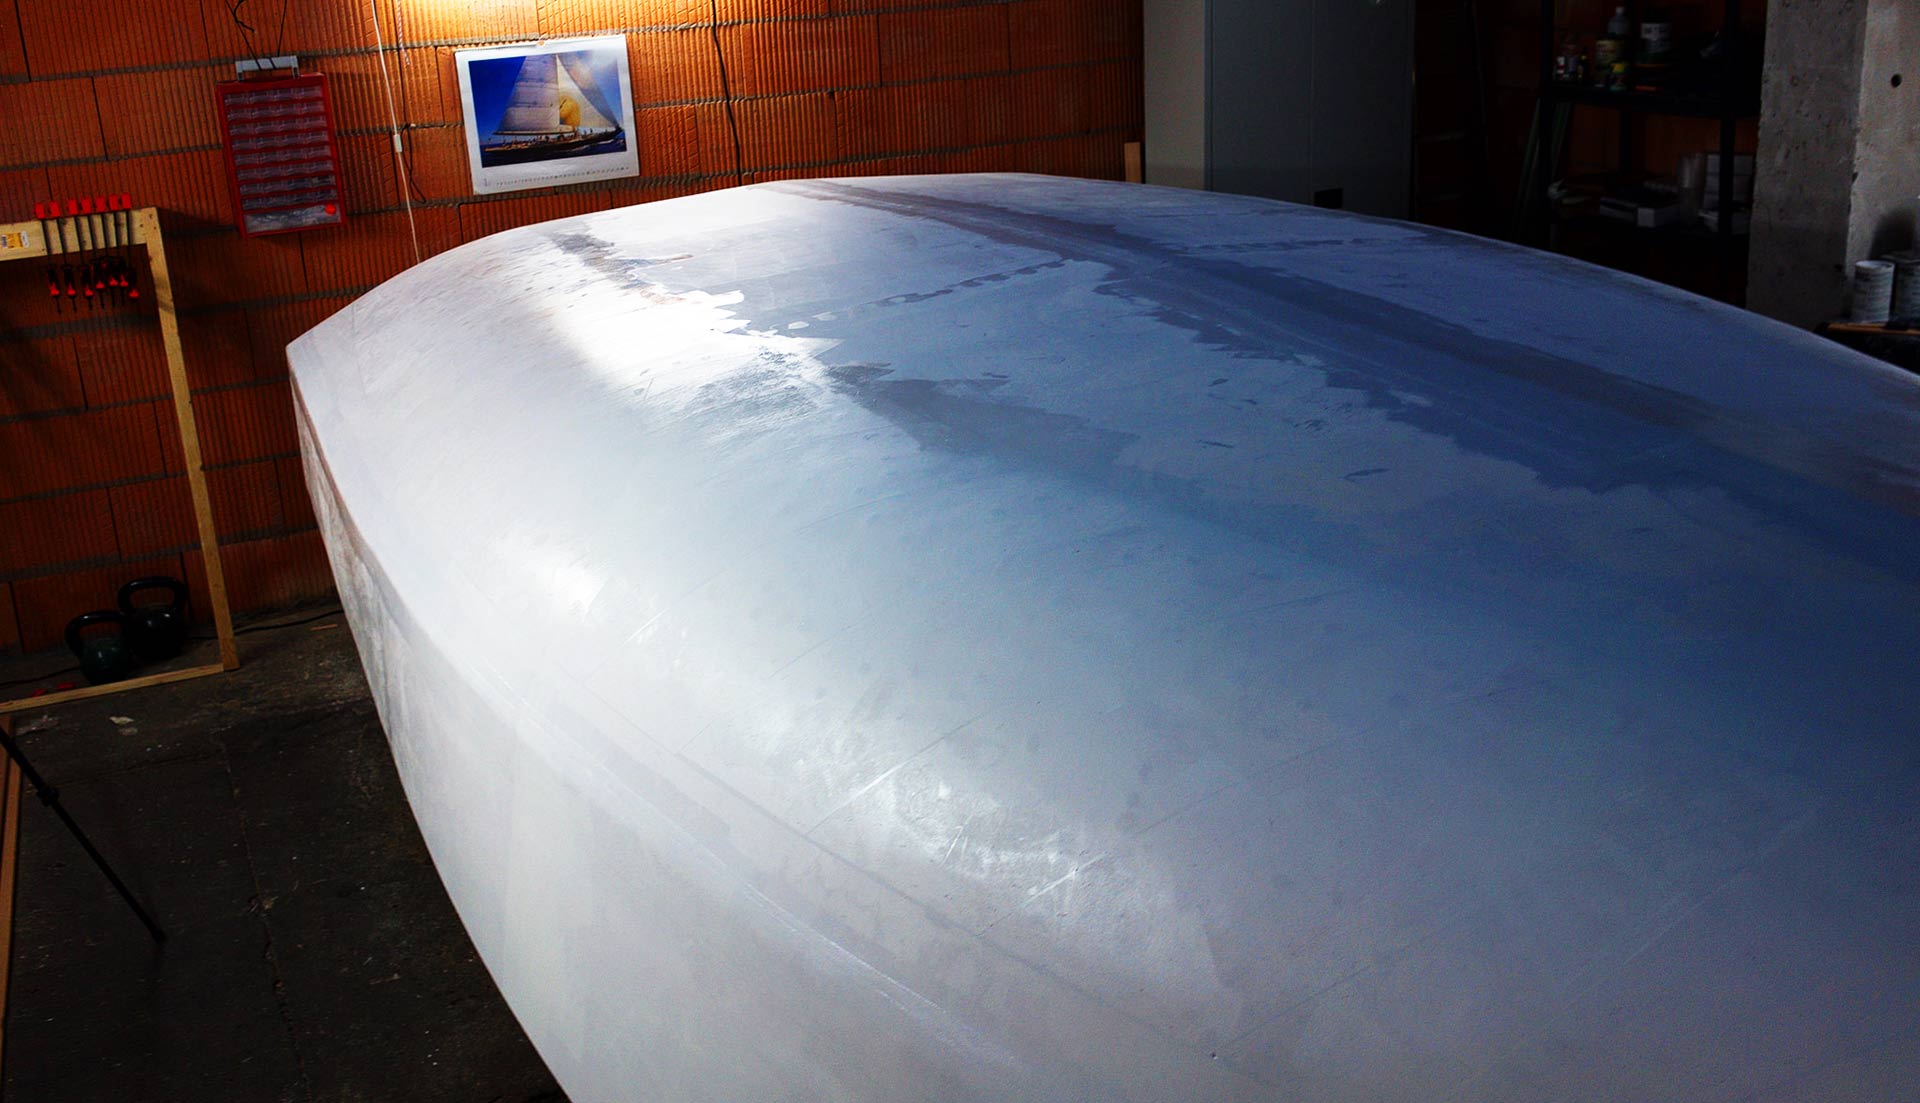
Alex: “I then had to fill those with Epoxy and sand that down again, resulting in a lot of primer coming off with it. And with every layer I discovered more holes. Very frustrating! I’ll have to add more of that later on. After that comes on a different kind of primer, and then the top coat.”
NFS.com: “When the boat was upright, what was it like to be inside the cockpit for the first time?”
Alex: “I felt pretty amazed! You see, after I spent many months getting the hull to that point it was very rewarding to finally being able to get a feel for the inside of the cabin.”
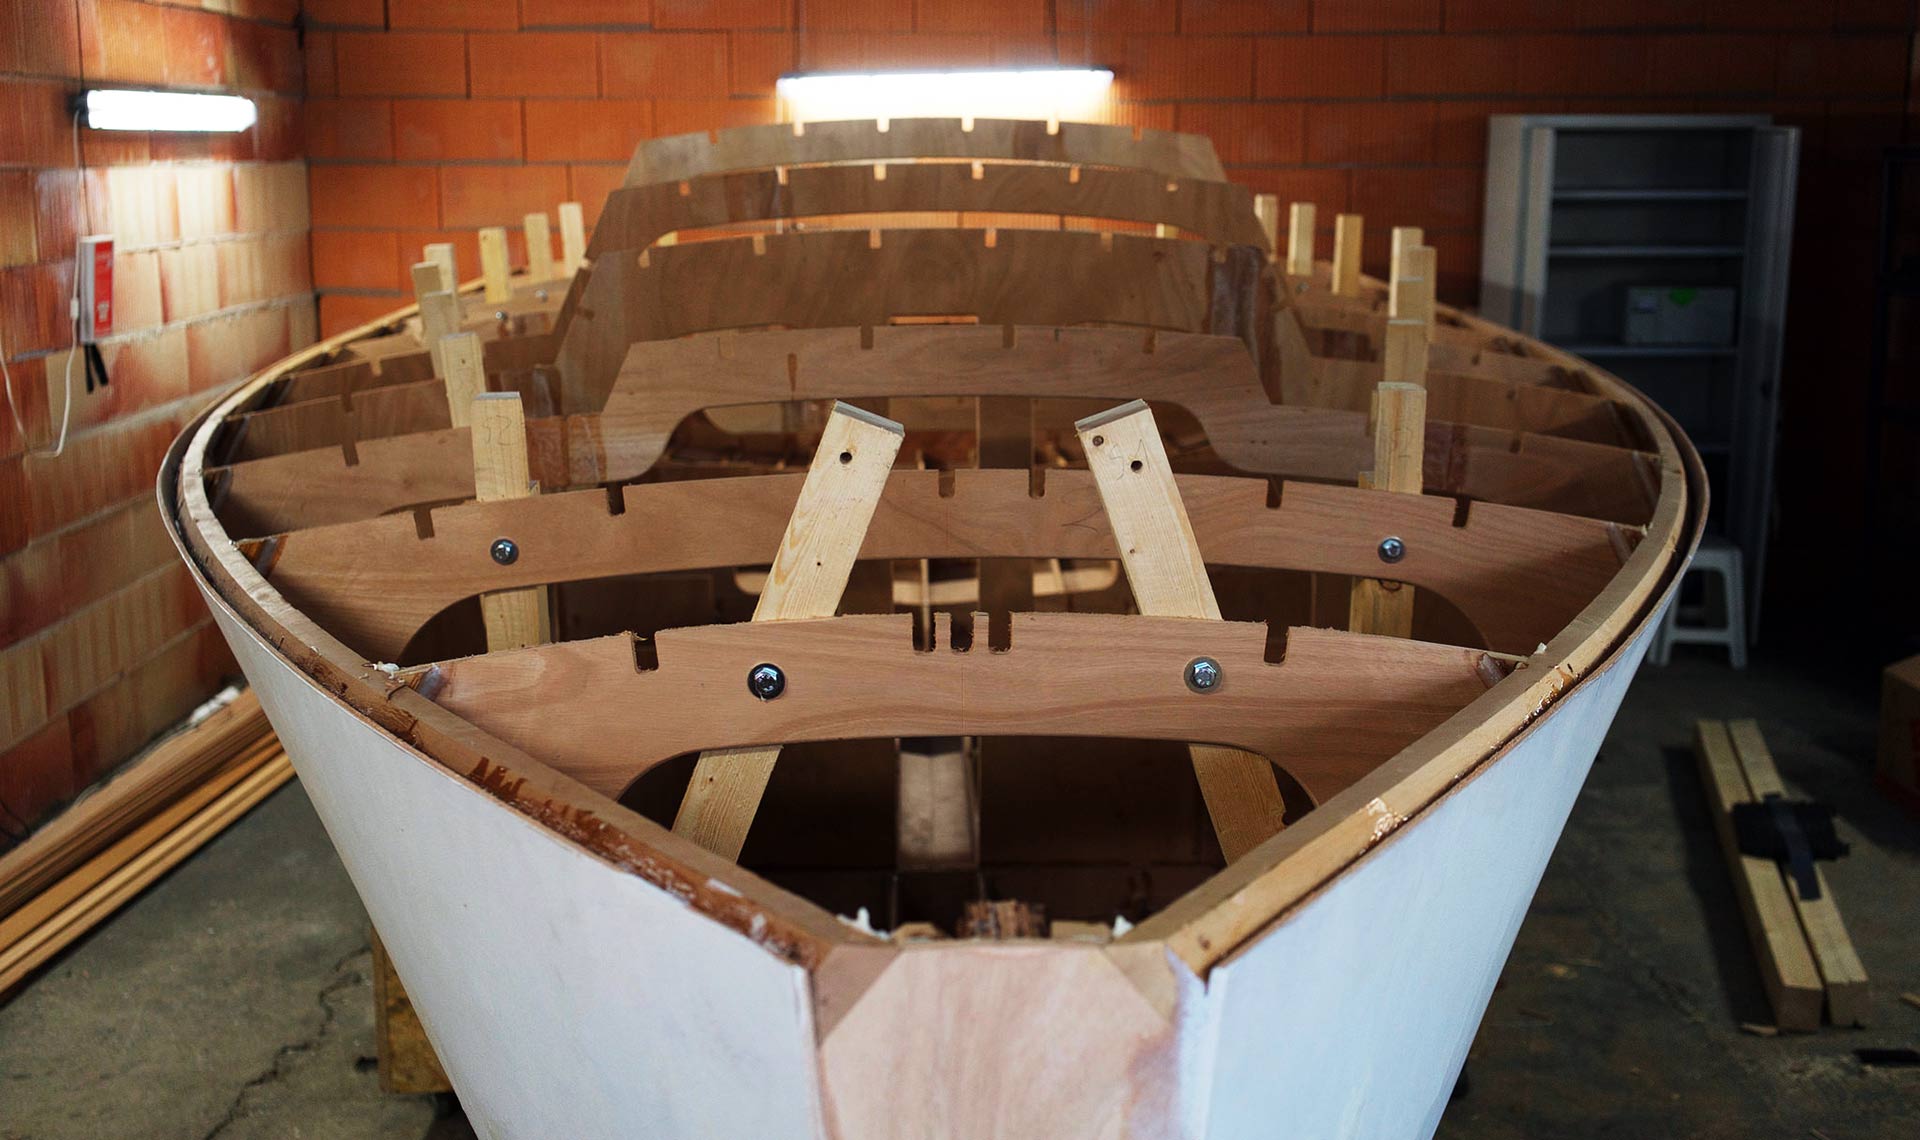
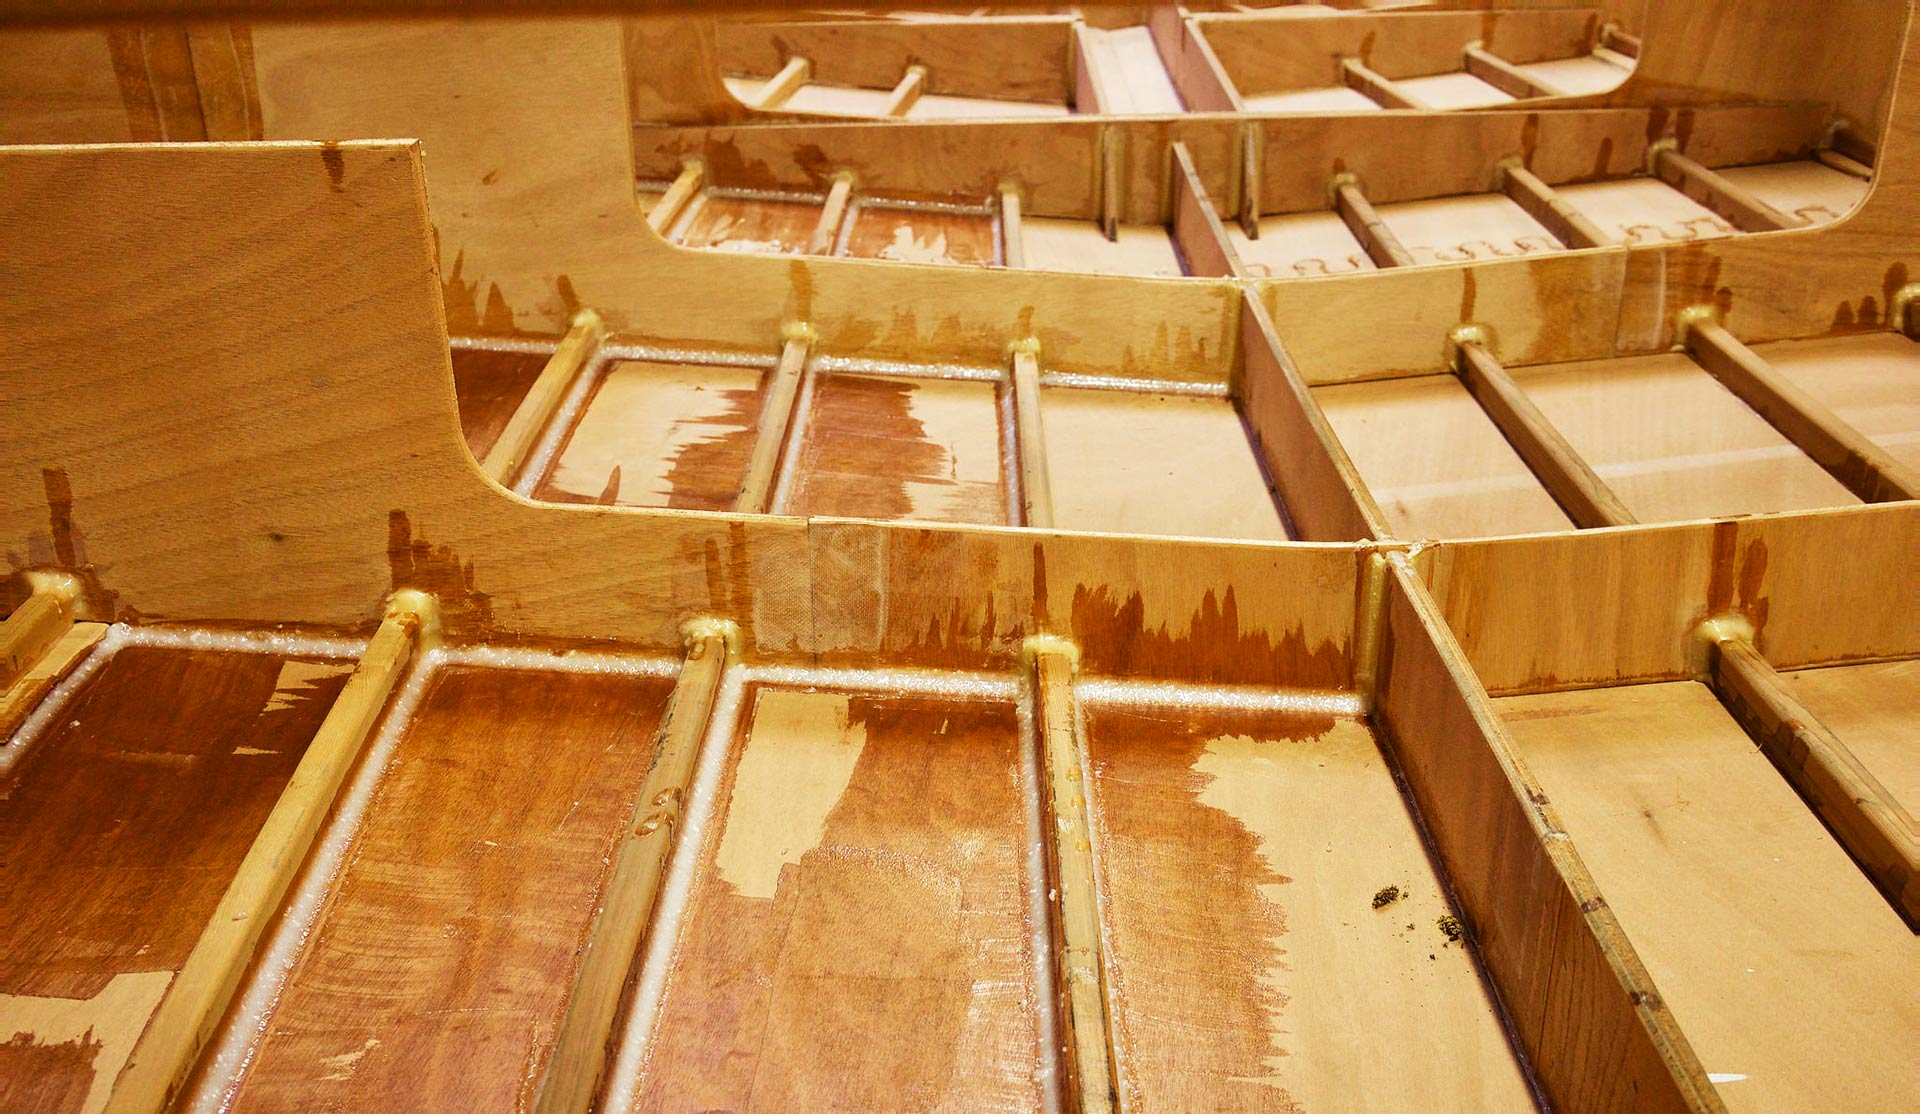
NFS.com: “You attached some kind of GRP-stripes and Epoxy to the inner-hull structure: Describe this process, the tools, the materials and the purpose of this step.”
Alex: “These are epoxy fillets I mentioned before. Just gluing the hull onto the stringers by putting some epoxy on them wouldn’t be strong enough. The fillets form a much stronger bond and strengthen the whole structure. These fillets are made by thickening some epoxy, putting it into a little cone shaped bag – actually these are the same ones used for making bakery – and squeezing the Epoxy into the area between stringer and hull. You then use sort of a round squeegee to shape the fillet.”
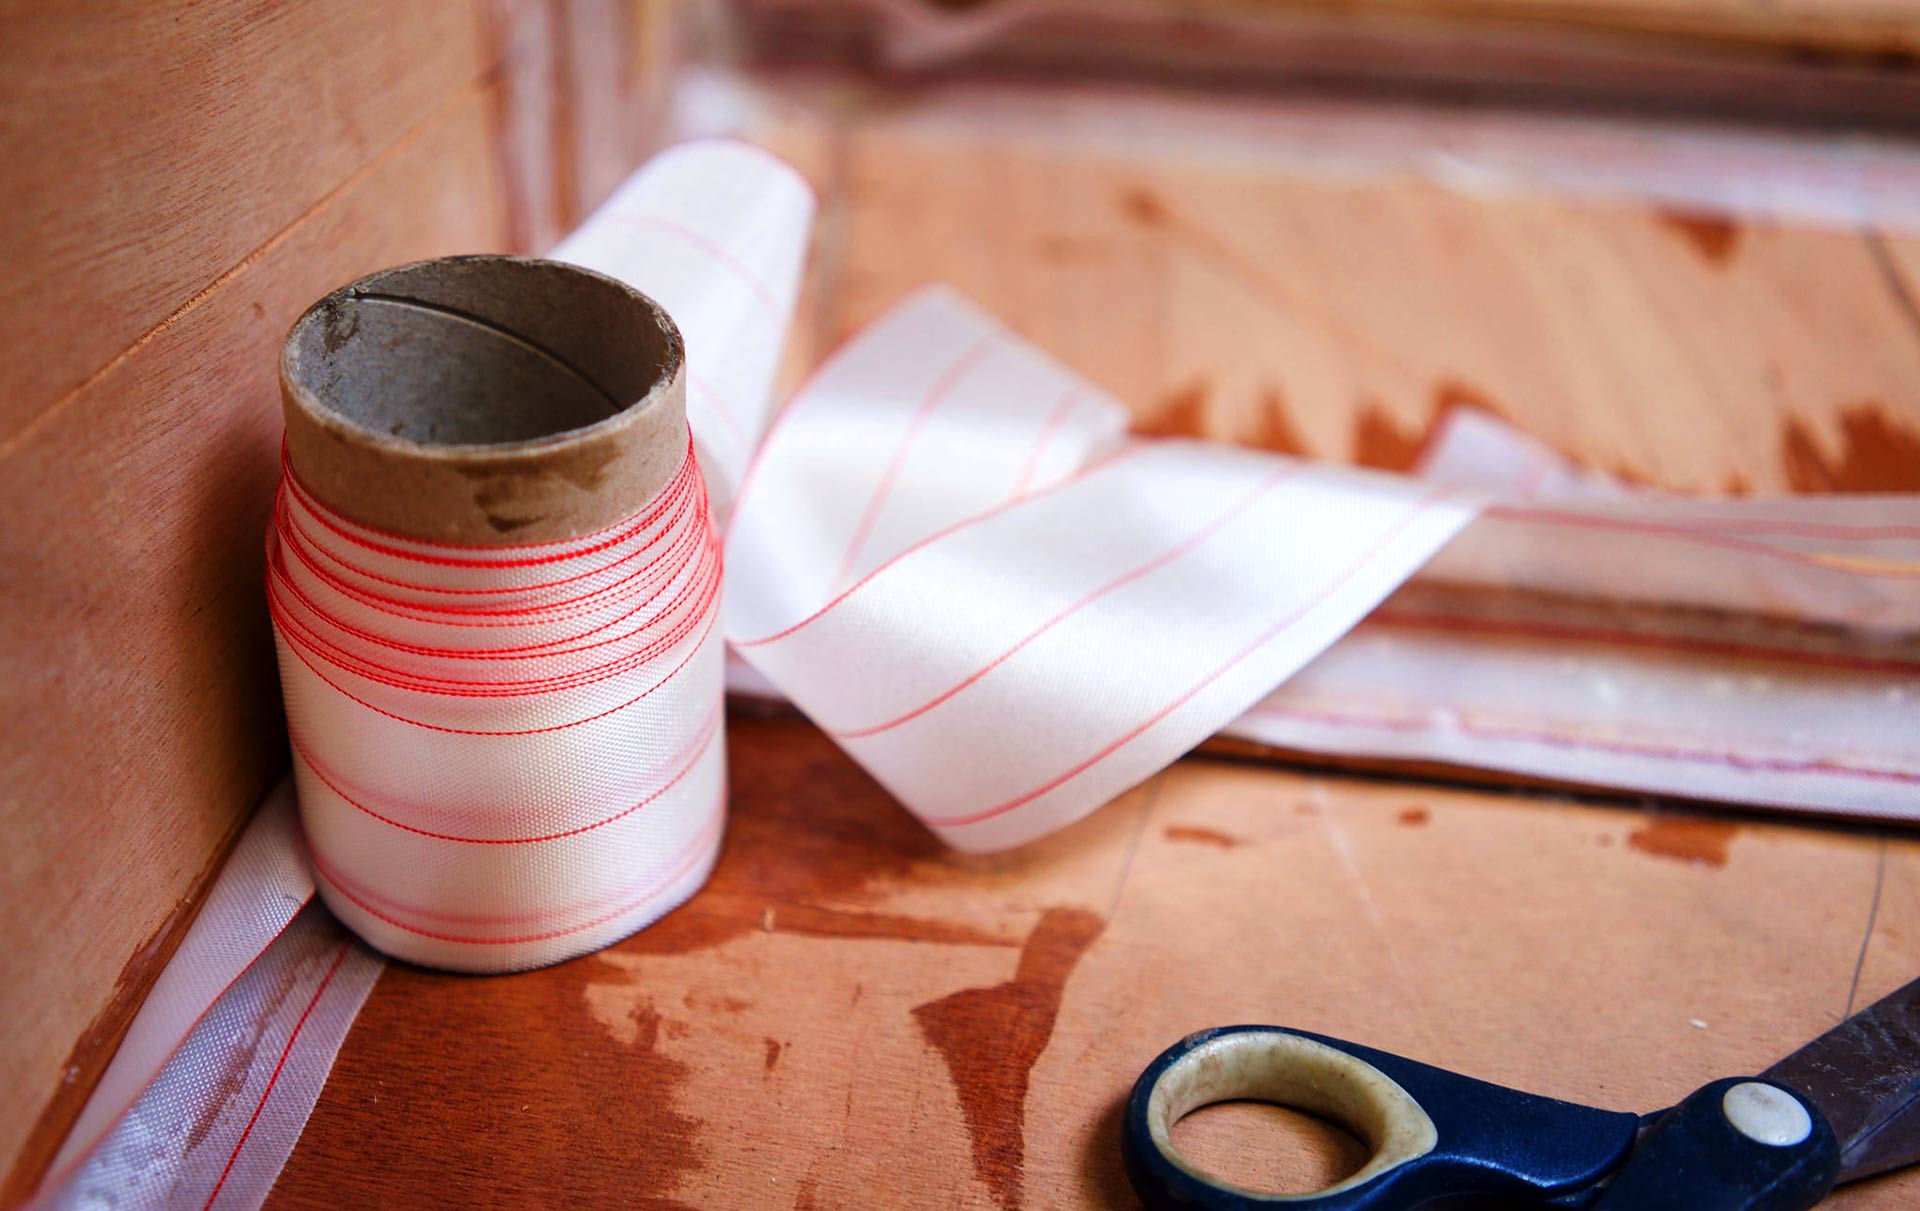
Alex: “I am also experimenting with peel ply right now. This is a waxed fabric you out in the wet epoxy, and then peel it off once everything is cured. This leads to a better surface, requiring less sanding. It’s a bit tricky to handle when it comes to corners though.”
NFS.com: “What did you do in the inside of the hull to achieve a watertight, hardened hull”
Alex: “Nothing yet to be honest as this is one of the upcoming steps of the process. The idea is to soak all of the wooden parts completely in Epoxy inside and outside. I’ll probably keep using the Epoxy based paints from Nemo Coatings for the inside, too. In the end there won’t be any exposed wood visible.”
Getting out of the old shed to the new yard
NFS.com: “Your boat seems to have been transported somewhere – did you left the building lot to have it fitted somewhere else?”
Alex: “Yeah, that´s called gentrification … they kicked me out of my old shed to build luxury apartments, so I had to move. I’m now in a shared workshop with a few carpenters, boat builders and a metal worker, which is nice. They know this stuff much better than I do …”
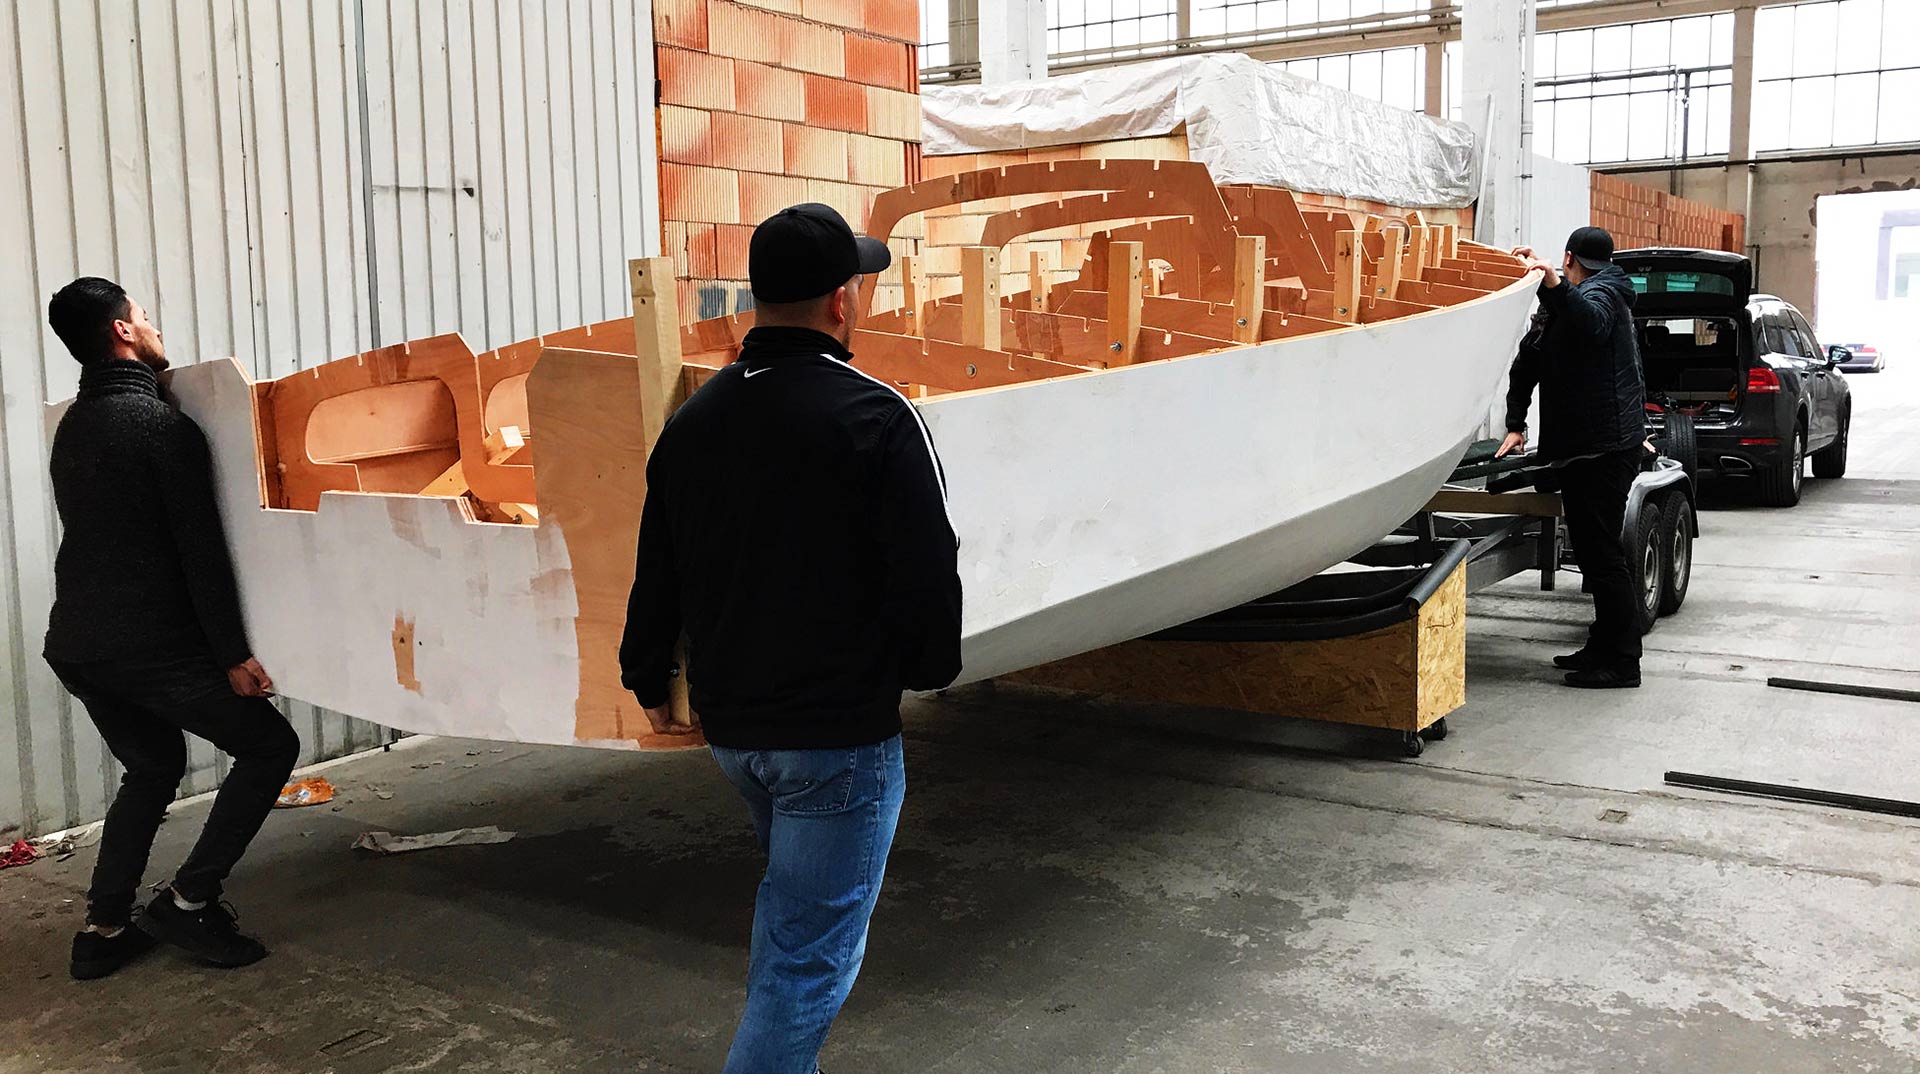
NFS.com: “What was it like to see it loaded on a truck rolling over streets in the outside world?”
Alex: “A bit scary to be honest. The guy driving the truck had to squeeze through a lot of narrow streets where things got very tight. But everything went well in the end. By the way, I was very much surprised by the fact that the boat was actually very light-weight. I alone was able to lift either the bow or stern by myself so that I would estimate it´s weight of around 200 kilograms.”

Number, numbers, numbers …
NFS.com: “Give me some statistical facts about your building project so far.”
Alex: “Well, I started working on the boat in October 2015 and have done some 350 net working hours up to now. I am not really sure if the small dinghy I built prior to the Mini before is included, but the budget spent so far is some 19.300 Euros …”
NFS.com: “… which is amazing. Considering your data and comparing them to my own refitting project of my King´s Cruiser 33 I have spent some 15.000 Euros for the refit itself plus 17.000 Euros for the used boat.”
NFS.com: “Alex, last question: What are the next steps of the Class Mini project?”
Alex: “As I said, I will continue to add fillets at first to cross off this item from the list. After that I´ll switch to interior design of the boat which is making the saloon furniture, attaching the water ballast tanks and the foam for making the hull unsinkable.”
Alex, thanks so much to providing us with such a detailed insight into your project. It´s amazing to watch your progress and to understand how you manage to overcome problems and even more how you come up with your own solutions or changes in the original design to make an even better boat. I look so much forward to seeing you making further progress and for the next time to maybe sit inside of the saloon of your boat for the next interview.
Other interesting articles on that topic:
Alex Lang´s Class Mini 650 project, part 1
Plywood performance cruisers by RM-Yachts
Making plywood roofing panels for a yacht´s saloon