Wow, what a relief! Finally another small item can be crossed off my list of jobs to do on the refit project of my King´s Cruiser 33 sailing yacht. A small job for sure, but a big jump forward for the whole project. After some 2.5 working hours I drive home and wonder when and how this all had started, I search my own website and read the first entry on the subject of the Teak ceilings … that´s almost exactly to this very day! Most shockingly: 2 years ago!

Back then I was full of hope and joy that I might be able to have OLIVIA back in the water by the coming year but it all started right after beginning of this Teak-ceiling-operation when things in my schedule began to deteriorate: One item done, two new items appear. A nightmare! Nevertheless, now, 2 years later, things fall into place quite nicely and I slowly but surely begin to see a light at the end of the tunnel. So, here´s where I start today:

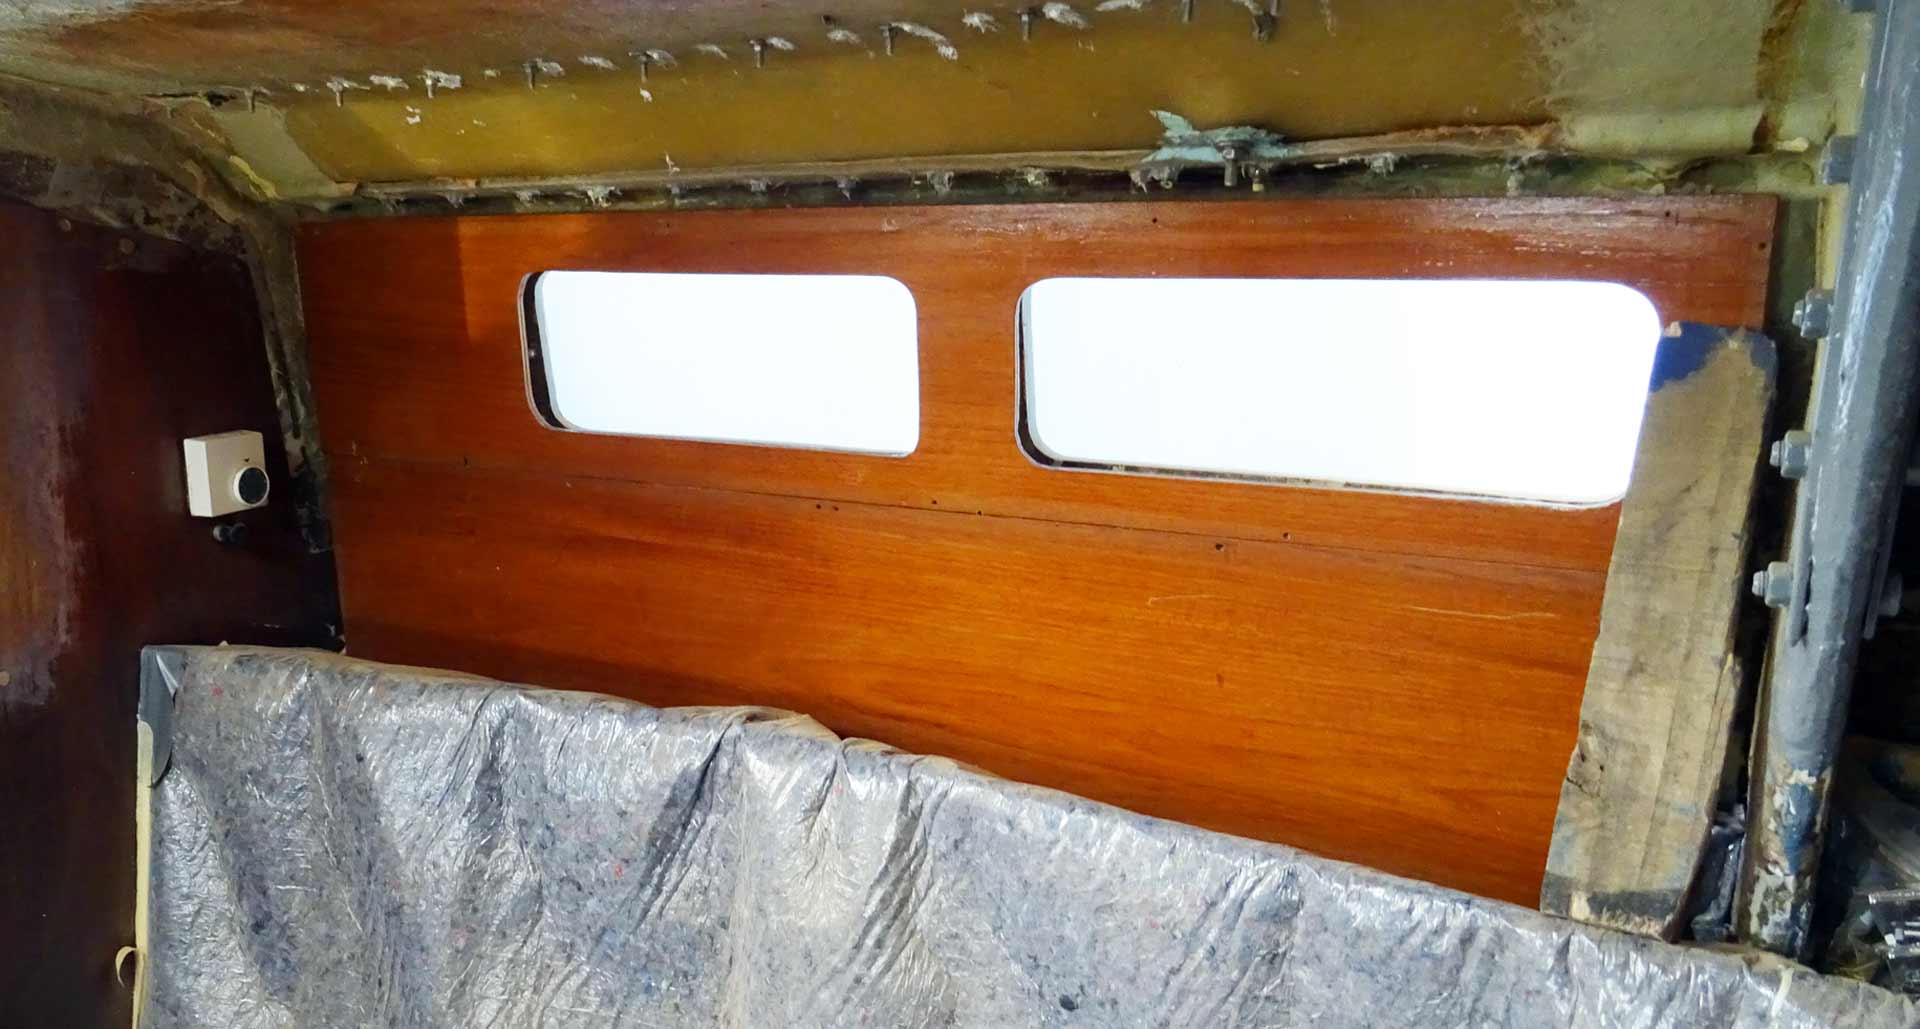
After having finally renewed the porthole windows, which was far more complex than I initially had thought, I fixed the inside of the windows with two layers of Epoxy – as a kind of Loctite for the window-Screws – and painted the bare GRP of the hull of my boat with some layers of white. As the ceiling panels won´t be attached right to the windows there´s quite a big distance between window/hull and panel and I don´t want to look at bare GRP. White is better.
Time to harvest: Finishing the porthole windows-job
But before mounting the panels I had to clean the windows and finally complete the window-job. When I was preparing mounting the windows I did have indeed a moment of enlightment by didn´t getting off the protective foil from the Plexi glass windows. That was on purpose because, as you may see on the picture quite clearly, leftover from the cement is spilled over the window:

So I took a sharp carpet knife with a brand new sharp blade and elaborately cut along the window through the cement and the foil. This was a bit tricky because once loosing the right track the knife would cut into the window certainly leaving a not so nice damaged surface. But I kept a steady hand and everything went just fine.

Taking off the protective foil was a no-brainer, the leftover cement also came off quite nicely. A very welcome side effect of this action was the sheer amount of natural light suddenly flooding the salon: Although there is still one layer of foil left on the outside (which will come off not until the boat is finished) removing just one was making the boat so much brighter. In the coming dark months a nice thing to have though …
Mounting the salon´s Teak ceiling panels
So, let´s go for it! I couldn´t wait to have the two bigger and two smaller ceiling panels finally mounted. I could barely remember what the boat was looking like inside in the first place. But then I find the picture: The panels had just been made of ordinary plywood, cut out windows and some glossy paint. Well, I am sure that the new Teak ceiling is way more classy …
How to mount the panels in the first place? Two years ago I already attached pieces of Oak battens to the hull. Dead certain glued to the hull with the magic D4 501 cement by Kleiberit, an industry-standard cement that can glue almost everything on almost everything. These wooden pieces had been deliberately placed by myself where later the nice brazen screws would be positioned above.

By means of a screwdriver I remove screws where underneath the wooden pieces are: By utilizing the old boreholes I wouldn´t destroy the looks of the panel. Although I would have to use longer, stronger screws with a crossed slot I don´t think that later on people would recognize the difference of the screws.

On each side of the big ceiling panels I drill in some three to four screws, three more to the middle between the two windows. The whole process does not take all too long and after minutes the first panel is mounted. And what a joy when I sit back an look at the works!
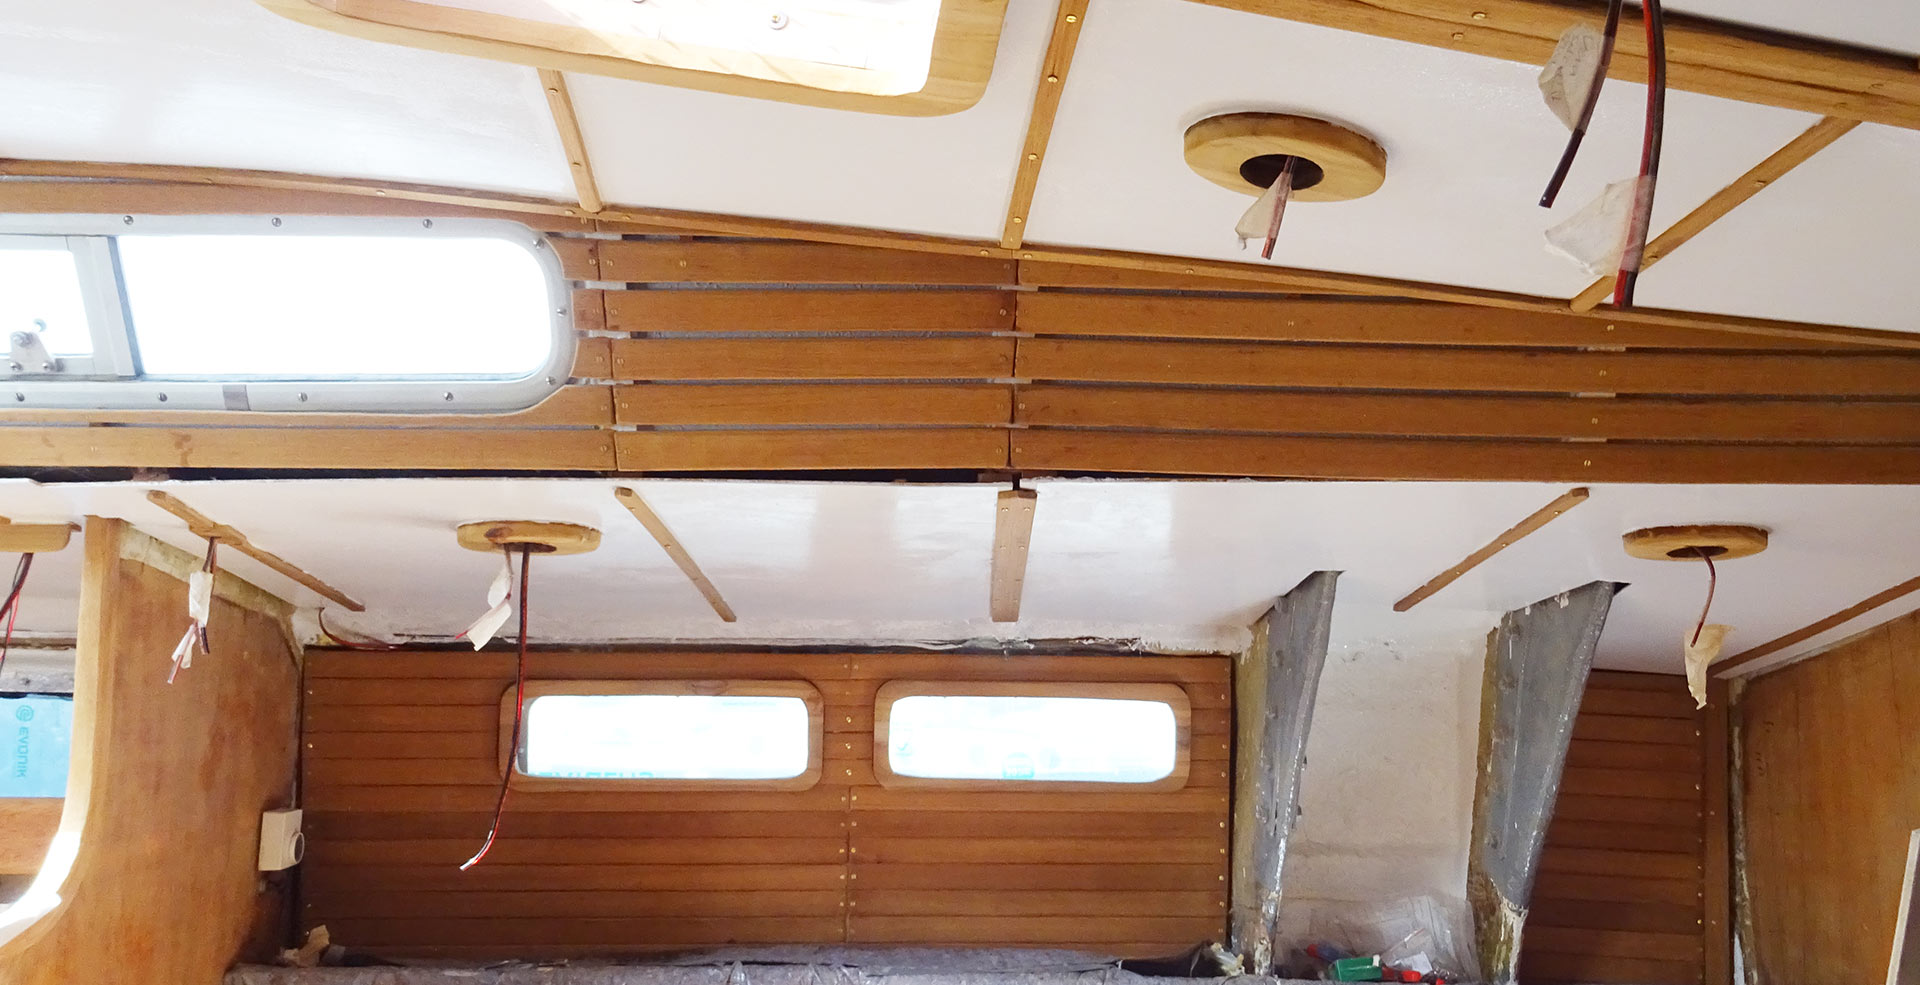
The whole character of the boat suddenly changes. With those wooden applications the boat almost completely changes its appearance, it gets cosy, warm and … well, just the way a boat should feel like! And this was exactly the reason why I insisted on refurbishing the panels and getting rid of the plain plywood-stuff in the first place: The King´s Cruiser 33 is a true classic and I am now more sure than ever that this is the right path to go when refitting her.
Tricky stuff upcoming …
In all the uplift there´s a downside. Dark clouds coming up: As I finish the mounting of the starboard side panel and the two smaller panels as well I crawl forward to the forepeak and find four pre-assembled pieces of Teak-veneered furniture. Also a job from the past: In early November 2016 I built the four wooden encasements for the GRP-stringers which take on the loads from the shrouds.

Mounting these will be a pain in the ass. First of all I missed making a mark which of them belongs to which side of the boat and onto which respective stringer. Secondly, the casings are made back then fitting onto the stringers without the roofing panels being mounted. So that´s a big puzzle and endless trimming, cutting and sanding of the parts until they fit. Not a job I look forward to.

On the other side, when these four parts are finally mounted, the salon is finished – at least the bigger part of it. What will follow is the rear part with galley and nav station. And then it´s “just” the details. And the other cabins. And the quarter berth. And the electric stuff. And … well, the list (still) is endless …
You may also read about Teak, the yacht´s refit and more:
Making a Teak ceiling for my sailing yacht, Parts 2, 3 and 4