Laminating the bulkheads to the deck: A detail only, but a crucial and very deciding step in boatbuilding. This article shows how this is done for my custom Omega 42, where everything is hand-made and no computer-aided designer provided a CNC robot with data: This is real craftsmanship and I am going to show now how it is done.
It´s Sunday today and traditionally this is time for a more detailed article, making you indulge into a bit more reading than usual. This time I chose as subject a very important building step of a sailing yacht, yet a topic that is seldom talked about: Mostly because in series boat building the fixing of bulkheads to the deck isn´t a huge thing (Why? You will learn later in the article), but also because many boatbuilders don´t like to talk about this all too much.
To start with: You surely remember my two in-depth articles about the very interesting occasion of the hull-deck “marriage”? This was one full exciting day when back in the building shed after all the deck had been fitted to the hull, glued and bolted thoroughly so that both formed an inseparable, sturdy, robust and rigid bond. If you haven´t, you should check these articles too as this single building step transformed the construction site into a boat finally: Click here for part 1 and here for part 2. Anyway, as exciting and deeply satisfying this was, it wasn´t finished – the bulkheads needed to be fixed to the deck as well.
Structurally sounds & solid: The Hull-Deck Joint

What are we talking about? The picture below shows the building status of my new Omega 42 about one year ago during the principal phase of furniture and interior construction. The deck is not fitted as of now and you can really clearly determine the wide bearing surface going around the hull from stern to bow: This is where the deck will later be glued and bolted too. But then there are also a lot of red marked areas, can you spot them in the picture? See here:
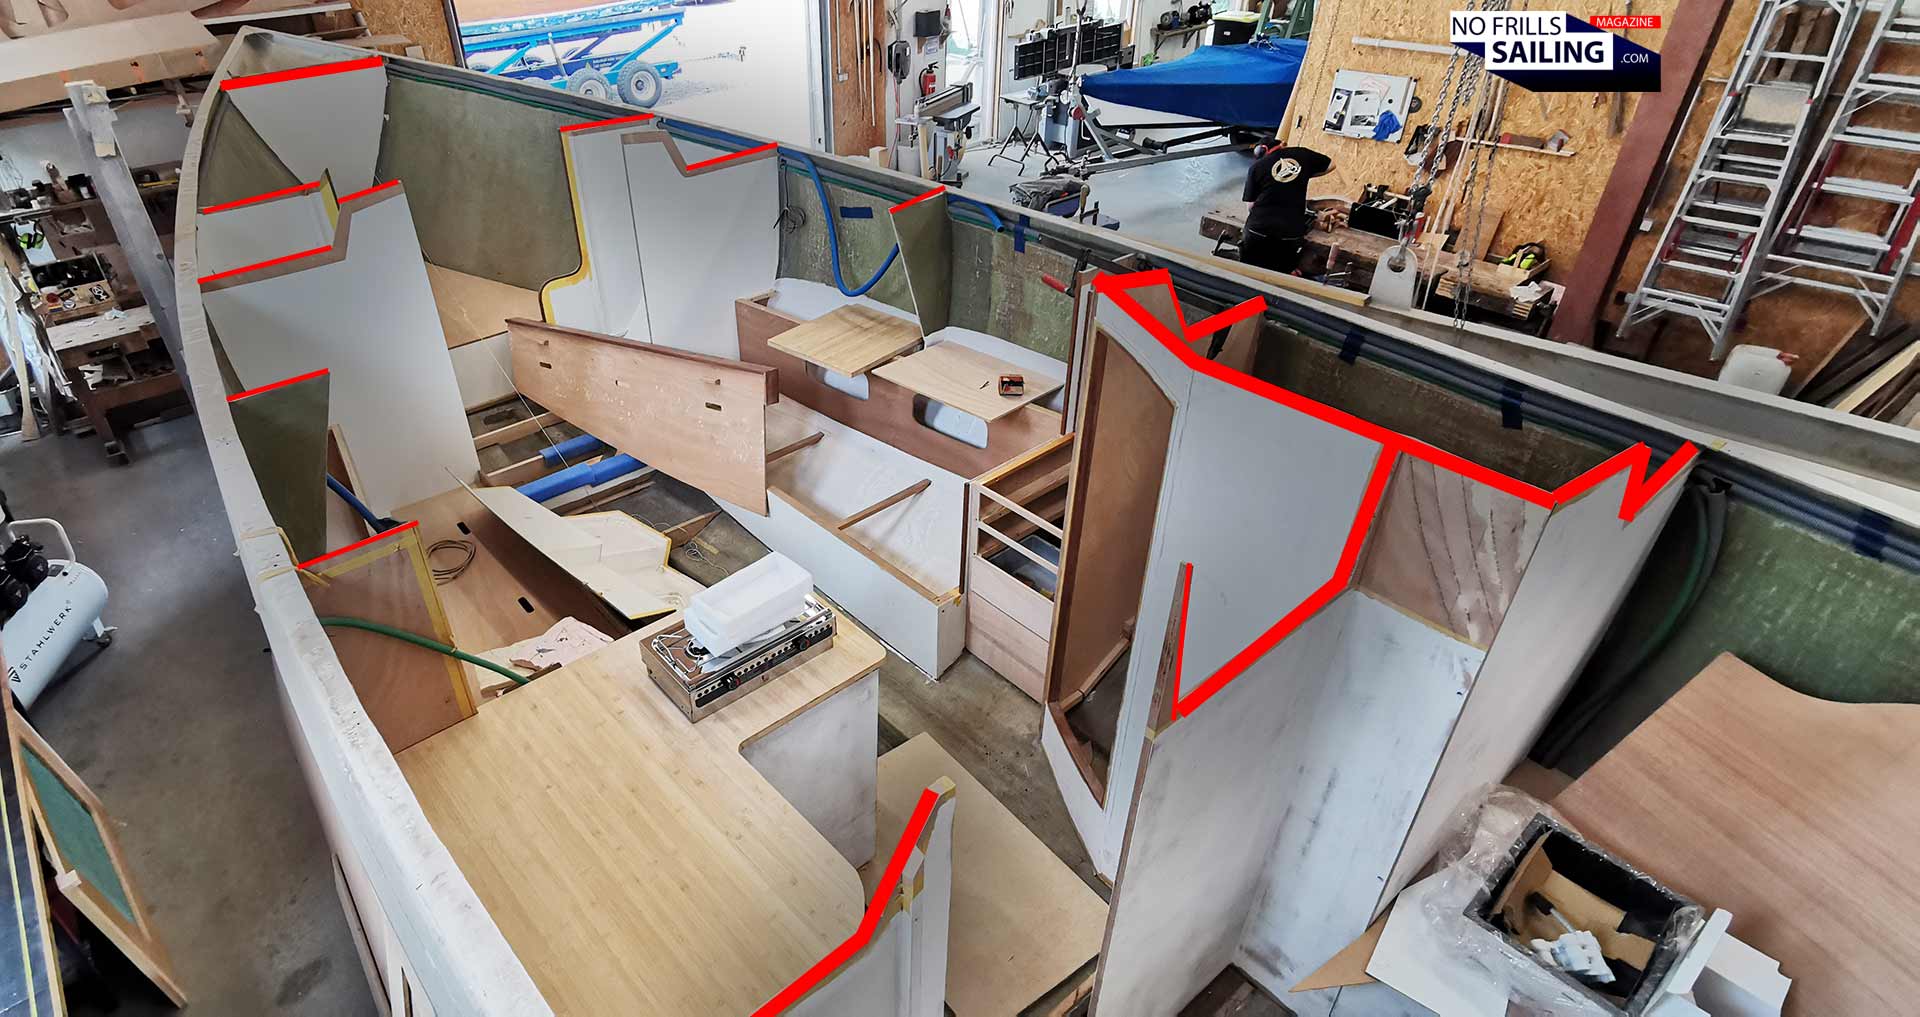
All of these red marks are the upper sides of a bulkhead. These may be short and small if you look at them individually, but measuring the contact area and adding them up makes for a pretty large number. So that´s again a lot of contact area to be fitted to the deck (when on top). This is what this article is about: How did the boatbuilders finally connect the red marked parts to the deck of the new boat? But why bothering writing about this seemingly “unimportant” detail in such a long article anyway?
Why bulkheads are so important for a sailboat
Did you ever walk over a sailboat and felt a kind of “wobbling” underneath your feet? When the deck is kind of “springy” or “soft” and it just doesn´t feel right? Or, the other way round: When I for the first time in my life set foot aboard an Oyster sailing yacht (I guess it was the then-new Oyster 575 during Cannes Yachting Festival), I indeed felt nothing at all when walking all around her side decks: She felt as solid as an aluminum yacht! So clearly, the way a deck is fitted to a hull and supported but traverse structures underneath determines its structural rigidity.
You might think that bulkheads are primarily for separating the individual interior rooms or areas from each other, like the salon, the cabins and the heads. Which is of course true, but there´s a second, deeper layer to it. And that is the structural integrity of a yacht. Bulkheads prevent the boat´s hull from being “squeezed” by sheer forces, which is their primary function. They also support the deck from below, hence no “wobbling” when walking on it. And lastly, if watertight, collision bulkheads can act as a very important safety measure on an oceangoing yacht. So clearly, this is an important detail, would you agree?
Fitting the bulkheads to the deck
In series production yachts and high-class one-off boat projects this is not a big deal. Any part of the boat has been constructed on a computer, utilizing CAD-software. When produced, often those bulkheads are cut to size by CNC-machines which provide a very, very high degree of accuracy: If a boat is made this way, the individual parts will fit in the end with a staggering precision. So there´s absolutely no need to worry about clearances or the need of adjustments.
That´s not the case with my Omega 42 however. Each and every part of the boat has been made by hand. Apart from the limited amount of molded GRP parts, everything had to be handcrafted. This is also valid for the bulkheads. One of the big challenges of reviving this iconic sailboat was the fact that there are simply no construction plans. Nothing has survived: You´ve read my article on the lamination “manual” of the last Omega 42-producing shipyard? This describes best the starting basis of this project. Heiner Francke, CEO of the shipyard and initiator of the new Omega 42 generation, had to reverse-engineer the whole boat: Including the bulkheads.
Another factor had been my individual choices for the boat. If you look at the interior of the hull #001 – see a picture here – you will notice that the owner of this boat went for the classic separation between salon and cabin. Not so for my boat, hull #002: I asked for an “open” interior, skipping the major bulkheads (and doors) to the front and aft cabin, asking for the least possible amount of bulkheads. My aim was to make visible the sheer length of the boat also from the inside. Adding it all up meant: Hand-built, hand-adjusted bulkheads. And this comes with considerable variance, as you can see.
Achieving a firm bond
In fact, I was astonished of how small in the end those “open” seams between deck and bulkheads had been after the deck got fitted! I sadly don´t have pictures which would document it, but it went as following: Know that they would have to adjust the bulkhead´s upper sides to the deck, those areas had been produced with excess material in the first place. Before fitting the deck, the boatbuilders would lower it multiple times onto the hull, checking the bulkheads, take it up and sand down the bulkheads ever so slightly, just to repeat this process multiple times. In the end, the open seams after marriage ranged between 4 to maximum 8 millimeters. Amazing!
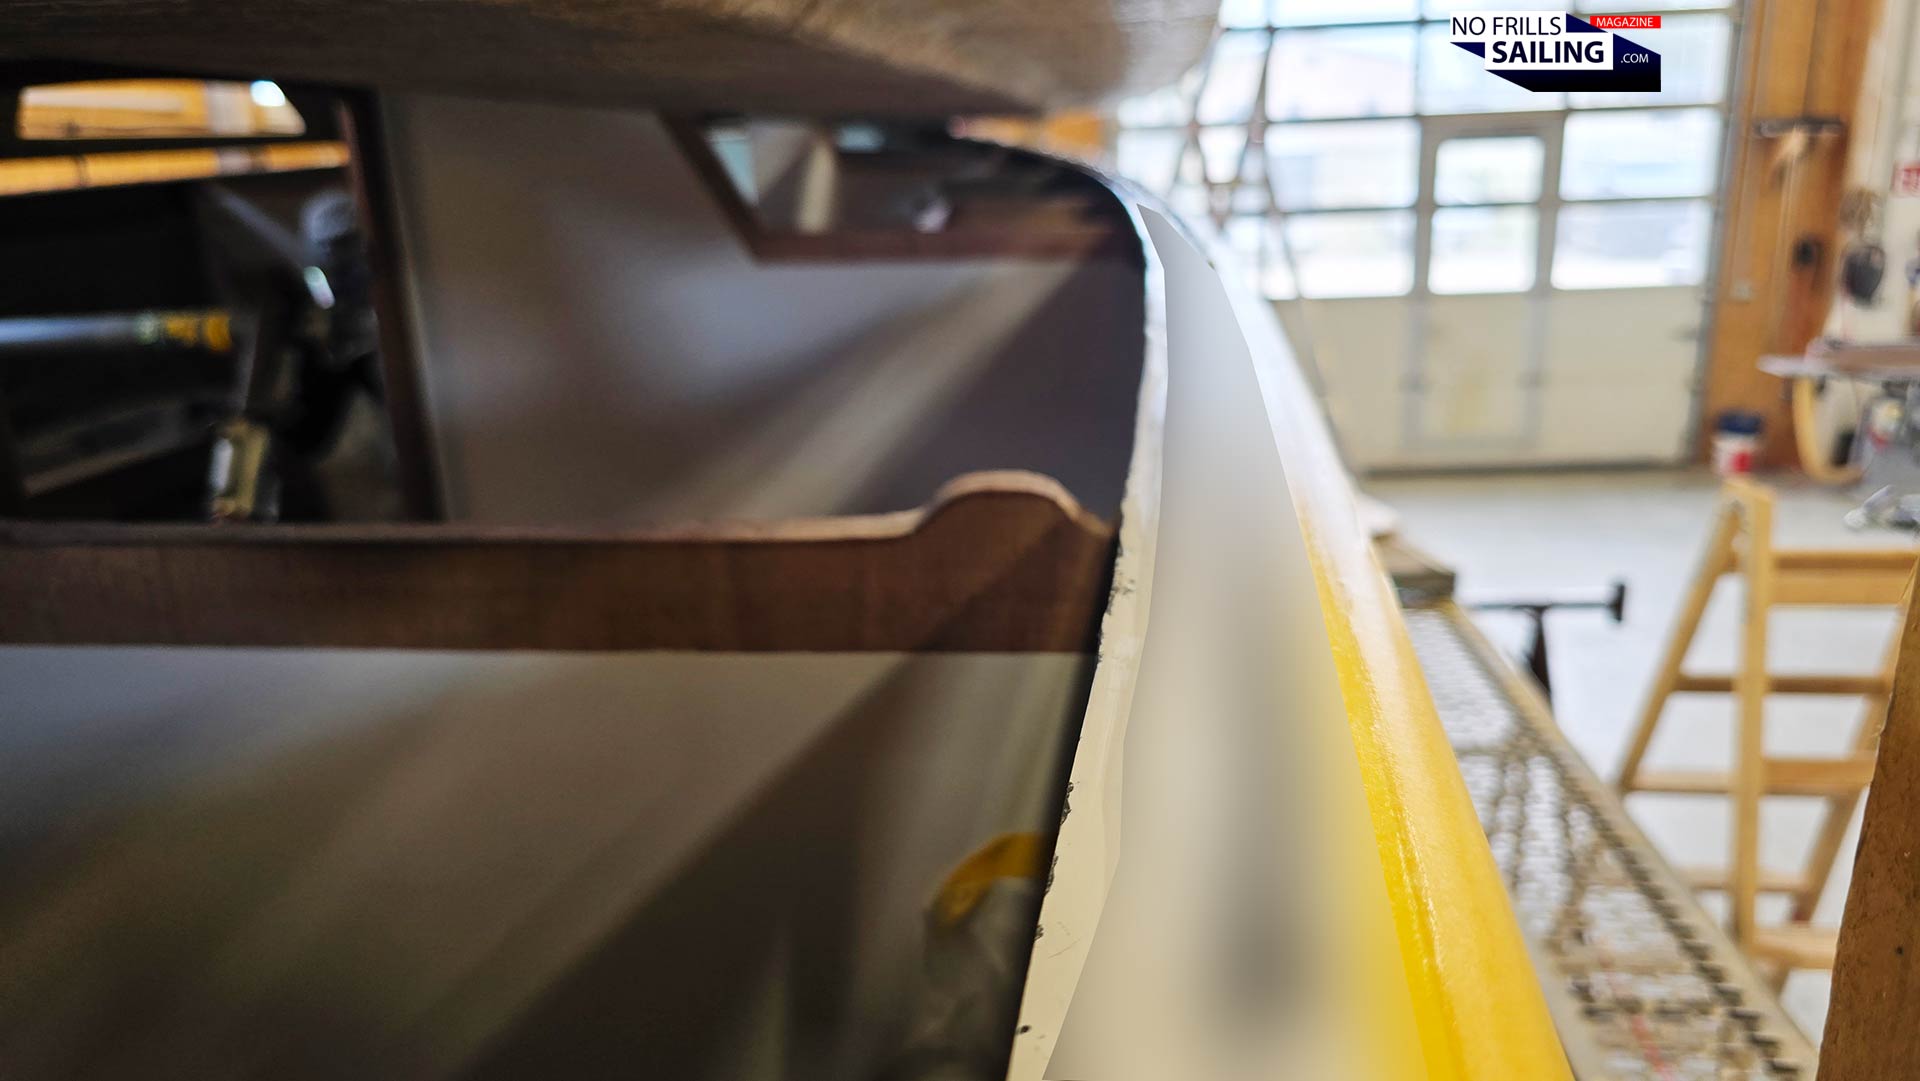
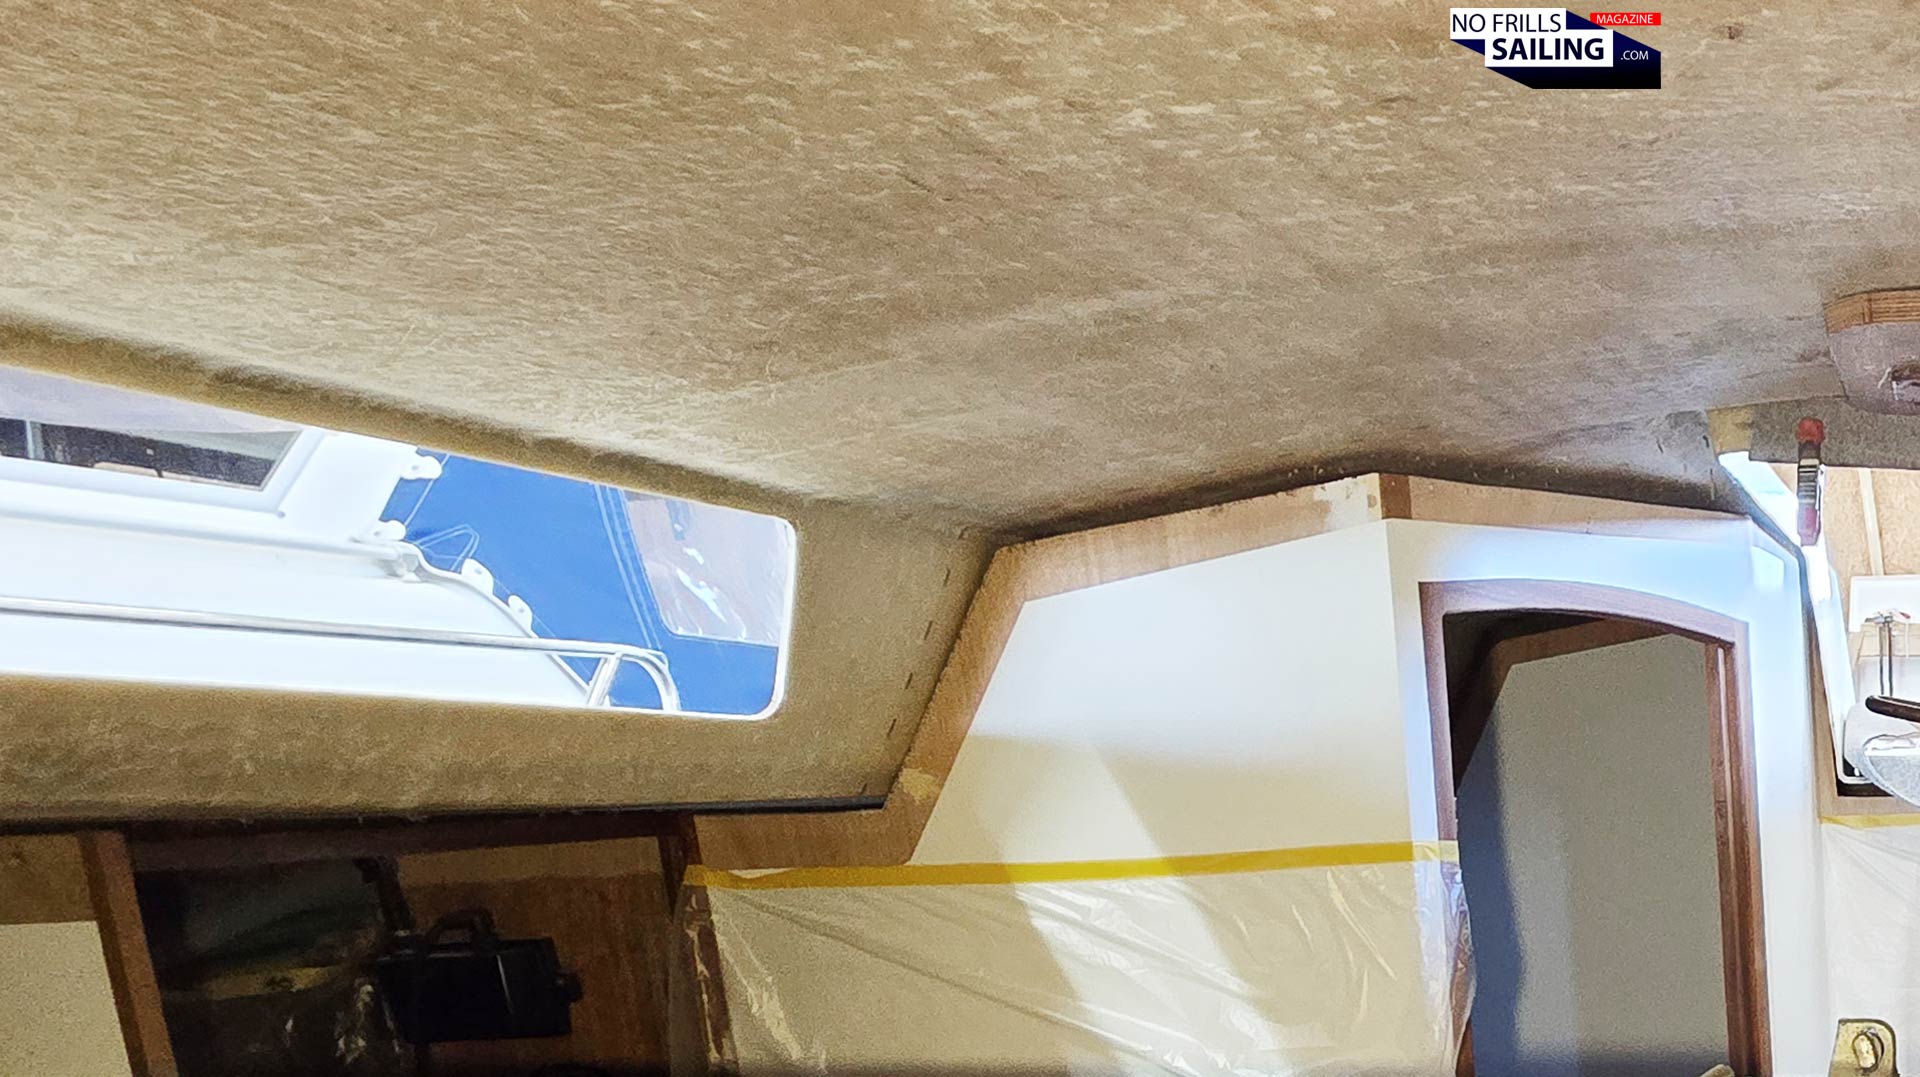
Last time I visited the boat – staying for a whole week to make the bottom paint (read the articles here and here – I of course roamed her interior as well to check for the boat´s progress. I was amazed to see that the bulkheads, all of the previously red marked areas in the first picture, had already been laminated thoroughly to the underside of the deck. And indeed, walking on top of her deck made for considerably less “wobble” than last time, when we were taking the measurements for the Seldén mast or produced the gauge templates for the PVC-deck! Nice!
The already painted and lacquered surfaces of my interior had been thoroughly sealed by protective wrap, the faint smell of fresh epoxy resin and GRP-material was slowly venting from the seams. There´s almost no chance to really distinguish between bulkhead and seam, between vertical wooden frame and firm connection to the deck. But how did they achieve it? Let´s take a closer look at those areas …
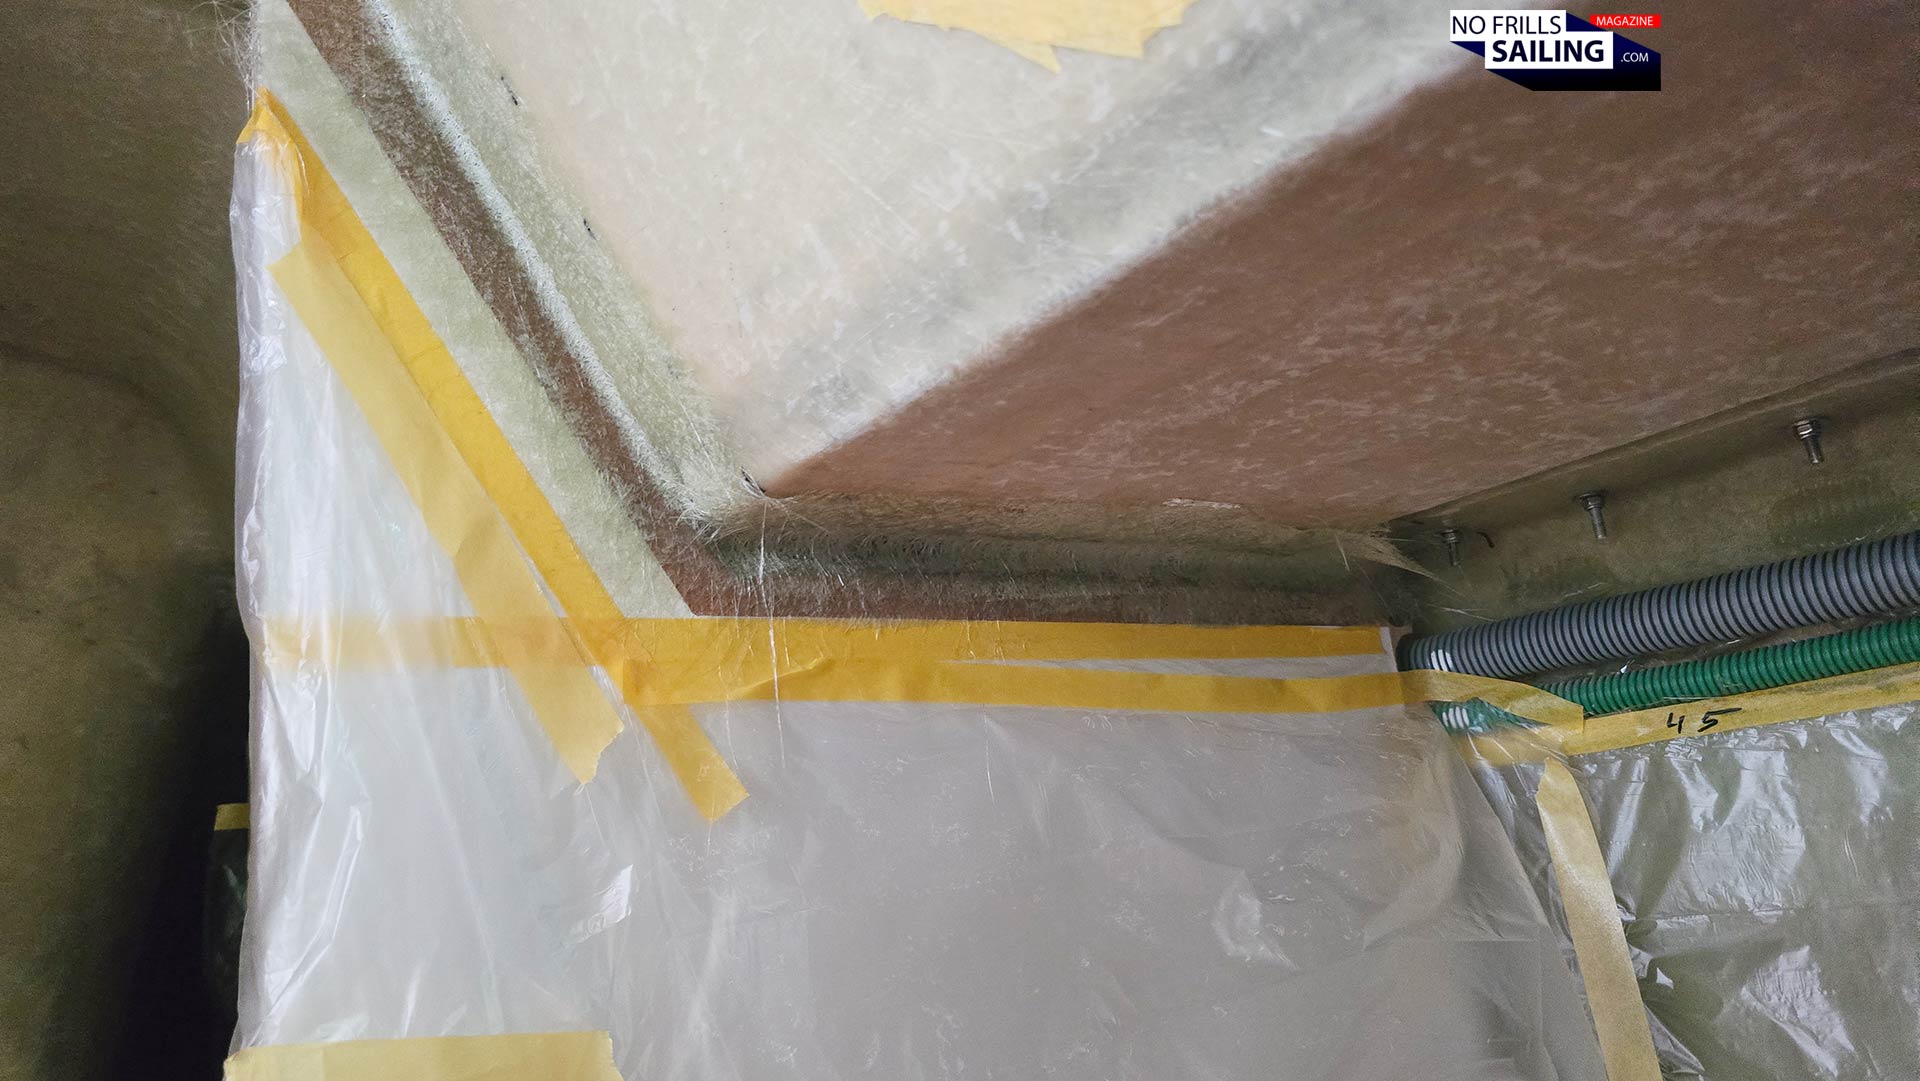
This is how it´s done
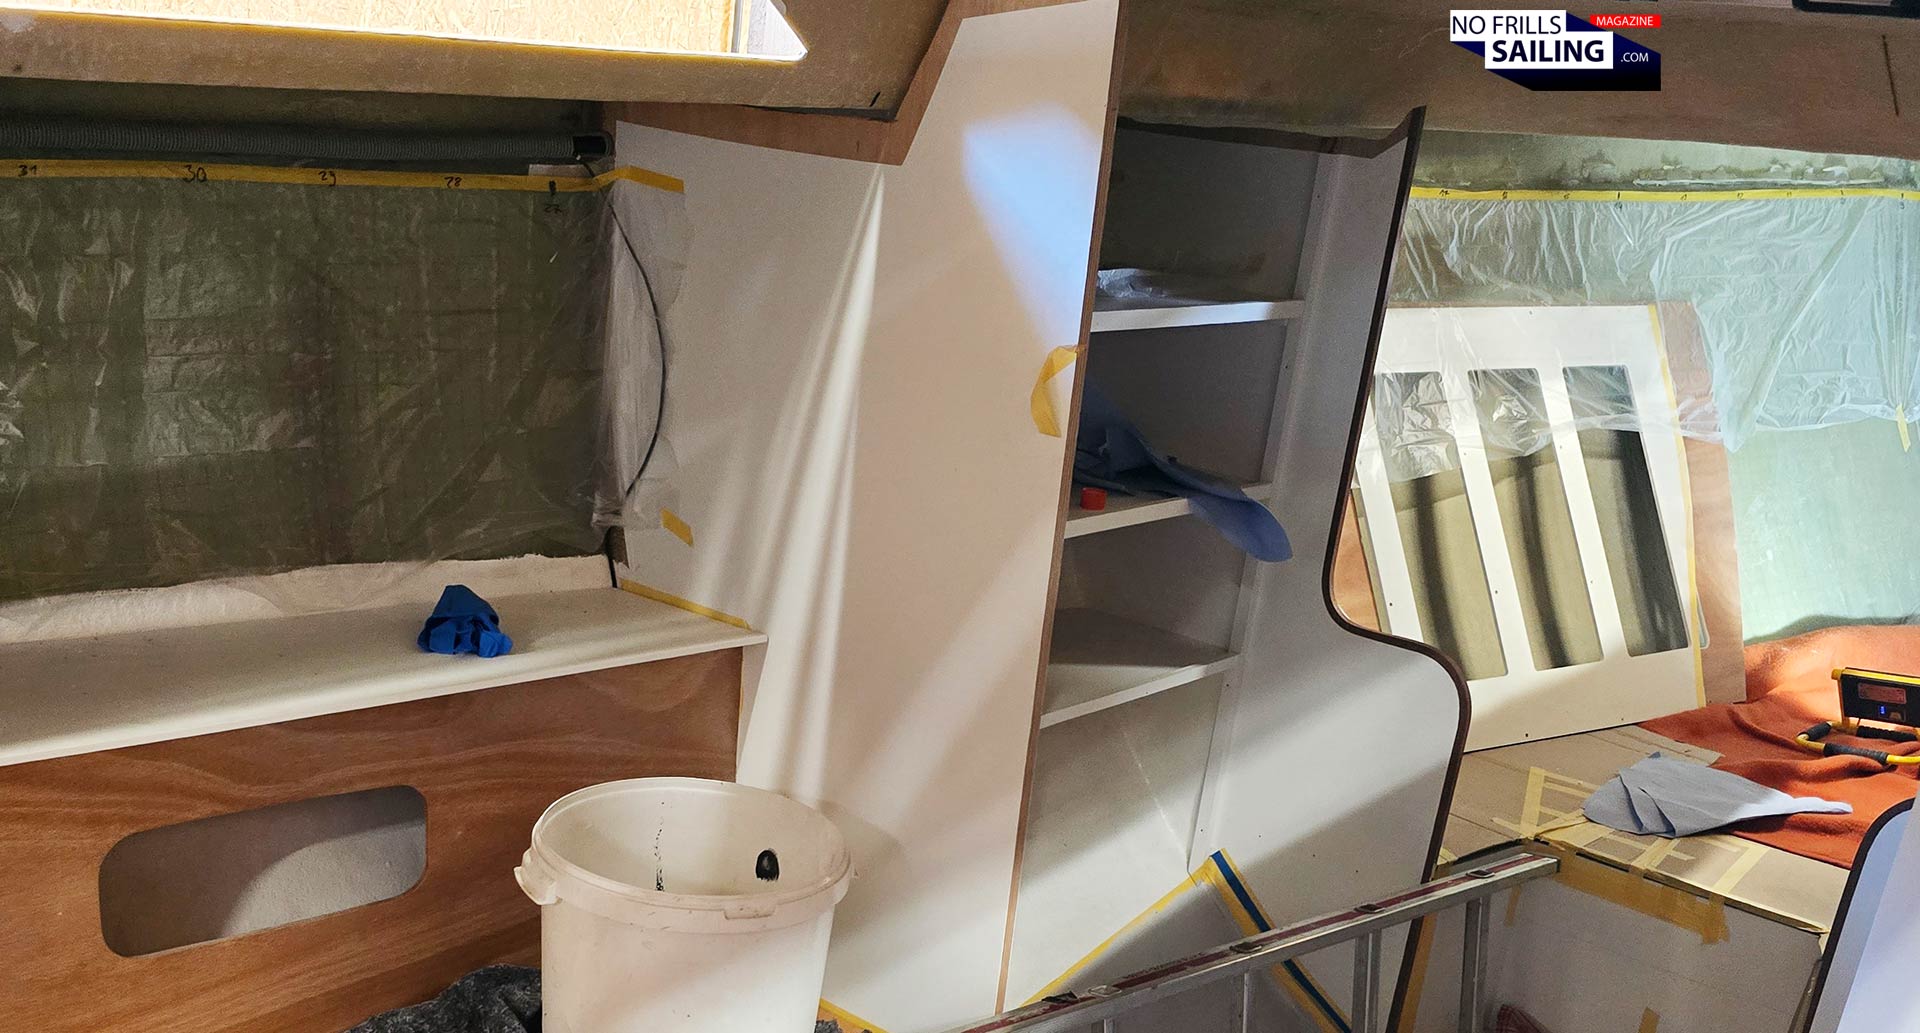
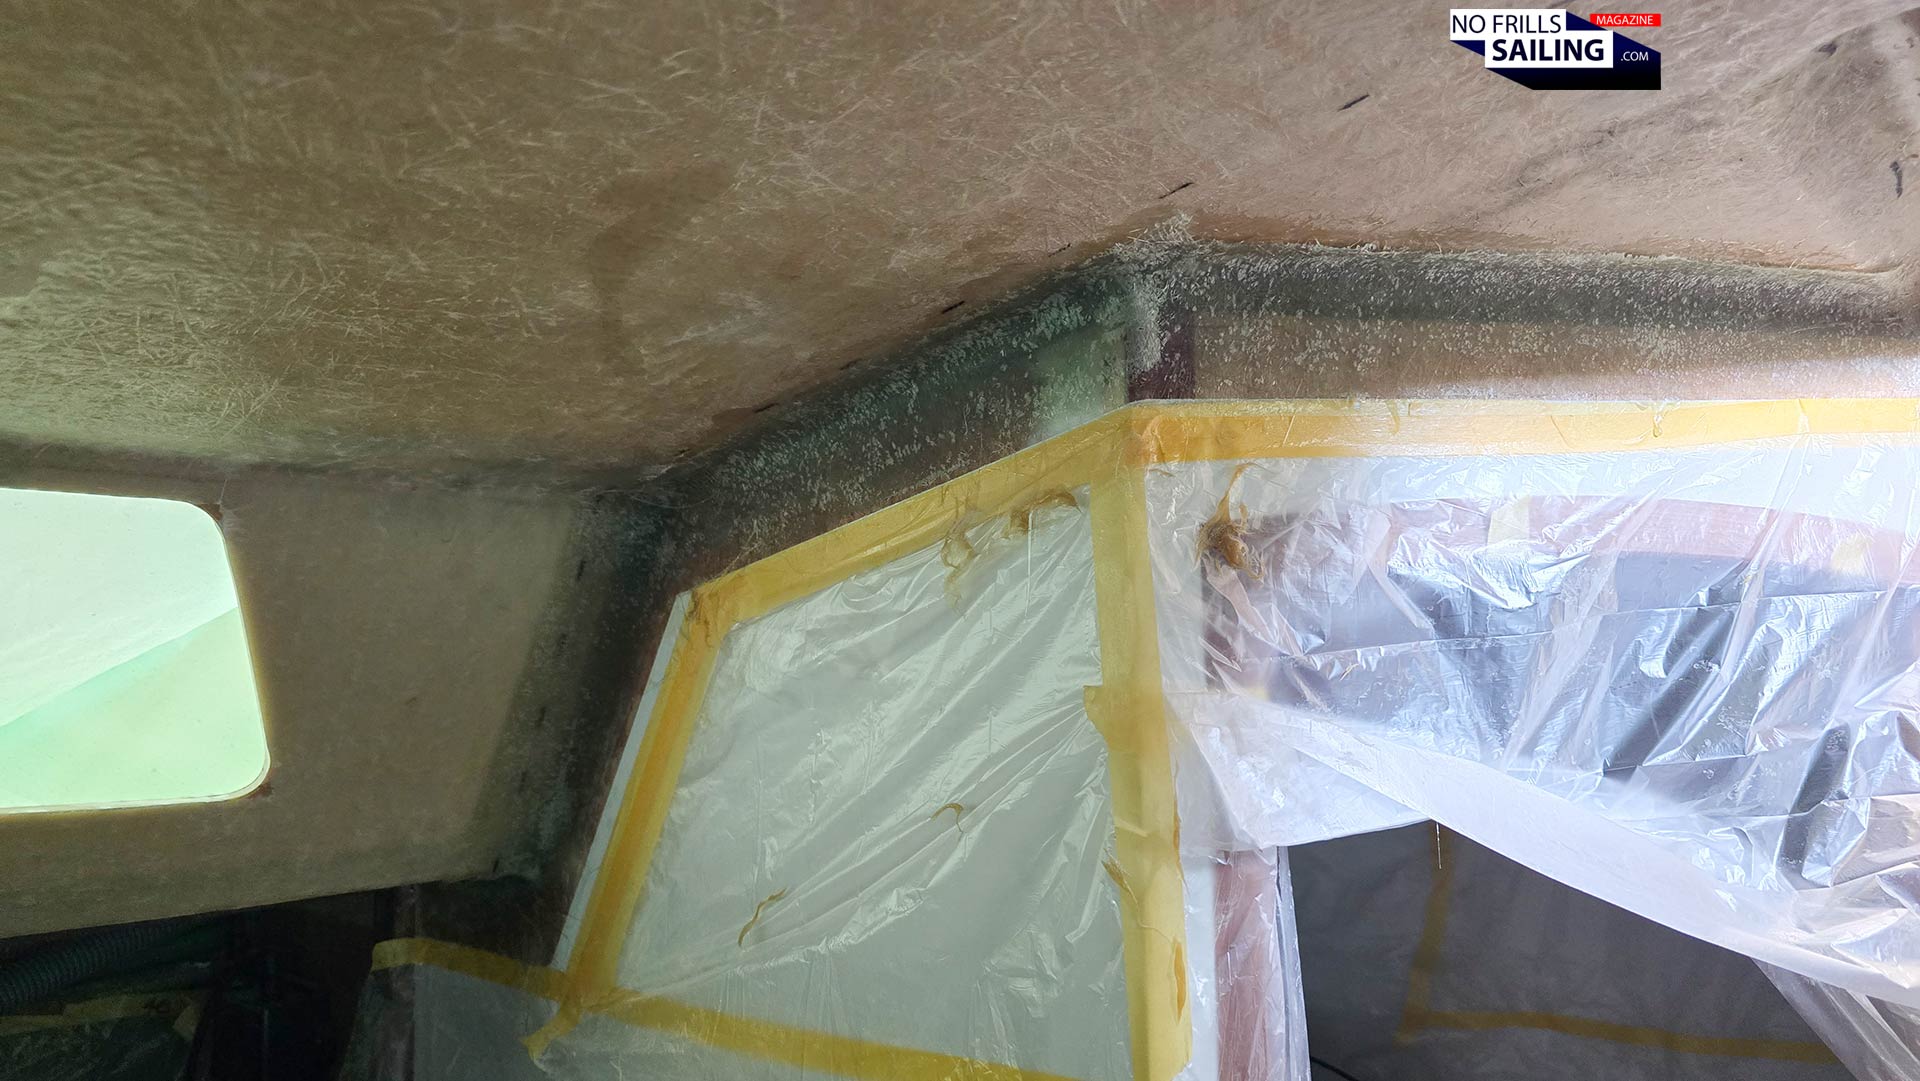
As you can see on the picture below in this unfinished part, the first thing they would do is to laminate little square glassfiber-parts forming an “L” from the bulkhead to the deck. By the way, this is exactly the reason why the white paint did not cover the whole bulkhead up to the top on the first hand. Some 8-10 centimeters had deliberately been left unpainted exactly for this occasion. So here we have it, a number (they won´t disclose how many, company secret!) of L-shaped GRP-layers as step one.
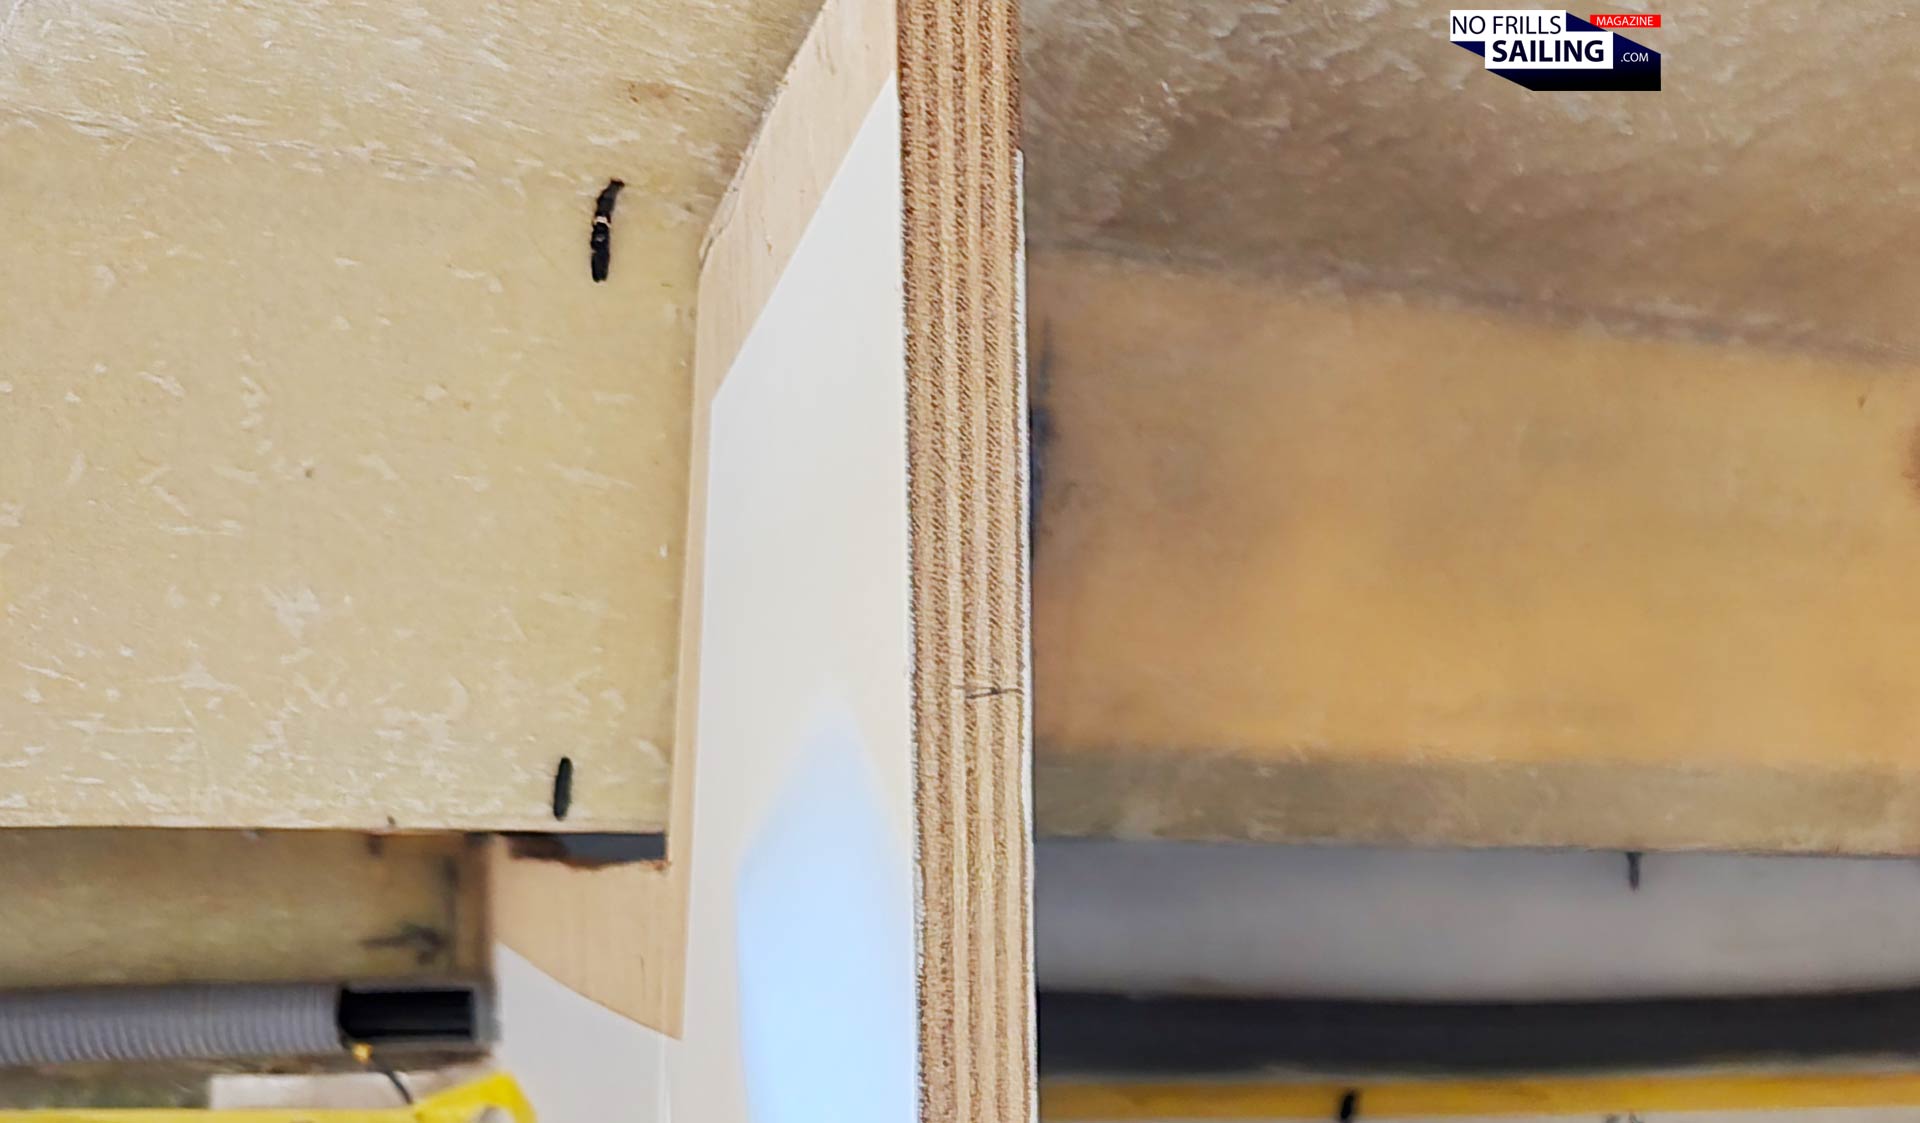
After dried thoroughly, it was time to fill up the gap between the upper side of the bulkheads – the red marked areas in the first picture of this article – and the underside of the deck. I´ve seen this in many production boat shipyards many times over. Some utilize a kid of semi-soft Sika glue to allow for some movement, some will go for the “solid” firm bond. Neither of the shipyards where I´ve taken pictures of this process had allowed me to publish them – as didn´t my own shipyard. So that´s a secret too, I´m afraid. But be assured, the outcome is perfect! Let´s say, in case of my boat, the seam is filled with some form of filler product that will harden thoroughly and bind together deck and bulkhead.
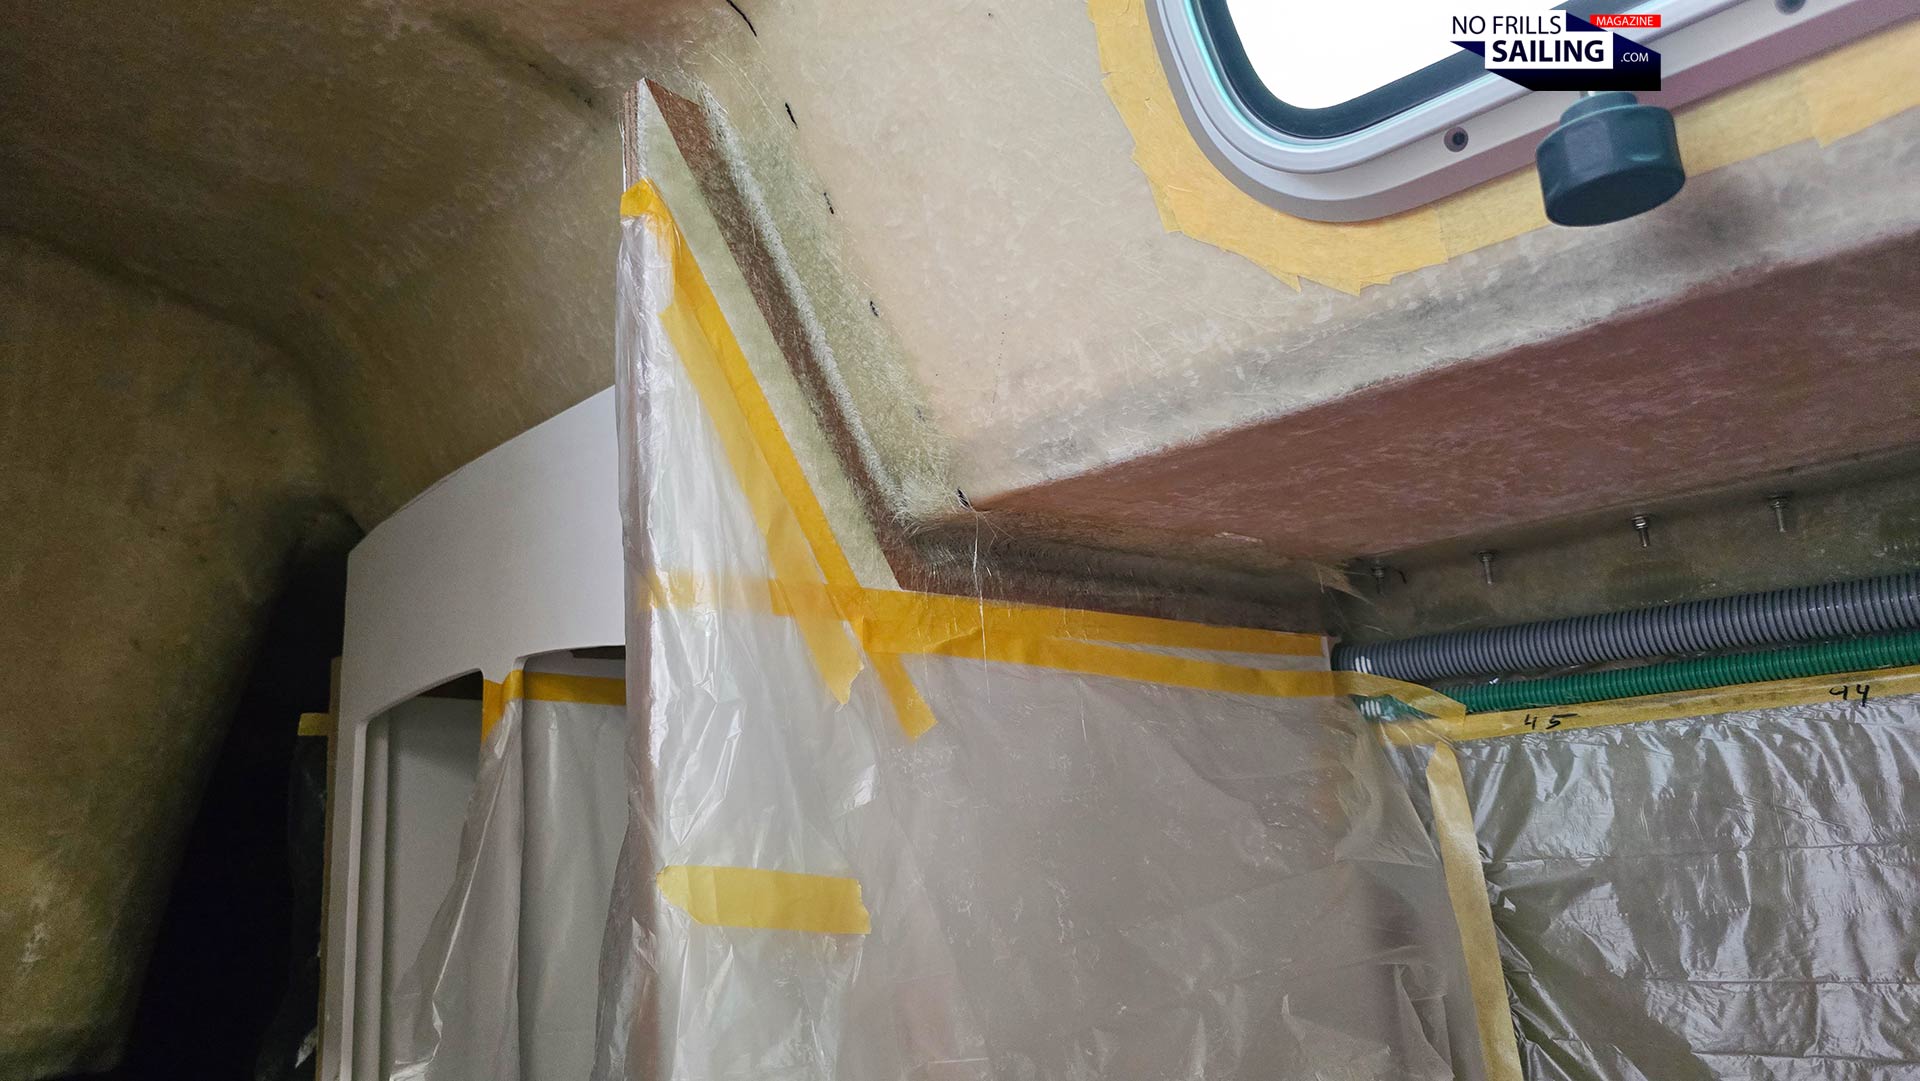
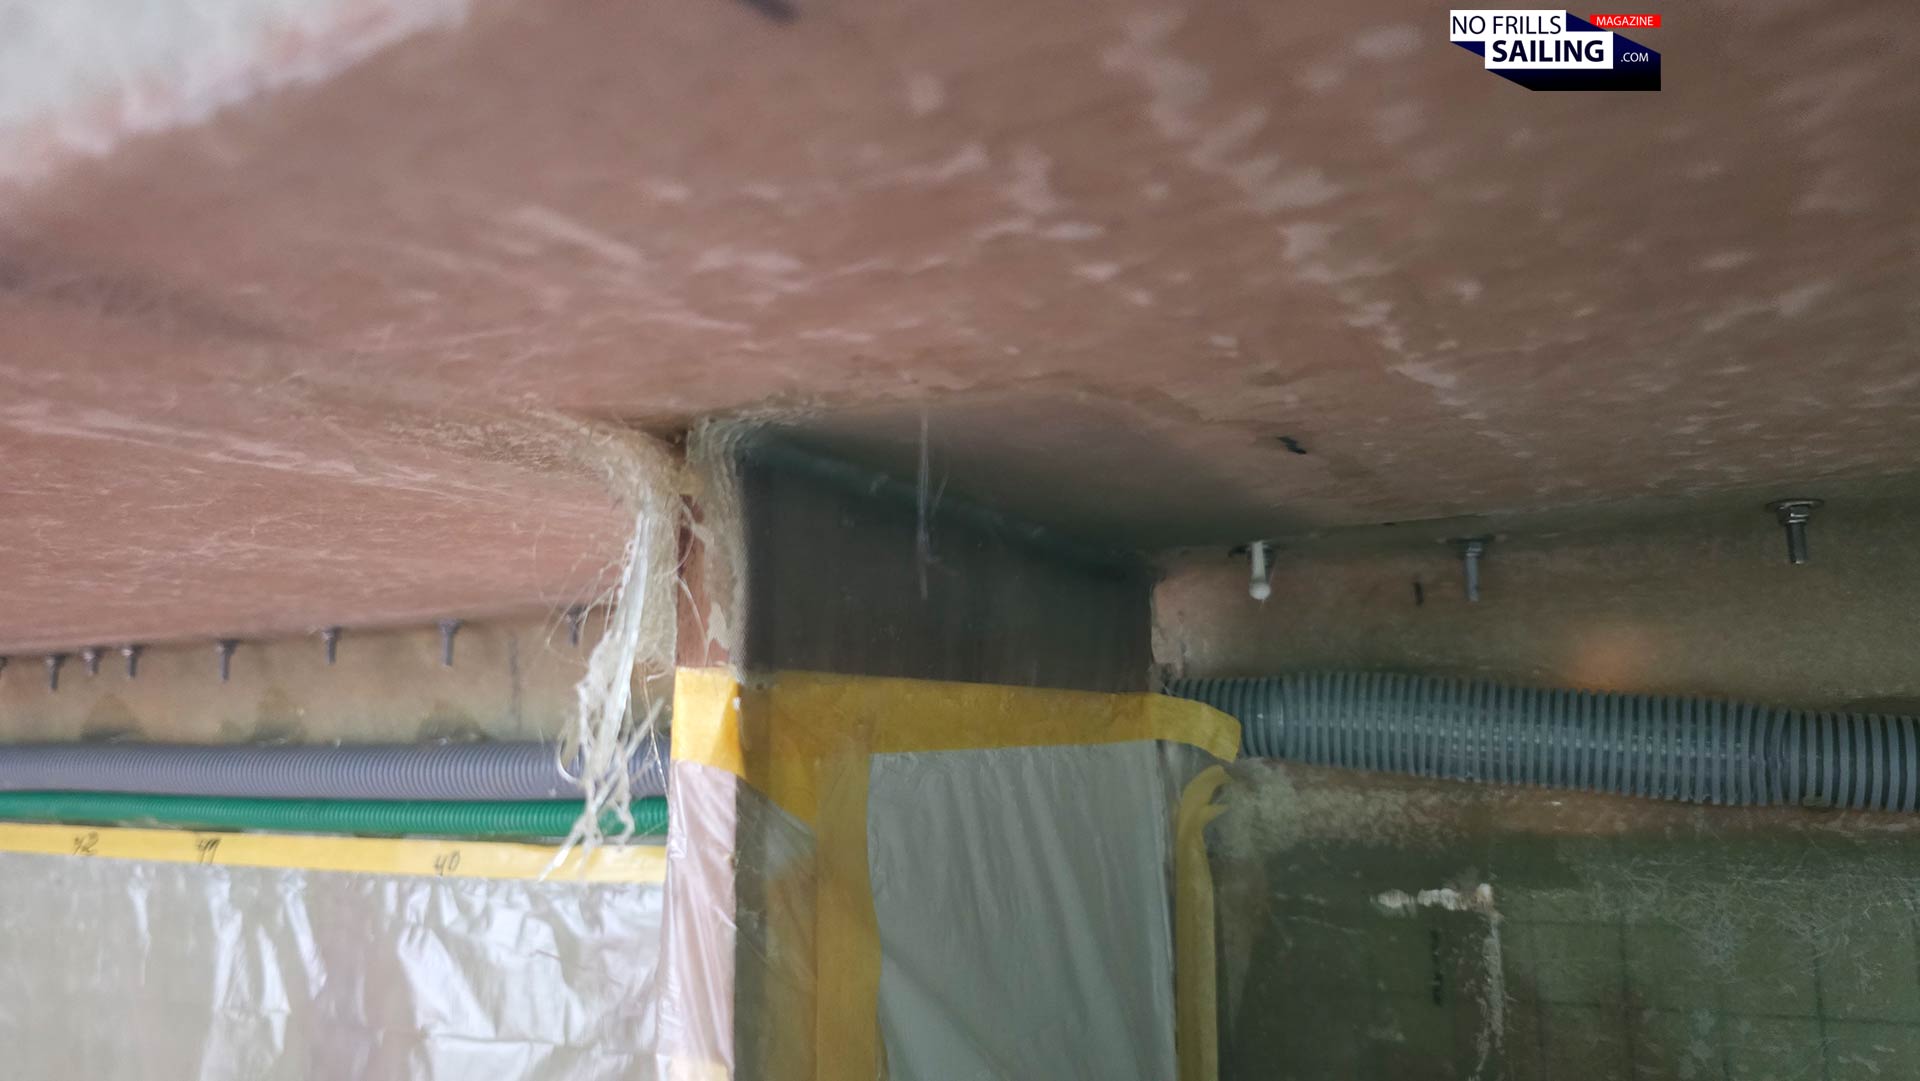
Now it´s time to close the other side too: Again, square parts of fiberglass will be laminated into the edge, forming a corresponding “L”, or knee. This way, the bulkhead is now firmly joint with the deck structure. As a las measure, loose glassfiber is put on top of it so that a smooth surface is achieve. After drying, such a bond is rock-solid and makes sure that the deck cannot move on top of it. It adds additional stiffness and counteracts any possible sheer forces acting onto the hull. Here we are – this is how it´s made. Speaking of which, there was another little detail the guys took care of whilst working with glassfiber and resin anyway …

Moving the chainplate knee … an unplanned delay
As you may have read in the article about taking the measurements for my Seldén custom rigging, we detected that the chainplate knees had been laminated to the hull incorrectly. For whatever reason their positions needed to being moved forward to the bow by more than 20 centimeters. I don´t know how and why this could have been able to happen in the first place, but again: 100 percent handmade can also mean that one incorrect measurement or decision could lead to such an error.

The chainplate knees are important because it will be here that the very steel chainplates will be bolted too. The forces from the mast are induced into the knees and furthermore into the hull structure. Their position determines the position of the chainplates, hence the angles of the spreaders. The guys had to take off the GRP chainplate knee and laminate it again at its correct position so that later when the mast is put onto the boat the prepared shrouds would fit just perfectly. As much as I am wondering, I am more happy that this issue had been taken care of now, albeit it may have cost me the splash of the Omega 42 this year.

But I guess that’s the side effects of having a custom made sailboat being built as a one-off project: There are always issues popping up here and there which will have to be addressed, making adjustments to the schedule inevitable. The Omega 42 will be finished this year, that´s for sure, but I am not so sure if I´d put here in the water. Because, sailing a few weeks in September may not be worth it: It will be rainy, cold and occasional autumn storms will have to be expected. So I am thinking of rather putting her next year in the water as early as March or April, starting full throttle into a full sailing season. We will see …
Related articles which might be of interest for you as well:
Fitting of the bulkheads in the first place
The interior layout plan for my one-off sailboat
All building-in-progress articles of my new Omega 42