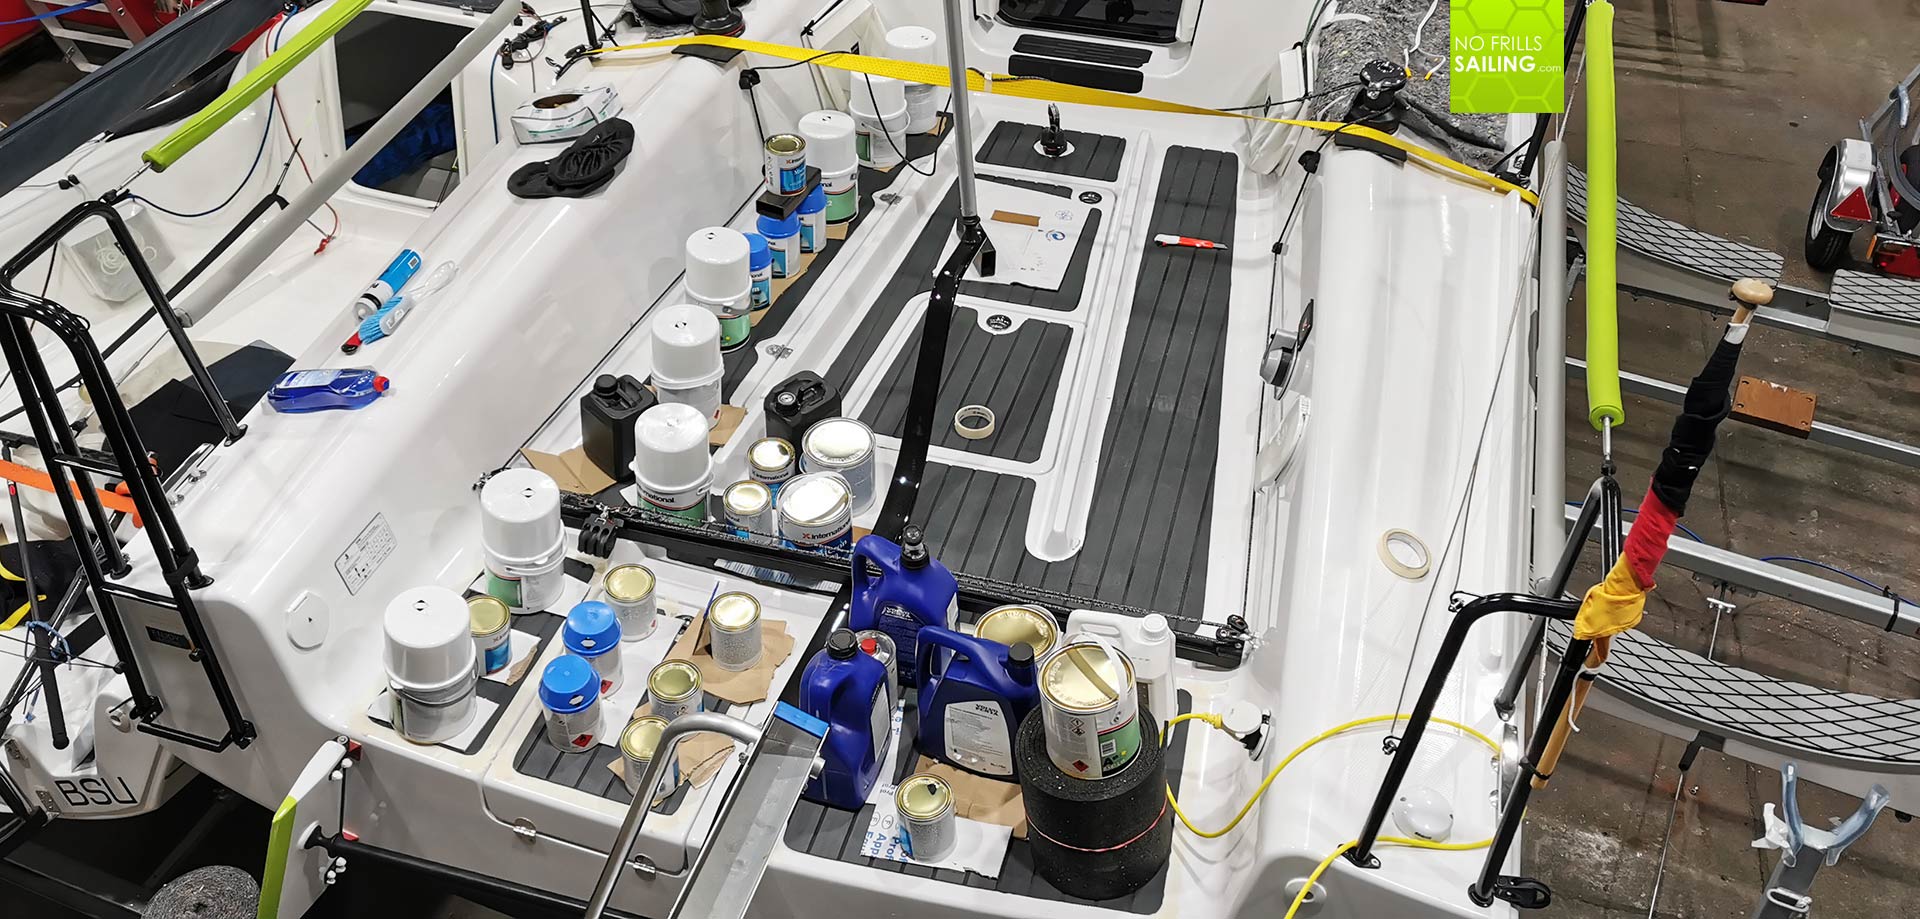
As you may have read in my previous articles on EVA-foam, I decided to put some of them into the cockpit of GEKKO just to increase sailing comfort a bit. The boat does not have any side benches like a cruiser would come with (it´s a racing boat, though) and as such I am ending up most of the time sitting down on the very floor of the cockpit. And that – I am 42 years old now – really hurts my butt, to be honest. So, after cutting the panels to size and checking for the best method to glue them onto the GRP I went forward to finally do the job.
The weatherman meant it good with me and just like a miracle temperatures had risen over the past two days from minus 13 degrees Celsius (overnight) to barely Zero. Which was a good thing since working in below Zero-temps is everything, but not satisfying. Secondly, chemical bonds – and we are talking about lots of adhesive power today – need a certain minimum temperature to work properly, best would be 10 to 15 degrees Celsius, I figured that 5 might do the trick as well. Now, let´s start then.
Preparing the surface
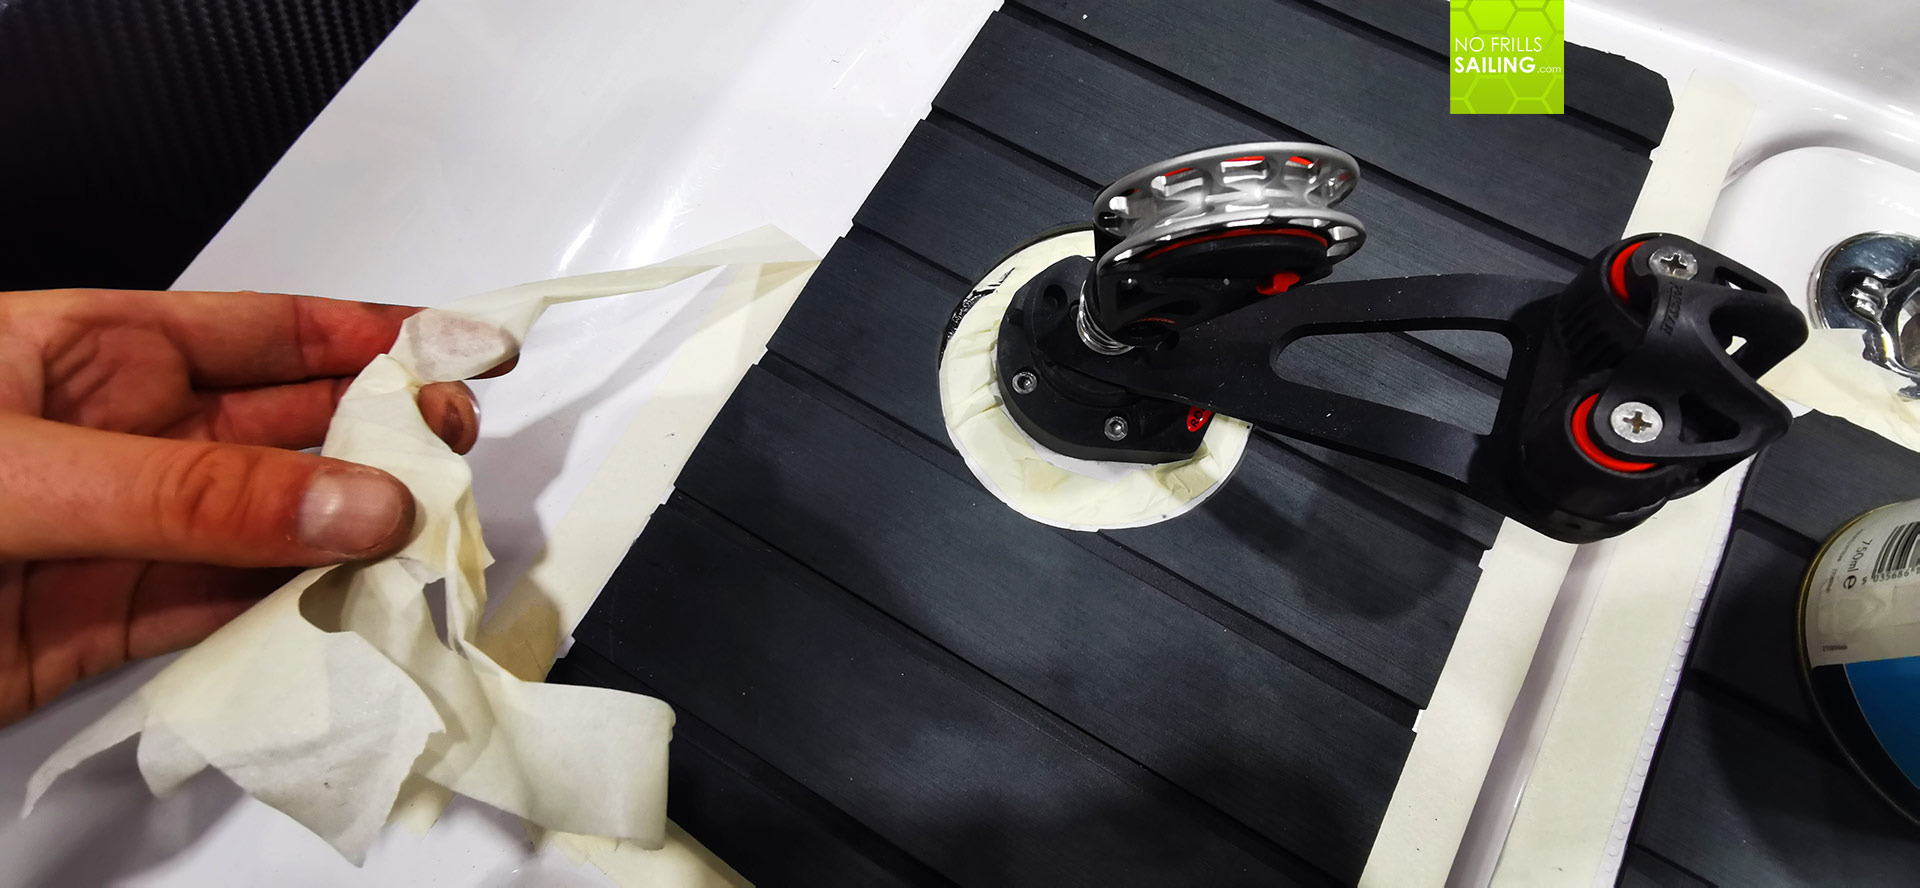
At first you´ll have to prepare the surface. That´s an easy job: With a small broom I wiped off the crude dirt and took my hand-vacuum which I honestly love to suck off the fine dust. You wouldn´t believe how much dust and sand and stuff a boat´s surface will literally attract like a magnet over time, even inside a shelter like our workshop! After that, I took a nice, non-pilling wipe and treated the surface with Acetone.
I just love Acetone as it cleanses almost anything imaginable and brings out the true color and sirface quality of any material. Well, the downside is, that if you inhale too much, a proper headache will kill you the same evening (which, of course, set in with me after I finished my job). Anyway, after cleaning the GRP surface the EVA-foam panels can be put in place. That easy? Well, yes and no.
Pantera-action: A delicate matter

If you read my previous post on this matter, I had tested the sticking qualities of self-adhesive EVA-foam versus glue-aided sticking. The outcome was predictable but the glued panel did hold tight so much impressively superior that I´ve decided to not rely solely on the self-adhesive powers of the foam. Which, by the way, are absolutely sufficient when utilized for interior purposes, but I guess the floor of the cockpit is much, much, much more stressed and strained by me walking around, sitting and using the material, together with UV by the sun and saltwater by the ocean. Better make sure it sticks well.
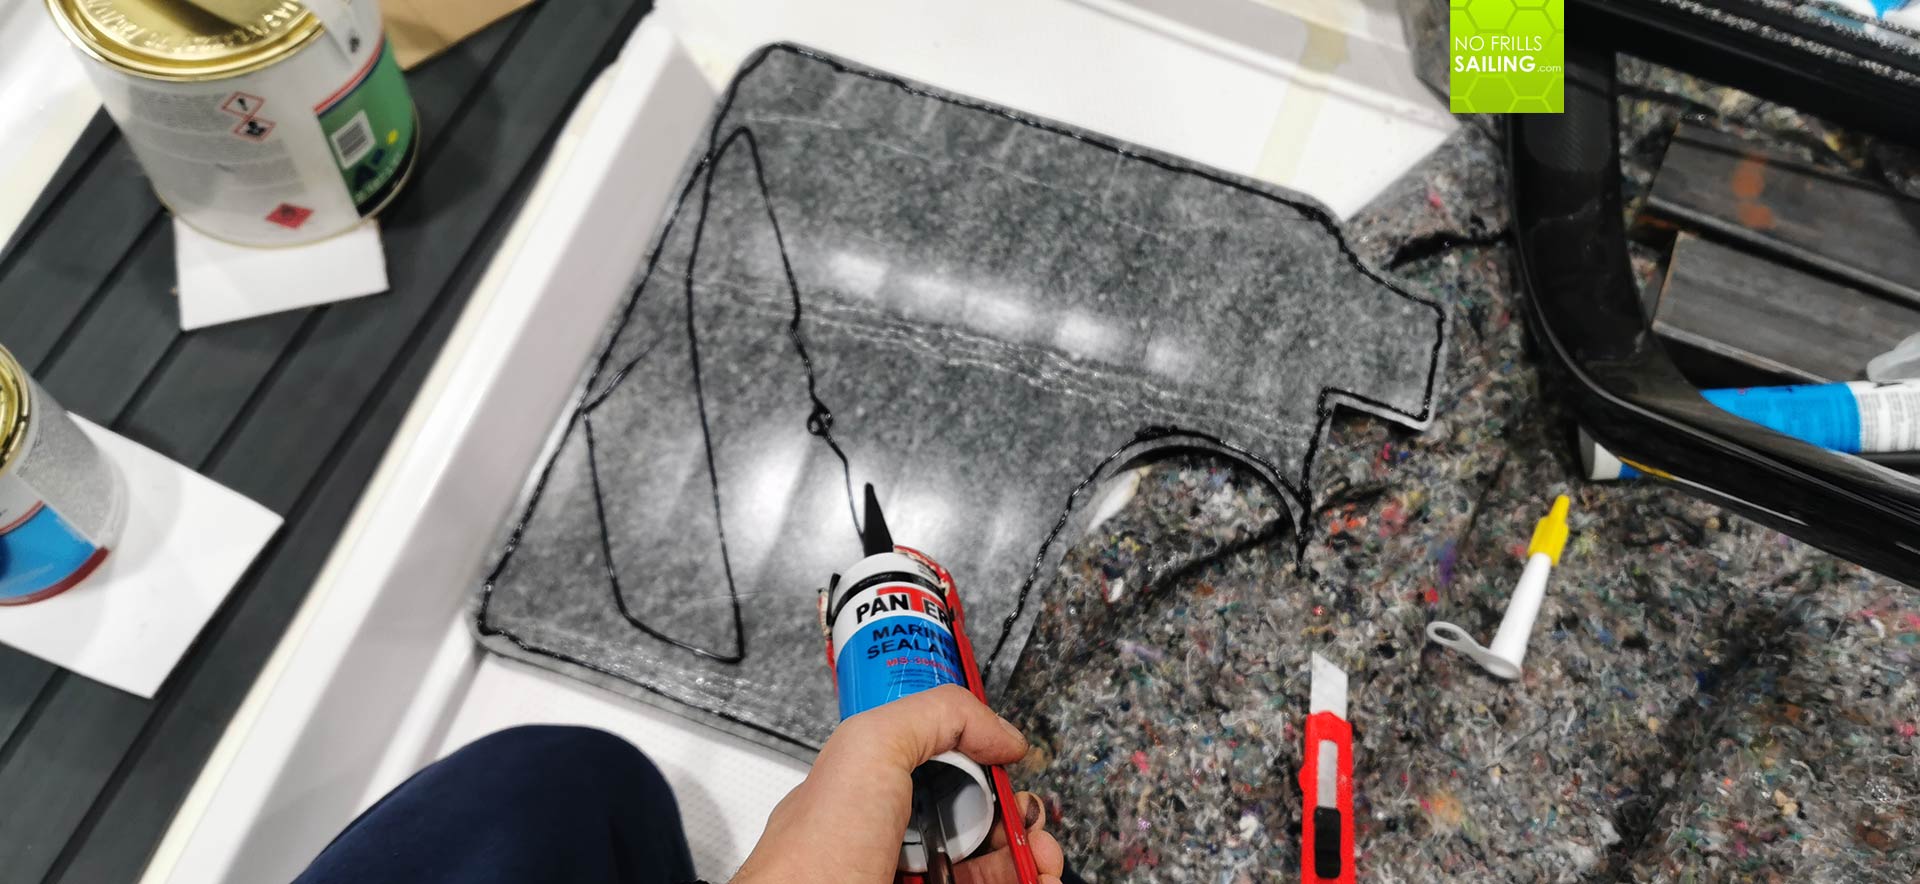
So here we are, with Pantera. For some reason our professionals in the yard always prefer Pantera over Sika. I don´t see a difference here but as we had our stock filled up with Pantera, I used it. Color of choice, of course, is black to correspond with the main color-shade of the EVA-foam panels. We have a saying in our company: “When you think of Pantera … it starts to stick.” And it really is that way: I tried to avoid contact with my skin by wearing rubber gloves and checking where I grabbed onto the material and where not, but in the end, I promise, my hands were black …

So, basically, I pressed the glue all around the outer limits of the panel and applied some more glue all over the panel´s backside. With a spreading knife I flattened the thick round “sausage” of glue to cover more surface and tried to bring the chemical over right at the edge of each panel. This is a delicate matter as Pantera, even the smallest amount, instantly sticks and will spoil not only you body, your clothing and such but also the nice white and shiny GRP at an instant. So, pro-tip: Always keep paper towels and beloved Acetone ready at hand.
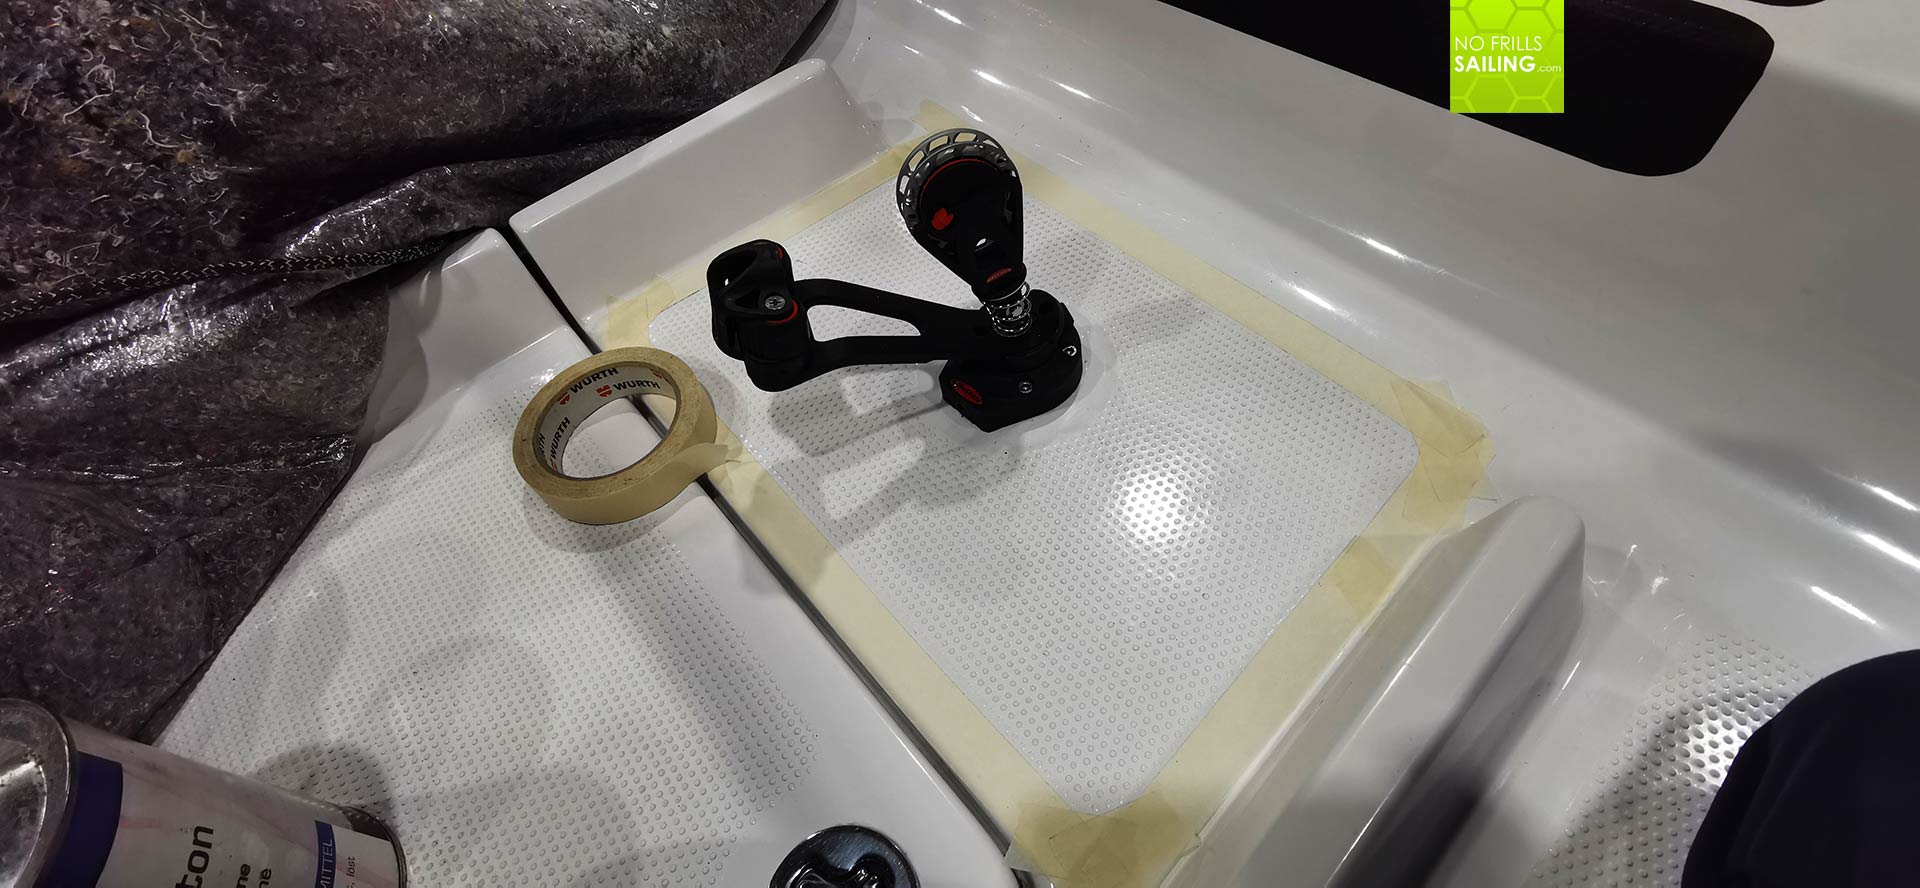
Adjusting the panels and pressure-treatment
Putting on the panels wasn´t that easy either. I started with the smallest of them, for “practice”, you might say, just to see if my idea of working with this material was right. I learned that for once, when the panel hits the surface and it is initially pressed too hard, there is no chance to adjust the panel´s position. You´d then have to take it off completely, which is a dirty mess and will surely spoil the whole panel with spilled black Pantera. So, at first: Just let the panel “hover” smoothly over the floor.
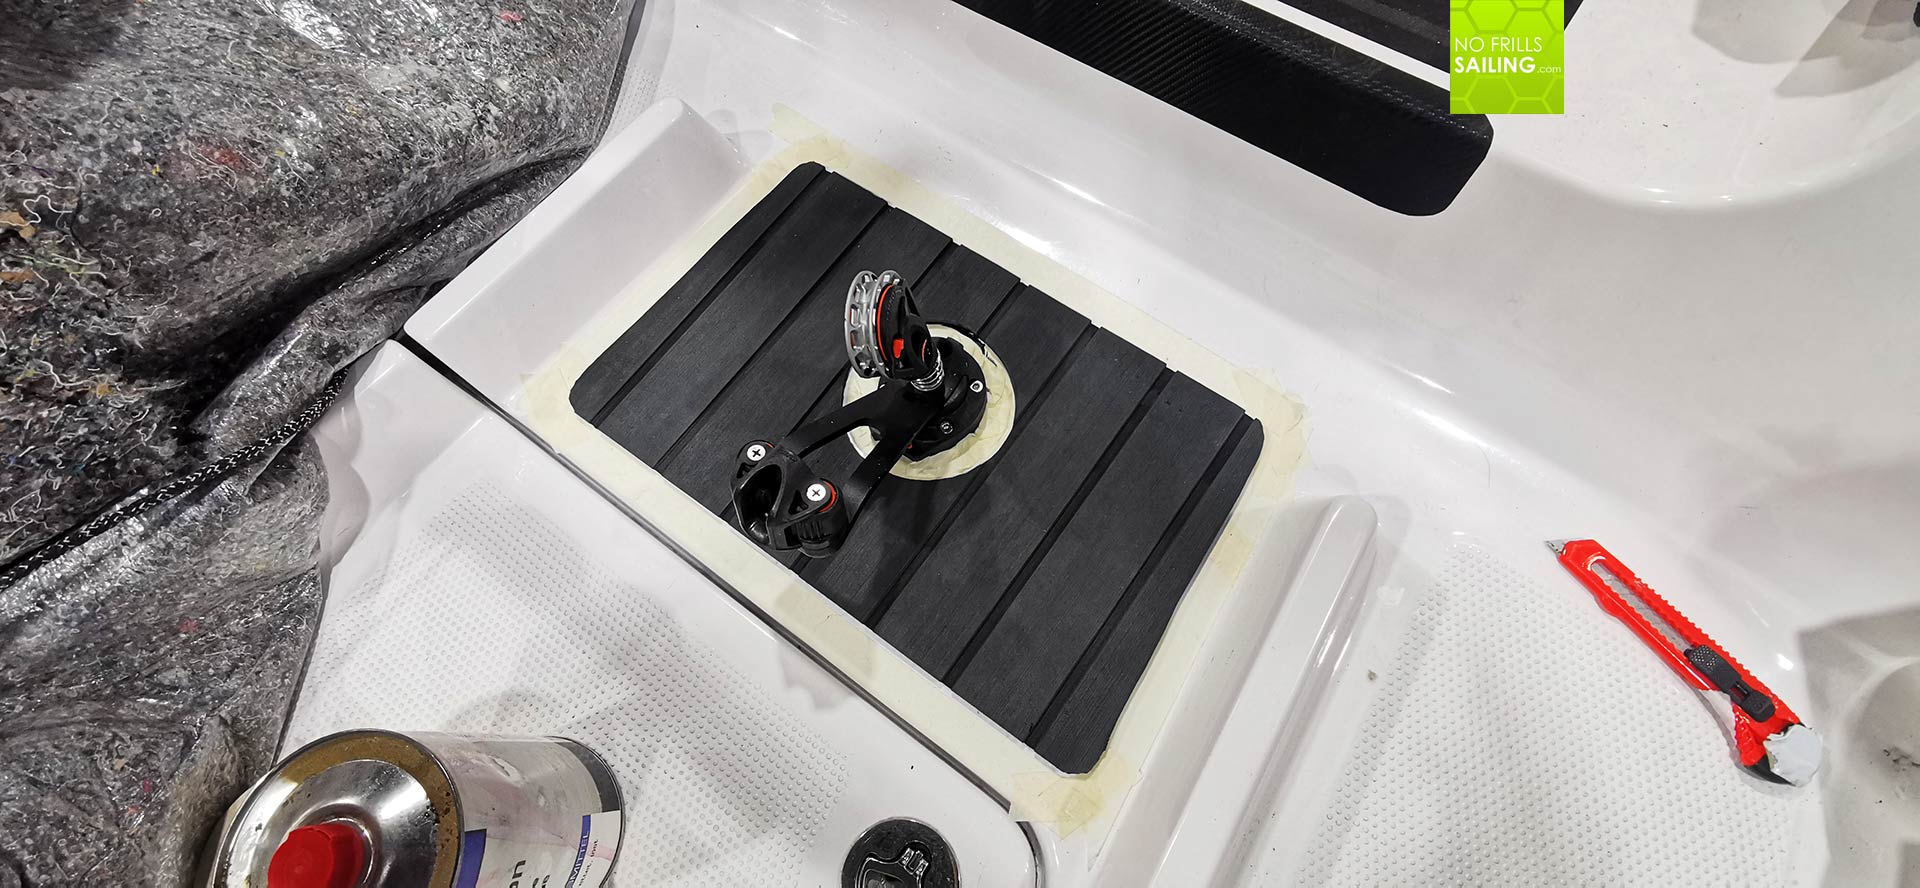
You may then adjust the panel adhering to the borders set by the masking tape. I taped the outline for each panel on the GRP of the cockpit. There are two reasons why to doing so is advised: First, as said before, the masking tape will show you where to put the panel. You may want to orient at the non skid-surface of the cockpit but that´s a fallacy as the panel will obscure the diamond-pattern. Secondly, the masking tape will protect the white GRP from spilled Pantera-glue and believe me, you will spill some!
After the panel has reached its final position, you start to press down. First with your bare hands – make sure that no leftover Pantera is on them – and then by simply walking up and down for a couple of minutes on the very panel. As I said, the bonding of panel with surface is immediate and very, very strong. It just takes a few minutes and even if you would have to remove the EVA you would have to invest a lot of pulling power. This is amazing stuff! Now, after walking around, I grabbed hefty things out of the workshop: Full cans of antifouling or paint for example, and put them onto the panels to keep on applying pressure. One floor panel done, next one´s up.
Two hours later …
The whole procedure of glueing all of the eight panels took me some three hours – and I can tell you the backpain, in co-work with a grown up muscle sore in the legs, next day was a proof of just how tedious this work really is. A combination of meticulous work, trying to arrange the panels just right (stress for your head) and manual labor in a bent-over position. Man, I´m growing old …
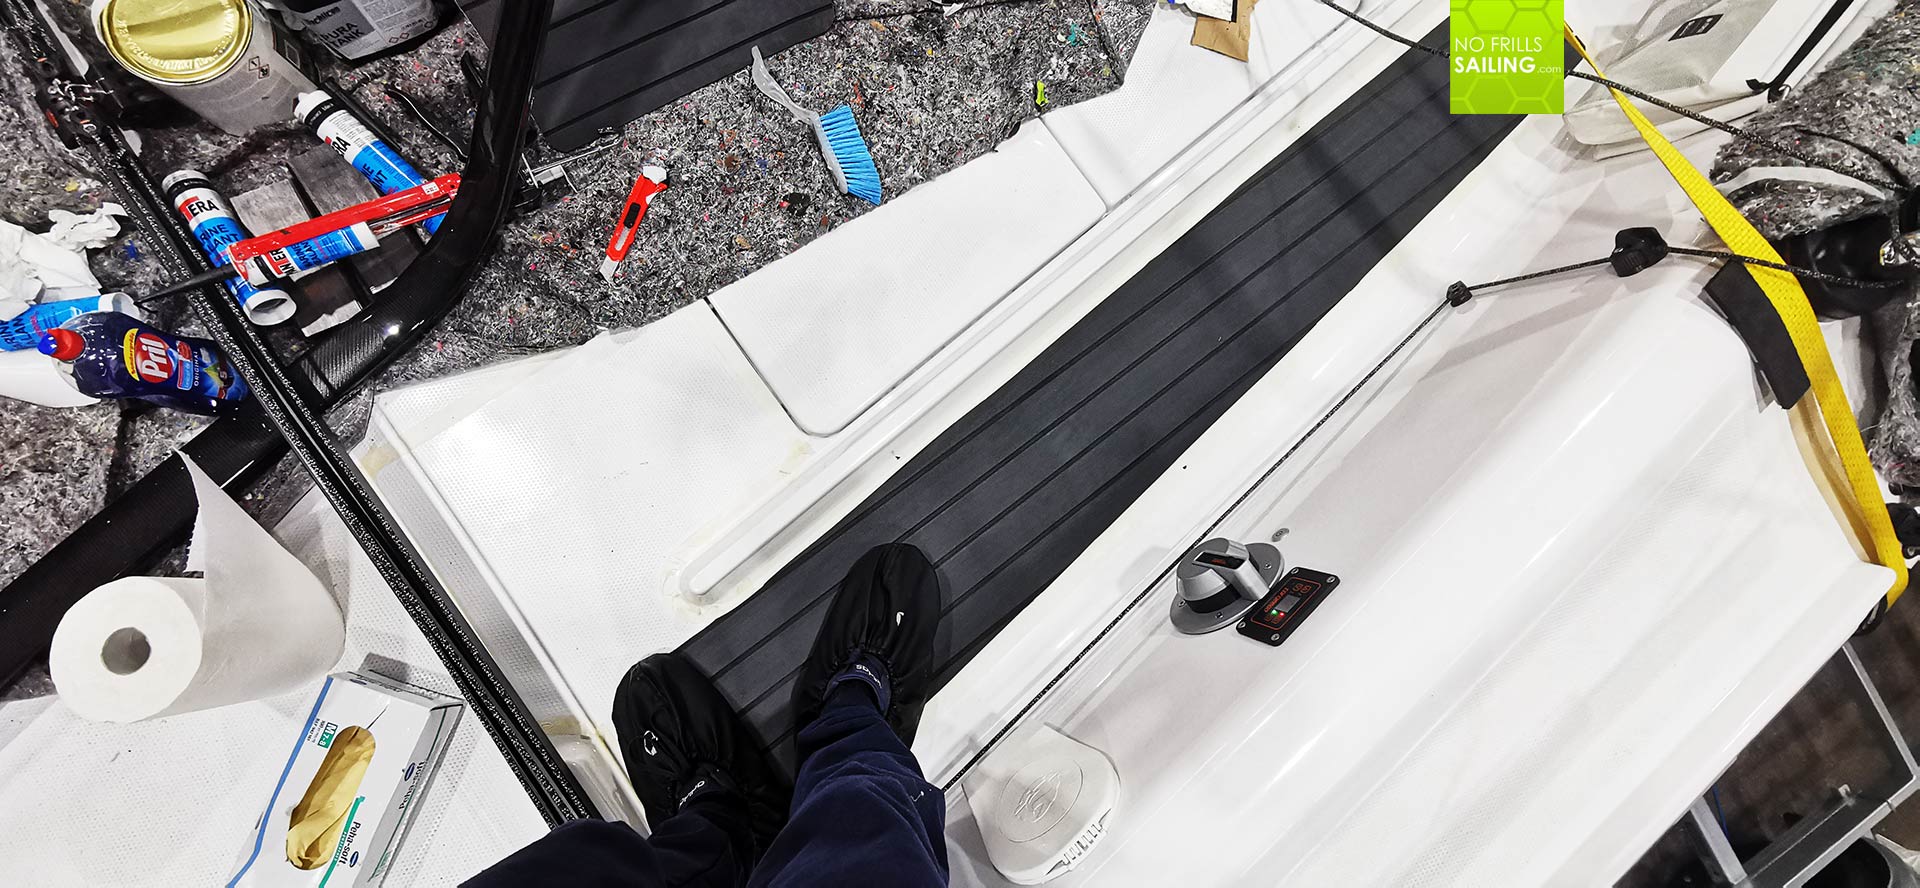
After having the pressure weights on for one or two hours, I removed the heavy cans of paint to avowing pressure-marks and such. You as well want to remove the masking tape as sometimes one or two millimeters of it might be underneath the EVA-foam panels or pressed out Pantera will prevent the tape to be taken off when hardened. By doing so, the cockpit for the first time revealed its new looks – and it is awesome! Together with the black solar panels which we had been applying a week before, the boat´s deck looks just neat.
What I like and what don´t.
Next morning, sun is up as a good mood harbinger of coming spring (at least the days grow longer from now on!) I proceed to the workshop. Applying the last two smaller panels, a job I know now intimately, takes just 20 minutes. Taking off all the weights and removing all masking tape, I get a first impression of the new cockpit as a whole. Of course, I am neither a boatbuilder nor a very skilled craftsman. And that’s something one can immediately recognize upon taking a closer look.
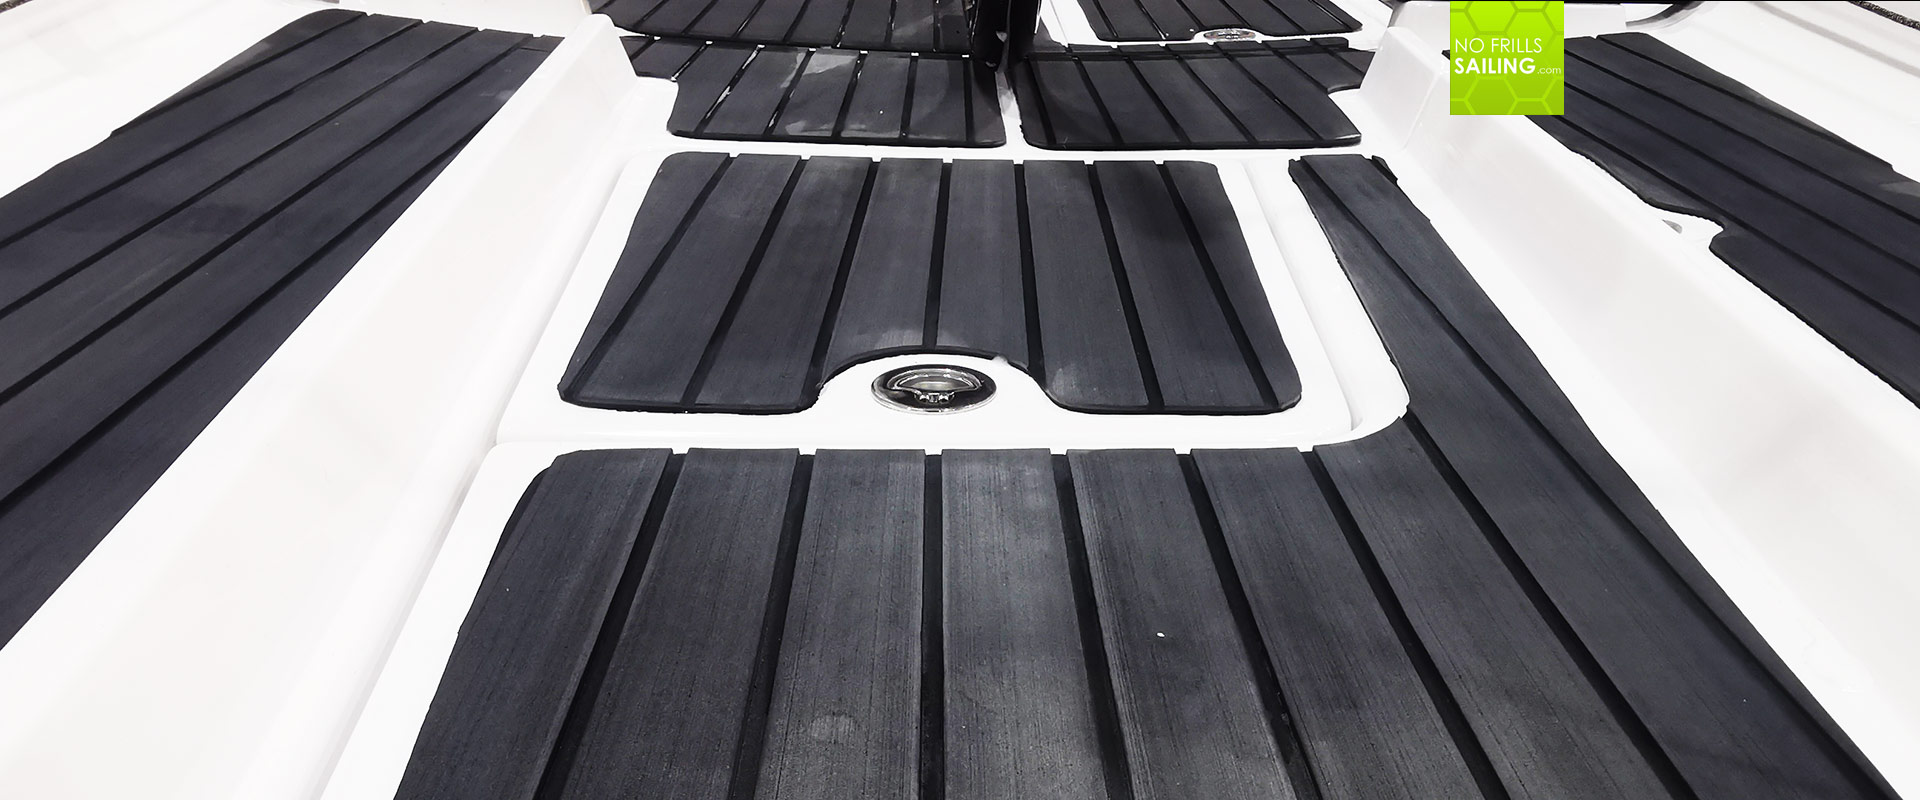
I curse silently as I see that I haven´t managed to resume unbroken straight lines over all the panels. Especially the engine compartment lid is a bit turned away from the longitudinal axis which really pisses me off a bit! That´s not nice. Also, that the caulking-pattern of the EVA-panels is not running uninterrupted from panel to panel bothers me. But that´s a detail, I reckon and I will get used to it. What is not so nice and gives me a headache is the seam all around the panel´s edges: Should I apply a closing seam? I text Finn, our boatbuilder, who happens to be skiing in the Alps. Let´s wait what he says …
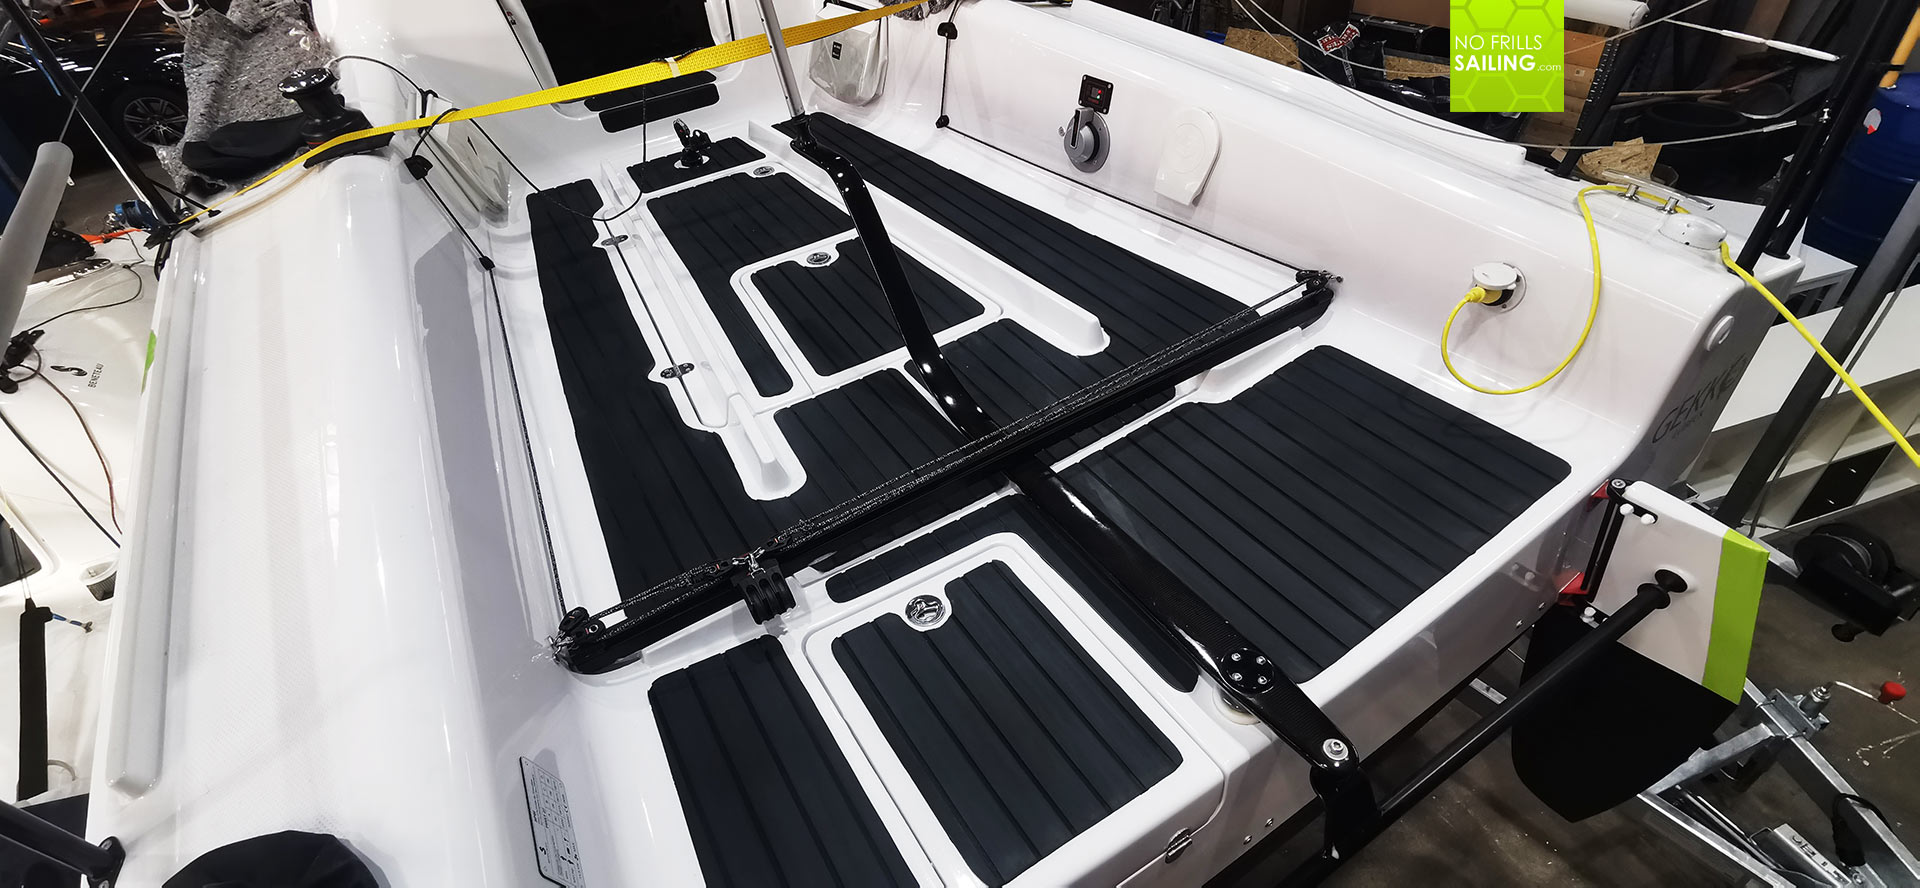
Other than that I am very much satisfied with my work. It was a long way from planning to making the panels 1:1 models, so cutting out the EVA-panels from the big roll to finally putting them up onto the boat. Cost-wise I spent some 250 Euros, which is peanuts compared to what I would have paid if I had handed over this job to a skilled craftsman or even chose different materials, like “real” fake Teak – I have a cost estimate of around 2.500 Euros – or even real wooden Teak. I like it, period.

Finished at last: Overall a great job …
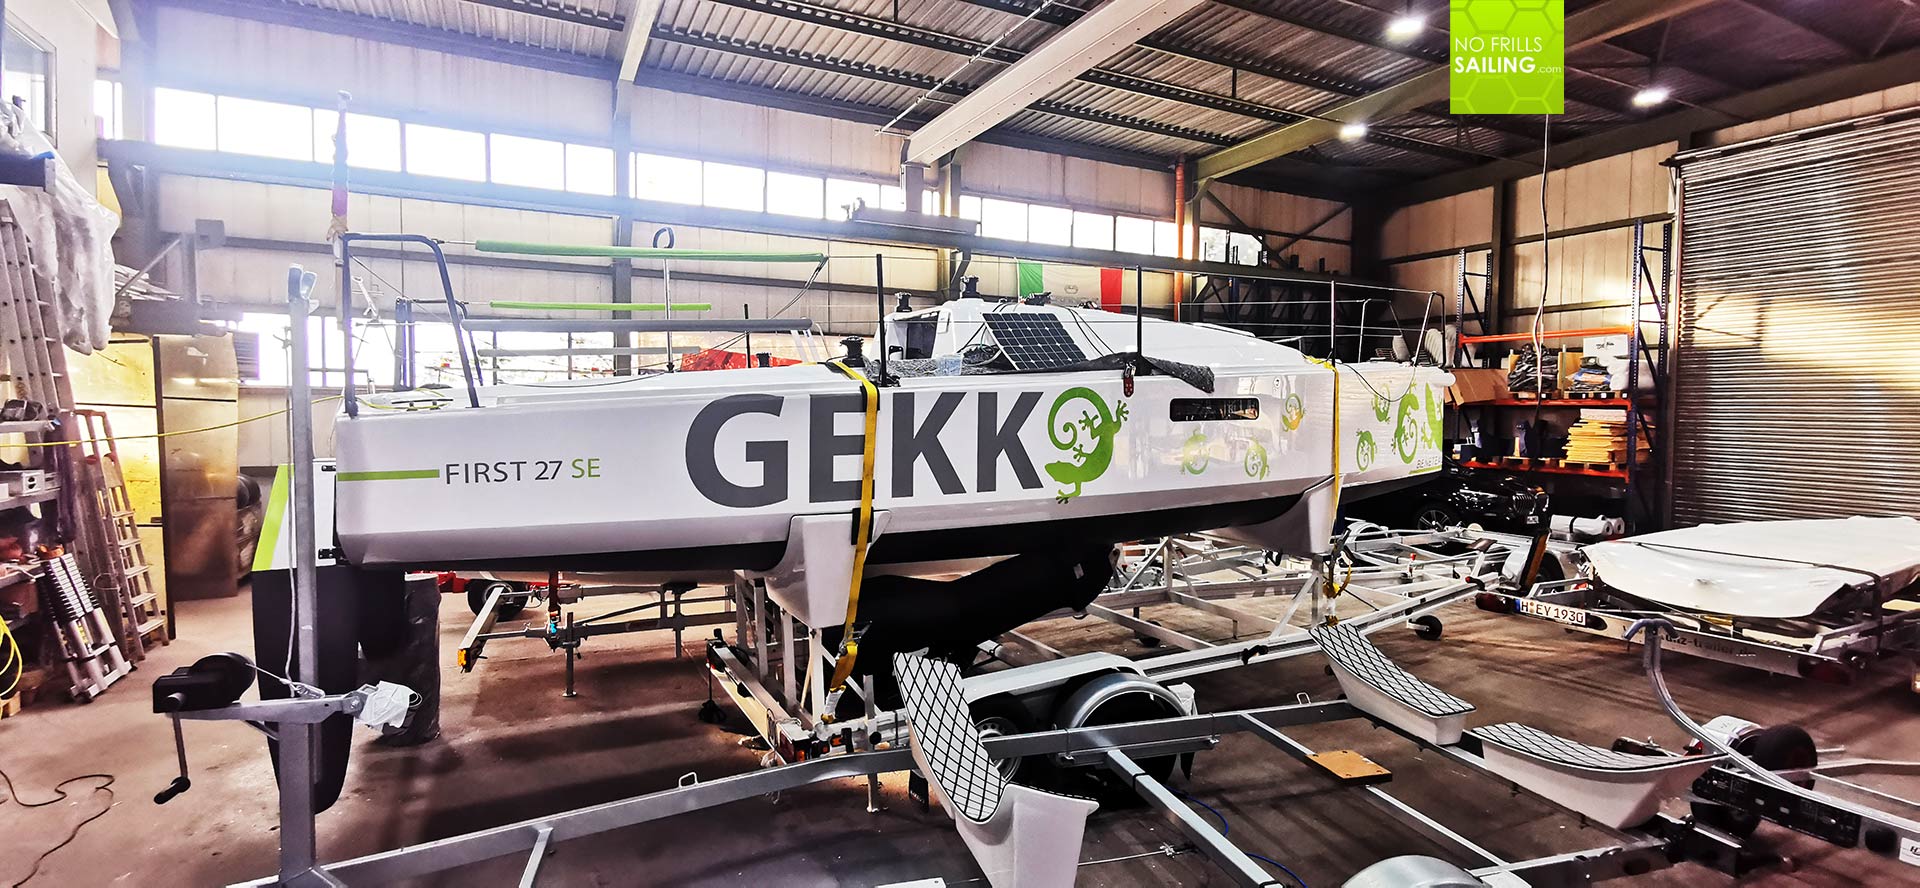
I leave GEKKO in our workshop with one big item crossed off the list. I am relieved and happy. My plan, to utilize some of the free, calm spare time in between Christmas and New Year´s Eve for the boat worked out just fine and this is truly a really satisfying feeling. Looking to the boat, I instantly notice the bright white sides of the cabin superstructure: Already being freed of Gecko-stickers, it´s this location where the side solar panels will have to be mounted to next. Together with wiring up the whole system and upgrading the energy management of this boat it marks the next big job to be done.
It works out just fine, overall. Little, satisfactory steps make for a good mood and an overall optimistic outlook onto the future. But now, driving back home, I smile, take frequent looks onto the nice pictures I have taken and look absolutely forward to returning in 2022 to make all this crazy stuff happen which is battering my brain. Have a great New Years Eve, dearest readers.
You may also like to read these articles:
EVA-foam for boosting interior comforts
Adding an element of #microcruising to small boats
BBQ á la First 27 E – with my brand new Jetboil-grill