Did you read my interview with Nina and Hannes about their love/nightmare of refitting a sailing boat? No? Maybe try this article first, it´s called “Black hole yacht refit” and you know what I mean: Last week the refit-curse struck me again. You see, refurbishing a sailing yacht is like “one job done – two new jobs appear”. And it´s really like this. This time it was the hatches of the boat, and it turned out to be an urgent job.
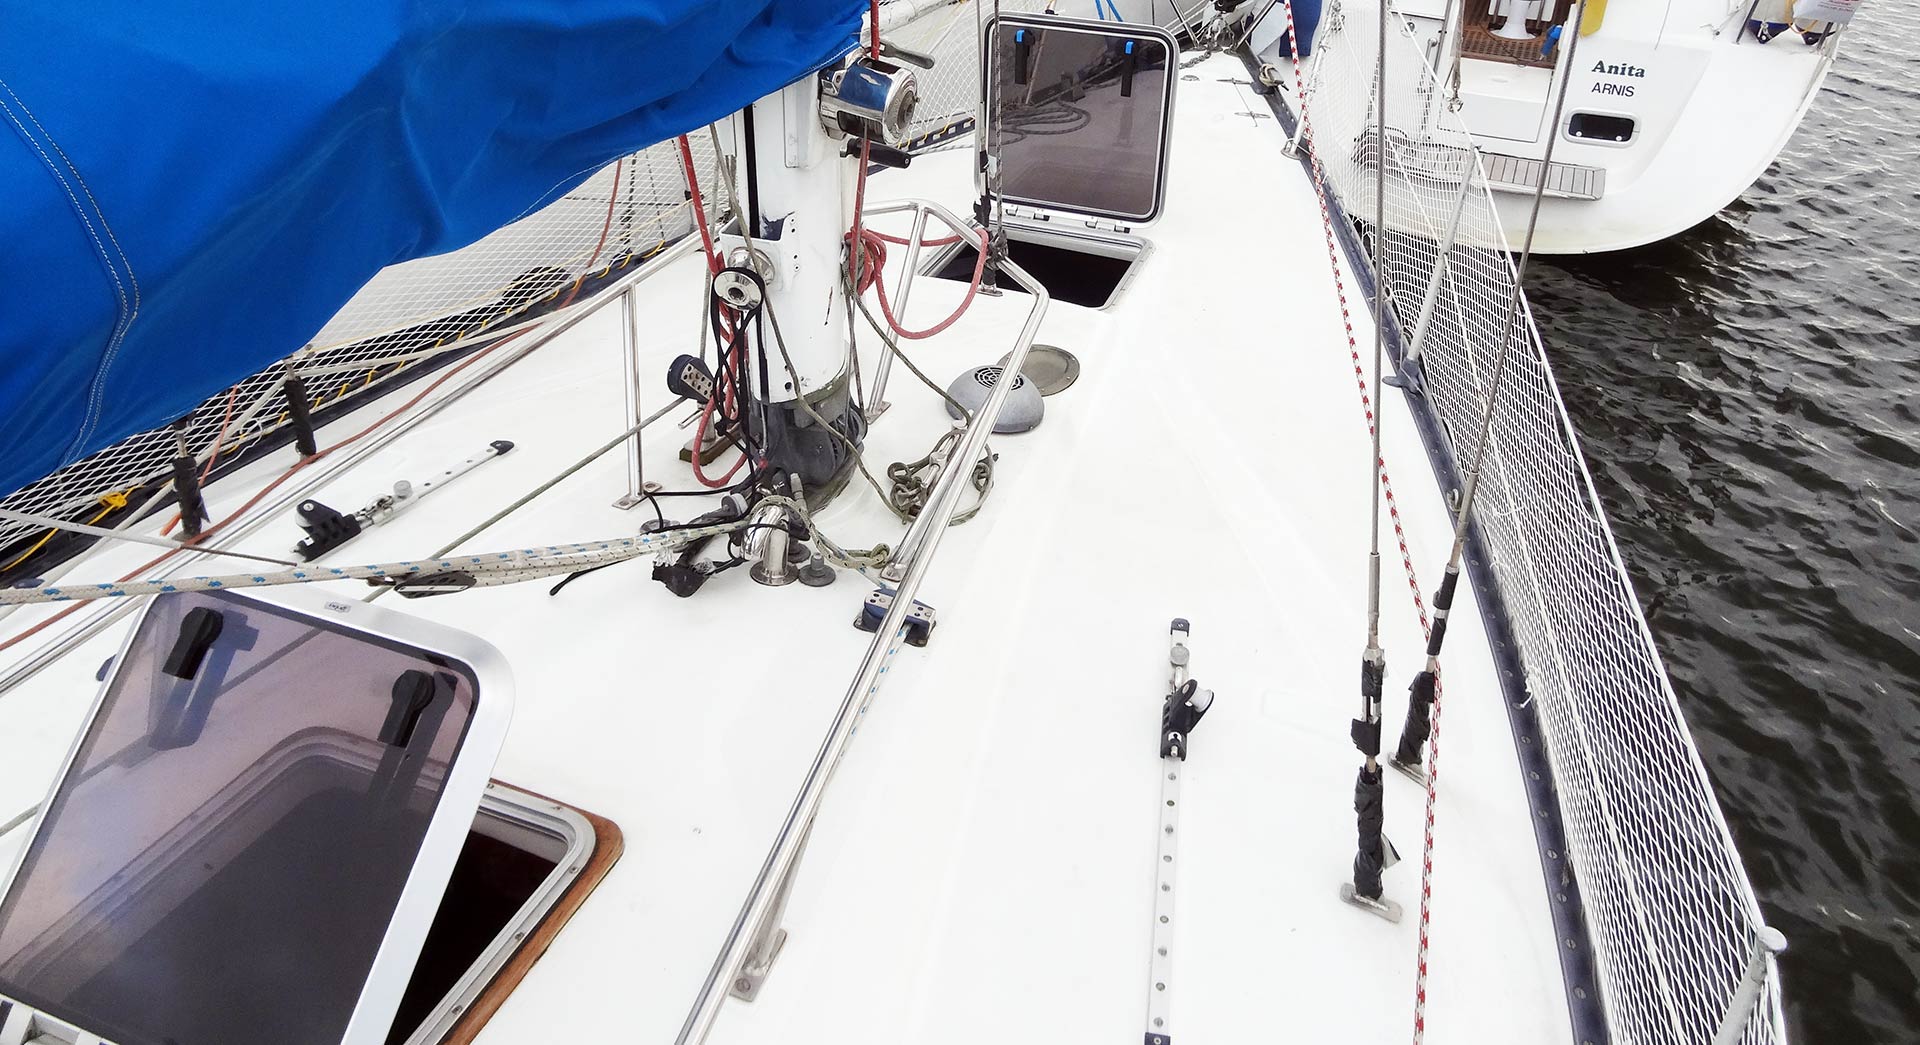
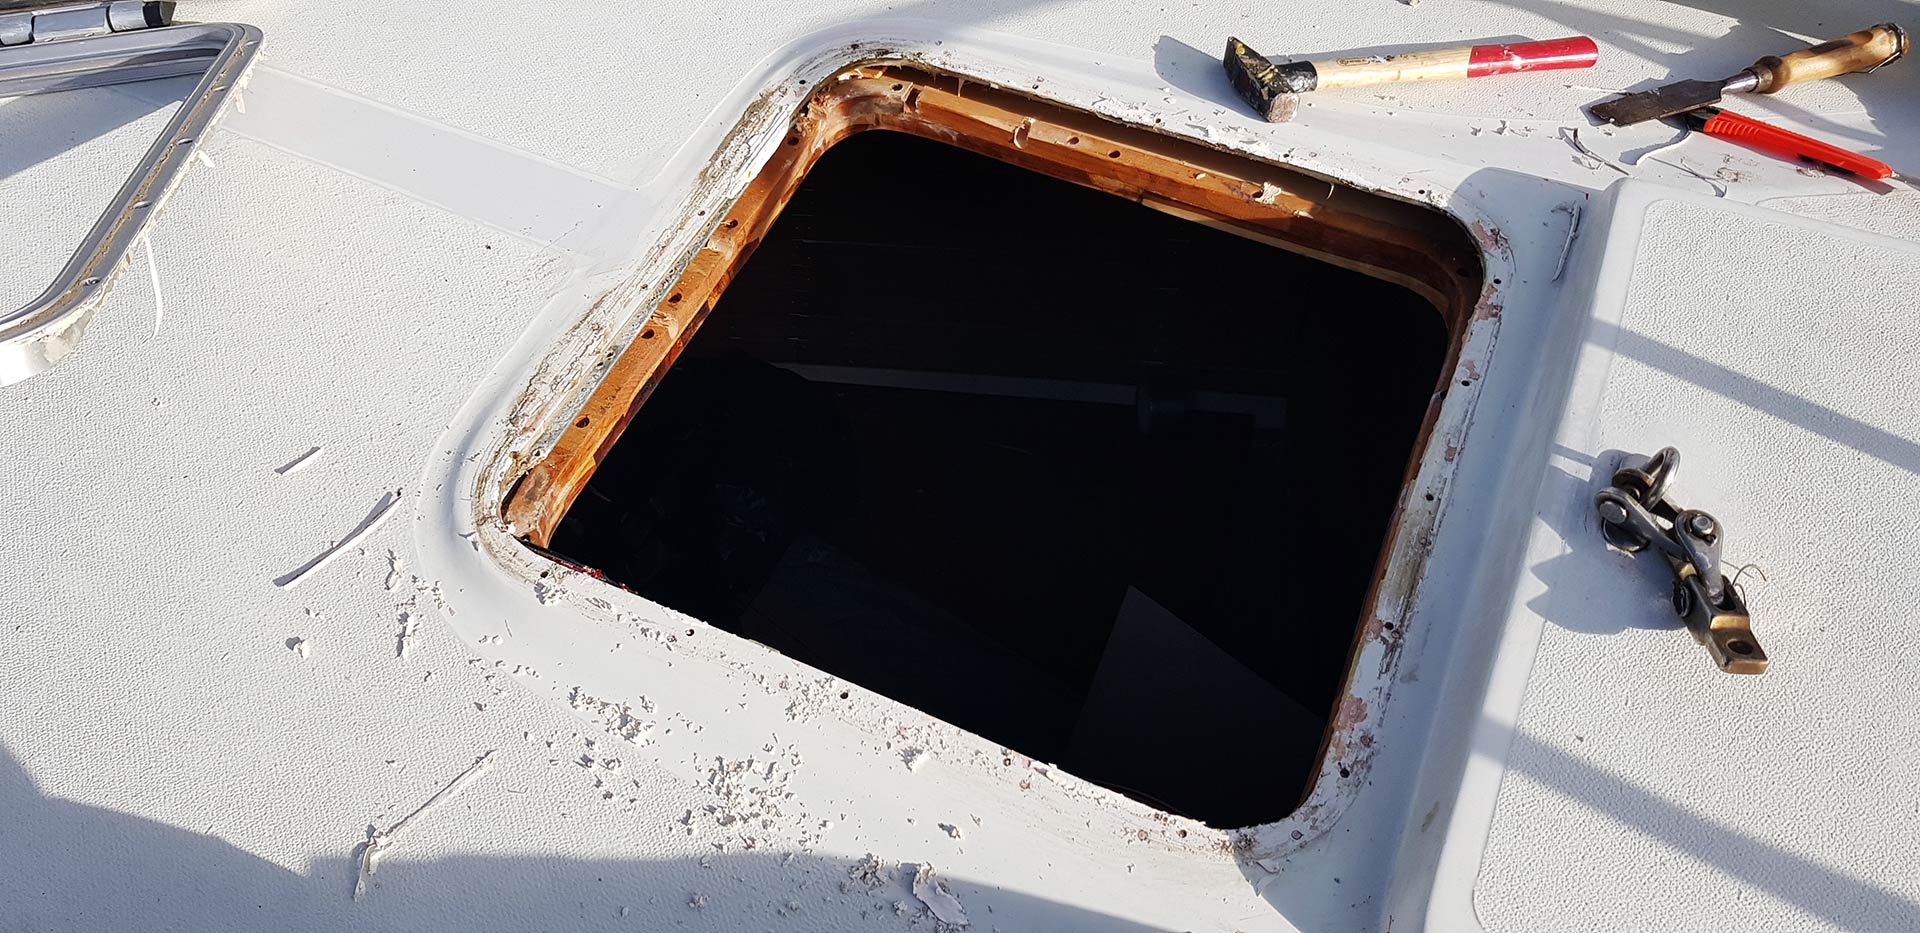
Two hatches in my King´s Cruiser 33My King´s Cruiser 33 has two skylight hatches. That´s ordinary Gebo hatches, a nice quality and I´ve never had any problems with them. Until last week when a really strong downpour was washing the boat for hours. It was proper thunderstorm with many, many litres of cats and dogs raining and that had an effect: I did have water in the fore cabin. Days later I discovered a (now dried) puddle and judging from above that has easily been one litre of water inside the boat. I traced the source. It was the fore cabin´s hatch.
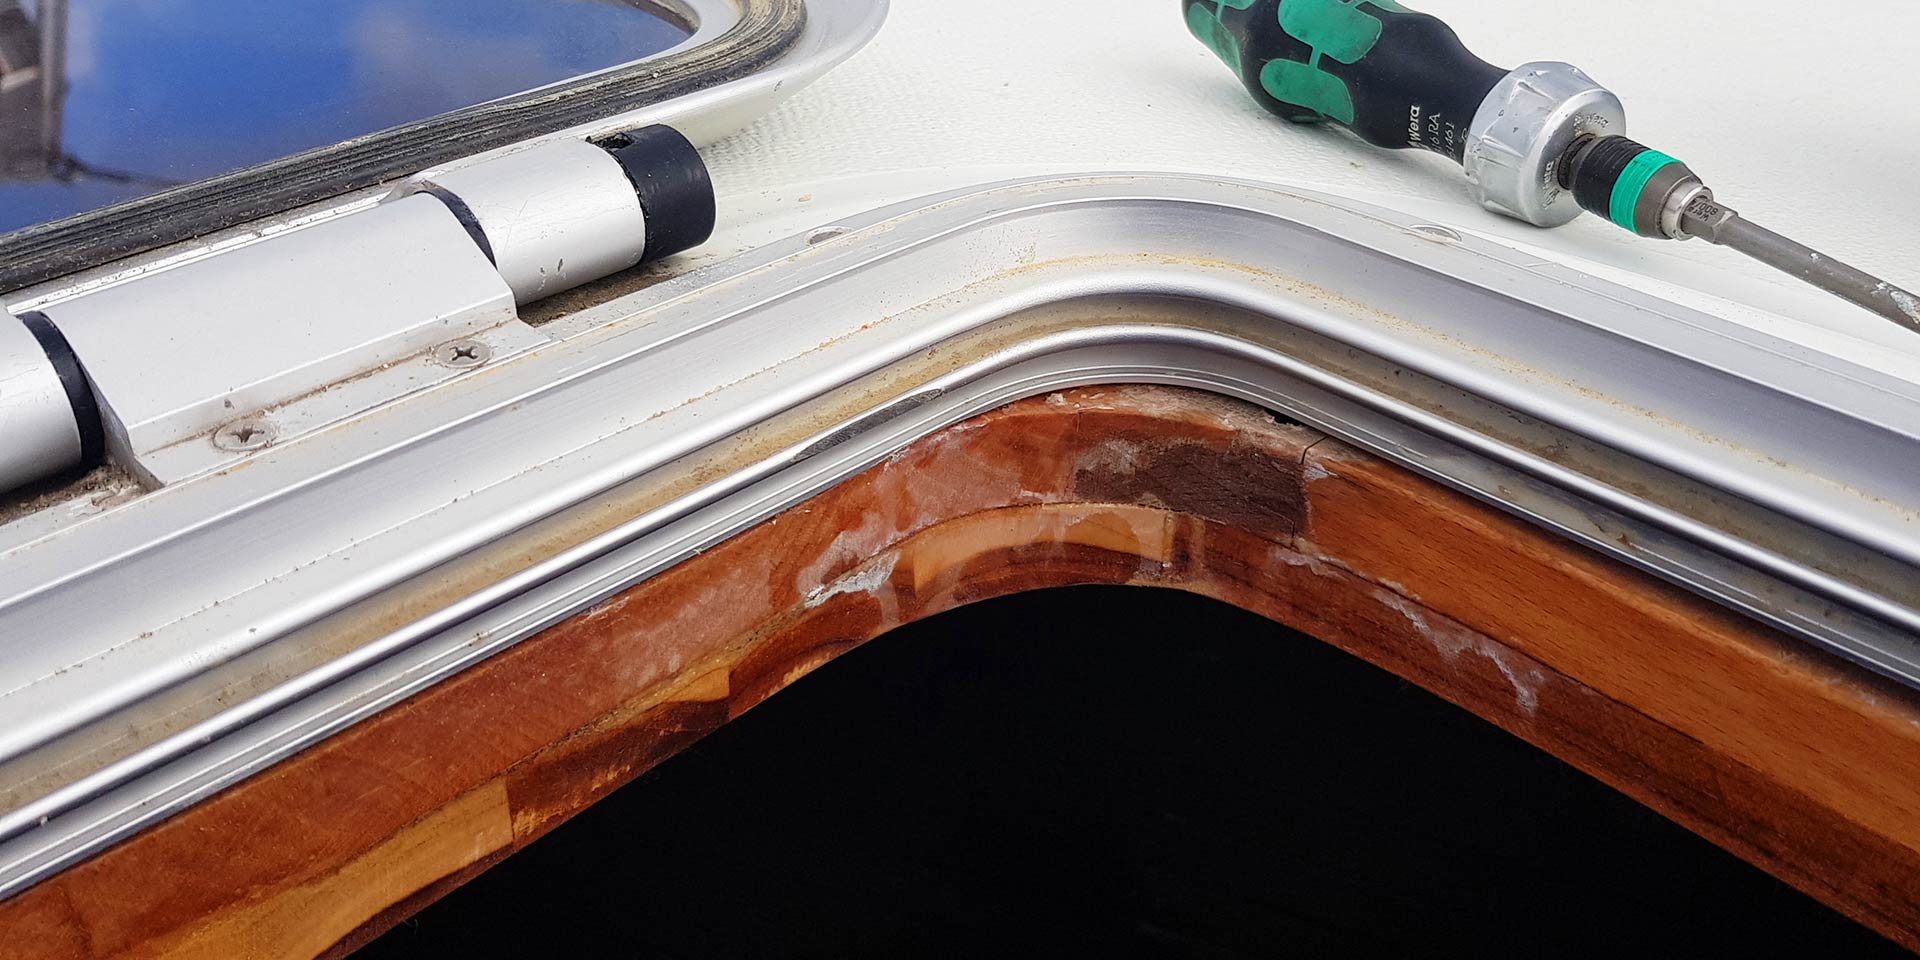
But it was worse: The water had apparently been entering the inside of the boat via one of the four edges of the aluminium frame and first hit the new Teak-frame I had freshly carved out from a massive piece of Teak and mounted some weeks ago in the course of the roofing-refit. What a shame!
Getting off the old, leaking hatch

Before I was mounting the Teak frame I checked the hatch for possible leaks but couldn´t find any trace of water. So I glued and screwed the frame to the roof, not thinking of one occasion that I might have to take the Teak off again one day. Well, that day emerged faster than I thought! There was no time to baa, I had to act. But taking the frame off to be able to reach the screws with which the hatch was fitted to the deck was of no question: That would have meant to destroy large parts of the new roofing panels.
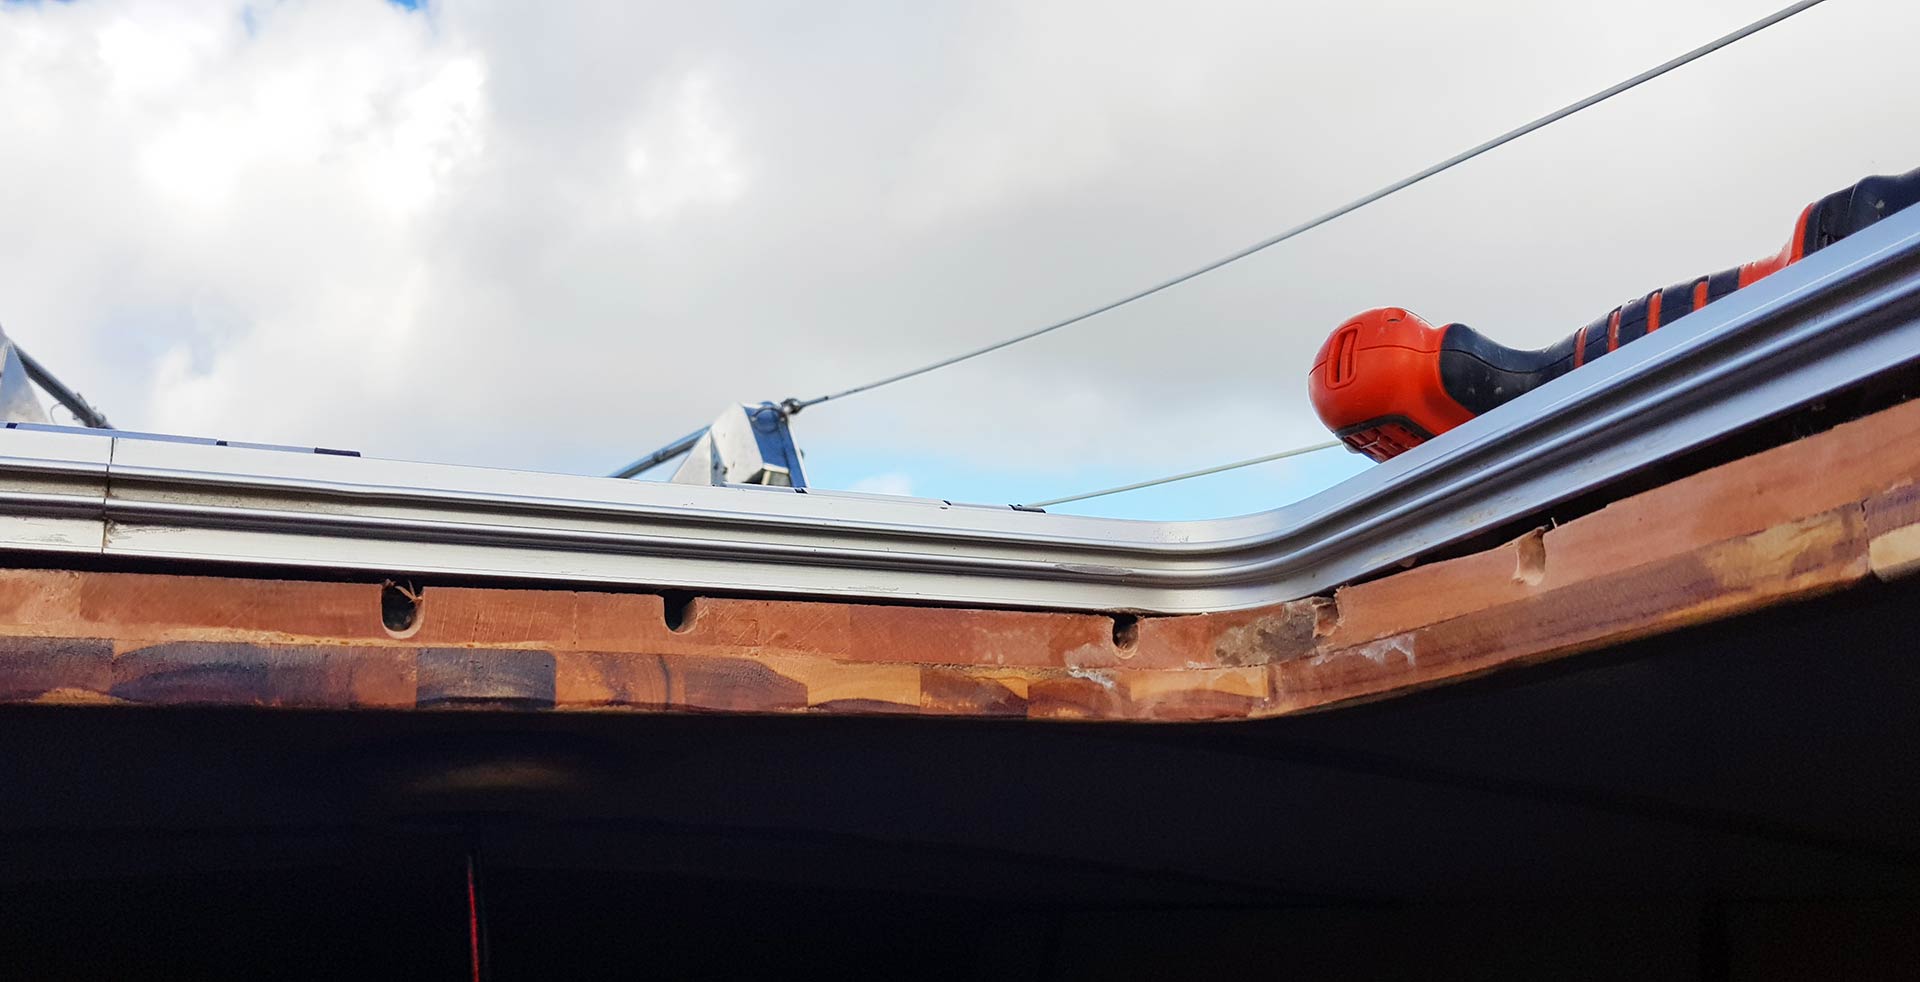
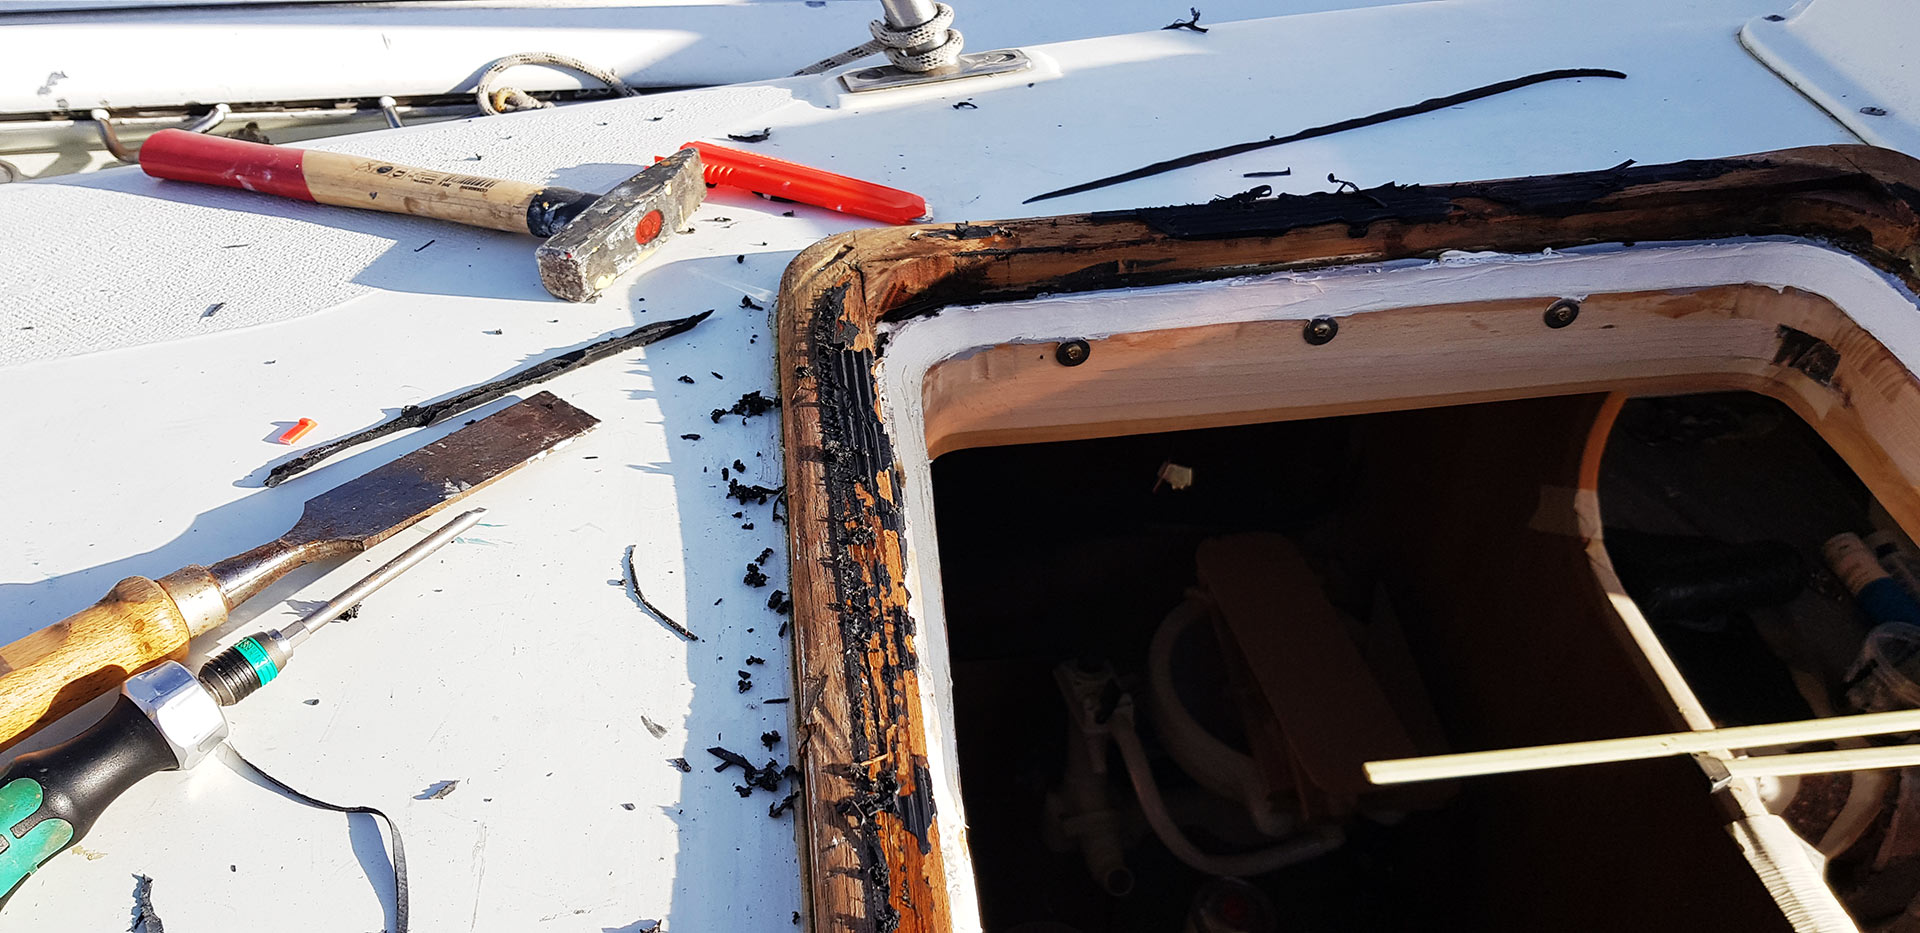
So I fitted the biggest drill to the machine and made big boreholes right underneath where the screws must have been. It was a game of luck, but eventually I managed to do that. I though, destroying the wooden frame partially (and later being able to secure the boreholes with wooden plugs again would be a better idea than to rip off the hole ceiling. Well done, with some acrobatic skills I was able to turn out every single screw.
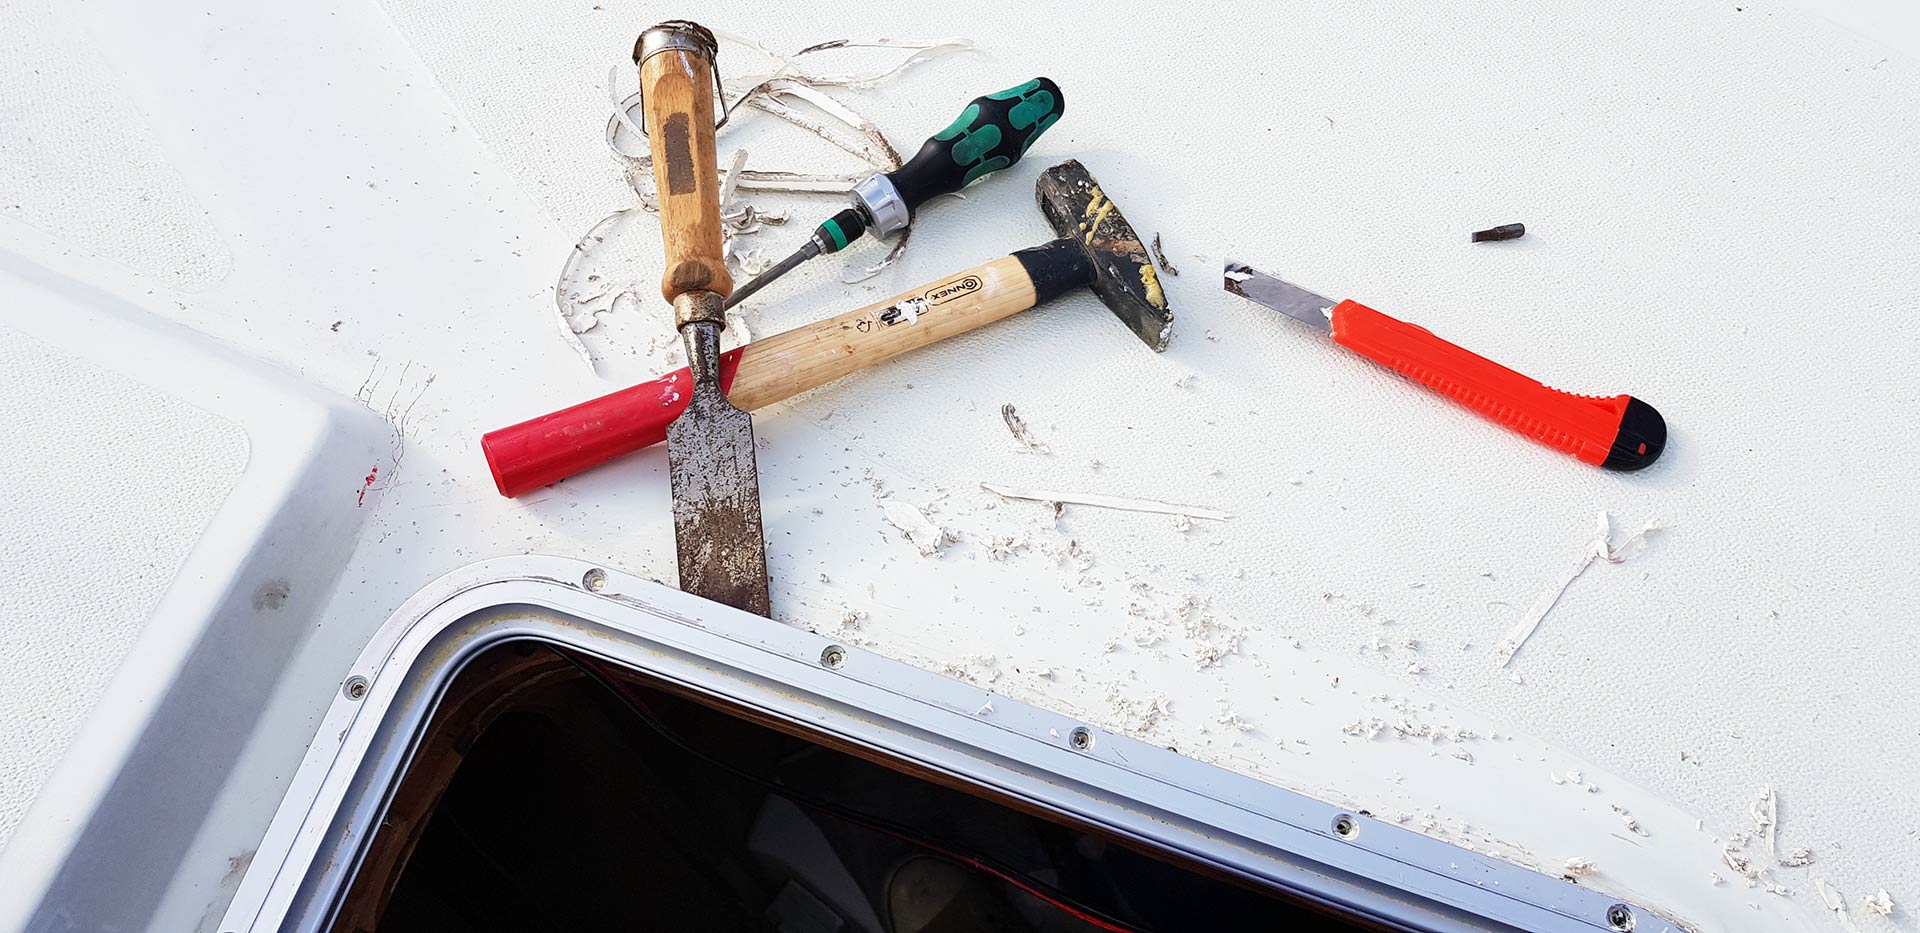
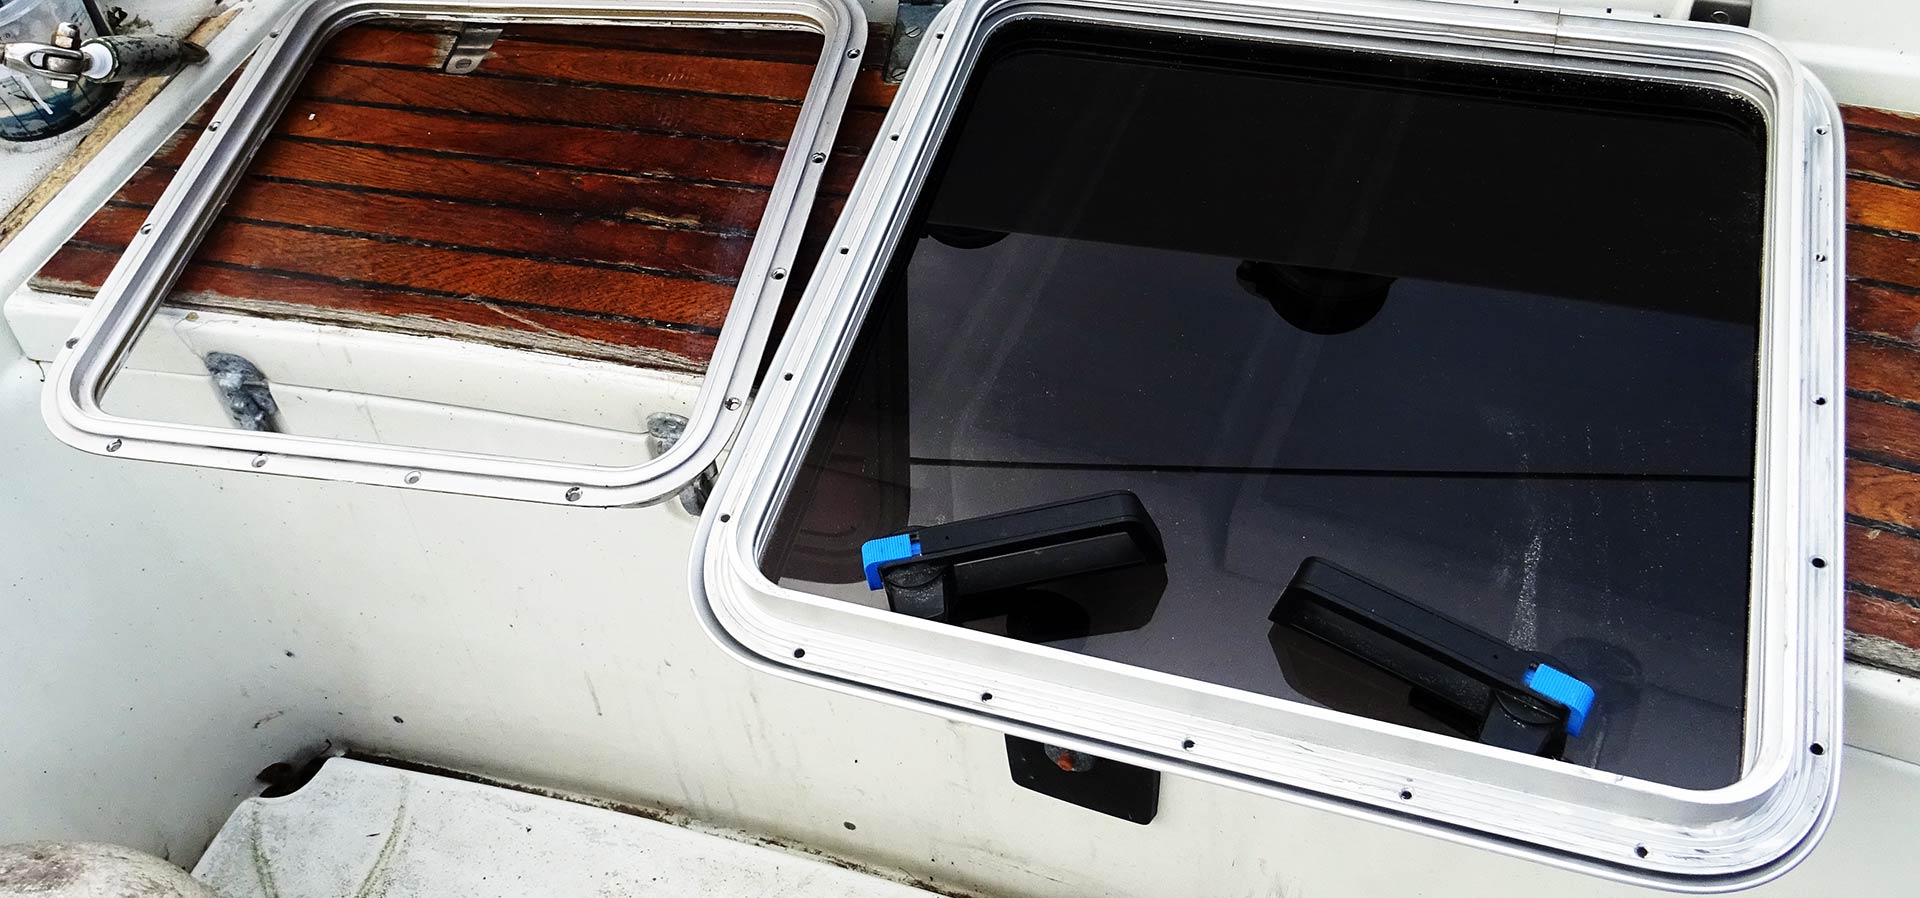
But then the next task ahead: Getting off the old hatch from the GRP surface. My previous owners had done a fantastic job in sticking the hatch to the boat. I used up the sharpness of two carpet knifes and tried to cut loose the Sikaflex-adhesive between hatch and boat. Then I served some heavier weapons and applied a chisel and a hammer – carefully – and put some leverage force to the hatch.

Slowly it came off at last and I was happy. Well, here the curse struck: I discovered multiple boreholes which had been very poorly sealed off. Apparently from another hatch that had been fitted there in past times. The holes had been tried to seal with Silocone. Again this f****g Silicone!
How big is the damage? Taking off the second hatch.
So, here´s a next job coming up: Sanding down the GRP there, filling the holes with glassfibre and Epoxy and have it sanded down again to seal these holes once and forever. I am also thinking of a method to secure the roofing panels from future leaking events: I don´t want to have water enter the interspace between GRP-roof and panel for obvious reasons, having the electric cables running along there is just one. So maybe foaming everything with building foam and then seal it with Pantero or Sika? I don´t know yet.
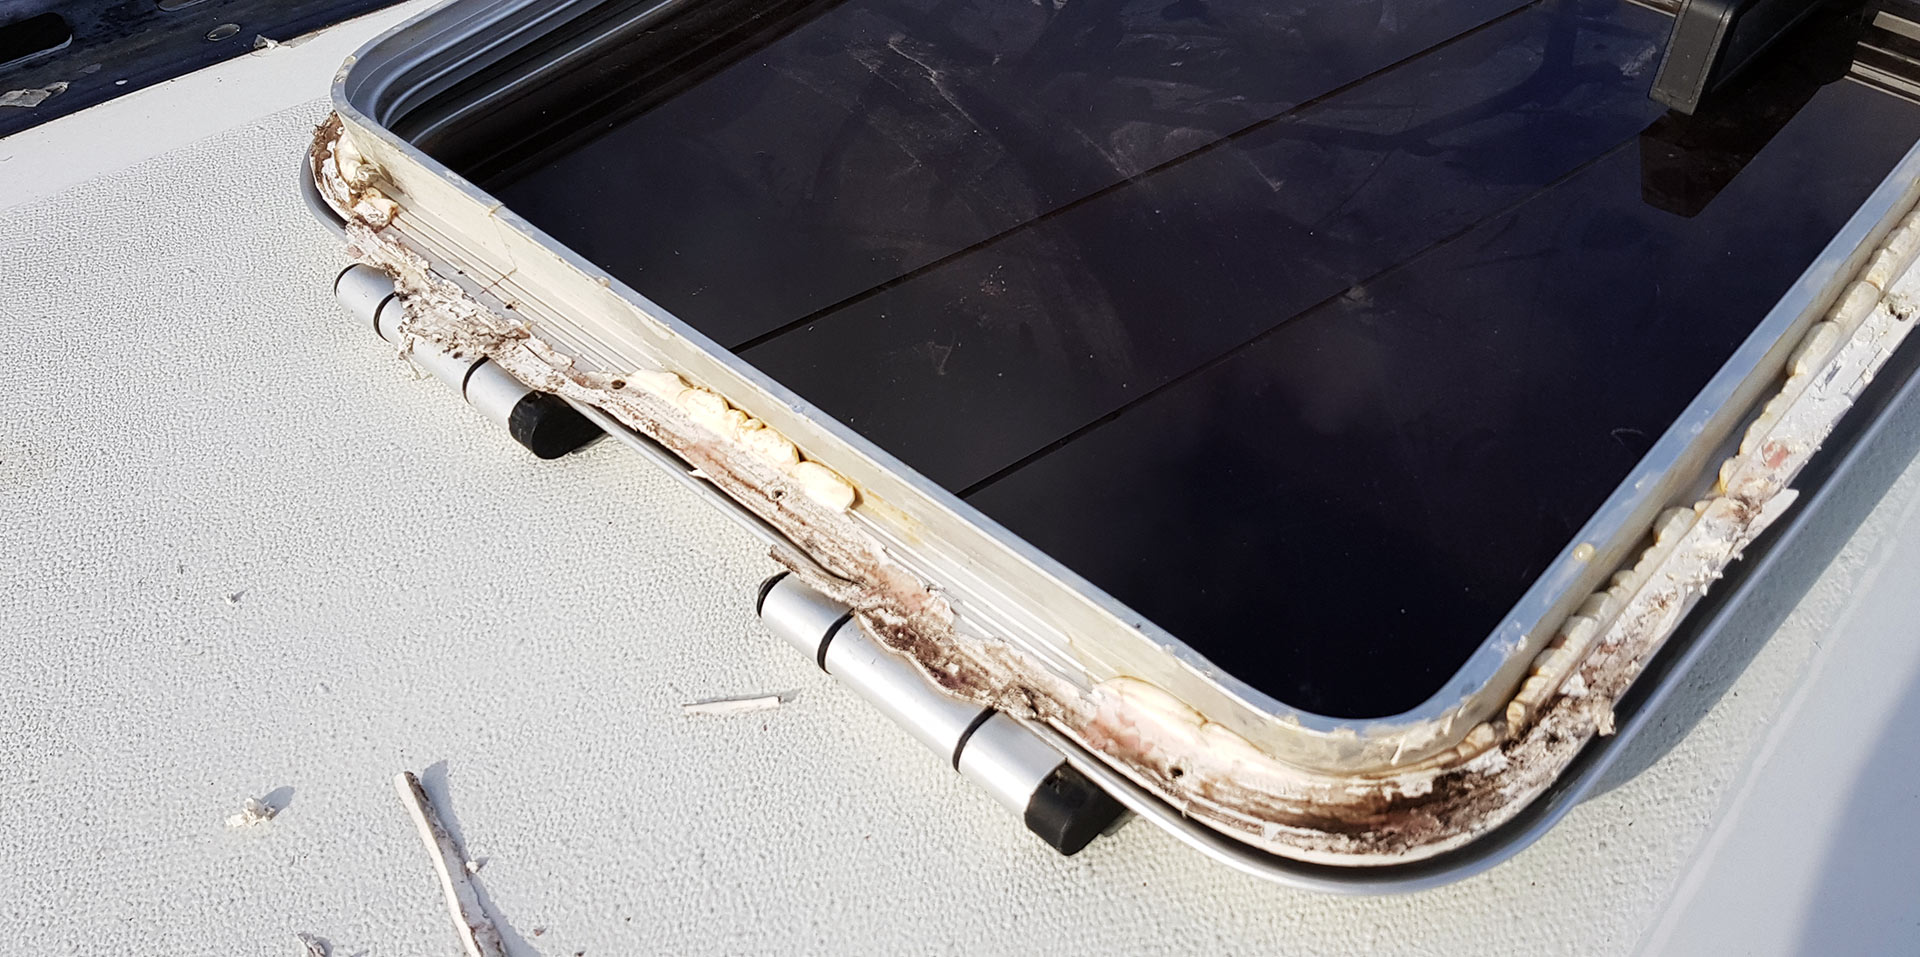
Well, I have a run here, I thought, and decided to take off the second, smaller hatch in the salon. This one was easier. Apparently because of the fact that the hatch had been glued to a Teak-frame instead of GRP like in the bow. Nevertheless, the revelation was equally disappointing: Though not really leaking now, the wood appears to be at the end of its lifetime. I am still wondering if I´d just sand it down and strip off 4-6 millimetres of material in hope that below this area the Teak is still intact and not worn out or to just take off the whole frame and make a completely new one. Still thinking. If so, this would be job number 2 connected to the hatch-desaster.
But the good thing about this hole is that I now can learn by seeing where any why the hatches had been leaking. Both on the hatch itself and on the adjoining surfaces I was able to detect areas where no sealant or very little sealant has been applied. These were the weak areas where the water as after all able to sneak its way through. By flipping one hatch I actually could observe – easily detectable by the brown mildew that has been growing there between hatch and GRP – where the moisture and the water entered the boat.
So here´s a lesson to be learned: Don´t utilized too little of the Sika or Pantera stuff! I am glad that I had been able to fit the new porthole windows to the hull so nicely some weeks ago (here´s an article on this topic) and so I am sure I will be able to re-attach the hatches to the boat as well. But am I going to re-attach the old hatches? Or why not go for new ones? That´s what I though to myself in the first place.

Refurbishing the old Gebo hatches
Well, I quickly refrained from doing this because hatches, as it turned out, are a hell way to expensive! Wow, I would have never thought of such a “simple” commodity like a boat´s hatch being that pricy! The bigger one of the hatches in the most ordinary of all available qualities, is still priced at some 450 Euros! Oh, okay. Nope. I try to refurbish.
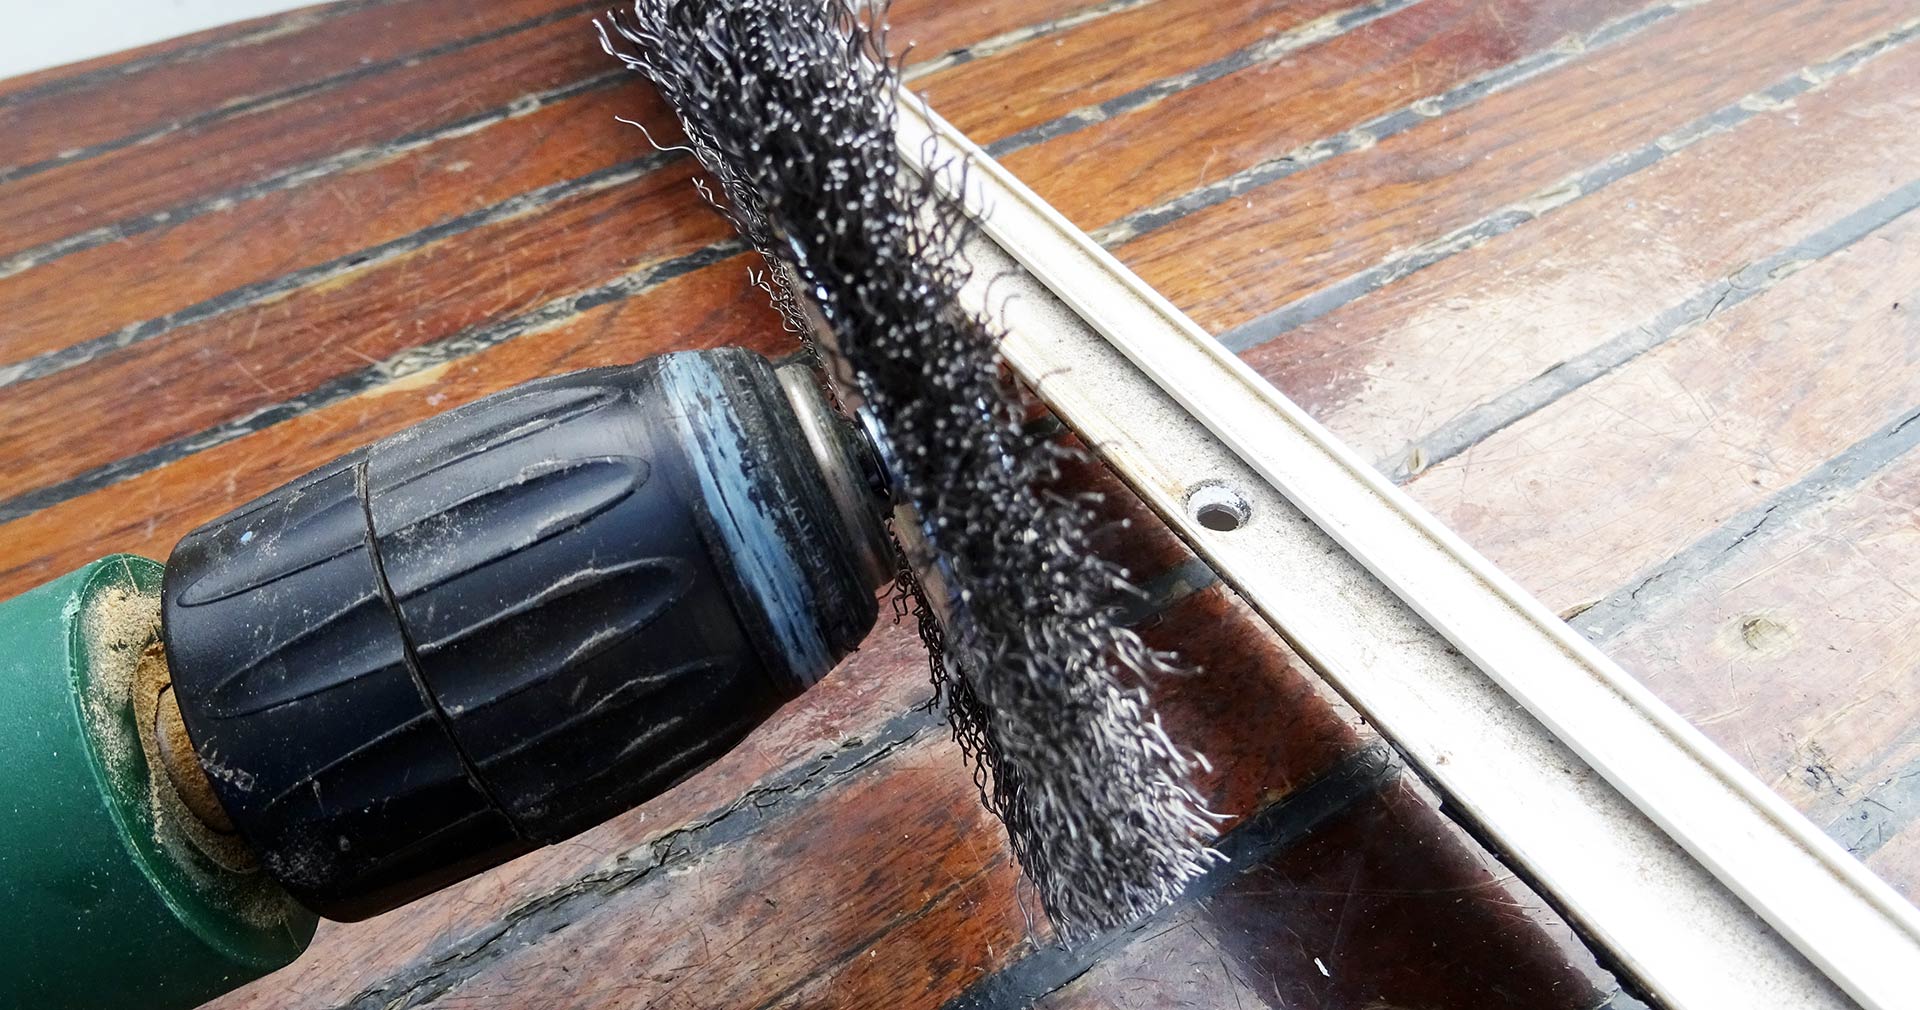
Which is a good idea because the hatches themselves are in pretty good shape, no major dents or scratches, the hinges still working fine and the leverage to close and seal off the hatch perfectly working. So I went to the home improvement and bought a “soft” kind of rotating steel brush, mounted it to the drilling machine and off I went to sand off the leftover Sikaflex.

Which really made the difference! It is a nasty work though with lots of 1 mm sized Sika-crumbs flying around and sticking to whatever they hit, but it´s definitely worth it! I wasn´t able to get off all of the sealant, but at least the aluminium is now freshly brushed and shiny new. The joining surfaces where the hatch frame will be attached to the GRP is clean now and ready to receive new Pantera-sealant. I am happy with my work.
Still, there is some work ahead: I will buy new rubber seals for the hatches, hoping that there are spare parts for hatches that old still available. Then I must refurbish the GRP-area around the fore-cabin skylight hatch, which is my next job. And there is still a decision to be made whether I take off the wooden frame for the salon-skylight and rebuild it or I try to sand it down. In any case, it will remain exciting …
Like reading about refit-action of an old sailing boat? Try these articles as well:
A filthy old bilge – shiny new
Refurbishing old steel chain plates
Captain´s chairs á la Hallberg-Rassy for my boat?