So, step by step and slowly but surely the tough times of the refit of my King´s Cruiser 33 are drawing to a close, which is, frankly speaking, a real bliss after I´ve entered the third year of working on the boat now. It´s the fore cabin that was keeping me busy the last months and it truly was an amazing venture from the start, when I was scraping off the old ugly stuff …
You´ve followed the process of refurbishing the cabin reading through the articles when I sanded off the gelcoat and painted the boat in white to the times when I´ve skilfully tried to fit a wooden sub-structure to the bare GRP surface and began to attach the Teak batten for a brand new ceiling. Now, that was a long way to go and I´ve learned so much underway.

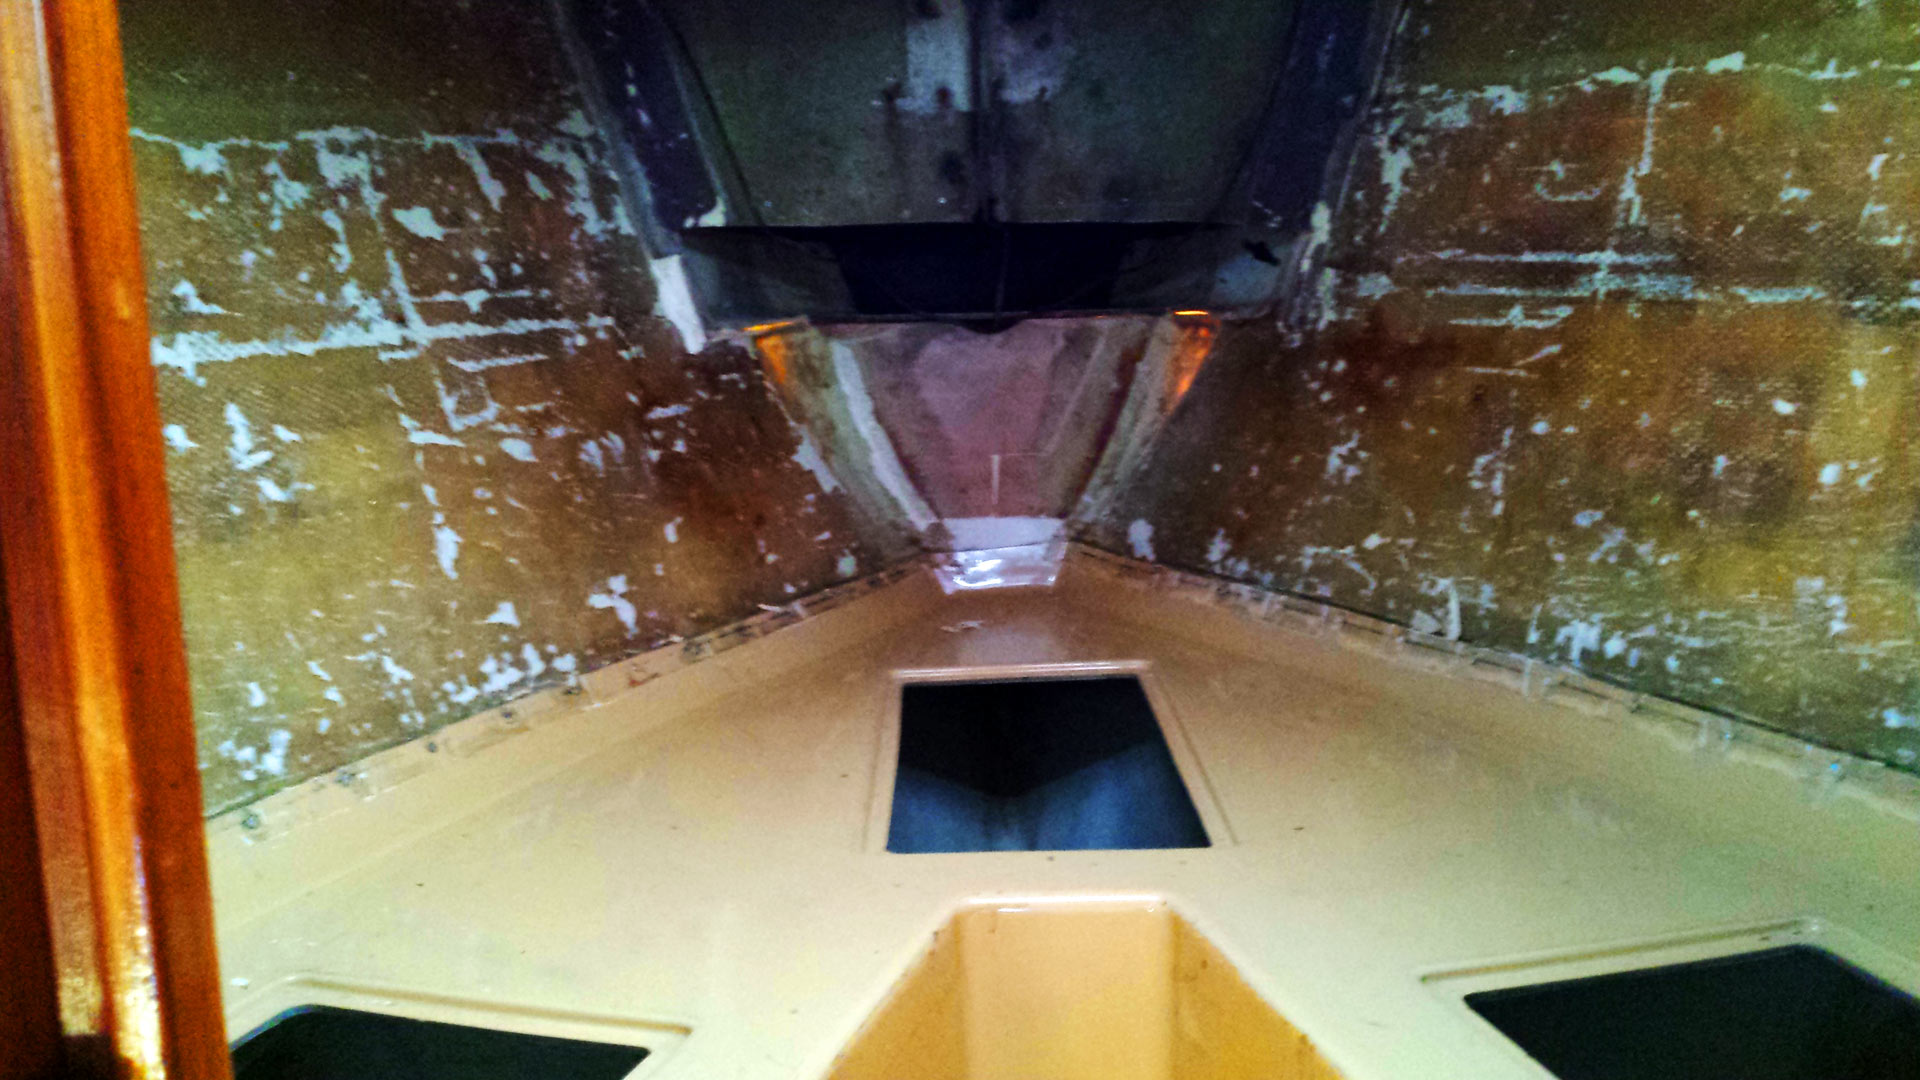
I then fitted new roofing panels, which was a pain in the ass to make since I was so clever to have destroyed the old roofing panels and finally I´ve made the masterpiece of this cabin, the new chain locker-cover made from Teak which I think is a real beauty. That´s where I start now and this is where the trouble sets in. Trouble? Well, I would say that the smaller the job is, the more complicated it gets. The details. It´s the details which are killing me here … here are just three examples.
Gas valve cover: A deciding part

My boat has two gas valves inside the hull and the main switch right at the gas bottle. The first of the valves is right behind the chain locker bulkhead and when I was making the covering panels I planned to leave a small flap for opening and closing the valve. Yet, I refrained from trying to fit hinges to the flap since the Teak-surface was plywood and screws do not really fit here tight very well. So I came up with another idea …
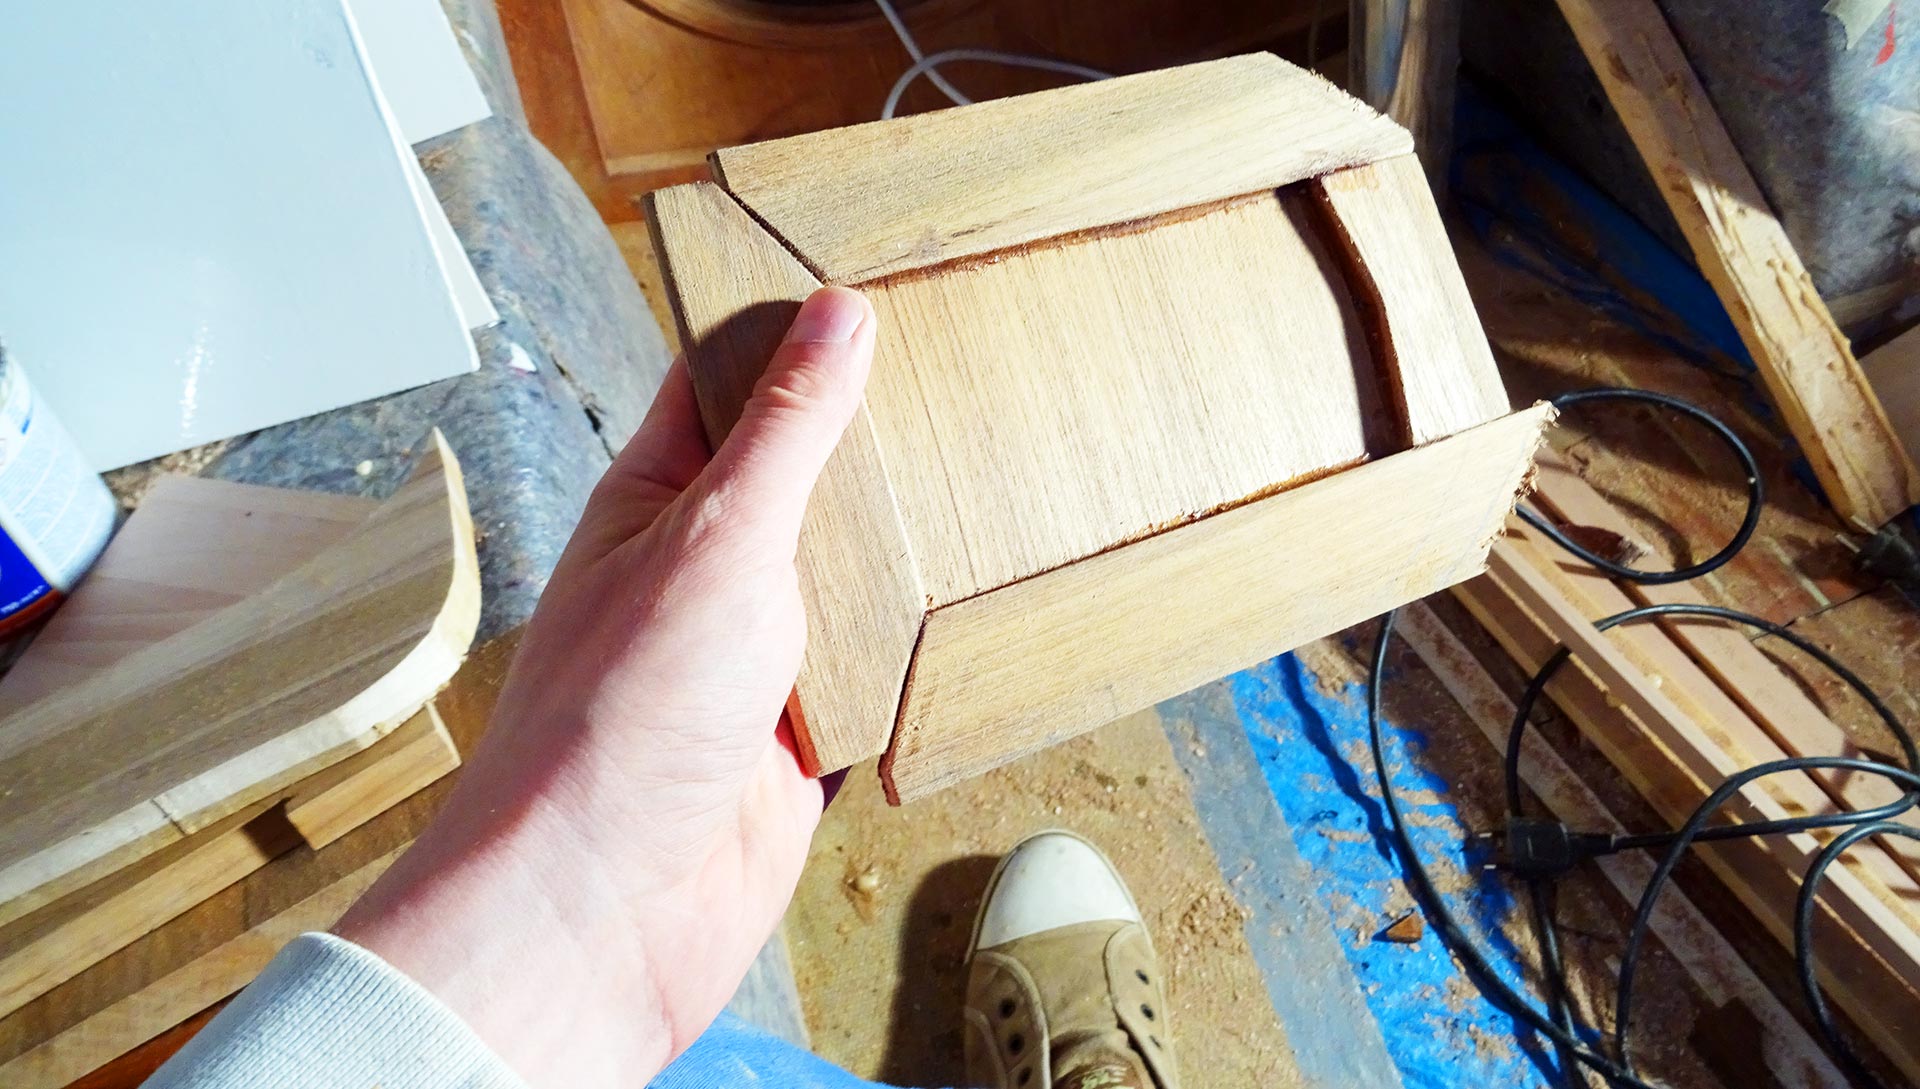
First of all I did have the flap but it was ugly. The bulkhead to the chain locker is the one deciding element of the whole cabin and since you sleep here feet first this is the thing you will be looking at the whole time: I wanted it to be a bit nicer looking, so I took some offcut Teak batten and glued them to the flap as trimming. Later the sanding disc brought it into shape and – voilá – it was fitting just fine.

The substitute for the hinges was simple magnetic stripe which I also glued to the flap as well as to the bulkhead. The stripes are strong enough to hold tight the flap in place – but still, I need the real proof of this concept when hitting the first rough waves of the North Sea. Then I shall see if a hinge wouldn´t had been the better choice.
Horror-Details: Decorative Teak Stripes
Fitting of the roofing panels was a real tough job, although I must say that here in the fore cabin works went on just fine after I´ve learned how to do it (or better: How not to do it) with the salon´s roofing panels in the first place. Nevertheless, the two big panels had been attached to the substructure just nicely and I painted the crews in white. I could have stopped here but I wanted this classy look so I went to a joiner and had the Teak batten saw in half.

Every 50 or so centimetres, where the screws where still visible, I wanted to have those Teak stripes mounted. And this is truly not a fun work: I held the stripes in place and marked with a pencil where the screw-heads where situated. The I sanded away some material off of the backside of the Teak stripes. But behold! Those stripes are not very thick and all too fast I sanded away too much of it.

With brass screws and white Pantera adhesive the stripes had then been attached to the roofing and – fairly nicely – indeed did cover most of the screw heads. But this is not the final part: Later on I will have to re-fill all of the stripes´ edges with white Pantera, sand away the surplus material (which will be a tinker and a true mess, and then I´ll have to paint all of the white panels again with the final layer of paint … phew, I see lots of hours coming.

Surplus stowage: How to deal with it?
Another detail struck me in the fore cabin. See, the cabin originally has two V-berths and a small V-shaped recess between them. It´s far too small to be standing in it (for undressing or getting dressed) and so my previous owners have fitted a V-shaped plank that was placed between the two berths to create one big berth. Which is a great idea and that makes the cabin sleeping-wise far more attractive.

And it creates this new room for stowage in the V-shaped recess underneath, which I find highly interesting. I decided to have the plank fitted permanently and was thinking how to utilize the space underneath it. There is no drainage so that´s no room for sea boots (which would even be stupid to carry wet boots all through the boat to the bow to have them stowed here). So I am thinking of maybe fitting a shelf in between to create two chambers for clothing like socks or alike.
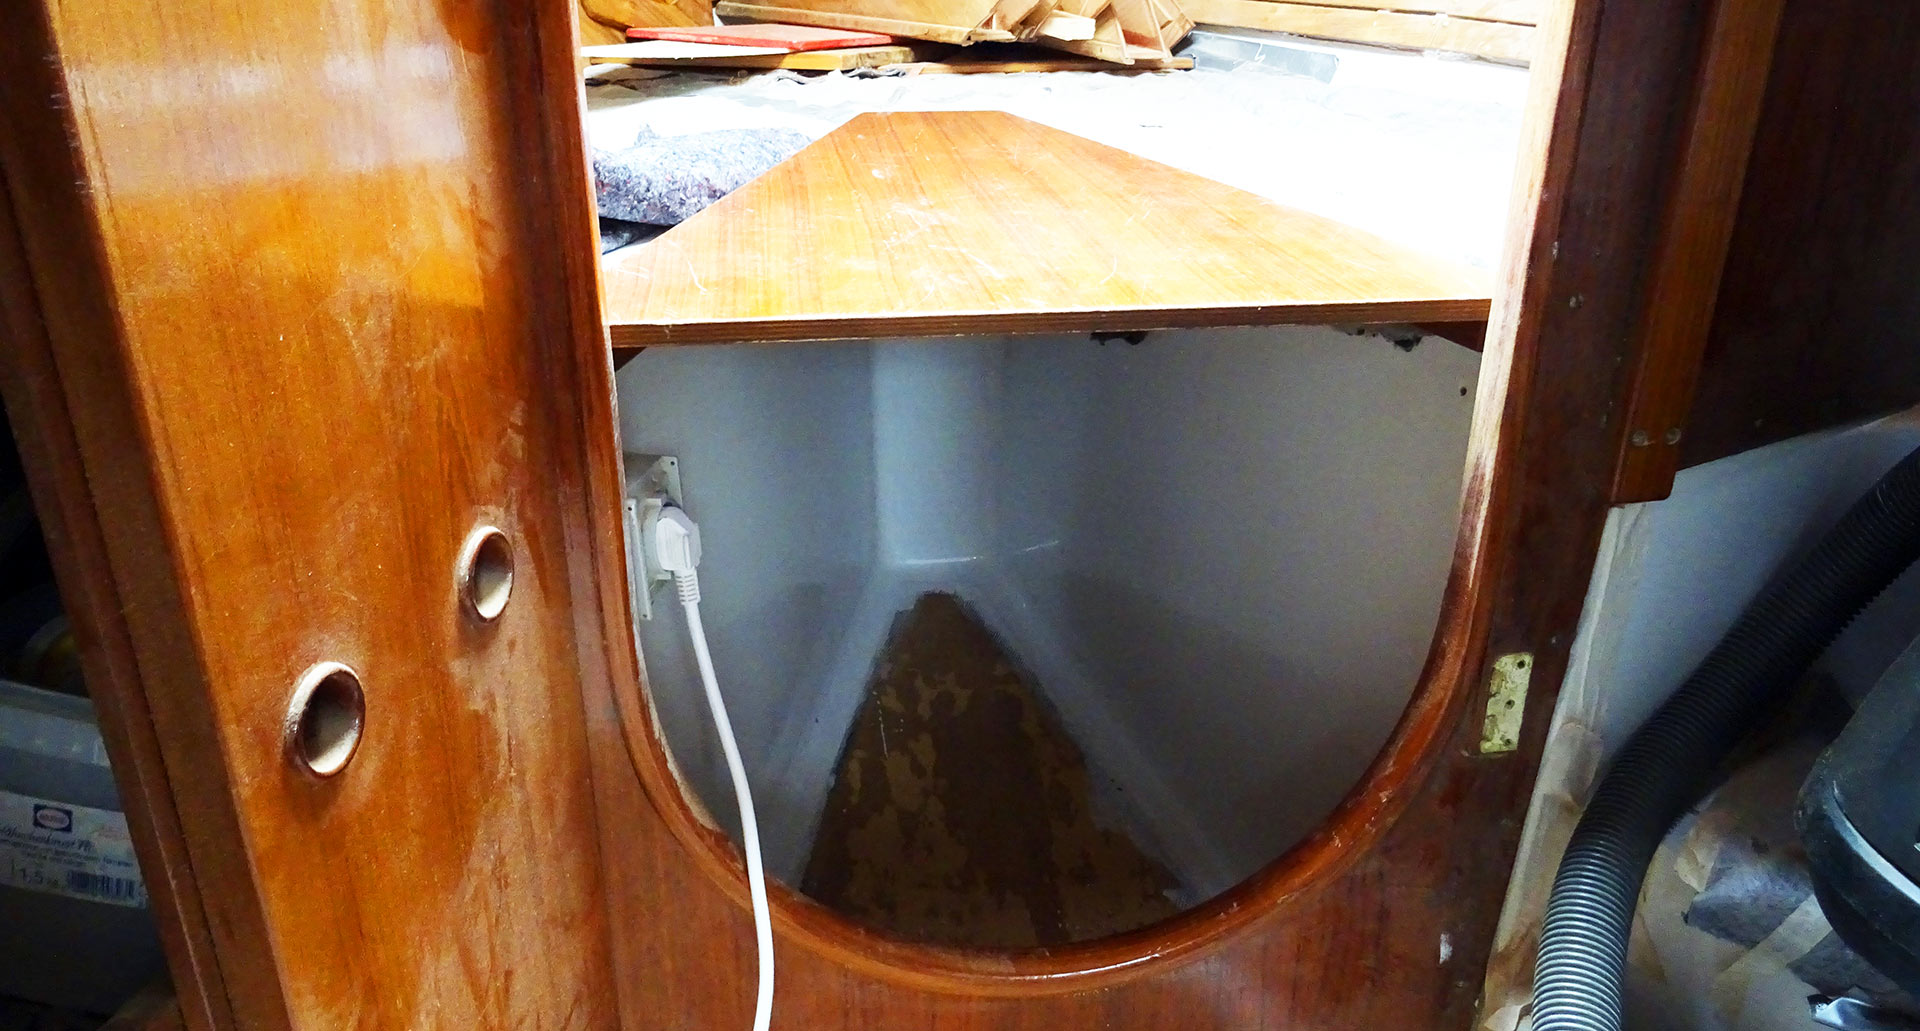
But this brings me to the question how to secure the contents from falling out? A net? A flap (to which this time hinges wouldn´t be a problem. Or something completely different? I don’t know as of know but this single item is a nice example of those frickin´ details which are making the whole process of refitting the boat so complex – it´s one thing crossed off the list making two new things appear. That´s the hard fate of the refit of a sailing yacht …
Sailing yacht interior design: Nice front cabins though …
Interior design concepts of sailing yachts Part 1 and 2
Blue Water role model: The Oyster 745
My absolute all-time favourite sailing yacht: The Cigale 16