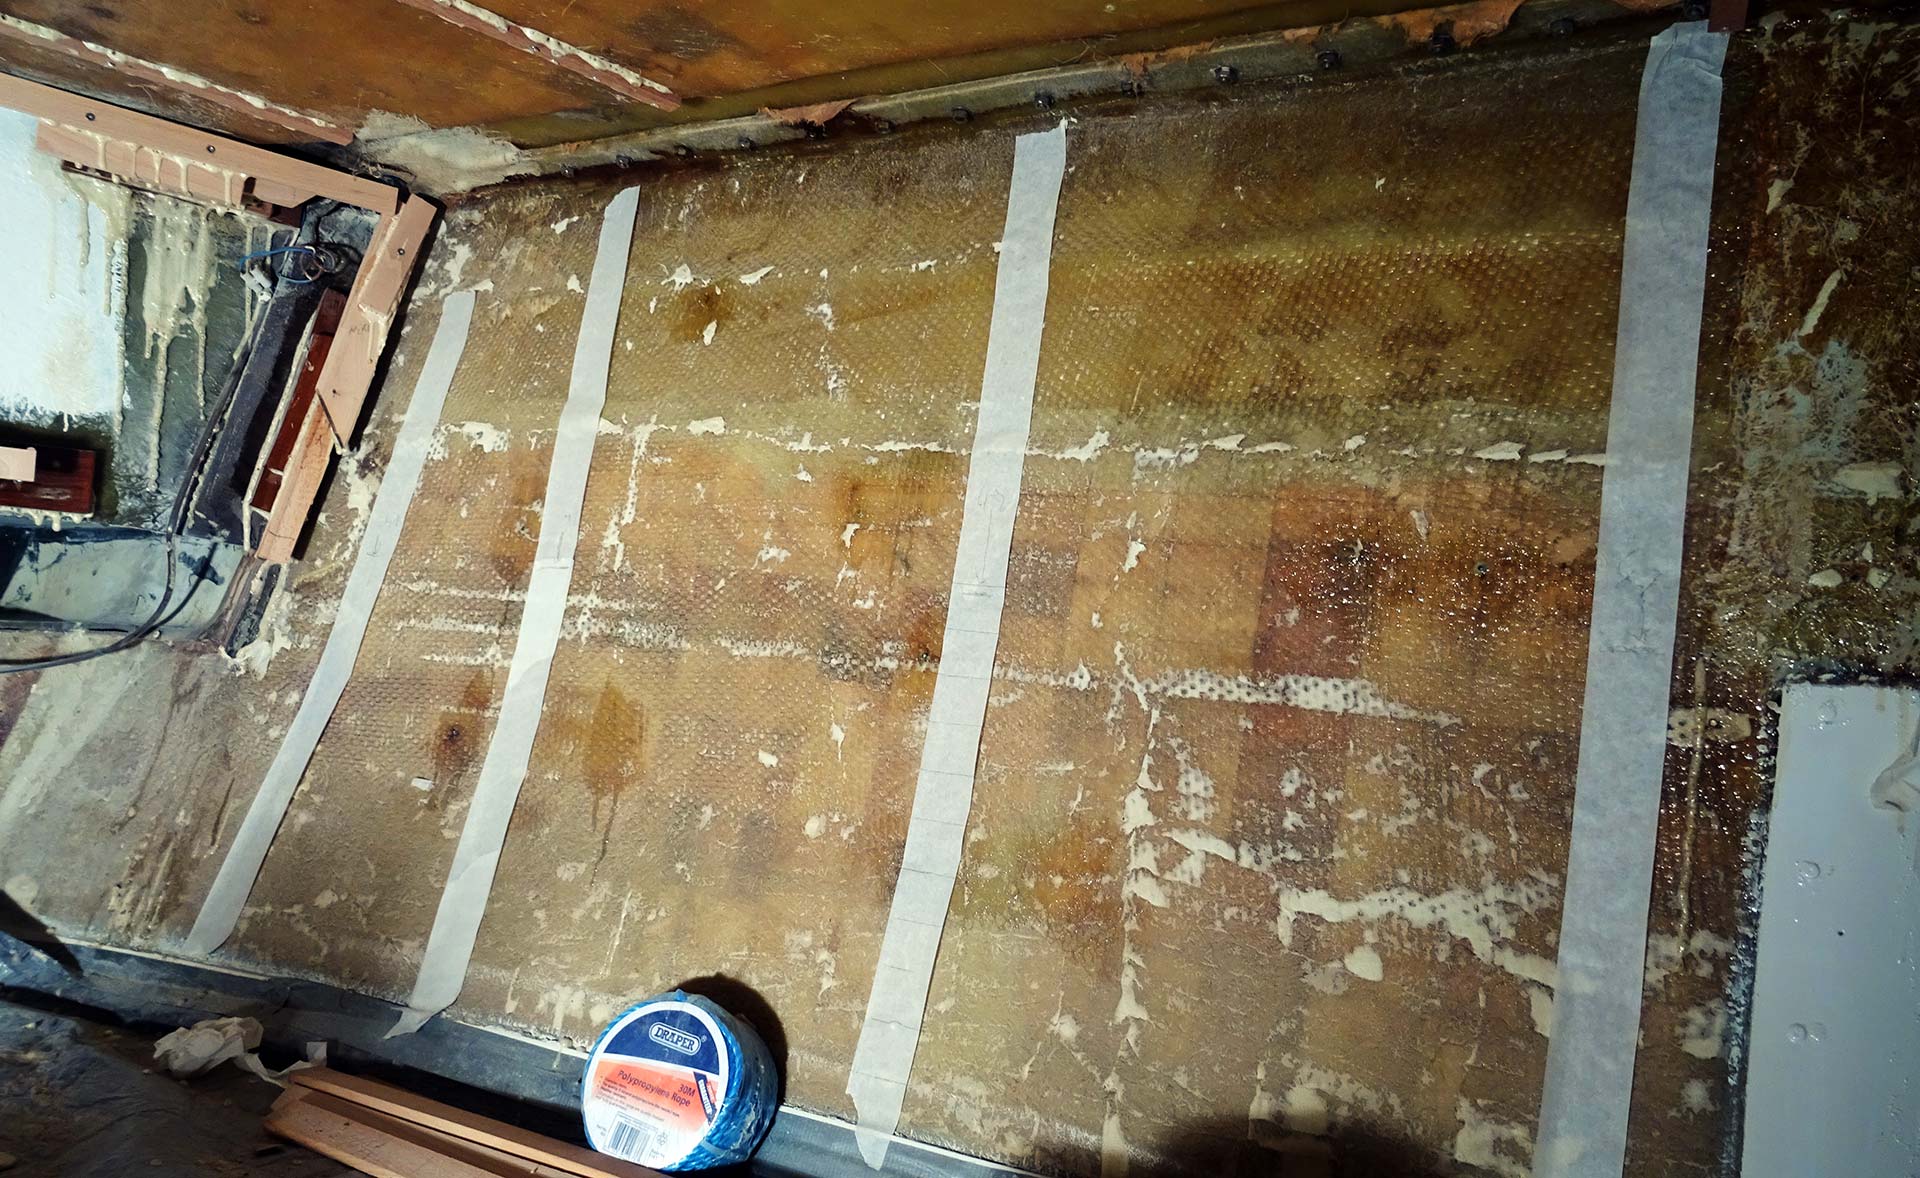
Now that is something that is really exciting and makes me smile all the time: The fore cabin refit is something that has a miraculously fast progress, other than my multiple-months long work in the saloon with all its complicated edges and stuff, it seems that the fore cabin will break the ship-wide record of the fastest ever finished item of my refit to-do-list. Last weekend I was able to make real good progress and this is what I want to talk about here in this article. It all began with stripping down the cabin and taking off everything from her ceiling, the ship´s hull and the floor. The GRP has been re-painted since then and I began to make the substruction for the roofing panels.
For the substruction at the ship´s hull it was an easier task, but later more why. I made some plans how the new fore cabin should look like, but the initial planning (read about that plan here) was soon skipped for a more classic approach to designing the new forecastle as I found it more suitable for a boat this age. The cabin is going to bear a mixture of classic ceiling at the ship´s sides made of massive Teak batten (like I have in the saloon) and white lacquered panels for the roofing and a part of the ship´s sides. As a specialty, I figured to make some brand new cupboards for either side of the cabin. Let´s roll …
Finishing the substruction

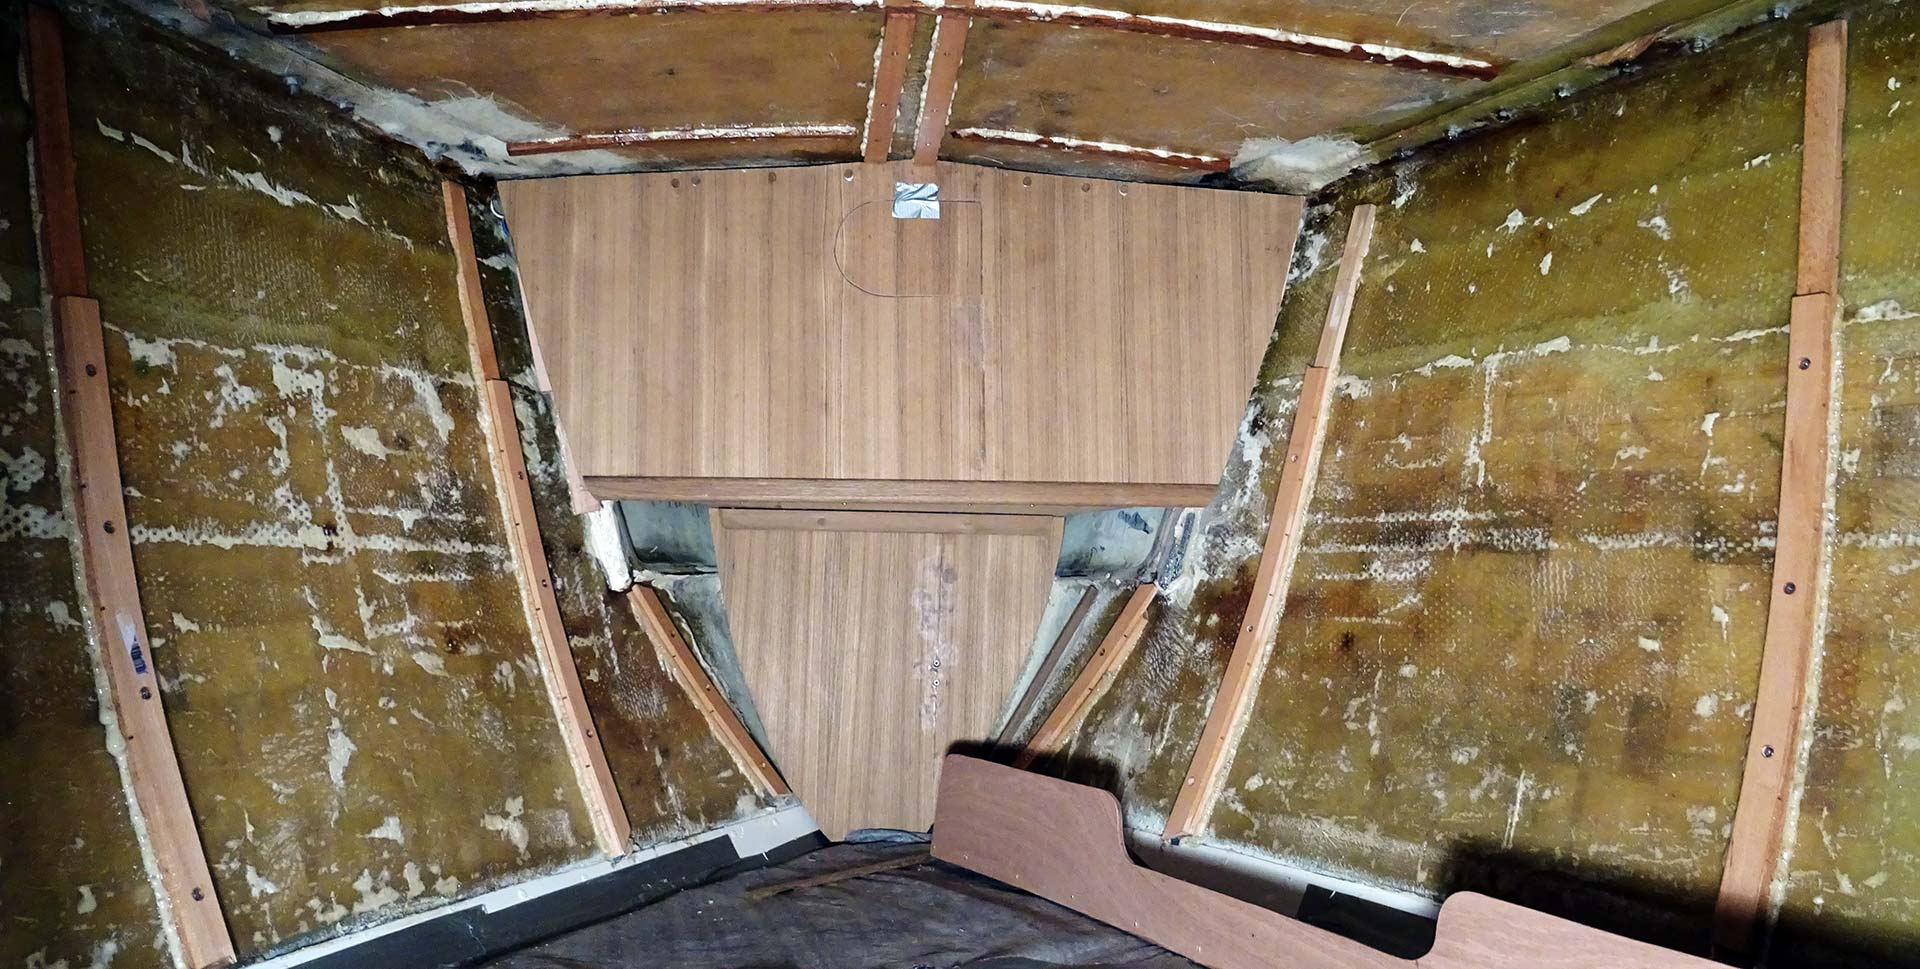
As for the substruction, it´s my well-proven Oak batten I am utilizing again. This technique was also used for the saloon´s panels and that´s the best I think. The substruction functions as the basic fundament to mount panels and batten to but also to create a void between panels and the actual ship´s body to ensure a free flow of air for ventilation as we all know which amounts of condensed water can be accumulated in a boat´s interior over night. But as for the Oak substruction at the fore cabon´s hull I needed to figure how to get them bent. Really bent.
The ship´s hull in the bow is bent a lot and so I first had the Oak batten in my flat where I was pouring hot water over the timber and had weight on them to bend them with the classic old technique. For five days I was showering the batten with boiling hot water but there wasn´t any effect on the Oak timber. I guess you´ll need really hot steam or boiling vapor for a continuous amount of time or even fire to bend such hard timber. In the end, I was cutting slits every 7 or 8 centimeters into the batten which worked very fine when I was attaching the Oak to the hull.
Making them fit was a no-brainer since in the fore cabin (other than back in the saloon) the boat´s hull has been manufactured in a Balsa-core sandwich style so that I was able to both have the batten glued to the hull with PUR-D4-glue and secure a mechanical fit by three to four screws going right through the inner GRP shell into the Balsa core. I never had so much fun in attaching the battens since just glueing is a pain in the ass – read about it here.
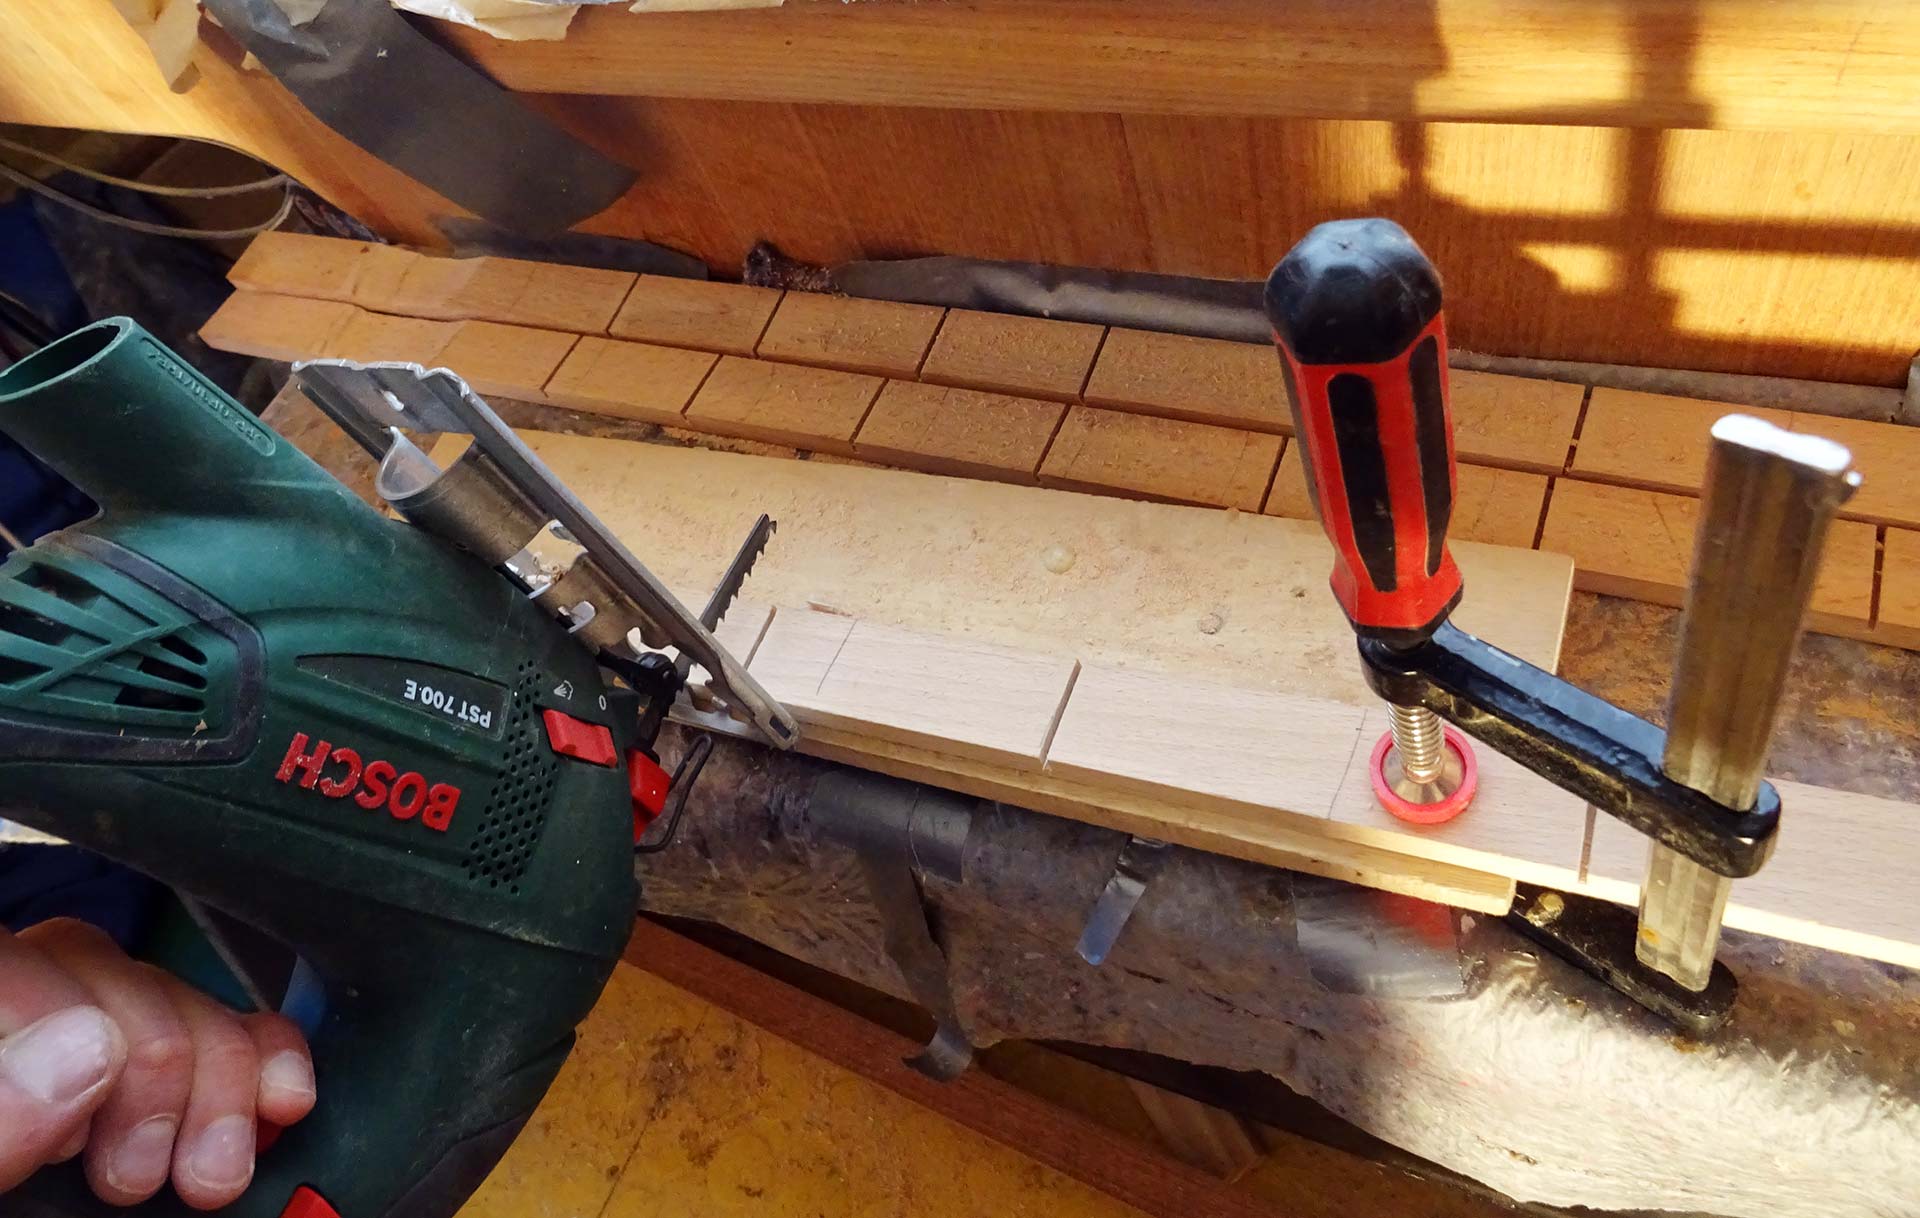
Making the Mahogany sideboards
The fore cabin of my King´s Cruiser 33 does have plenty of stowage under the mattresses, three large lockers under each berth and a central deep space between the V-berths which will be utilized as shoe locker when the whole cabin is made a sleeping room with a V-shaped insert. Nevertheless, it´s a bit circumstantial for anyone stowing his or her belongings under the mattresses to reach for stuff as one would have to remove the cushion anytime. So I figured that cupboards to either side of the cabin for the most used stuff (like underpants, socks et cetera) would be a great thing.
This is also something I do regularly see in modern day yachts and from my experience the fore cabin cupboard at the ship´s sides is a very practical amenity. Making the cupboard is fairly easy as you only need the ground board and a front board. I chose Mohagony laminated wood. I know it won´t match the cabin which is otherwise completely in Teak by colour but I went for it for two reasons: Mohagony is cheaper to acquire and the laminated wood is comparatively harder to laminated Teak. On the other hand, having such a “break” in the colour code of the fore cabin could add a nice counterpoint to the classy Teak-style in here. When everything is multi-layered in glossy-paint, I guess this will look awesome!
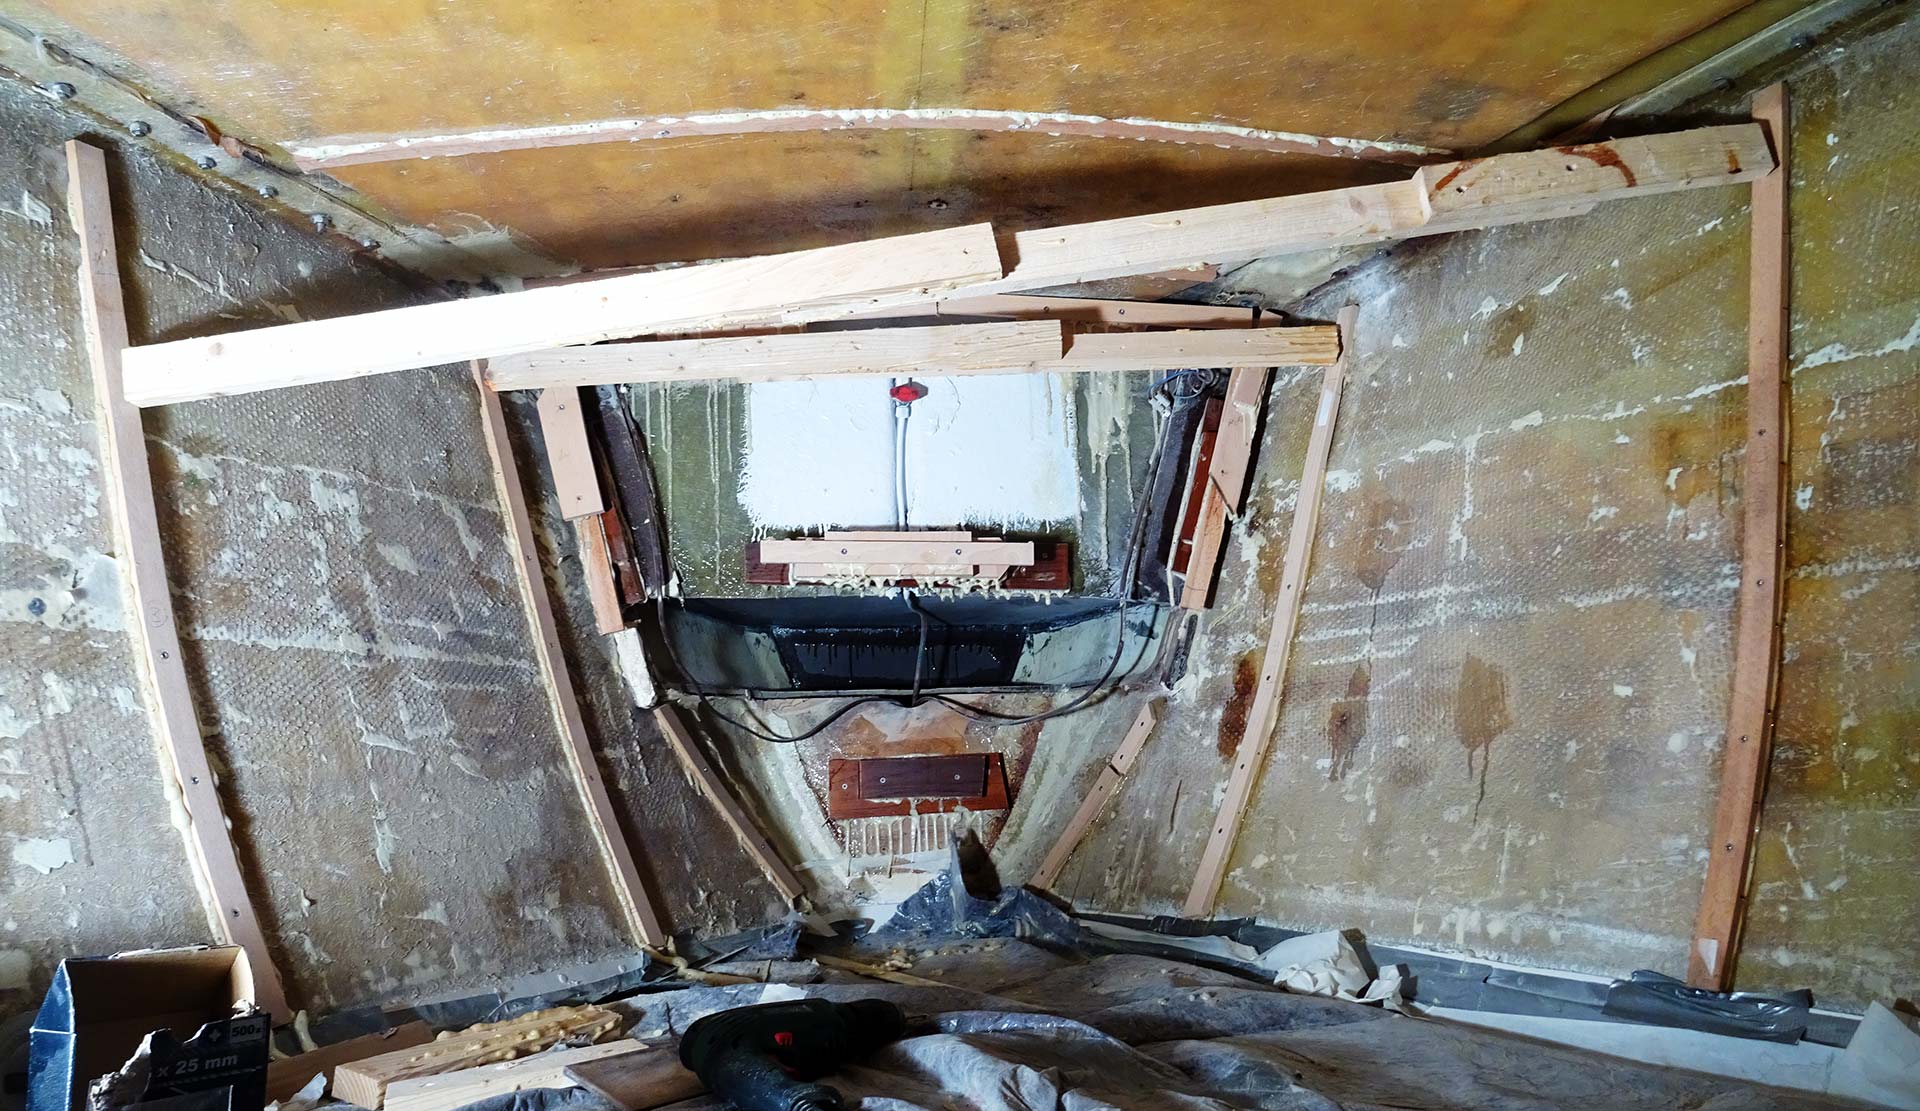
So I cut all the Oak batten and glued and screwed them to the boat´s hull. It was pure fun to do so because I didn´t need to apply stamps all over the place to create the pressure the glue otherwise needs to bond the two agents. The pressure was created sufficiently by the screws and so it was a much easier and – what a treat! – much more cleaner process. I wish I´d had the chance to work this clean and fast in the first place with the saloon, which sometimes was a real nightmare to have the Oak substructiion fitted.
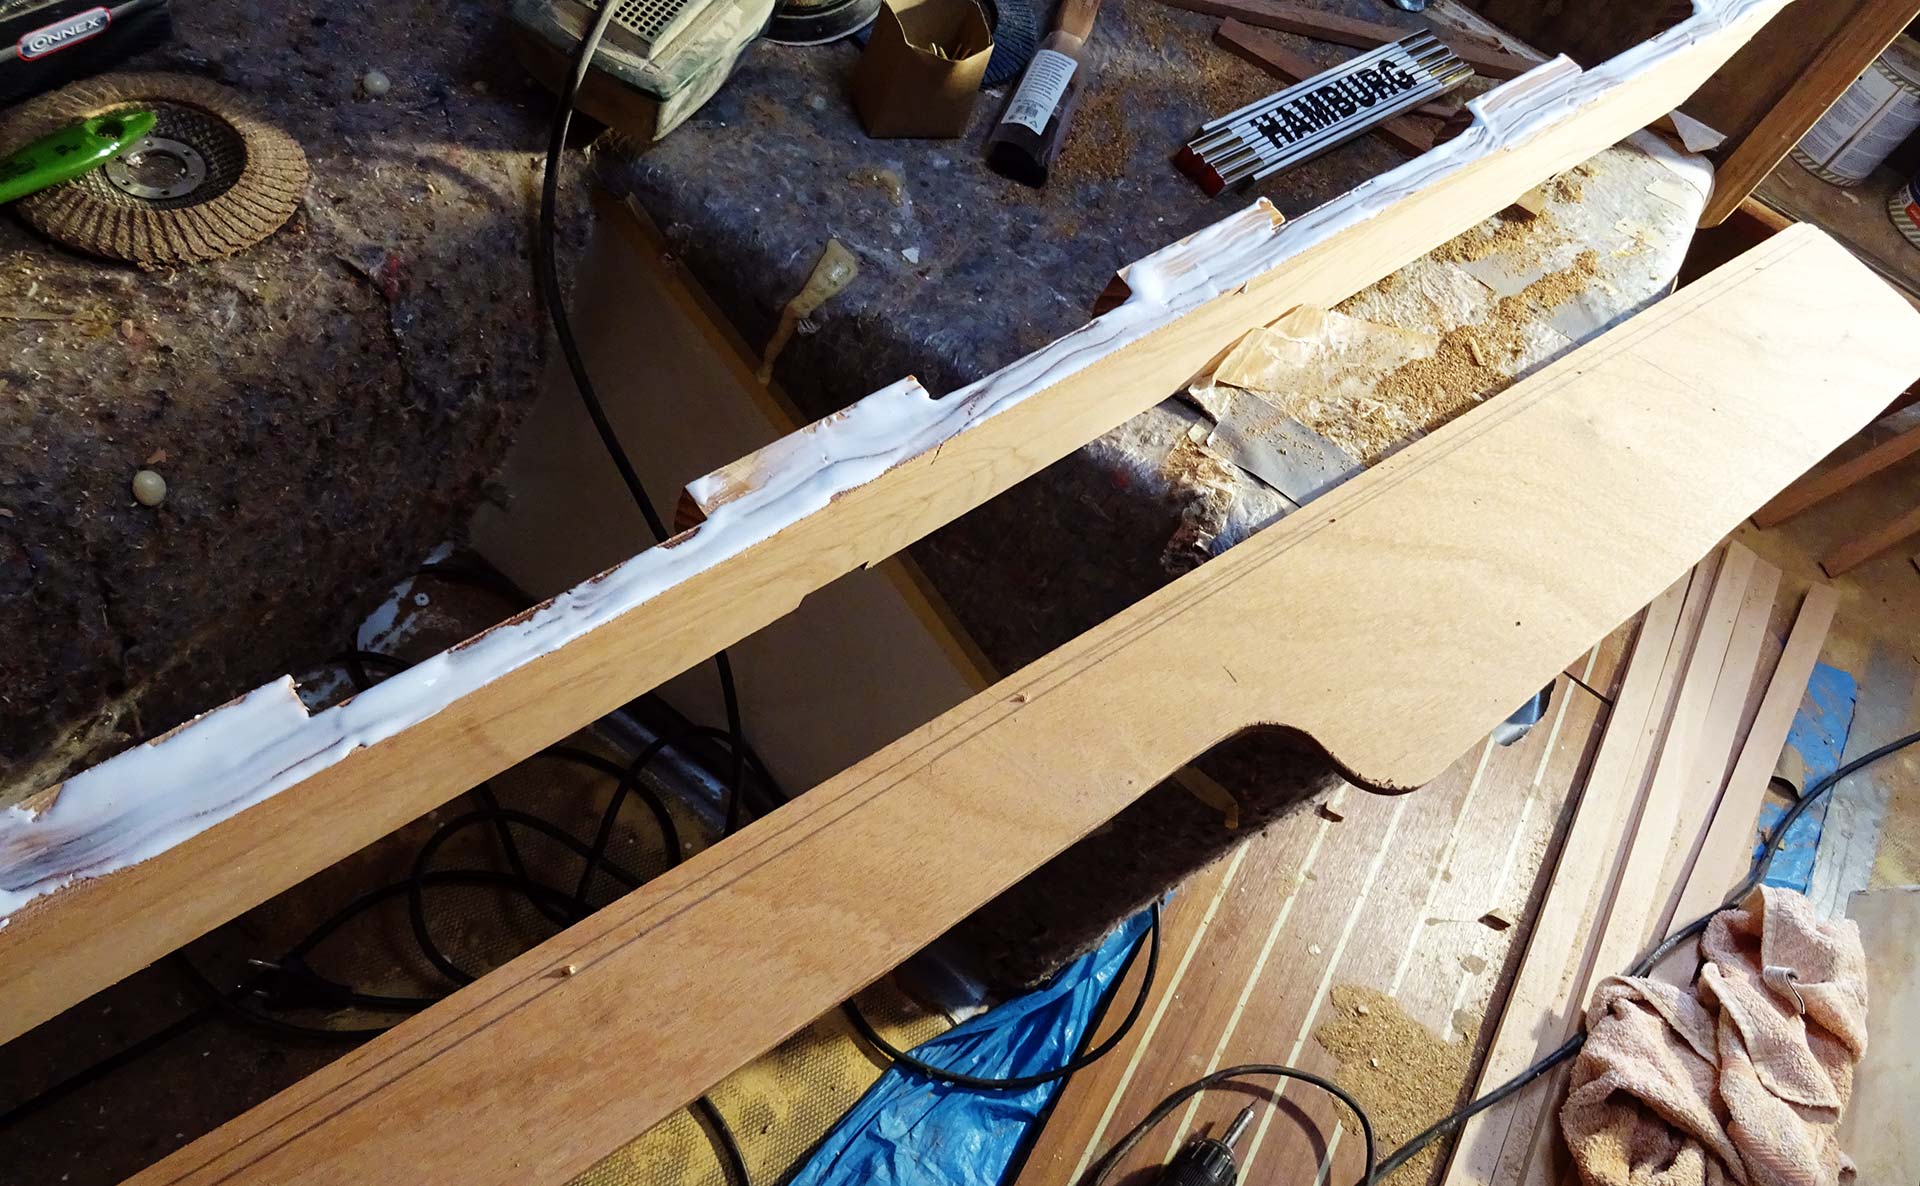
Then it was time to finally fit and mount the cover or the anchor chain locker. I´ve built this construction over a time of two weekends from Teak plywood and it´s a real nice work in the end. I was a bit anxious if it would fit neatly and besides a small cut I had to apply to take away some 4 mm of surplus material the whole thing fitted just as nice as I hoped. Six big screws in the upper part and some two or three additional screws through the lower part of the construction secured it to the ship. I closed the bore holes with Teak plugs so that in the end nothing will be visible anymore. It looks so nice!
Back to the cupboards: I attached Mahogany batten at the edge of the ground board to increase the contact area to the front board and sanded the batten round which adds a nice little touch to the joinery. When everything has been dried thoroughly, I glued the front board to the ground board by bending it all along the bent shape of the fore cabin´s ships walls and attached a brass screw every 20 centimetres. This is a firm and solid bond and it looks so neat. As I was fitting the raw board I was delighted of how nice the whole thing looked. I think this will be awesome when finished.
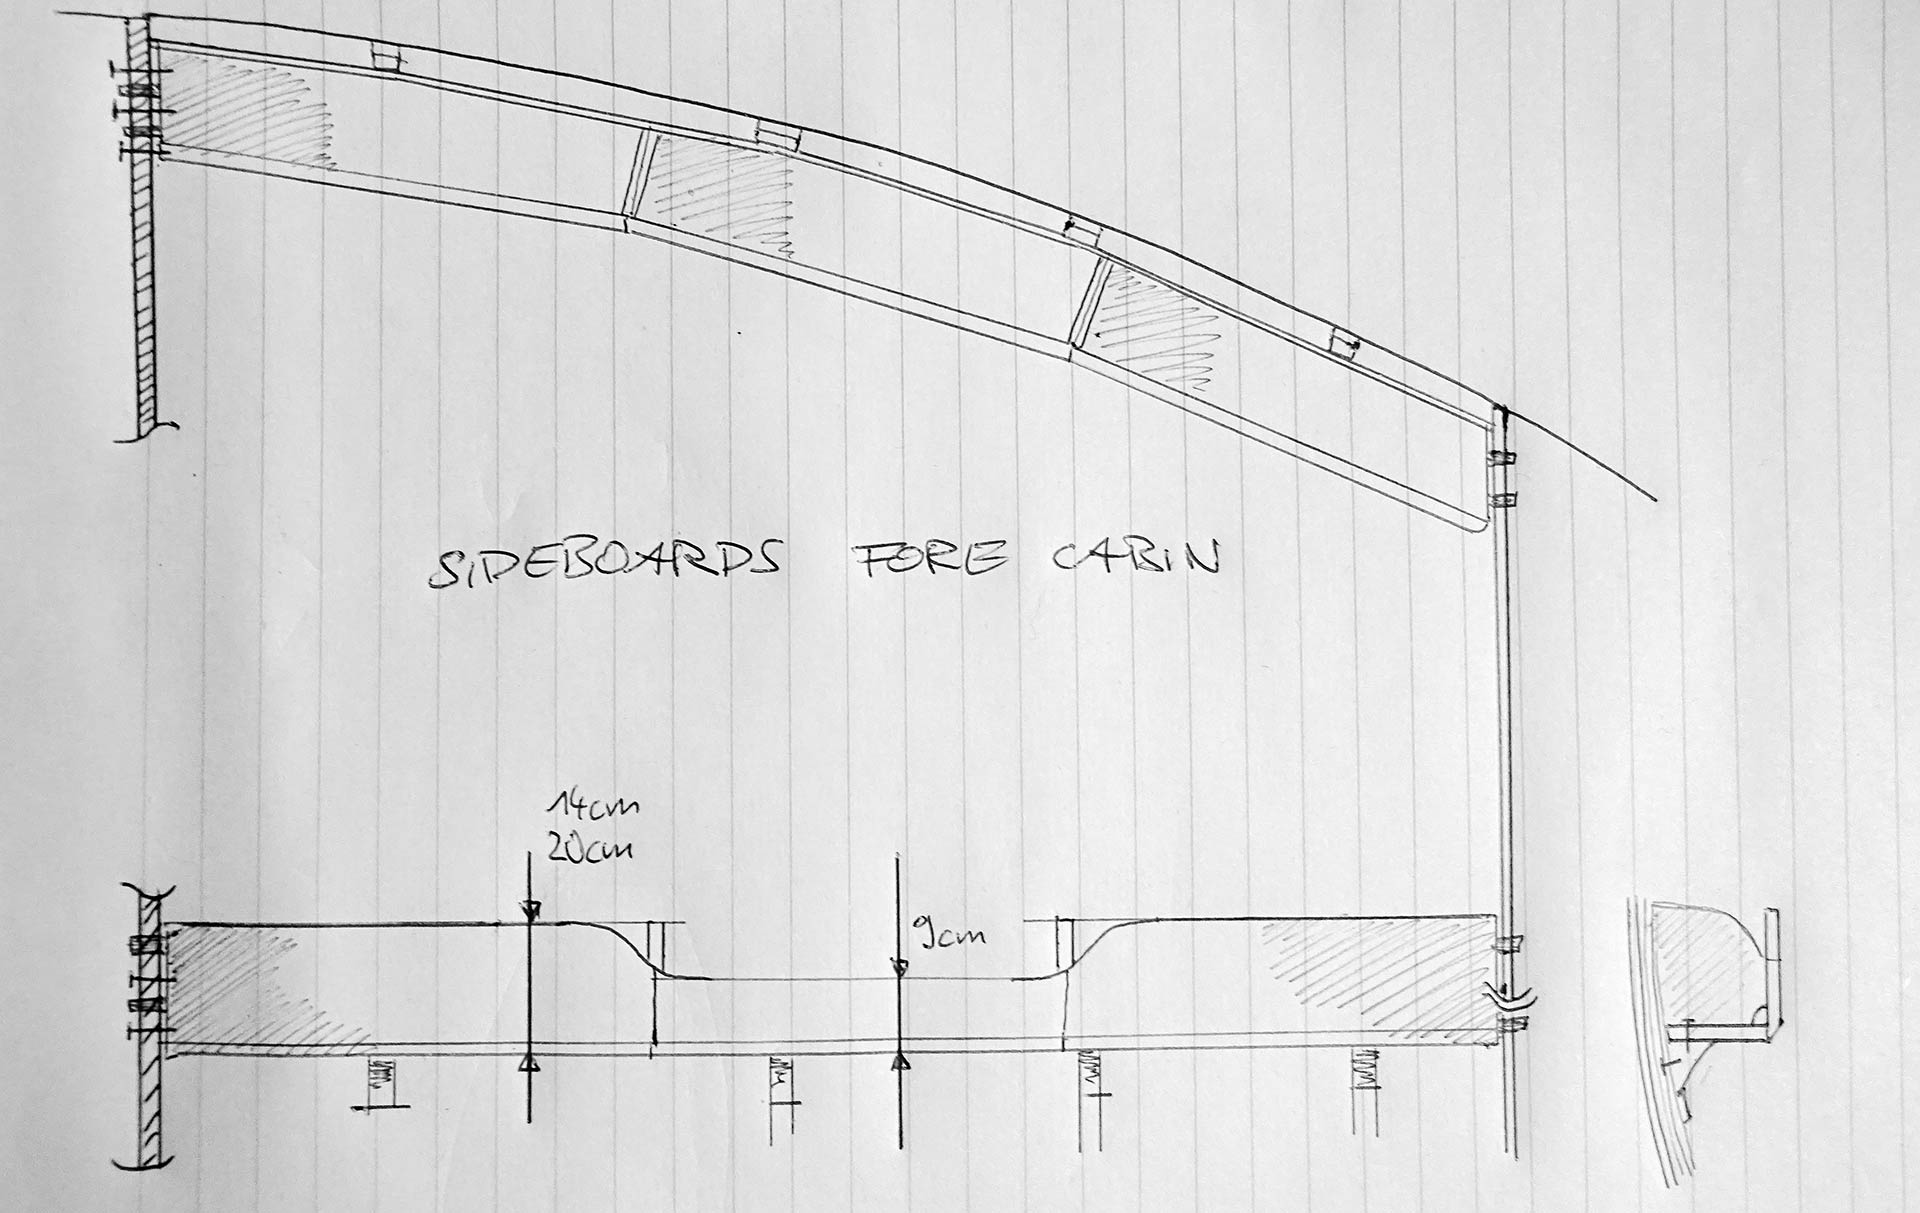
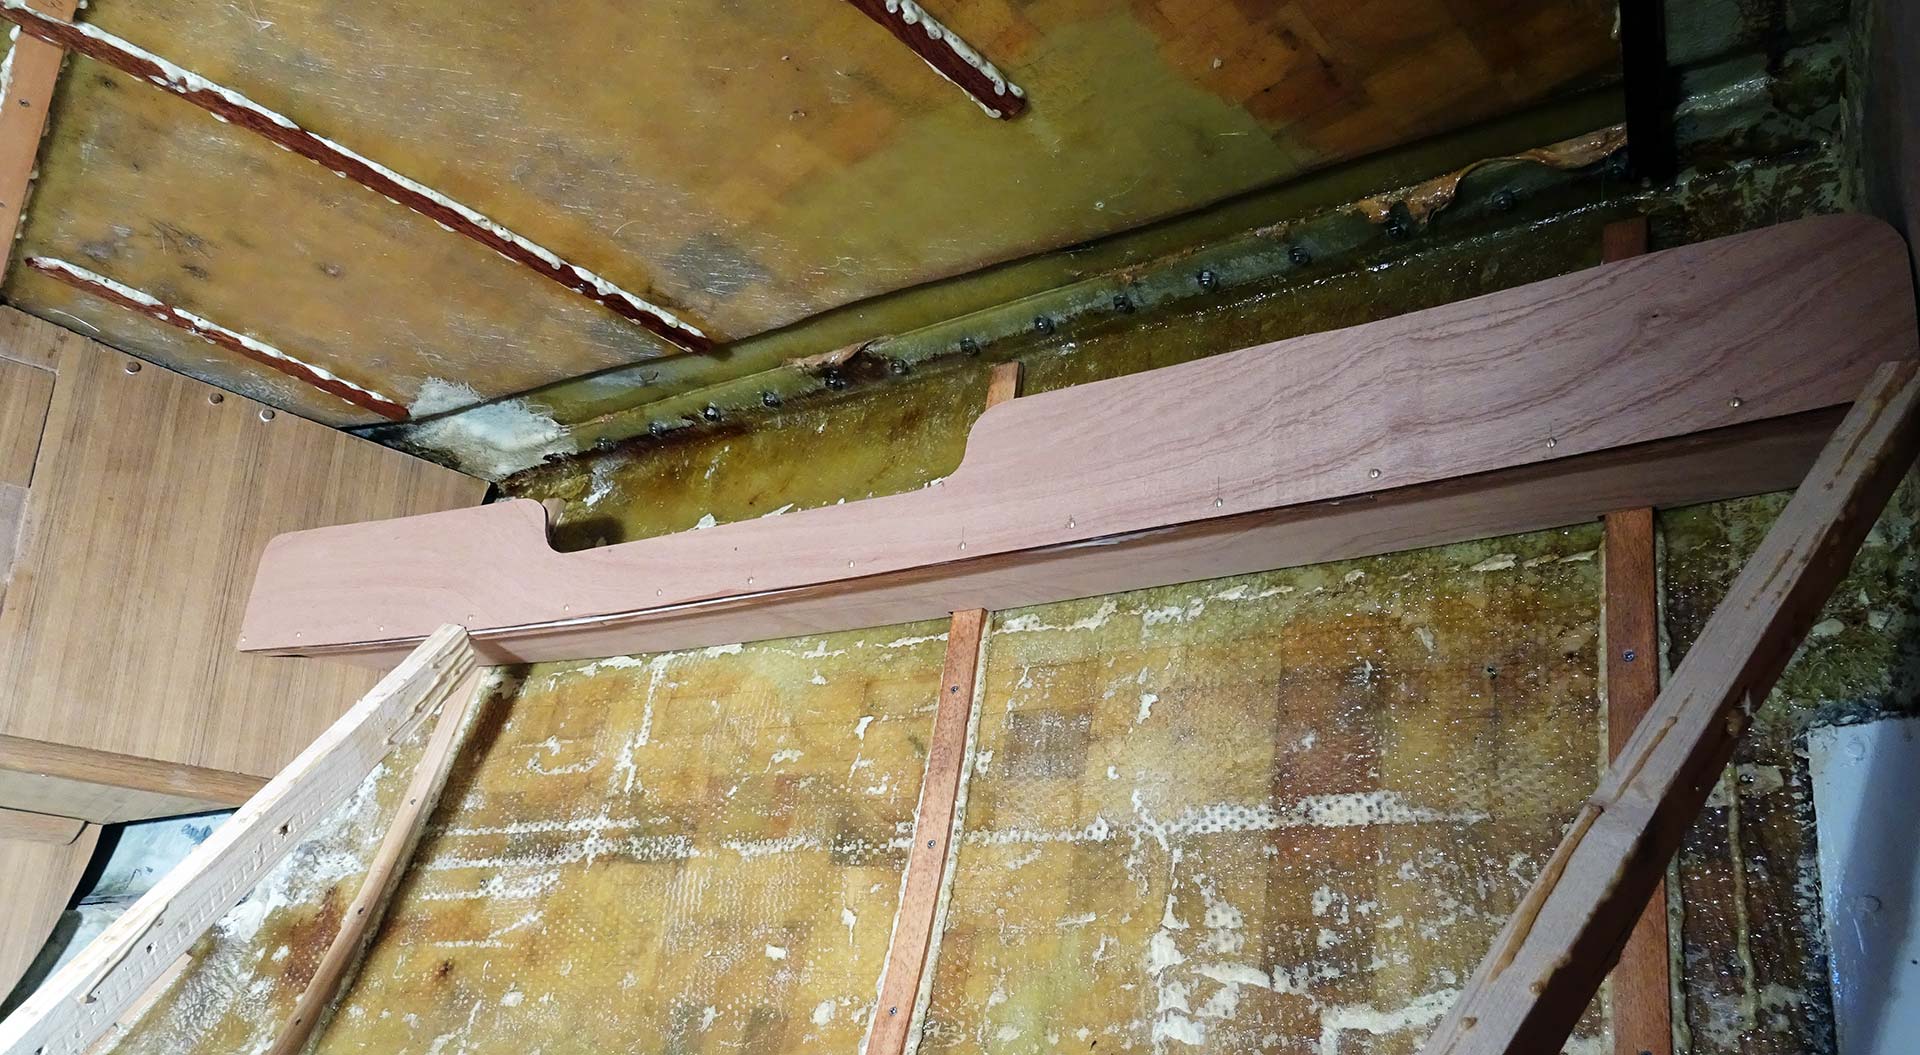
To fasten the cupboards to the substruction I will use stainless steel angle brackets on the upper side of the cupboards which will then later be covered by Teak-made angles which will at the same time function as separating elements for the then three compartments of each cupboard. To the underside of the cupboards I will fit massive Teak angle brackets I was cutting out of surplus – otherwise waste – Teak material. Nicely round sanded they will add a very nice look to this construction.

Perfect fitting and basic groundwork for Teak ceiling
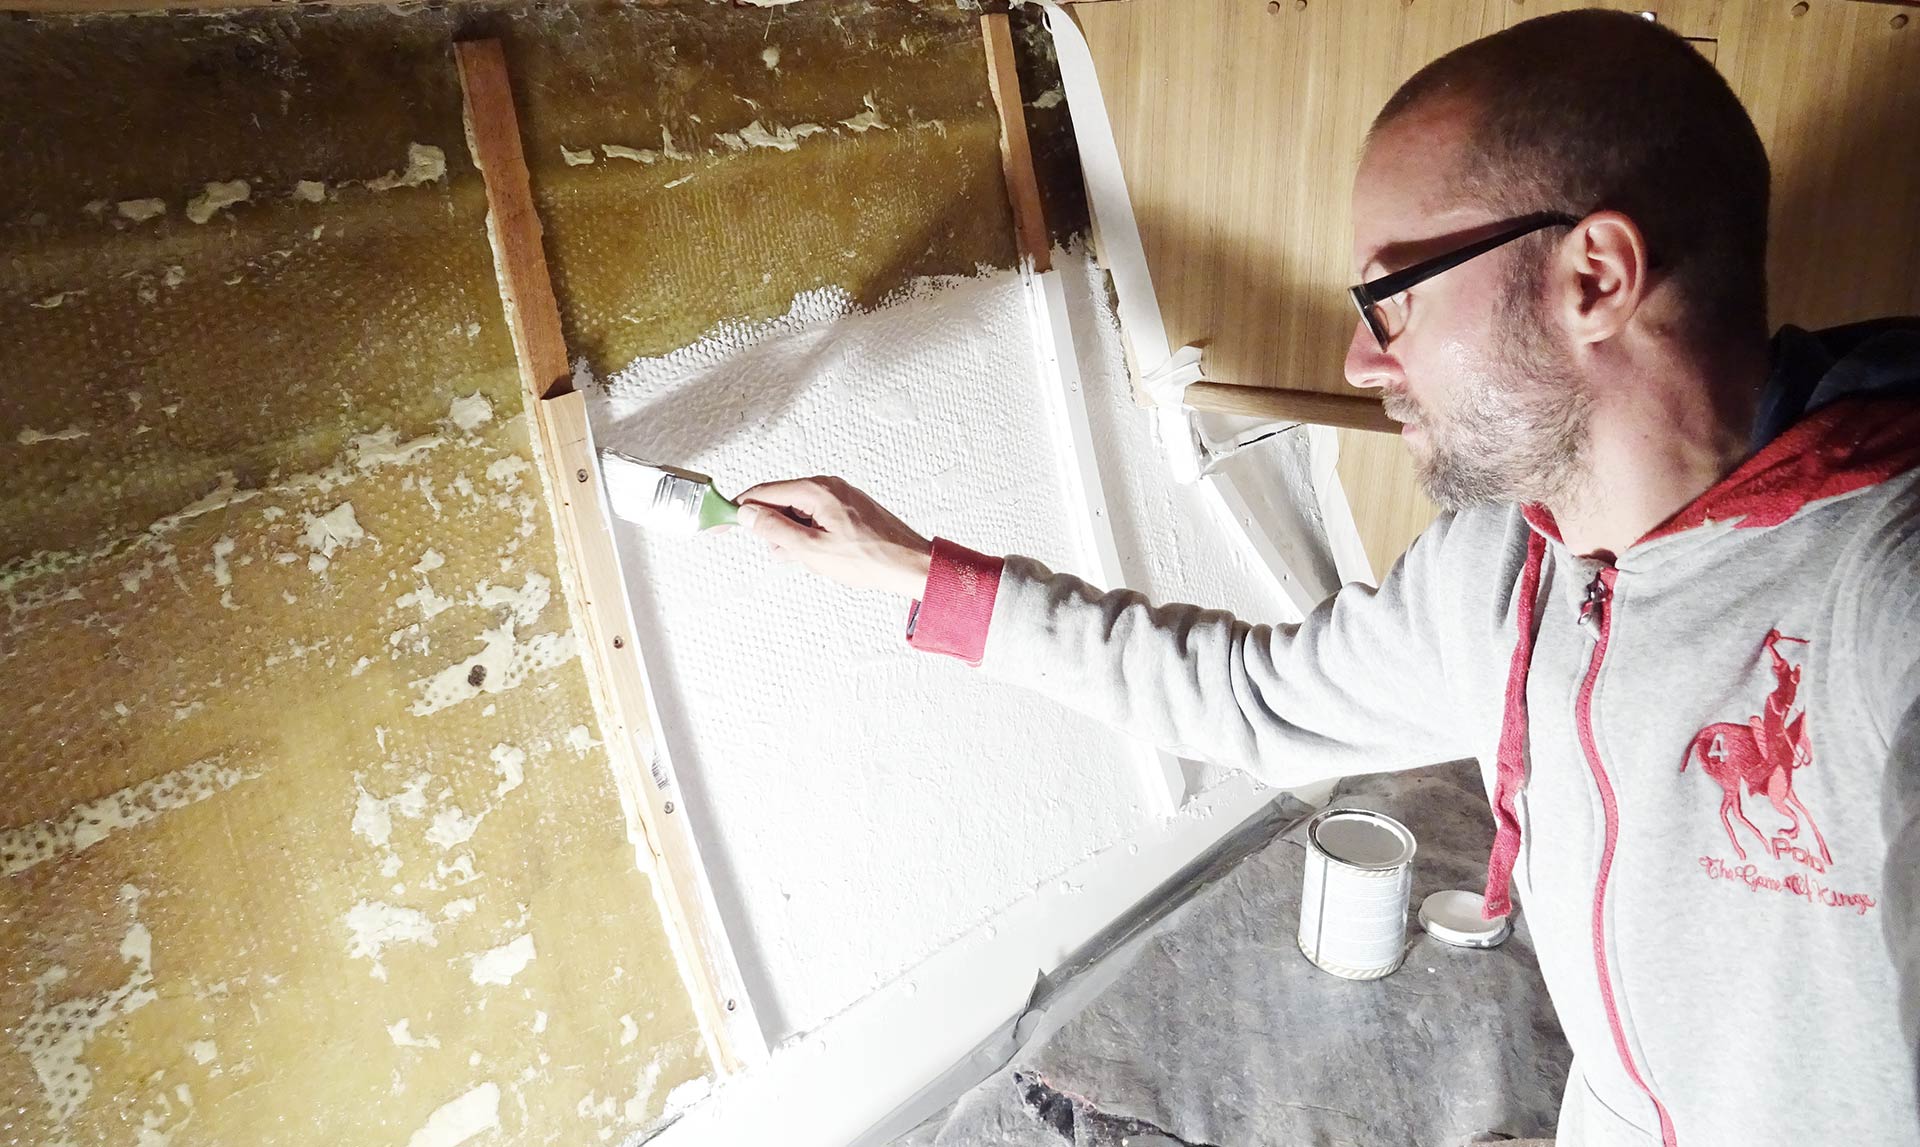
Last but not least I took out white TopLac paint again and a brush to paint the ship´s sides in Yacht white. That´s because in this area I am going to apply massive Teak batten to form a nice ceiling like I have done in the saloon. As I am going to let seams of 2 to 3 millimetres between each Teak batten to allow a free flow of ventilating air, I want the background of the Teak ceiling to shine nice and white. It will just be a barely visible feature but I love the idea of this detail.
In the end I am very satisfied with the overall progress of the front cabin refit. Again, a proper joiner or boat-builder would have done a far better job but considering my amateur-status in boat building I think the level of quality of my handcraft works is sufficient, at least acceptable for myself as it makes me proud what I have achieved so far. And the level of interior built quality is far better than the status quo when I was buying my yacht in the first place so that´s a progress in the end.
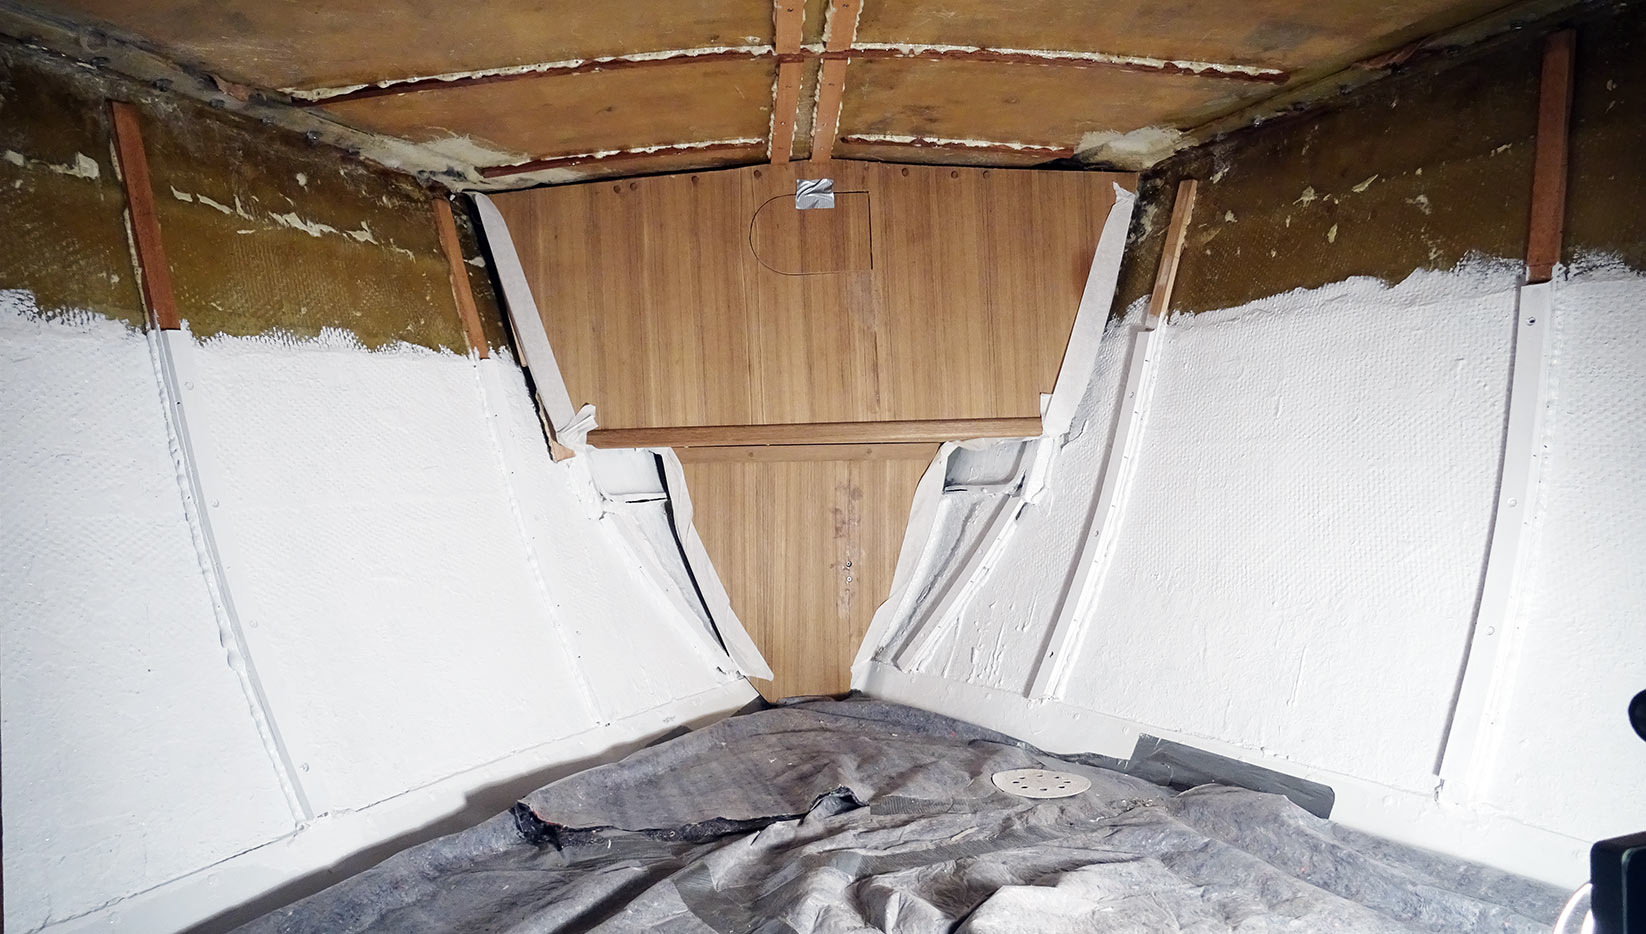
Next steps will be adding a second layer of white paint to the ship´s sides, attaching the roofing panels of the front cabin first of all, secondly the mounting of the cupboards, making the side panels as well as finally begin to mount the Teak batten for the ceiling. Then it´s just some minor details like decorative Teak stripes for the roofing and framing-panels for the anchor chain locker cover. I figure I will be finished with the front cabin raw refit sometime around November this year. Nice!
You may also like these yacht refit-articles:
What a project: Making roofing new panels Parts 1, 2, 3, 4, 5, 6 and 7