This has been truly a very busy weekend as I was working some 11 net hours in the yacht, something I rarely do. Maybe that’s due to the fact that the current phase of the refit of my King´s Cruiser 33 is slowly but surely coming to an end? Things fall into place and that is really motivating – I hope I can keep up the pace now and finish working on the roofing panels soon. Here´s what I´ve done so far: The substruction made of Oak batten was the first to do (read it here), then it was taking the measurements of the roof area by means of cardboard gauge models (read it here) and making the actual panels from Birch tree plywood. After having waterproofed the plywood panels on the outside with Epoxy and having painted the nice side in yacht white the panels had been fitted. A tedious work and I learned so much about this kind of joinery that the outcome of the work got better and better every time another panel had been screwed and glued to the ceiling.
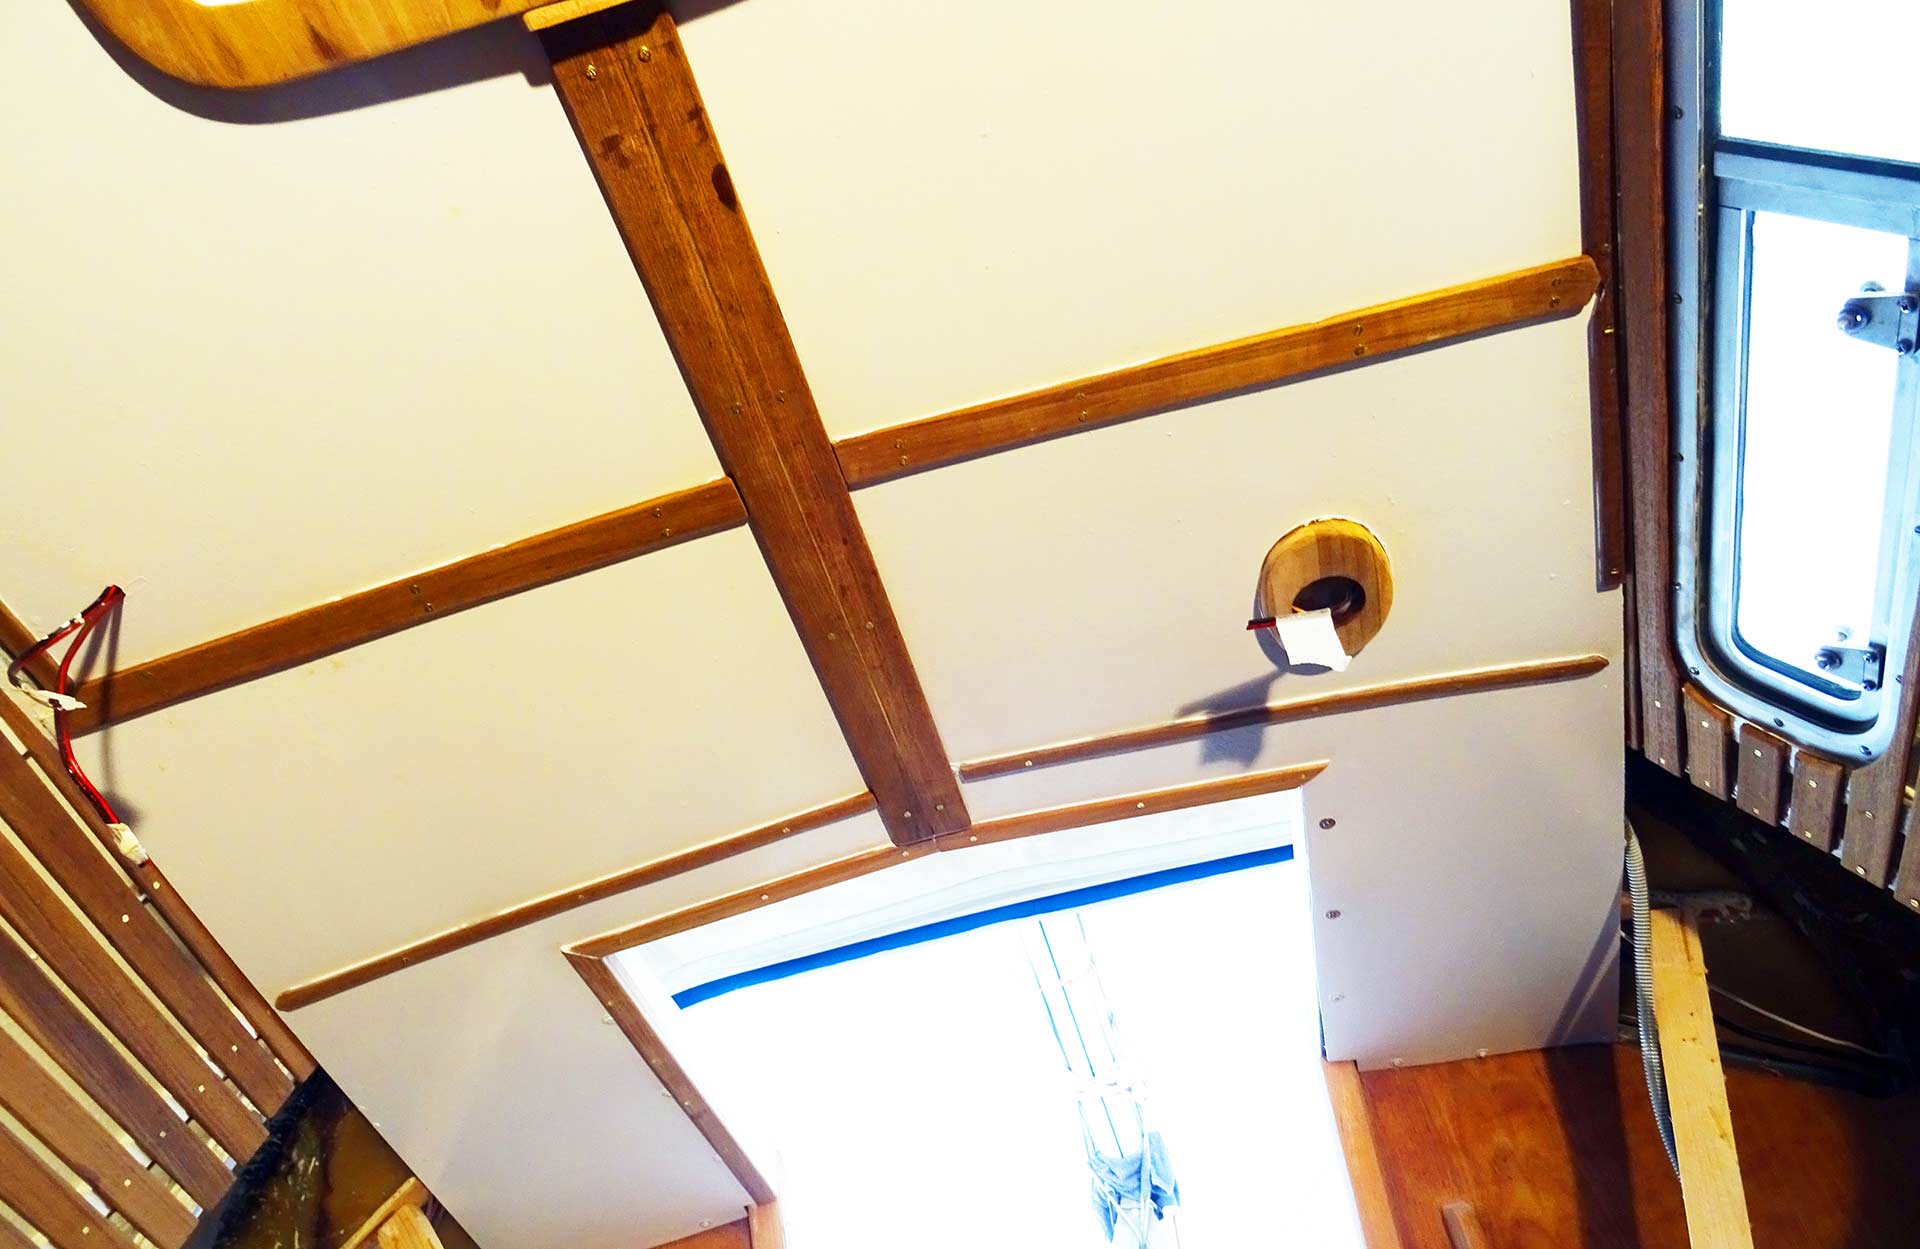
Finally it´s decorative Teak stripes and the entryway Teak framing I was mounting last session (read it here) and that is how I´ve left the boat since then. A huge leap forward in the general appearance of the yacht for sure. I really like the big framing of Teak in the entryway coming down. That looks just massively awesome! Another detail I love is the Teak plinths for the LED-lights on the panels (actually made of offcut Teak – useful waste I would say, read more here). What´s up next for the already half finished areas? It´s Pantera I am going to fill in every seam between panel and Teak stripe (that will be a fuzzy work!) and of course the final layer of white paint. Anyway, that have been the easy panels, but there´s more to come …
The last Corners – are the most difficult ones

The last corners above the galley and the chart table in the navigation station are the toughest ones. Besides, Galley and quarter berth are actually the most difficult ones as it is a very, very narrow and cramped situation working there: I couldn´t even take off the old faux leather covering and so a decision was made. I simply let go of the last corners which I really cannot refurbish in a nice way. I´ll try to refurbish those corners up to a point where it starts to hurt and that´s really it. Not all can be done nicely in my yacht, it´s simply too cramped.

Here in this area a lot of recess holes for the screws to fit the winches are situated. That´s another reason why I can´t simply put shiny new panels in front of it. There´s an item on the refit-list called “standing rigging and winches” and this will mean I´ll certainly have to unscrew the winches and set them up in a new way: Rock solid panels, mounted to last forever isn´t a good idea in those areas in the first place. So I just paint everything nicely white and hope that my guests will fall for the trick and just look at the general refurbished areas overhead in the saloon.
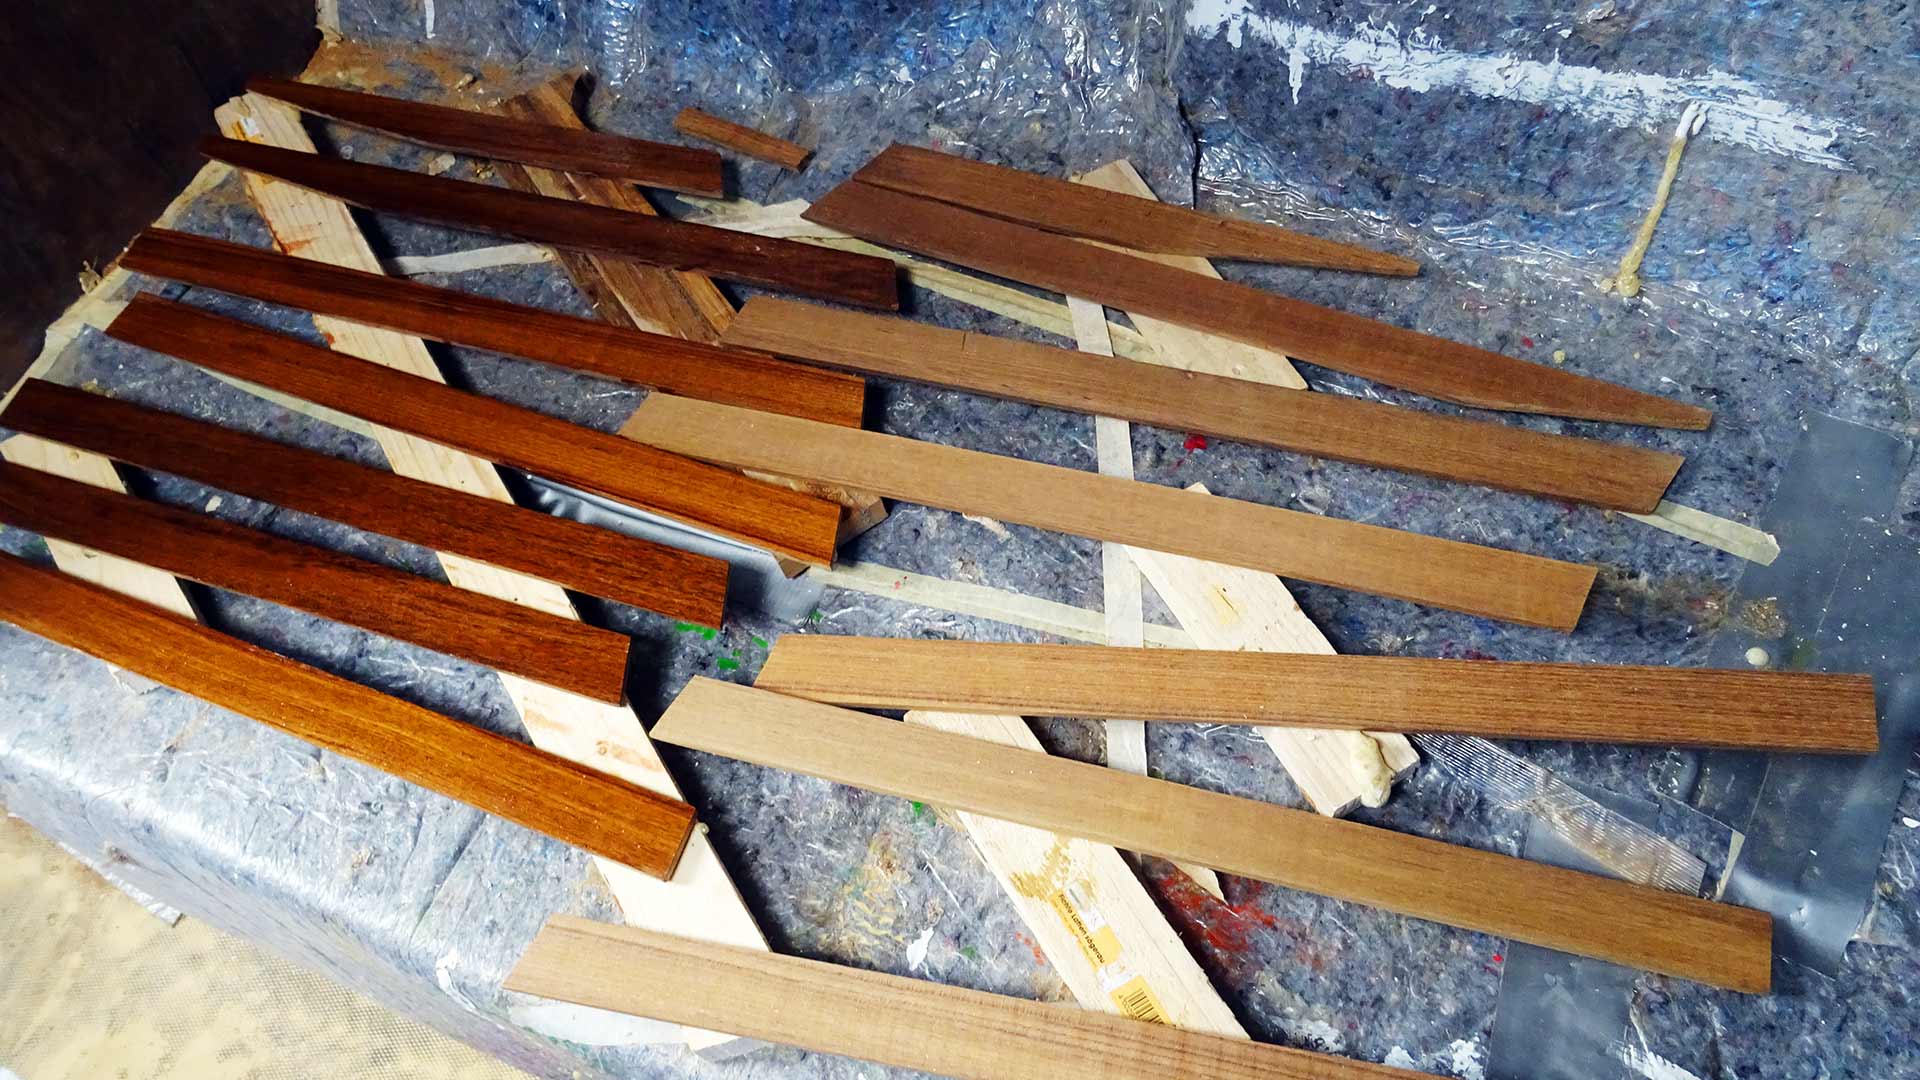
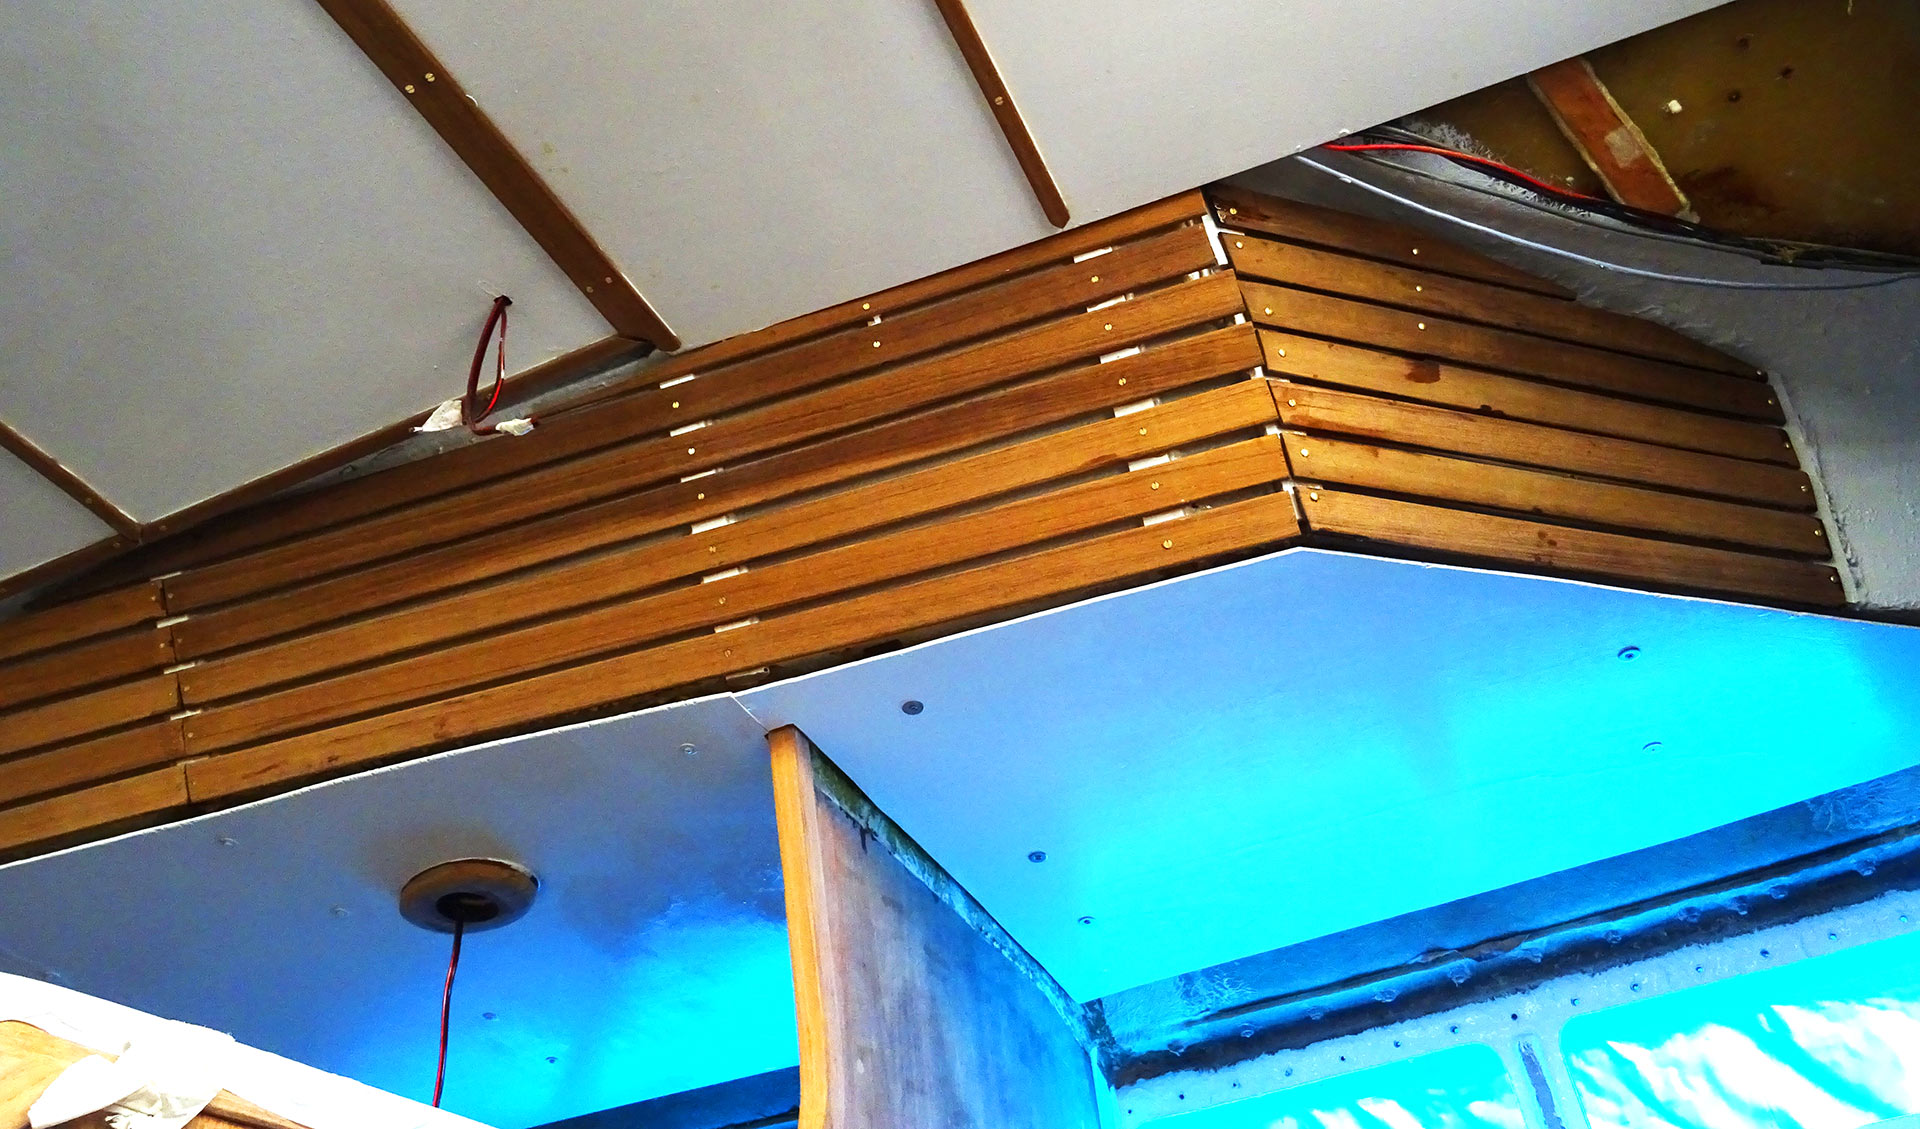
But for the corner´s ceiling there´s a challenge: How to cover a bent surface with straight batten? Well, that´s impossible and so I have made the decision to simply cover the whole area by straight components – speaking of the Teak ceiling and the panel. Taking measurements is a no-brainer now since these are my tenth or so gauge models, initial fitting of the last panels was an instant GO! Cutting the Teak batten as well, as I have done a nice job with the Teak ceiling in the saloon some months ago (read it here). Each Teak batten has a dedicated place and fit and number. The backsides are waterproofed by Epoxy and then the batten are screwed and glued in place. One by one.
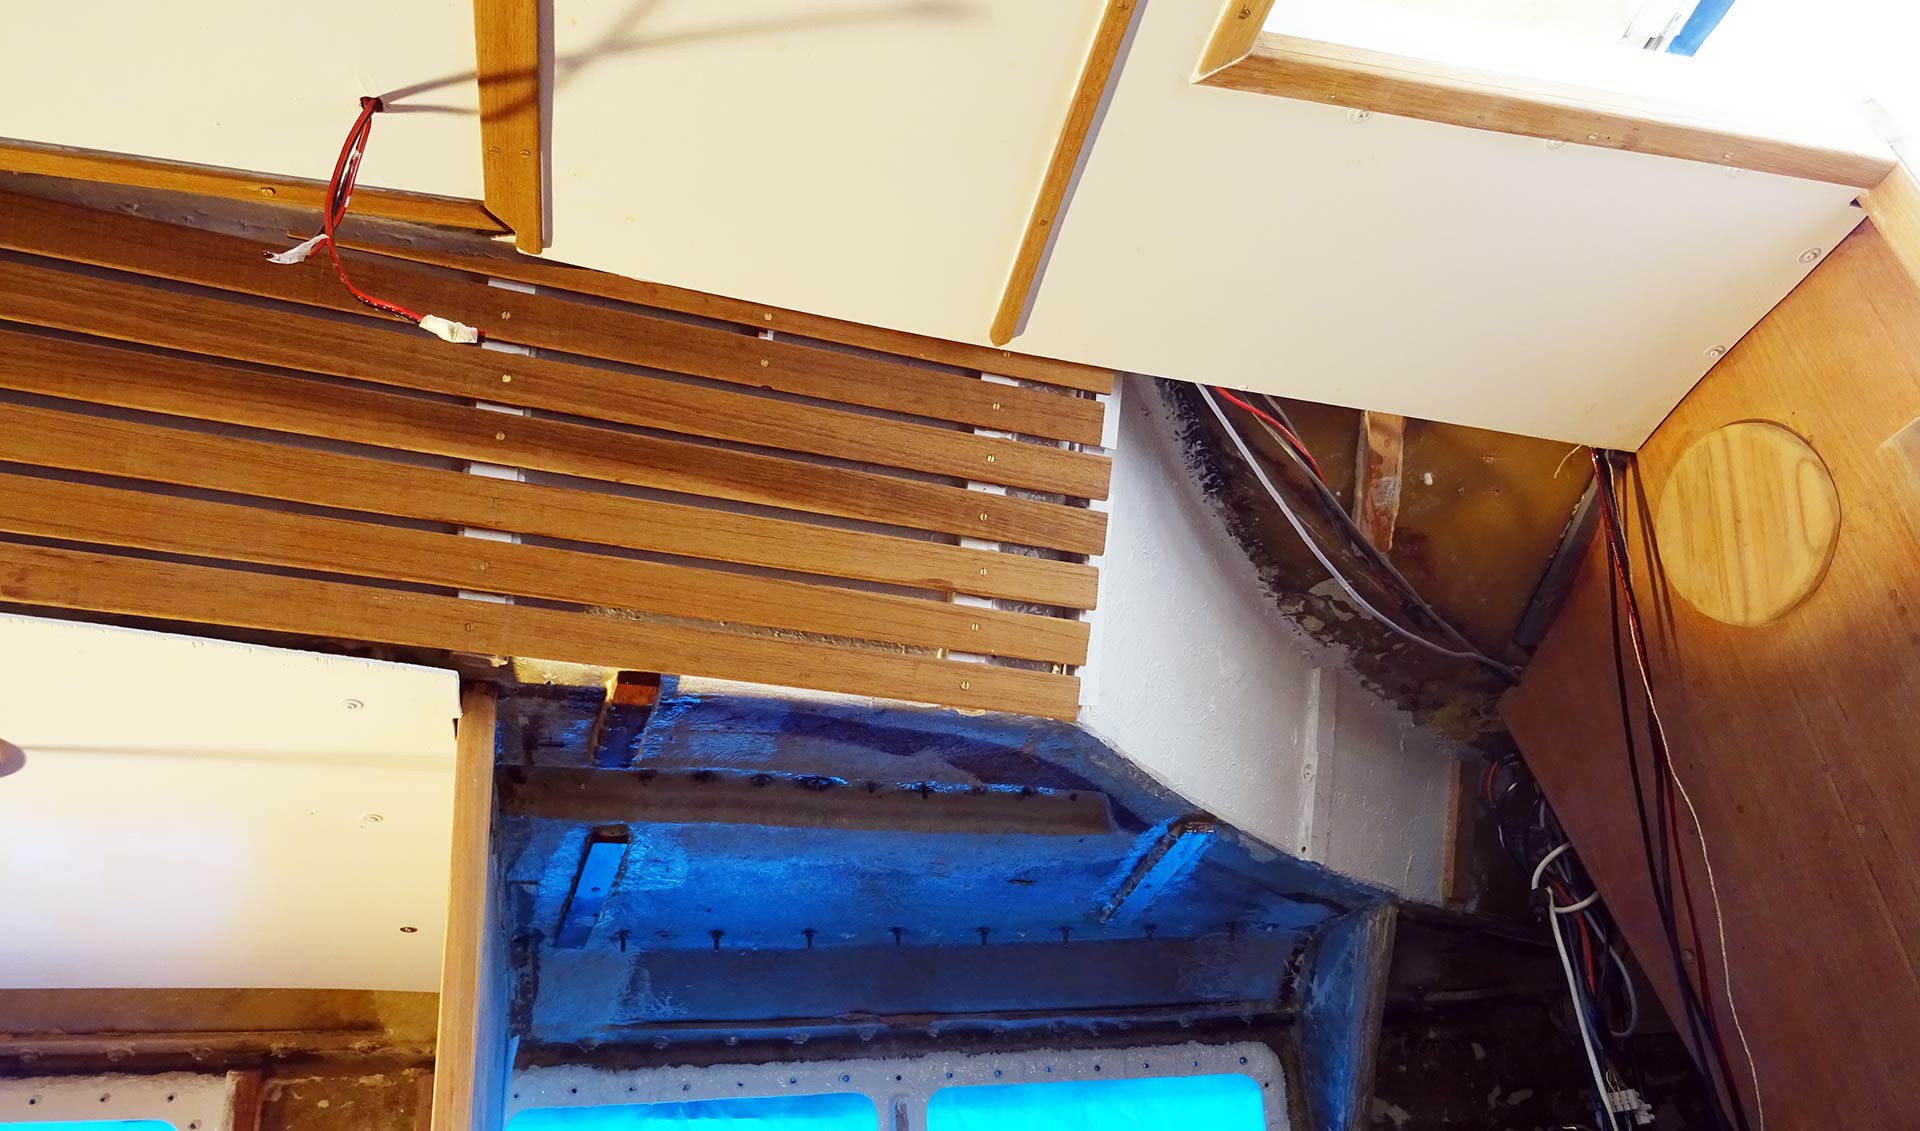
The brass screws are drilled into holes which I have been pre-drilled by the smallest possible drill-bit: Teak is a very soft and weak timber and has the tendency to break and split when screwed and that’s screwed than in the very meaning of the word – every Teak batten lost is a real pain in the ass since this is a very expensive material to work with. I loose very seldom a batten, but it happens.
As one side is finished I am doing the opposite side and that is where the last drill bit (1 mm) breaks while utilizing and since it´s Sunday the hardware stores are closed and I have to shut down work and postpone the finish of this item until next session. That´s a blowback but this is also part of the game. Well, let´s switch then to another part of the work: Panel making.
Making the Roofing Panels for the Galley
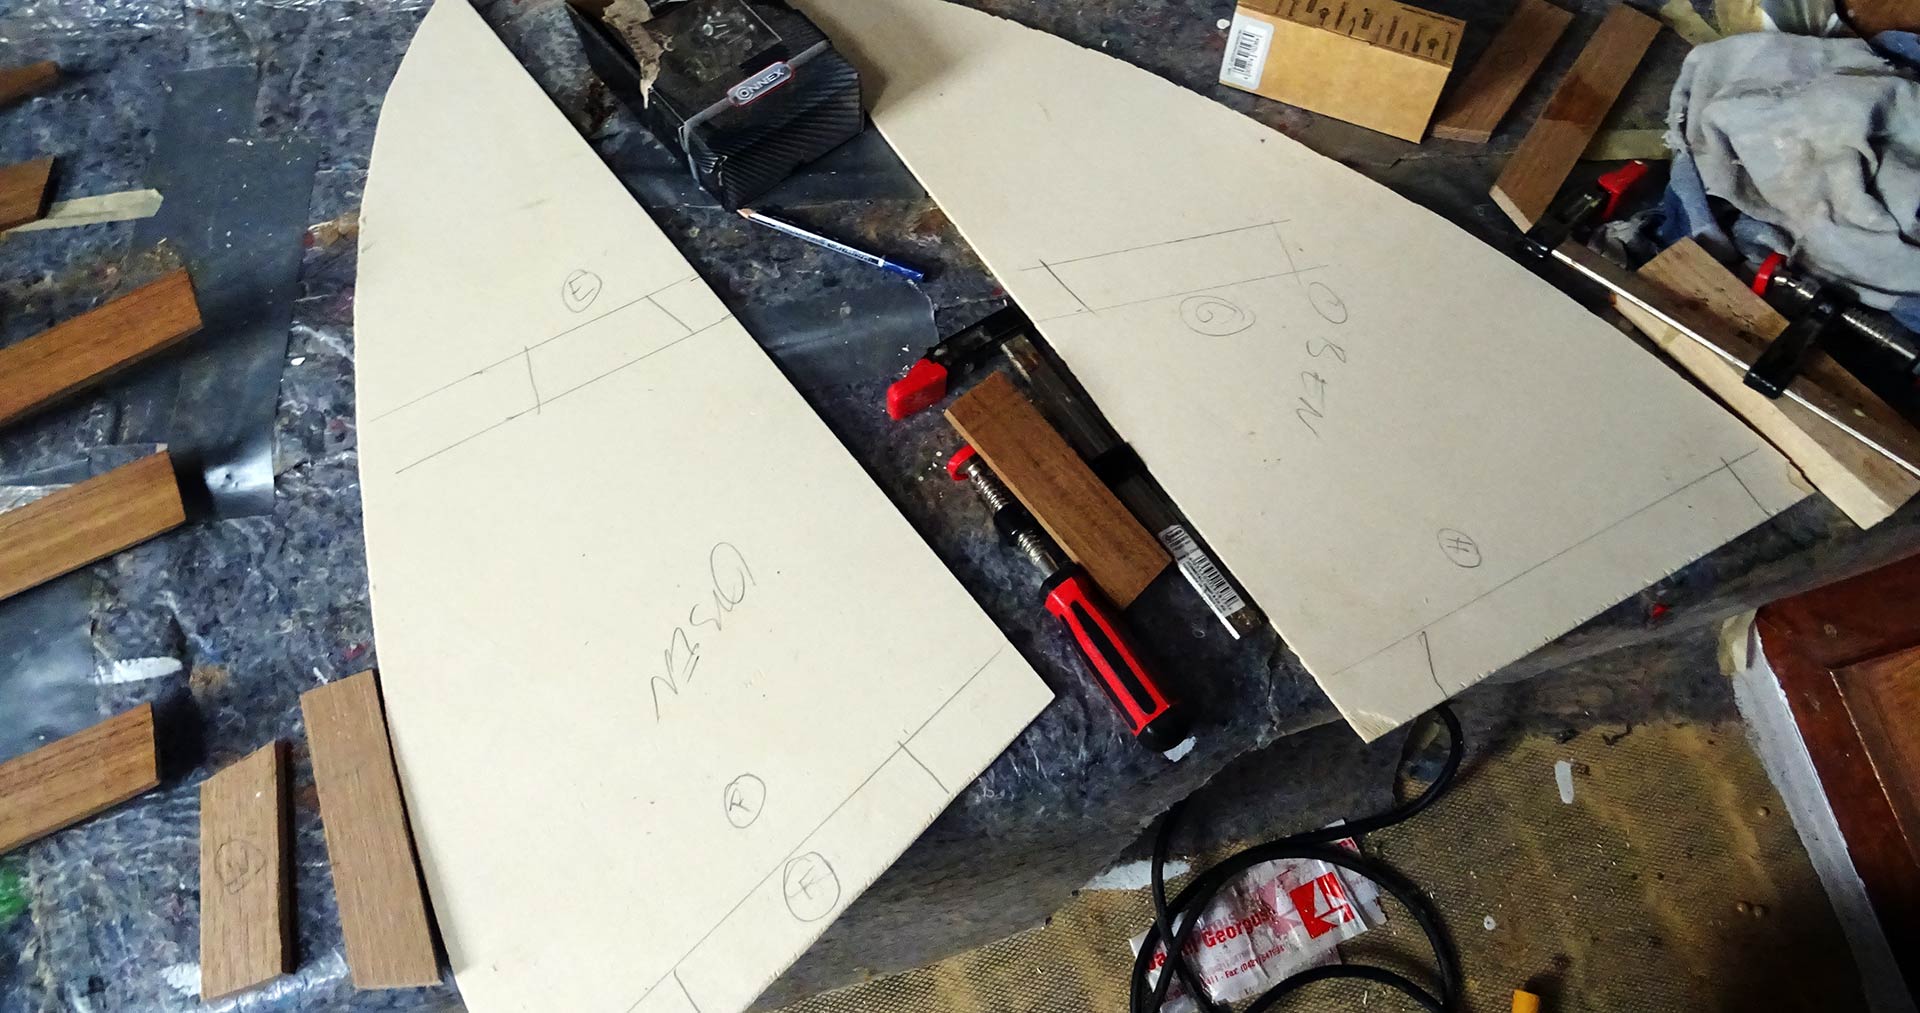
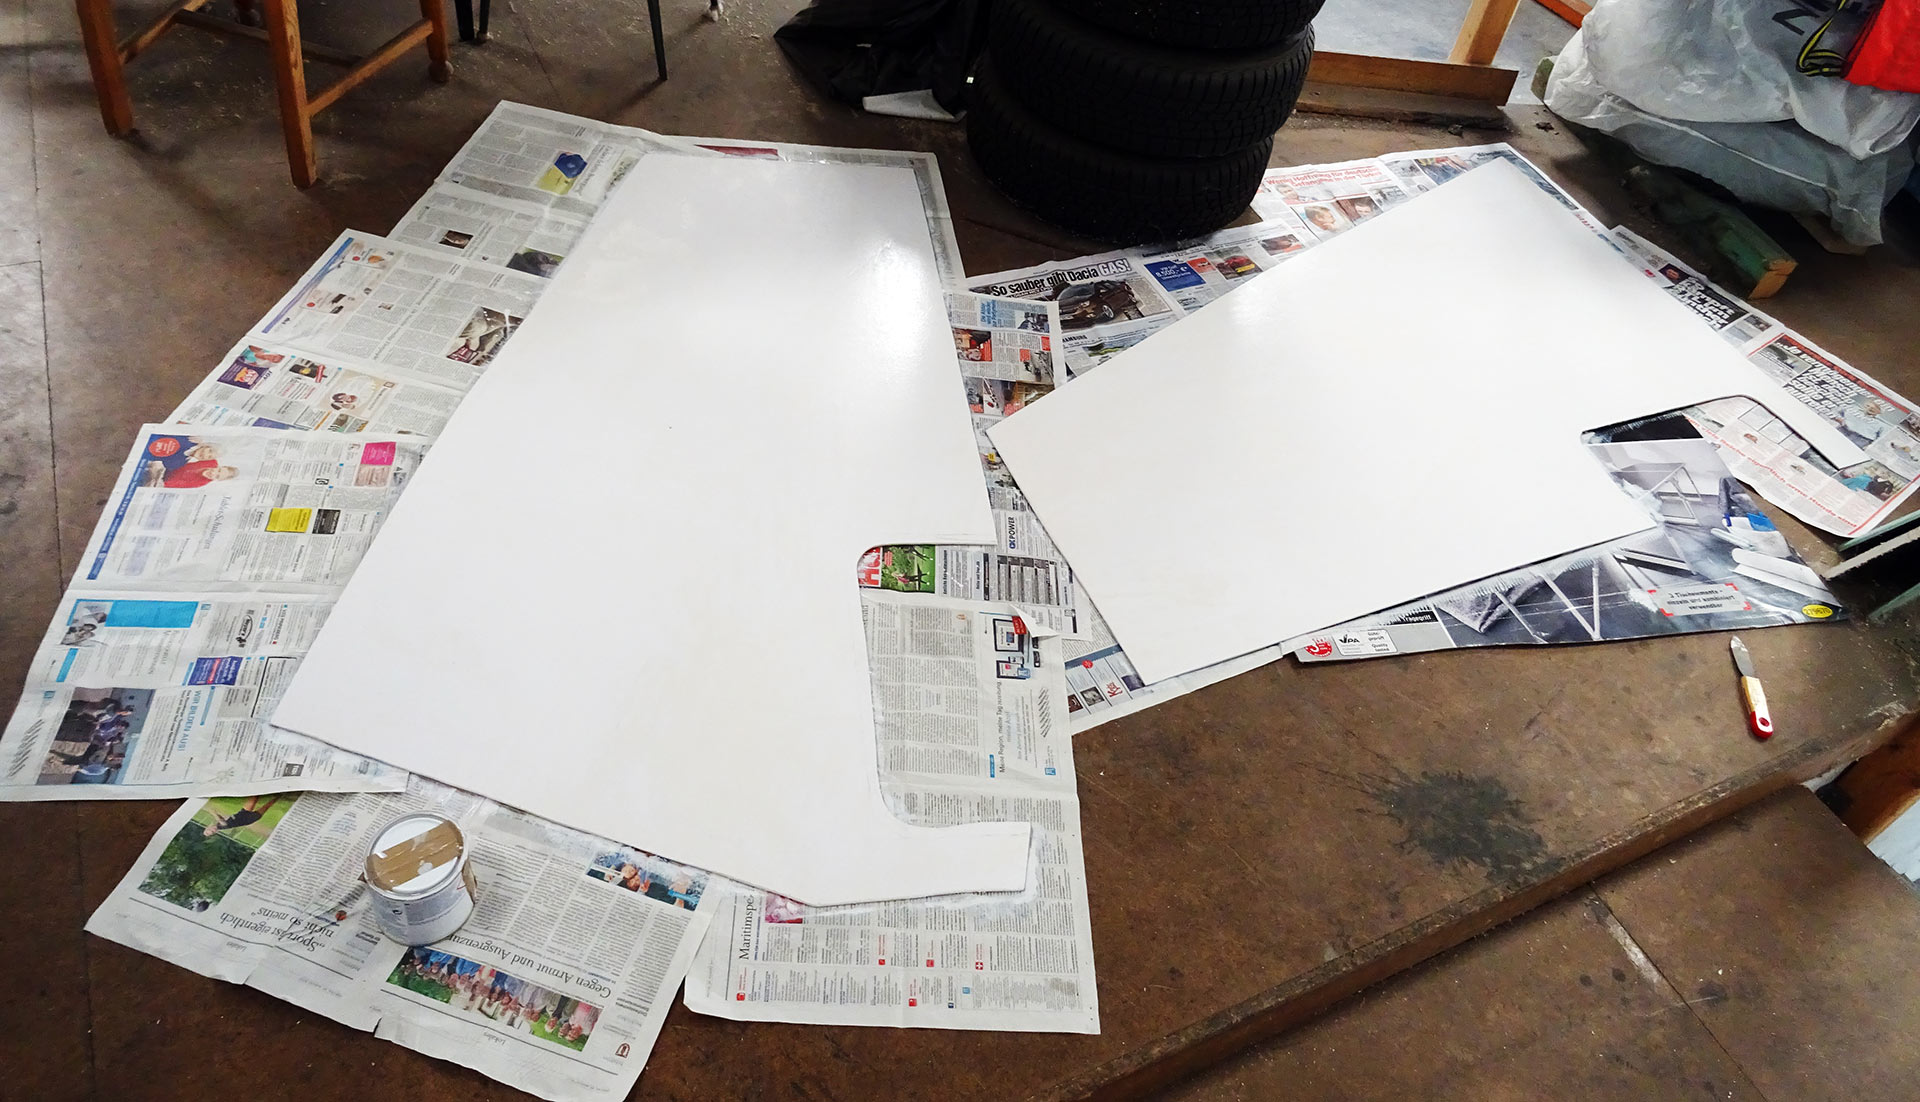
I can´t believe it: These are the last four panels of the whole saloon and then it´s done! What a great perspective! I am working on this item work more than 200 net hours now and slowly things fall into place. Great! The big two overhead panels for the navigation area and the galley are produced very fast and efficiently. The smaller two panels need more time as they will cover a very exposed area (everybody entering or leaving the boat will see them) so I invest a lot of time and some cardboard gauge models to make them the best possible way.
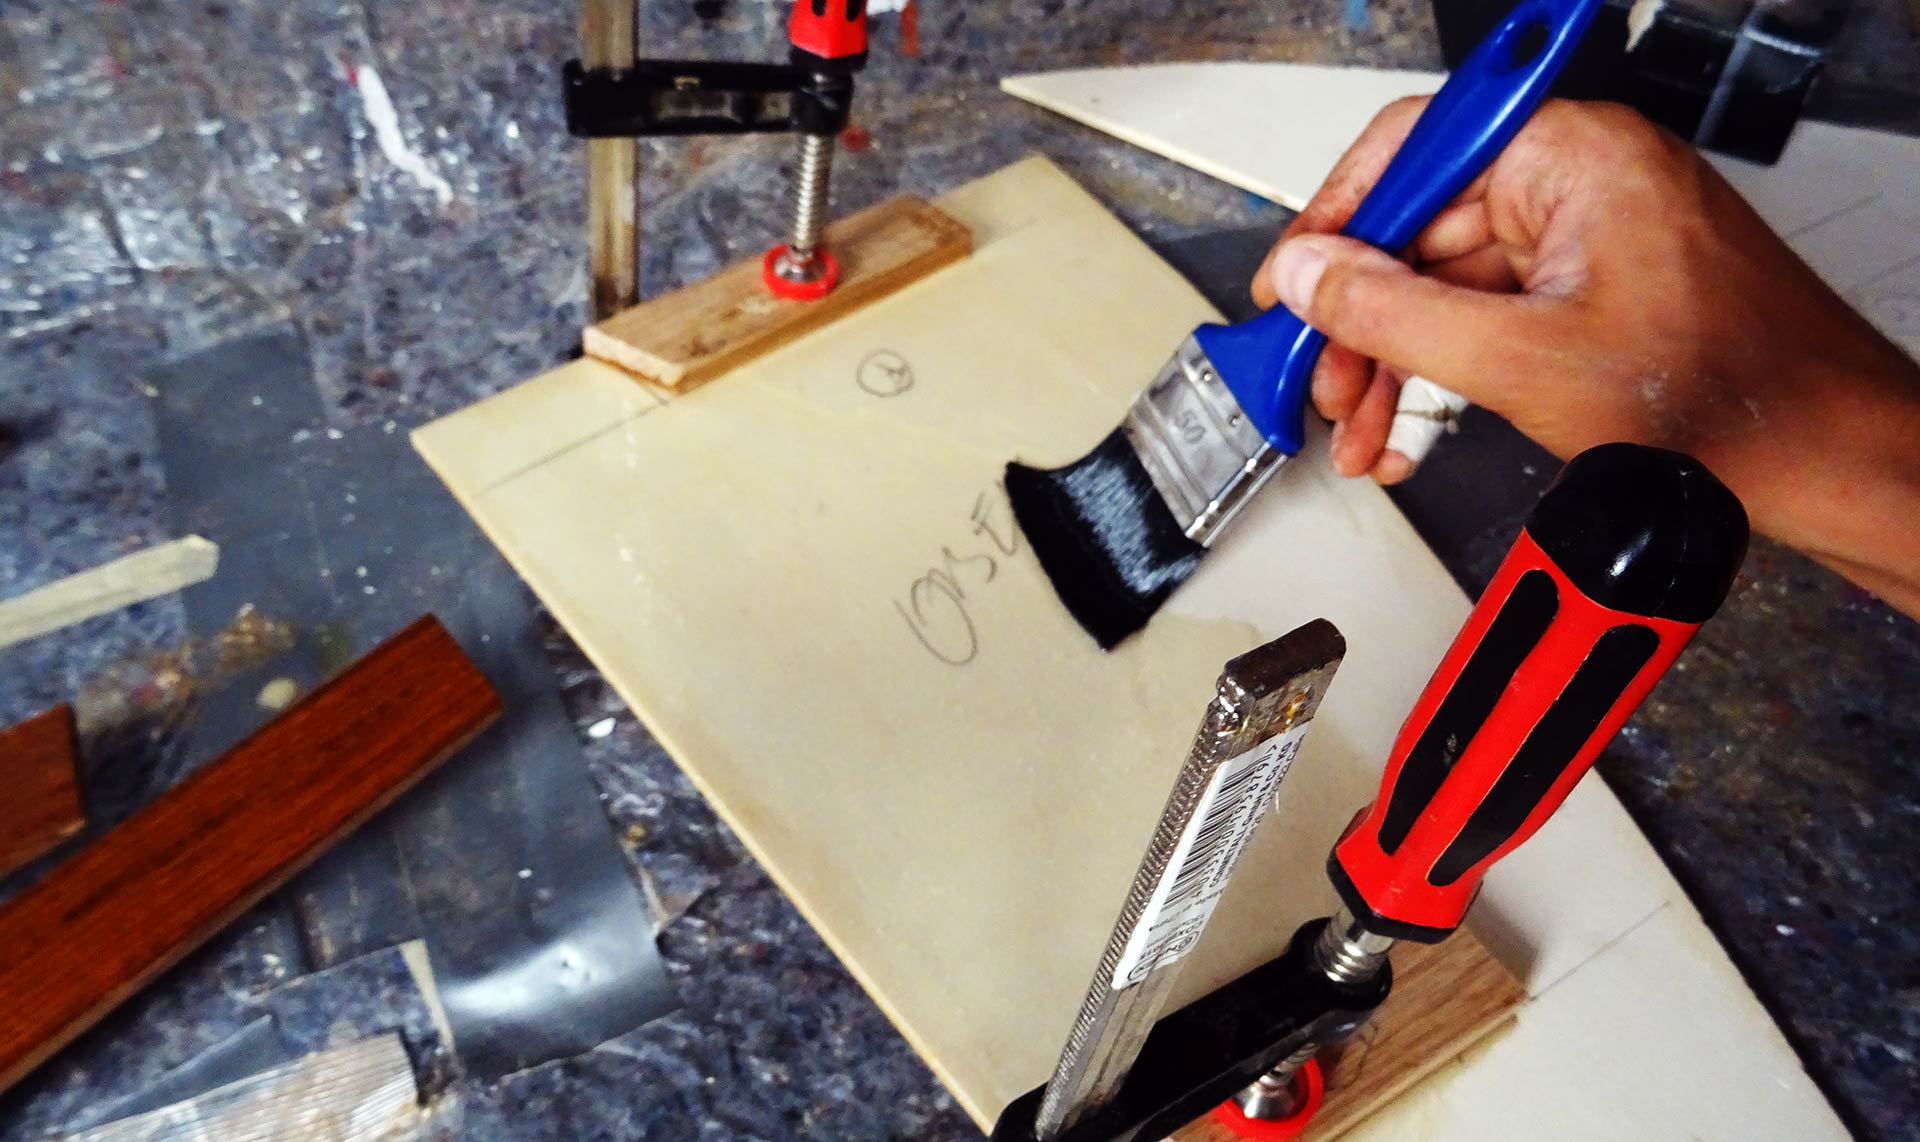
Then it´s again waterproofing with Epoxy and fitting of the Oak batten-parts on the backside of the panels. Those Oak tree batten have two tasks: First it´s adding strength to the 4 millimetres of not so strong plywood and second these are the areas where the screws are drilled and the panels are finally mounted to the corresponding Oak batten which I have previously fitted as substruction to the GRP roof. A very rigid and stiff construction method.
I am also hiding the electric wires for the LED lighting here, sometimes with plastic cable ducts as done with the big panels in the saloon (read about this here) and that is basically it. Sounds easy but this is really a tough way to go as the whole operation of refurbishing roofing panels in my sailing yacht is a general complex thing. There are so many different steps in the process and the area simply too big so that – say in the front – I have the finished panel ready to be fitted whereas in the back I am still working on the substruction. Lots of co-ordination needed and the brain cannot rest a minute here.
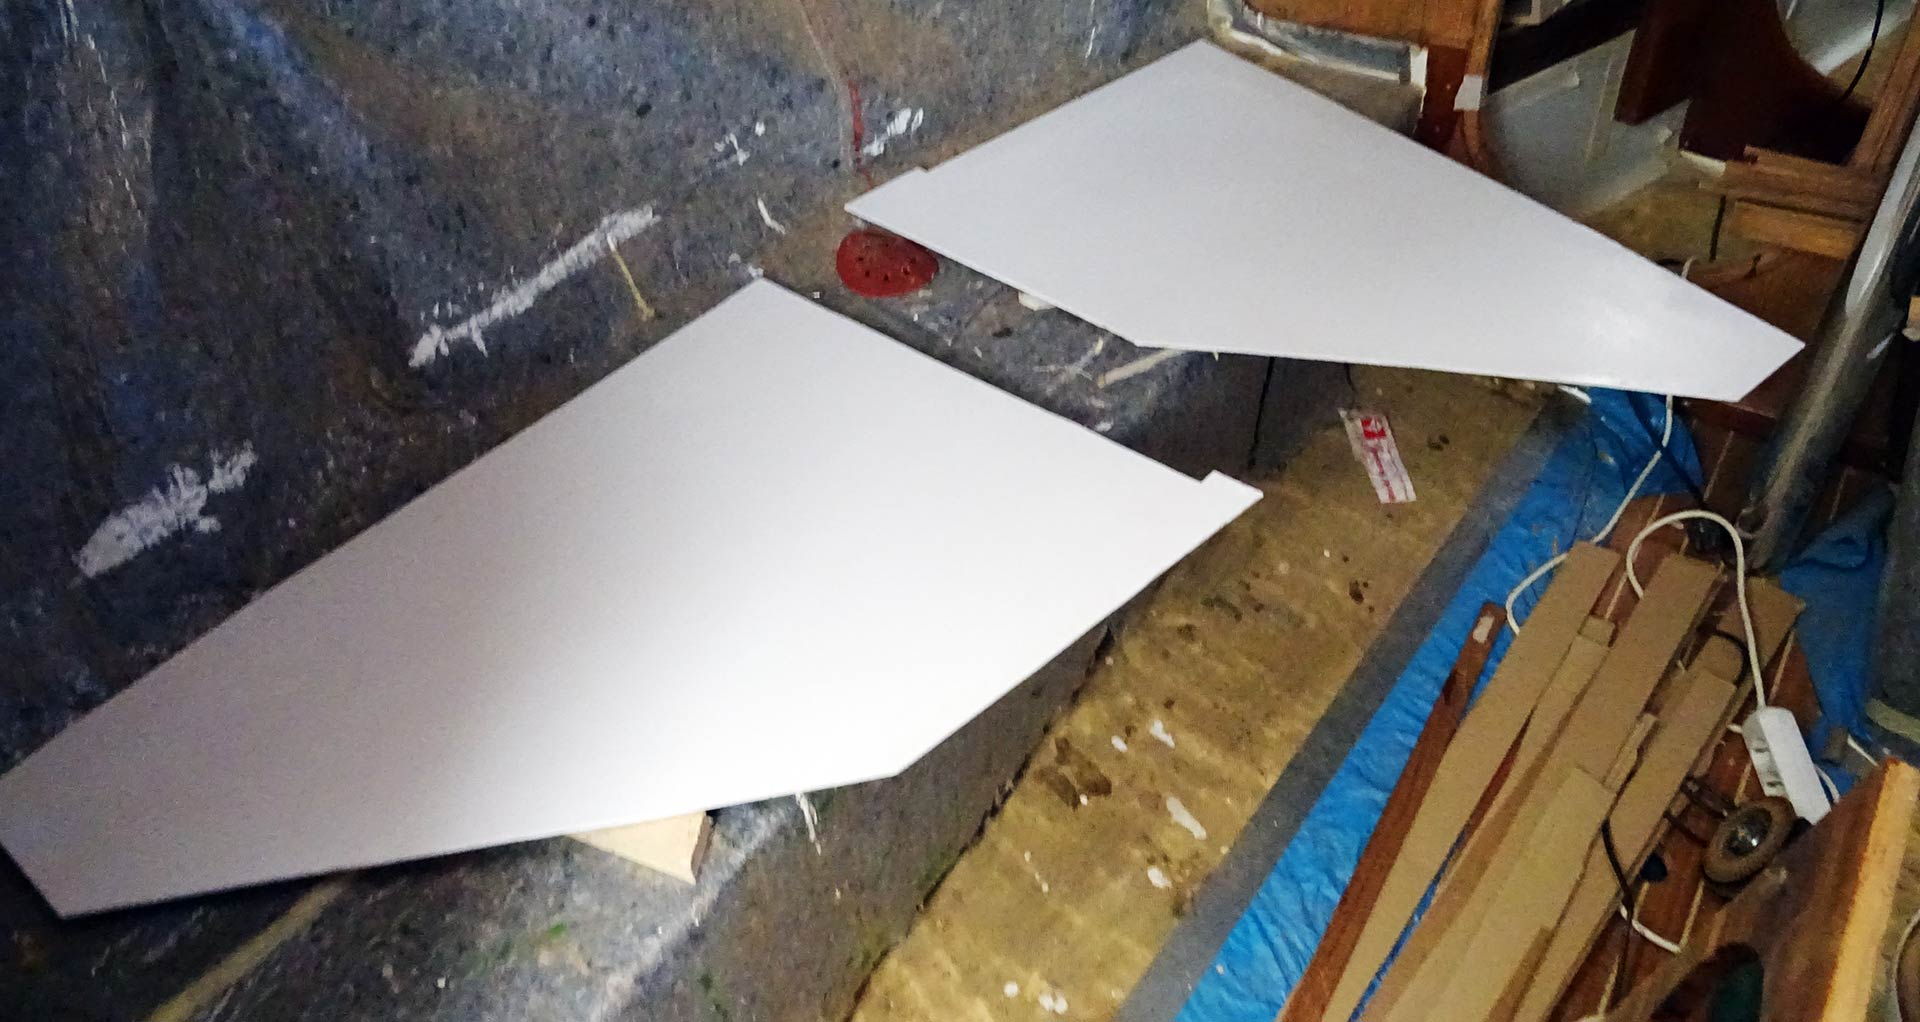
At last the remaining four saloon panels got their white paint – a sign that they are ready to finally be mounted to the roof. But there´s a special thing in the galley. The ship´s cook will need light. As you may have read in my article about the lighting concept of the boat (read it here) you may have noticed that there are quite some lights for the saloon (all in all 6 lights) and there´s a seventh light in the passageway directly above the cook´s working point. But that´s not enough: I need a light directly above the stove to see what´s happening inside the pans and pots.
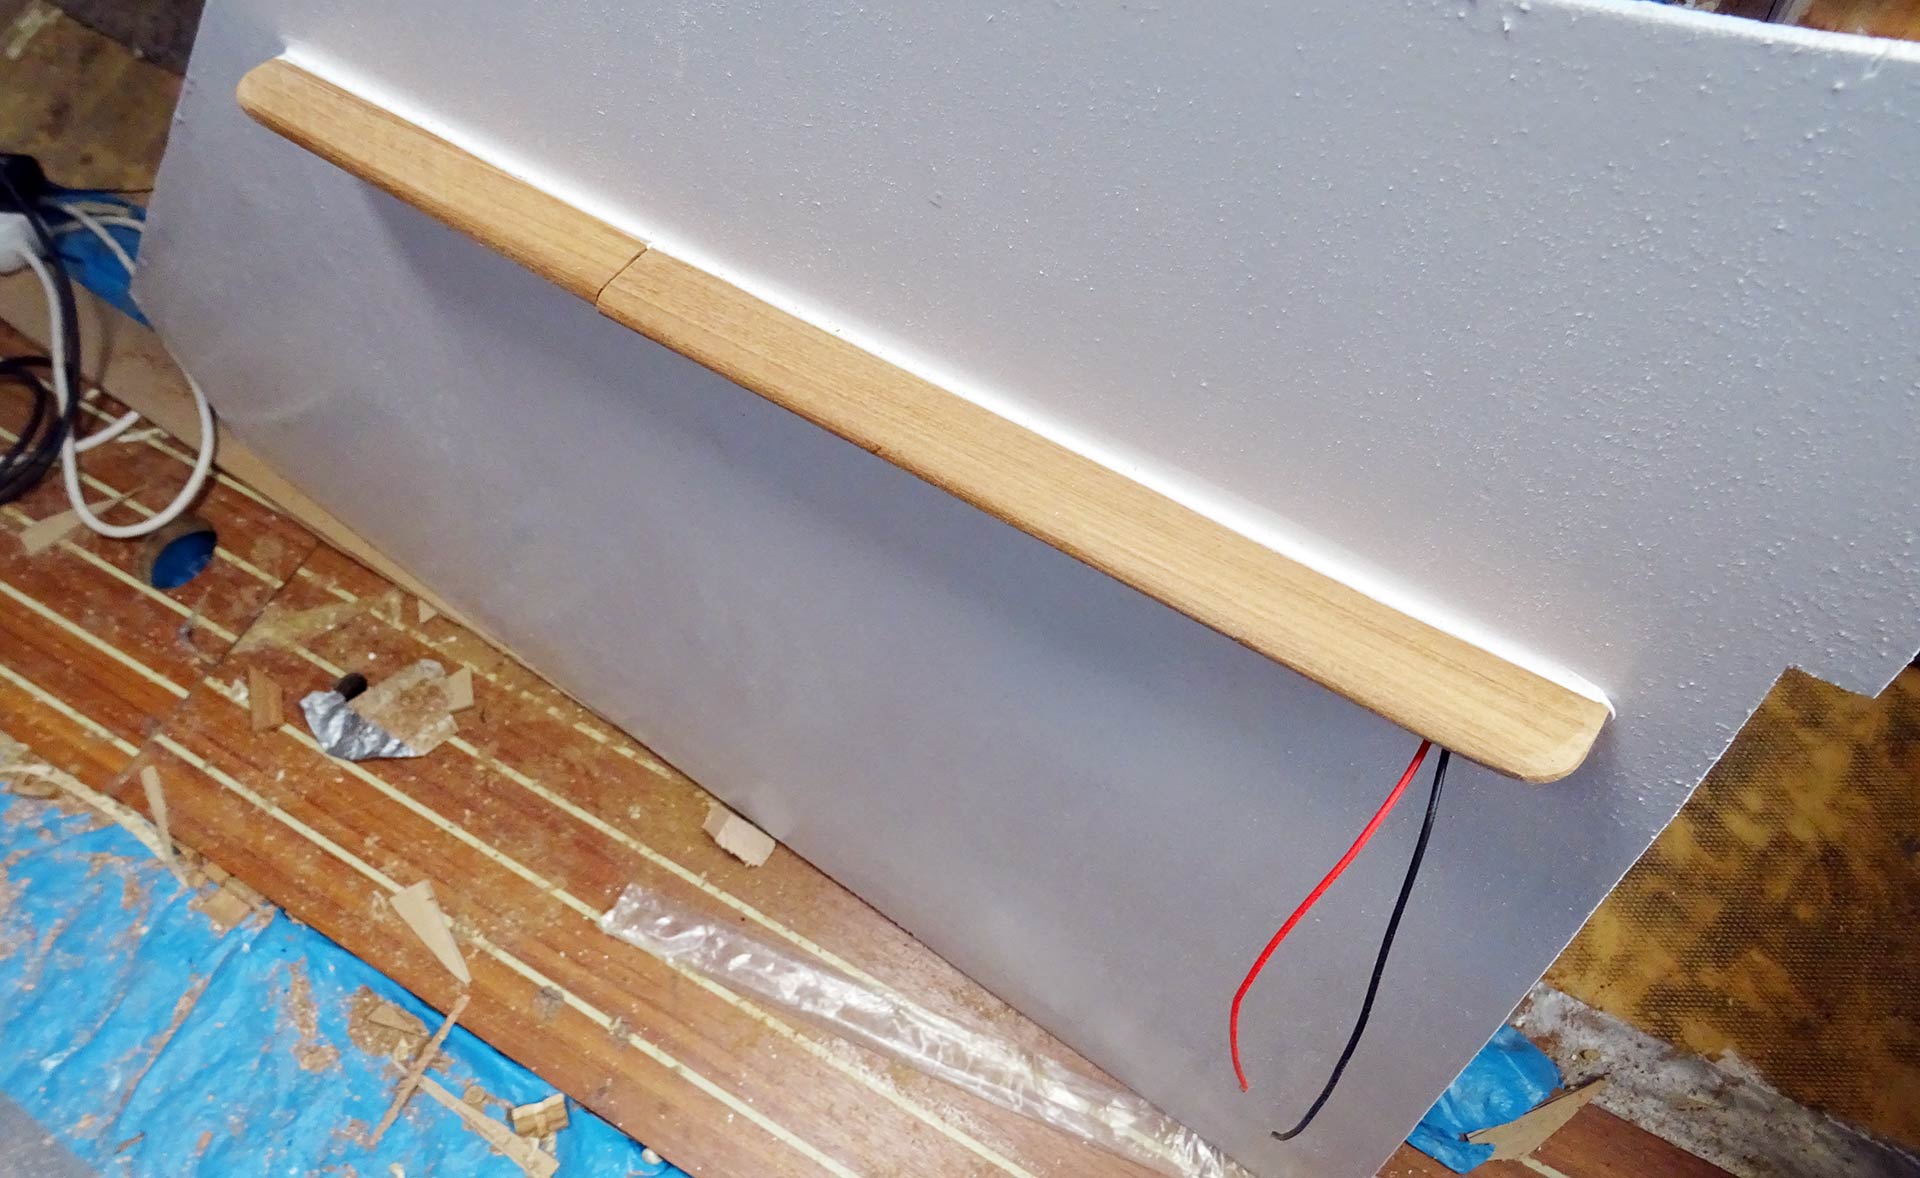
So I am mounting a LED-strip behind a Teak facing directly to the panel. Later a simple switch will turn on and off this light. I hope that the vapors and the steam of the boiling stuff underneath won´t do a harm to the LEDs but the aide in the shop assured me that this product is waterproof and made especially for tasks like these. Okay, let´s give it a try. Next time these four panels will be mounted and decorative Teak strips will cover the somewhat large seams between the panels making it look like a solid roofing unit. “Last panels”? Well, not quite …
Fore Cabin Roofing Panels: A status quo
As you may have noticed, I recently also started working in the fore cabin. I had been making some initial plans more than 2 years ago (here´s what I was thinking initially) but I´ve changed my mind in the course of the refit process. After trying out a new technique of making big gauge models of the panels (read this fascinating article here) I cut out the very LAST panels of the whole ship, sanded away the splints, added a waterproof Epoxy backside and three layers of white paint in the outside: Panels are ready to be mounted.
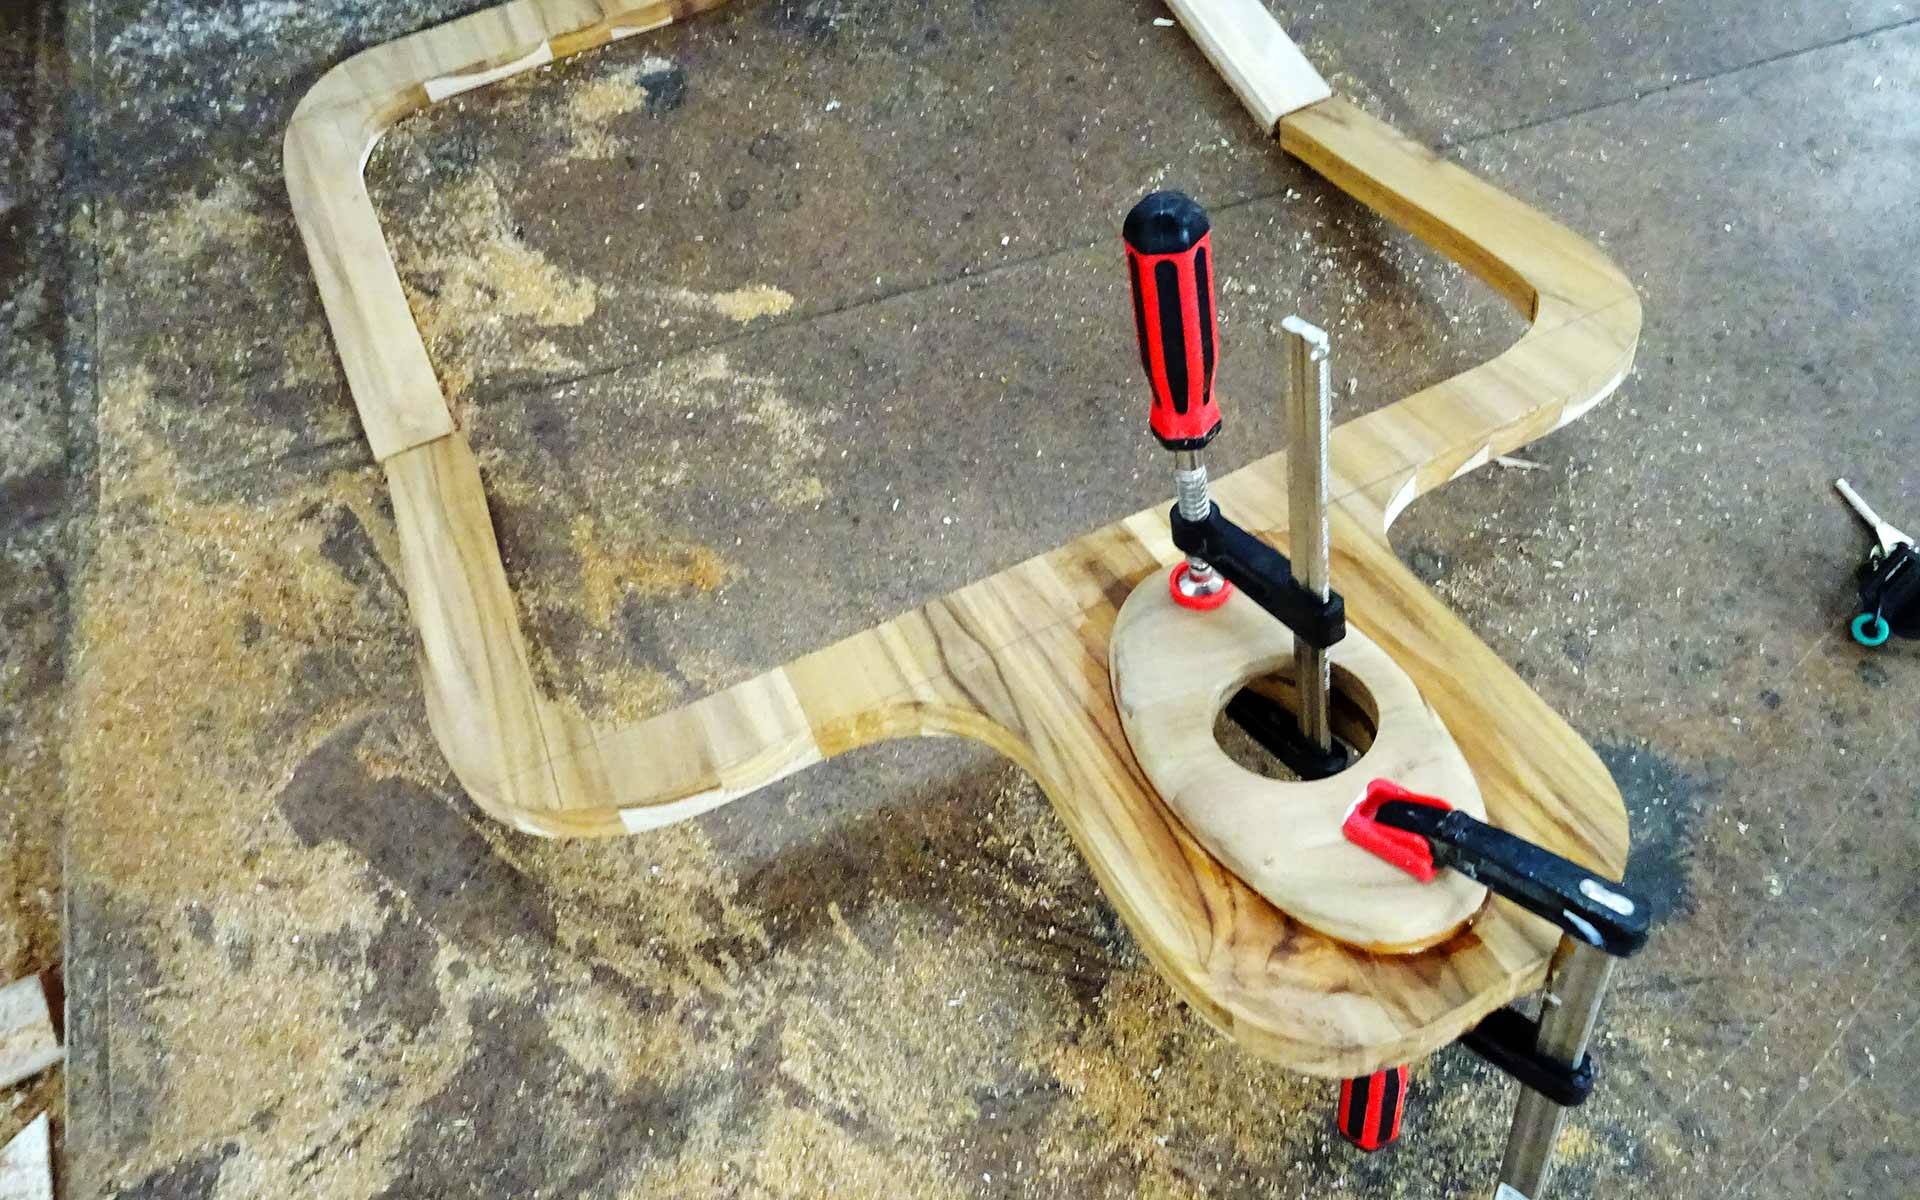
But now the challenges come. First there´s the chain locker cover in the very bow. I am building quite a complex thing out of Teak covered plywood (in fact that´s the surplus material from past work when I was making the chainplate covers, read it here). All that was needed here is the closing mechanism for the small access hatch to the main Gas valve. But that´s a different story. In order to finally mount the chain locker cover I needed a massive substructing construction which I fitted in hours and hours of work. The outcome does not look very appealing, but it´s effective and will do the job …
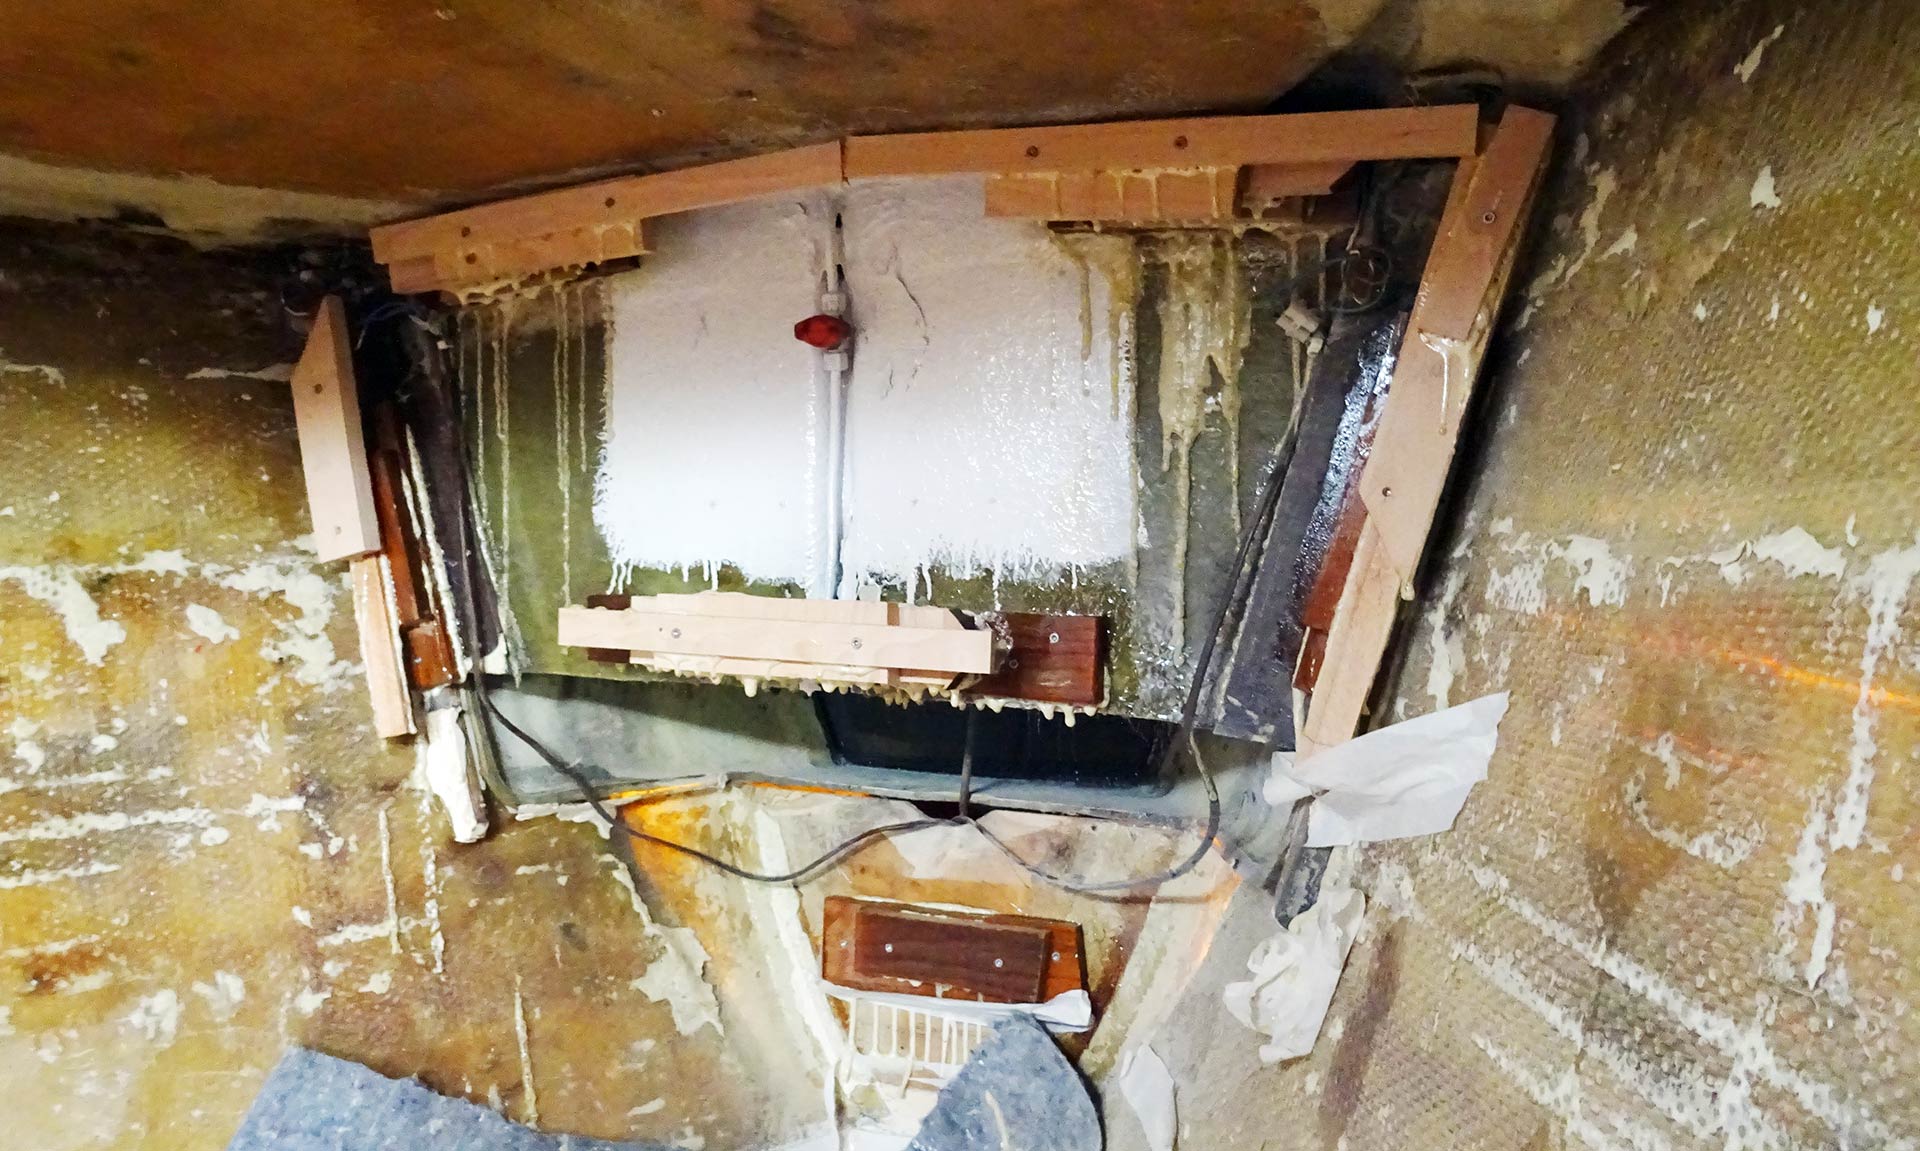
Speaking of substruction: That´s what the current state of work is now. Adding Oak tree batten to the ship´s sides in the fore cabin for mounting Teak ceiling batten and panels and then I´ve decided to add shelves to either side of the fore cabin for putting stuff. This will be a complex construction as well and yesterday I´ve bought the raw material for this undertaking: Mahogany plywood. Let´s hope I am doing a good job with this item as the shelf will have to be rigid and solid on the one hand and handsome looking on the other …

Adding another nice detail
The last of the big LED-lights for the boat will be mounted in the fore cabin just overhead. As I had one of the nice Teak plinths left I was seeking a place to mount it. This one single light will do as I suppose there won´t be much light needed in this cabin. Just switching it on to get ready for bed and that´s it. So a mounting place in the middle would be nice. And then I had this idea of restyling the Teak framing for the escape hatch to take on the LED light and this is what I´ve done. It looks so classy …
It´s really adding a classic touch and highlights this small room. I love this detail! Together with the shelf to come this fore cabin will also be a nice room for sure. Won´t think of the bulkhead in the back which isn´t sanded down yet, but that´s something I will probably change next weekend when I will be there for some working hours again. I am also thinking of adding a USB smartphone charging station next to the LED-reading lamp on the port side of the cabin, but that can make things even more complicated. But there´s also some time to think it over as well. All in all I like the outcome of the current work phase although there are spots of blotted work and simply not-so-nicely done things here and there, but I guess that´s the price you´ll have to pay if you do it by yourself. Nevertheless, I am proud of my work and this is what counts, isn´t it?
Interesting articles on this topic:
Making a massive Teak navigation station´s chart table Part 1 and finished Part 2
Building a Class Mini 650 Racing Yacht from Plywood
Plywood Performance Cruisers of RM Yachts – Plywood plus Epoxy