Probably every seaman will have some kind of valuables aboard – be it the cash box of the boat, the personal documents, credit cards and stuff like that. I am talking of personal belongings of value, not huge treasures of course. But where to put them? Where to have them stowed away where they are safe, secured and all in one place? Well, a yacht´s lockbox might solve this problem.
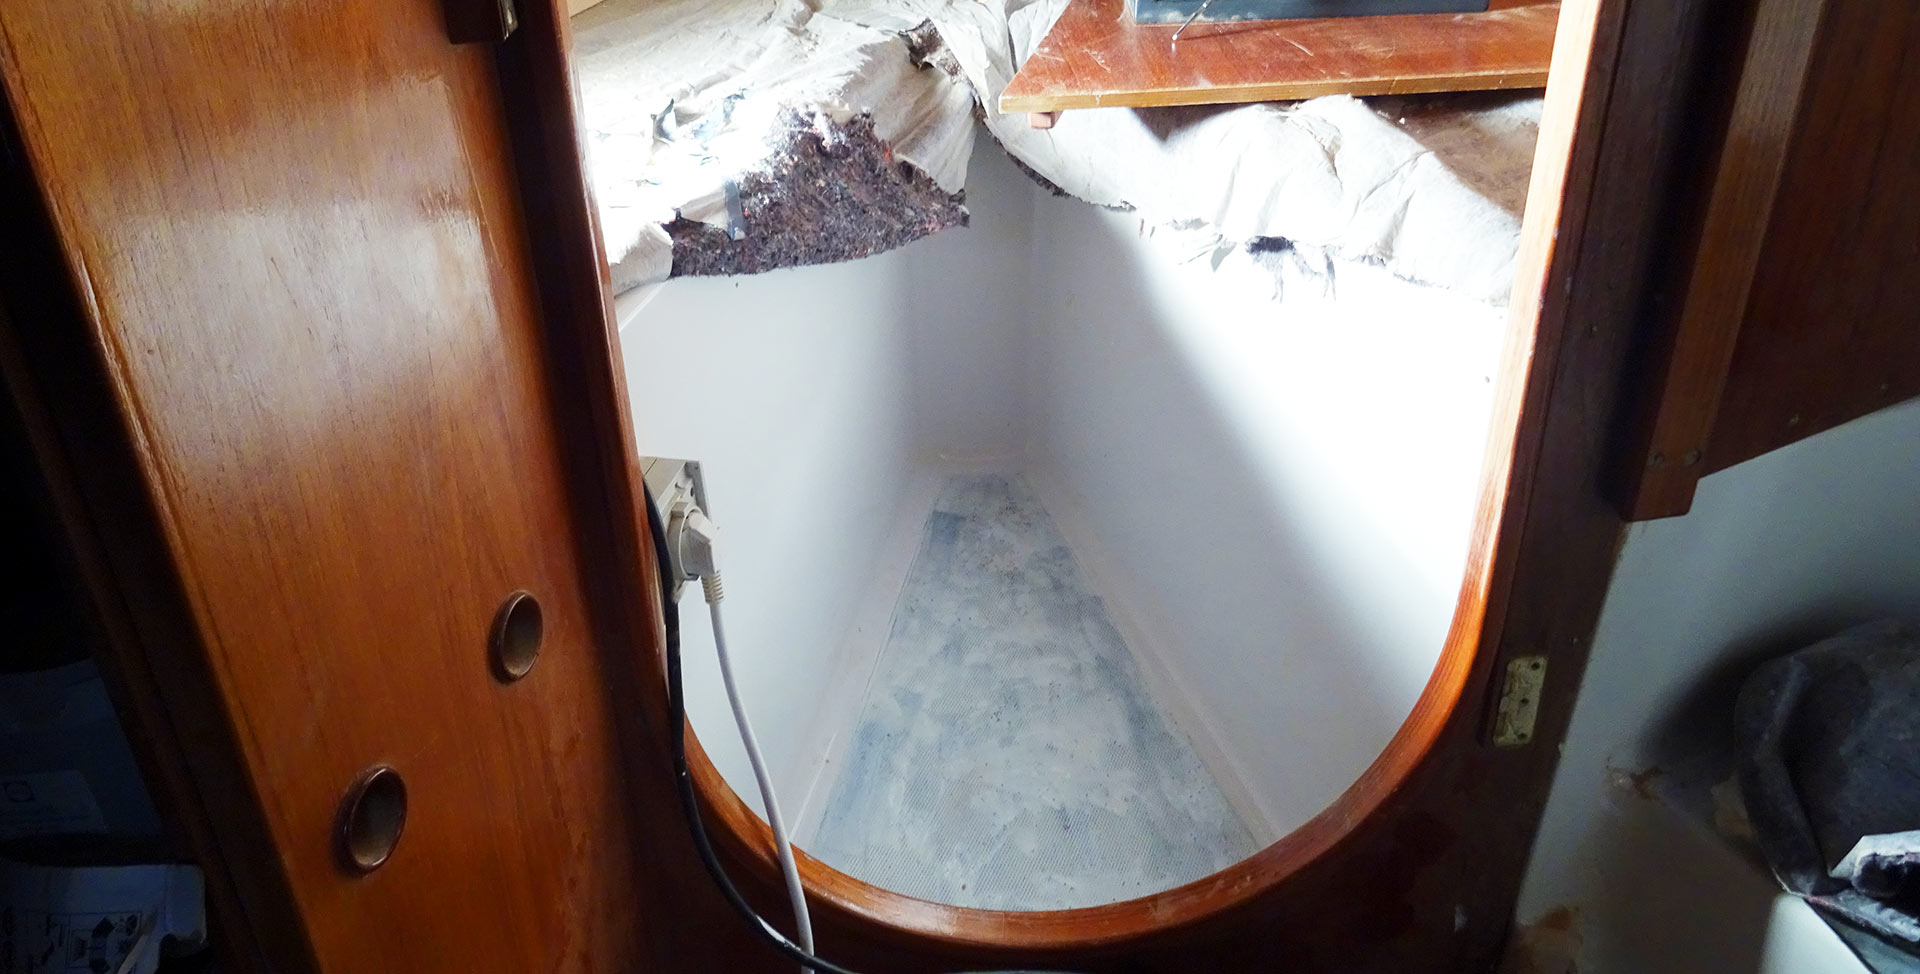
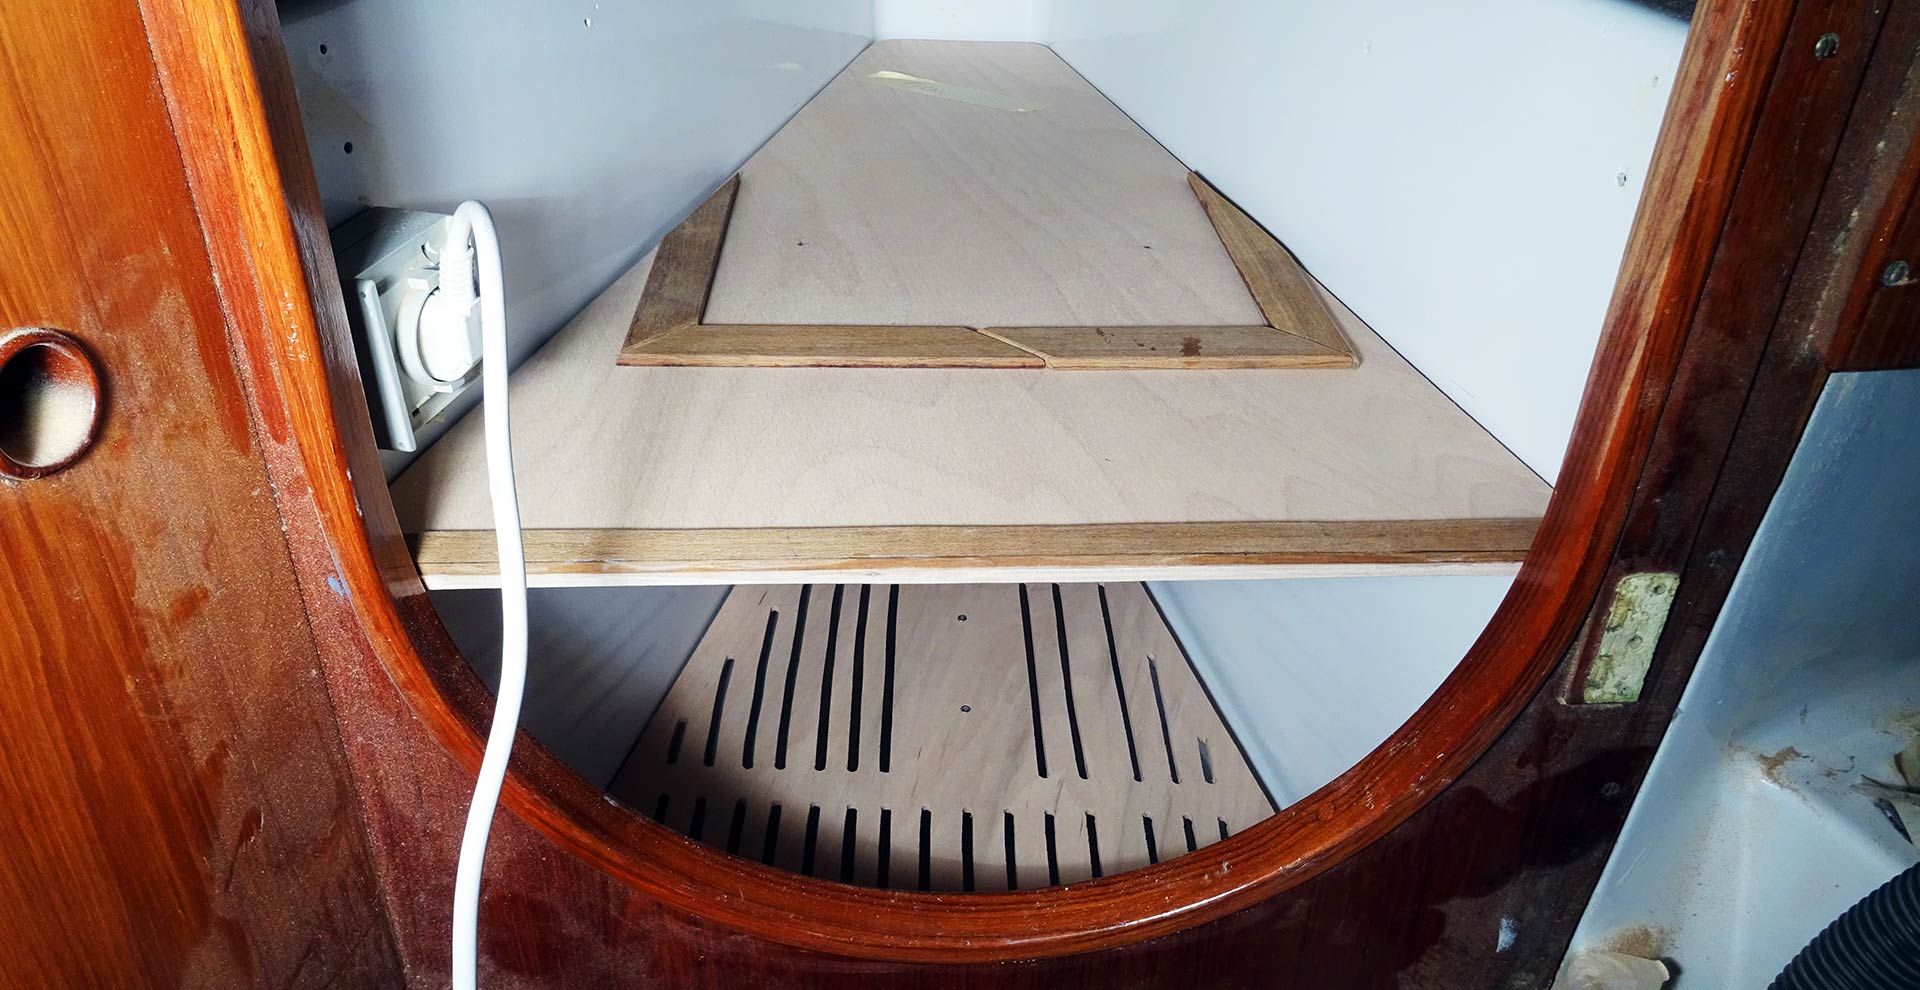
The idea of installing a small safe also solved for me the problem of what to do with the free, unused space between the V-berths in the fore cabin. As you may see on the picture, there is a triangular space or cutout between the two berths (which, of course are so small that nobody would ever sail the Kings Cruiser 33 in this configuration) and normally it would be stuffed with … bags. Not so nice.
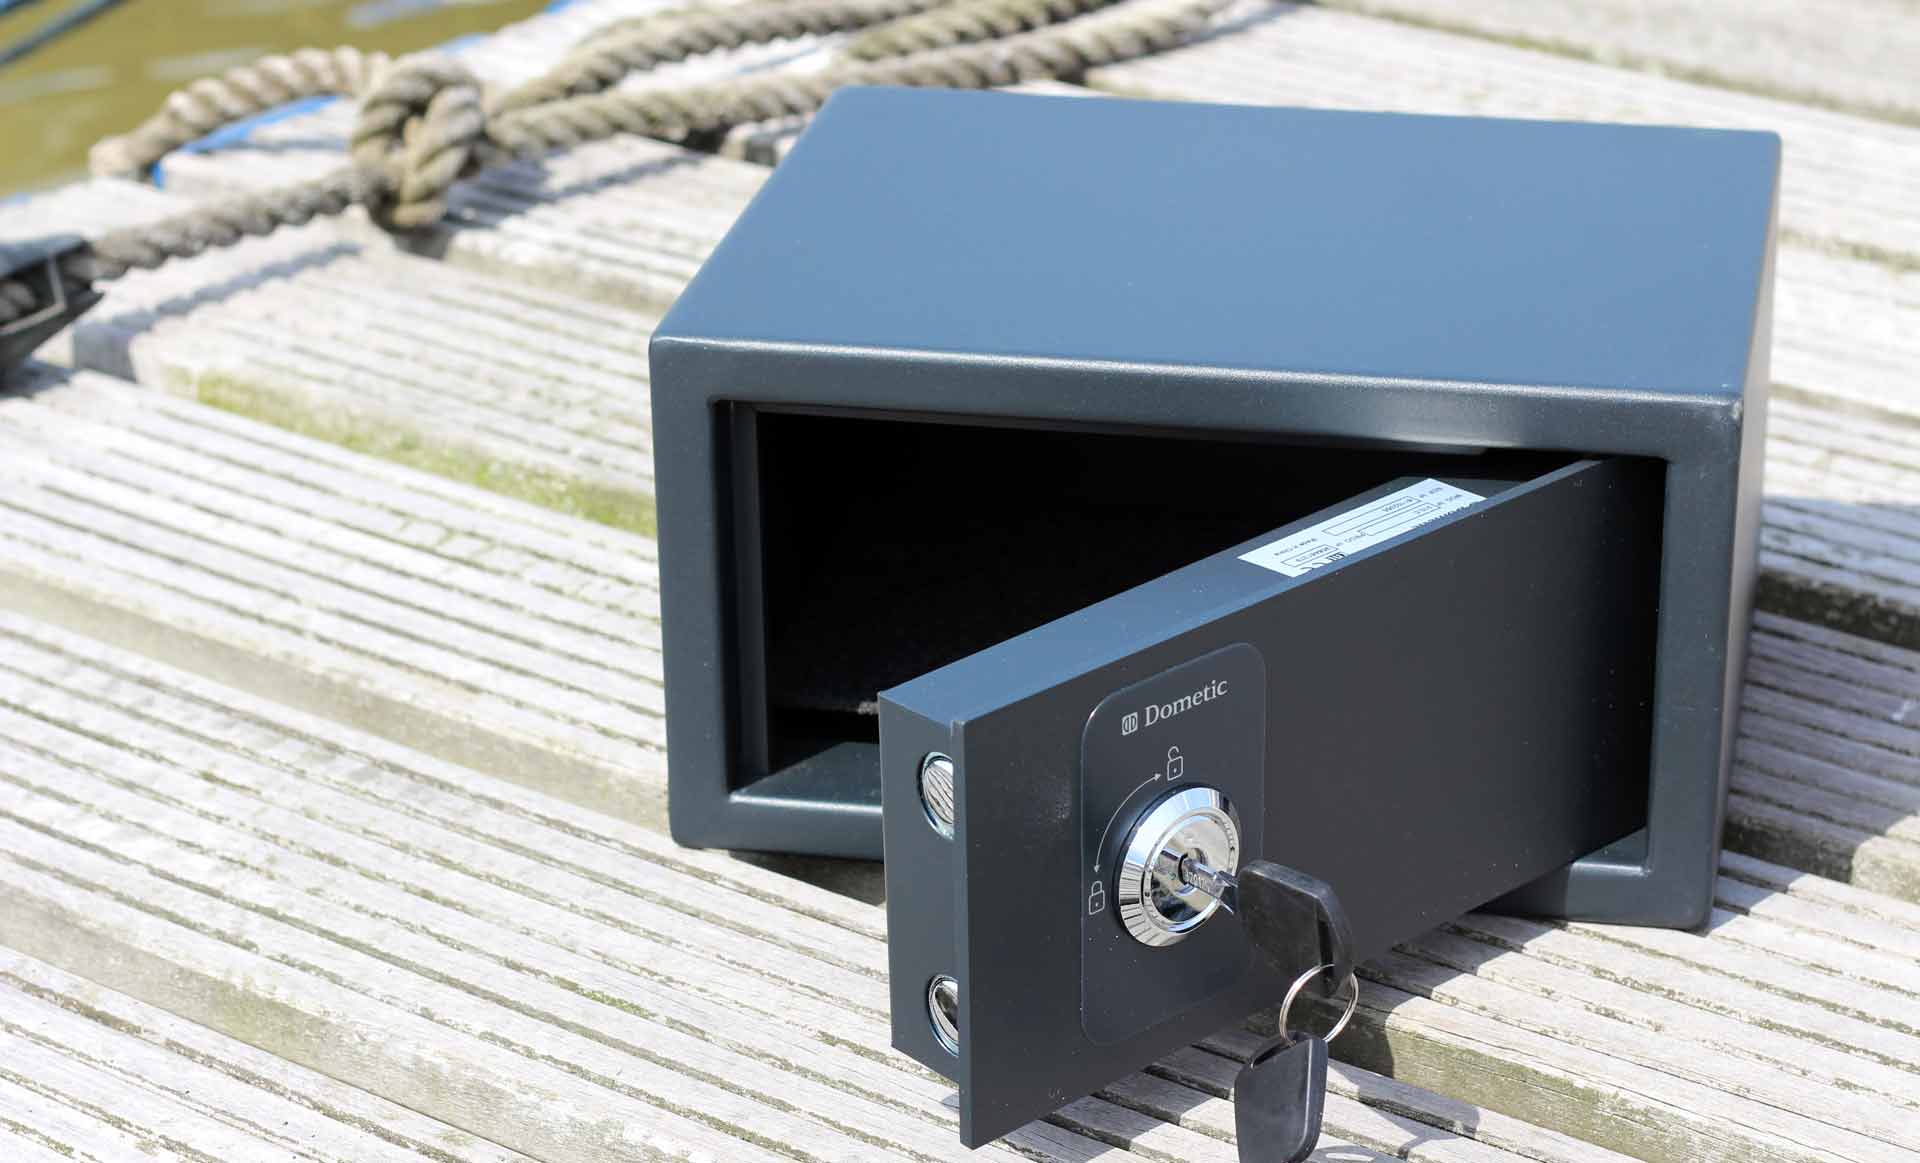
Two years ago I was on a shopping trip at Dometic, one of the producers for appliances for boats and caravans. One of the items of interest was a safe, or better, a small lockbox, which I found highly practicable. On last big sailing trip of 2 weeks (read it here) a group of two sailors spent slightly more than 1.000 Euros. Of which a big amount was electronic cash, nevertheless: Where to put the cash box of a boat? Normally it would end up in the chart table, where I don´t want it to be, or in somebody´s cabin. Which isn´t perfect neither. So, let´s go and make a secure vault of of the fore cabin´s V-cutout …
Making a grating
The lockbox I´ve bought from Dometic wasn´t that big. Since the V-cutout offers far more space I thought that incorporating a two-drawer configuration may be the solution. In this matter I would not just have my safe place for documents and cash but also gain some more stowage for clothing, maybe sailor´s boots or stuff. But I don´t like to put it on the floor of the boat directly, so the first task was to make a nice grating.
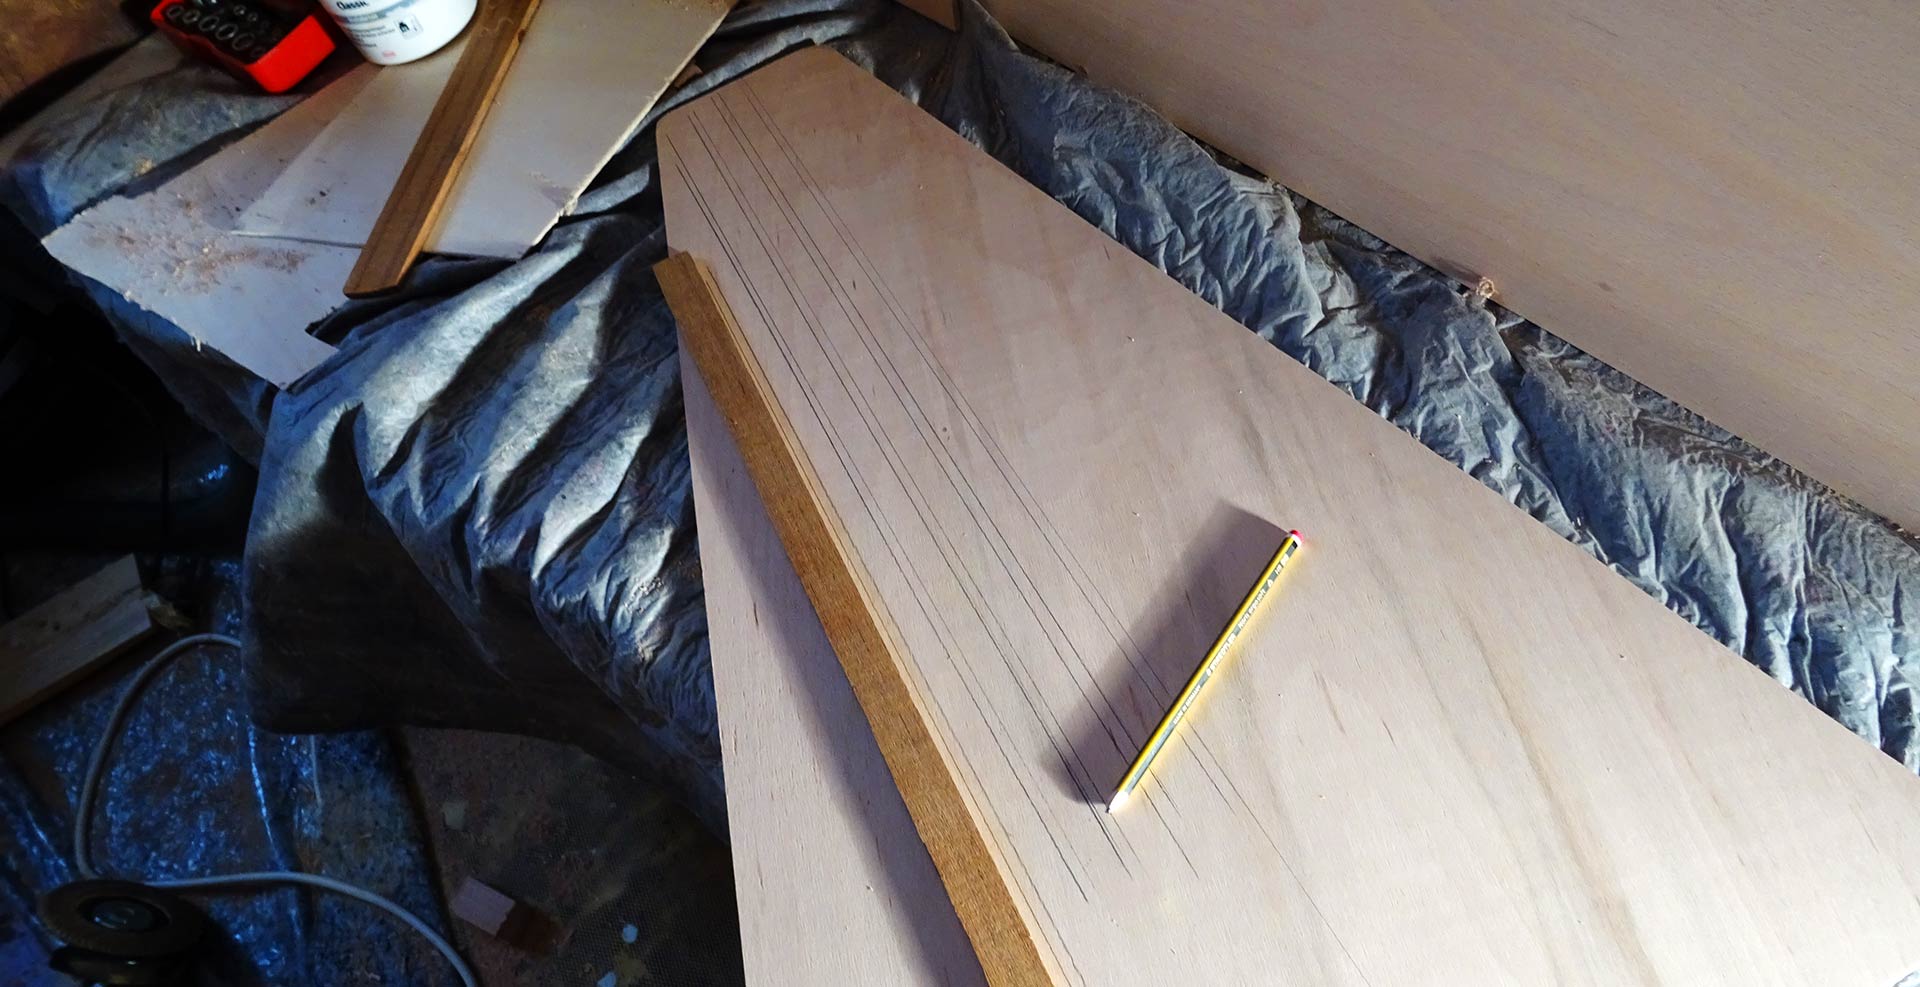
After cutting a triangular-shaped top from a stronger kind of plywood I sat down and was drawing the gratings onto the wood. I opted for longer, thinner stripes because that would be easier to make: Of course my grating can´t be a real grating (which would be ridiculously costly for this matter).

With a drill I was then making holes at each stripe´s start and end. By this I would be able to fit in the cutter of the padsaw and simply cutting the hole stripe out by going from one end of the borehole to the other. That´s two cuts per stripe and believe me it was – although not the most complex job of them all – a very tedious undertaking: Holding the padsaw steady to cut out a straight line was not so easy.
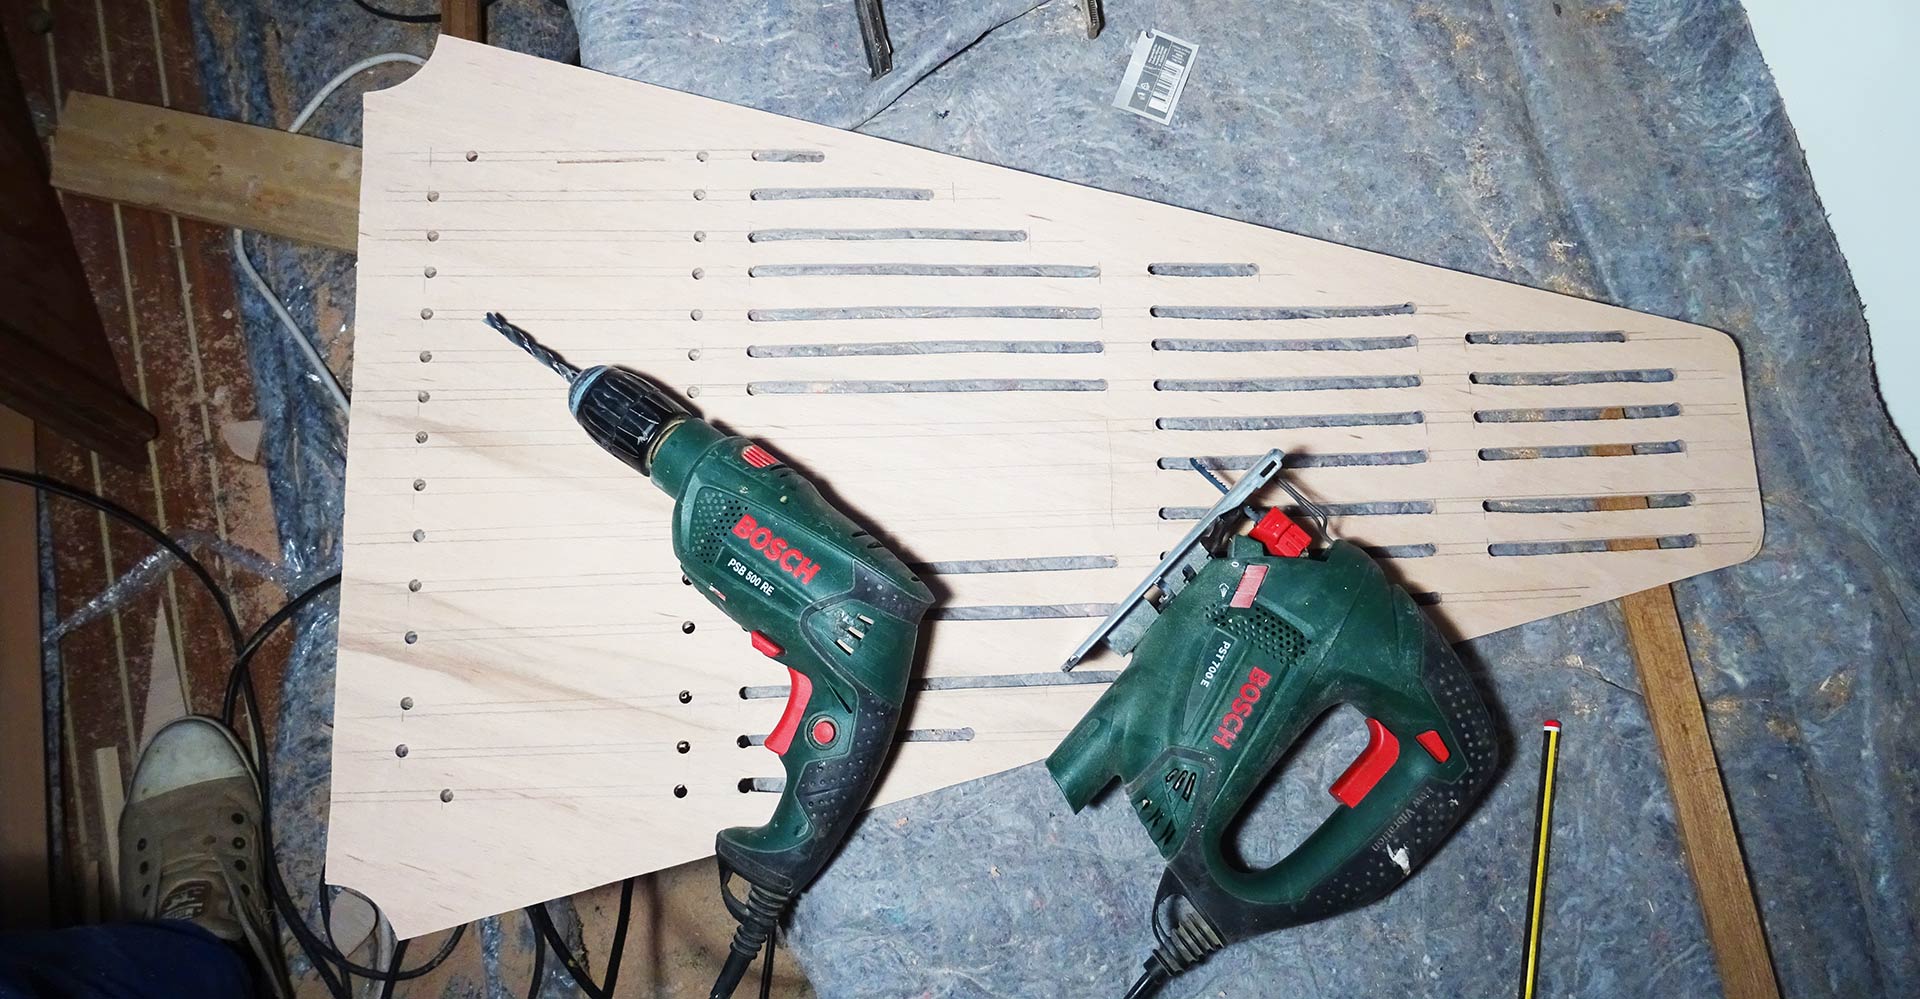
I know, the stripes aren´t that straight as they should be and the finished grating really fits the overall looks of the boat under my refitting hands so far – not so straight. But anyway, as this grating will later be covered by stuff, nobody will ever notice the slight un-straight cutouts. In the end, making this grating took me about 2 hours of concentrated working.

After cutting out the stripes I sanded the whole sheet and was happy that it was fitting just fine and looked awesome! This grating on the other hand reminds me strongly of the deck plates of a German U-Boat, but that´s a different story then. Let´s move on to making the second drawer that will feature the lockbox.
Installing the yacht´s lockbox
The second sheet was a no-brainer since I transferred the measurements of the grating onto an even thicker piece of plywood (which I re-inforced with a second layer of plywood underneath). The safe is weighing in some 15 kilograms and I don´t want to have the wooden stuff breaking apart when the boats hits a wave hard. I then manufactured two thick battens onto which the second drawer was placed. The battens have been glued by Pantera and bolted with 5 M6 stainless steel bolts onto the GRP of the boat. Rock solid.

I tested the two sheets and both fitted just awesome. A nice embrasure for the safe made of offcut Teak adds a little nice touch: I don´t want to throw away this precious timber and so I keep every piece of offcut until I have an idea where to utilize it. Here´s a nice one. I am sure, when both of the plywood sheets are glossy painted, it will look way better.
The safe itself is bolted to the plywood sheet by two thick screws. I then made the backsides of both sheets waterproof by painting it with Epoxy – the upsides will be glossy painted. Looking at the outcome I was very happy: The aim of making use of the large area between the berths has been reached. I now can put some stuff like shoes or boots to the bottom compoartment and can lock away the valuables safely to the lockbox. There is even another “secret” chamber behind the safe … but I won´t tell anyone …

Next step will be the making of a nice facing because I don´t really like the front design of this configuration. But this will be the another article of my yacht´s safe-series. For now I am very happy with my work. What do you think?
You might be interested in these articles too:
Shopping time: Dometic has it all
Where is the safe? Aboard the Hallberg-Rassy 64