My trips bear always fruit. At least I try to do more and learn something on top of the real voyage´s purpose. For example, my last visit to the Beneteau Sea Trial Base in Port Ginesta Spain was originally a meeting with a lead interested in the Oceanis Yacht 60, a nice day out sailing and explaining this yacht. At the same time, by chance, the shipyard had one of their advanced trainings for the technical staff of us boat dealers. And as my dear colleague was participating, I took my chance and joined. And as it turned out, it was not just very interesting but I could also learn something upgrading my own skipper´s knowledge.

The day course´s program consisted mainly of training on the new onboard network systems, like Beneteau´s Seanapps, but as I joined later I was happy to witness the – at least for me – most interesting part: “Galva-Test”, as the schedule printout on the wall said. Having heard so many times about it, even being able to hardly scratch together some of my A-level style knowledge from times back in school, I listened and watched with great interest. And behold: This is a topic much, much, much more valid for us sailors than we think!
Anodes and cathodes: In a nutshell

So, at first, what is galvanic corrosion? To explain this, we have to take some steps further back and look at the chemical, more specific into the electrochemical properties of metals and alloys. In principal, any metal, no matter if pure or alloy (like Bronze), does have an electrochemical potential. The strength of this potential – measured in mV – depends basically on how many electrons are whirling around the atomic nuclei of the respective metals. The less electrons – the “noble” the metal. This would be the cathode. The more electrons, you guessed it, the more “basic” the metal, that´s the term base metal. That would be the anode. Something ringing? “Sacrificial anodes” are those zincy, aluminium-like, heavy rounded or edgy metals all over down below waterline on your hull. But that´s for later …

Cathodes, being the “noble” metals and anodes, the base metals. Now, normally separated, for a boat something special happens as a third player enters the game: The electrolyte. In our case, of course, the water. Water is a conductive material, much more so, salt-water. And just like humans (well, that applies at least to me) who do not like huge gatherings and dissipate, cathodes tend to draw in those electrons. Away from the anode, hello cathode!
Galvanic corrosion, surface leakage & Co
The course instructor by Beneteau holds up metal sticks and says: “Imagine this is the yacht. You have parts made of very noble metal, like the propeller shaft, the propeller itself and such; you´ll have the rigging made of aluminium, which is a base metal; you have a lot of wires made of copper and so on.” For each of the metals, there is one stick, connected to a wire. This is a mix of so many metals, cramped in one place (aboard) placed within an electrolyte (the ocean). He puts it in a bucket full of saltwater – for later.
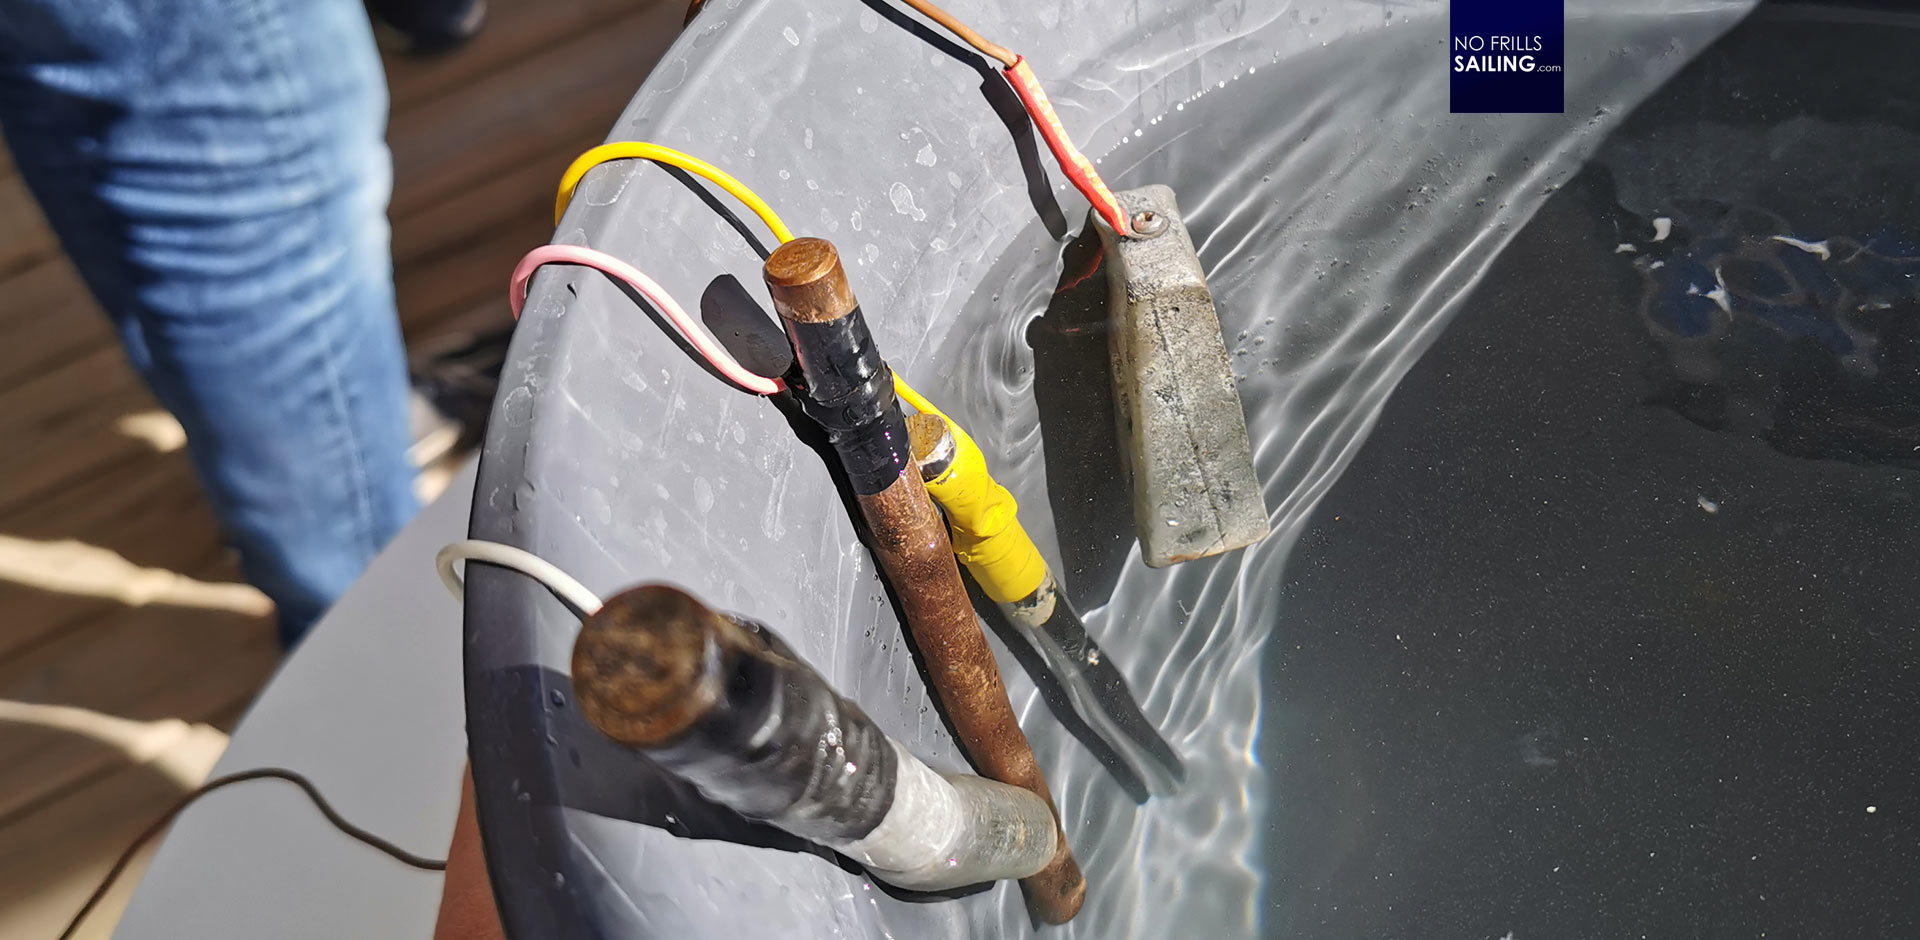
Currents – our electrons dissipating the mass gathering at the base metals – trying to find their ways to the noble metals in a “natural” way are called galvanic corrosion. This is something that can be prevented by insulation and separation, of course, but a rest current will always remain. It is inevitable. Galvanic corrosion is the big enemy. But it gets even worse: Leakage currents, or surface leakage. This is a current between the noble and the base metals, even stronger, induced by faulty electric installations on board. Those currents sped up the so-called “random harvest” of electrons: We all know too well those horrific pictures of saildrives eaten away, bronze-valves gone and ultimately sunken vessels.

Our course looks at the schematics of a sailing yacht where all electric installations, all wires, power sources, current consumers and such are marked. This is a maze of ducts, the bigger the yacht the more colorful and confusing the schematics. As for Beneteau, and I assume every other professional shipyard as well, the installation of those components is done with most care. Also, each boat is tested in the shipyard´s pool where the said “Galva Test” is performed. But, as we get told, without the rigging, the biggest yacht without the keel as well. Much of the potential missing. Therefore the proper and thorough testing of galvanic currents and potential surface leakage must be performed upon commissioning of each boat. And at best, annually during the maintenance check-up. But how does it work? Back to our bucket …
From a bucket to your boat
Having the different noble and base metal-sticks in the bucket, freshly filled with the salty water of the Mediterranean, our course instructor connects one by one via wire with a Voltmeter. This measures the currents and displays them. We could clearly see that there was a current apparent within our bucket, depending on which metal was apparent in the water.

As boat dealers and official representatives of the shipyard Beneteau has great interest in our technical staff being aware of the complexity of their products. Measuring and performing the “Galva Tests” should be a matter of course both when commissioning the yachts as well as during the annual check-ups of the boats. “Look what happens now …”, the guys said and put in a sacrificial anode into the bucket: Suddenly the Galva-Test indicated a “green” metric.

“The same way your body has, let´s say a minimal and maximum temperature, a range in which it can function, there is a green range around 37 degrees when it works best.”, he states: “Also, on yachts – depending on type, material, fittings but also the water the boat is in – there is a range in which the boat works. She is either underprotected or overprotected. The Galv-Test and a certain chart scale shows you if the boat is “healthy” or not.” To solidify our theoretical bucket-knowledge, the group proceeds to the yachts mooring at the Sea Trial Base.
Checking currents on (new) yachts
The course teaches the boat dealer´s technical staff in very practical proceedings of how to commission the boats in a way that the customers and owners can be sure to sail on a safe boat. One of these procedures is the Galva-Test, and this is what our group is now doing.

As all boats are tested for galvanic currents and possible surface leakage in the shipyard before shipment to the commissioning locations, a certain degree of safety is “built in” already. But, as I mentioned above, these tests had been carried out without the rigging apparent on the boat and for the biggest units even without a keel attached. Therefore, Galva-Test is must-have before handover to the clients. But how and where to measure?
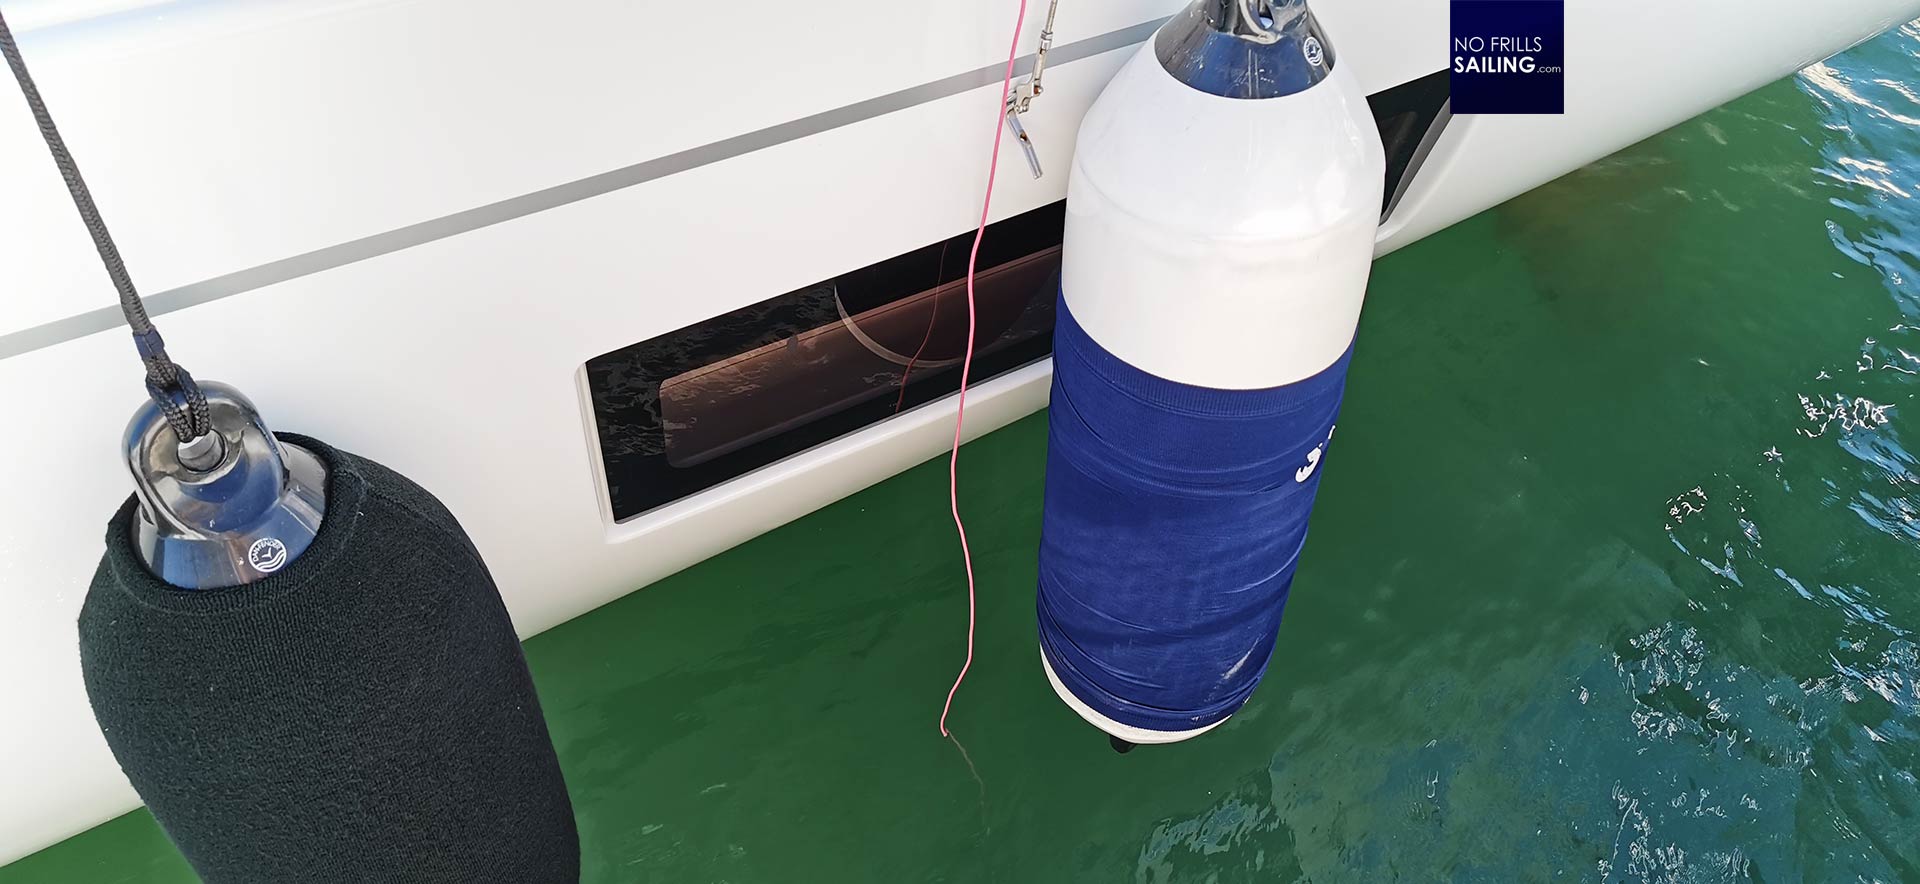
The main installations, metal-wise, are in the stern part of the boat. So at first, one of the wires of the Voltmeter (the positive pole) is carried below decks and connected to the Diesel-engine block. Another wire, the negative, hence “sensor”, is put right next to the boat into the water. The electric circle is now closed – current can flow between engine, shaft, propeller and water. The Voltmeter, or “Galva-Test” can now take a measurement.

The idea is that, depending on the boat type, size, location and various other factors, the readings are kept well within a “green” zone shown on the chart. If the readings are higher or lower, meaning “outside” the green zone, the team has to start the search for the errors. If you find this topic complicating and confusing up to now, you will surely have your head buzzing regarding what the fault diagnostics are all about: A floating Sherlock Holmes is needed.
Internal and external factors
Tracing the fault is of utmost importance. If there is an imbalance or a even a minor current leakage, it can literally eat away your sacrificial anodes in a matter of weeks. If not detected, whole saildrives can disappear, propellers can turn to red dust and even boats sink because of valves corroding to open up holes in the hull. The search for this error can last and requires knowledge both of all electric and electronic (current-producing) installations and equipment on board and a load full of experience. What makes it so tricky is that not only internal factors can be the reason for galvanic or electrolytical corrosion, but also external factors as well.
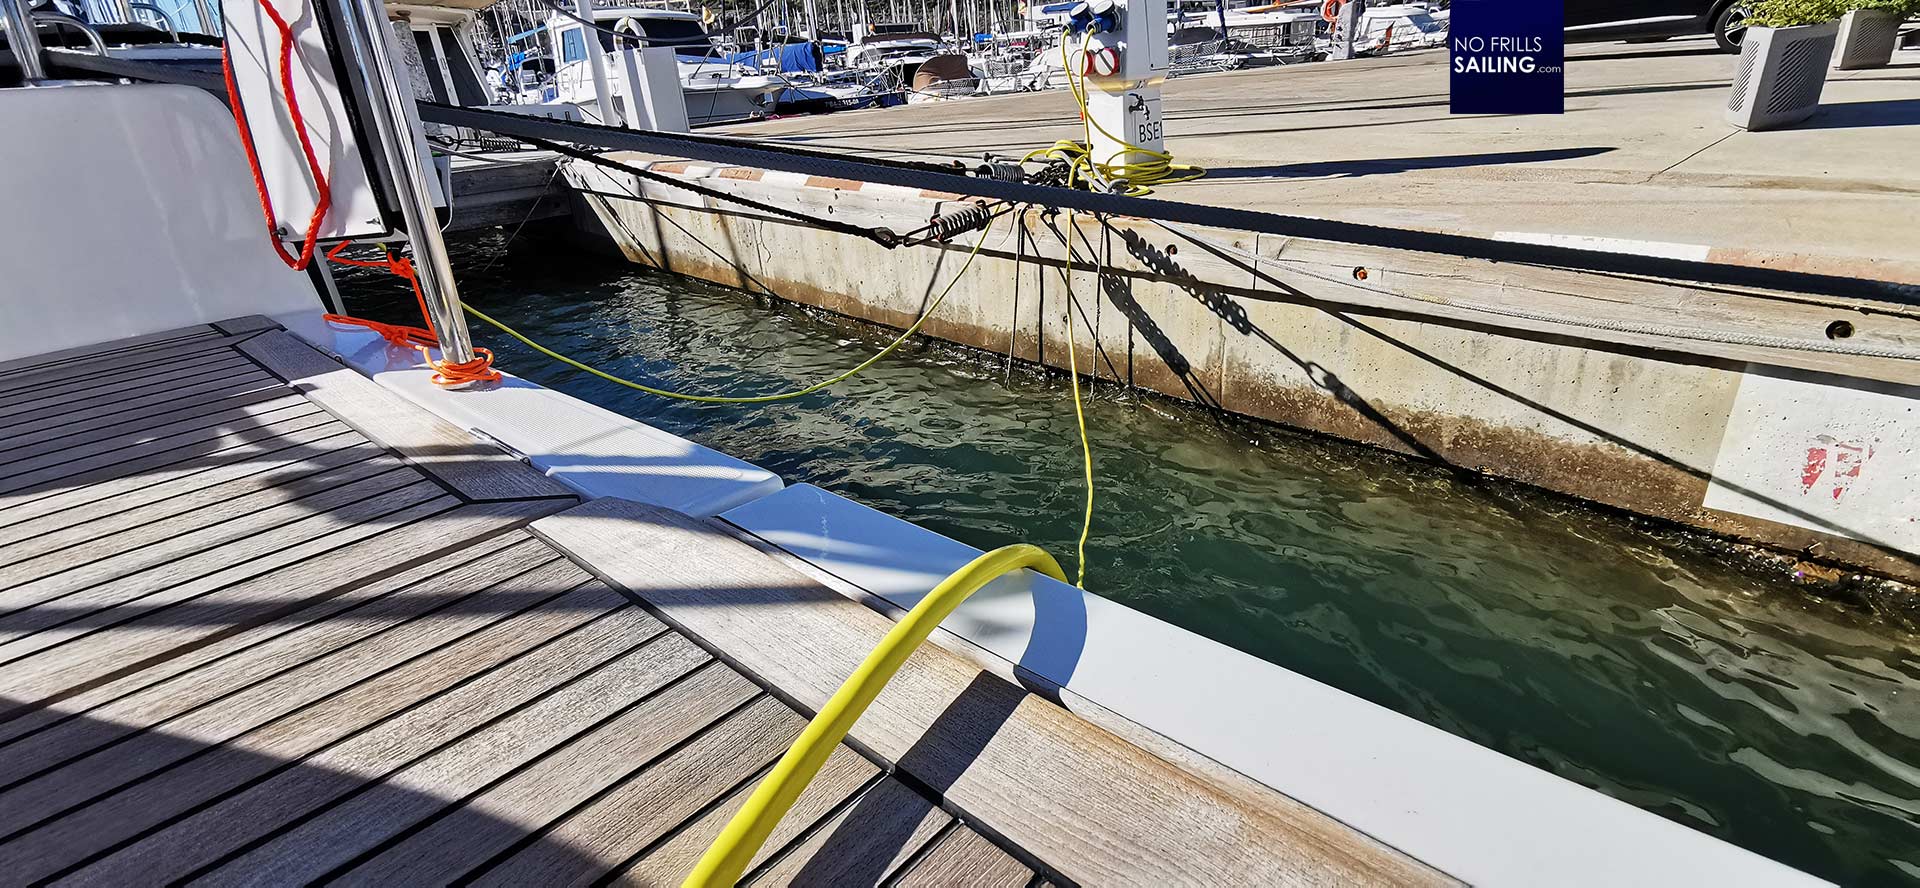
One of the usual suspects is the shore power installation of the marina. Un-earthed shore power-terminals, poorly isolated cables may be causing trouble for your yacht. Often, an iron sheet pile wall that is used to be the base installation for the quay you are moored too can be the source of the trouble. As our instructor tells us, even neighboring boats can turn out to be cathodes, sending over their electrons and using your yacht as a huge sacrificial anode.

A steep learning curve
I am not an electrician and even though I am interested in any aspect of boat building and maintenance, boat electrics have always been a red flag for me. I rely on the experience and knowledge of others. That said, having gained this insight into this one aspect of boating electrics and electronics was absolutely astonishing. How complex and also fluid, this is. In essence: Each and every current consumer brought on board can and will change the potential of your boat. Each new berth, each new harbor can do so as well.

Constant checking – at least annually when the boat is put ashore to check the underwater hull – is an absolute must. Replacing your anodes and keeping them up to date should be a matter of course. Lastly, as an owner, you should not take the maintenance-plan suggested by your shipyard too leisurely. It can save a load of money and ultimately even your boat. For me, after returning home, I immediately called my shipyard currently engaged in building my new boat to check if the galvanic balance of the Omega 42 is ensured. (And of course, it is 🙂
You might also find interesting to read those related articles:
Thorough stern thruster fitting
What a professional underwater hull treatment should be like, parts 1, 2, 3 and 4
Making gratings for the boat´s head