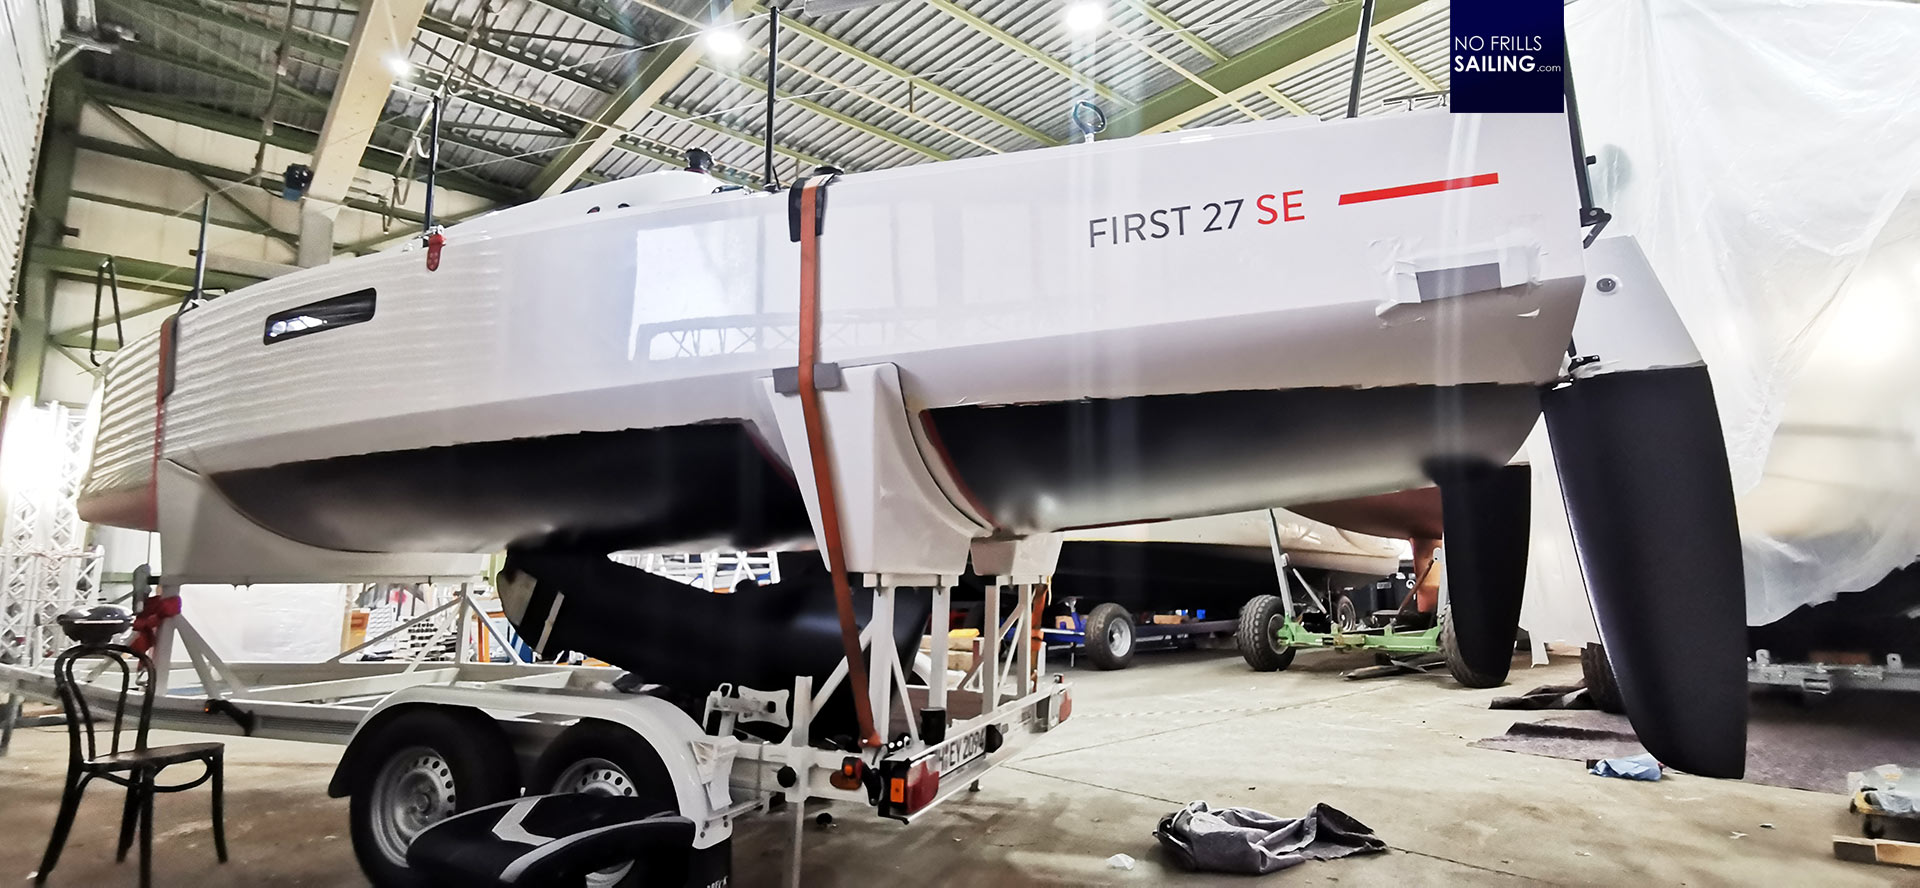
Works on my new boat are progressing very well as my dear colleagues take the strain to apply an antifouling professionally – you may have read about it in the last article. The priming layers are already on her hull as well as a layer of holding primer, now my friend Ahmed is working meticulously to apply the very antifouling layers: First one is red, the following two will be black. Apart from the biting stench, I too the chance to enter the boat and work a bit in her inside.

The First 27 SE – or Seascape 27 as many still prefer to call her – is a thoroughbred racer and as such she is not offering a load full of comfort. Well, on the first view. In reality, she is a pocket cruiser, as Andraz Mihelin once told me. I myself went to choose this boat over another small boat I had in mind because of the fact that she can pack a punch in quick sailing and offer at least a small amount of cruising comfort. As I will be sailing a lot with my kids, a proper toilet is needed as well as some privacy. I now entered the salon to, well, let´s say, kind of upgrade the attractiveness to the eye of the beholder. Let´s see what I´ve done.
Bringing more natural light to the salon
The salon of the boat is kind of darkish. That is because there is just one skylight hatch and two very thin hull windows through which natural light could enter the internals. With the new Aluminium-rigged version of the 27 they have corrected that and put in some very big windows – like those used in the First 24 – but that´s not available for the Carbon-rigged boat. So I thought maybe with a trick I could change that.

Many companies offering self-sticking mirror tiles in various shapes and sizes. I bought a set of some 100 pieces, 3M-stickers for extra strong holding power and began to search for a place to put them on. I discovered that the main forward bulkhead – just top-coated in plain white – might be the perfect place for it. So I began to stick those mirror-tiles to the bulkhead and it worked out just perfectly.
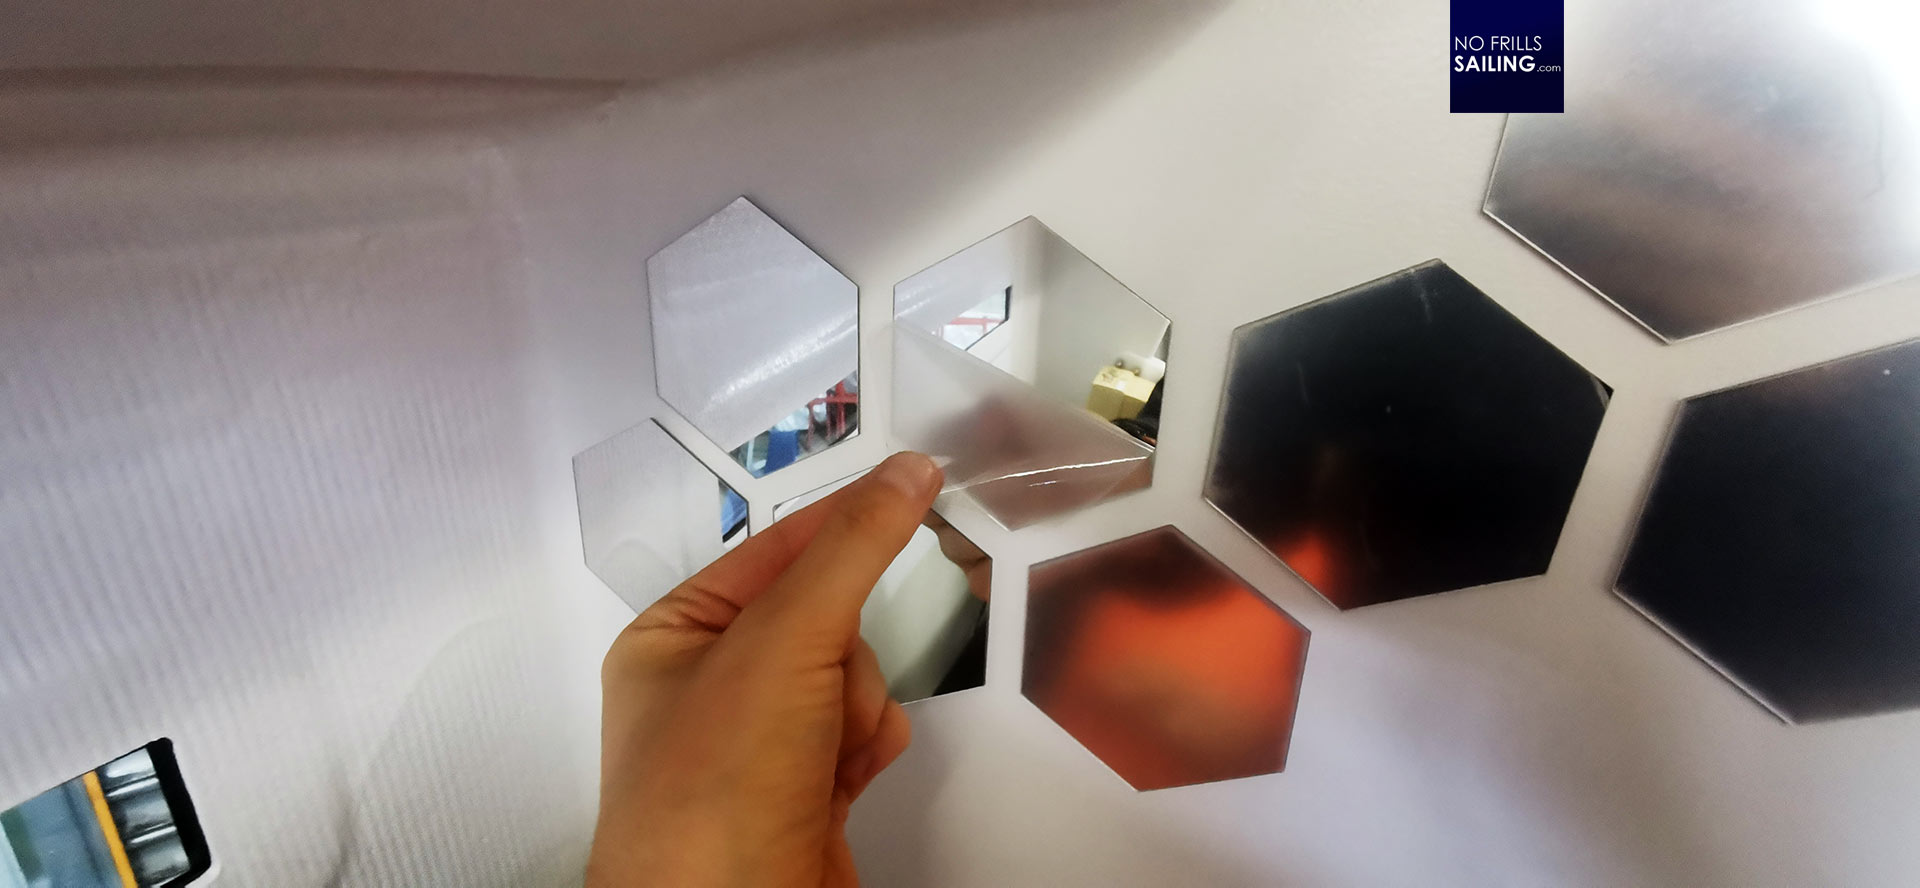
The stickers are holding very tightly, but could also be removed with applying some force in case a tile gets scratched or damaged. I applied the tiles with one centimetre distance to each other to both sides of the bulkhead. The idea was to use the natural light entering the boat through the hull windows and have them reflected by the tiles. As such, the numerous small mirrors would be acting as surplus sources for natural light.
More comfort for the small heads

The head of the boat is very, very small. In fact, you´d have to close the – otherwise ingenious! – magnetic doors to both sides of the head to create a room for absolute privacy. I tried to sit here an it indeed is absolutely okay. The tightness and cramped feel of the room could be of advantage – for example in rough seas when you are thankful of things to hold on to while doing your business.
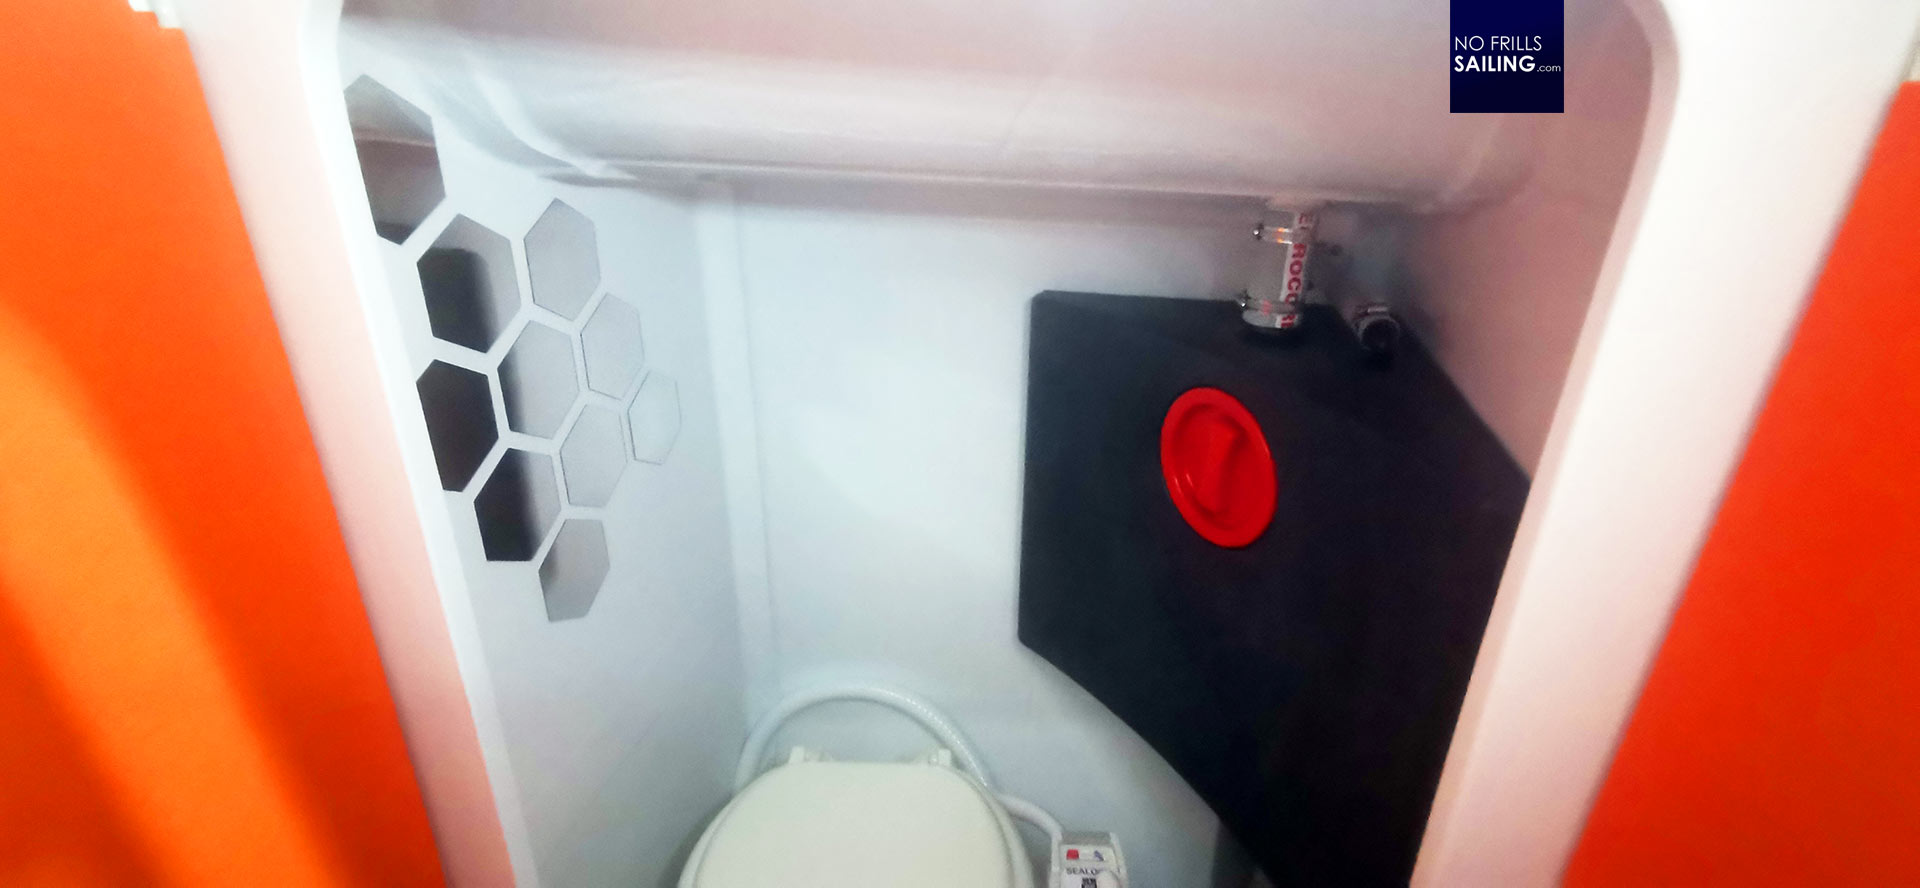
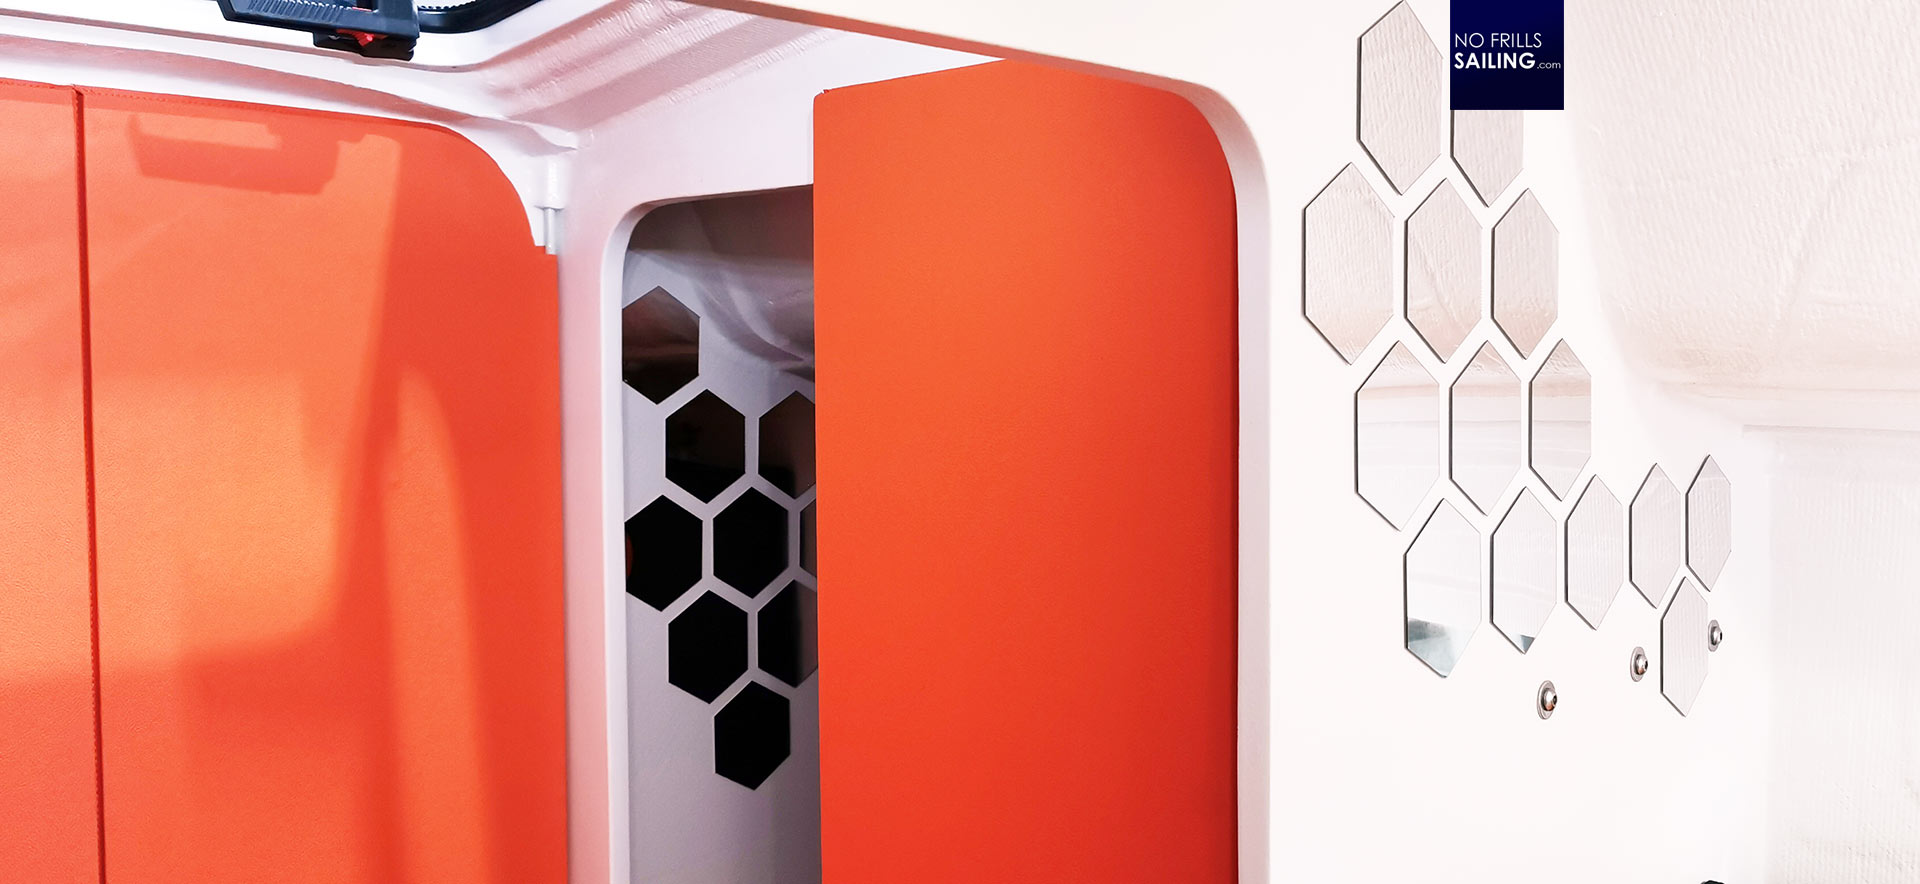
I put some of the mirror tiles to the secondary bulkhead. The effect is magical: Although there is not much light apparent in the small area, these handful of small mirrors create a light-hearted feel and are indeed reflecting some of the light to make the room appear brighter – and bigger. The idea worked out just perfectly, I must say.

Then it was hook-time. I also bought some metal hooks which are also self-adhesive and put them into the head (where I can later hang my sponge bag with toiletry utensils for personal hygiene). Two more hooks have been sticked to port side in the salon where I can stretch a string to have dish towels hung up for drying or something. I must say that I became a big fan of these self-adhesive gadgets which can be bought for a small budget on amazon: Easy, cheap and of decent quality. The interior got a very good upgrade both in appearance and practicality here.
Every ship needs a mascot
Next thing I did was a mere cosmetic job. As you may know, my kids have decided to name the boat GEKKO which is a big thing both for them as well as for me. Motivating my children to overcome their fear of the seas and give in to their motivation of experience sailing adventures with their daddy is indeed a big, big thing for me so carrying through the GEKKO-image is something I put very high efforts into. So I re-designed the Gecko-logo animal for the design of the boat´s outside at first …

And you can see that the animal-logo received some “scales” graphics which make it appear more modern and adds some depth to the logo. Besides: I have some experience now in designing ship´s outward appearances as I did it with our MADCAP and HOTSHOT – both First 24 sailboats – and latest with the “Feynman-boat” THE LAST WALTZ. So that was a no-brainer. The cool thing about the animal-scales is that they re-appear in form of the mirror-tiles inside the boat now.
Every ship needs a mascot, of course, and for the GEKKO this can only be a Gecko. I shopped a green rubber animal on amazon that resembles a bit the logo. This is sticked (thanks to 3M) to the mast-stand in the middle of the salon now and greets every sailor and guest entering down into the salon from now on. My kids love it!

I like the interior appearance of my boat now much more: The mirror tiles are kind of “lighting” up the somewhat dark place by reflecting natural light into the room. The tiles also resemble the animal scales of the reptiles kind of and take on the Gecko-theme to the inside of the boat. What do you think? Does this upgrade suit the boat well From the outside green will be the dominant color, inside I went for orange cushion which kind of can be interpreted as resembling sand or desert – the place where the Gecko lives. Of course, a major step forward was the new EVA-foam floorboard-upgrade. I love the new salon. I am thinking of maybe stick some more mirror tiles to the roof, but I am still a bit unsure. We will see.
Next steps in bringing the boat to the water
So what is the next step coming up? Ahmed will finish the antifouling within the week. The boat is then put into straps of our crane so that the parts now hidden under the cradles of the trailer can be painted too. That will take another week, I guess. The boat will then be put to our showroom where the outside stickers will be applied – that will be a major day for the boat!
After this, I will tow her to the Baltic Sea where the last – but most crucial – step of her commissioning will take place: The Torqeedo-engine, the big new Lithium-Ion-Battery and all machinery will be installed. Also, the custom made solar-array is likely to be delivered in oder to be installed. So, lots to do still and sticking some mirror-tiles appears to be the smallest thing. Nevertheless, I am happy for this upgrade. Stay tuned, dear readers.
Read more about interior yacht design and Seascape/First sailboats:
Interior yacht design concepts, parts 1 and 2
Magic saloon of a Cigale