That has been quite a while, I thought to myself when I happen to be at my boat to spend a weekend´s day working towards completion of my refit plans for the King´s Cruiser 33 designed by Pelle Petterson. I meant the ceramics of the brand new Jabsco marine toilet. Well, “brand new” in this case means 2 years! It have really been 2 years since I´ve bought this toilet to be fitted to the boat. To my plea: That has been two fully packed refitting years! But nevertheless, 2 years is a long time. And today, today way going to be the day that – at least this pumping toilet – would finally be mounted.

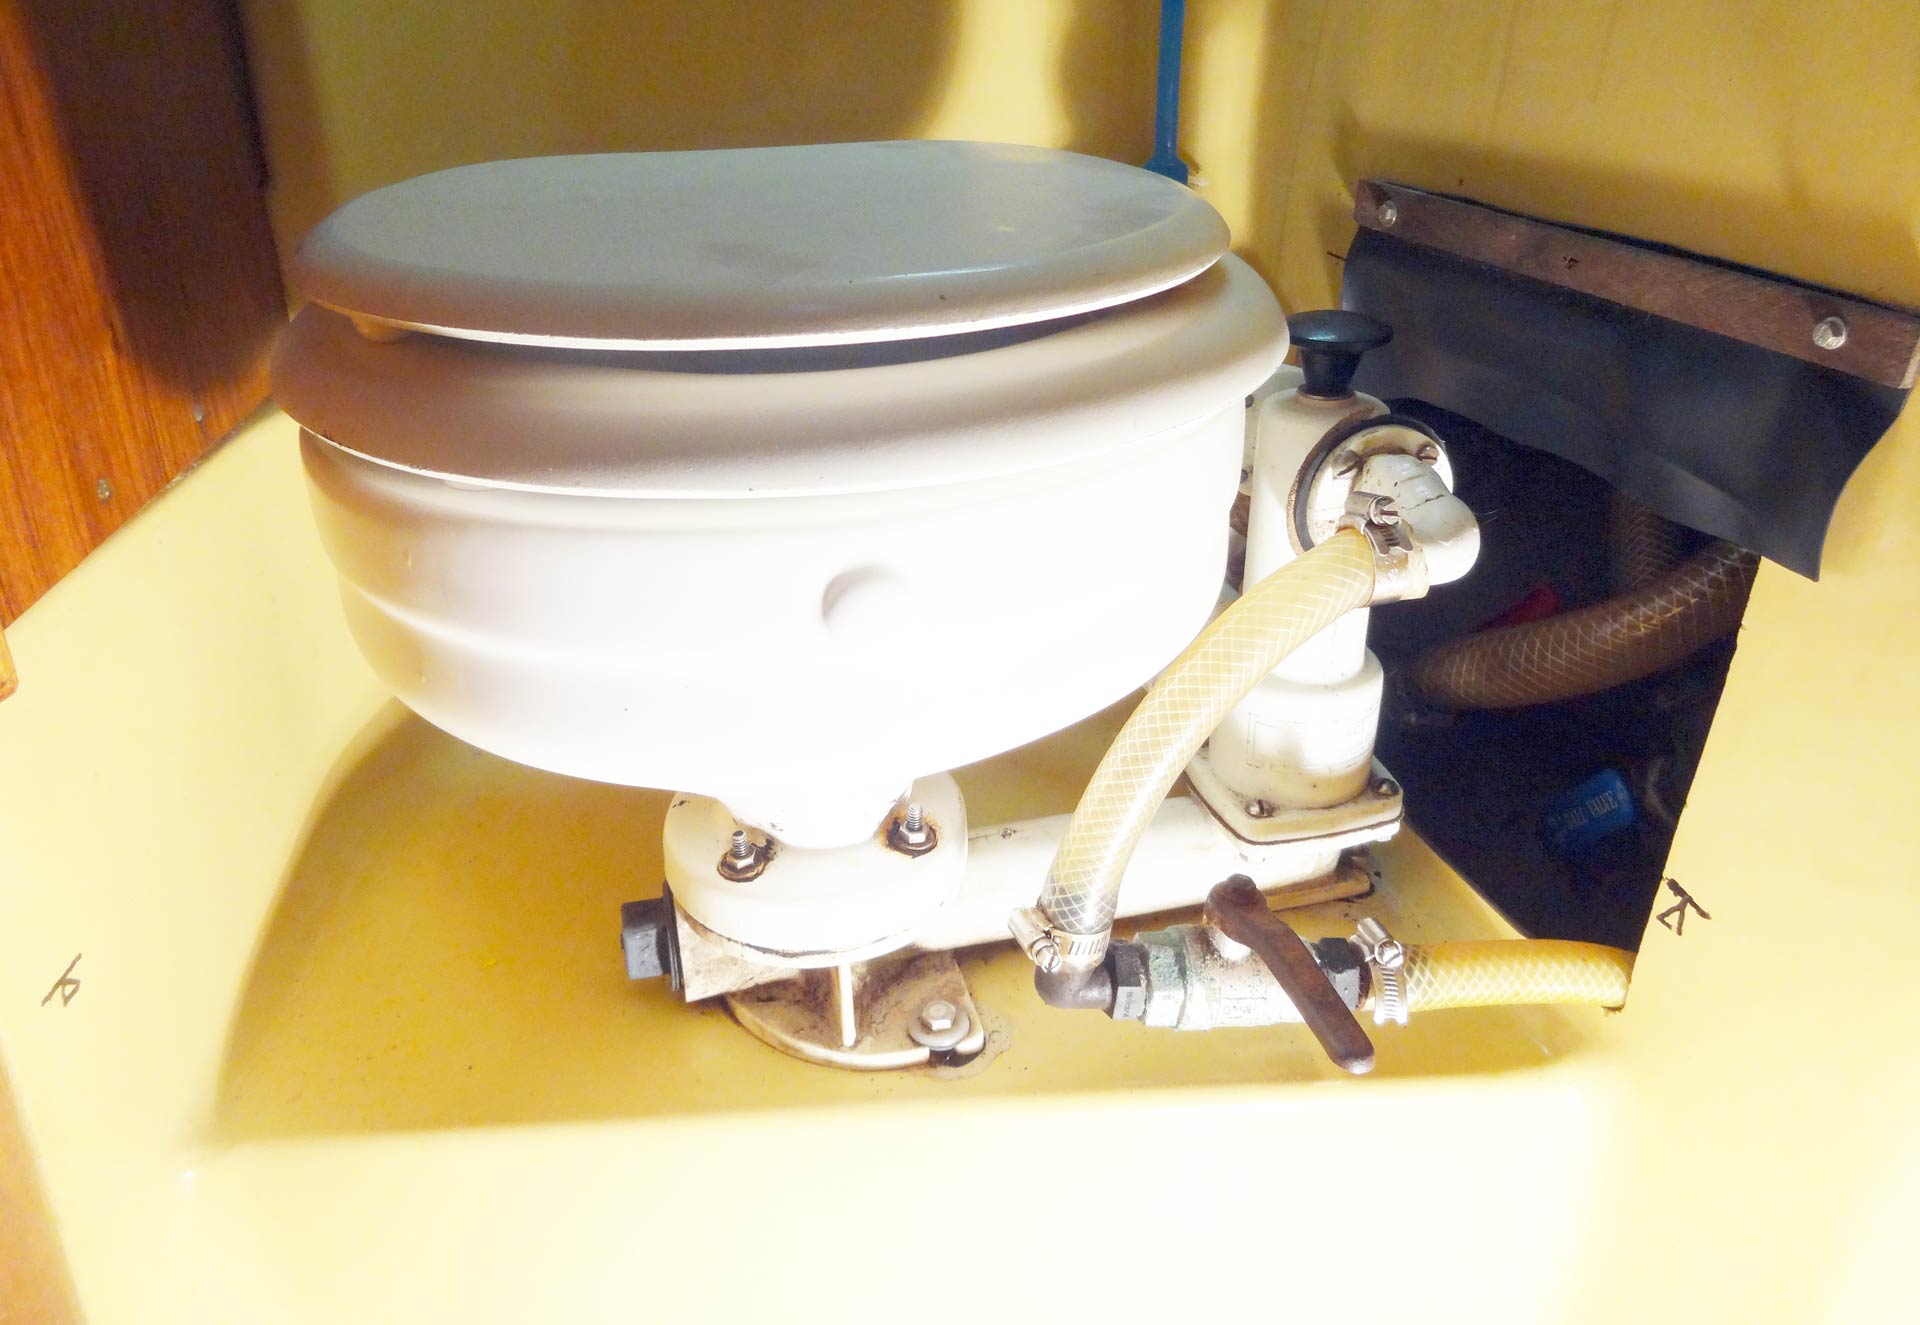
It all began with my plan to have the head of the King´s Cruiser refurbished big time. (Read the complete article here). In the end it was the old pumping toilet that finally tipped the scales and made me wanting to do the big program. Why? Well, look at the picture: This pumping toilet was at least 20 years old, if not older. It was working, indeed, but the smell, the touch, the whole idea of having a used boat, a really old one, was culminating in the small lavatory of my OLIVIA. And here it was, my dilemma: I couldn´t just take out the old WC and fit a new one. It was the head that made me decide to have the whole boat stripped of the old paint, stripped of the old wood and stripped of the old, old stuff to give it a brand new look.
That it was taking this long period of time, well, I couldn´t believe my friends who warned me. Given these facts it is all the more important and makes me even happier when I am able to complete a long job, like the fitting of a new toilet. And a great leap forward this day was indeed! So, read here how the refit of the yacht´s head came to a near finish and why fitting the new shiny white ceramics by Jabsco made me so happy.
Fitting of the custom Teak parts

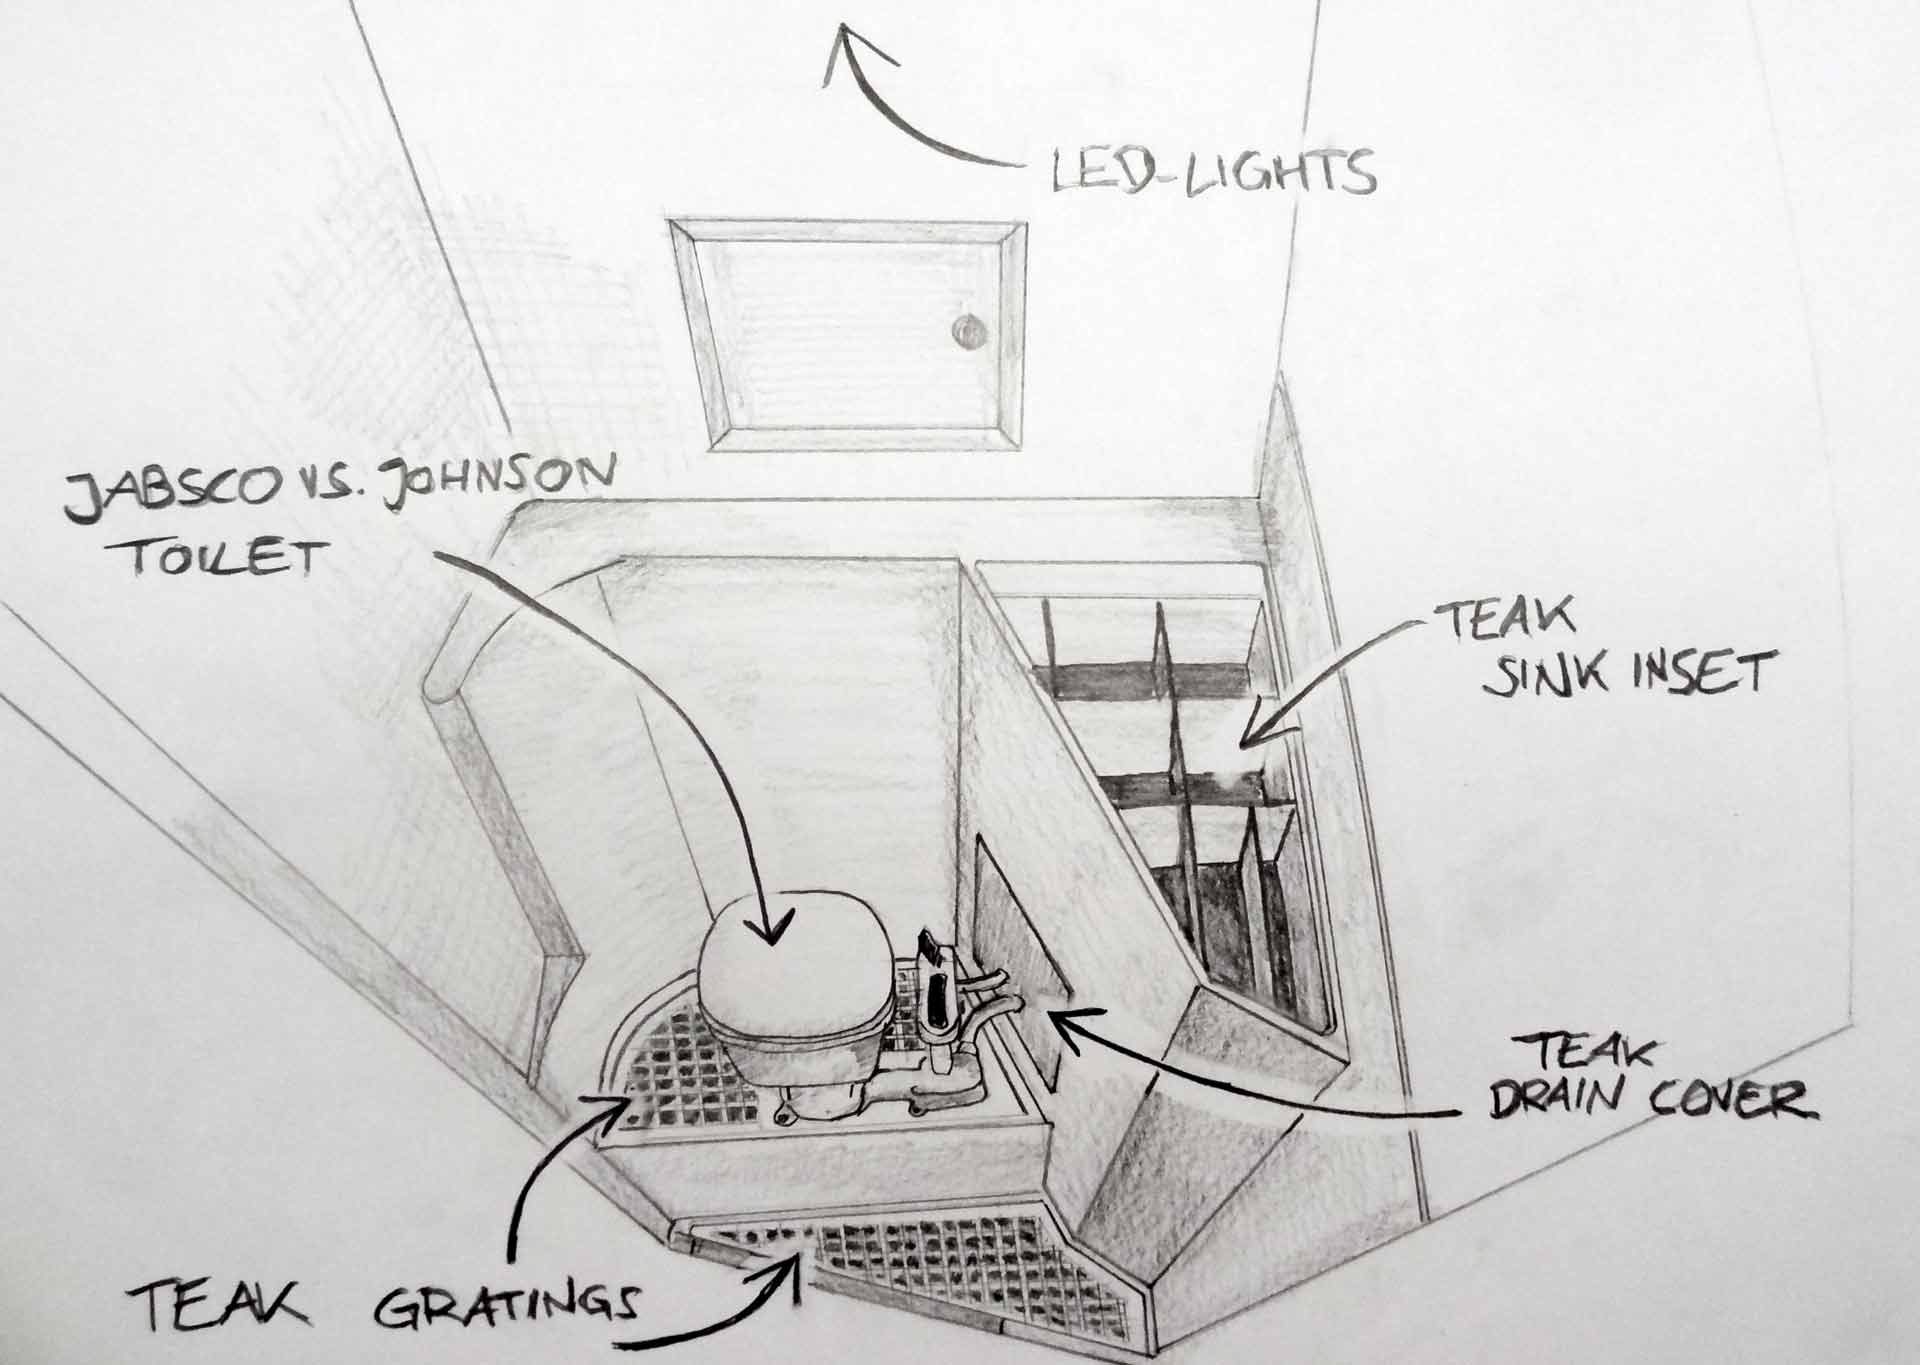
Mounting marine toilets, like the Jabsco pumping WC, is a no-brainer: It literally takes nothing more than 4 screws and bolts and two pipes to have a new WC connected. But not with the OLIVIA. As you may know, I am – at least when it comes to this very boat – a bit obsessed with utilizing Teak. I really love Teak and love the combination of white GRP-surfaces and glossy painted Teak. So, years ago, I had already made Teak-floorboards which would add a friendly, warm and cozy tone to the originally all-out-GRP head of the boat
The first floorboard was a 1 cm thick worktop of Teak, already cut and sanded and glossy painted (as well more than 2 years ago). I cleaned the whole head by means of vacuum and wet wipes, adjusted the floorboard and had it stuck to the boat with the help of Pantera marine sealant, which itself is a perfect cement. I had it drying for a couple of hours and focused on something else. When it felt proper, I went to stage two.

With a boring machine I drilles four holes through Teak worktop and the GRP of the inner hull of the head. Hammering four long screws and fitting nuts from the counter end I was able to create some tension to further tighten the bond between teak and GRP. Now, it wasn´t exactly the time to bring on the ceramics, but I fitted the second floorboard the same way. What a difference it made at once! Wow!
Plumbing: Fitting a new Jabsco yacht toilet
Now, when you take a shower you do not slide into the old used clothing, don´t you? Same goes for the piping of the new toilet. And how I loved this part! Unscrewing the hose clips – of which some were functioning without a problem (stainless steel), some were that rusty that it took all my power to get them loose. I finally took off the two hoses from the seacocks. By the way, the seacocks function absolutely properly and by the time I bought the boat these two had already been replaced by the pre-owner a couple of years before. I decided that I wouldn´t have the seacocks changed to prevent opening up another refit chapter here.

Looking at the old pipes I noticed how worn out these had been. The rubber apparently didn´t contain any softening agents anymore so that they appeared very much stiff. In contrast to the brand new (2 years old) Dometic pipes which were flexible as hell. I could also see thick crustations inside the old used pipes and the smell, still after 3 years of not using them anymore and having them dry as the desert, the smell was awfull!
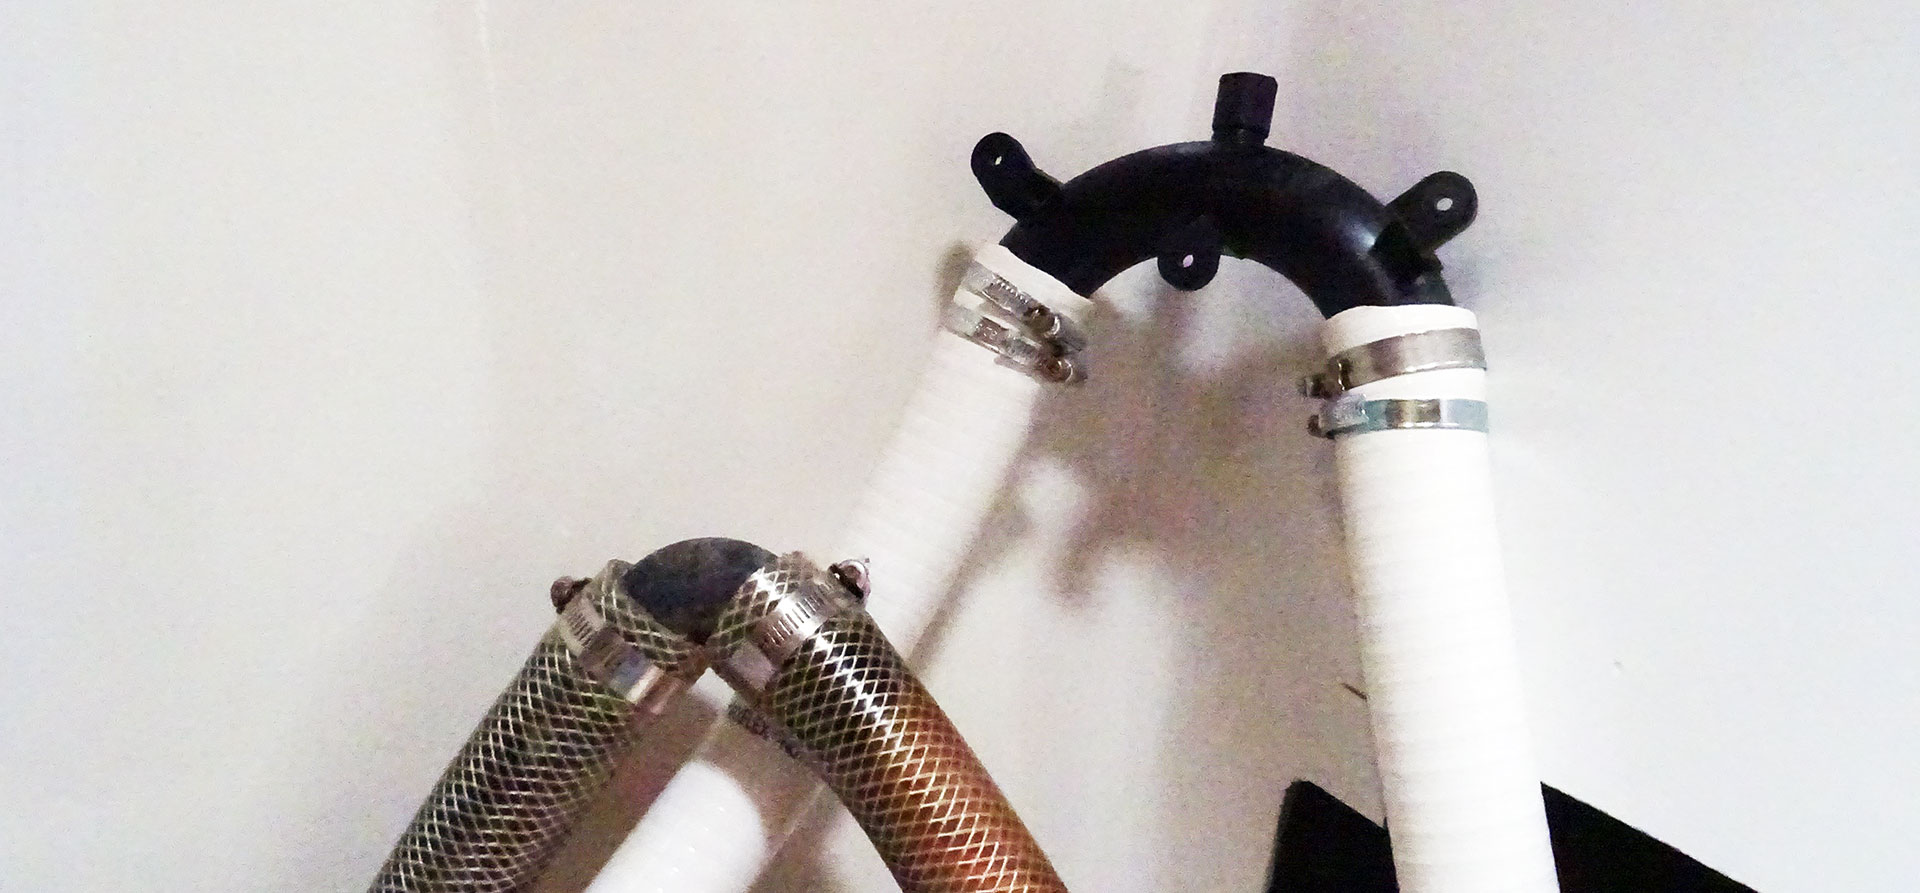
Connecting a manual marine WC means that you must have two pipes running from valves to the ceramics. One, the thin one, is fresh water from the outside of the hull that is used for flushing. The second, thicker pipe is used to drain the toilet and have the sewage pumped outboard. For the latter a special safety-installation is needed – the pipe must be installed with a gooseneck of which the highest point is above the waterline of the boat. That´s a precaution to prevent flooding of the boat via the toilet. The old gooseneck was just a 90-degree-fitting. It worked, but Dometic offers a special gooseneck-plastic part that forms a nice round curvature and allows an unhindered flush even of … well … the hardest parts of human excretion.
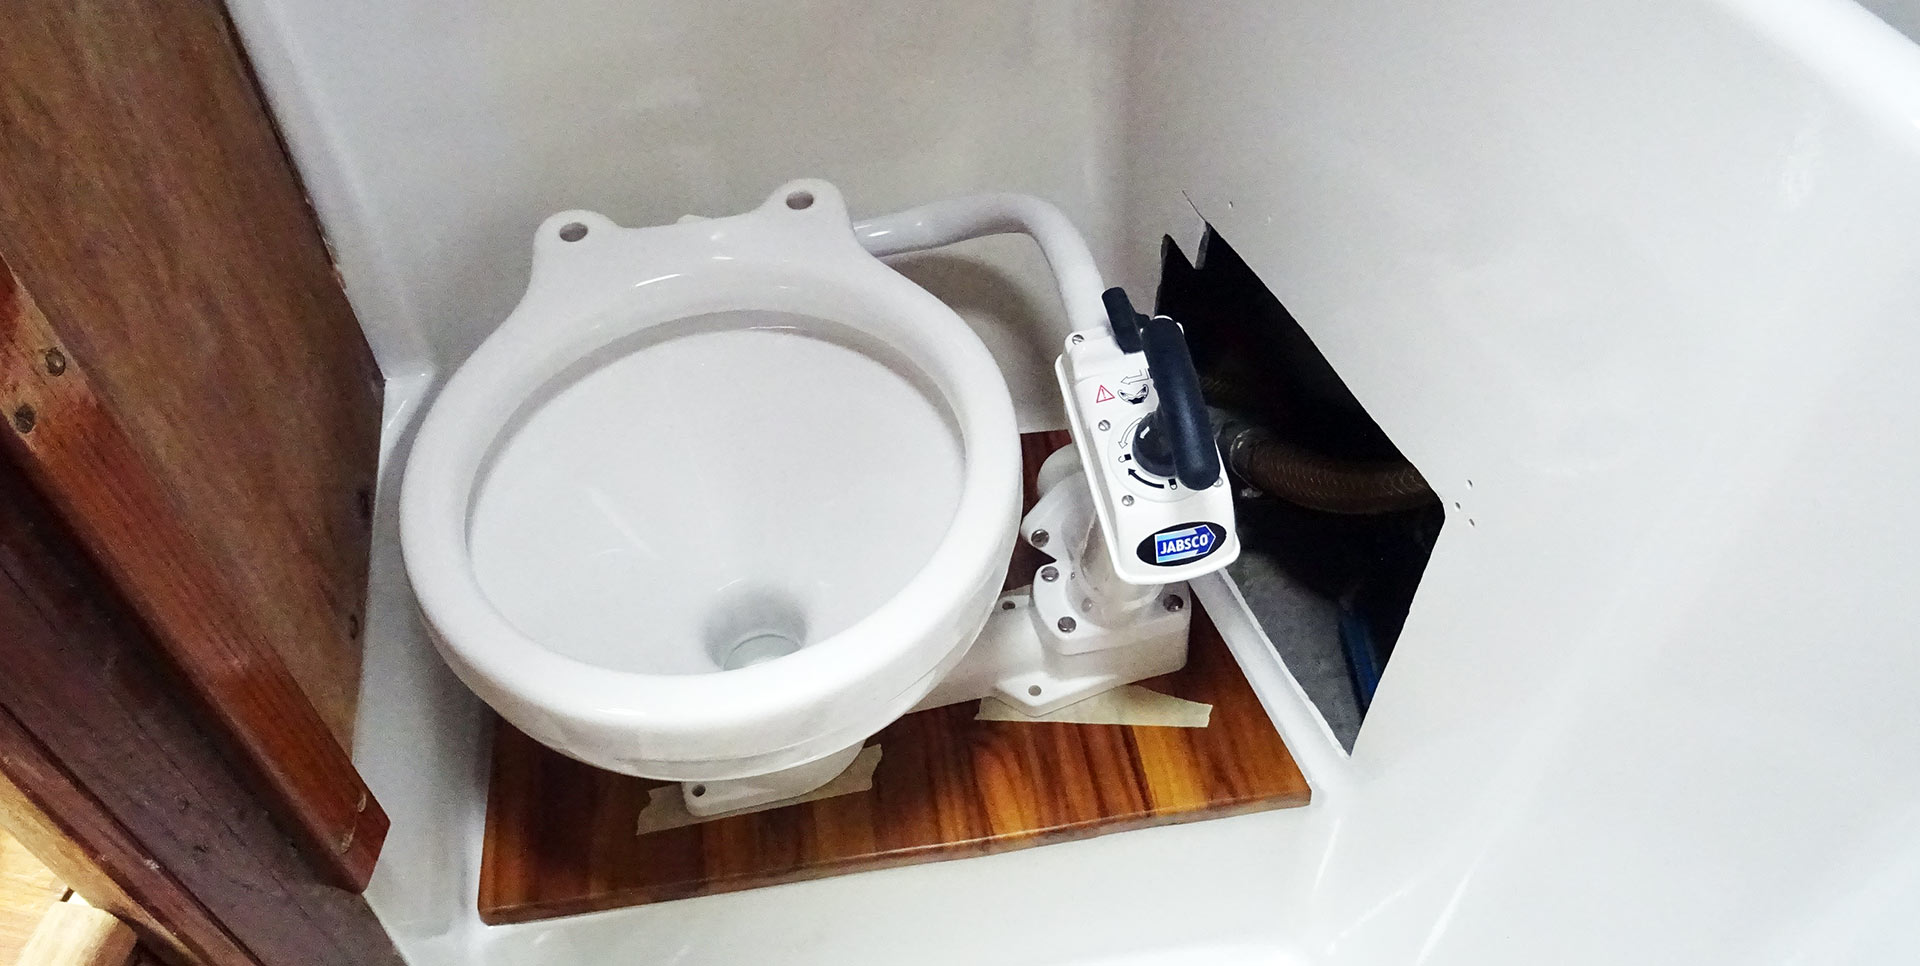
I finally twiddled the two pipes behind the nice white painted GRP: The water inlet on the King´s Cruiser is some 2 metres more to the bow (which is logical because “fresh” flushing water is best catched far away from the outlet of the sewage). The space between inner and outer GRP-hull at this point is very narrow. Laying on the floor and having sunk my arm all along in the moist interspace wasn´t that funny, especially when I almost cut my hand in blood on old broken glass of a shattered Beck´s beer bottle. Germans …
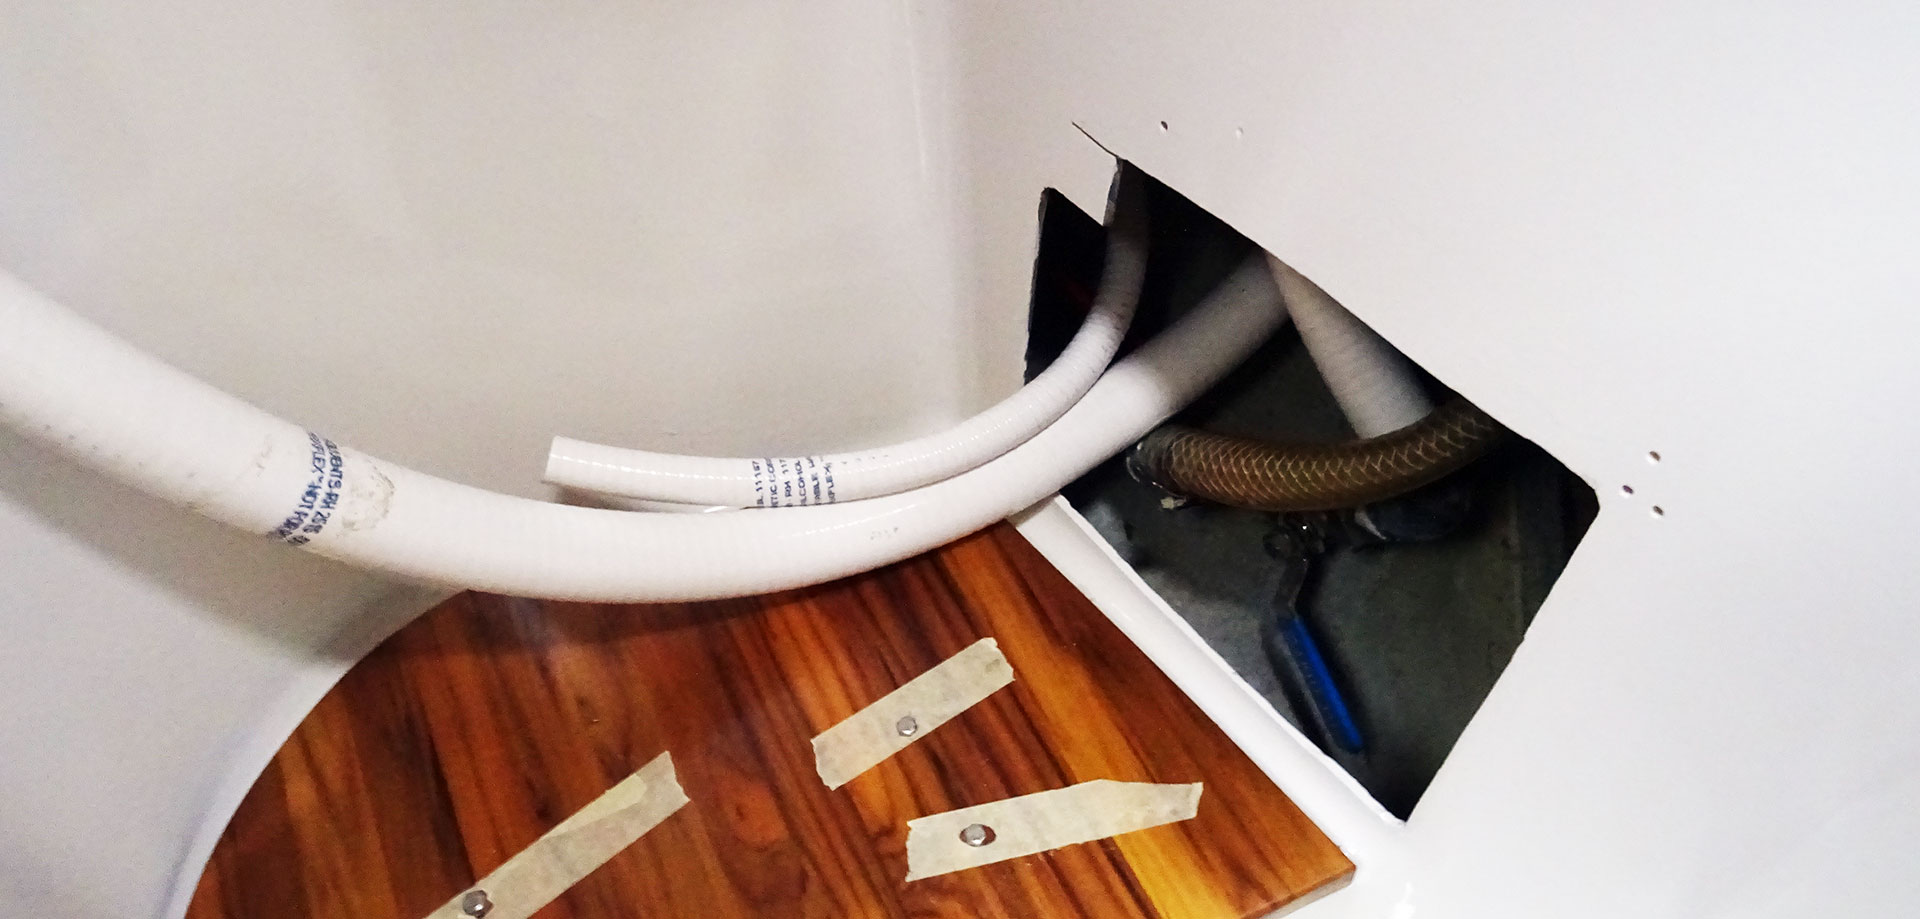
In the end both the fresh water and the sewage water pipes had been in place – though not fitted to the seacocks – and I was happy taking a pause. In my enthusiasm I was very fast in declaring this job to be finished but, I must admit, it´s more to this than just four screws. Nevertheless, another big leap was done. I grabbed the toilet and put it on the GRP-raise to take some measurements of the pipes. Nice work.
Hiding the plumbing: A nice Teak inspection flap
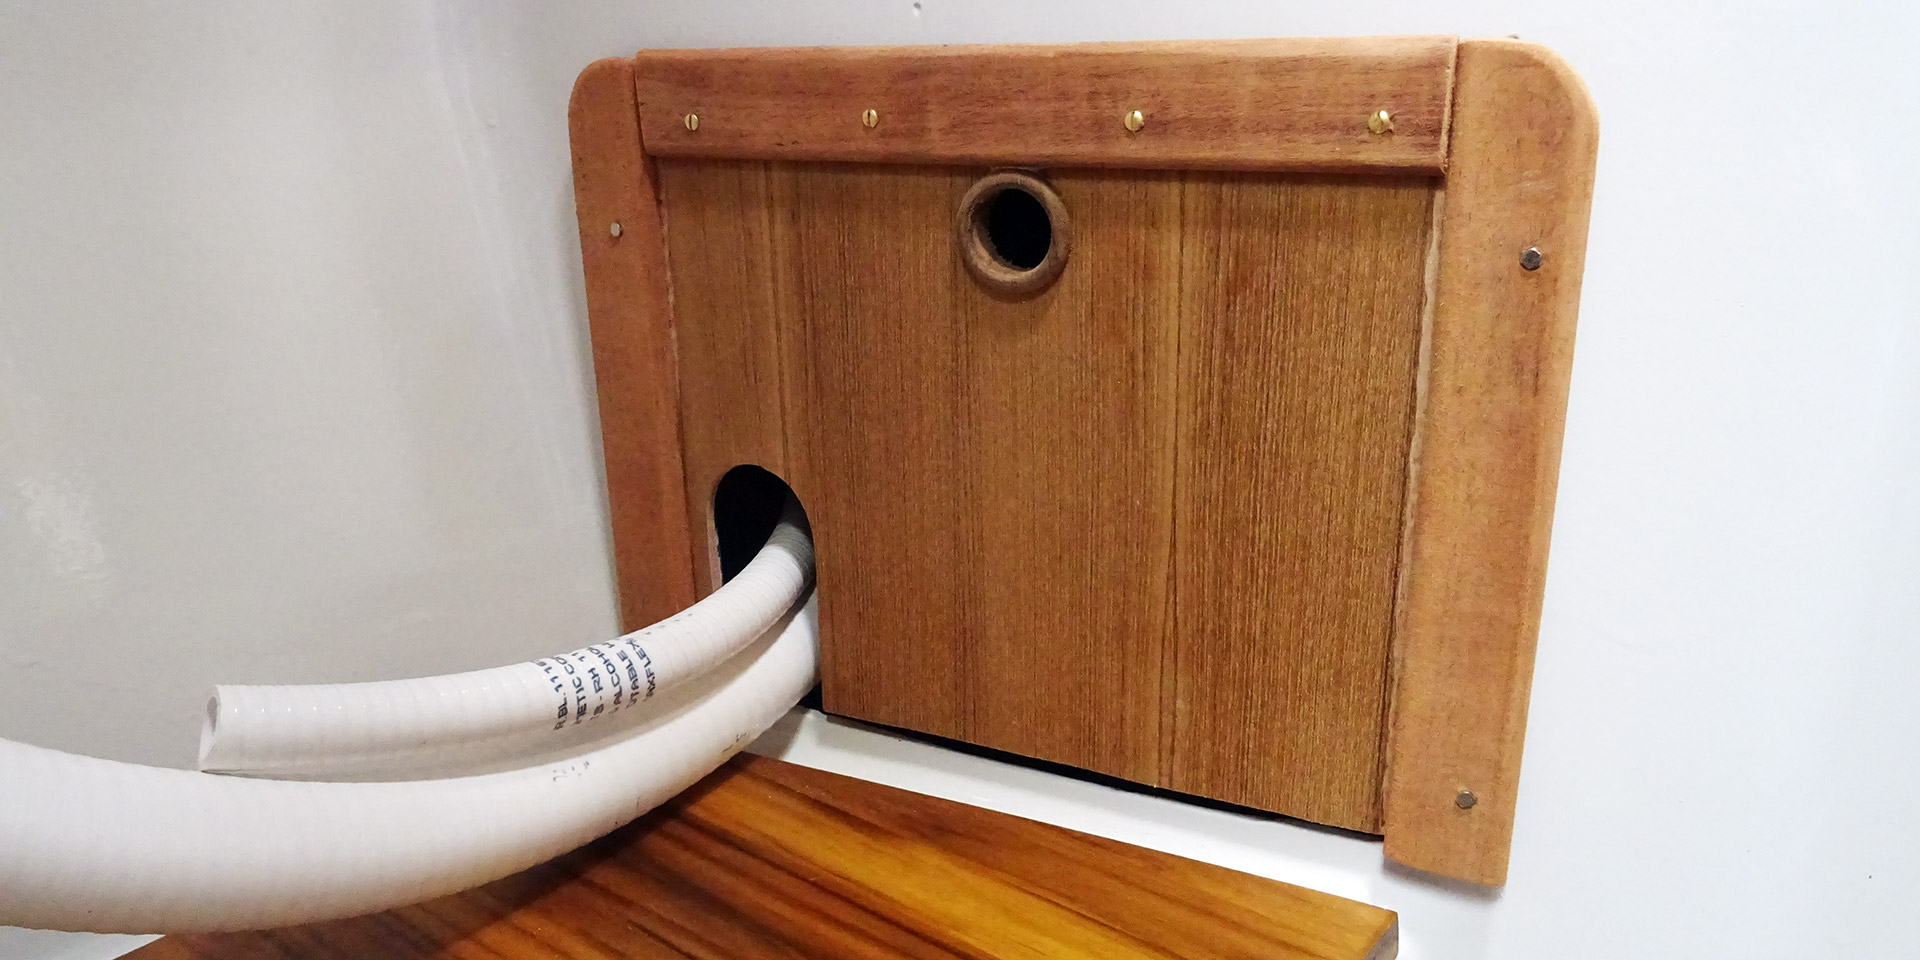
Well, but not so nice to be able to actually see the plumbing. Right there next to the toilet there was this 30 by 30 centimetres wide gaping hole in the GRP through which one could open and close the seacocks and actually see the inside of the boat. Not a particularly nice view! Back in the days when I bought the boat this huge opening was barely covered by a simple piece of plastic foil acting like a curtain. I looked cheap and didn´t really do the job.

Let´s have it done properly, I thought. There is always some nice offcut Teak and Teak-veneered plywood lying around in my boat´s timber storage and it didn´t take me more than 5 minutes to find a properly sized part. Cutting it out, sanding the edges and applying a handle was matter of nothing: Let´s check … it fitted just neatly. I also cut out a slid through which the two pipes would run smoothly to the toilet. Perfect!

I would have this inspection flap fitted as a sliding cap. So I made two tracks out of offcut Teak batten and fitted them to the GRP (Pantera + screws). A quick testing revealed that the inspection flap on the one hand was sitting tight and didn´t hang loose in its tracks and on the other hand the flap could be taken off by sliding it upwards when the seacocks might be operated or some other maintenance was needed.
It all looked pretty and nice and I was happy that it turned out to be that simple. I cannot wait to have all those nice Teak-things I was making during the past three years glossy painted because looking at the already finished Teak stuff … man, it is so awesome!
Mounting the custom made Teak toilet seat
Now, after some three hours of hard work and more than 26 months of waiting it was finally the moment: I was digging up the custom made toilet seat and lid which I had already made so long ago and intended to have them fitted to the toilet.
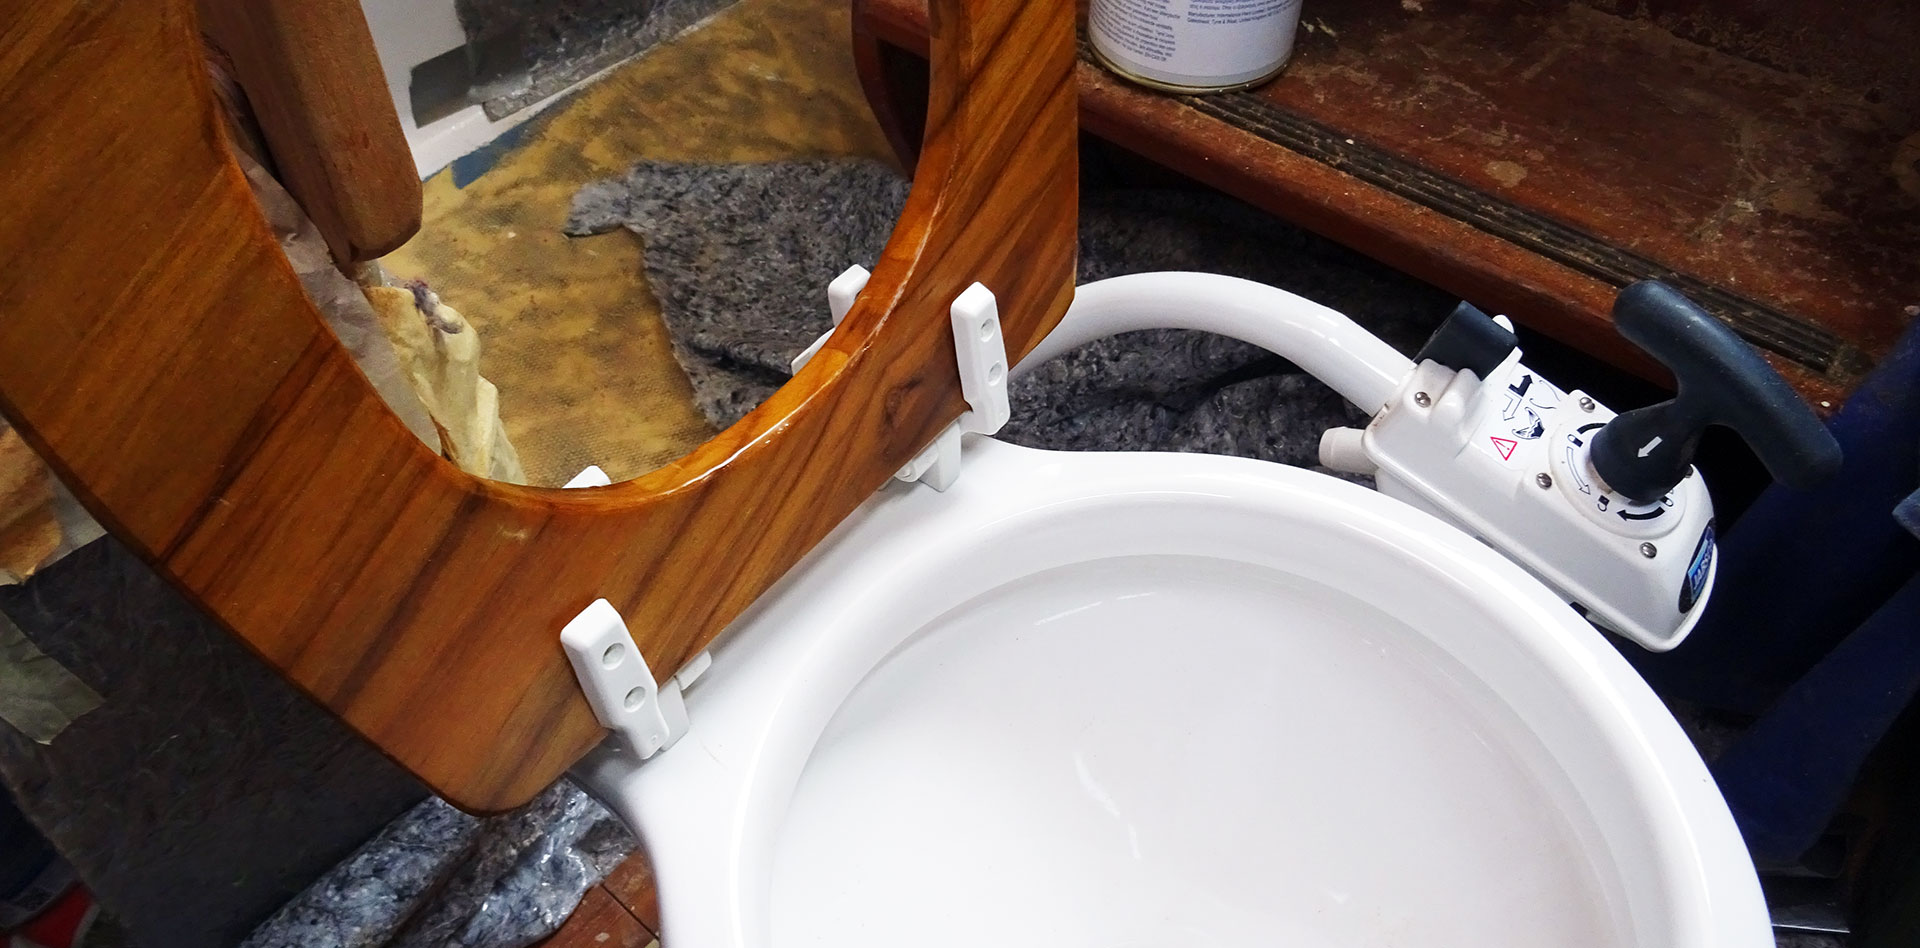
Another think that will make my King´s Cruiser´s head unique: Instead of utilizing the standard seat and lid of the Jabsco WC I made my own out of – you guessed it – Teak and had it glossy painted. All in all, that was the plan, that would blend in nicely with the Teak floorboards and the Teak-veneered bulkheads of the lavatory to create a warm atmosphere.
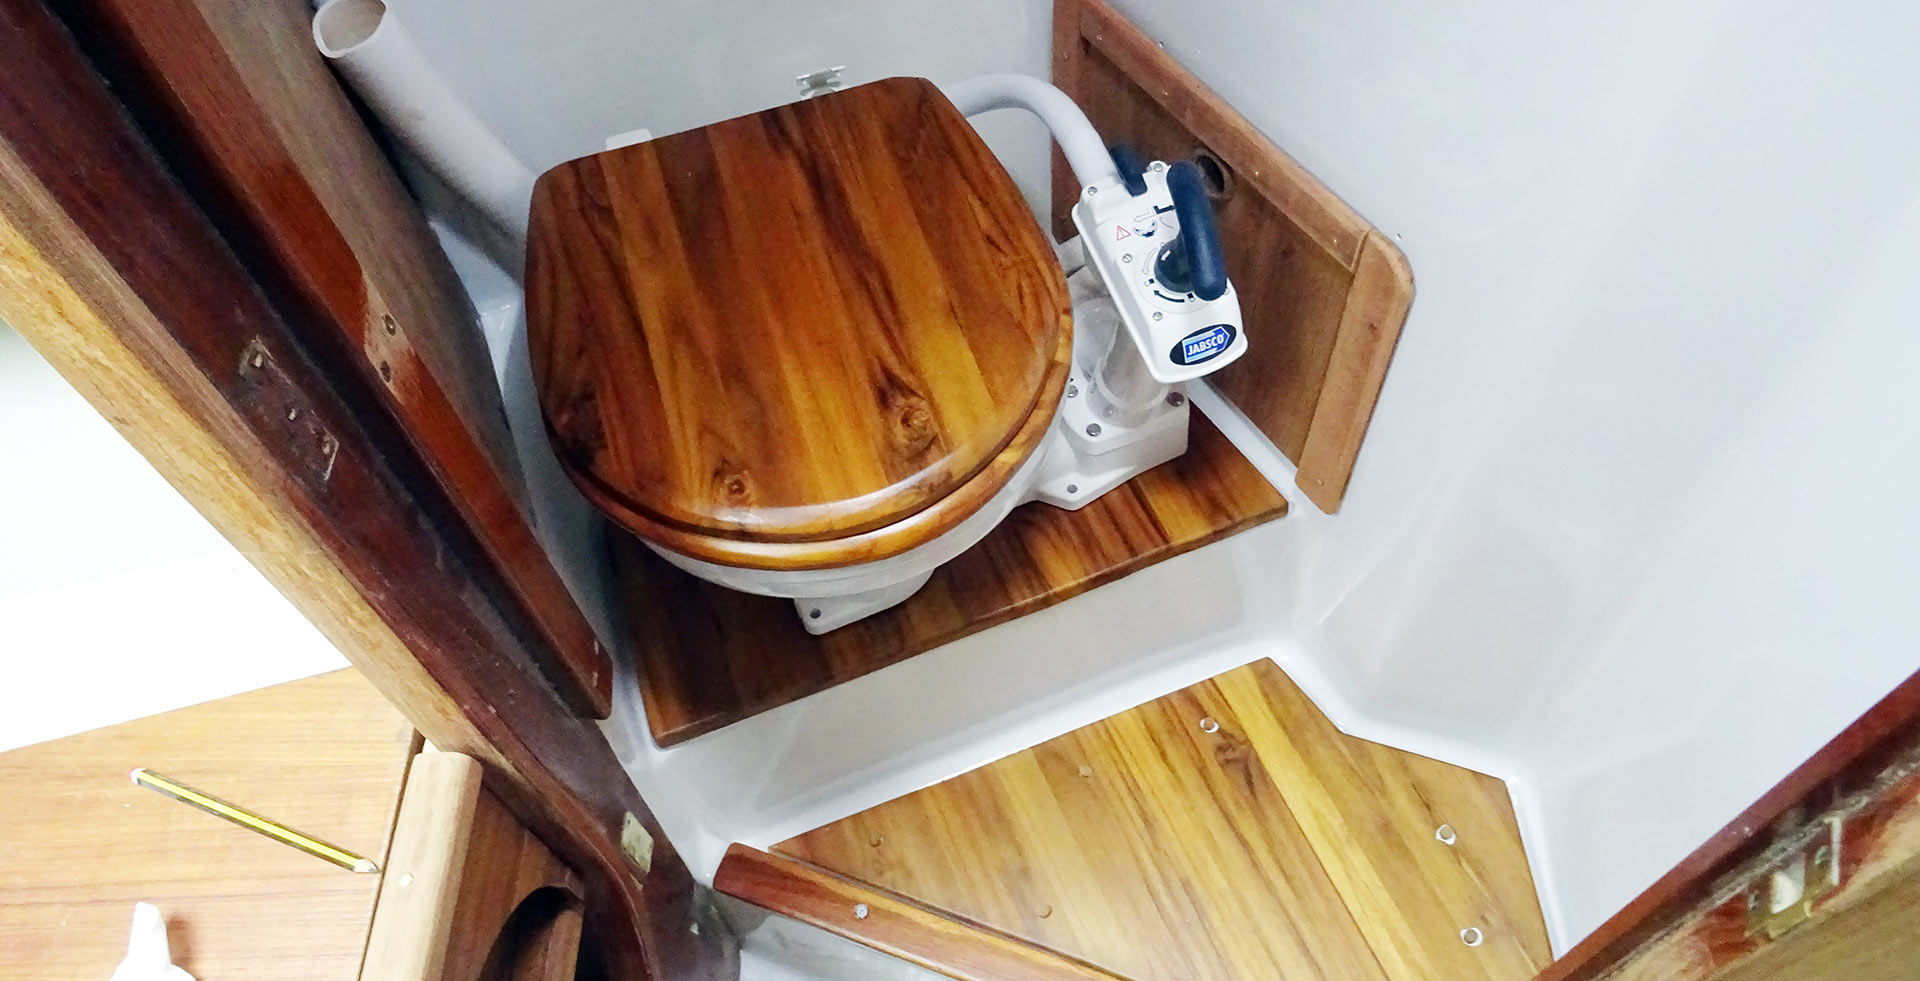
Fitting the four screws was a no brainer although I meticulously watched not to apply too much force with the cordless screwdriver: Teak is a very soft material and screws which are drilled in with too much power tend to overrun and loose grip in the wooden piece. That would have ruined the whole Teak stuff. But my caution was eligible and it worked out just fine. Now, look at this lavatory: Isn´t it a beauty in itself?

Next steps of the head refit: Final fittings!
Well, I of course wasn´t able to finish work in the head this day. Next time I will have to bring a hairdryer in order to heat up the rubber pipes to finally be able to get them over the valves. I hope that I won´t forget to buy some more hose clips either. Then I would have to think for a solution to fit the Teak made tray for bathroom utensils in the old sink.

I decided not to utilize the bathroom sink anymore. I will disconnect the hose and close the valve underneath forever and remove the pipe. The bathroom of my King´s Cruiser is just too small to use it as a shower or even to get a decent wash here. Instead, washing one´s hands after taking a dump can be done in the galley´s new sink (another nice project upcoming) and whilst sailing I am the greatest fan of wet wipes of which I have the XXL-packages with me all the time.

Not to mention the roofing of the lavatory, of which I fitted the panels last time and now the finalization will be done: Adding decorative Teak stripes and cover strips. Well, in the end this was a great 5 hour working day. Finally another big chunk of work was done and maybe my prophetic vision from two years ago will indeed turn out to be true in the near future: I then said: “The yacht´s head will be the first room of my boat to be completely finished.” There´s a good chance it actually will.
Here´s lavatory refit article 1, 2 and 3
Sailing yacht refit, a neverending story. Here´s more:
Chain plates refurbishment, Parts 1 and 2
Making a great looking chart table of massive Teak, parts 1, 2 and 3