Today was a particularly good day. After five working hours in the boat I return home – fully covered in Teak-dust. After a long hot shower – the draining water was coloured brown by all the sanded Teak in my hair – I sit down in satisfaction and look back onto a very, very successful day. These days are seldom when you do a tedious work like a yacht refit but when they occur – man, this feeling is worth the rather dreary days of refit. What was it about today? You remember how the hole fore cabin refit thing started? Well, here´s a pic:

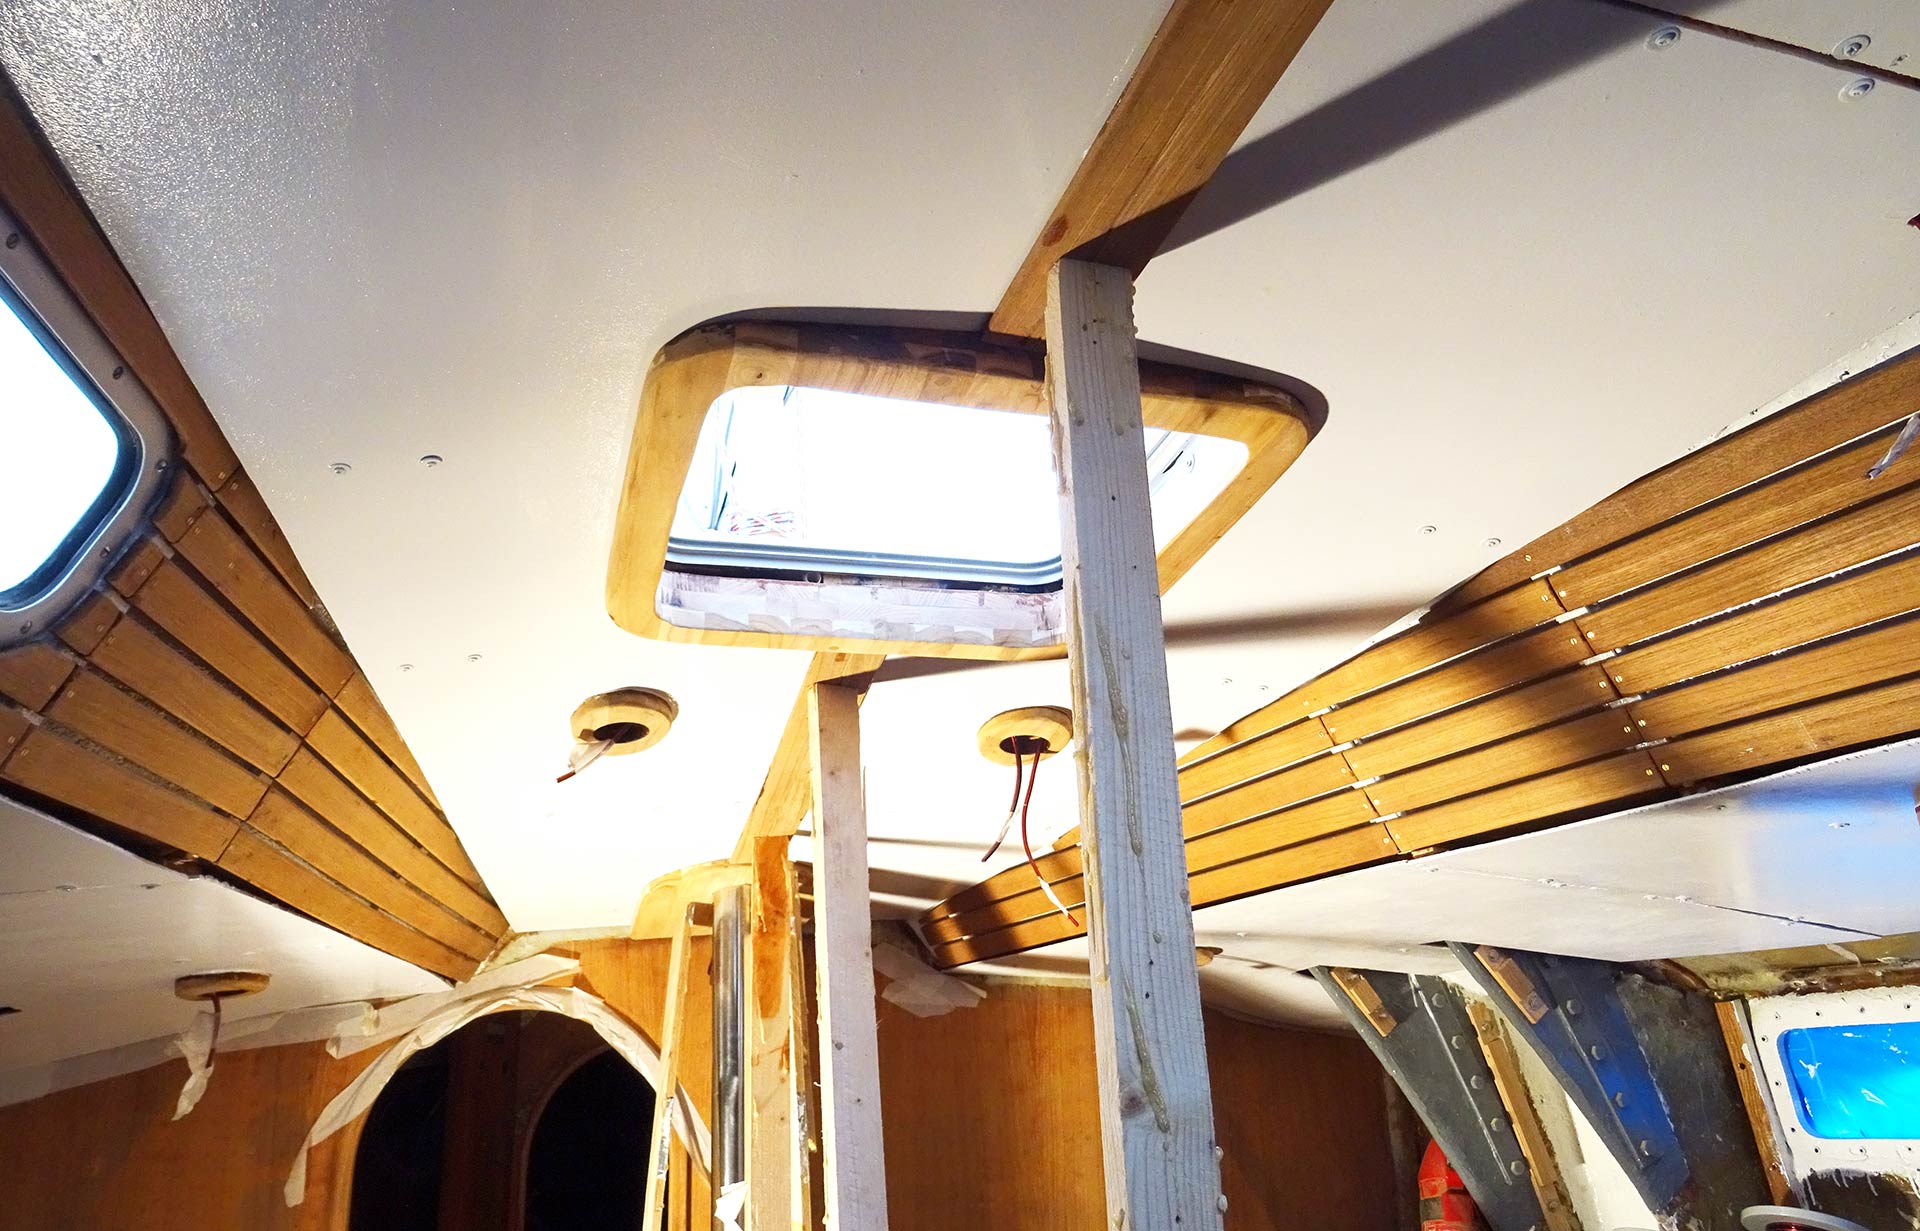
I did have a vision how the new fore cabin should be looking like when it´s done, well, to be honest, I´ve had two visions and today was the first day that the magic of a plan coming ture occurred. Today I really for the first time saw with my own eyes that my vision was finally coming true – and that it might look just awesome. First of all, it started with the last roofing and hull panels …
Fitting of new roofing panels

I was thinking a lot of the fore cabin. You see, this is the place where I will find a good night´s sleep after a long day out sailing and therefore I want this cabin to be cosy and nice. It´s a classic V-berth and the rear end (being actually the front of the boat) is not very wide: There´s just 35 centimeters from end to end. No problem for one person alone. Two adults will have to bring at least their feet very close together here. But back to the fore cabin concept: Cosy means warm, snug and secure. Teak is a perfect material to offer this warmth. So I decided to again go for a ceiling here.

But the whole fore cabin? No, I thought just because of the cabin being so small – it´s just 2.10 metres long and has nearly the same width at the bulkhead end. A small cabin for sure. If I would cover all of the hull with Teak it might get too dark in here. So I opted to have more white in this room by simply adding lacquered panels to the upper part of the cabin just above the newly added shelves (read here about making and fitting of the shelves). So today it was all about making the panels and fitting them.

Cutting of the plywood from a cardboard gauge model was no problem as because of the wooden substruction running all along at the hull just until under the roof there will be any problem to screw the panels securely to it. When I was finishing the cutting work and did apply some minor corrections with sandpaper I was happy to see that it worked very well for the cabin: Indeed, when the panels will later be painted in shiny white (just as the roofing panels) it will increase the intensity of the brightness and thus be lightening up the small cabin for sure.

As with all wooden surfaces which will not be accessible after being mounted I painted the backside of the panels with Epoxy to ensure a water-repellent effect. Especially in this small room the condensation of people´s breath while sleeping can create a serious problem for unprotected and soft wooden surfaces just as plywood is. The nice sides of the panels had now been painted with two thick layers of nice yacht-white and after final fitting in the coming days there will be a last and final layer of this nice paint. For now, I am happy.
Getting rid of the old GRP hatch frame
Not so happy I was with the escape and ventilation hatch of the fore cabin. You see, when you lay down on the cushion and cannot find your sleep instantly, you will unavoidably look up to the ceiling whilst laying on your back. And what will you see? A dirty old GRP-hatch frame. This frame might be as old as my King´s Cruiser 33 is, so that´s some 43 years! No, I think there has to be something different, something more beautiful and stylish. I was doing the same to the ventilation hatch of the saloon some months ago and the outcome was just as perfect:
Doesn´t this look just great? Teak is doing wonders to a classy boat like mine and getting rid of this old plastic stuff is always a leap forward for the boat. But there is also a second thing to it which is very gracefully solving another problem: The lighting situation. I need a light in the for cabin, of course. When I was planning the new electric wiring and got the new LED-lights for the boat I decided to install one light in the ceiling above (and maybe one another reading light to the bulkhead, but that´s for later). So I came up with the idea to integrate the light plinth into the frame itself.

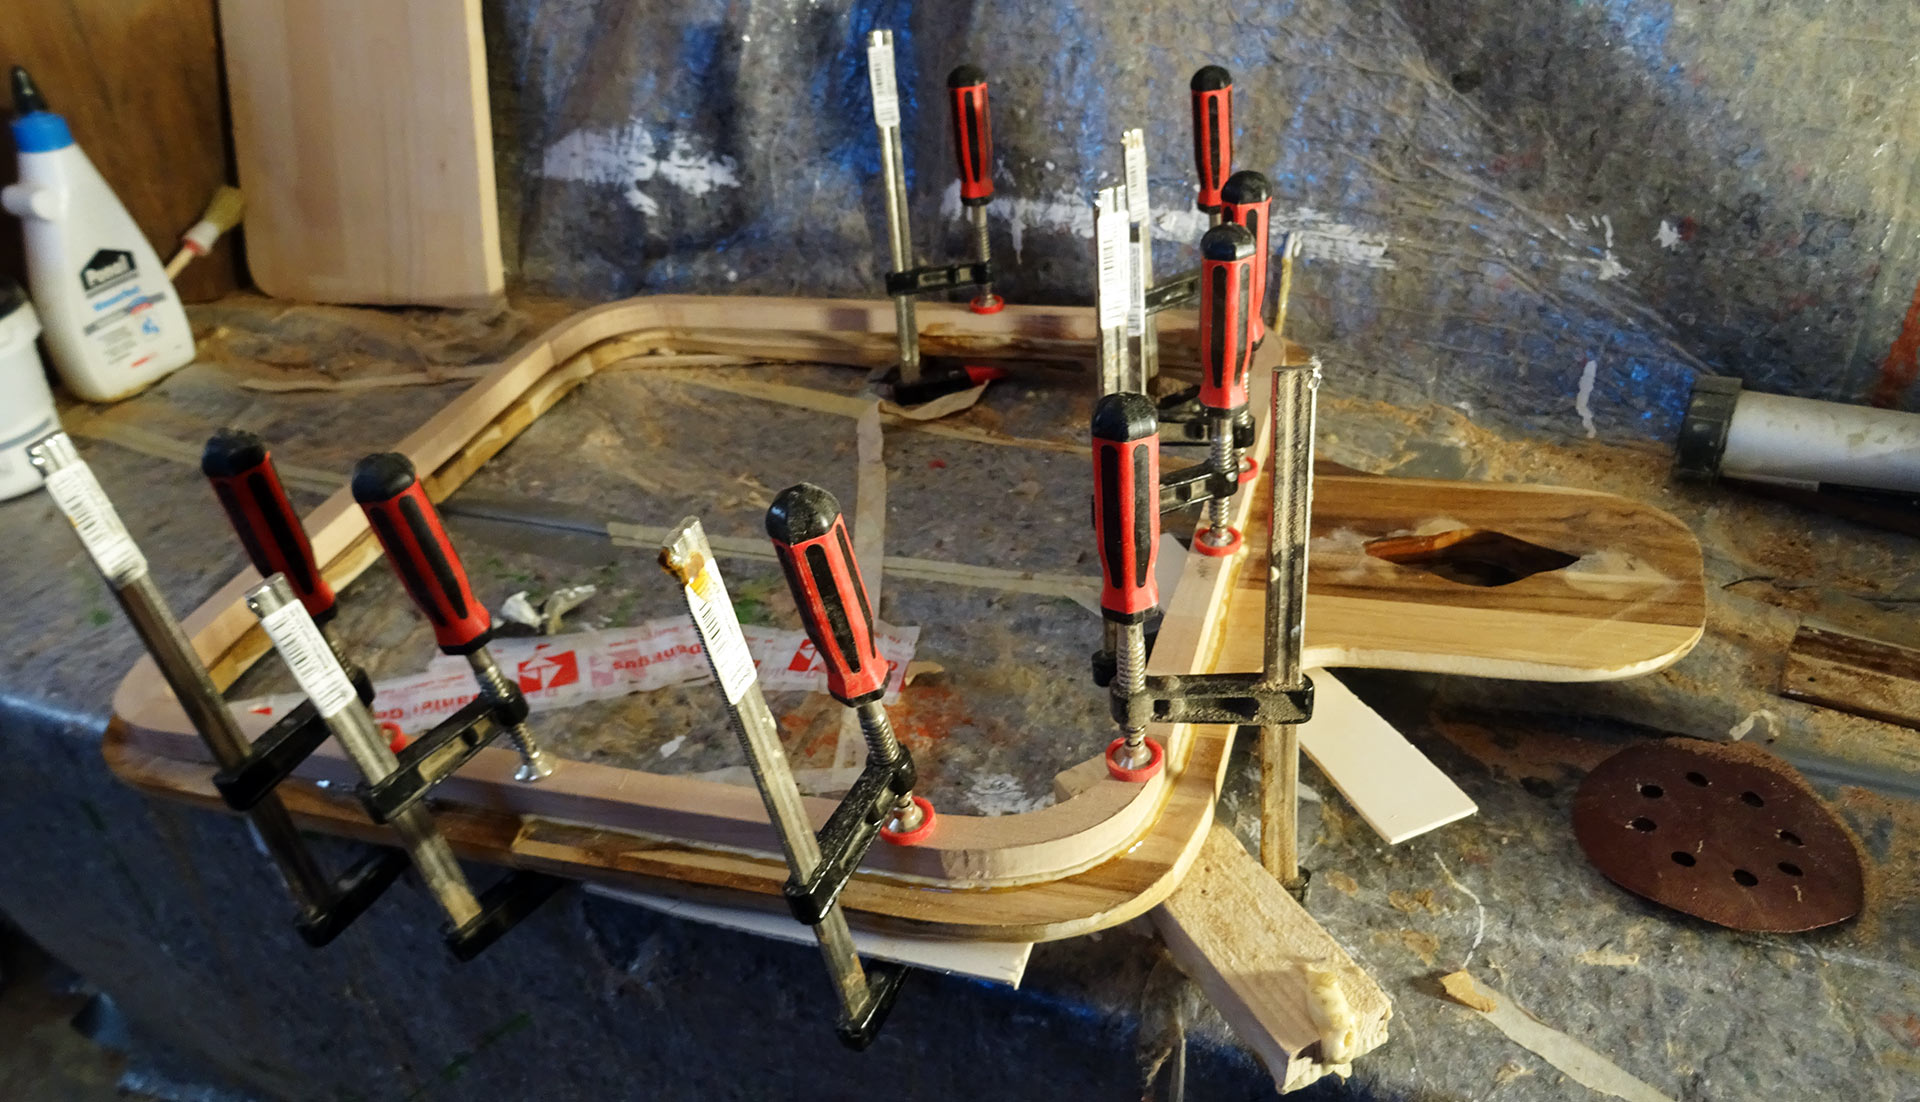
Said and done. Cutting the Teak board to size after transferring the measurements of the escape hatch frame from the old GRP-part was a no-brainer. Since Teak timber is one of the more expensive raw materials to be working with I decided not to cut from my big board but to utilize surplus material and offcut stuff into size. In the end it was three parts, a big puzzle. Yes I know, one solid frame would still be looking a lot nicer but since I am spending only a few hours in the fore cabin (and most of these unconsciously sleeping) I think it´s okay to have the frame being pieced together.

So I needed a second layer of wood that would be keeping the three parts together. I also used offcut from a mere cheaper timer, I think it is beech tree, sanded it down and started the big puzzle. The parts then had been glued together and under big pressure with D4 adhesive. When the glue was beginning to solidfy I additionally drilled some screws through both layers to ensure a tight fit.
When this has also dried thoroughly after a couple of days I again water-proofed the backside of the new hatch frame by adding a thick layer of Epoxy. Now was the time to get dirty … because of my knowledge back then when I made the roofing panels of the fore cabin (read about this adventure here) I deliberately left a much smaller cut out for the hatch than needed. Because I knew that the roofing panels wouldn´t be fitting just and accurately – but if I´d already been cutting out the material for the hatch I know for sure it would not have been fitting neatly. So today I started the hand-grinder and began to tediously apply an overhead abrasive finishing to the panels to finally fit the hatch frame.
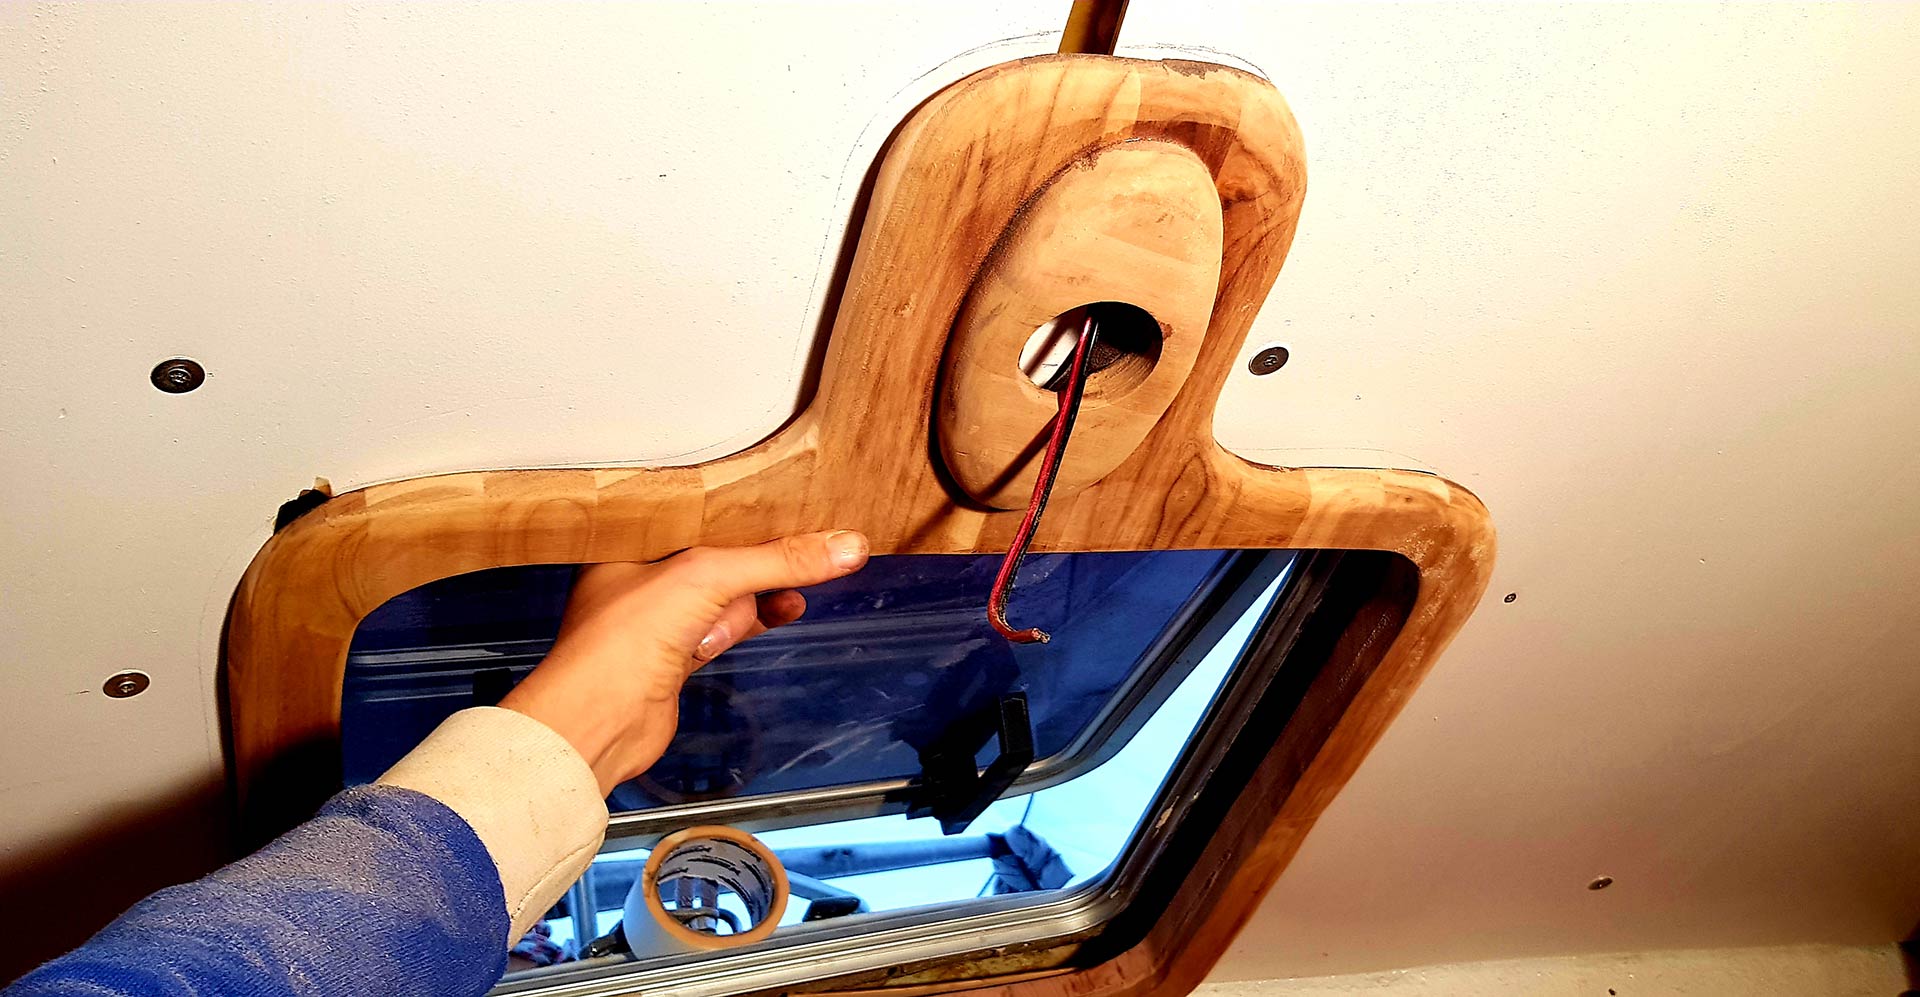
After some 20 minutes of nearly unbearably loud sanding in the poorly ventilated fore cabin I was covered in dust completely and the floodlight barely couldn´t pierce through the fog, but when I tried to hold the hatch frame to its new place it was fitting right from the start! What a great day! My heart jumped for joy and I was just satisfied. I shortly began to think over my wiring plan for the fore cabin and decided to have a change – and arranged the wire to be running to port side instead of starboard because I instantly had a magical inspiration where to place the switch for the light …
What´s that hole in the bulkhead?
You see, I am the fifth owner of this King´s Cruiser now and there have been 43 years now since this yacht was brought to her element for the first time: That´s 43 years and four people trying to make themselves as comfortable as possible in this boat. So, naturally, everybody was drilling a hole here and installing something there. Some things are cool, like the Diesel heating which will be doing a great job when I will be sailing this yacht in the colder months of spring and autumn. But other things aren´t so cool – like the big hole in the bulkhead here:

Until now I really do not know what the hell was the guy thinking when he was cutting this huge hole into the bulkhead and fitted a plexiglass porthole to it. A porthole into the hanging locker. Into the hanging locker!?! What is this? Does he want to see how the cloth on the hanger is swinging in the dark locker? I just don´t know. But as I was working with my Teak offcut I suddenly had the idea: Why not cut out a round piece of Teak and fit it to this ugly, useless gaping hole finally covering it?
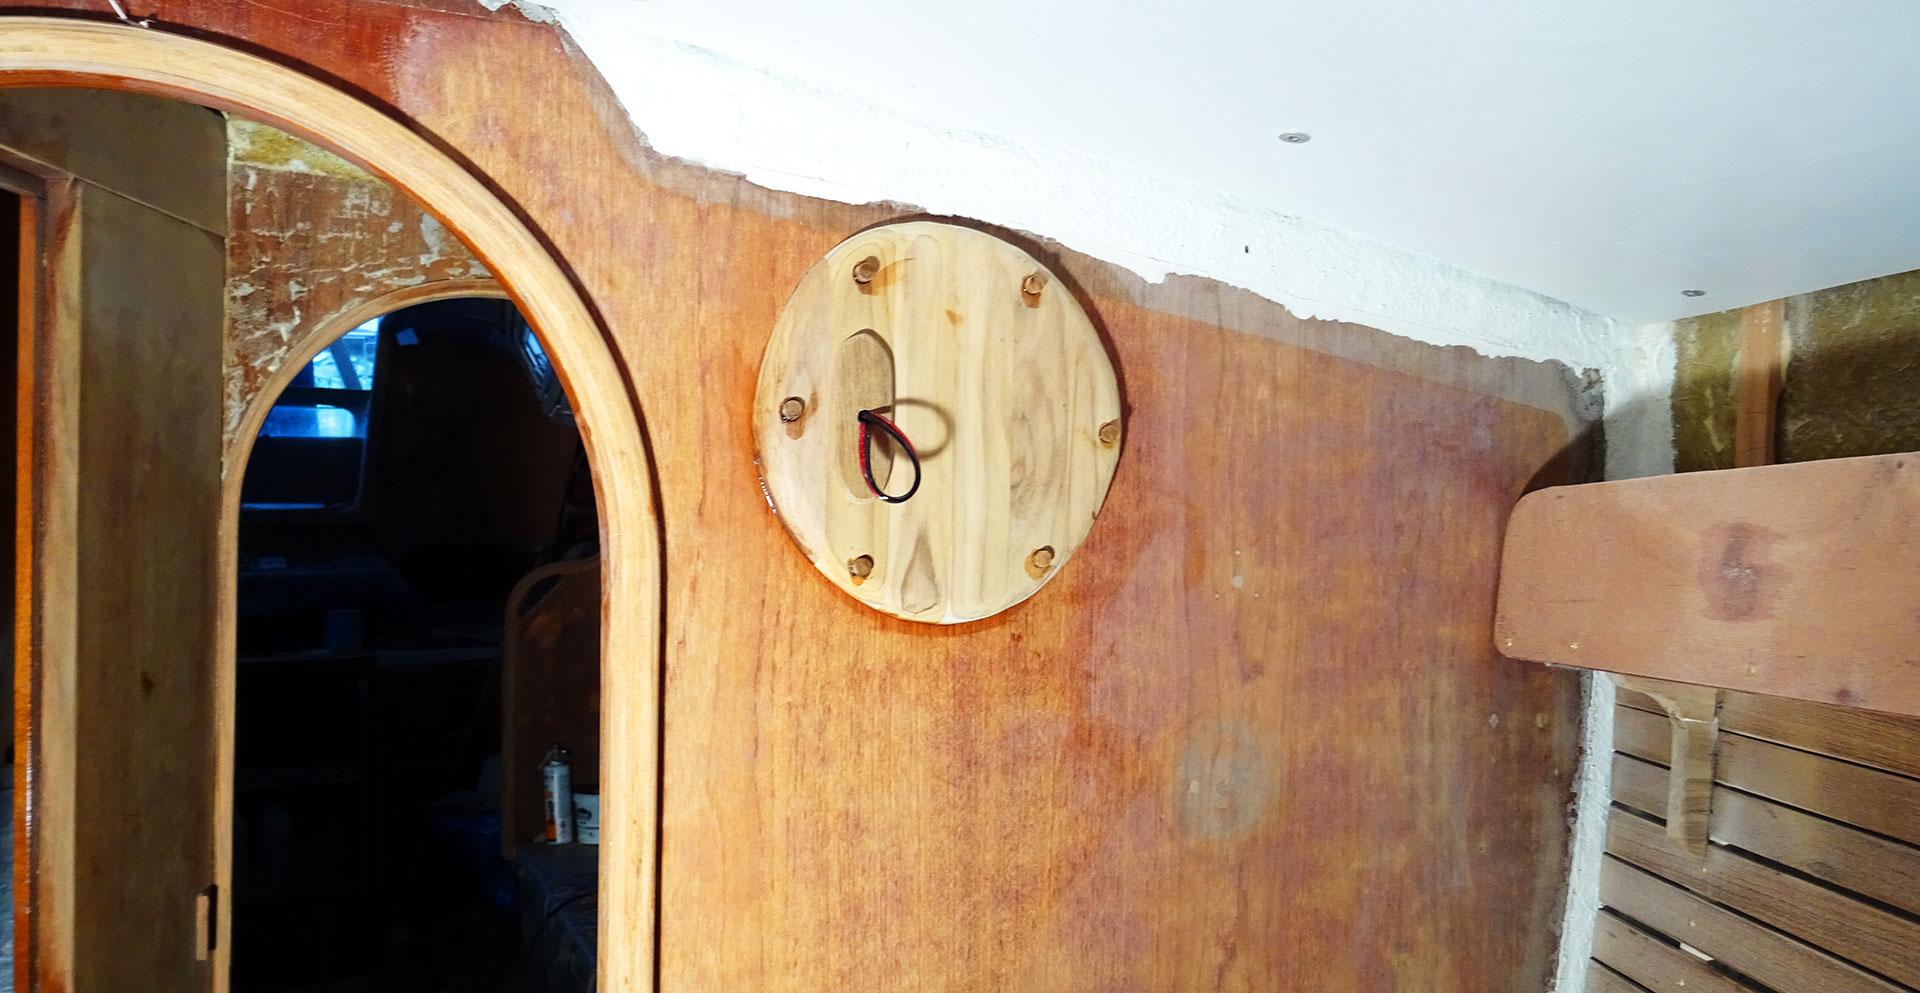
There´s another thing to it: I now have the perfect place for the switch of the ceiling light and more than enough space to either fit the reading lamp (an idea of which I am not that convinced right now I must admit) or to fit clock. You know, there are such nice yacht clocks out there. Or maybe I´ll fit something completely different here, like a small rack for a smartphone and an USB-hookup for loading the device. We will see. For now I am happy having finally closed this black hole …

Ornamental teak frames
Last but not last – and surely the greatest thing of today´s refit day at the yard – had been the fitting of the ornamental Teak frames to the chain locker cover. Man, I am so happy that this came out being finished so nicely that I can´t barely find words here! You see, when I´ve made the chain locker fairing (read about this interesting chapter here) I also had to accept more or less big allowance for interstices. Sure, there is a way to close them. But that´s a hell of sanding work!
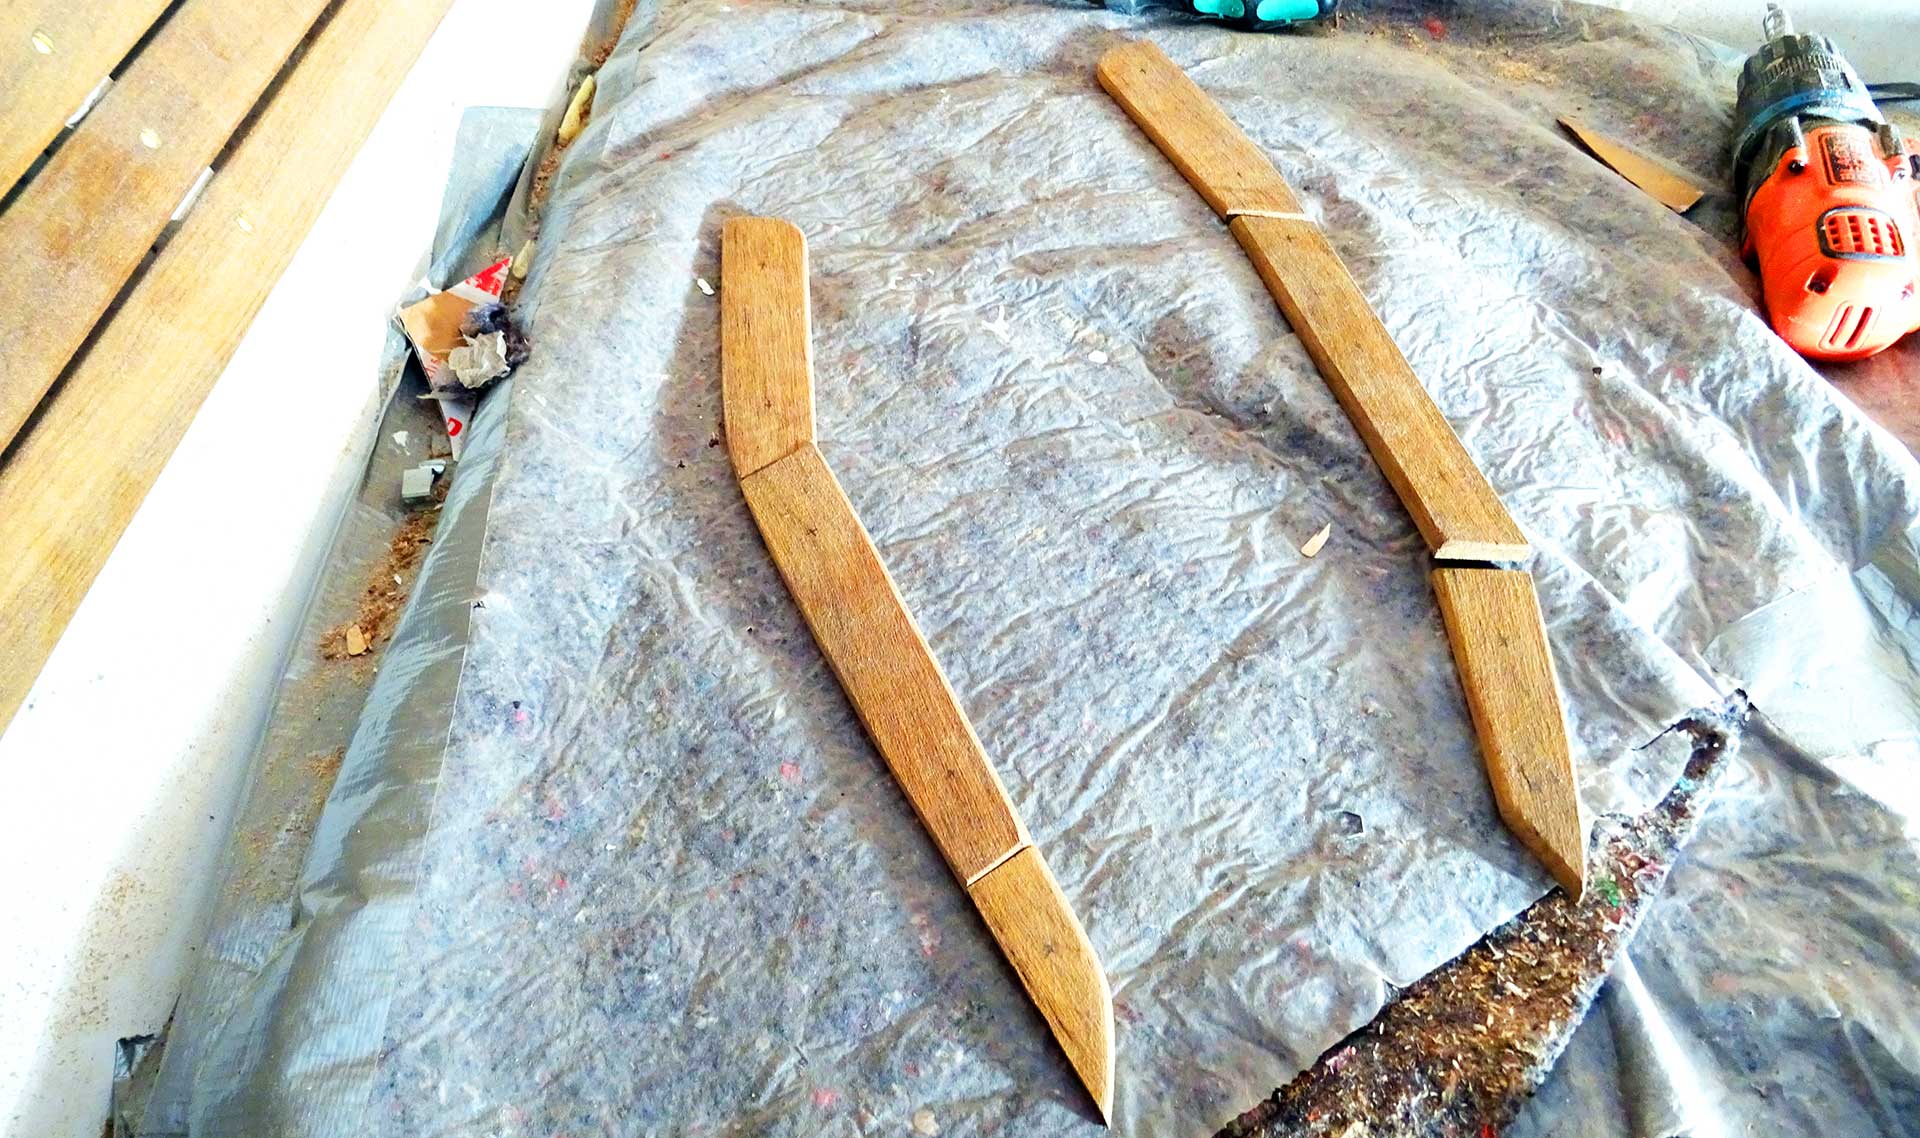
It took me at least 2 or 3 of today´s working hours to have these parts sanded in a way that they would on the one hand match their interconnecting areas neatly and on the other hand form a nice curve that is the same as the curve of the hull. In this way these ornamental frames had been glued and screwed to the chain locker and – voilá! – closed just nicely the big seams. I also added some decorative Teak stripes at the front and also worked at the small hatch to the main gas tap (more on that in the next refit article) and I would say this is just great work!

There is still a lot to do in the fore cabin: The final fitting of the Teak hatch frame alone will take some hours and lots of efforts, then the fitting of the hull panels, the decorative Teak stripes in the roofing panels and the last of the ornamental frames but I would say the most sensitive work has been done today and I am extremely satisfied with the way it all plays out so smoothly and my vision of the perfect fore cabin for my King´s Cruiser 33 finally comes true. It´s so nice when all falls into place – and I can tell you, I can´t wait to see all of this nice Teak timber being glossy painted and shining brightly with pride!
Also nice to read about the sailing yacht´s refit:
Refurbishing a filthy bilge
Refit of a yacht´s head
Making the perfect chart table