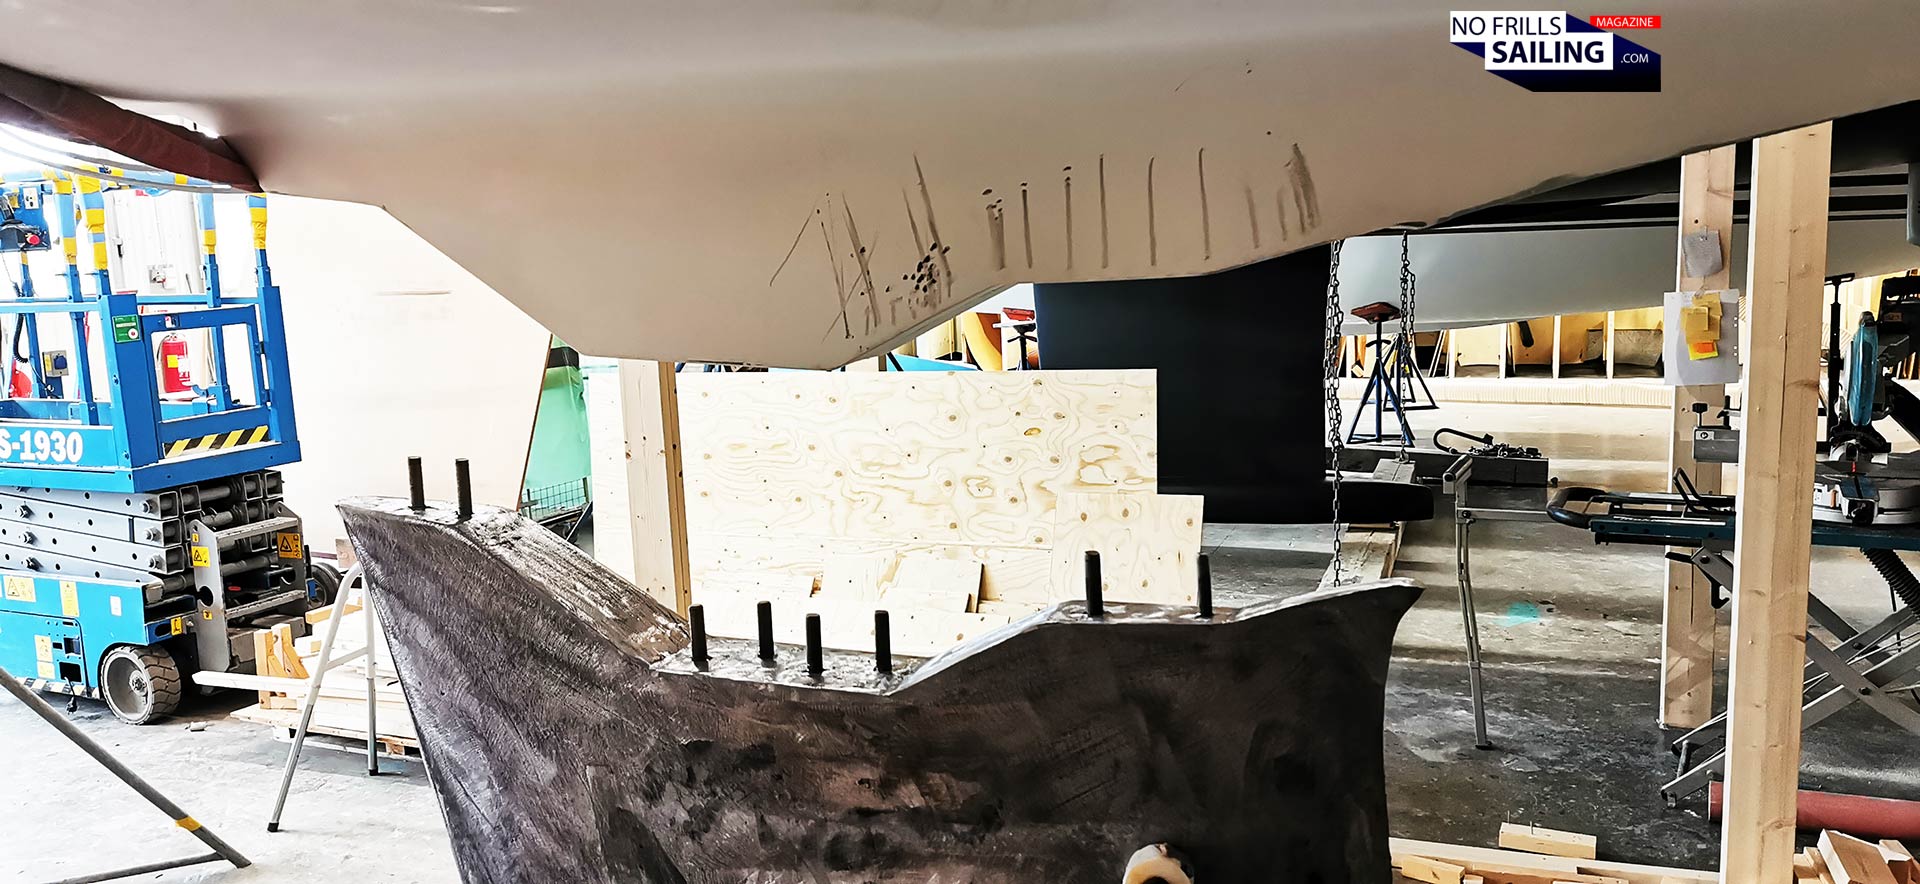
You may have read already about my visit to Linjett Yachts in Sweden in previous articles. Strolling through a shipyard is one of my most favourite occupations, next to sailing of course. This is because these birthplaces of boats do have an enchanting allure, a special attraction to me. Which is a combination of my love for boats and my adoration for craftsmanship. Behind every corner a new detail lingers, waiting to be discovered, waiting for me to make their story known. Rosättra shipyard was full of those. One of which has been this very keel, ready for mounting:
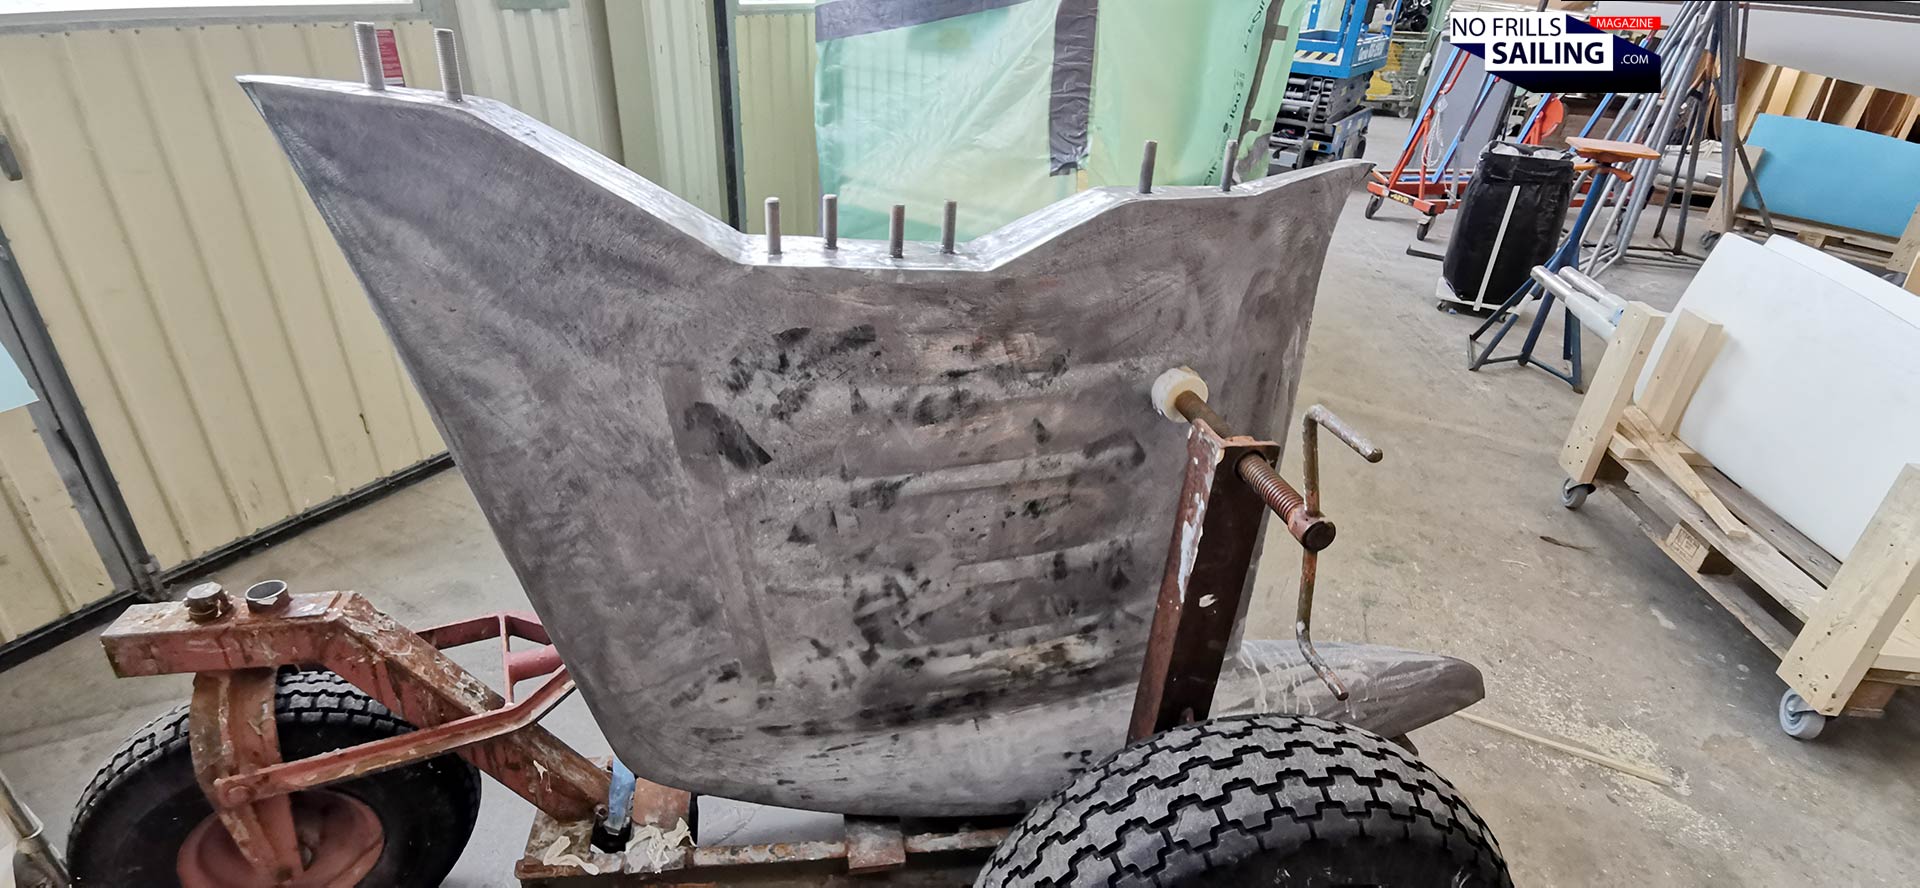
I have already published a number of articles about yacht appendages, from swing keel issues to the latest developments of casting the keel for my own new boat. The importance of this topic should be a matter of course for any sailor: If a keel fails, disaster is imminent. Looking at Linjett´s keel I immediately noticed a before unseen shape of its flange, which only increased my interest. So, let´s dive deeper into this „clever keel“-solution and compare it to the mass-market.
The importance of sailboat keels
No question, without a significant amount of ballast underneath your hull, your yacht wouldn´t stay upright and capsize. The ratio between overall displacement, or the weight of the yacht, and the ballast is a good indication for its stability. In modern cruising yachts this ballast-to-weight ratio is often below 30 per cent. Modern, wide hulls with chines are said to compensate for this lack with more form stability. Also, a longer keel means greater leverage force, requiring less weight. But that´s not what I wanted to focus on in this article. You see the keel in the picture below?
This has been photographed during my visit to Dufour Yachts in La Rochelle a few years ago. It´s a standard cast iron keel, no lead in its tip. To prevent the iron from corrosion, that would occur almost instantly as pure iron is prone to rusting, those keels are covered with a layer of filler making its surface smoother and some epoxy coating. You can clearly see the keel bolts sticking out, made of high grade stainless steel. The difference to the Linjett keel seen at the beginning of this article is striking in many aspects. One of those differences is the, in this case flat, flange.
Peter Norlin´s genius
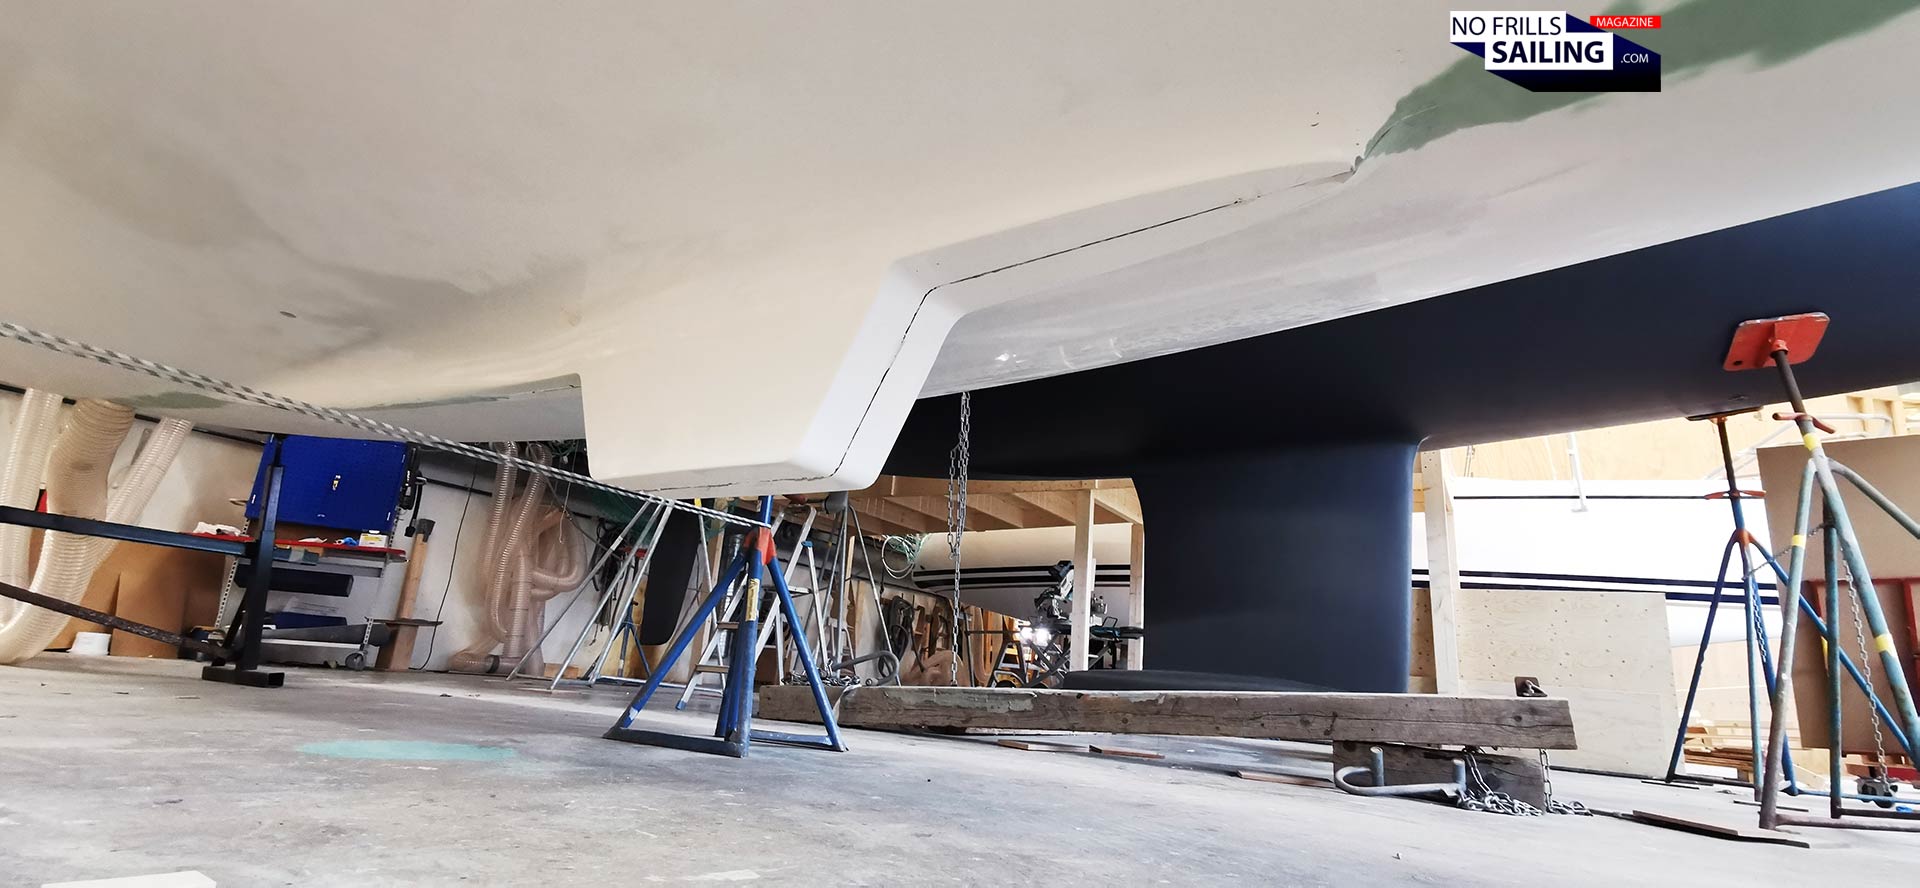
Here my new own boat, the beautiful Omega 42, comes into play as well. Norlin not only designed an outstanding yacht in terms of her appearance, but also incorporated some very interesting technical and constructional details. Look at the bottom part of the raw hull in the picture below. You will notice that the glassfiber-flange where the keel of the yacht will later be fitted, is actually angled:
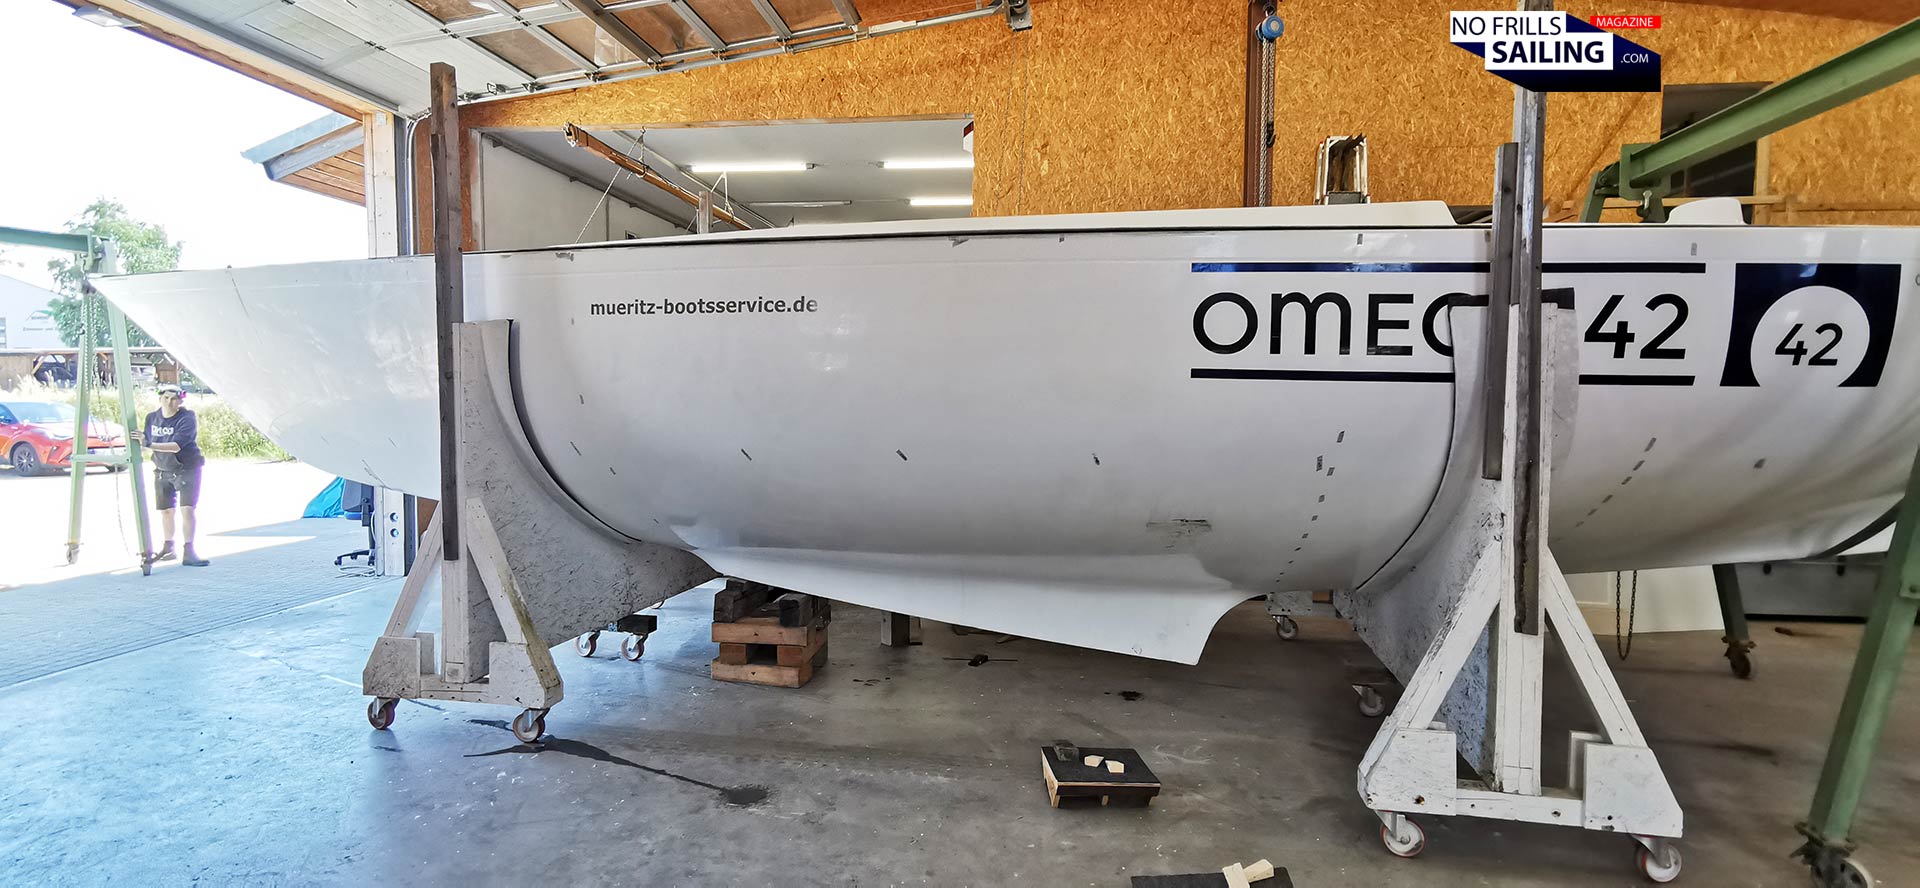
The Omega´s keel flattens out to the aft. In contrast to almost all modern boats produced nowadays, where the flange is horizontally aligned, here it is in a positive upright angle. Today, having a horizontal flange is surely a matter of optimizing and aligning mass production methods, decreasing time of the production and assembly of the boats and lastly, also, getting down the cost. But why did Norlin want to have an angled the keel-boat-connection? Well, two reasons. First: Increased contact area to achieve a rock-solid form-closure with maximum positive locking. As you know, the keel of the Omega 42 weighs in some 3.5 tons. That´s a massive amount of lead! By increasing the contact area of boat and keel, the number of keel bolts could be increased as well, thus reducing the strain put on each single one. It makes for a nicer distribution of the initial weight and the sheer forces when the boat sailes with heeling.
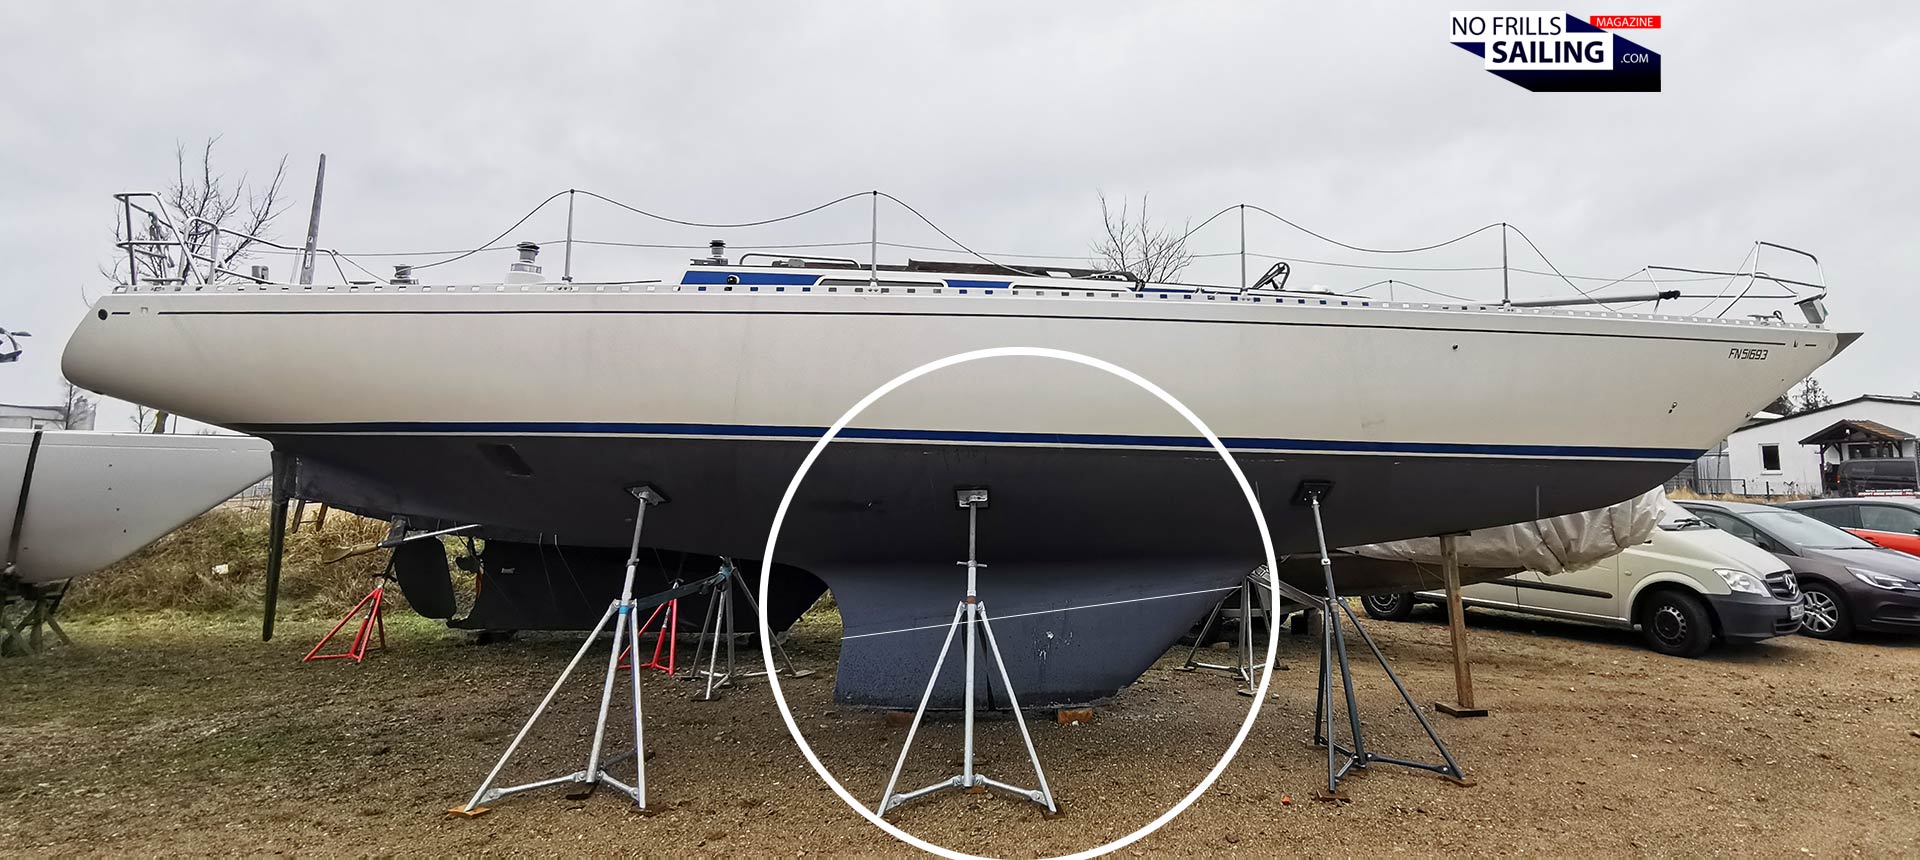
A second reason is the reduction of damage in a possible collision or grounding-event. Look at the picture of a classy Omega 42 above. I´ve marked the line where the lead keel is attached to the GRP hull. Imagine the boat hits a stone underwater. The forces of the impact will be distributed to a significant portion into the hull, not solely into the bolts. The hull, of course, is laminated particularly strong in the area of contact. In a modern day cruiser, as the line of contact is horizontal (remember the keel shown above), those impact forces almost all go directly into the keel bolts. Often resulting in huge drag force at the keel´s front, literally ripping out chunks of GRP, and compression force at the keel´s end. There, the massive keel fin is often pivoted upward into the hull´s underside. Such damage could result in a total loss as repairs are much more expensive than just getting a new boat. While the catastrophic keel loss if often prevented by the still connected bolts, it´s of course a very dangerous hazard.
The Scandinavians still have it!
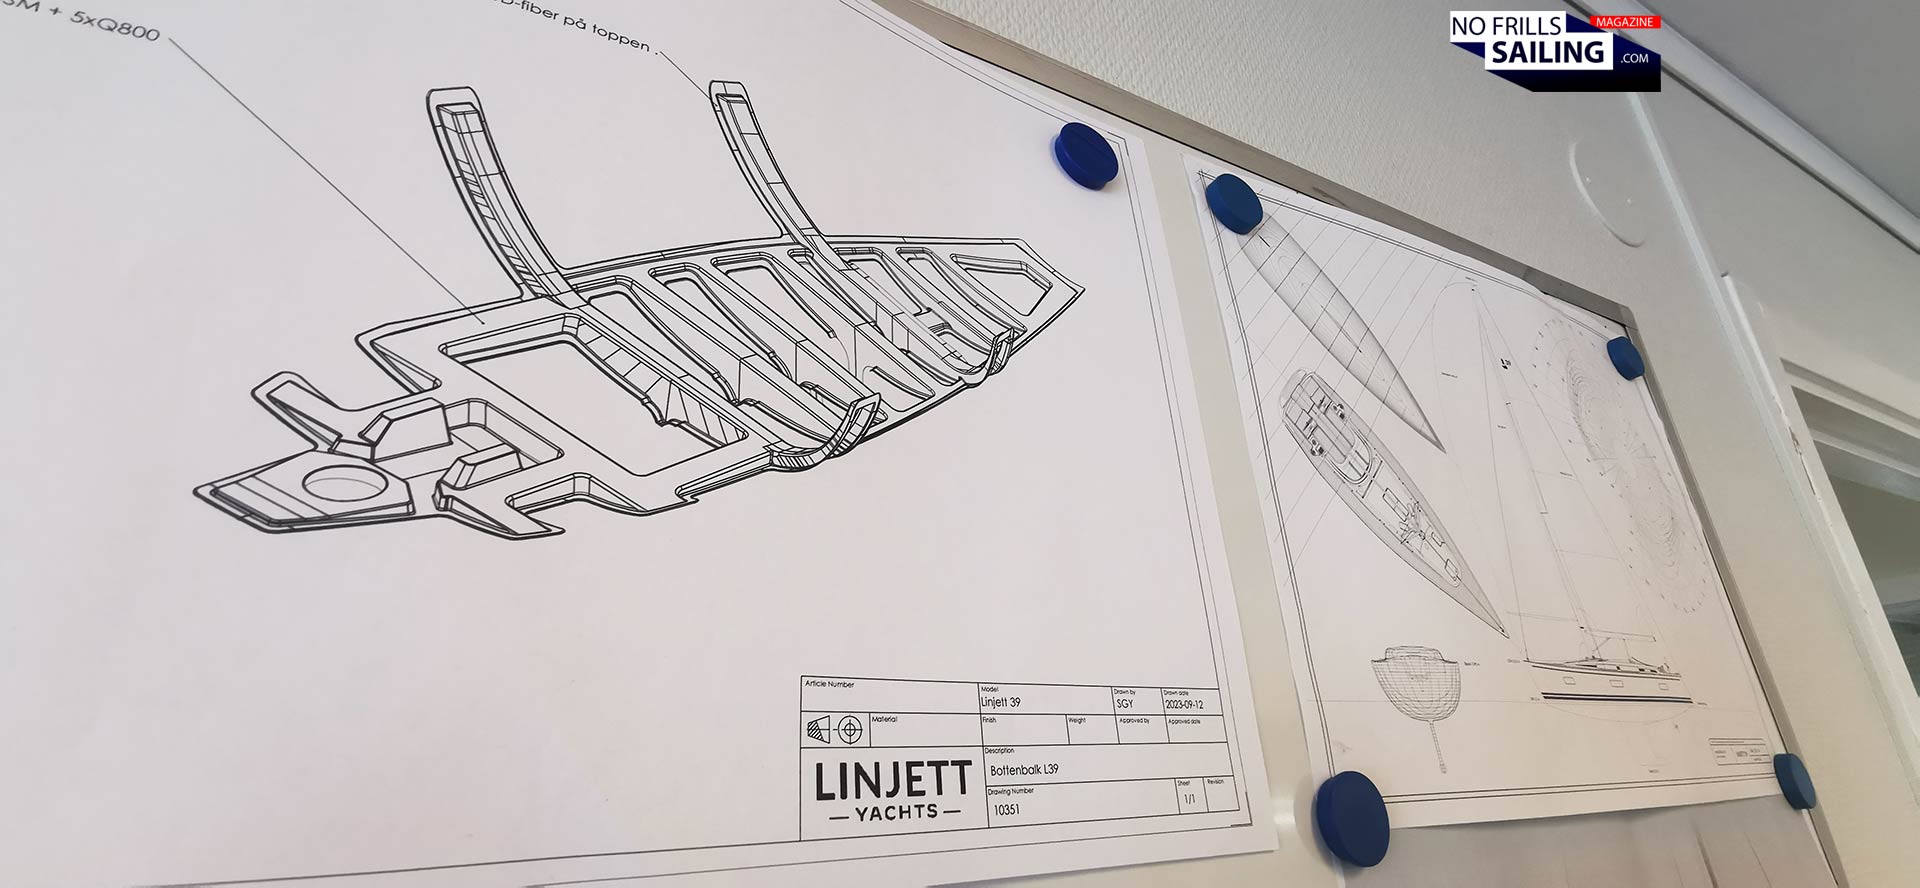
Having understood the 45 years old genius of Peter Norlin, let´s beam back into the Linjett shipyard, where the keel I saw parked in the yard underneath a hull sparked the idea to make this article. How are the learnings and experiences of then translated into a modern-age now? Of course, it starts with a thoroughly calculated digital model of the yacht: At Linjett, the decades of experience in making seaworthy sailboats is combined with state-of-the-art computing.
While the bulk of the design is done internally by Linjett´s own engineers, for some very specific tasks external specialists are empleyed. I´ve documented such an external optimization recently in an article about X-Yachts hiring Vmax-pro Max Gurgel for certain calculations and computations for their latest XR-41. As with many yachts, a Linjett comes with an inner module made of GRP that is stiffening both the hull. X-Yachts and Grand Soleil for example offer steel-frame modules, some others utilize carbon fiber-inlays. In any case, this module in a Linjett has two more functions.
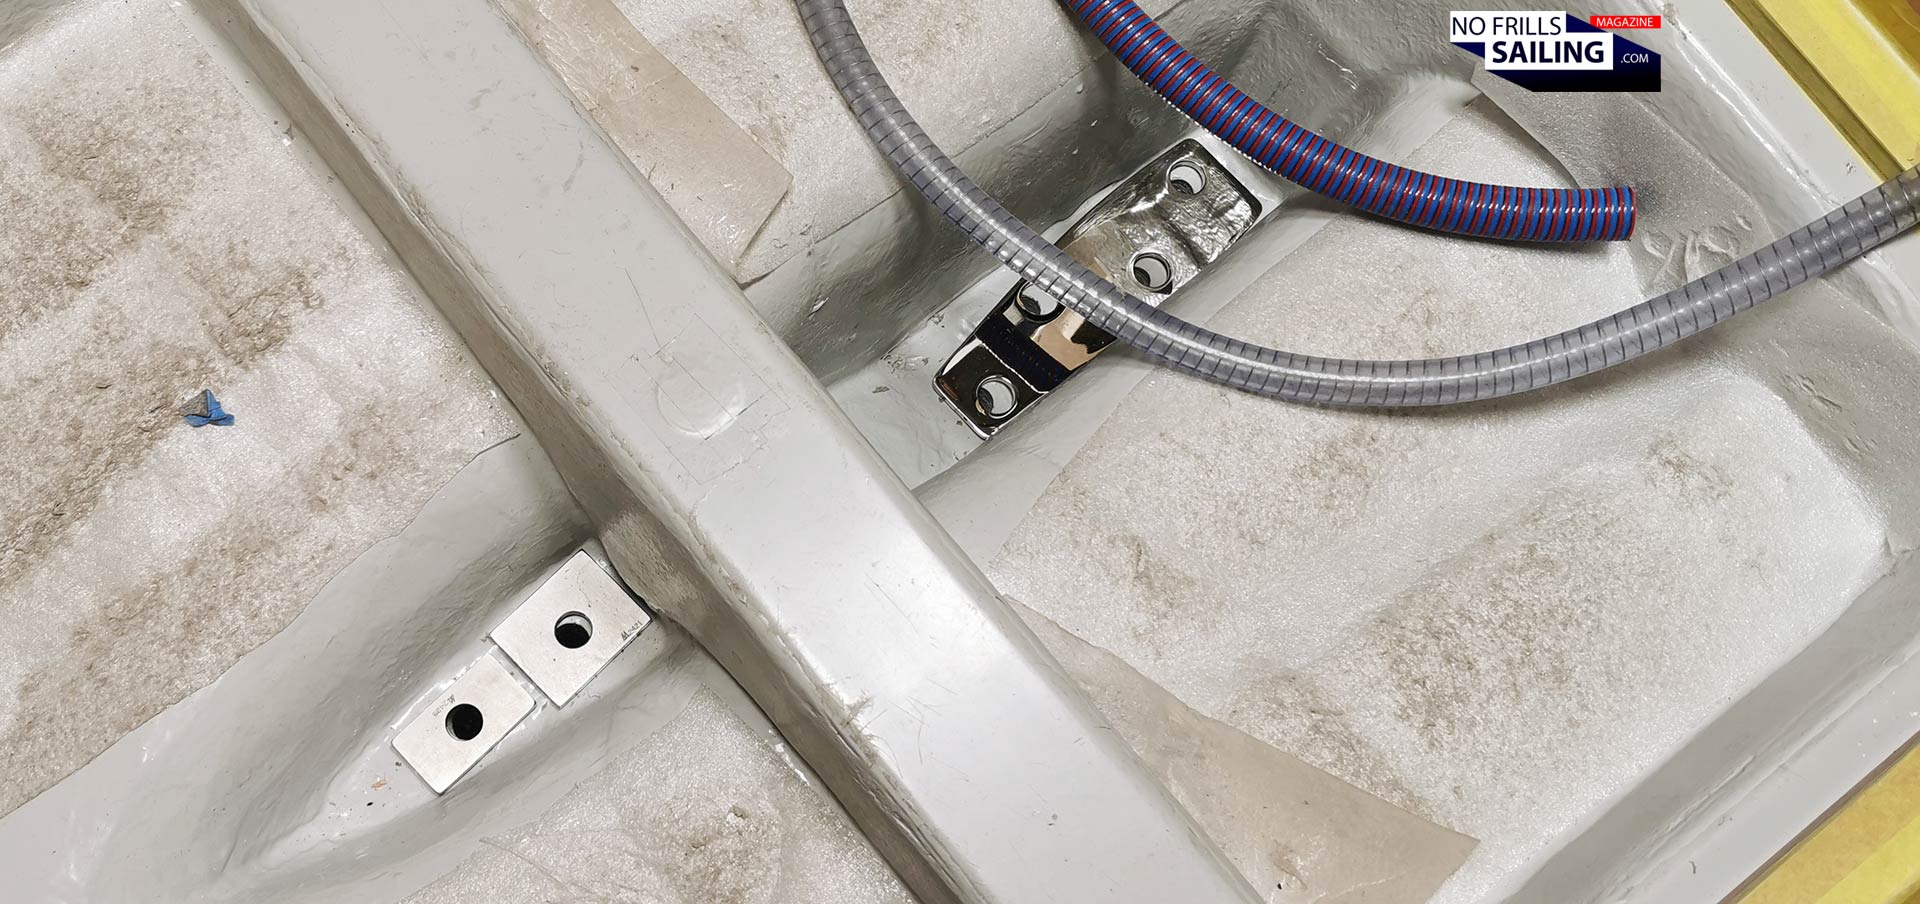
One is to take on the keel-stepped mast of the boat. Putting the mast on the module and not on the bare hull will make sure that ist compression forces are distributed more evenly and over a wider area. Thus taking off some of the loads and protecting the hull. A second task – and here we are back to our keel topic – is also to support and take on sheer forces of the keel. At the bottom of the deep bilge of this boat you can see the counterplates ready to receive the keel bolts.
Keeping the keel safe and in place
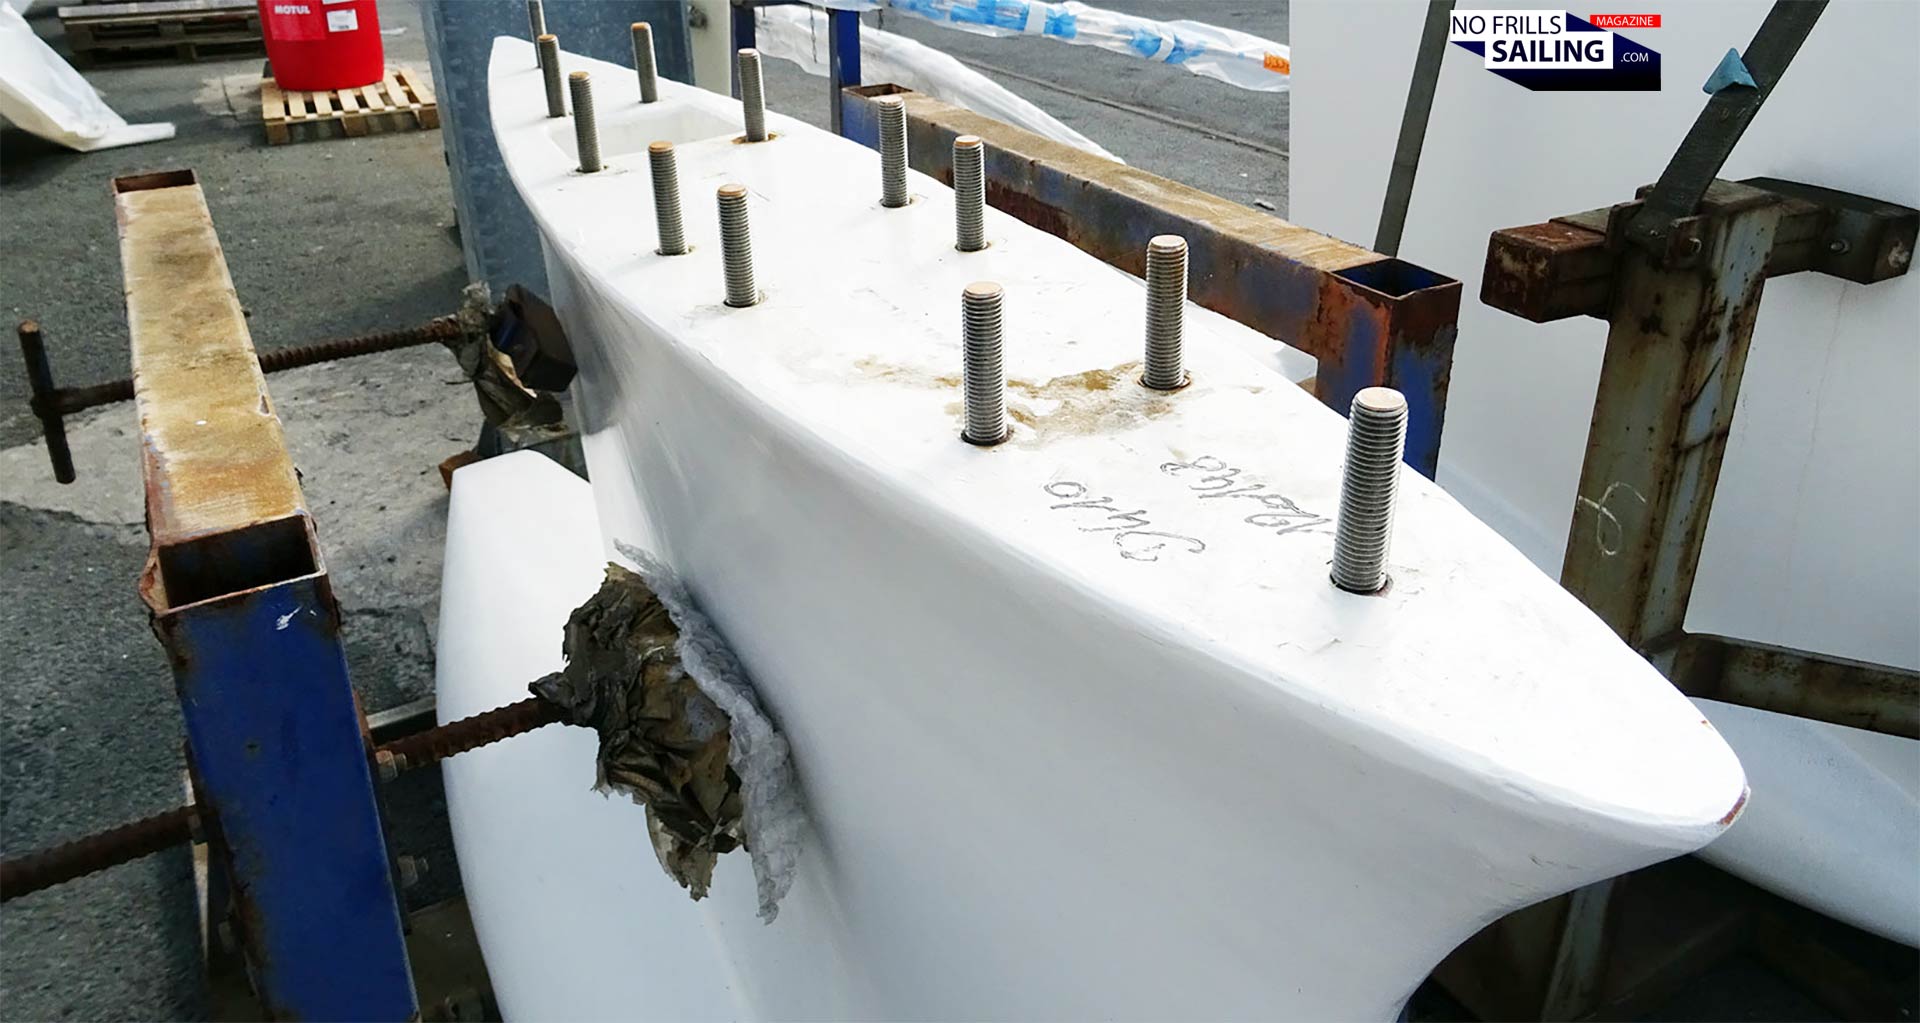
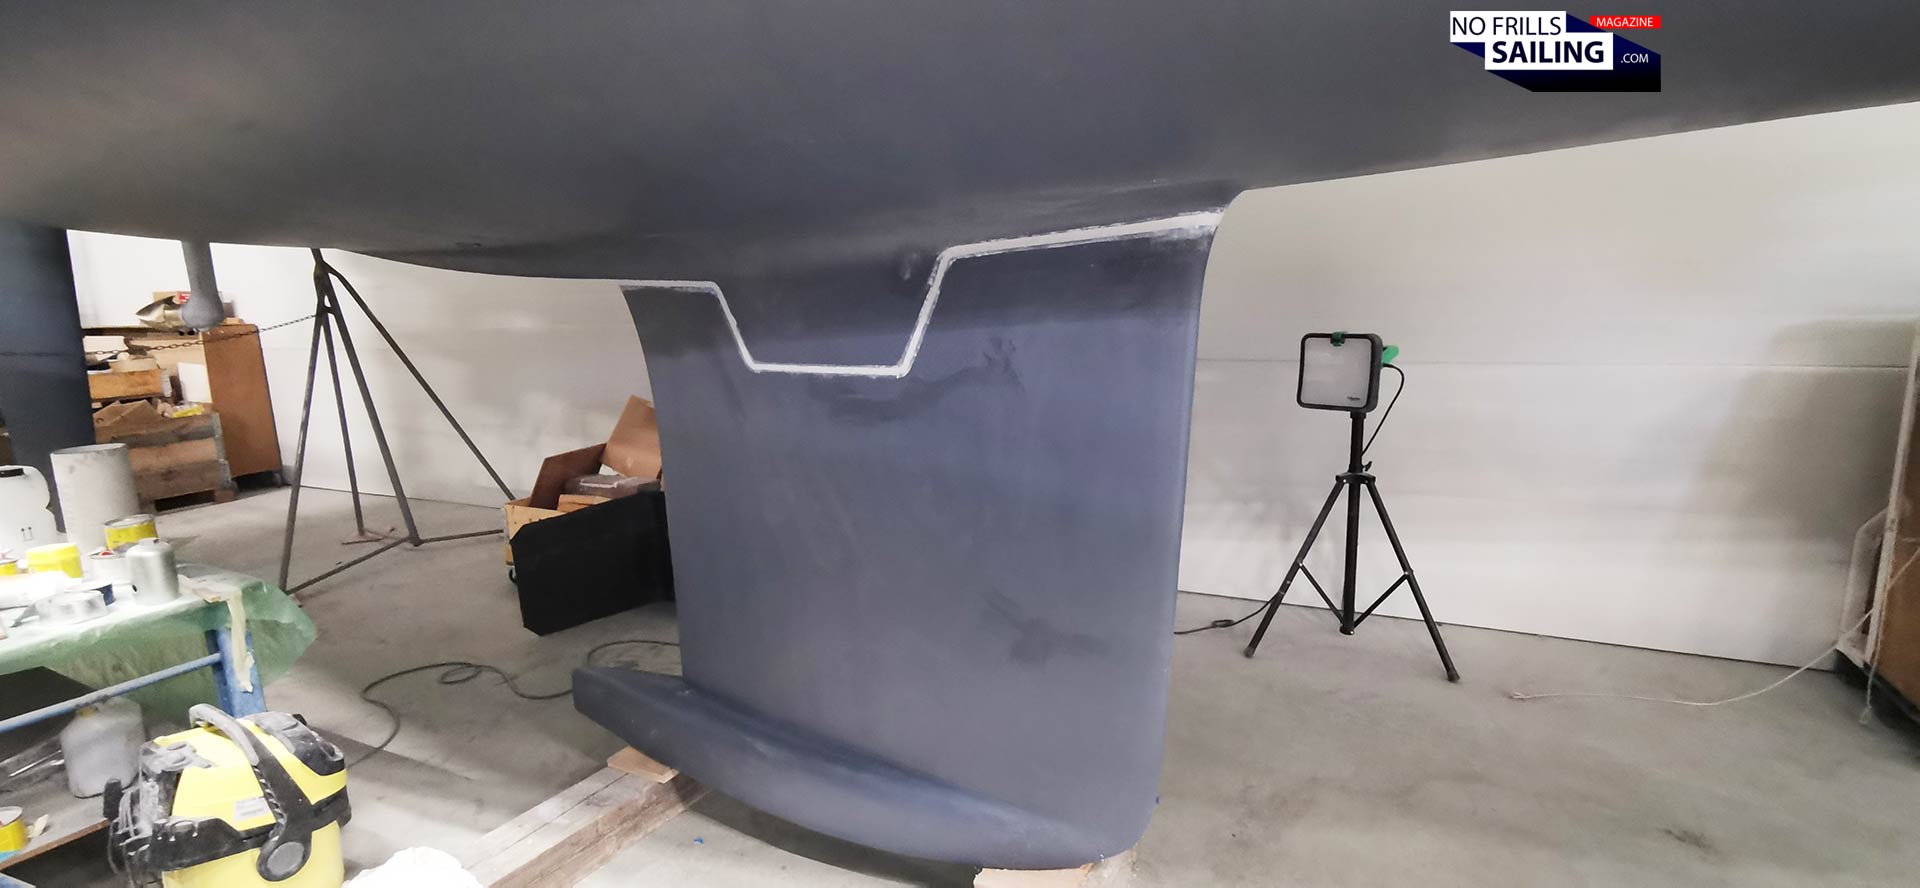
Which brings us to the exciting occasion of the keel fitting process itself. I´ve witnessed such an event some time ago at Lake Constance where a fixed keel of a First 27 had been attached. So I was very attentive how it is done in Sweden. A striking detail, and to my knowledge something unique only to Linjett, is the distinct shape of the keel flange, as you can see in the picture below:
In the end, the idea behind having this „W“-shape is very similar to Peter Norlin´s solution for the Omega 42: By increasing the surface area of the flange, the forces on any given point of contact between keel and hull is decreased. At the same time, not unlike masterful joinery, the keel is „locked“ in place by this very shape: Movements are absolutely restricted to a very tiny minimum. Some movement, as Linjett´s guys confirm, between keel and hull are inevitable due to the material´s nature, but as the keel is gridlocked, it is brought down to a fraction. Form fit combined with wide area friction contact.
Another specialty of a Linjett keel is its material. Whereas many producers combine a steel-keel with a lead bomb or even composite fins (made of carbon fibers) with the torpedo-shaped lead bomb for some racing yachts, this is not Linjett´s way. Also, they do not use the cheap cast iron as in most series production yachts, but a full lead keel – fin and bomb. It´s a pity I could not attend the very casting of my own keel due to standard operation procedures and safety reasons (lead is a hazardous heavy metal), but I know that it takes a meticulously manufactured casting mould to be filled with the liquid lead. Casting fin plus keel at once, as this is a very complex 3D-shape, must be absolutely interesting to witness.
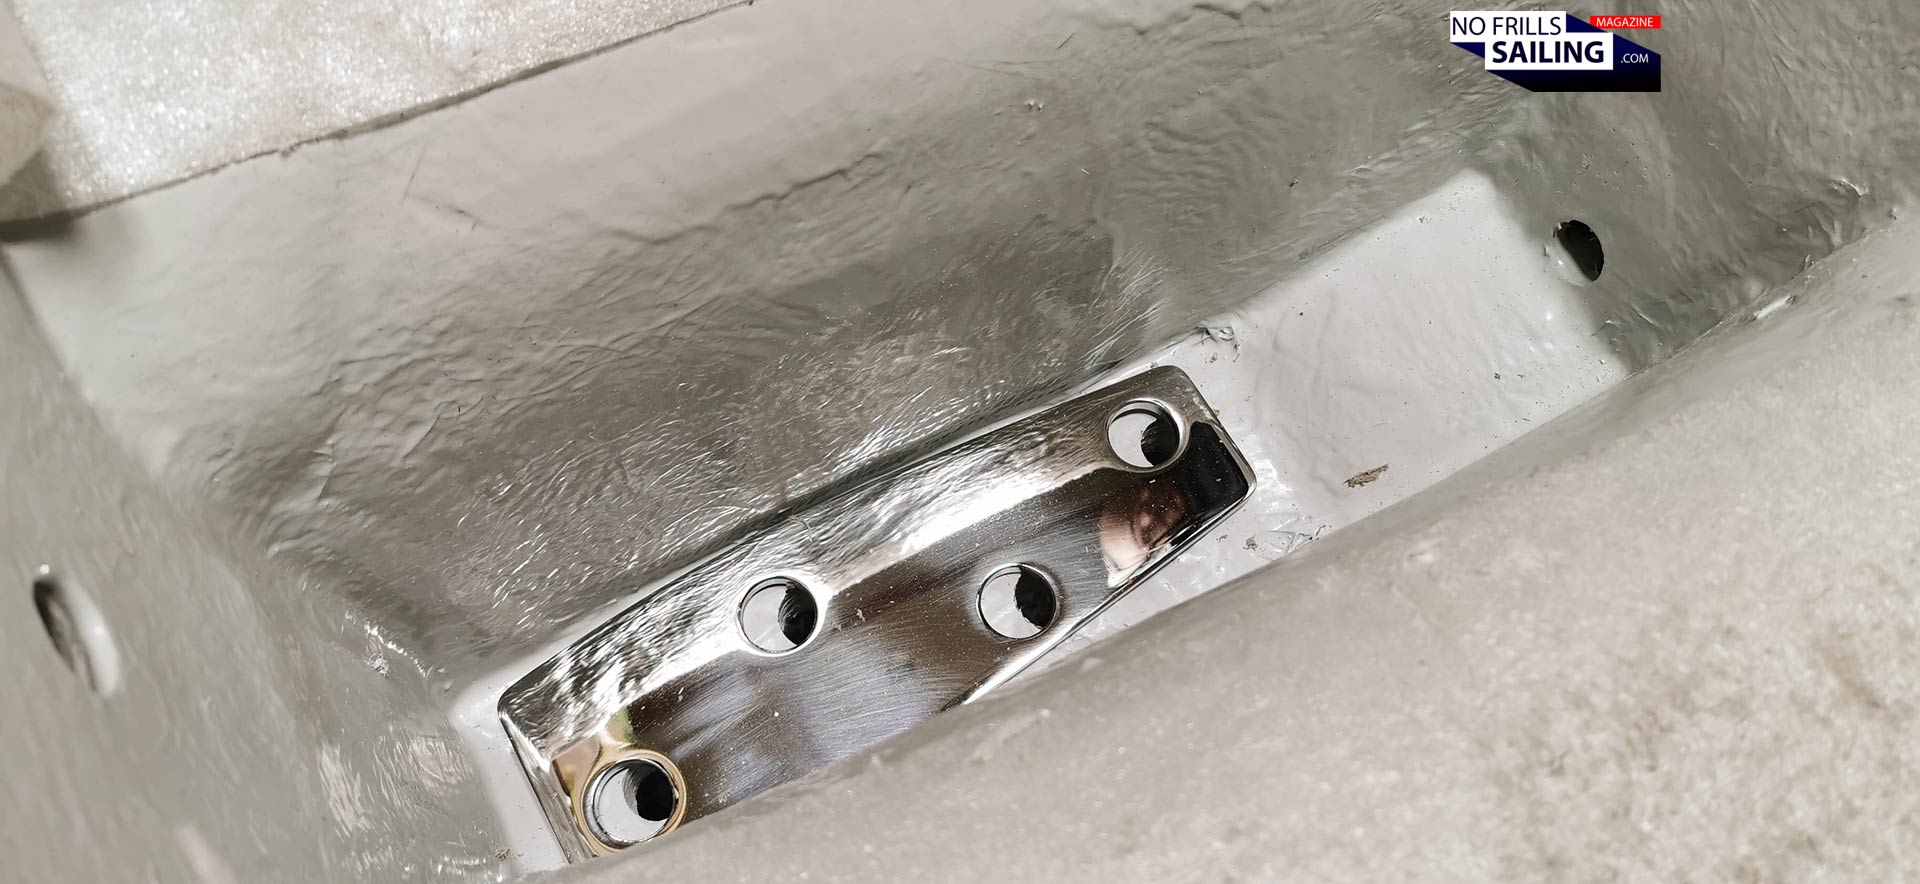
Anyway, as the boat is slowly lowered onto the keel, the stainless steel keel bolts slowly appear in the boat´s interior, sticking through the holes. A word to those nice stainless steel counter plates: These will be put between the bare GRP hull and the nuts securing the keel. Also evenly dispersing the forces by the tons of the keel´s weight. I still remember my efforts back in the day when I was refitting the filthy, rusty bilge of my King´s Cruiser a few years ago, being astonished that underneath the scum similar high-grade steel plates appeared. It is imparative for those counterplates that the edges are rounded and received a thorough deburring. Those Linjett counterplates are role models in this respect, shiny like mirrors …
Another new Linjett receives her keel
Seen from the outside, the process of attaching the sailboat´s keel is similarly exciting. Before lowering the hull onto the keel, the guys align the yacht in an exact horizontal position. It is necessary that both keel and yacht are connected in such a way that the keel stands exactly upright. Just a fraction of a degree to the left or the right and the yacht will have a constant heel later. Likewise, the boat, when lowered, has to be aligned perfectly in all directions, both along the centerline as well as to both sides.
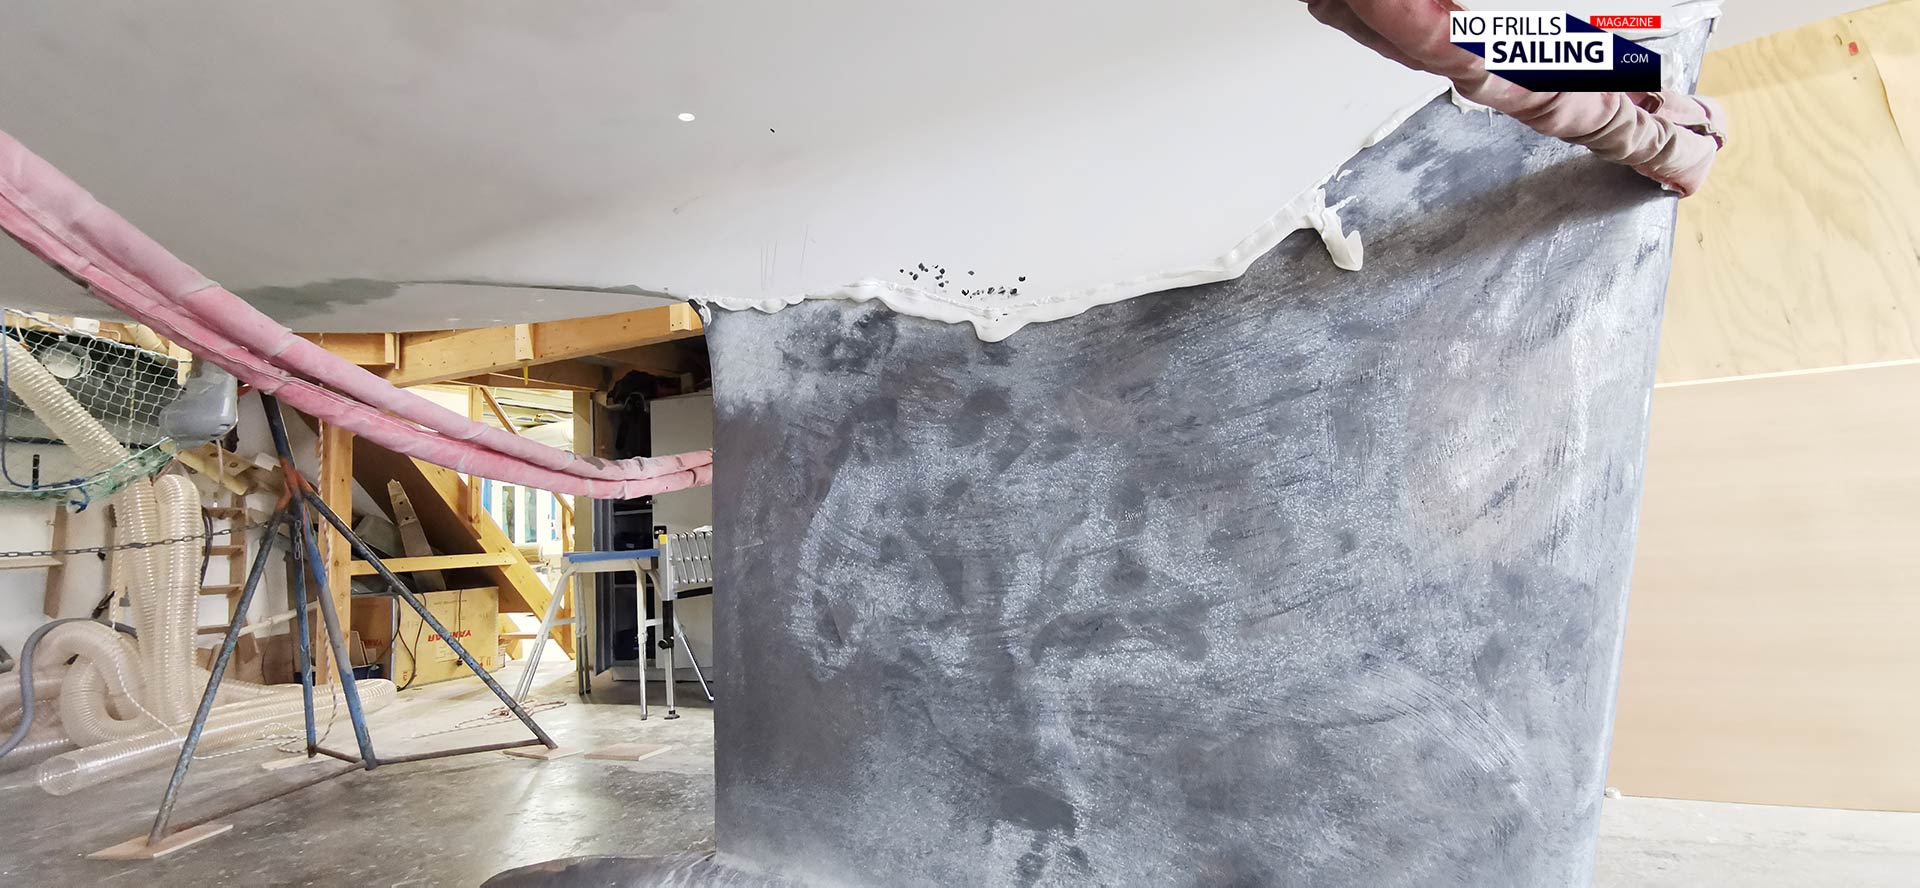
Albeit most of the keel´s weight is secured to the hull by the connection of the bolts, in addition to this mechanical bond the magic of modern chemistry is employed as well. The white „toothpaste“-like glue you can see being squeezed out at the line of contact is a high-grade industrial adhesive. In this case, Simson MSR made by US company Bostik. By the way, this is a brand owned by the Arkema Group, the very company that has recently launched the Elium-resin used in the first completely recyclable GRP-hulls by Beneteau.
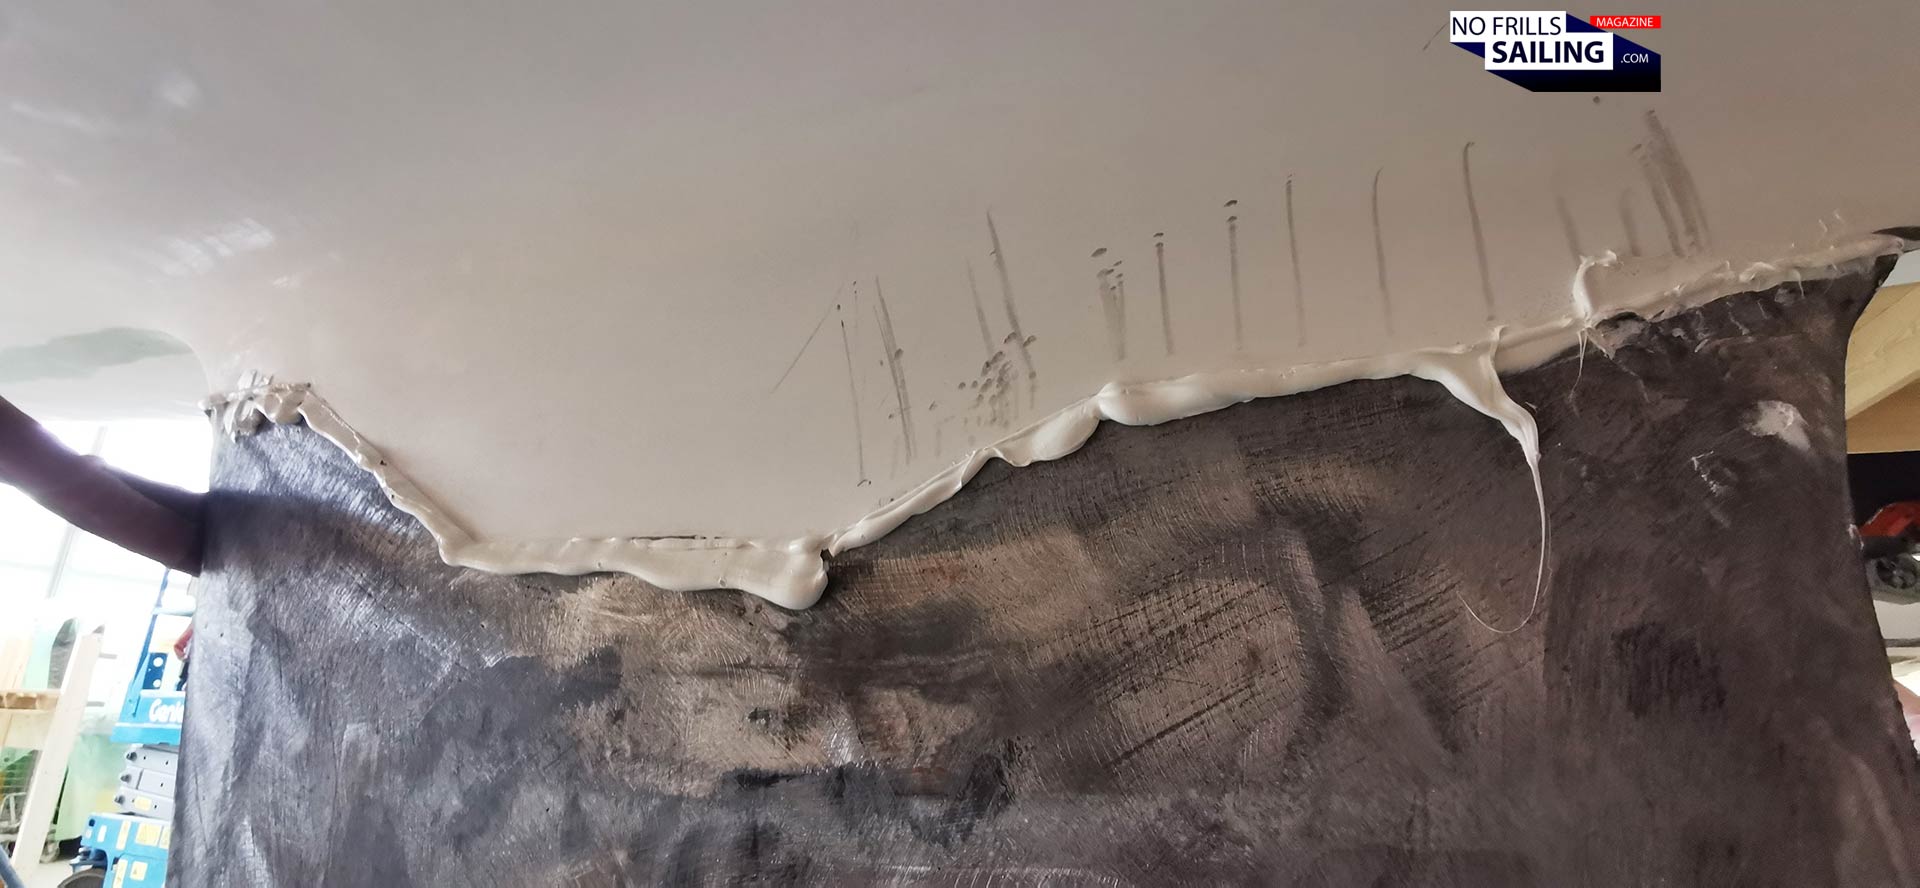
The Bostik-adhesive is primarily used as a bonding agent, closing even the tinyest gaps between keel and hull so that a full form-lock is achieved. It also serves as a sealant, making sure that no water whatsoever can enter the boat´s interior through the keel-bolt boreholes. After a certain drying-time the overlay is scraped off and the boat with its freshly attached keel enters the last production step in this respect. I can see what this looks like in another hall where a yacht has just been finished.
A unique technique
Sanding, priming and sealing the bare lead keel with some layers of filler and epoxy is a matter of fact. Since lead is a heavy metal it does pose a certain hazard to the surrounding marine life and water purity. In this, it is a manufacturing specification and legal condition to cover, or „encapsulate“, the lead. The outcome can be seen in the below picture. The keel is smoothened and has received the same bottom paint or antifouling as the yacht´s hull. Some additional fresh sealant makes for a perfect joint.
So, that´s it for now: A clever keel solution with a special shape to ensure both perfect form and friction fits. And a nice nod in reminiscence to the „old masters“, like Norlin, who some 45 years ago already had some pretty clever ideas. Again, thanks Linjett for this intimate insight into those production-details: Seldom are shipyards that open about how they make their yachts. Now I am looking even more forward to at last receive the keel of my own yacht and have it finally attached to my ALPHA. Stay tuned – and don´t forget to sign on to my new monthly NO FRILLS SAILING newsletter.
More keel? Related articles on this topic:
Attaching a keel to a Beneteau
„Zero Keel“: The solution utilized in Kraken Yachts
Omega 42: from a model to massive lead