Yes I´ve finally made it! I am working to get my first own Oyster yacht. It´s a dream coming true, I can say, and I am happy to announce that the new boat will arrive within the coming weeks. Yes, it´s just weeks ´till I receive my Oyster yacht. Well, half of it, to be precise. And instead of the true 74 feet this boat will just have barely 50 centimetres. But anyway – it´s mine. It´s an Oyster. And she makes me proud.
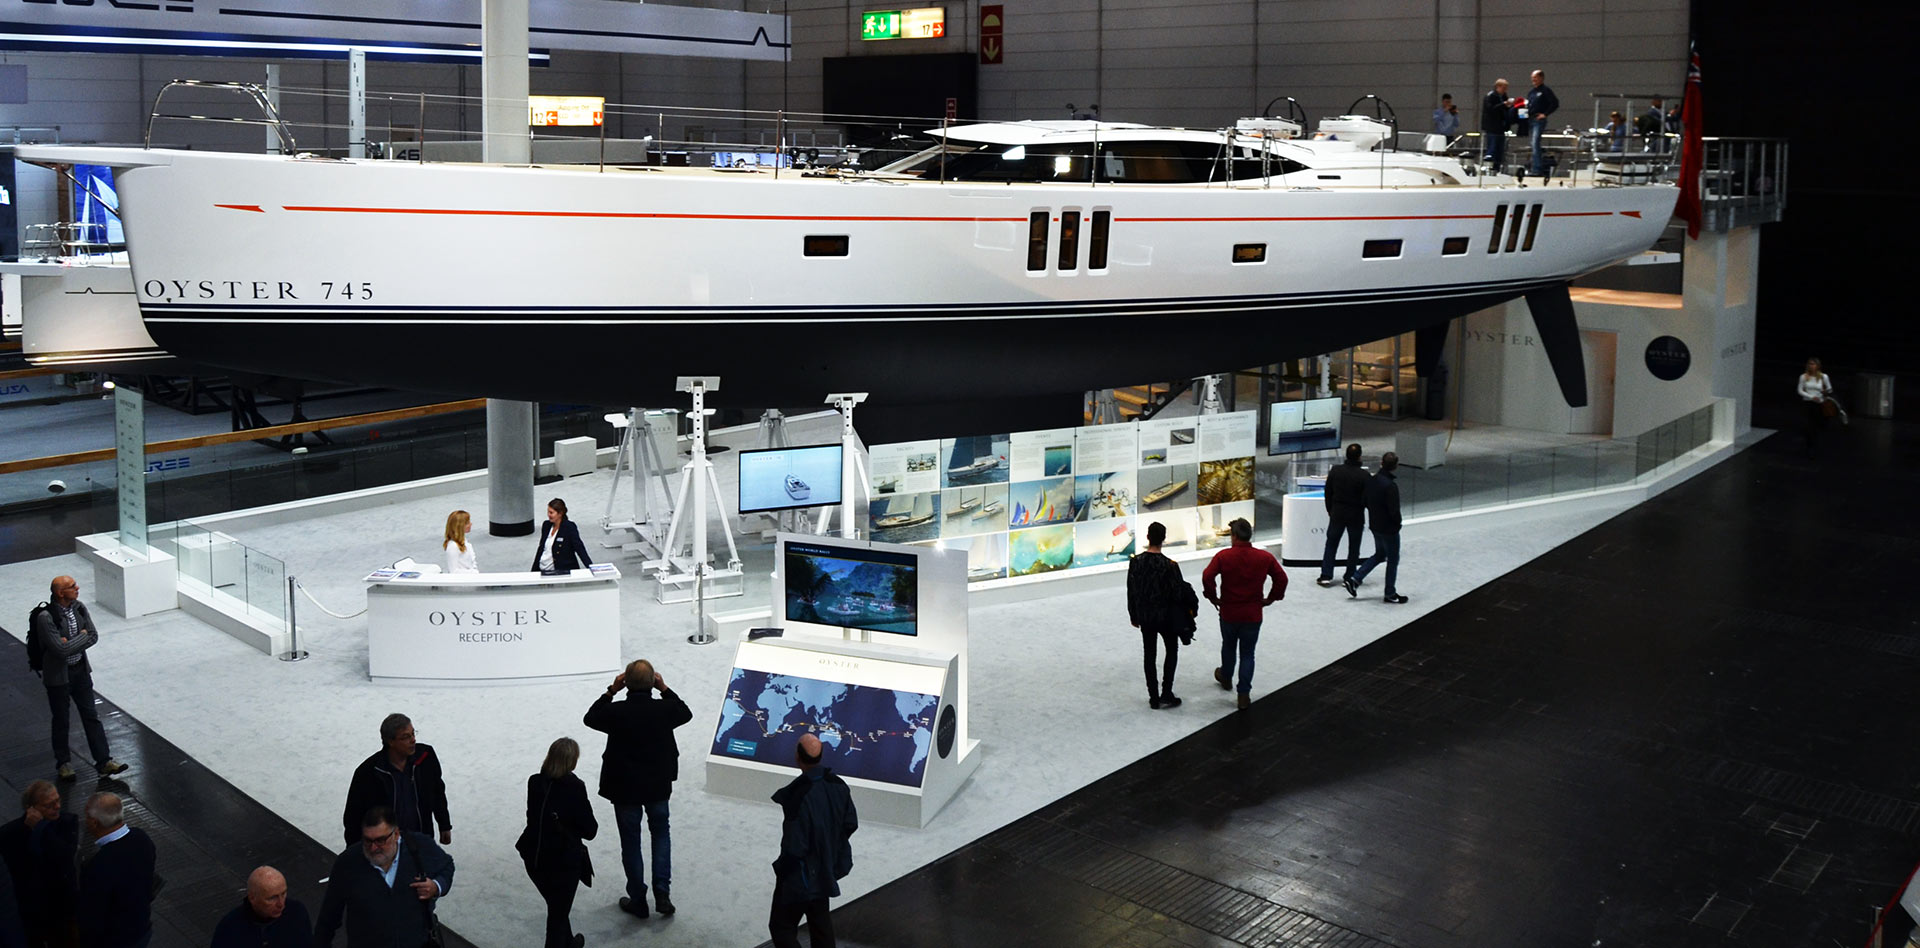
Since last Boot boat show in Duesseldorf of January 2018 I count myself to being a true Oyster fan. The then displayed Oyster 745 – read the full article about this marvelous boat here – catched both my heart and my imagination. I would say that this is truly my favorite sailing yacht when money wouldn´t be a problem. The 745 is such a wonderful yacht, both inside and from her outward appearance. I cannot say how many times I´ve watched Matthew Sheehan sailing the Oyster on You Tube. I must have one!

And since I neither have nor will have the budget to be spent on a dream yacht like this in my current lifetime, there must be another way to have a yacht like this. So I thought it might be a good idea to have the 745 made as a half model for the bulkhead of my own boat – to port side there will be the Wempe instruments put back in place again and to starboard side, vis-à-vis the big dining table and U-settee, there is much space on the wooden bulkhead to be utilized. Why not with a half model of my favorite boat?
Offcut Teak – another purposeful use

I started by printing out side and general views of the Oyster 745 from the internet. Since I am kind of talented in making model boats (read here about my home built Class 40 yacht from cardboard) I didn´t had any trouble in transferring these measurements via simple calculations to the desired size that would fit just neatly at the then refurbished bulkhead of my King´s Cruiser 33.

By sticking together offcut Teak that was left over by my various carpentry workings just as the brand new chart table or the new galley stuff I made a formidable solid block of nice Teak. Transferring the measurements to the block by means of a biro was a matter of half an hour. Then it as the turn of the sawing machine and the sander – and I can say it was a load of fun!
Making an Oyster 745 half model
First I cut out the side view of the boat, trying to be spot on to hit the exact fine full beamy lines of the Humphrey brothers who are in charge with designing Oyster yachts. I decided not to make the full size of the keel but just a base for having the keel attached later. When I had the rough lines sawed out my heart was beating: It´s going to be a real Oyster for sure!

Then it was the sanding machine making her works. By means of a rotating sanding blade I had the nice transom done in a matter of minutes – well, half of it of course. The transom of the Oyster 745 is available in the classic design (of the kind I fancy it most) and in an “extended transom”-version that provides more space on deck and a large dinghy garage. But I feel that this version is too much of a modern boat to me so I went for the classic looks.

Shaping the fine lines of the hull, especially from the bow onward, was another thing: Really tricky! I began to sand down the bow and worked my way aft. It´s kind of hard to find the right amount of power to apply to the fast rotating sander and I regularly checked the outcome. Slowly but surely the sharp bow was moulded to the deep V-form in the forward section that makes the Oyster so seakind in her motion and around the keel the hull gets a nice round beamy shape.

I later sanded down the somewhat raw surface with sand paper and tried to polish away the smaller glitches left over by the aggressive sanding machine. The outcome was stunning. I even managed to sand down the aft part of the boat to achieve the sheer line of the Oyster 745 original that is slightly raising beginning midship.

Plans for finialization of my Oyster 745 half model
A quick dress rehearsal at the bulkhead in my King´s Cruiser 33 and I was very happy with what I had made. The boat, well, the half model, looks just awesome! Next will be the application and sanding of some layers of filler to achieve a smooth and perfect surface of the boat. Then it will be painting time. White hull, black underwater body, nice waterline stripes and of course the moulding of the Oyster-deckhouse with the catlike windows that I love so much.

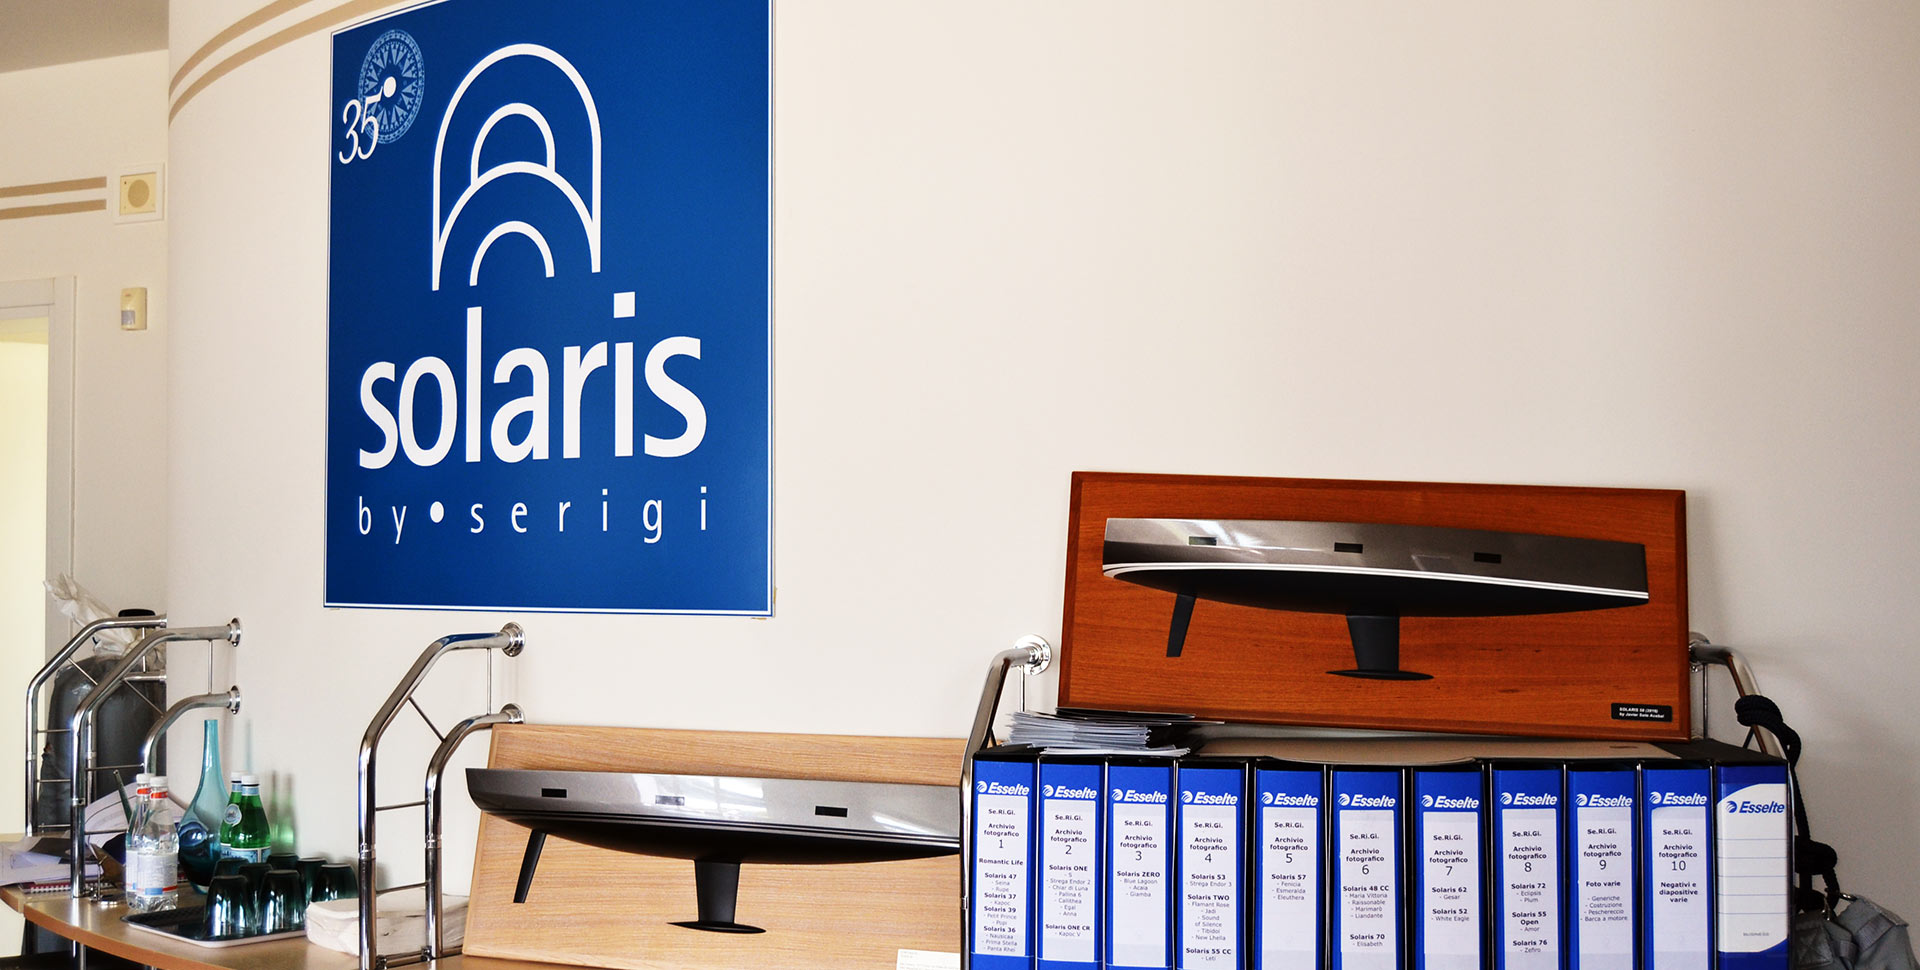
In the end I hope to get something like the nice half models I had seen in the office when I was visiting the Solaris yard in Italy – read the article here – which were just stunningly beautiful. I don´t know yet which base plate-format I will choose, whether straight rectangular or rounded – but I promise it will be a nice looking thing in the end.
So that´s the first step in making my own Oyster yacht. One should never stop dreaming and never stop aiming for the high shot. I won´t either. In having this small boat displayed at the wall of my own yacht, I will always be able to admire the fine lines of the Oyster which I like so dearly – without dismissing the fine lines of my own boat, which I of course also love so much.
Stay tuned for the second and final part of the Oyster half model-project.
You may also like to read:
Is 60 the new 40? About sailing yachts getting bigger and bigger.
Sailing a Rolex – walkthrough of the Oyster 575
A role model blue water cruiser? Hallberg-Rassy 64 as seen in Cannes