Spring is in full bloom and with temperatures rising and longer daylight-times the motivation to work on the boat is even stronger. What a difference to working in winter time! I grabbed the opportunity and got rid of the winter-tarp with the boat now open again to fresh air. Air that I would need because the last two big “crafty” items on my refit list are the one I tackled last week. One of them was the refurbishment of the quarter berth.
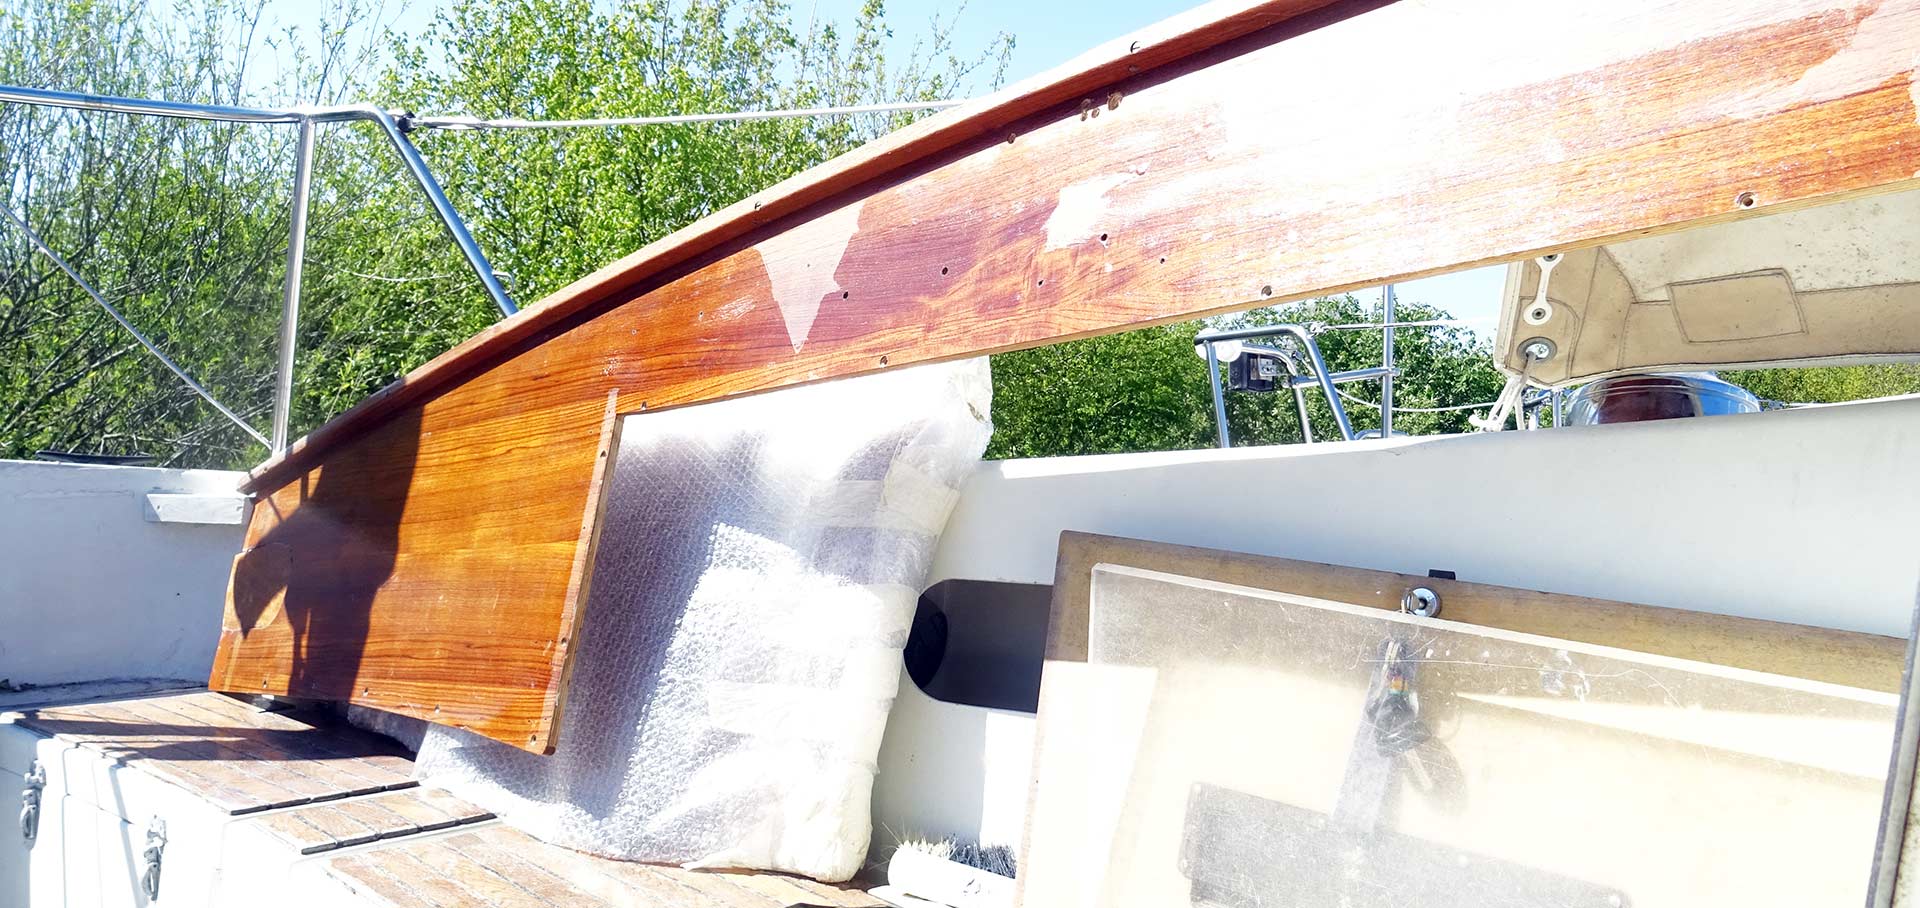
My King´s Cruiser 33 is of old style and thus hasn´t any cabins in the stern but a classy quarter berth or pilot berth. Back in the days I was very reluctant to have time, money and material invested in this area because I didn´t feel I would need this except for stowage. So one plan was to seal off this compartment with a new bulkhead (read it here) but now I must say that I am really happy for not having proceeded that idea but to go for a full refurbishment. “Full”? Well, not quite – the above seen very large shelf didn´t made it back into the boat. Instead of having this single big shelf there will be a more … subtle new fitting installed.
New ideas for the old pilot berth

At first I was climbing into the berth, laid back, and put my head to rest. I tried to get inspired what to do here. When would I need this berth? Well, when the fore cabin and the salon berths are occupied for another guest, right. But also for finding some rest “apart” from the others, maybe when I was sailing through all night and want to get some undisturbed sleep, a bit away from galley and other people. (I know, a cabin with a proper door would do better, but that´s not possible with my yacht)

So, instead of this huge single shelf I had the idea to fill up the space right above my head. That´s the large void that is created by forming the coamings of the cockpit – in the inside there´s lots of room that isn´t utilized for anything. So I thought maybe a small cabinet would just fit neatly here and took some measurements.
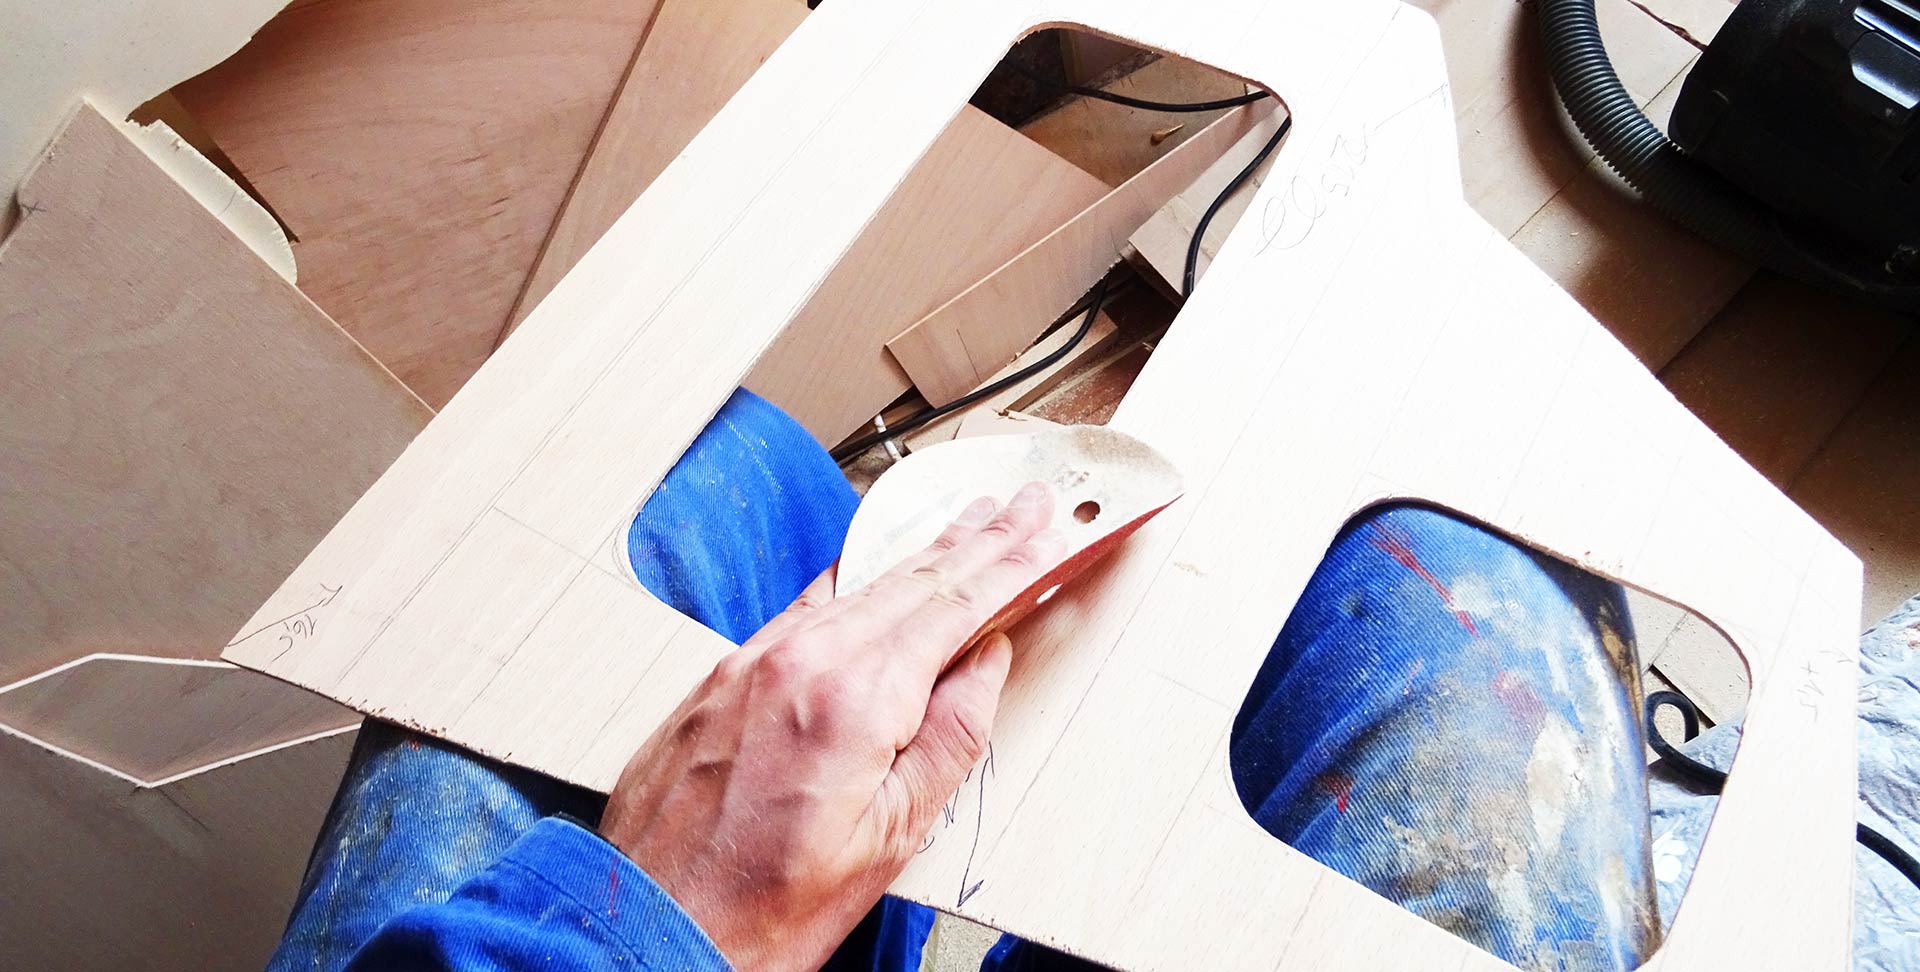
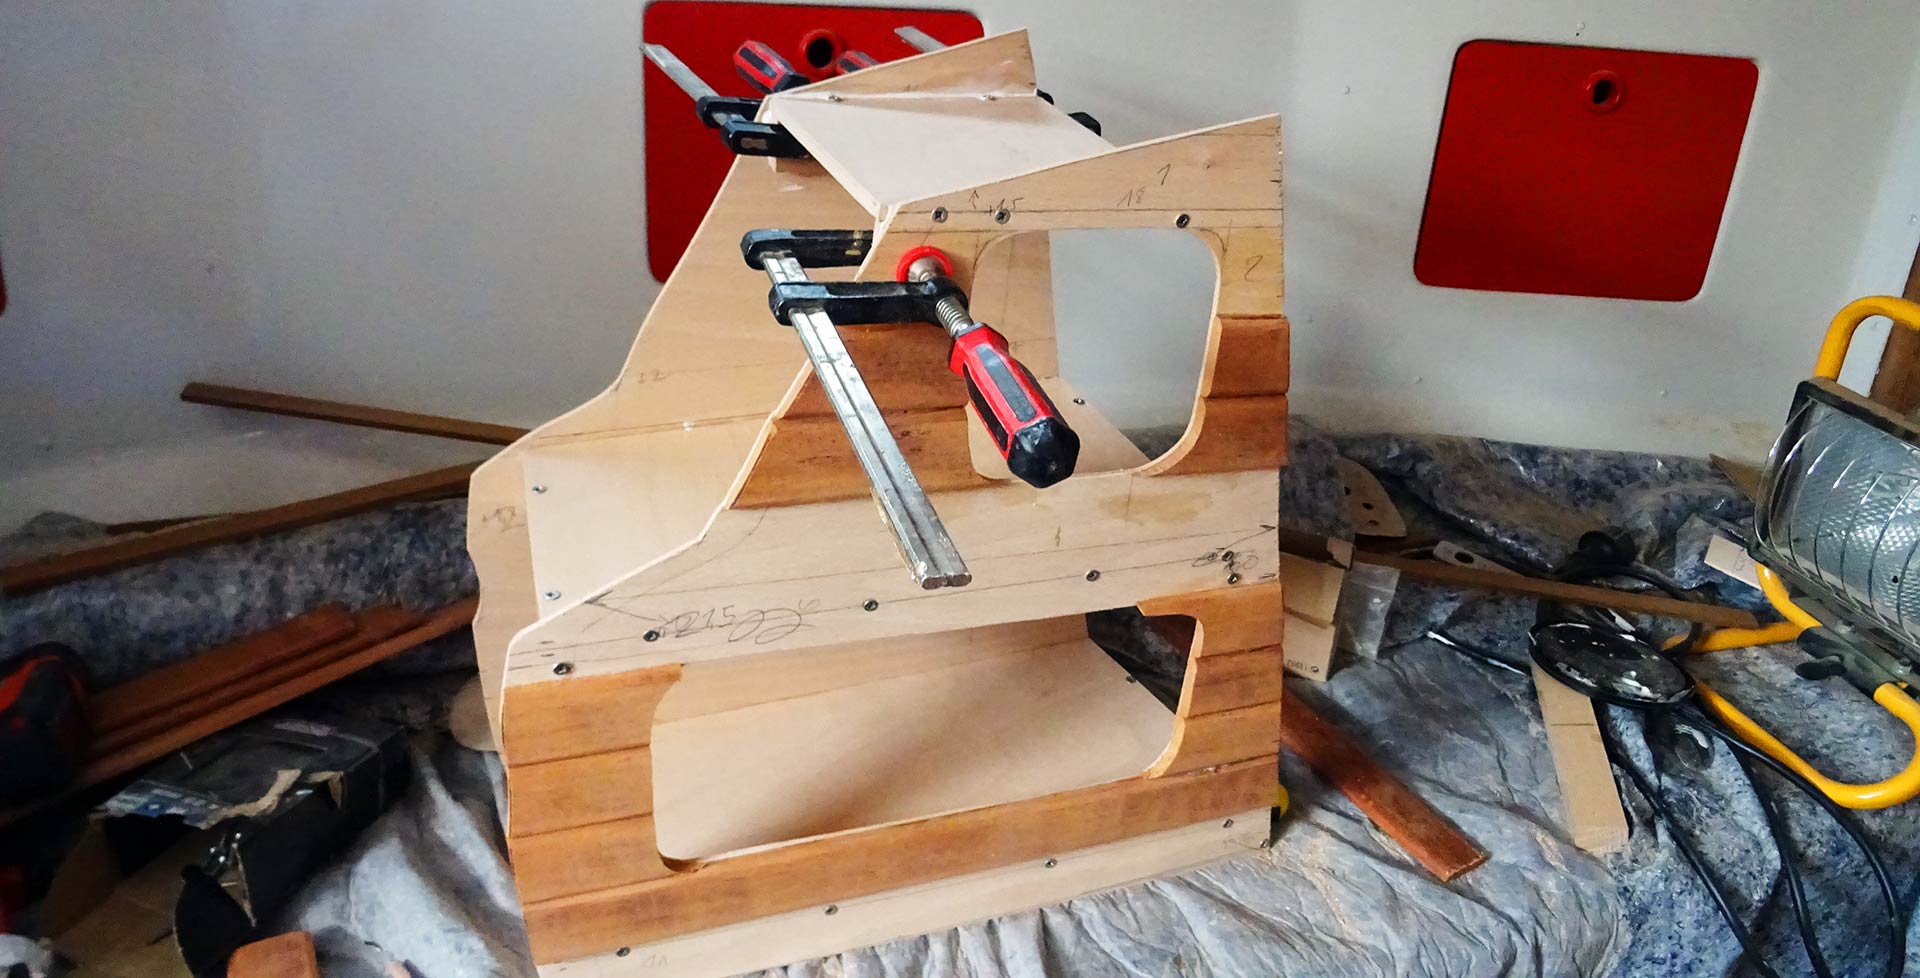
I went for a 2-story cabinet one with a wider opening and the second with a smaller opening. Not very much volume though, I know, but it will perfectly do for the small stuff like smartphone, socks and underpants or maybe other stuff like spare pencils or anything. The fitting of the raw plywood panel went just fine, awesome, I thought and went on.

The safe mounting of this cabinet posed some questions because obviously I cannot just drill a screw into the GRP of the surrounding hull segments, so I made the whole thing as strong but light as possible. It´s solely made of offcut and leftover plywood. I hate throwing away precious (and expensively paid for) materials and thus this kind of “re-cycling” of cutoff wooden stuff is really satisfying in a special way.
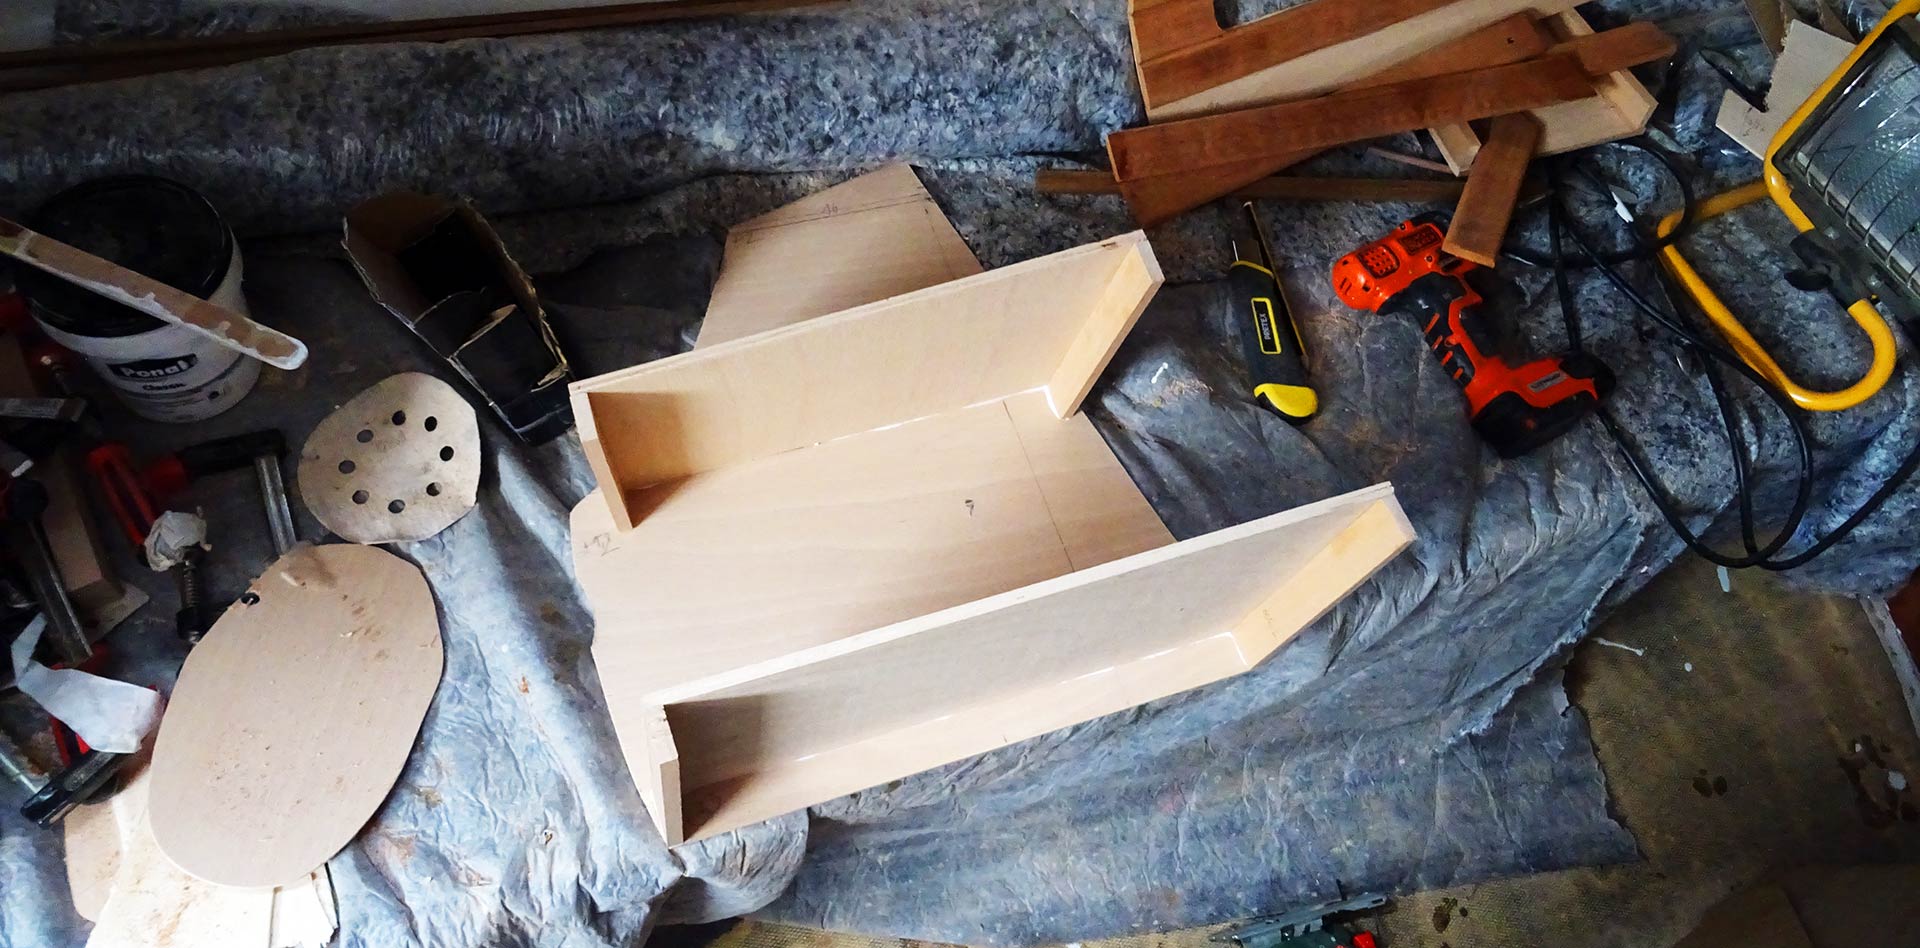
I was glueing and screwing the cabinet´s parts together which took me 3 days all in all and some dozen or so fitting moments. It´s really not that easy to have something custom made for a boat because with round shapes everywhere you just cannot take measurements that easy. Understanding this fact is also perfectly making clear why large production companies have those IKEA-like not-very-sexy interior design – because squares are easy, fast and cheap to manufacture.
Utilizing offcut Teak
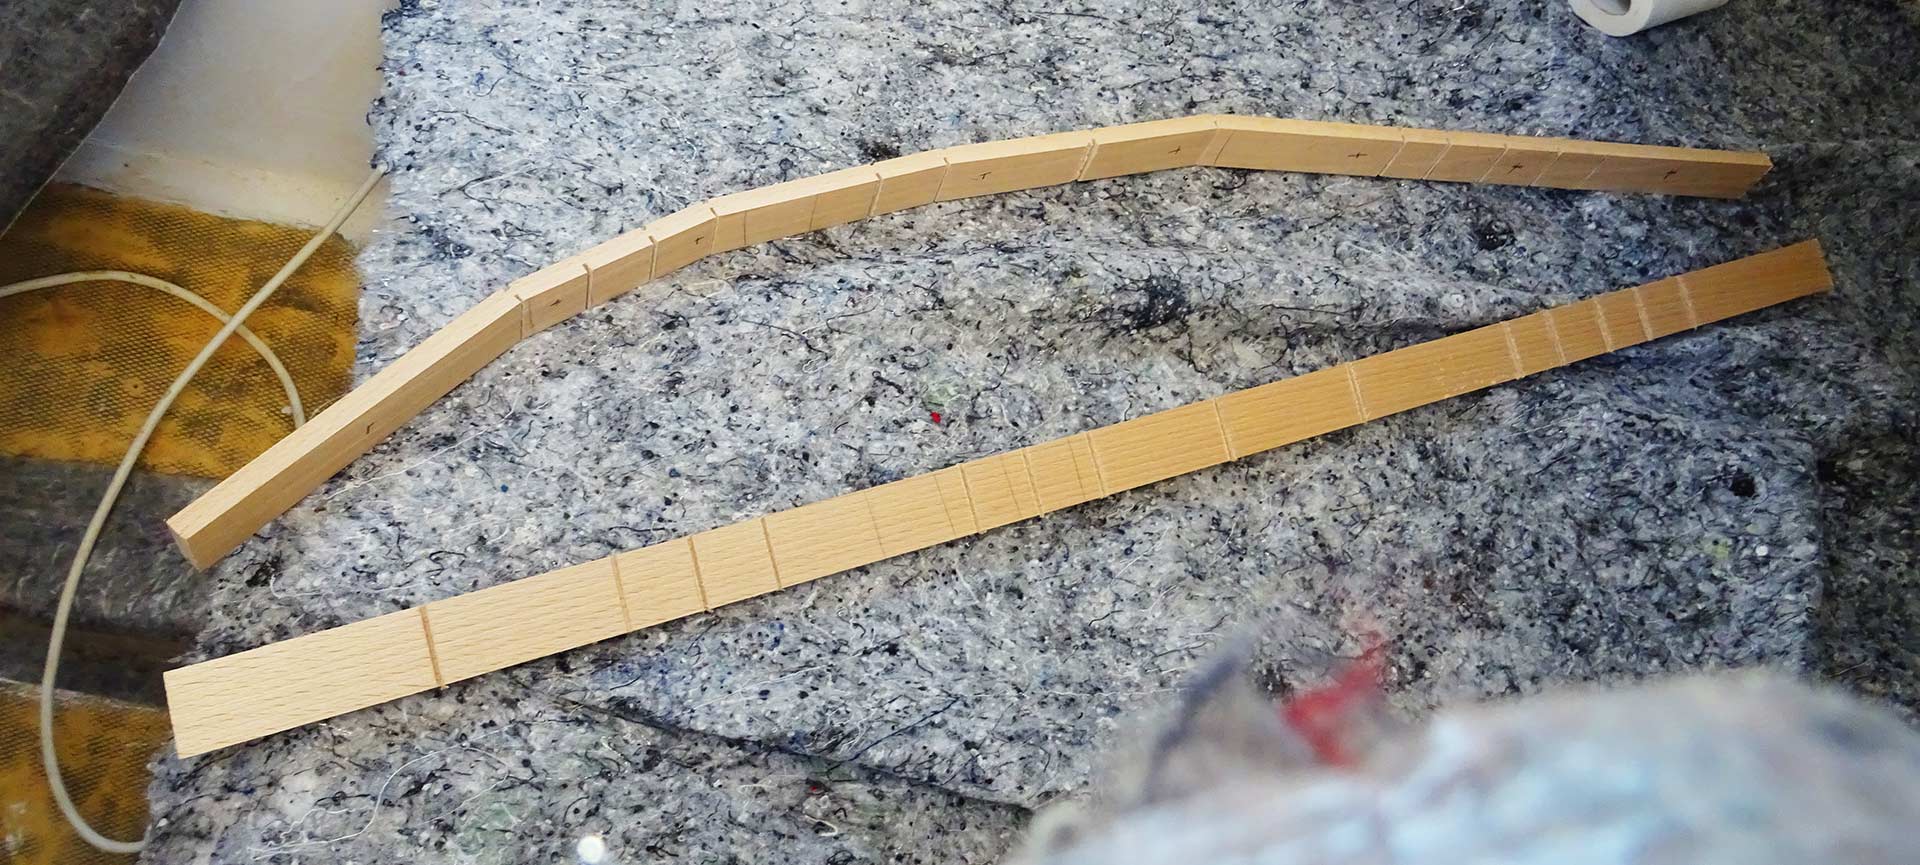
Did I mention that I hate wasting material? And did I mention that I loved Teak? So, again, I was looking for something special when I realized that I´d have some offcut Teak battens left over from the fore cabin-action. This, I thought, would enhance significantly the style of the new cabinet. Instead of glossy-painting ordinary plywood I could have another small area covered in Teak. So I went for it.

That was an easy one: Finding the right sized Teak batten-parts and attaching them to the plywood-front panel of the cabinet by means of glue and pressure. Again, this took me two days (because I do not have too many bar clamps) but gradually this puzzle grew more and more to completion.
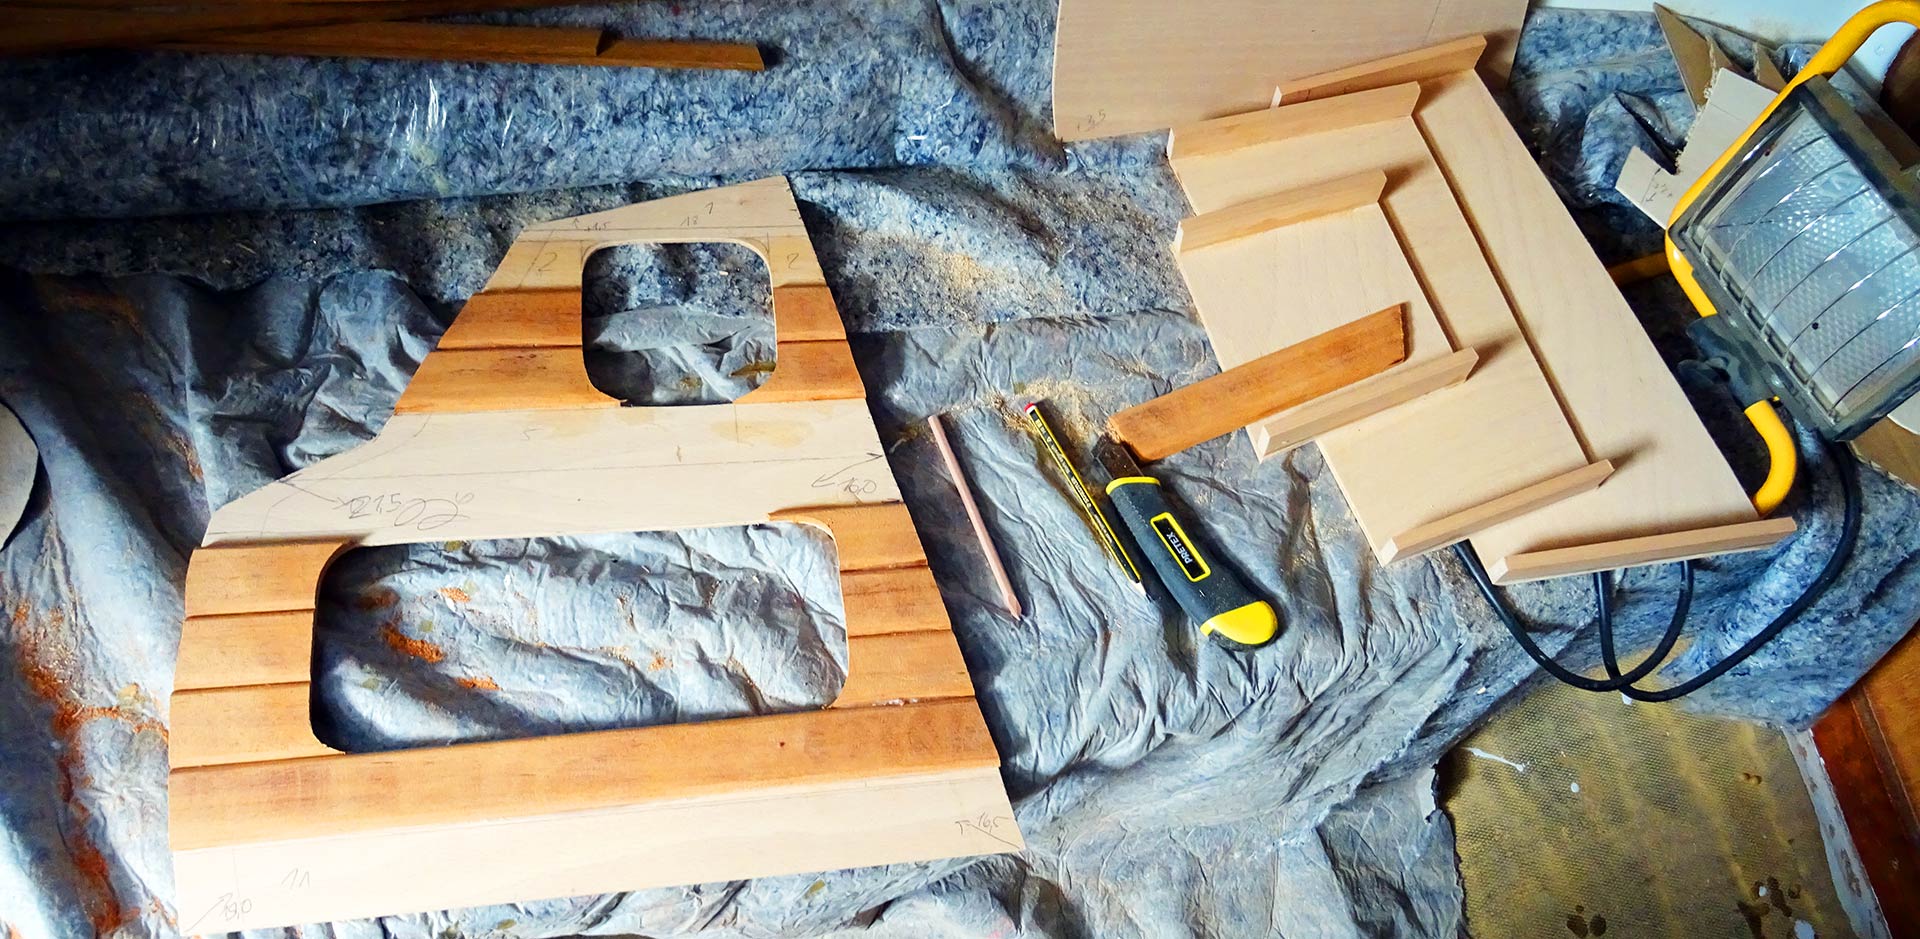
To achieve the nice rounded edges I then took the padsaw and had the compartments cut out at once, which in the end created these nice shapes. I know that this isn´t classic King´s Cruiser but in view of my brand new custom made Teak chart table and the fact that the old big shelf beared so many boreholes and scratches, I would say that making a new approach is perfectly fine.

That said, a final fitting of the cabinet (still without the front panel) turned out to be successful and so I went on to have the cabinet finished.
Finishing the quarter berth cabinet
That said, it´s the adjusting and mounting of the last remaining frontal Teak battens and then I put everything together. Some screws provide additional mechanical foothold to the whole structure whilst for the most part the cabinet is held together by a D4 glue for timber. Now it´s time for the nicer jobs.
I think for a boat´s interior there is nothing better than a combination of white and the natural grain of timber. No matter which, but it must be any kind of timber. In this matter I had nicely done the roofing panels in the salon and fore cabin of my boat and I must say that I just love this combination. The same applies for the cabinet.

Painting the shelves and the inside of the cabinet in plain white and having (later) the Teak batten glossy painted achieved this classy look which I adore so much. I was really proud of my work when finally the cabinet was finished and dried out over a period of days. Now, that was the fun part of the quarter berth´s refit …
Going for a Teak ceiling
So, originally the pilot´s berth was covered with faux leather – just like the rest of the boat as well. I got rid of this stuff for the most parts of the boat when I cleaned the yacht two years ago and thus I applied the same proceeding to the quarter berth. But just for the area that is directly adjoining the hull (that to say, the starboard side of the boat) and I left the leather on the longitudinal bulkhead to the engine and on the upper side of the berth.

Why? Because nobody except for the tired sailor will ever come to see these parts, so why invest too much of work here? It´s a different story with the starboard side – this area can well be seen and every time somebody is going abaft for the galley or up on deck he will have to look into the berth. So, what to do here? Well, let´s do the same as I did in the fore cabin: Let´s make a nice Teak ceiling!
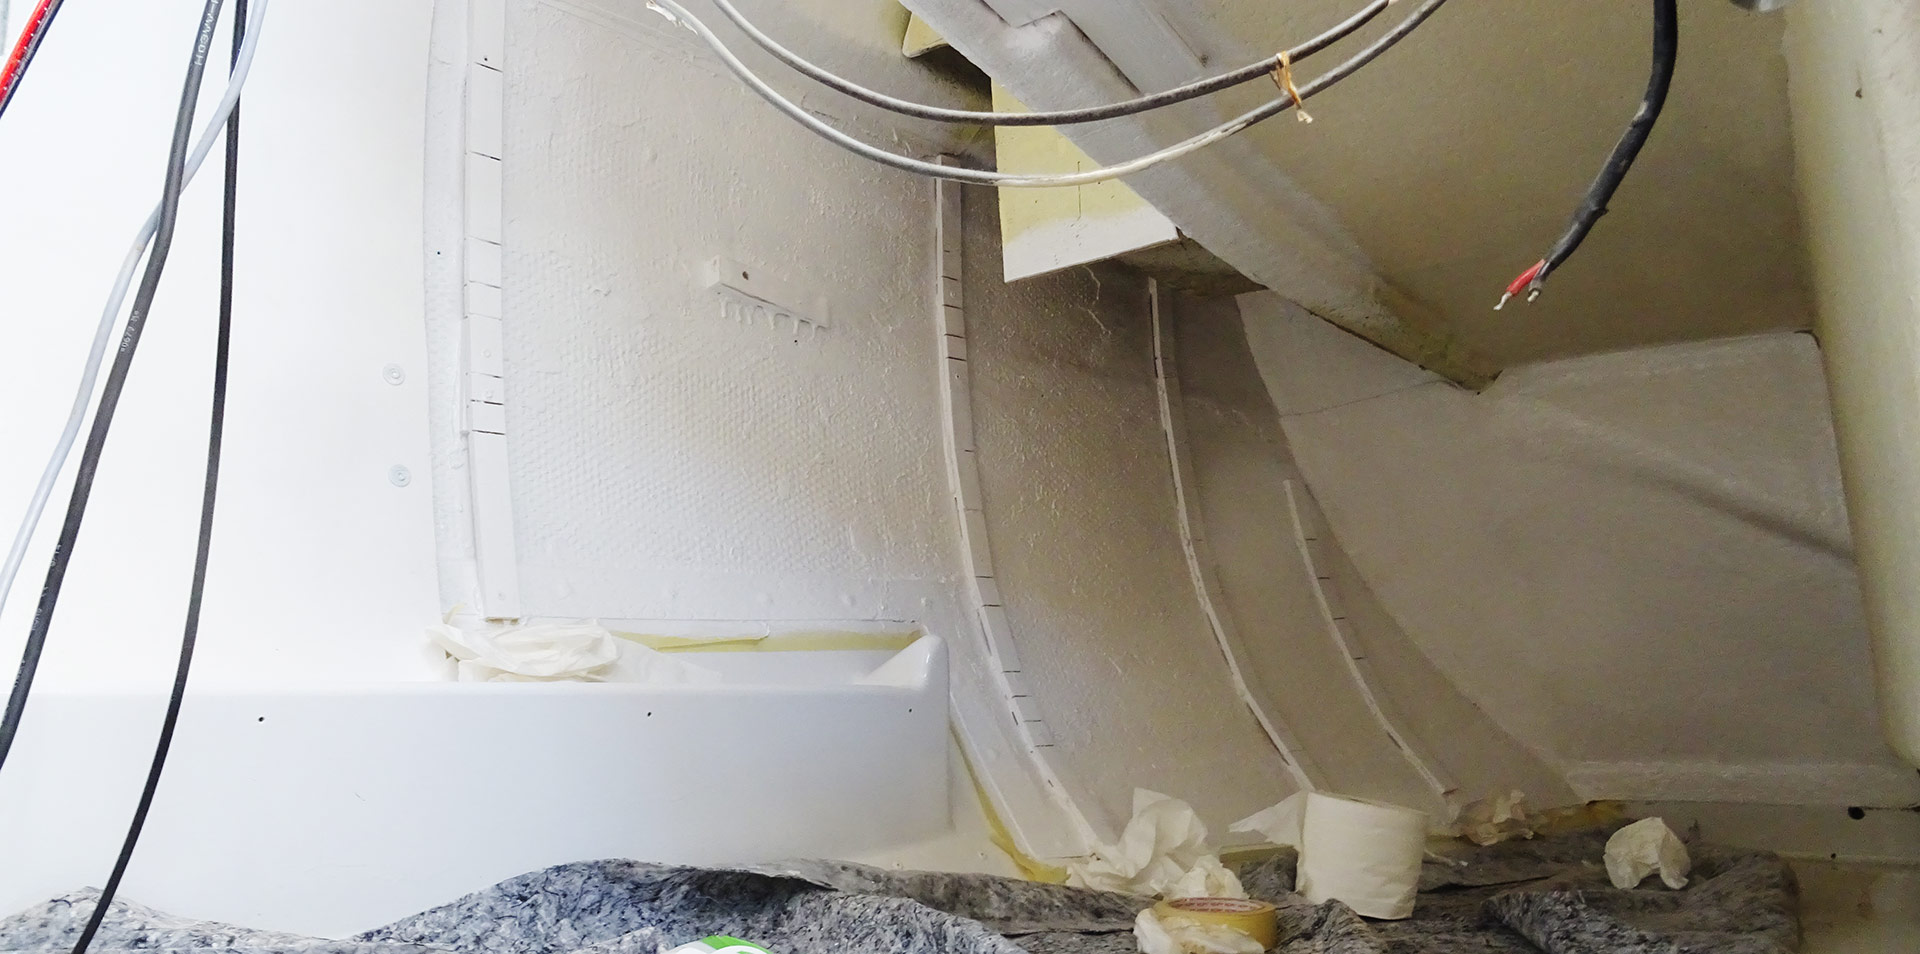
I am a specialist now in making Teak ceilings and so the work went on pretty fast. At first I took some measurements and adjusted Oak tree battens to form the substruction on which I would later have the Teak ceiling battens screwed to. But first I had to tackle the round chine of the hull which is much, much more extreme than in the fore cabin. I had to half-cut into the Oak battens many more times to achieve a bending that was mimicking the round chine of the Kings Cruiser´s stern section.
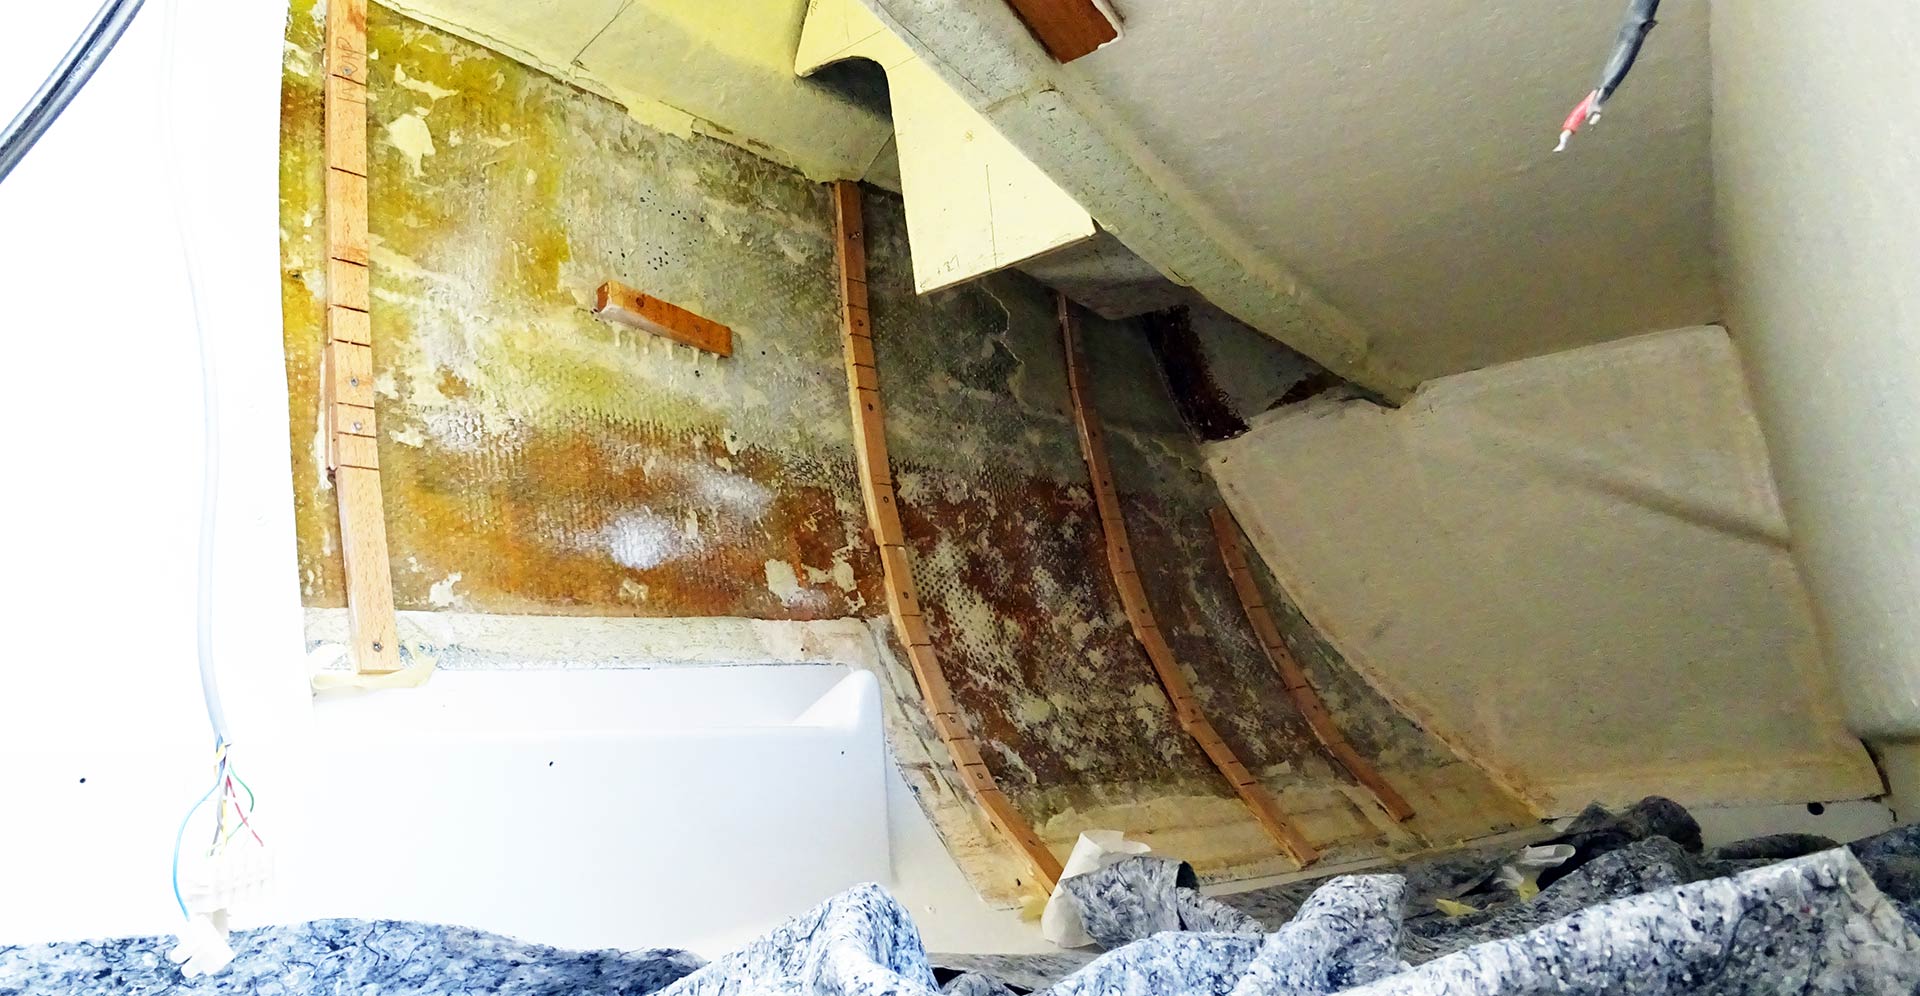
Now those four battens get screwed into the hull – which was no problem since as I experienced back in the day when I was refurbishing the bow cabin that the screws find perfect hold in the sandwich hull of the boat. Additionally, the battens are glued with PUR onto the hull and will later be treated with two full layers of Epoxy. I finished working here fast but … I couldn´t believe my eyes! The next day I saw that I had done something very, very stupid!
As I was so sure that in the aft there would be enough thickness in the material (coming from the sandwich-construction of the boat) I didn´t checked it before drilling. Now I had to realize that no less than THREE screws went right through the hill and come out at the outside! What a F***! I was so angry at myself for not having confirmed that there was sandwich (there isn´t any!) So, for now, I leave the screws where they are and next year, when hopefully everything is done and finished in the inside, I will not only have to polish and re-do the gelcoat outside but also fix the three holes. Man, that was depressing!
Anyways, live must go on and during the past two days I painted the quarter berth in plain white. This will be the perfect background for the Teak battens which will be mounted next time I return aboard.

Next steps for the Quarter Berth refit
So that´s the third and final part of the quarter berth refit-series: Reviewing my stock of materials I found that I still had all the Teak battens that had been originally mounted in the fore cabin of my boat. These battens bear holes, yes (and thatswhy I didn´t re-used them for the new cabin in the first place) but they are still nice to be used in the pilot´s berth.

Next time you will see me refurbishing and sanding the battens, cutting them to size and have them attached to the substruction one by one. I hope – and I am sure – that the outcome of this project will be a totally neat looking classic quarter berth, additionally enhanced by the new cabinet that will set a nice counter point to the chart table and main switch panel as well as the freshly white painted walls. Cool stuff – that´s how it makes fun (well, except for drilling holes in the hull …)
Refitting your own sailing yacht as well? Here are some articles of interest:
Black hole yacht refit?