Long time, no hear, right? There haven´t been any building progress articles on the Omega 42 in a few weeks and you are probably wondering what´s going on there in the shed. Well, the explanation is quite simple: I was kept so busy in my own business that it was impossible to pay a visit to the shipyard. Secondly, Northern Germany did experience a very unusual harsh winter this year, literally “freezing” all works for a few weeks. But anyway, yesterday I swung myself behind the wheel and drove east: Let´s check out how far the guys have come!
The Omega 42 interior is nearing its completion
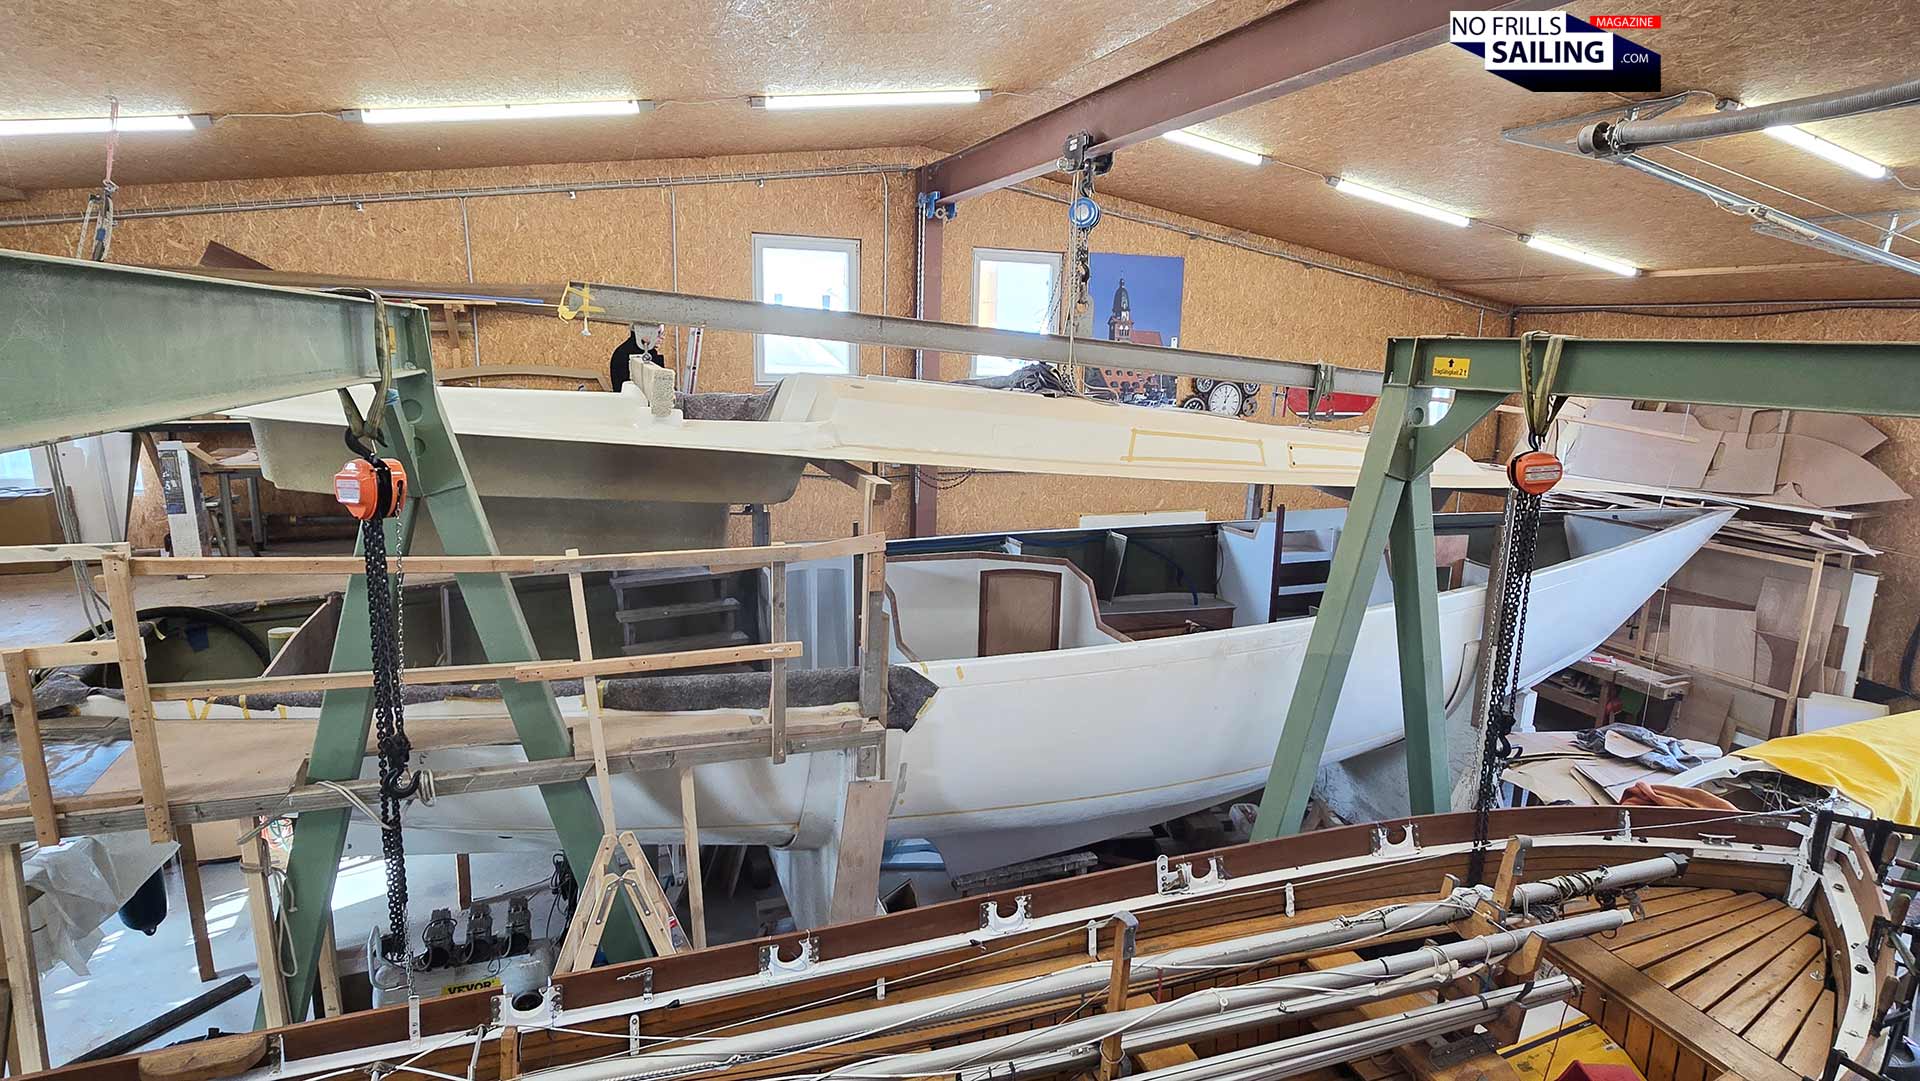
And indeed there had been accomplished quite a number of steps toward finishing the boat, which, by the way, is scheduled for end of June this year. That’s only four months to go! As I saw the boat on her cradles, I was struck: It instantly reminded me of two things. First of all, seeing the hull with the deck fixed above it neatly was exactly the first impression I got when I visited the shipyard for the very, very first time: That was January 6th, 2018 … only that hull #001 was a bit more complete, but not much.
But why does it take so long?!?
And secondly, I suddenly had to think about that very first day when the guys brought the then empty hull into the building hall onto her cradles. The day, the building process of hull #002, my boat, started. That was on July, 9th 2023. Quite some time, right? How far have we come since then and … “why the hell does it take you so long to build the yacht?” Maybe these are questions you are asking yourself given the fact that we are fumbling around for three years now. Well, we´ll delve into this deeply in this article. One thing upfront: Building a sailing yacht in semi-custom mode is a completely different story than ordering one off an options list from a series production shipyard …
From the rear part to the bow: What´s the status quo?
Advertisement
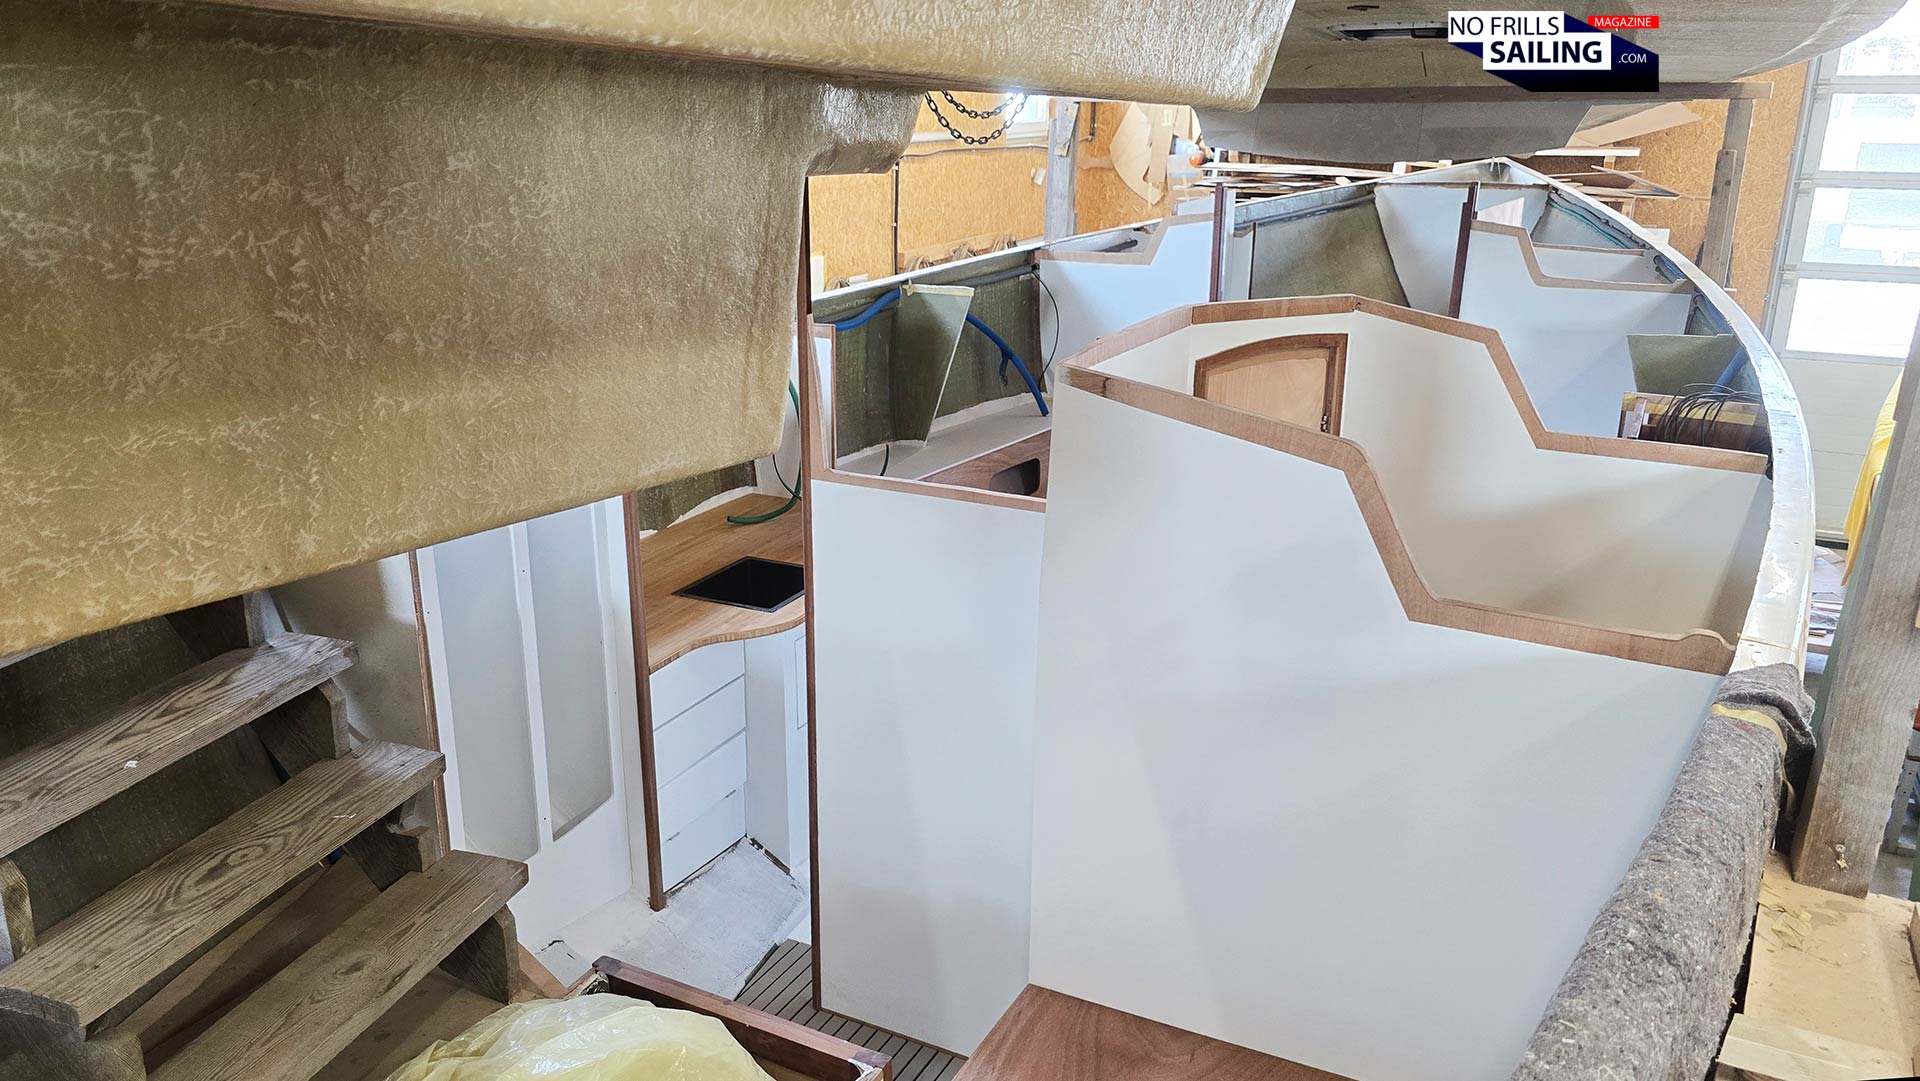
I though for this article it might be cool to take you through the whole boat from stern to bow, just so as I did yesterday myself. The boatbuilders have made sturdy staircase that is the entryway into the boat, leading straight down onto the portside pilot berth of the yacht. Instead of fitting a double berth cabin or even make a proper cabin here, I decided to have just a single pilot berth in the back of my boat.
In the rear part of the boat
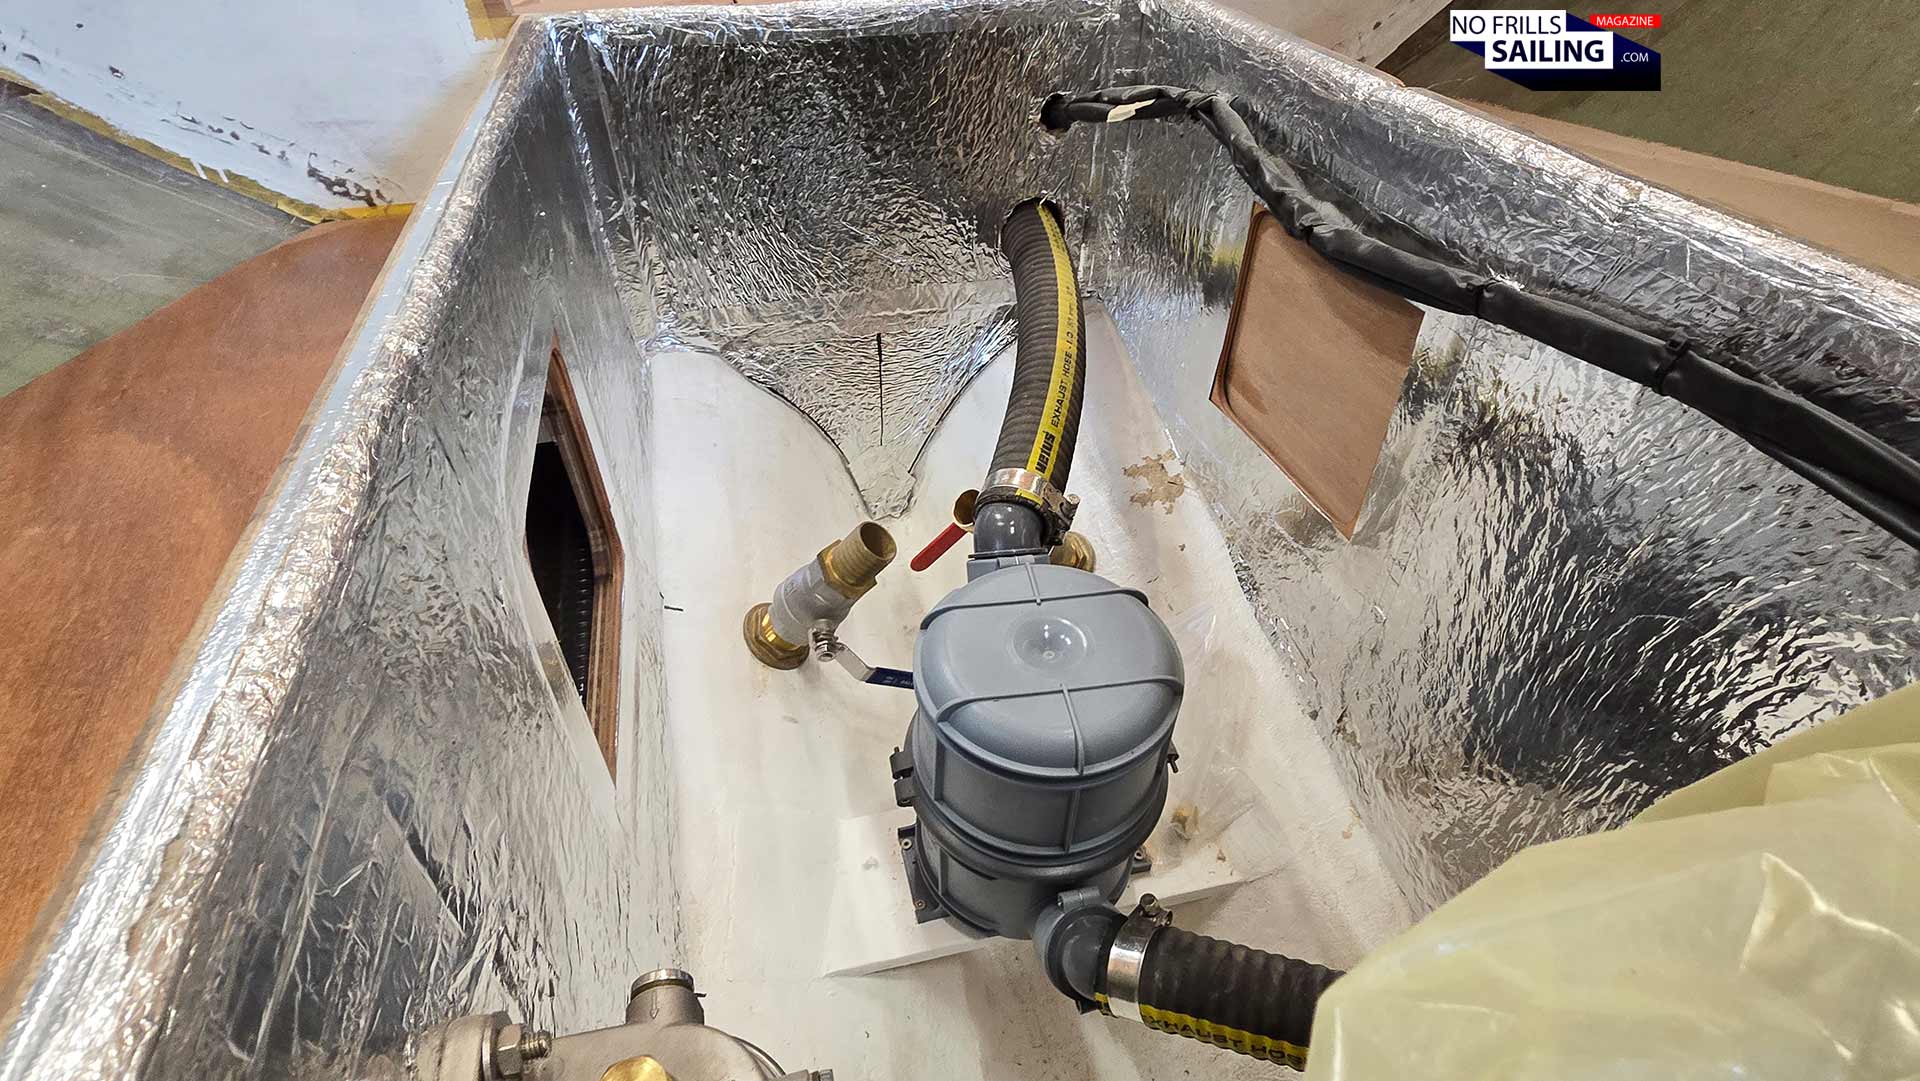
Between the two rear areas is the engine compartment. The Diesel with its saildrive propulsion unit is already mounted, but now the guys are completing the whole auxiliary installation that is needed to properly run it: Exhaust, cooling water piping, heat- and noise insulation. There´s a lot to do still, but that is a matter of a few days. Yesterday we finalized the positioning of the engine throttle lever (port or starboard?) and a few other things, like the manual bilge pump and so on. For now, it looks just fine to me.
Engine parts, insulation & more
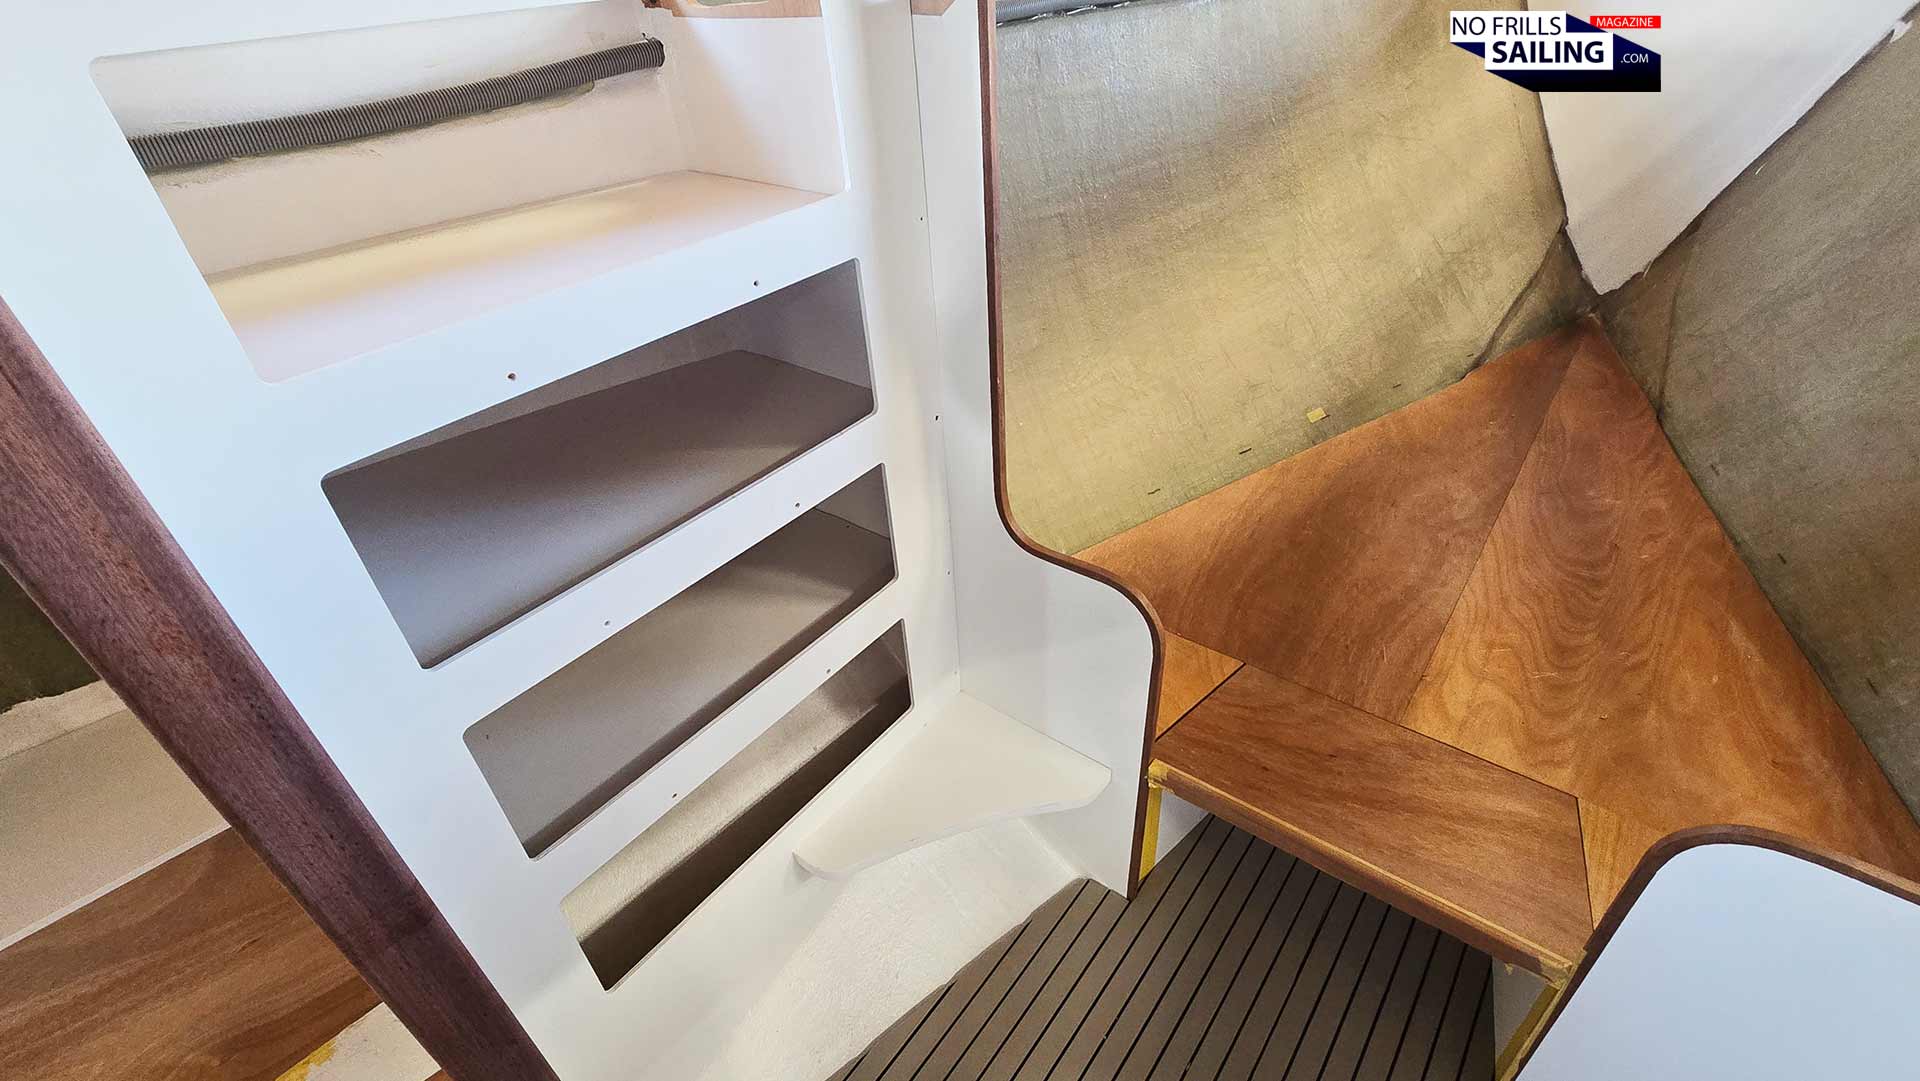
Also roughly finished – and this is valid for all the boat´s joinery now – is the big aft cabinet of the rear cabin. It´s a vertically divided cabinet (for structural reasons) that will later be equipped with a number of shelves. All of the fronts and furniture-parts of the boat are almost completely painted and lacquered as of now. This was a process that took the guys a few weeks as you can imagine. All of the rough joinery would have been sanded to fit precisely, dedusted and degreased thoroughly and then the application of a few layers of ground coat would have started. After this, the first layers of the top coat would have been painted. After drying, the parts got fitted inside here again. That´s a lot of work – as series production companies build the interiors in modules outside the yacht, this saves working time manyfold!
First furniture roughly finished
But the guys haven´t applied the final and last layer of paint as of now. It may look like, but it isn´t finished. In some upcoming pictures of this article you will get to see why. Regarding the rear area of the boat: I´ve ordered the batteries for my ship (expect a full article on the boat electrics-issue soon), which comprise of two Mastervolt Lithium batteries (LiFePo) and one AGM-type starter battery for the engine, including the whole charging and shore-power installation. Those will be fitted to the starboard-side area underneath the “bunk”. The rest is stowage.
… why does the building process take so long?!?
I know, I know, that´s the most prominent question most people ask. I mean, usually, building time for a sailboat lasts from nine to 14 months if ordered with a series production shipyard, depending on their order books and complexity of the boat. The Omega 42 is far from being a series-production yacht, she´s essentially a semi-custom or maybe as well a full-custom yacht indeed. As there aren´t any industrialized working steps, each and every single part of the boat´s outfit is made individually.
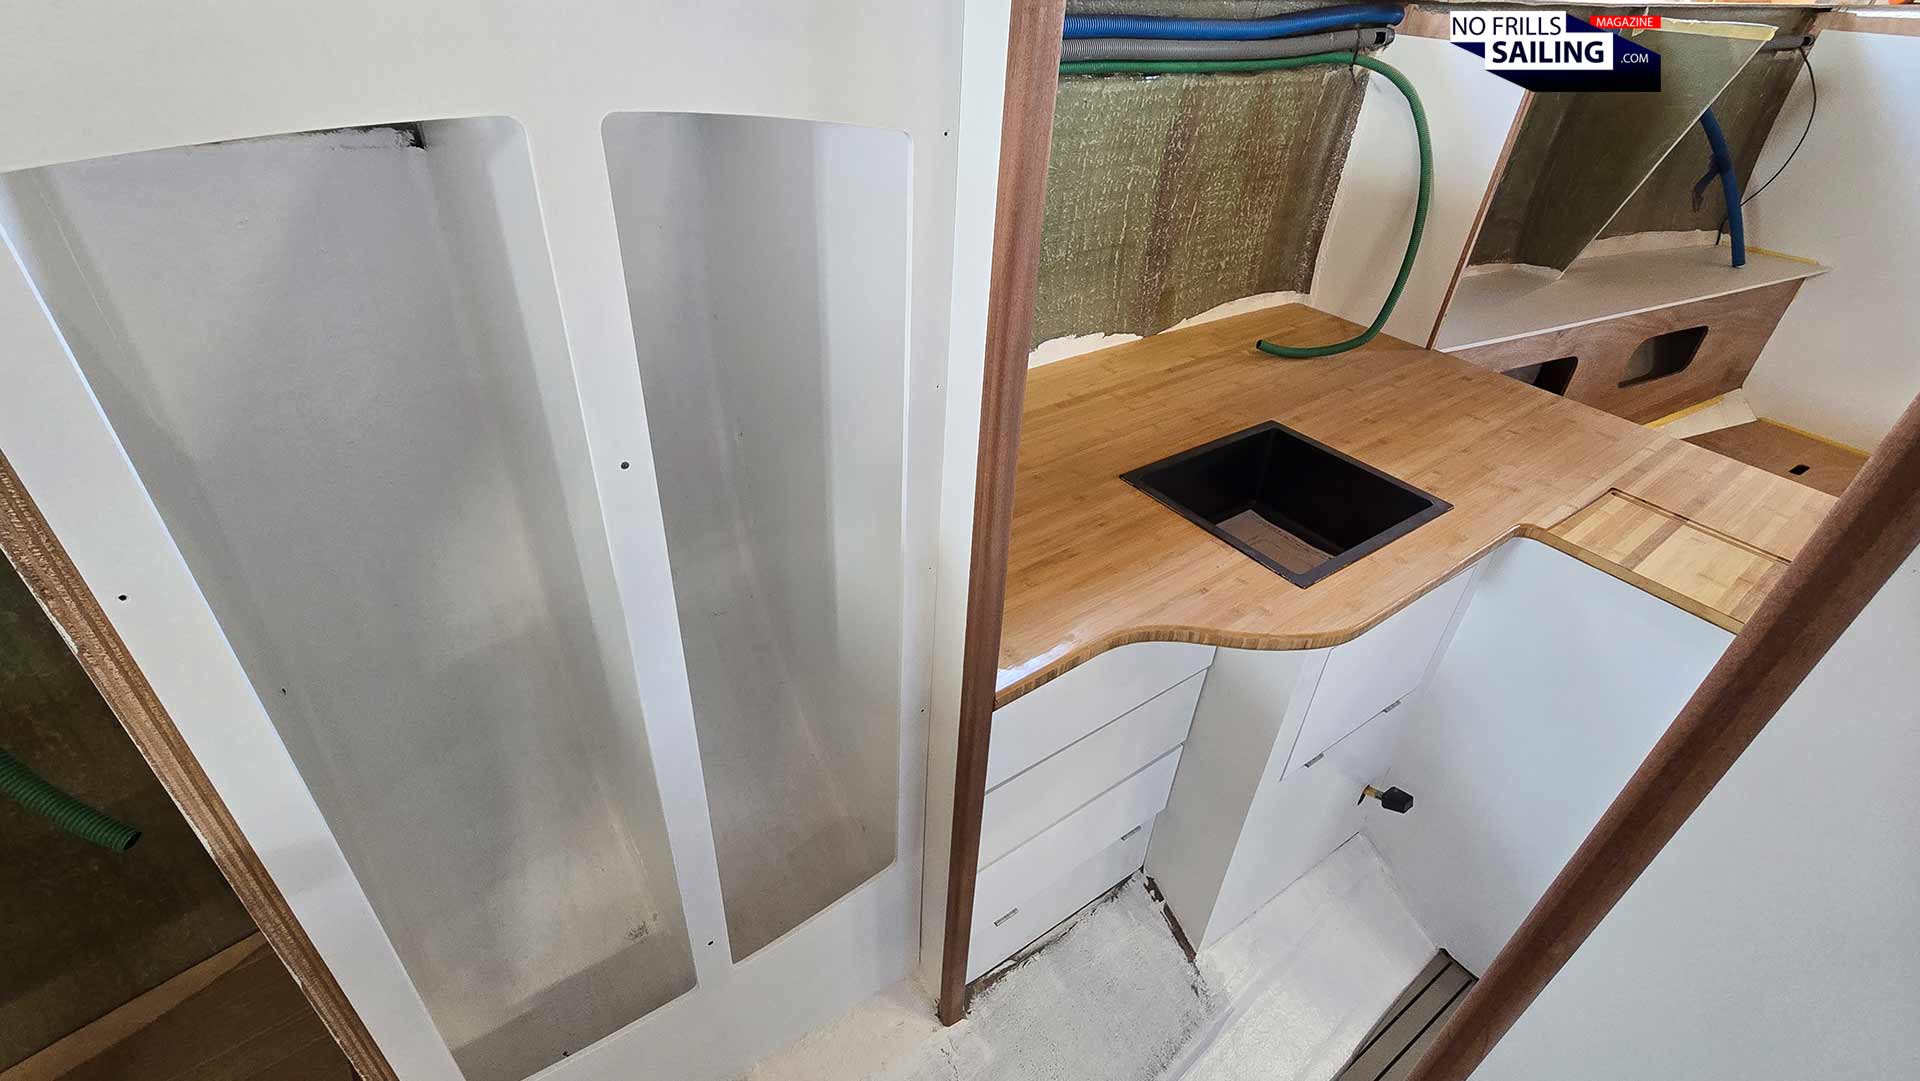
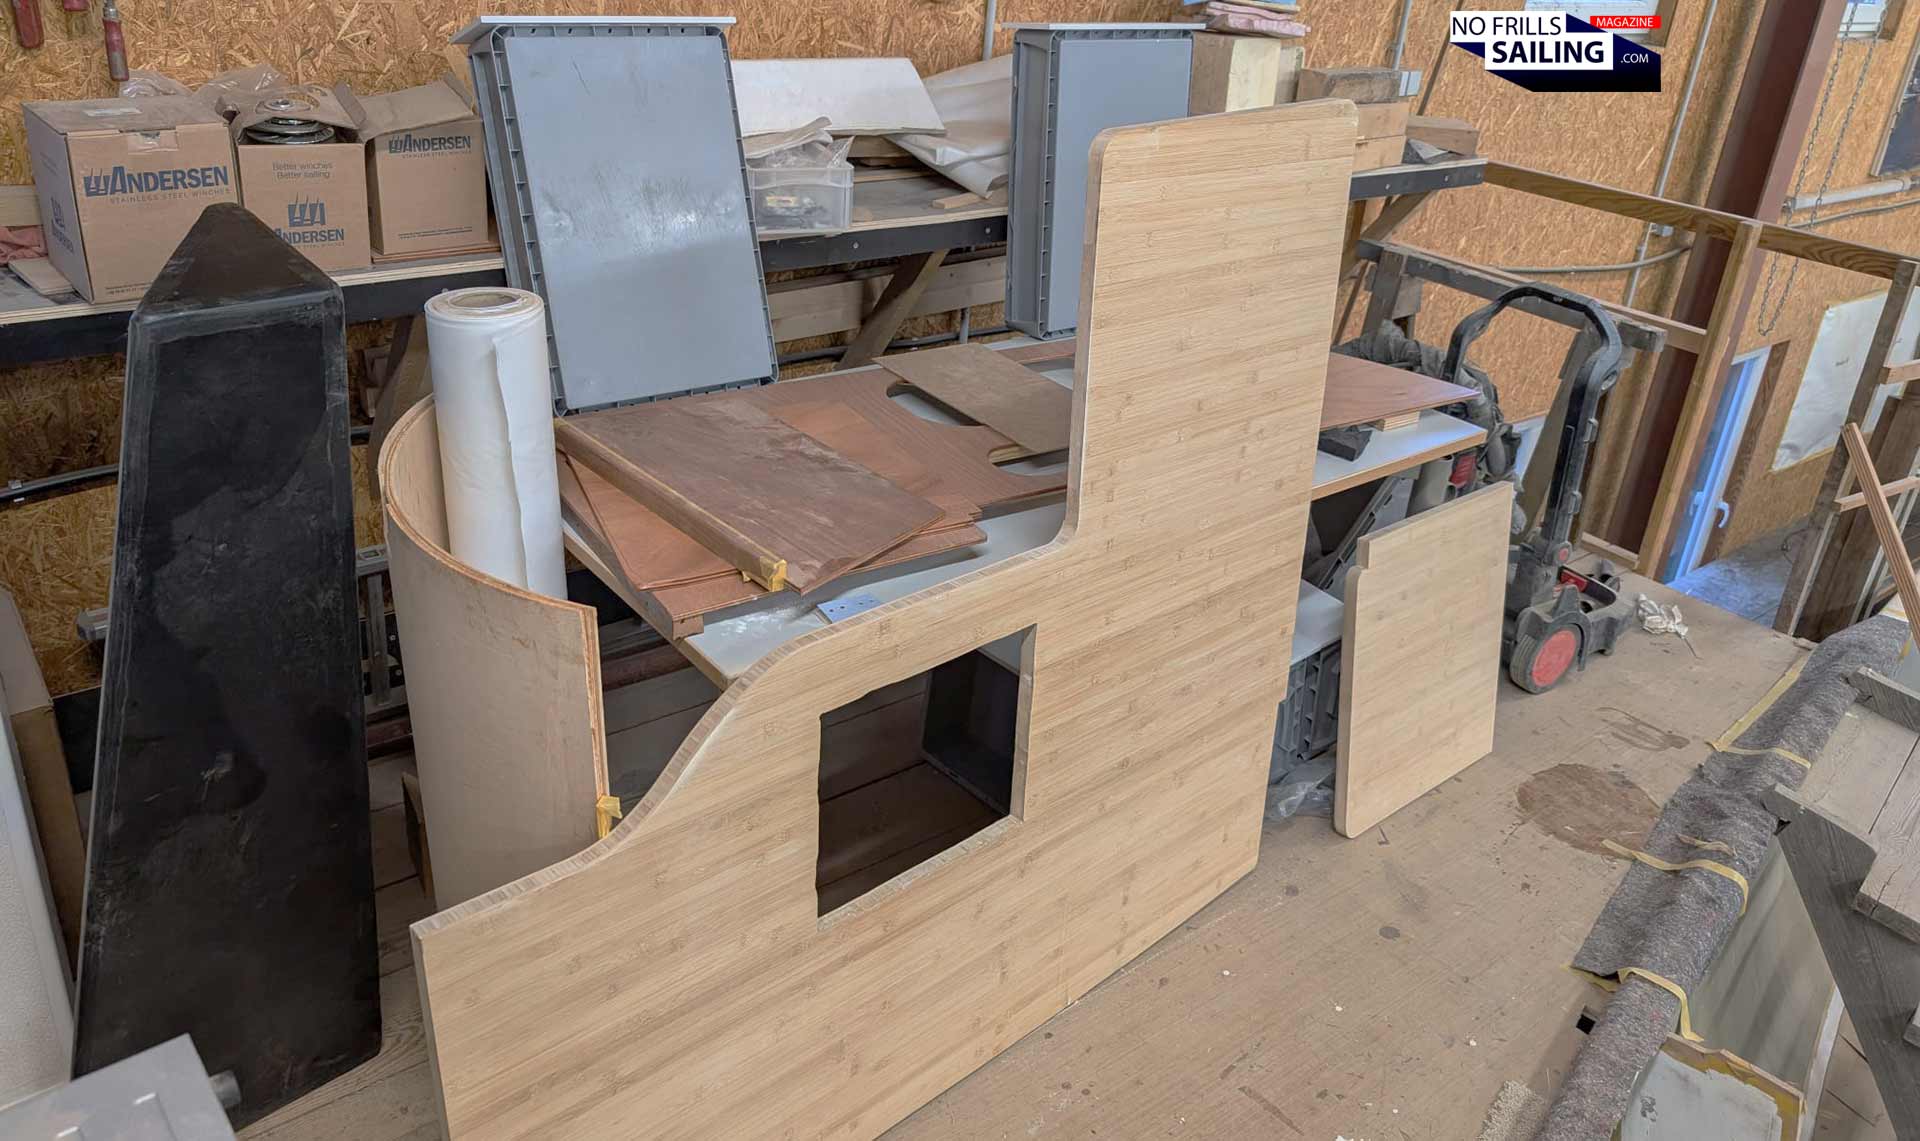
Can you imagine adjusting these lare parts?
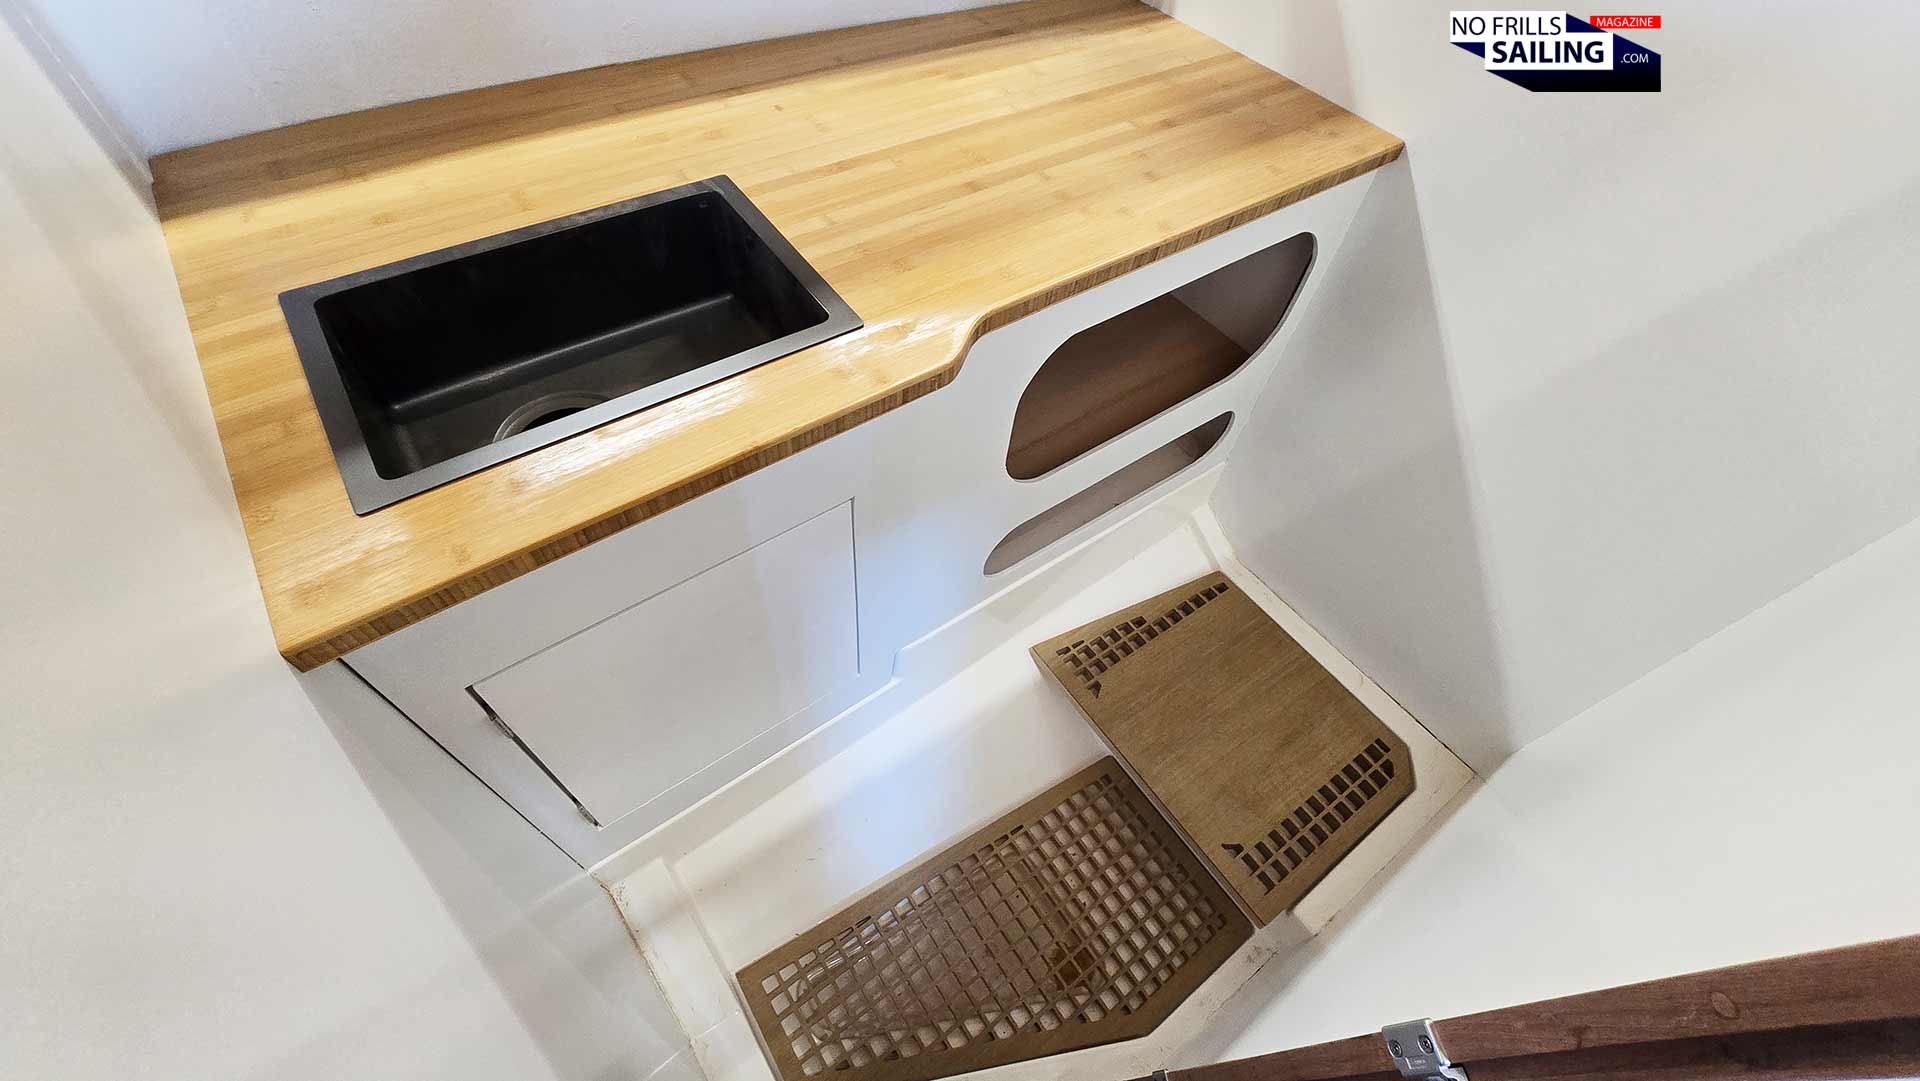
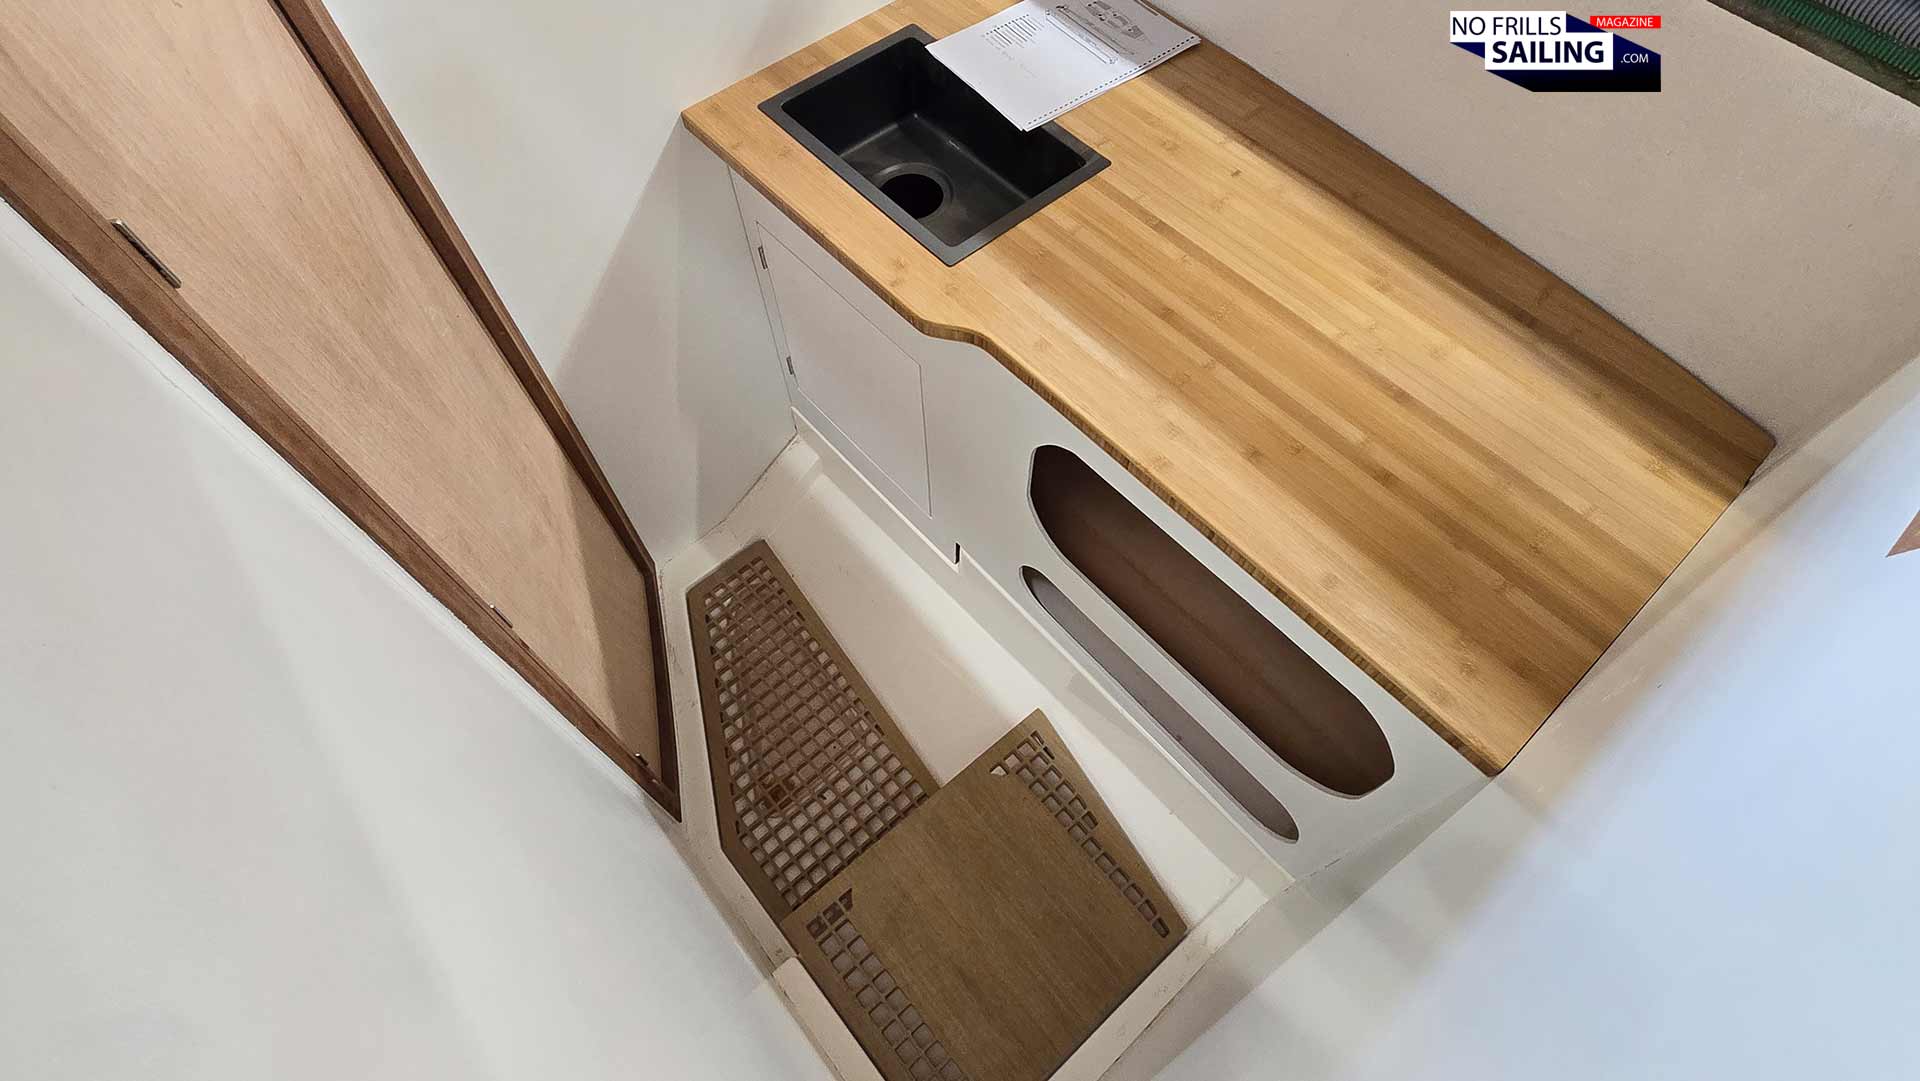
Just take the galley worktop, as seen in the picture above. It´s a huge part, probably the single biggest wooden part of the whole boat´s interior. But this is valid for everything else, down to the tiniest panel. The carpenters first make a gauge model to check for size, general design and potential problems. These gauge models are usually made of cardboard or cheap plywood/offcut. Often I receive the pictures or I have to drop by personally to discuss those. Is the shape right? Where do I want to place the sink? These are all questions I am asked and I get to decide. It´s not seldom we have to find a compromise between my ideas and wishes and the reality of boatbuilding.
Raw finished galley
In the end, all of those questions, well, almost all, have been answered by now. As well as for the Bamboo worktop of my galley, most things have been cleared and manufactured by now. But just imagine how many individual parts there are?! How many cabinets, shelves and things are there which sum up to be a boat´s interior – and how many ideas, possibilities and wishes might pop up in the process. Nothing of this is valid for a series production boat: Everything has already been decided for you by the interior designers, everything is pre-fab and can be produced in a matter of days. So, why does it take so long? Because there´s so much to manufacture, so much to talk about and so much to assess, research, tried and fixed. Surely the longest and most intense part of the whole building process, as I know now!
The burden of a semi-custom yacht project.
This all sounds like so much freedom for me as the owner, right? And indeed, in a way it is. I mean, I was the one who wished for a “boat without cabin doors” – and here we are! There aren´t any cabin doors, there aren´t any distinct cabins at all! The whole yacht is one continuous internal volume. Try to tell this your local Hanse-, Beneteau- or Bavaria-dealer … So that´s the nice side of realizing a semi-custom boat project. The downside of it (apart from the long time it takes to make and of course the price tag) is that even the seemingly smallest wishes or decisions can trigger a huge rat-tail of consequences, which – you guessed it – pose new problems. Here´s an example: I decided to have a very basic, very simple yacht. Make it as simple as possible. This included the ban of a gas-system for cooking. No gas stove for me. Instead I opted for the alcohol-burning stove, a really cool thing. But here we go …
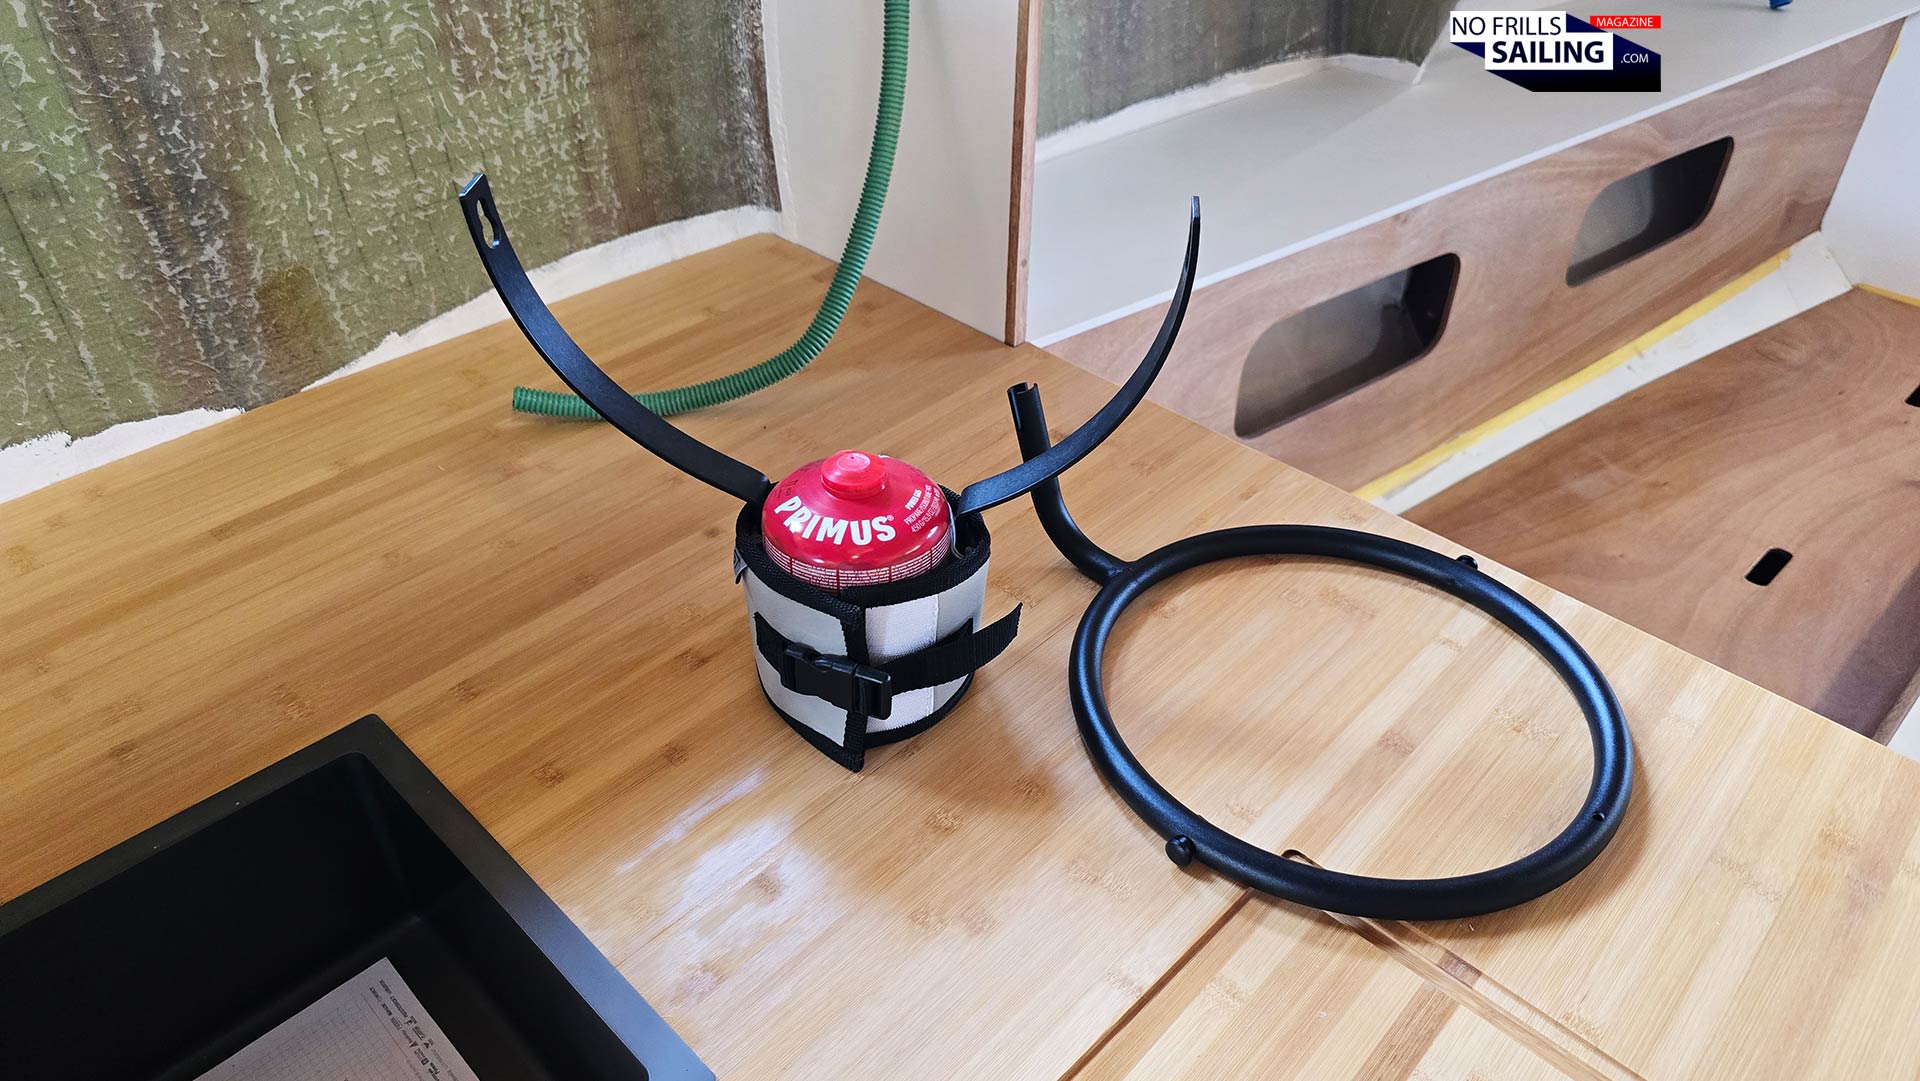
Details: Where to put the Jetboil?
As there aren´t any nice gimbal mounts available for that stove, we went for an easy mount without gimbals. This means I can only cook when the boat is moored or at anchor. No cooking whilst sailing. But of course, I need hot beverages or a soup now and then. So I emphasized to fit the proven Jetboil-system with the great Seascape-gimbal, which I had used excessively on my old First 27 SE. But where to mount it? Mount it so that it can burn safely? It took us almost 45 minutes of trial and error, of a vivid discussion yesterday until we had a solution. Expect those for many, many other items too. I would say that realizing a semi- or full-custom boat building project at least takes double the time of a series production yacht. At least! In this, three years building time doesn´t appear all too long anymore, right?
Fitting electrics and electronics
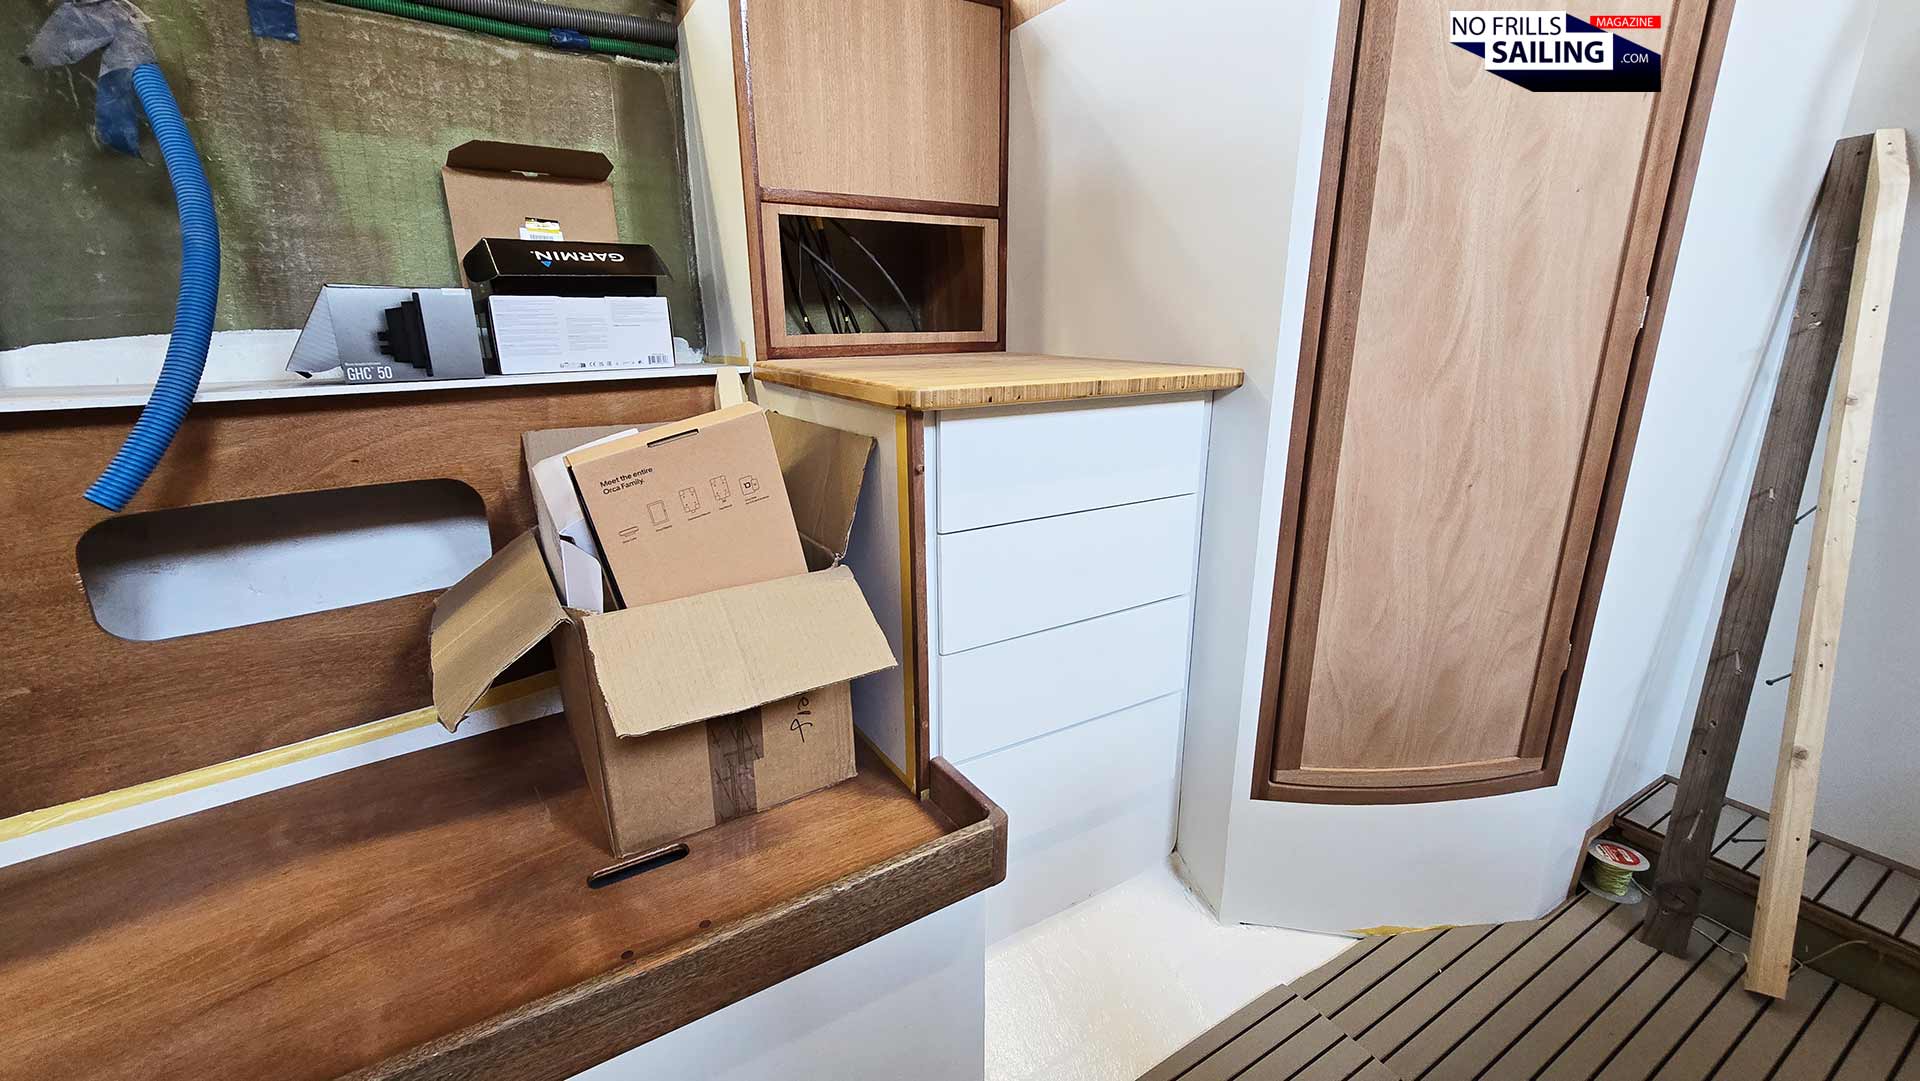
Let´s check the area vis-à-vis of the galley. Aboard my Omega 42, here´s the “nav station”, as I call it in absence of a better term. It features a small “chart table” with four drawers underneath. Those will hold everything I need to run the ship: From the papers, licenses and insurance documents to the ship´s kitty, binoculars to naval charts and all sorts of stuff, which eventually would be flying around in the whole boat. These drawers are simple plastic-trays with a white lacquered front. The opining/closing-mechanism works by a simple push. Nice, easy, clean and simple.
Ship´s electronics: Detailed decisions
Behind these panels and furniture parts, the gays have wired up the boat completely. There are wires running from the mast´s foot all the way here, as well as all the other wires that needed to be controlled via the Philippi main switch panel, that is due to being fitted. Same goes for the Gamin Cortex VHF, the Orca nav tablet, core and charging device and a Garmin secondary display. Of course, I was asked where I wished to have those fixed. Panel in the line of sight or down below? Where to put the VHF-handset? Again, details, but important ones, and I am one to choose.
Almost finished: The boat´s head
Another big step had been made in the boat´s bathroom. Again, I chose a very basic outfit for my yacht: No hot water boiler whatsoever, to start with. In the course of my sailing trips over the years I would say I haven´t been showering aboard the boats more than five times. Mostly I utilize the amenities which are provided by the marinas. In high summer, a black shower-sack hung at the mast will do just as fine. So I spare the whole weight and hassle with a hot water system, let alone the shower drainage, pumps and stuff.
Almost perfect head!
Speaking of pumps: There are no electric water pumps whatsoever in the yacht: Both the fresh water faucet in the bathroom and in the galley are manually operated by simple foot pumps. Nice black faucets are still needed, by the way: I just haven´t found nice ones without a hot/cold mixer. If you have an idea, suggestions in the comments more than welcome! Back to the bathroom: As with every other horizontal areas in the whole boat, the worktop here is made from Bamboo wood. I just love it!
Underneath is a push-cabinet to reach for the pump and piping to the left side and two open trays for bathroom stuff to the right. Here, we will put our sanitary products, toilet paper rolls, cleaning agents and of course the soft wood chips for the no-mix toilet, that needs to be fixed. In case you have missed this one: Yep, I also threw out the usual marine toilet systems, be it pumping WC or electric. I just didn´t want to have the hassle with the wastewater tank system and seacocks. If you like to know more about the solid separation toilet for sailboats, click here.
Mirror, stowage & WC
Everything that´s left to fit in here would be the felt on the hull (still open for the whole yacht) and a nice solution for a mirror, maybe a few hooks to hang towels. I am especially proud of and happy about the custom made gratings which are the visual highlight of the whole bathroom. You know it: I´m a sucker for gratings somehow. The bathroom door needs to be painted and fitted with a lock, and that´s all, head´s finished.
Lots of changes for the yacht´s salon
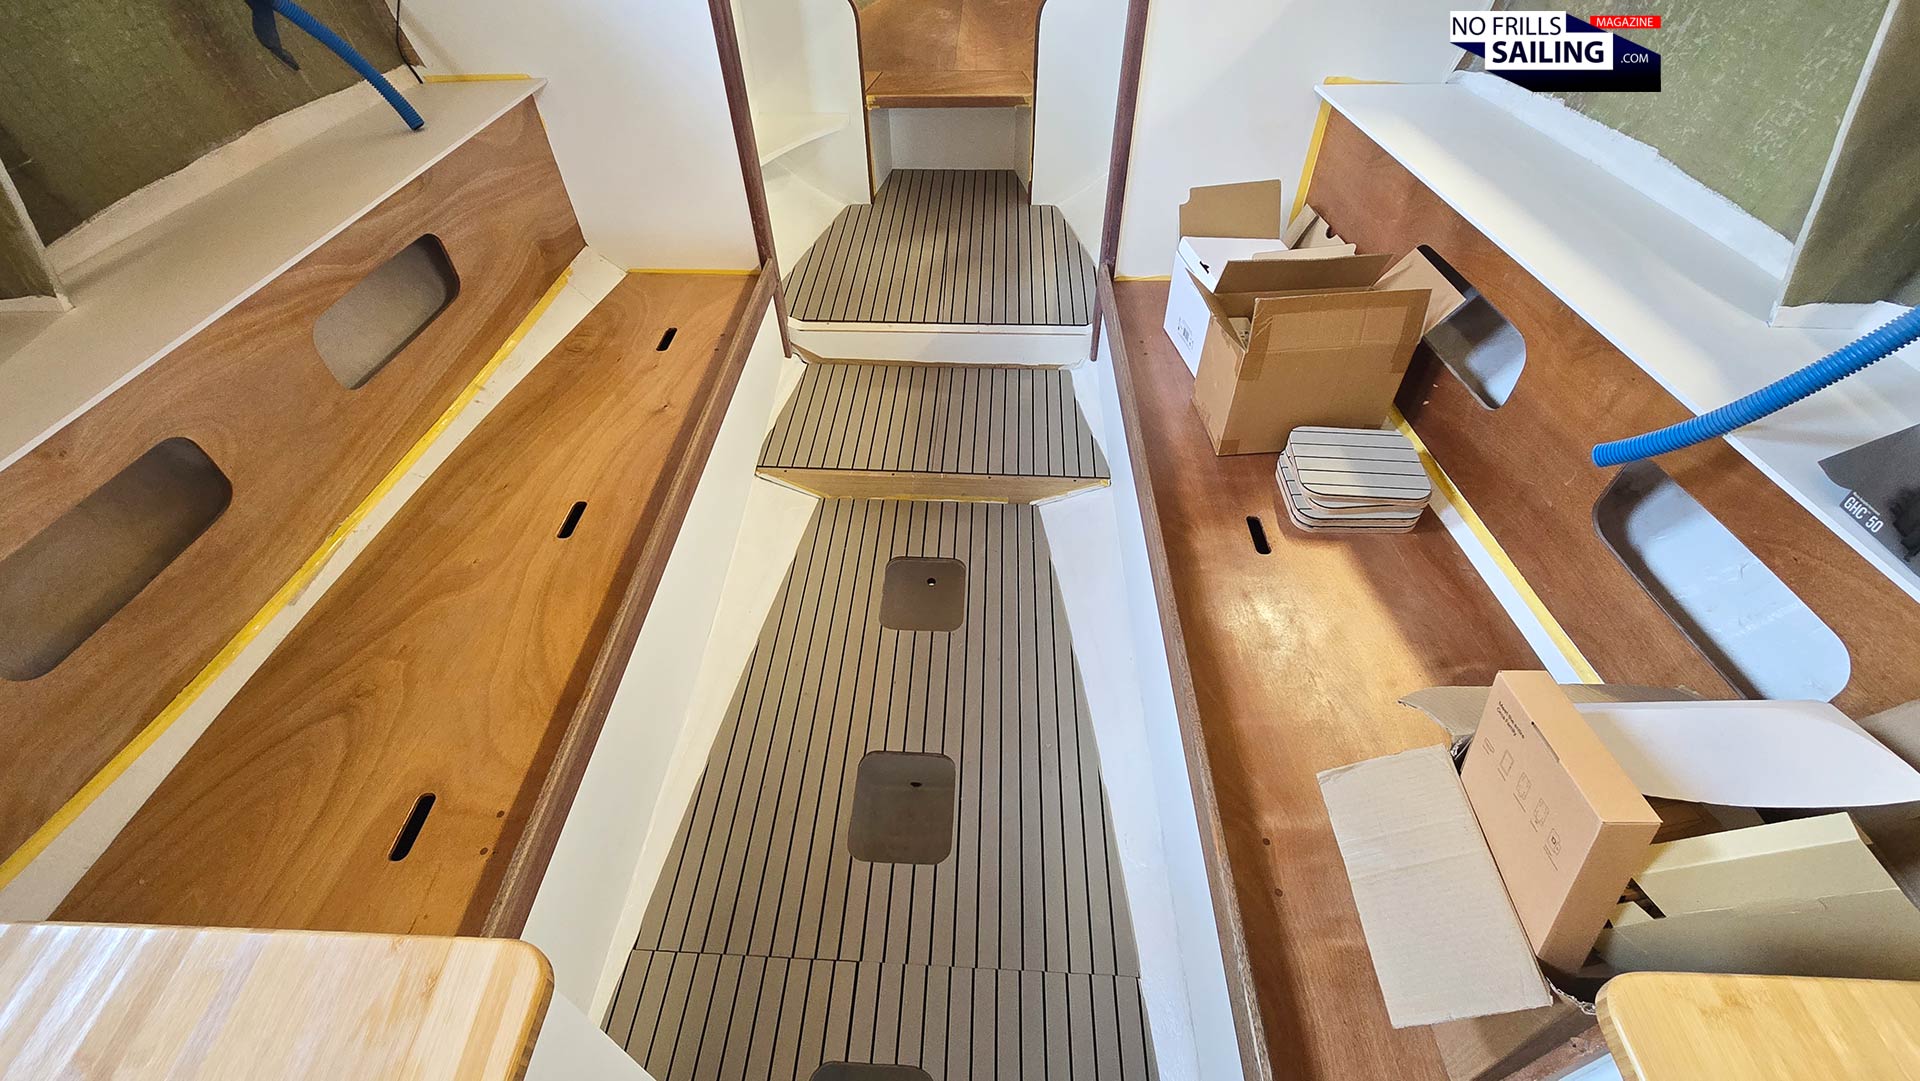
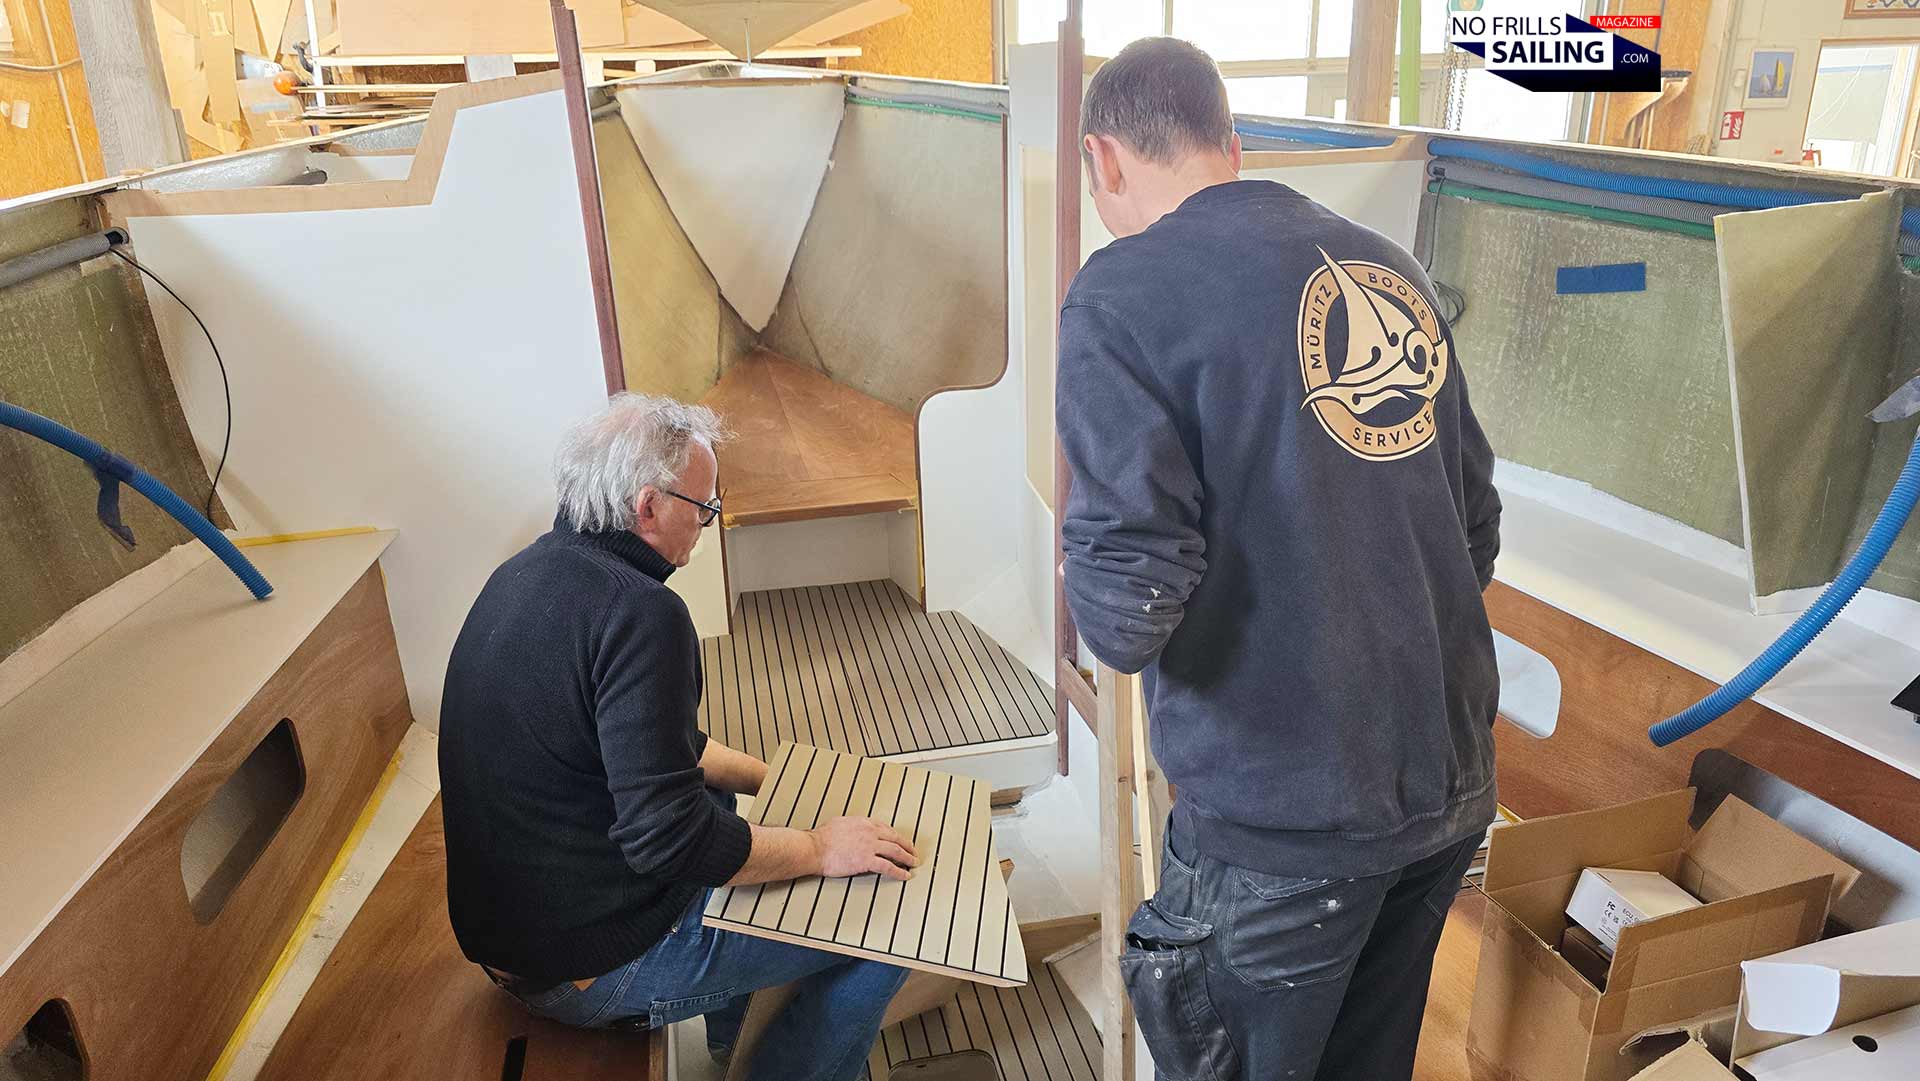
But not everything works out that smooth and fine. Here´s a great example of things going down the drain completely. Working our way up further to the front of the boat, we now turn our attention to the very salon of the Omega 42. As I said, the wall covering (done in two colors of marine felt) still needs to be fitted, other than that, the furniture and woodworks are finished, waiting for the final layer. But there´s a problem. A big one. Can you spot it already?
The (nearly) finished salon
The guys have fitted the floor boards which I had produced by an external boatbuilder and friend a few months ago. These are custom made, CNC-milled AVA-foam panels put onto plywood boards. Even though it had been done utilizing utmost care, for example by adjusting the EVA-panels exactly to the central axis – now that they are fitted, it just doesn´t work. I mean, look closely onto the picture above and you will surely notice the offset in caulking from board to board. Especially the central one, which is off by one centimeter! It looks just shit.
Tiny and major decisions needed …
Another problem we begin to see just now are the areas between the floorboards and the sofas. This is the rounded hull, covered in top coat. But also, this “shark teeth”-look is … I don´t know, it hurts my eyes, it looks cheap in a way. Additionally, I suddenly don´t like color anymore. It´s too “sandy”, too brown – for a yacht where the color palette consists of white, grey and blue only. “Sandstone” doesn´t really fit, it doesn´t fit with the Bamboo as well. Oh boy. Well, a decision needs to be made …
“Rip it out completely!” Floor boards issues …
After thorough considerations and really talking through all alternatives, I finally made the decision to get rid of these. I was simply too fast, too early in the process back then when I took those to the joiner. At that time, the color scheme for the boat hadn´t been fixed. Standing alone, the sandstone color is still very nice and beautiful. But seeing it now within the ensemble of all colors, it just doesn´t add up anymore. Apart from the fact that we don´t know how to fix the huge margins of offset. Let alone that someone did cut the front board into half, but not straight but weirdly diagonally. Nope, this doesn´t work at all!
Well … this must be changed
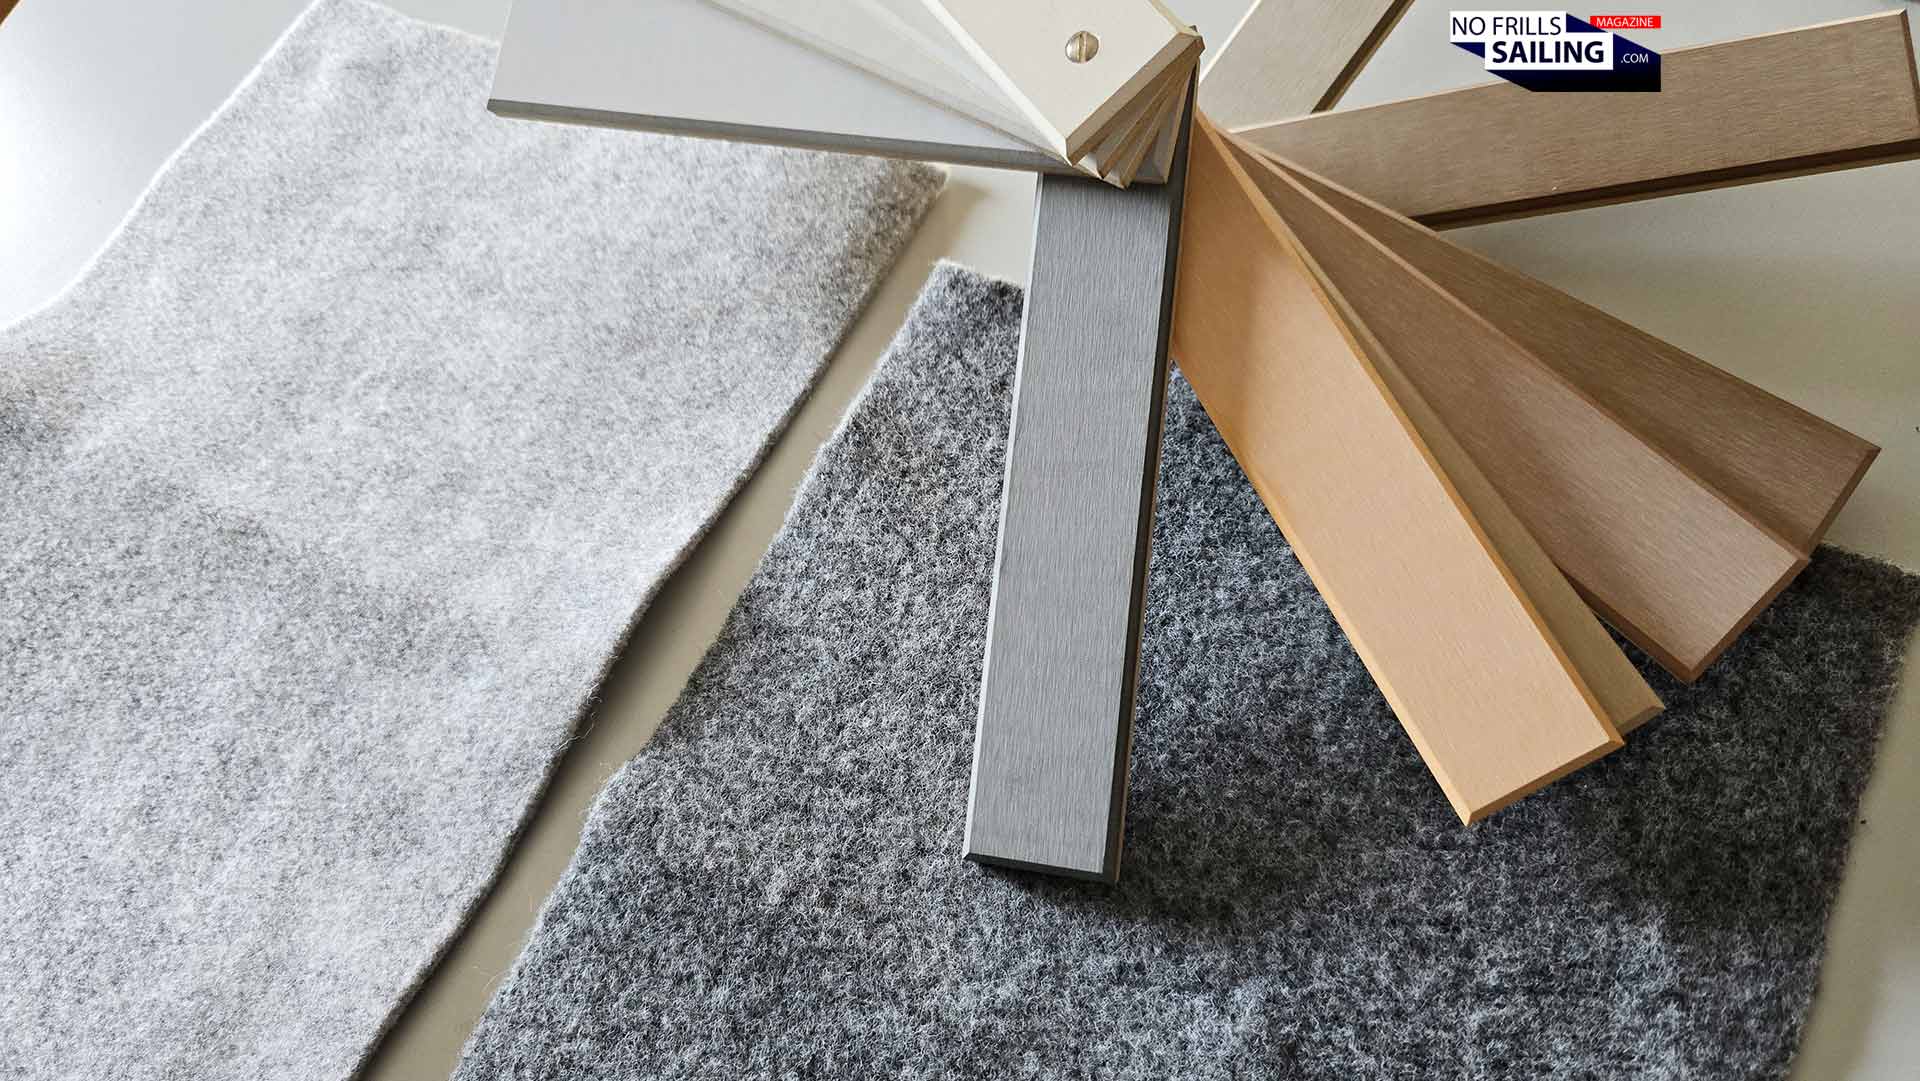
So, that´s money wasted, for sure. And money spent twice. The floorboards will be produced completely new. This time I also decided not to opt for EVA foam again. I still like the material, but maybe the guys are right when they tell me that the floor needs a more durable, harder material. There is however a new kind of stuff on the market by Sika. It´s called Sikafloor Marine 590. A 2-component polyurethane decorative resin that comes as part of its Sika Deco Comfort system. The guys have a set of colors and samples. (This time) carefully comparing this new color choice with all the other colors in the boat as well as with the colors of the upcoming cushions, I went for a semi-dark grey with a kind of blueish complexion.
… will fit much better!
How do you like it? The floor now being dark grey, woodworks painted in bright white, felt on the wall in semi-dark grey, felt on the ceiling in light grey. I am sure this will look much better and fit much better into the holistic look of the boat´s interior. And, yes, by the way, no roofing panels either in my boat. As the lighting concept of the yacht is equally simple (LED-lights, no wiring), there´s no need for complex and elaborate panels which will eat away at least a centimeter of precious standing height. So tell please feel free to comment: How would you have reacted regarding the floor boards?
Waiting for the cushions: Fore cabin (almost) finished!
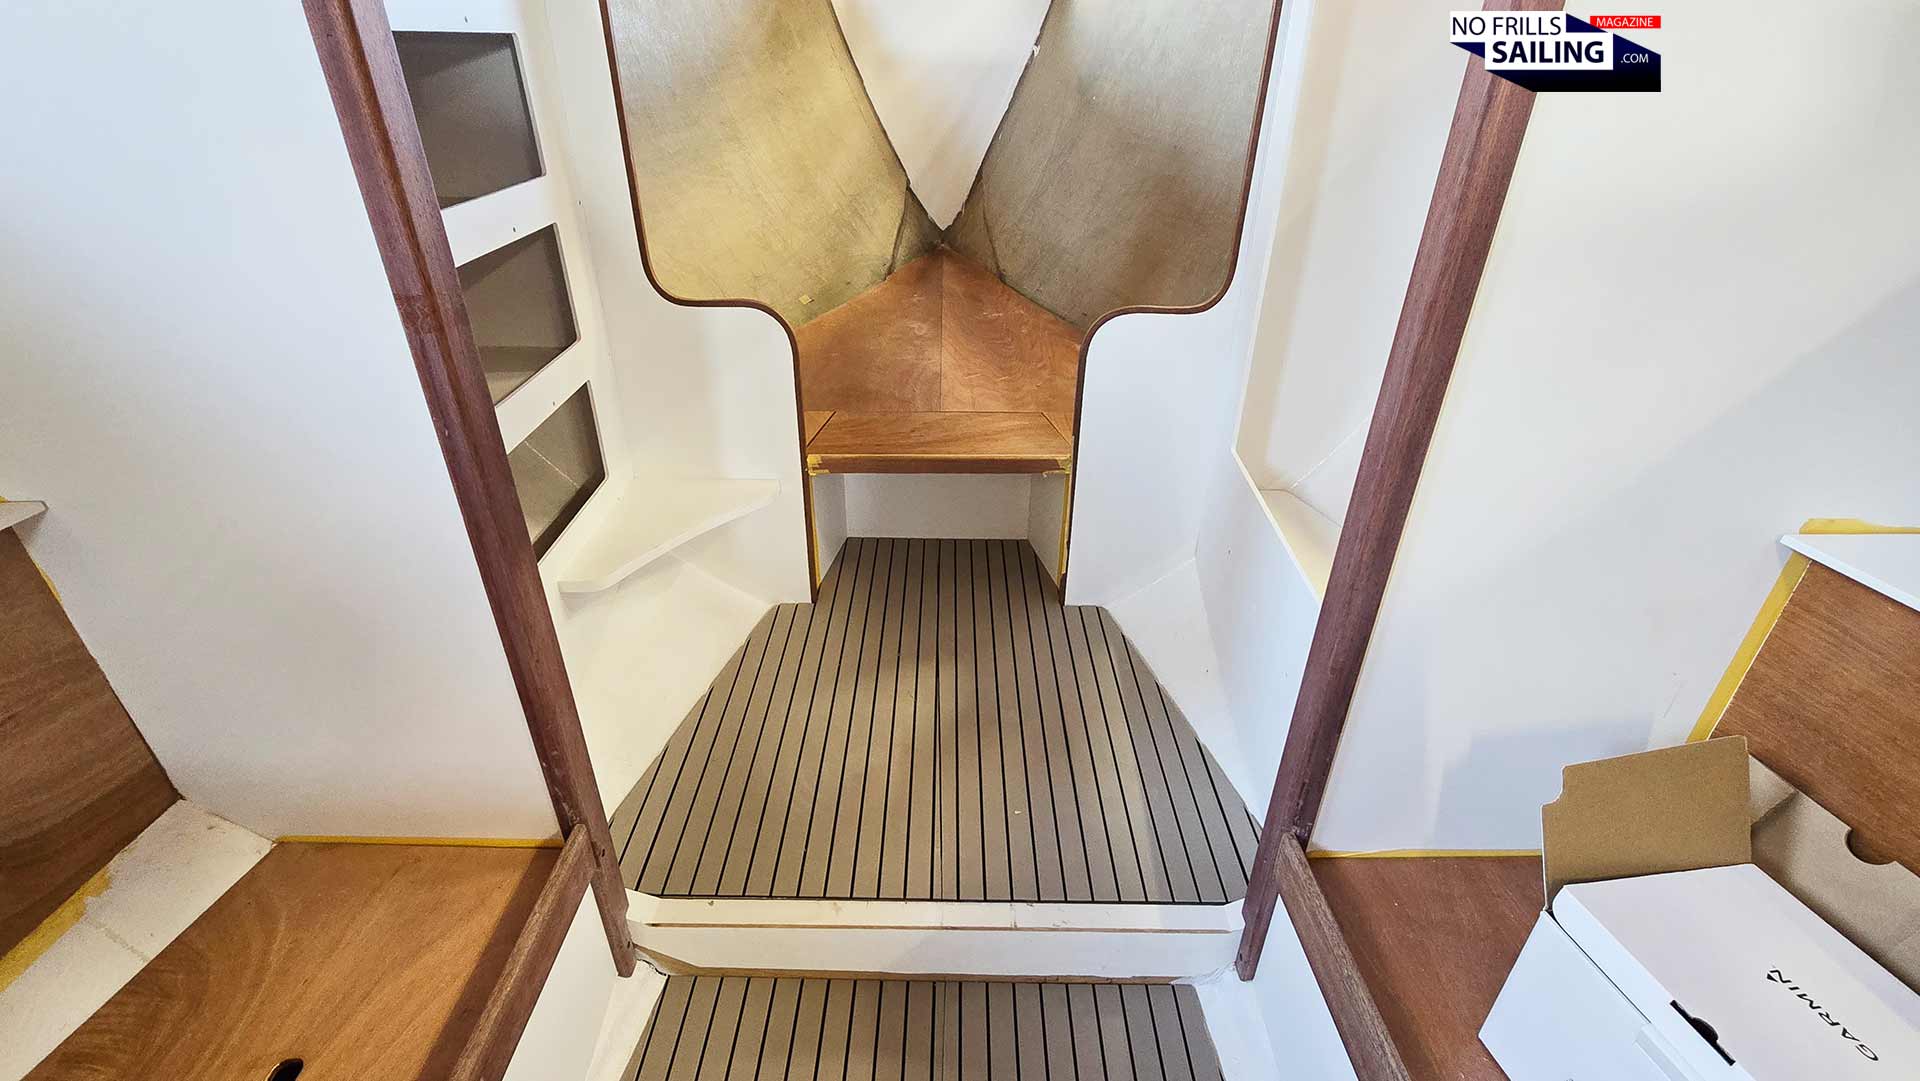
That´s sometimes the case with one-offs or custom boats: Ideas which seemed to be cool just don´t work out in the end. It´s a pity that so much time, effort, material and also money is wasted. But in the end I want a boat´s interior that is nice, cohesive and harmonic. I am sure my decision will prove to be right. So, that´s all for the bad news, here are some good news coming: The fore cabin is 99% finished!
Omega 42 fore cabin
Well, first of all, it´s not a proper cabin in my boat. I asked the shipyard to shave off as much frontal bulkhead area as possible without sacrificing structural integrity of the boat or risking a soft deck. In this, I have an “open” salon now with a free, unhindered view all the way back to the end of the pilot berth. Sailing alone most of the time, frequently visited by my kids or my partner, I simply have no need for cabin doors. They won´t filter human noise anyway, visual privacy, if needed, can be achieved by fitting nice curtails as well. That said, it´s an open forepeak for my Omega 42.
Large hanging locker to starboard
The ship´s sides will be covered with soft marine felt. Semi-dark grey on the wall, light grey to the ceiling above. Maybe we play a bit by introducing a “horizon” of dark felt and white felt on the boat´s hull to either side, we´ll see. Other than that, I didn´t ask for shelves or other stowage to be fitted in here. Just a very large, open, cozy playground! This is a boat that will sail far away, but with least weight possible. If there is stowage, it will certainly be filled with stuff. So I restrain myself here and I am sure sleeping in this huge free and open area will be a very special occasion!
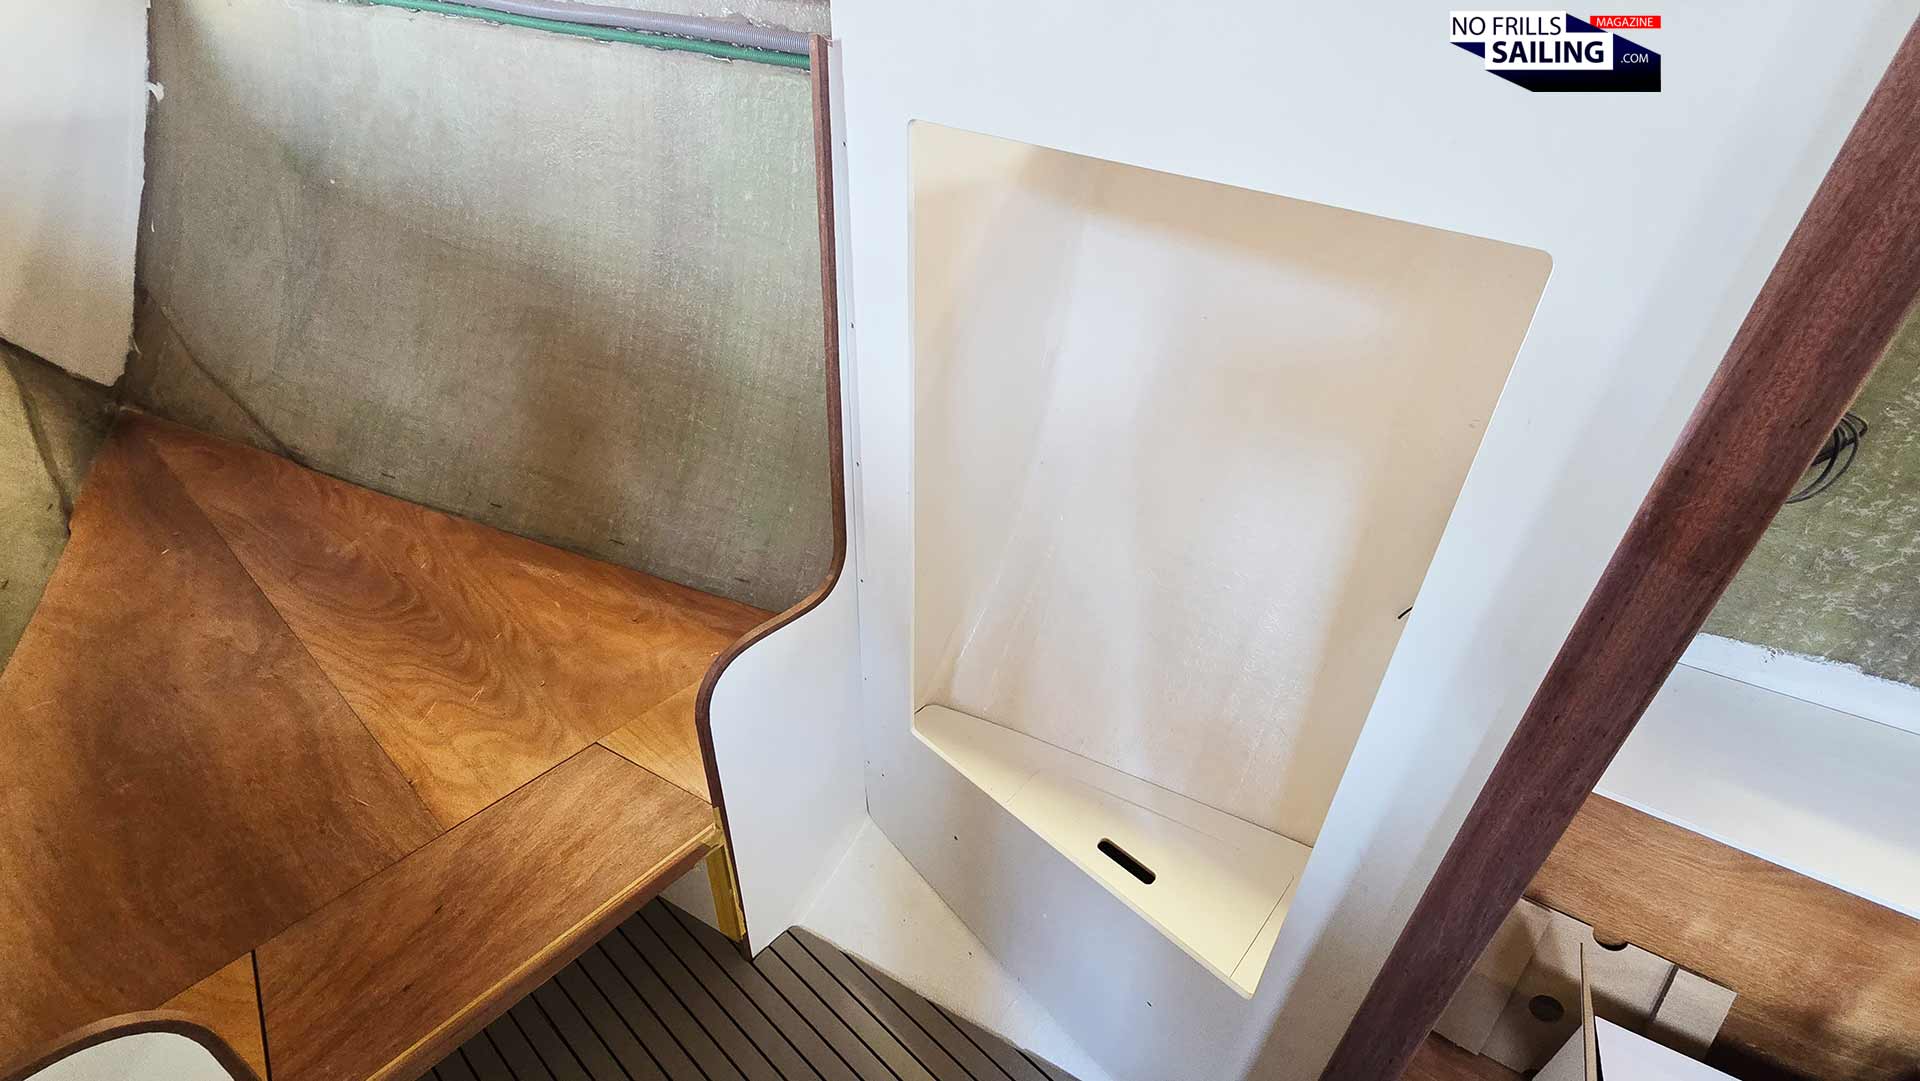
Cabinet to port side
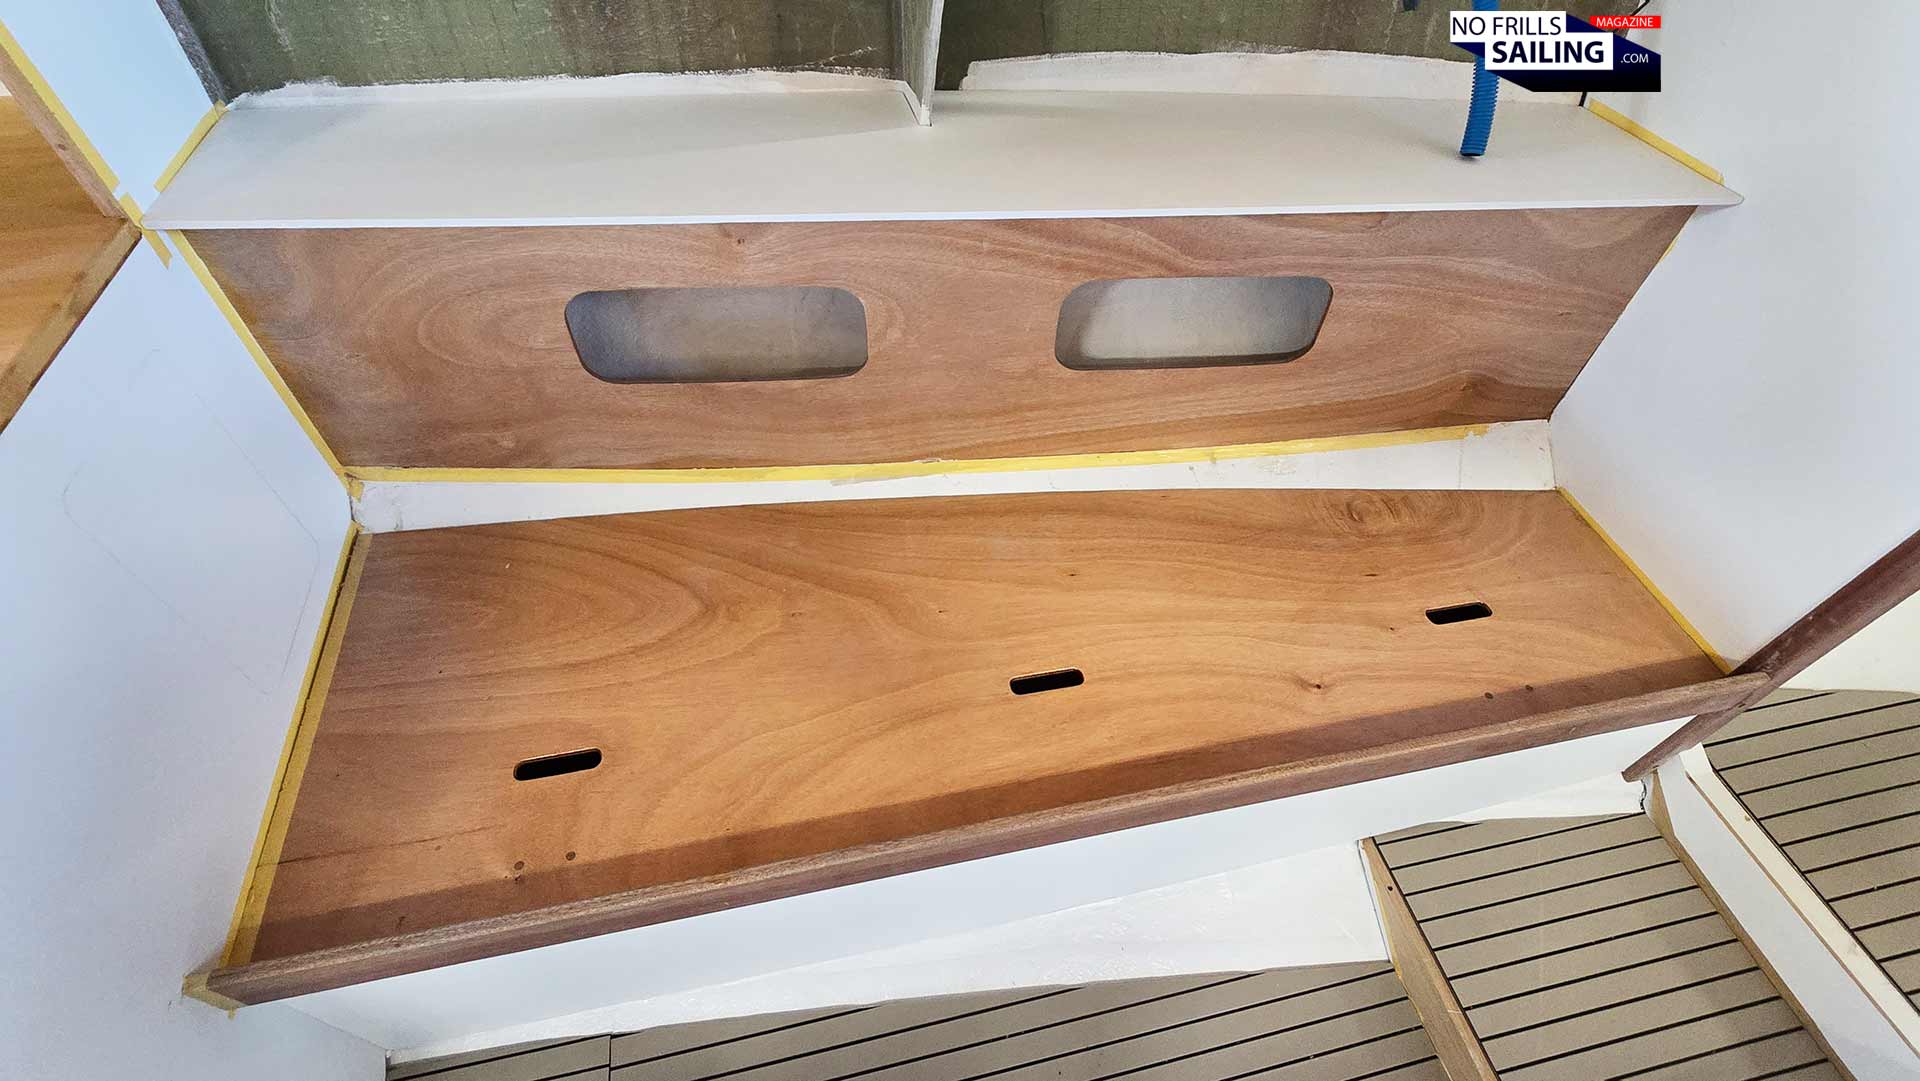
Besides, there is a lot of stowage in this cabin already. To starboard side there´s a huge hanging locker. Here, all of my wet gear, trousers, boat shoes and foul weather boots will find a nice place to be stored. Vis-à-vis is a four-shelves cabinet for all sorts of clothing as well. For a single- or double-use this is more than enough stowage. Let´s not forget that there´s another large locker in the rear plus a huge whole free “cabin” to starboard side in the back of the yacht. All that´s left to do is … to fit the mattresses.
End of March will be the deciding month!
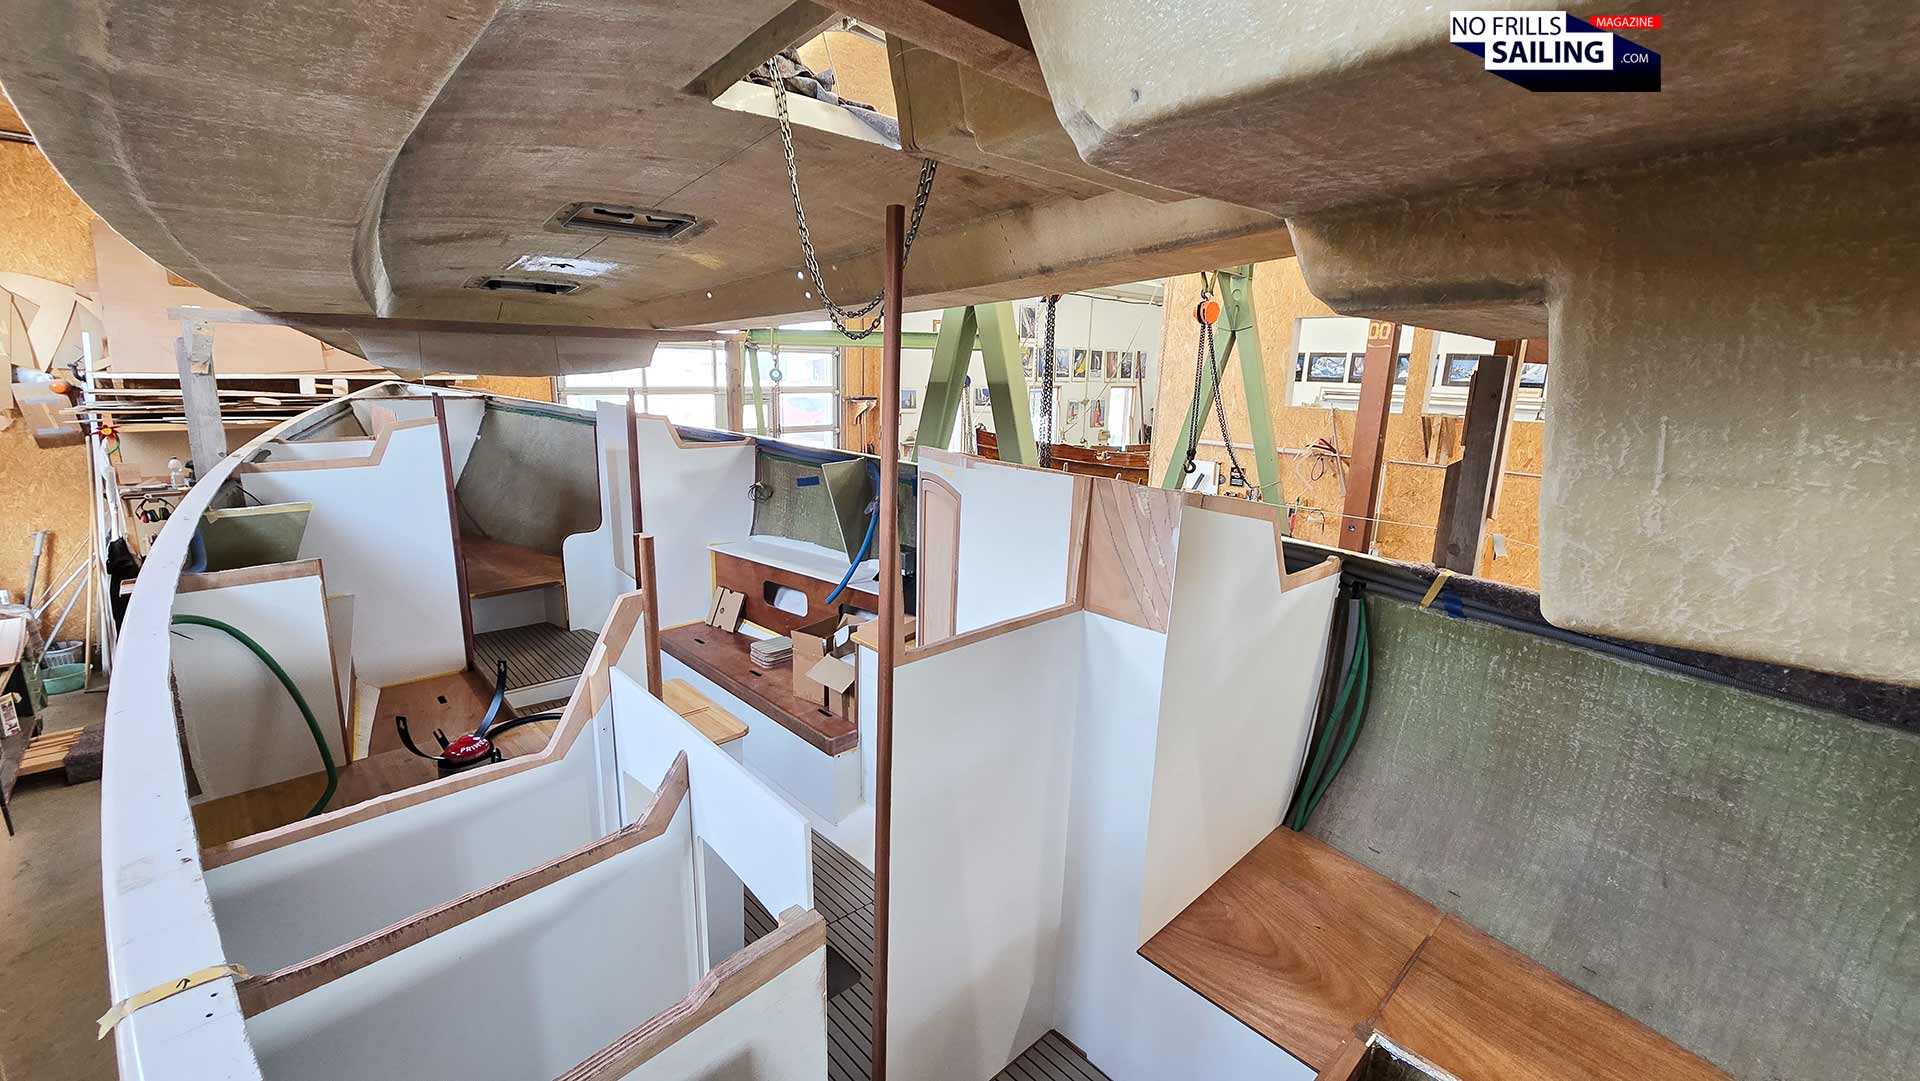
So, that´s basically it: We´ve reached the anchor locker and therefore the front of the boat. 13 meters from the stern lazarette all the way through pilot berth, galley and bathroom to the saloon with finally ending up here in the forepeak. Yes, it´s still so much to do, but the bulk of the internal works has been done. The guys will now fit the last bits and then there´s the very first, very big, big moment: The milestone of mating the deck with the hull! This is set for the end of this March, in roughly four weeks. And now comes the explanation why most of the boat´s joinery hasn´t been fixed by now: After putting the deck onto the hull, each bulkhead, almost every front and wooden part will be laminated to the deck´s underside. You can clearly see that those parts haven´t been painted and lacquered yet, if you look closely onto the picture below:
Up next: Mating of hull and deck
Only after the lamination has dried thoroughly and the wooden parts are “settled”, they will be fixed. By the way, I asked Beneteau if I could publish an article how a deck is mated to a hull in the Oceanis shipyard in France (which is a highly interesting process and very good to know which efforts go into this by a boatbuilder), the declined: Somehow, this seems to be a “production-secret”. So I have to delete the very, very detailed and interesting pictures. This article would have been a wonderful counterpart to the one I will write about the Omega´s mating – no secrets here, you can indeed look forward to this in a few weeks!
Advertisement
We´re getting there …
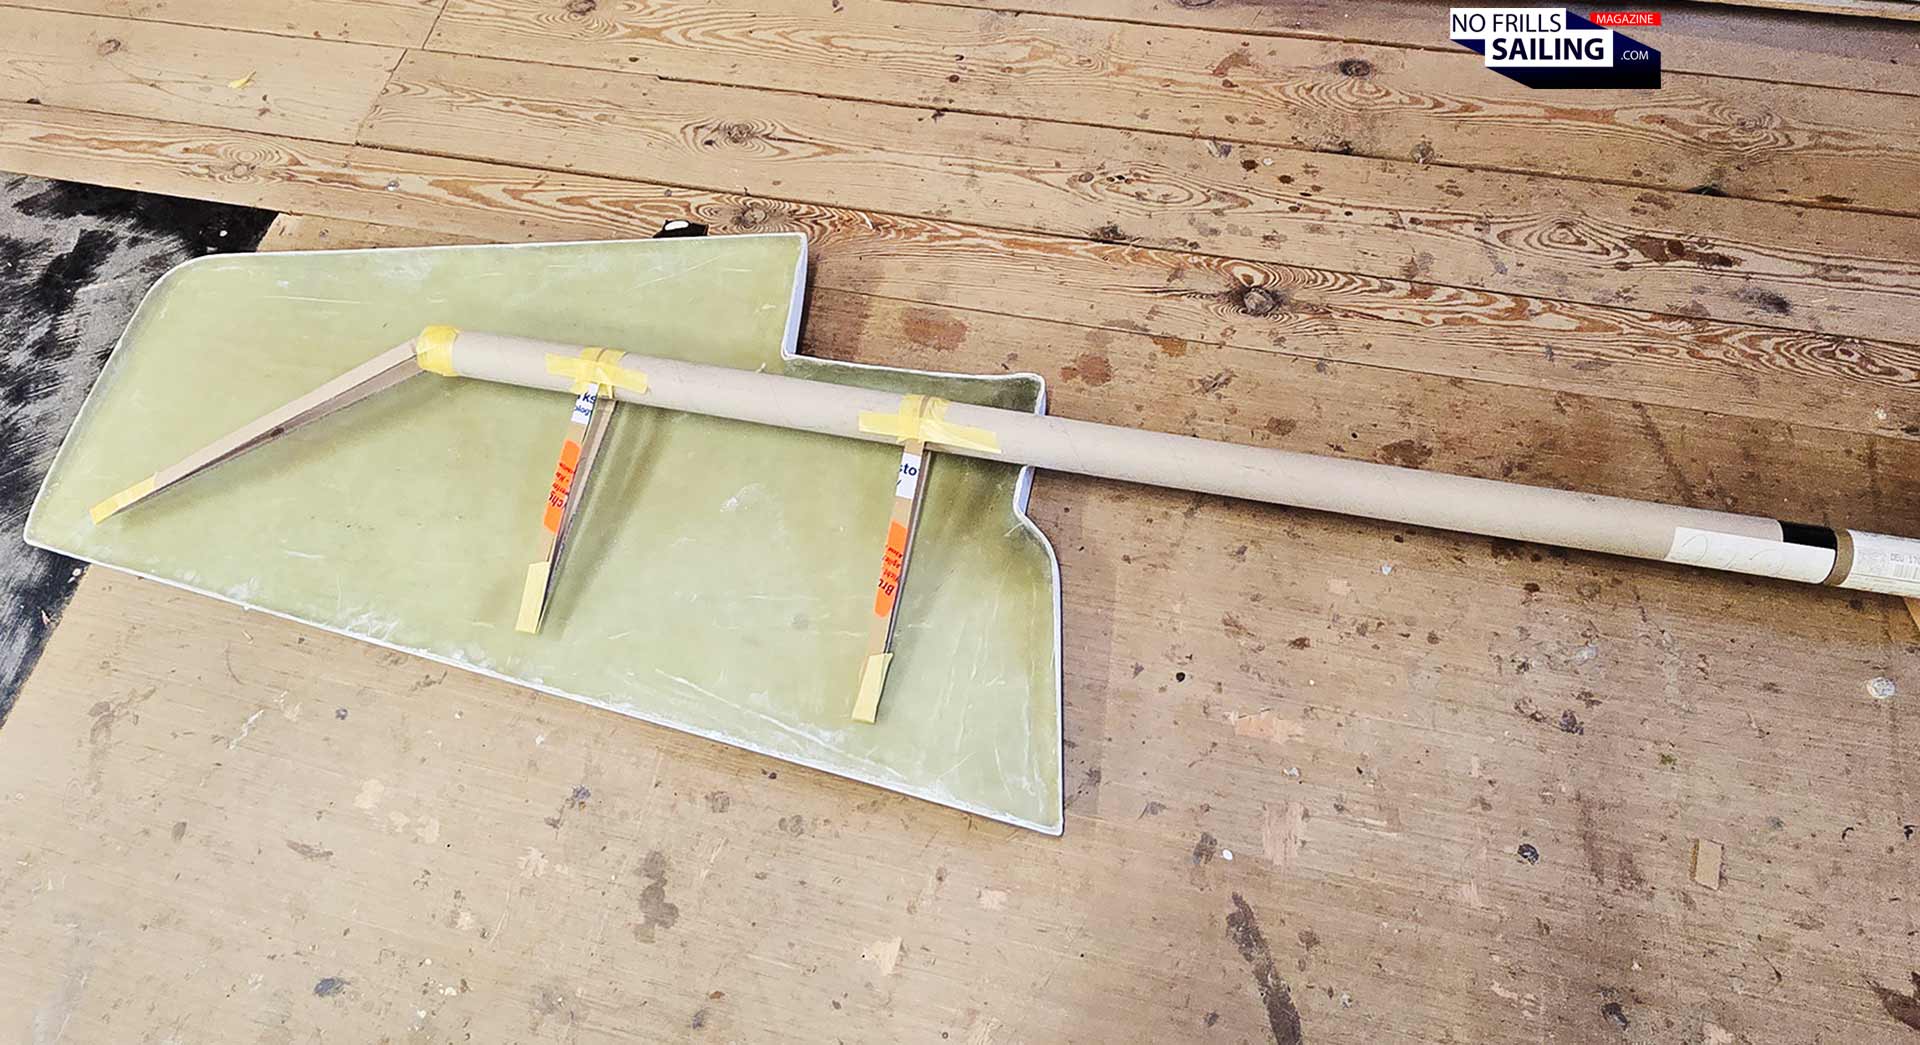
Outside of the boat´s hull, things are speeding up as well. Remember my first article on the Omega 42 rudder blade production? Now´s the time to go on with this one. The guys show a cardboard paper-model of the rudder stock and the metal inlays. This model is now sent to the nearby metalworker – who also is a very fascinating kind of “artist”) – and turned into VA4-stainless steel reality soon. Then I will go on reporting on finishing the rudder blade and fixing it to the rudder trunk, including mounting of the very important auto pilot system.
Gauge model for the metalworker
After the deck has been fixed and chain plates as well, Seldén is due to visit the boat to take final and thorough measurements for the rigging. After determining the accurate individual lengths of forestay and shrouds, at last the mast will enter production, as will the sails by Quantum. Lastly, short thereafter, the side windows will be cut and fitted and then my friend Ralph from Rosch-Yachts will enter the scene to bring up the PVC-deck. Pulpits, pushpits, railing and cleats … now we´re talking! All this is set to take place in April and May.
Looking forward to end of March!
Also coming up is the preparation of the massive lead keel, which needs to be faired, filled and sanded to being encapsulated with epoxy as well before it can finally be put underneath the hull. Another major milestone for the project. Finally, all that´s left to be done will be the hull treatment with epoxy and antifouling, the last step. A heavy duty transport truck is already booked, as is the berth. And oh boy do I dream of the initial sea trials with this boat!
Here´s everything about the Omega 42 new building you should know: