Well, there is something to celebrate. And I shall celebrate in style: The first ever part of my boat´s interior is completely finished – that´s some good news! The head of my King´s Cruiser 33 has received the final touches of it´s refurbishment and I must say I am both relieved and happy about the outcome. Looking back to where I started some 3 years ago makes me even happier.
I remember the bathroom being kind of strange: The old toilet was not really dirty nor smelly, but it was dated and … well, seemingly old so it wasn´t a real pleasure to utilize the bathroom either. In fact, the old looks, the old pumping WC and the 45 years that this bathroom was already in service was one of the major reasons for me to even consider stripping the boat and have it refurbished from bare GRP. And it was the very part of the boat that was sparking my imagination what could be done in the course of the refit.
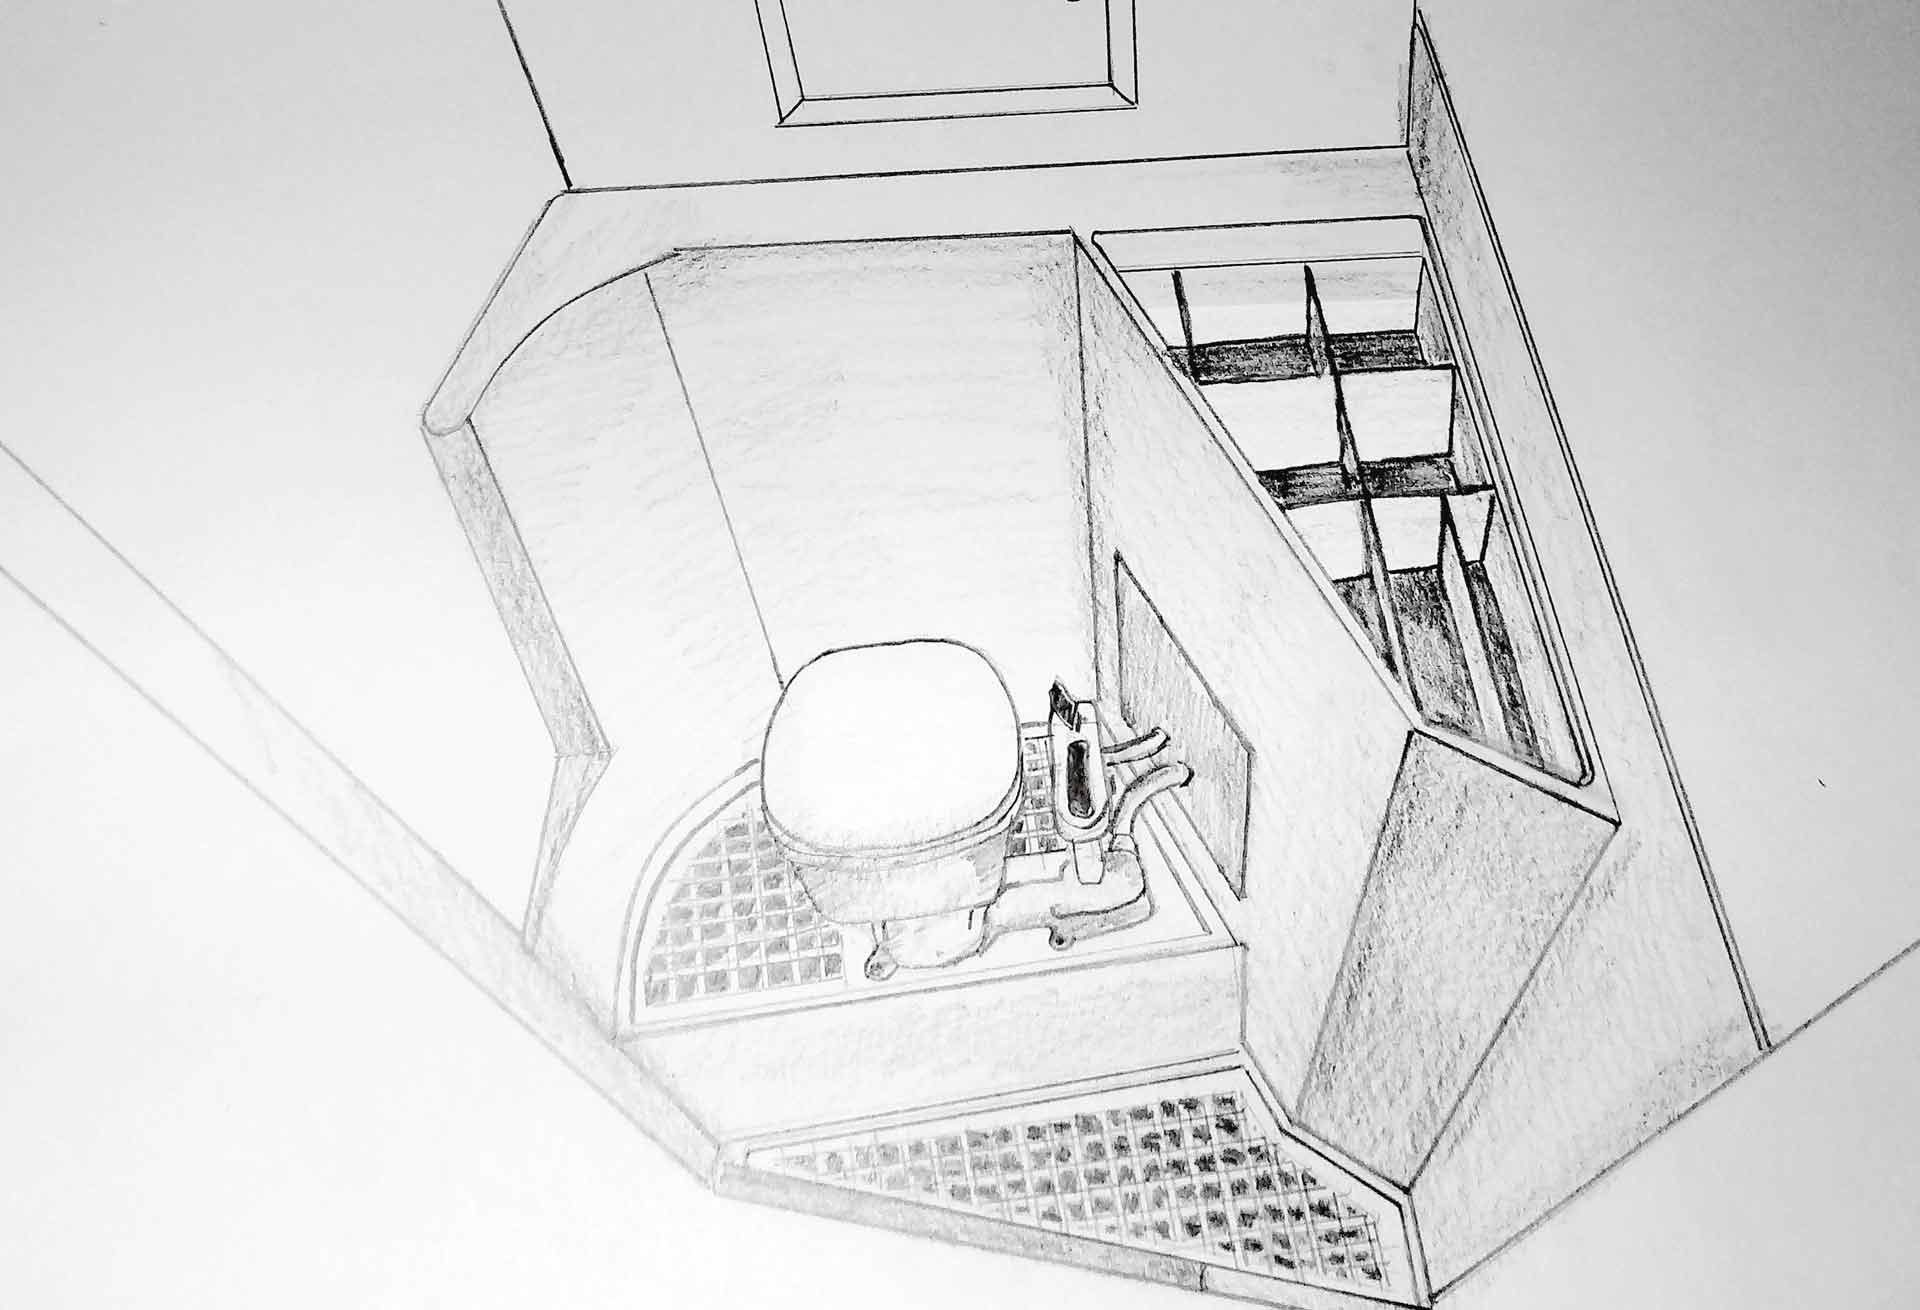
I imagined a white painted head with freshly glossy painted walls, a new roofing, a brand new Jabsco pumping toilet (as much as I love electric toilets, but that was out of budget that time) and some nicely done custom made Teak elements like the gratings – which are now much easier to make massive floorboards.
Last jobs on the new head´s ceiling
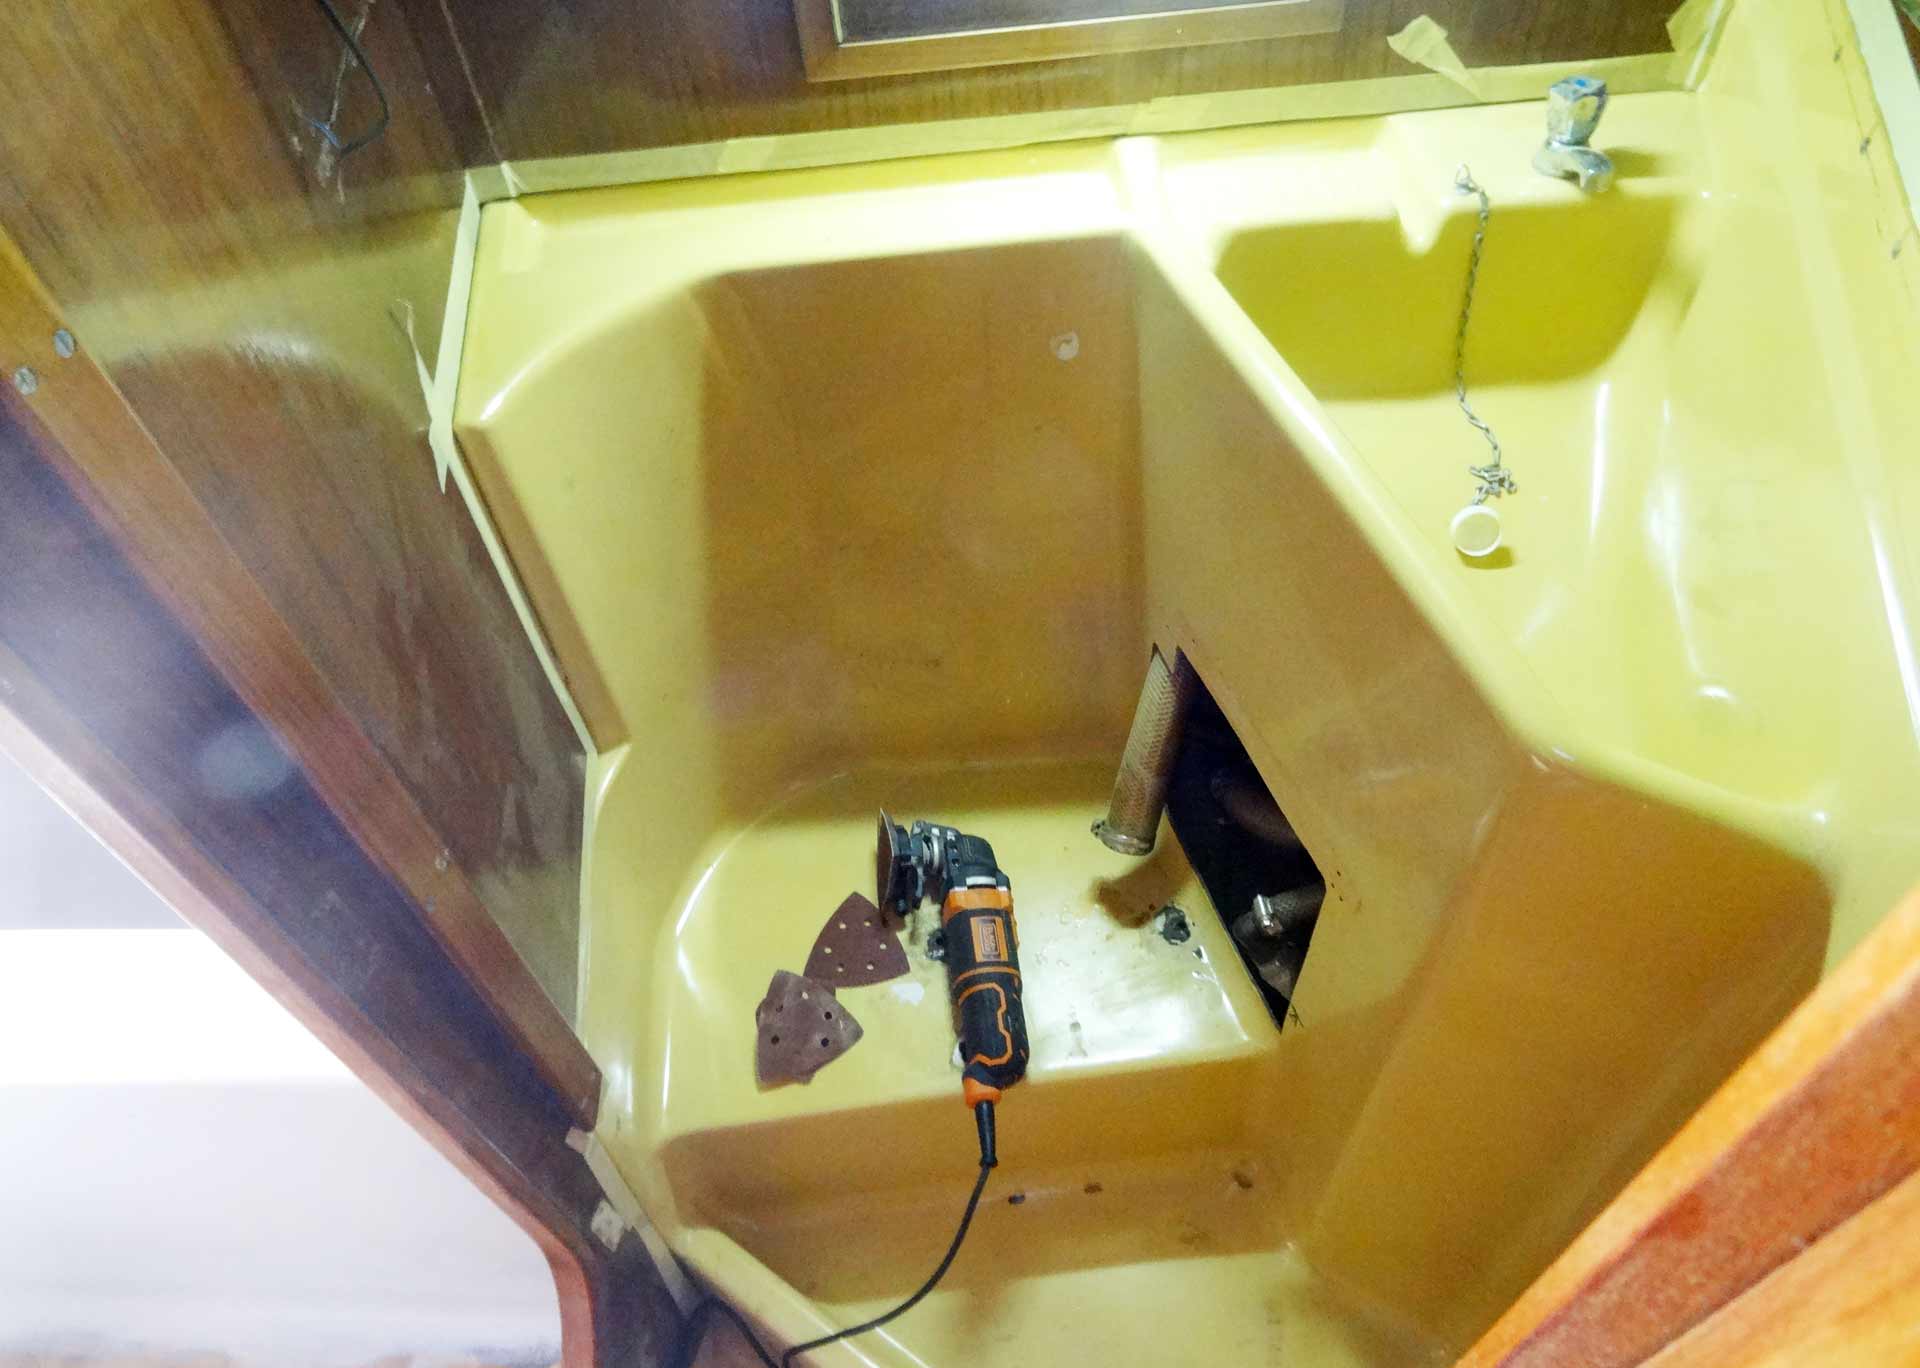
So, last week I arrived again at the boat and began my work. As the roofing panels had already been installed during the last session, the last job was to make the decorative Teak strips which serve as covers for the seams between the roofing panels. It was a quite tedious work as temperatures outside went up and I was suffocating in the small cramped head of my boat.

Tedious as well because each strip had had to be individually measured, cut and sanded to fit neatly. That meant that even for just for four strips in the end I had to produce eight strips as the rooftop construction of the King´s Cruisers´s cabin was bent. Anyway, when it was finished it looked just awesome!

In the end the only missing detail in the new head is some sort of ventilation. There is a small dorade-like ventilation but I am sure that after taking a manly dumb in here this wouldn´t work all too good. But after my experiences with the big hatches I refrained from adding a bigger hatch that could be opened because I feared that much hassle.
Mounting the new pumping toilet
The mounting of the new Jabsco pumping WC was a no brainer, I thought. At first the plumbing. I went for brand new pipes which I as well bought from Dometic. The thick one through which the wastewater is to be pumped out of the boat was fitting fine and I had no problems mounting it. Of course I utilized two hose clamps for every pipe-valve/WC-connection. No so much easy work with the thinner fresh water pipes …

These are a pain in the ass to get over the connectors and so I had to leave them unconnected until next day I borrowed a blow-dryer from one of my female sailing friends by which I could heat up the pipe to eventually force it over the connectors. Again, two hose clamps just to be sure.

In the end I was happy: My concept of conceiling the huge inspection chamber with a nicely cut and sanded Teak cover worked just fine: It is a nice little detail that is cool to look at. I also fitted plastic braces to both the lid and the seat of the toilet which worked fine as well. Now, work is done and all that is left for me doing here is the glossy painting of the bulkheads and the connection of a LED-light in the bathroom.
Some general thoughts
In the end, working on the heads of my boat was also making very clear to me how much boats have changed over the last 45 years. When I took a seat on the new toilet to see if everything was right I had to realize that the size of this head would not be acceptable on current boats, even on smaller ones – just remembering the huge bathroom on the 9.50 meters long Oceanis 30.1 which wasn´t just bigger in any dimensions but was also coming with a full fledged shower.

More over, I decided not to fit the door to my head again. Partially because in skippen the heavy door I will make up for some of the extra weight added to my boat through all those massive wooden stuff but mostly because I don´t want to sit down here and be cramped in this “prison cell” whilst wanting to let go. But that´s another story for later …

Okay, so, the head is finished – what´s up next? Not much to be honest and now being energized by this first big part crossed off my list I am looking forward to the next coming up: In the quarter berth it´s just two or three details, then the galley (another bigger chunk of course), in the salon it´s only the table that´s missing and the fore cabin it´s minor details like the decorative strips. So, come on, let´s have this refit finished by the end of this year!
You may also like to read the following refit articles:
Heads refit parts 1, 2, 3 and 4
A new Teak chart table from scratch, Parts 1, 2 and 3
Black Hole Yacht Refit?