Well, finally I´ve made it! It was a long journey and I must admit I had several times given up working on this item of my refit list, days spent trying and leaving again due to the horrendous of discouragement whilst working on this seemingly easy task: I thought it was time to refurbish the old hatches of my sailing yacht. Easy said. But looking back to the adventurous voyage that I had to undergo with refitting of the hull windows of my Kings Cruiser 33 I guess I should have been cautious and not so jaunty. Well, now I´m much wiser.
The whole project of refitting the skylight hatches of my boat suddenly became more urgently and an alarming touch when the other day I found my boat flooded (read here about that mishap) – that was because of the fact that the plastic “seal” of the open hatches was filling with water during some heavy downpour and the inevitable happened: Litres of water burst into the saloon. “Now let´s have the bloody hatches fitted again!”, I motivated myself and …. got stuck.
Painful in it´s birth: Finding the right rubber seals

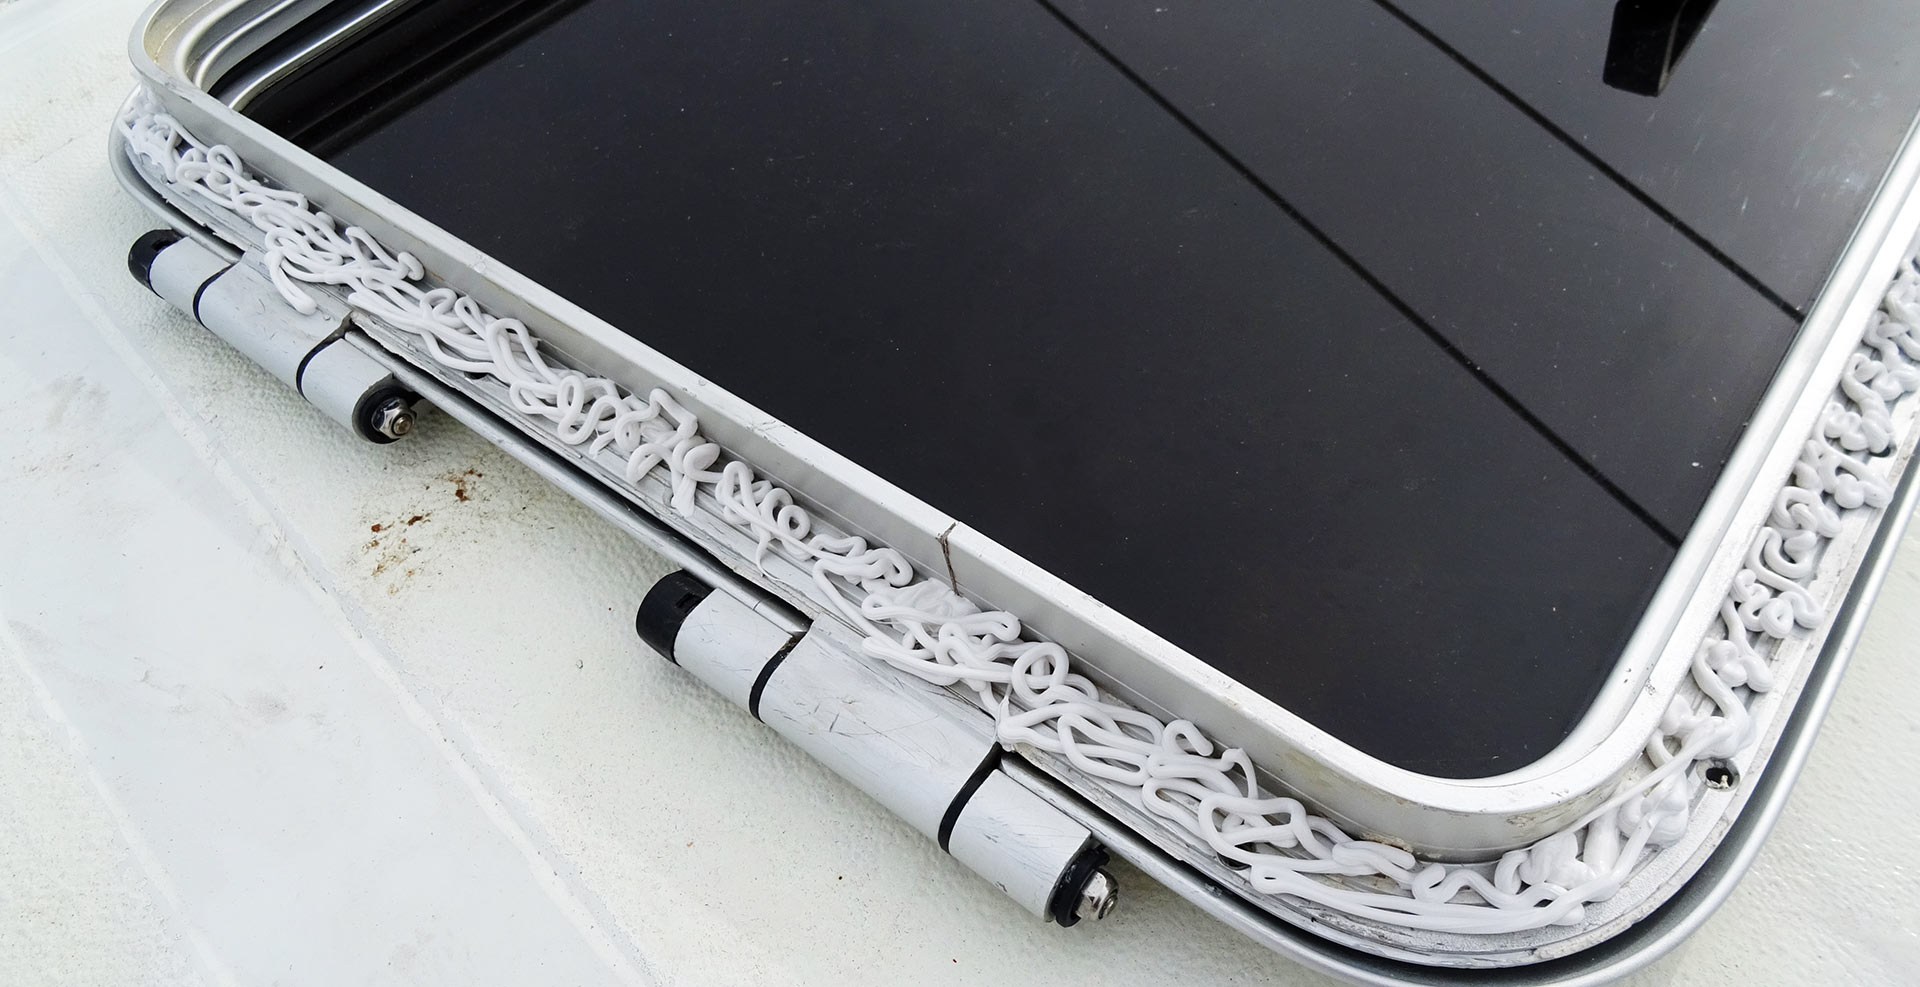
It was a run from Pontius to Pilate as I may call it to get the right rubber seals for the hatches. As you may have read in the Part 1 article on the recycling-treatment of the old Gebo-hatches you may have got to know that I refrained to buy new one as the old hatches had been in a seemingly perfect condition after polishing and refurbishing them. All I would need is a new rubber sealing.
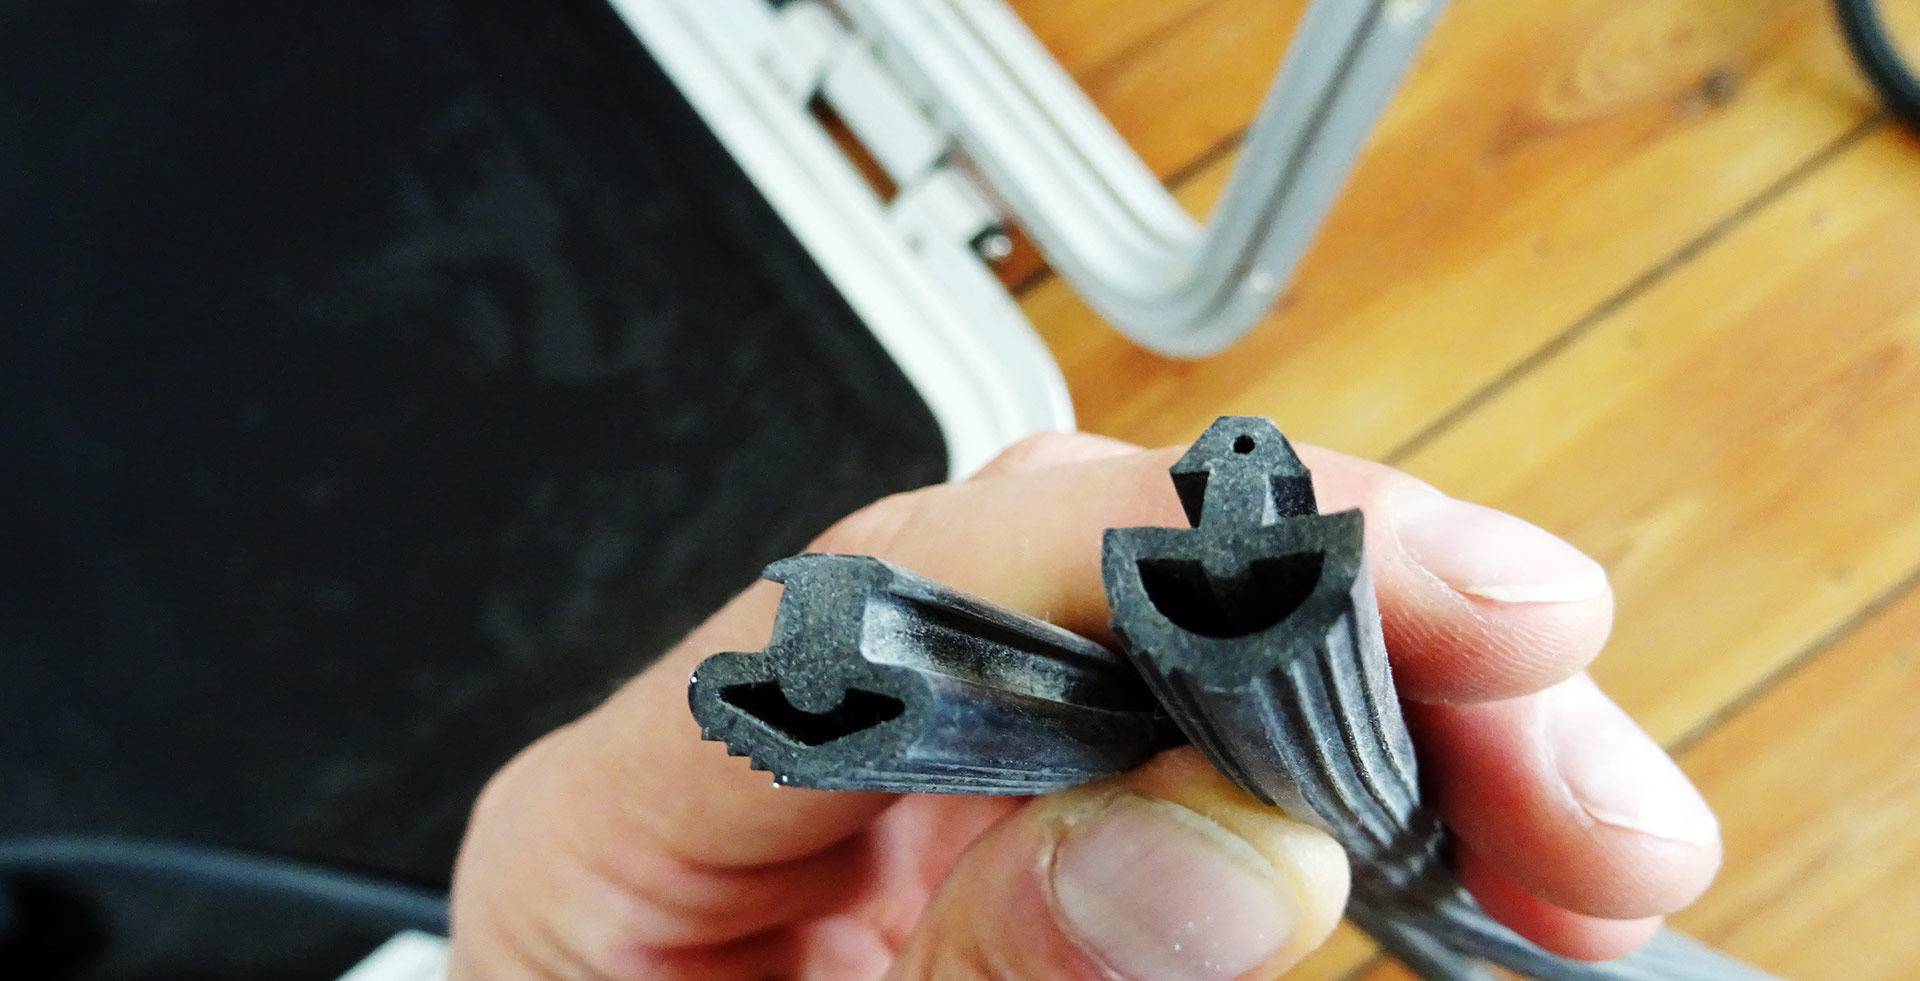
It took me weeks to get the right seals. As a matter of fact, Gebo somehow changed the cross section of the rubber seals and thus key and slot. That meaning, when I received my first shipment of rubber seals I had to assert that the new seals won´t fit. So I sent them a piece of my old rubber and – voila – after another 2 weeks or so finally received the right one. It was fitting just perfectly and I could go on working.
Where stupidity reigns
Well, “go on working“ in this context first meant to repair what I had to destroy because of my stupidity. I never cease to learn: This lesson could be called “first think through everything – before you fit something to the boat!” That said, I had to understand that I had fitted the roofing panels with the nicely shaped massive Teak frame for the hatch in a way that no nut would be unscrewed to take of the hatch. That was very clever. So I had to drill thick holes into the Teak to reach for the nuts to get off the hatch.
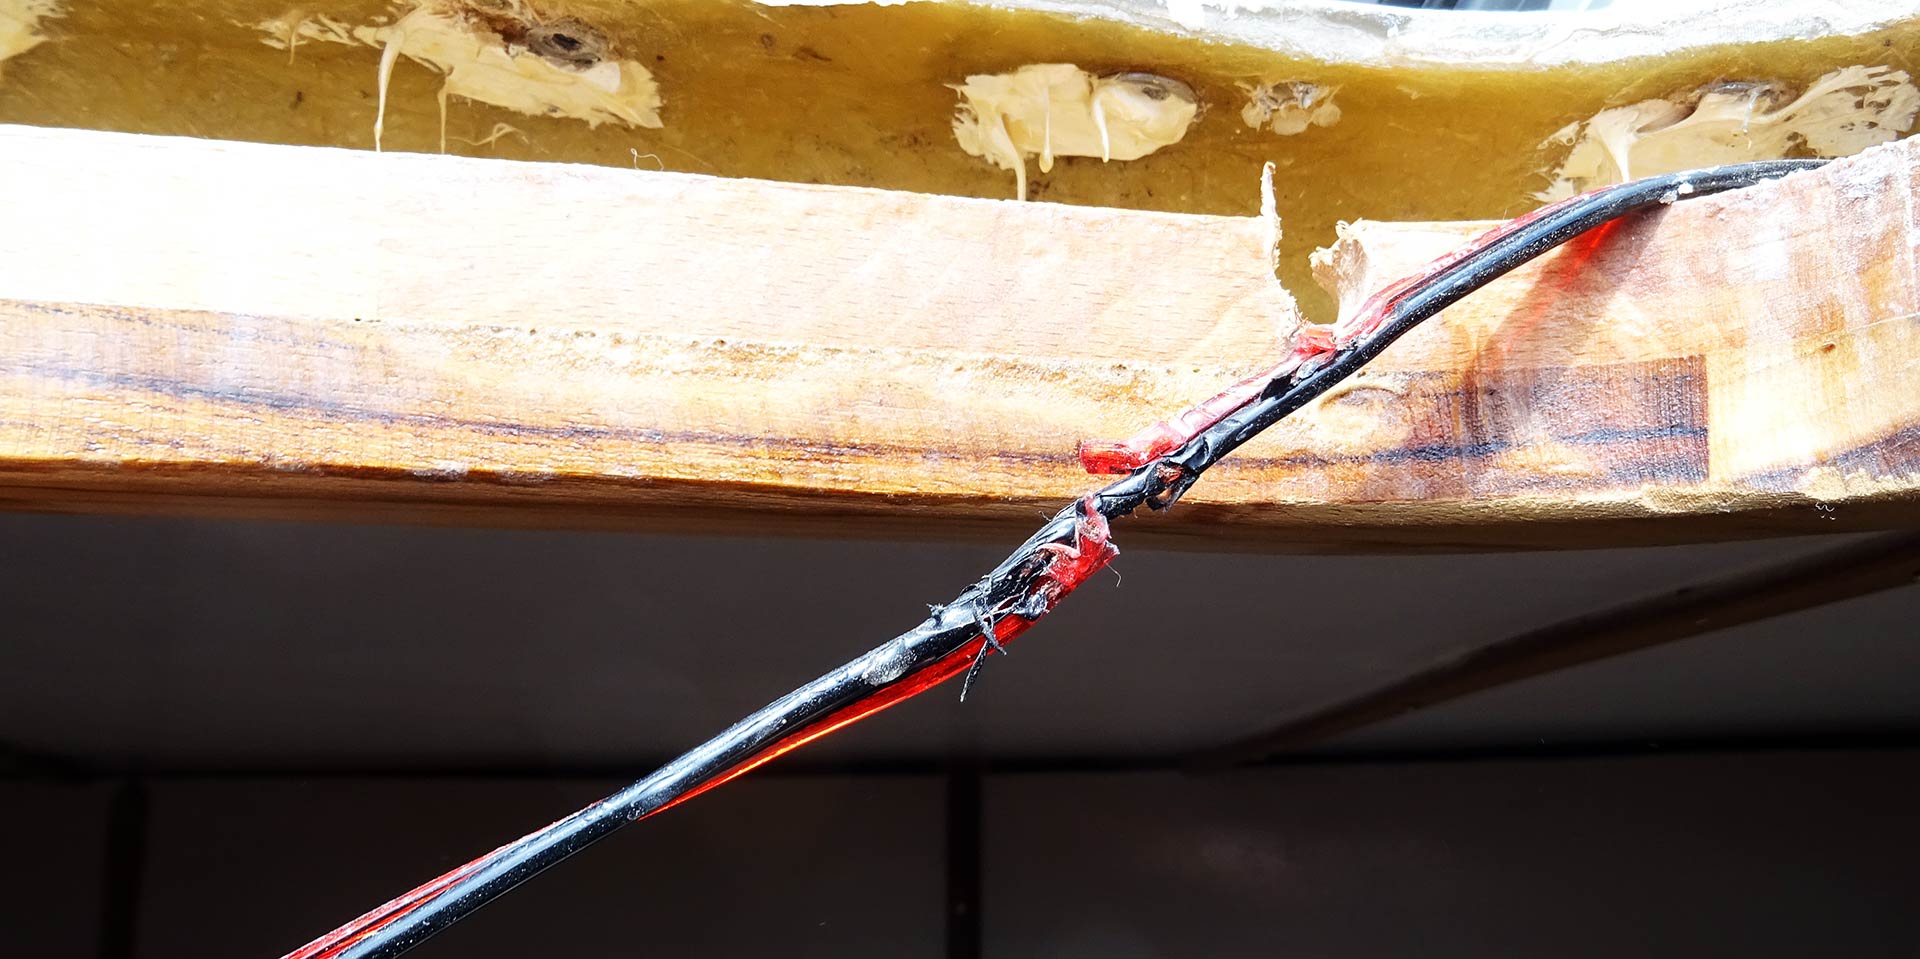
In that action I drilled too much and damaged the brand new wire for the LED-lights, only to learn again that the wire somehow got stuck in the cable duct and thus I wasn’t able to replace it. I had no other choice than to patch the wire together and have it sealed with a thick layer of tape. I guess it will work – if not, I´ll punch myself in the face, I swear! (Because I will have to remove everything again.)

Anyway, somehow I forgot about the hassle to unscrew the nuts of the hatch. That was especially funny as I had the hatch fully covered with Pantera-glue and ready to re-attach, fitted to the opening and wanted to have it screwed tightly only to re-realize that there was absolutely no way to get the nut onto the shaft of the screw – the slit between roofing panel/Teak and hatch frame was simple too thin. Oh my, I had to leave the location and take 2 days off, not thinking of the mess again!
Destroying my own work
Freshly motivated I joined the site again the other day and – boy, what a massive force was needed for this! – took off the still glued hatch from the boat and, for the second time, had it steel-brushed to get off the Pantera again. Now I needed an idea to widen the slit again so that I would be able to reach for the screws. The only way: Cutter-grinder! It was an awful work, I can tell you! Not just the fact that had to destroy a large portion of the wooden Teak frame, it was cramped, loud and the grinder´s cutting plate got so hot that the wood was smoldering blue and was short of catching fire! I had to wash the wood permanently with we wipes to prevent it from bursting into flames.
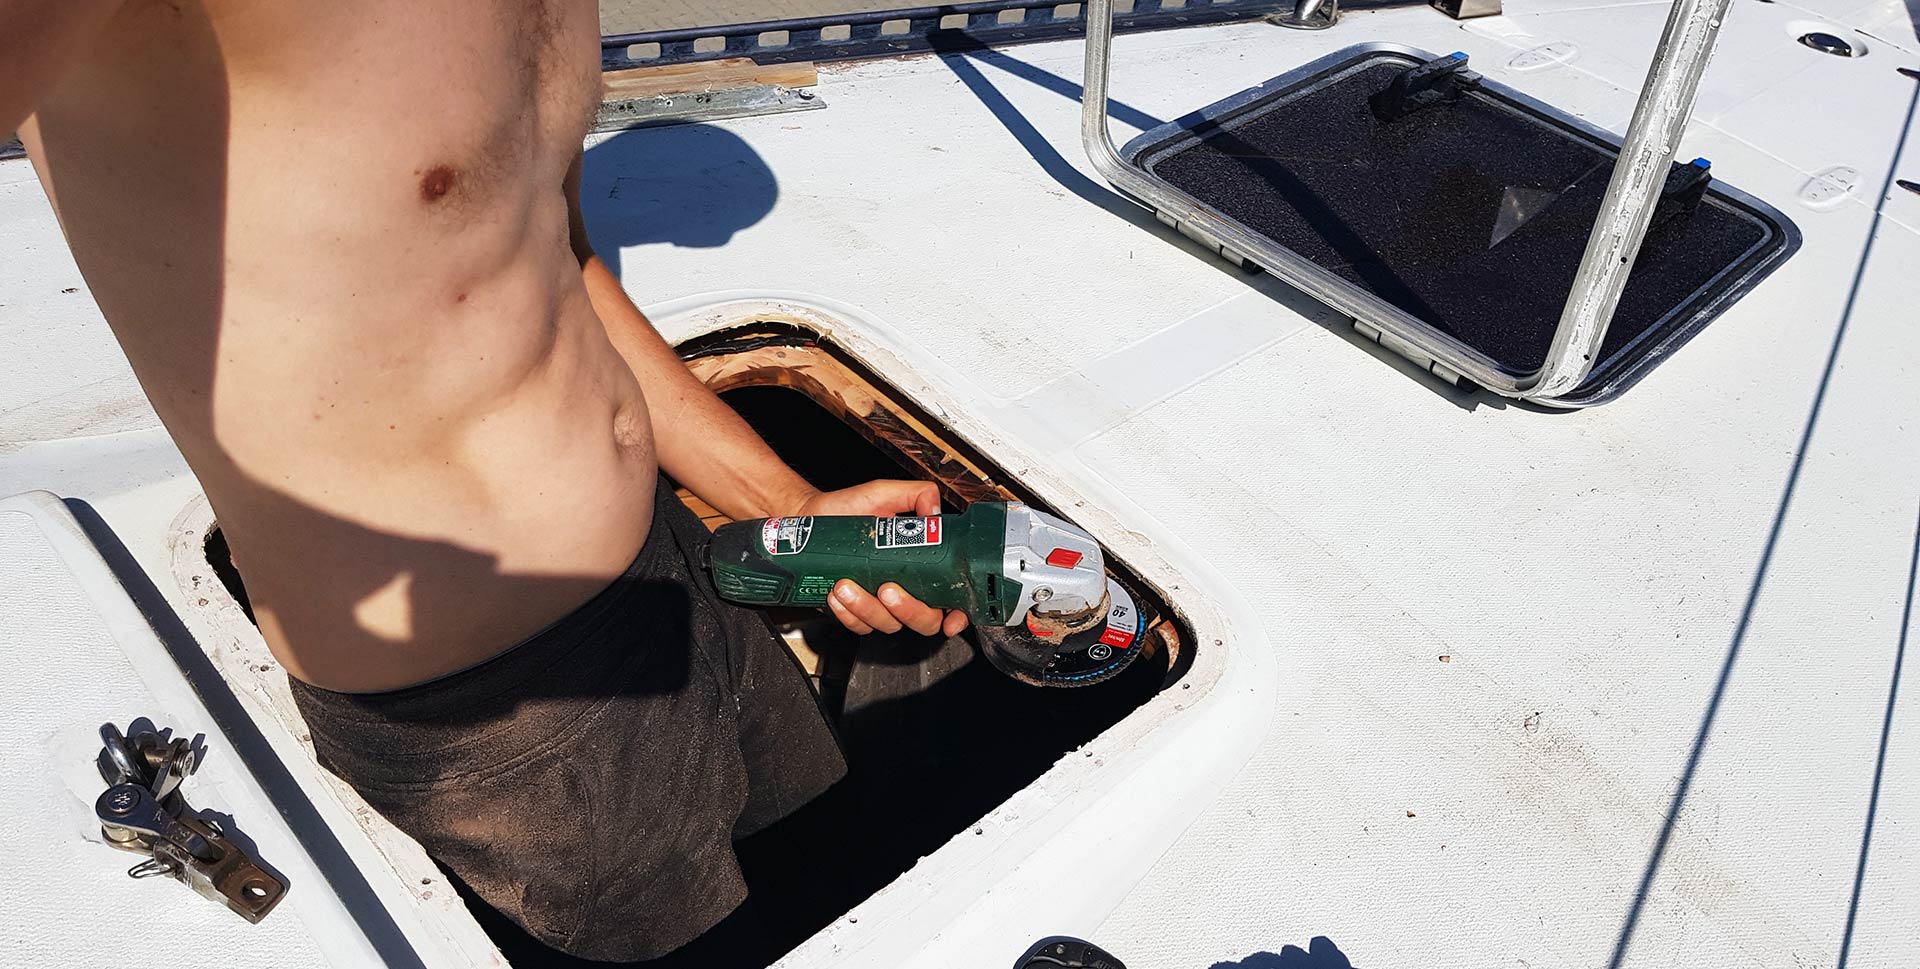
The other fun part was the sun: That day the thermometers gauged 35 degrees. In the shadow. I was working in the pure sun for almost an hour to cut down the edge of the frame and thus opening up a bigger slit. It worked just fine, apart from the fact that the black, smoldering particles which came off of the Teak where turning the inside of the boat into a smokehouse and covered the nicely done otherwise nearly finished fore cabin into a black, dirty room. Anyway …

After doing so and sanding down to Teak frame with the grinder once more the slit had been widened from less that 4 millimeters to more than a centimeter, giving my fingers just enough room to reach for the shafts of the screws to tighten the hatch. That was a plus and the first real win of the day!
Now, the rest was an old hat: Pantera glue, masking tape, the hatch into the opening and quickly tightening the screws before the Pantera that was oozing out between hatch and boat could dry in the sun. I then made a nice seam with white Pantera and closed the hatch: Finally, the beast was closed. I was happy, but soon realized that I would need a solution for the big gap between hatch and roofing panels from the inside now. As nice as it looked from outside – the worse it became from inside. Well, I will find a way …
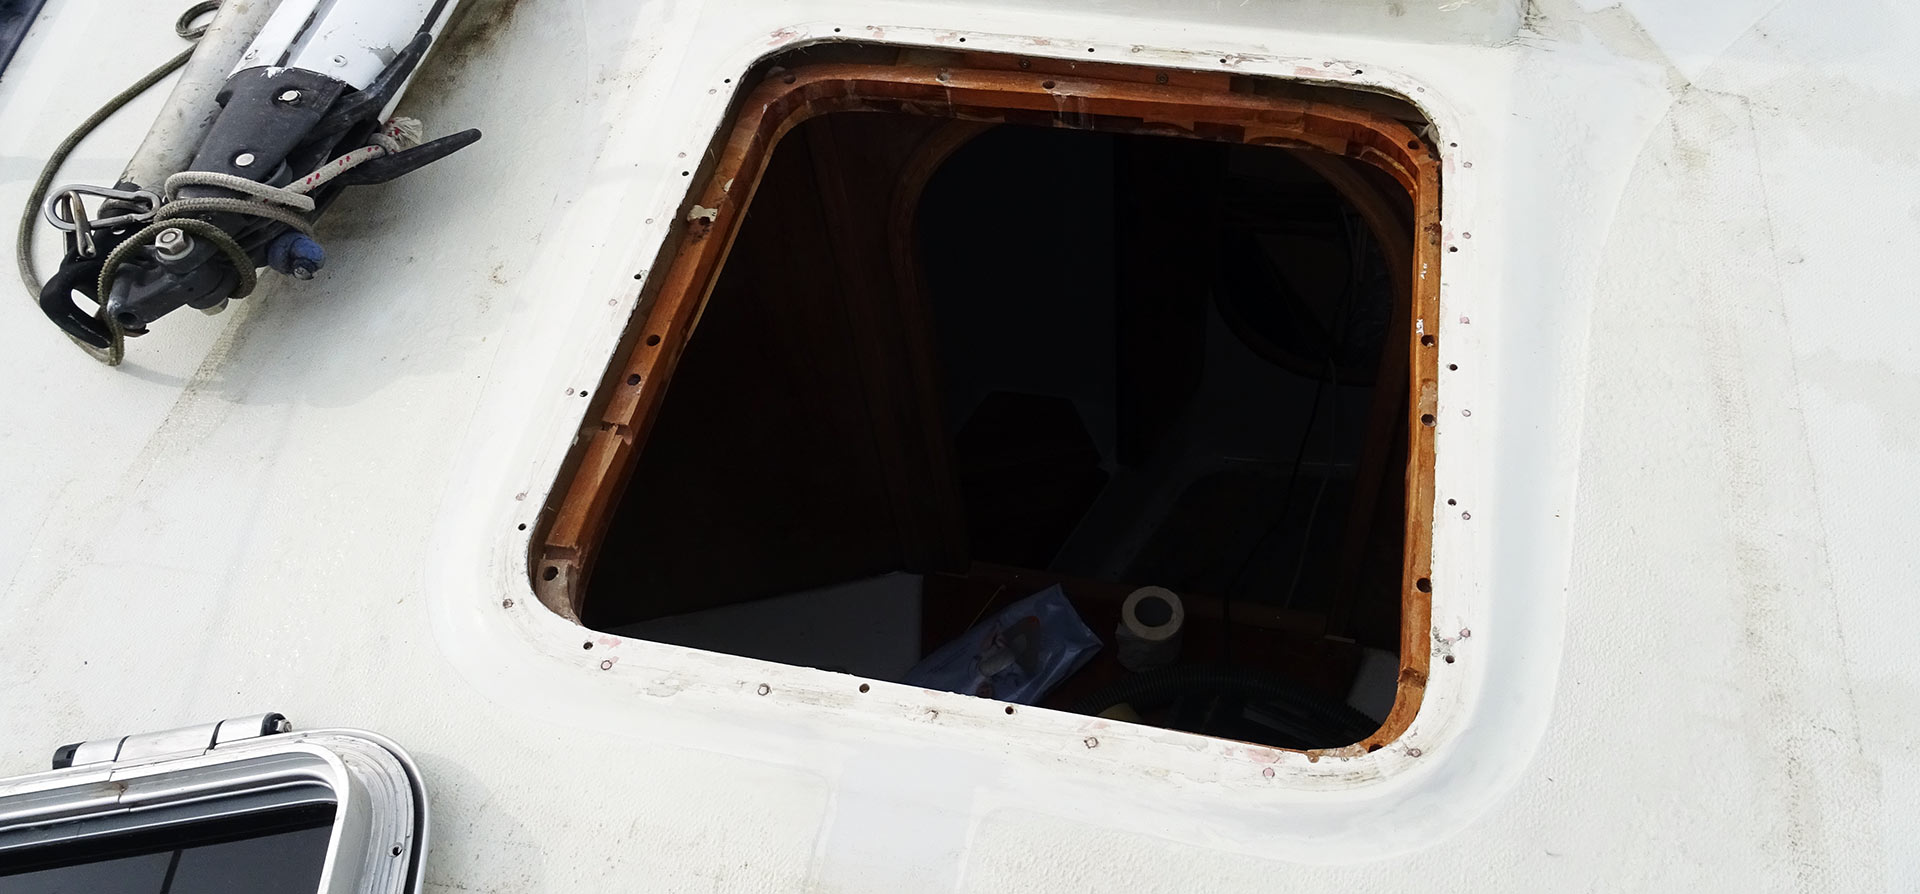
Old Teak frame: Refit or refresh?
The skylight hatch of the salon was not such a big deal. Partially because it was easier to fit as it was sitting on top of a massive Teak frame and was just tightened by screws – no nuts needed, partially because the whole state of material was better that in the fore cabin. I also refrained – for the first time of this refit – to “do it all new”.
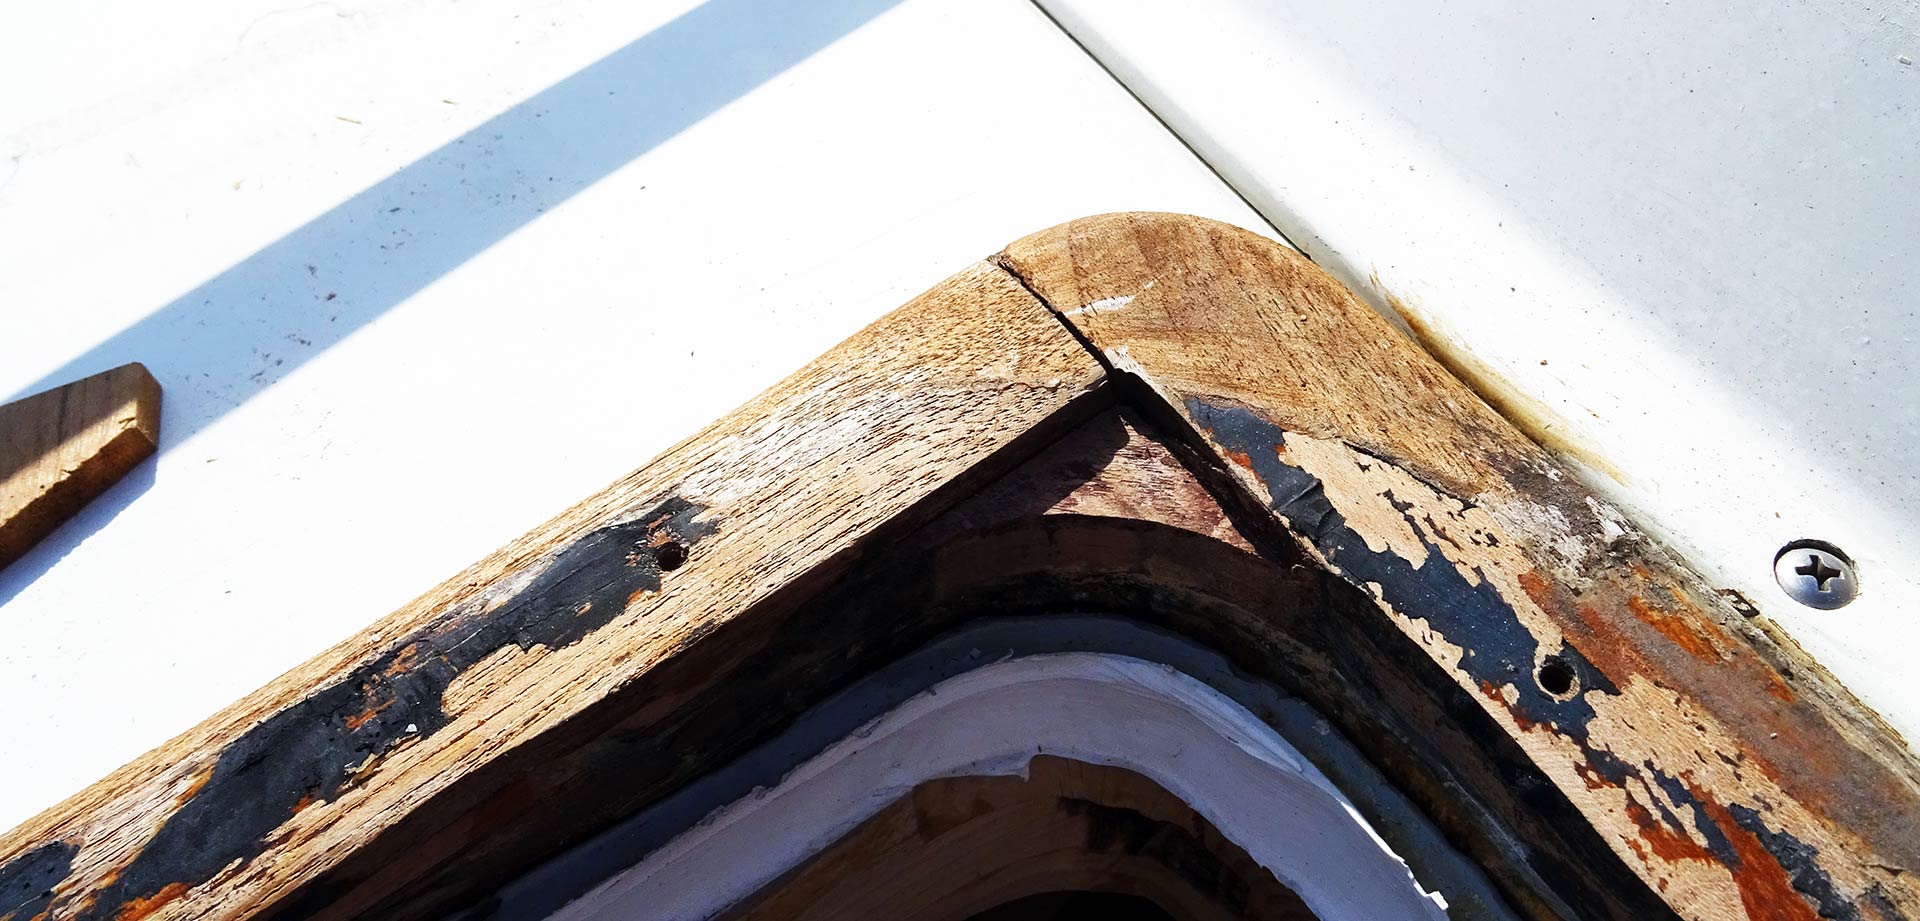
As I refurbished the massive Teak frame I discovered that the inner part of one of the round edges was coming loose and got lost. For a moment I therefore thought of removing the whole frame and have it reproduced entirely from Teak. I held myself back because that would have meant a major effort. Not to mention that the frame isn´t even at the underside but has to follow the convex form of the salon´s roof. Way too complicated – and it was the right decision!

It was in fact the right decision. I got reassured later when I sanded the surface of the bleeched, somehow worn down surface of the Teak frame. Underneath just a fraction of a millimeter the sander brought to life a fresh, hard and perfectly grained Teak structure. There indeed was absolutely no reason to take off the frame! So I attached masking tape to where I did not wanted to have the black Pantera glue touch the wood.
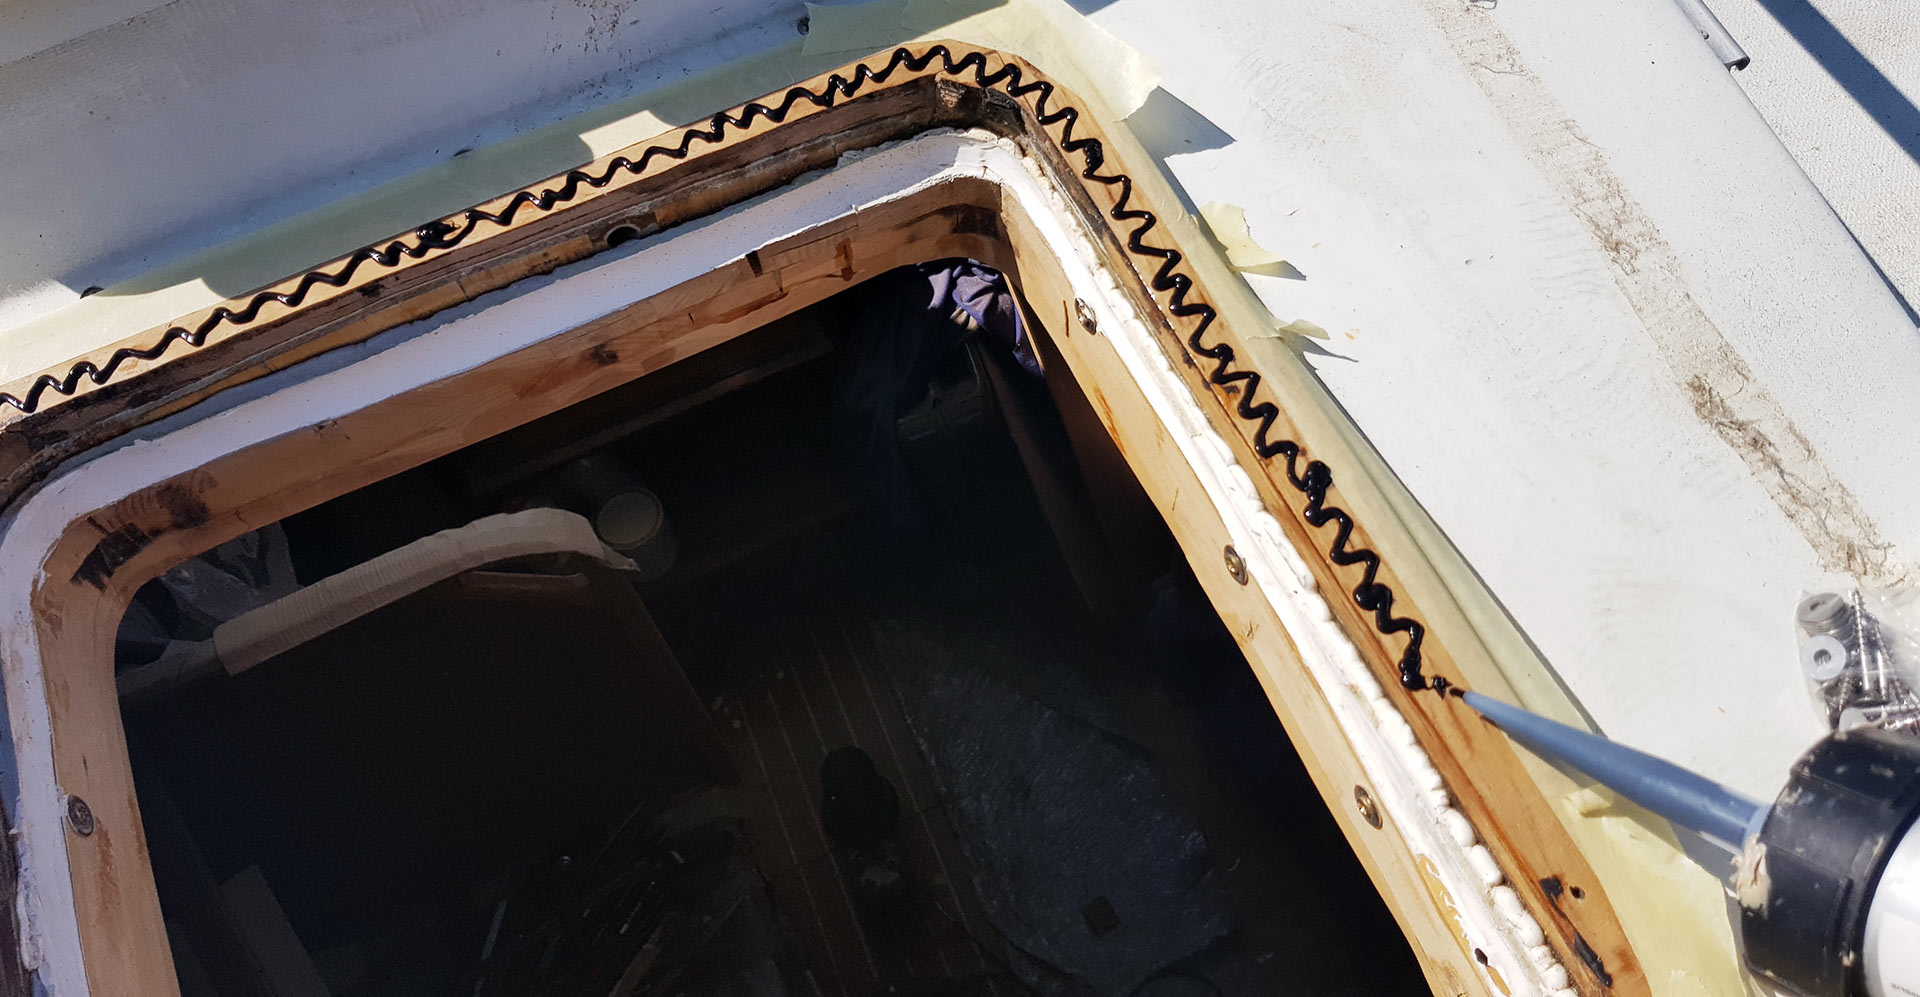
Applying Pantera in a sinous winding curve to the Teak frame I also filled the boreholes of the Teak and was cautions to have some glue at the outside-facing side of the Teak whenever there was a bore hole: There must not get any water inside the wooden frame! Then I placed the hatch onto the frame and … voila!

Everything falls into place at last
Brand new screws with a slightly wider size pressed the hatch to the wooden frame. I chose a wider size since the old boreholes needed some more compression by a thicker shaft of the screw to deliver the right pressure and thus solidness. It worked perfectly.

Both hatches looking great and – besides the fact that the boat had to endure so many rainfalls and storms with virtually no protection against water at all – it was worth it. I think it was the right decision to go for a hatch refurbishment and this will pay off most certainly. That I had to destroy some parts of previous projects is a setback but a major learning for me.

So what´s on for the coming refit days? Well, there is some details to do in the ship´s head with the final fitting of the new WC and some wooden parts and then I´ll most certainly return to the quarter berth and the galley, which are the both last big projects of the boat. (Well apart from the decking floorboards, the 12 V wiring and … and … and)
You may also like to read about other mishaps of mine:
Bilge refit and major setback
How I destroyed my hull windows
Cutting a brand new Teak ceiling due to measurement fails