Chapters in this post
It´s long ago since I´ve had the chance to spend half a day in my own boat, after all, the yacht broker´s season brought a pretty intense start of the year 2019 to my job so I cheered my own boat when I arrived today to get some progress on the refit efforts. This time it was the fore cabin (again) since I decided to work my way back from bow to stern.

Last time I was working on this space that is left in the fore cabin between the two berths, the nicely carved “V”. In the original configuration of the Kings Cruiser 33 it was up to the crew of the boat whether they´d like to have the space between the berths let free to have two “separated” beds or “closed” by putting on a wooden triangular plating and a cushion to get one large bed that covers all of the cabin.

I must say, that least is my favourite utilization of the otherwise not very roomy forepeak so it was clear to have the interspace below the triangular wooden plating made useful. I figured that a bisection of the volume would be best: The lower part was equipped with a wooden grating where shoes, sailing boots or alike can be stored perfectly. The grating is fixed by magnets and can be taken away to clean underneath it. The upper part, I thought, is best used to have the yacht´s lockbox installed. So that´s where I left this project some weeks ago and started to working on today.
Making a nice, curved Teak panel

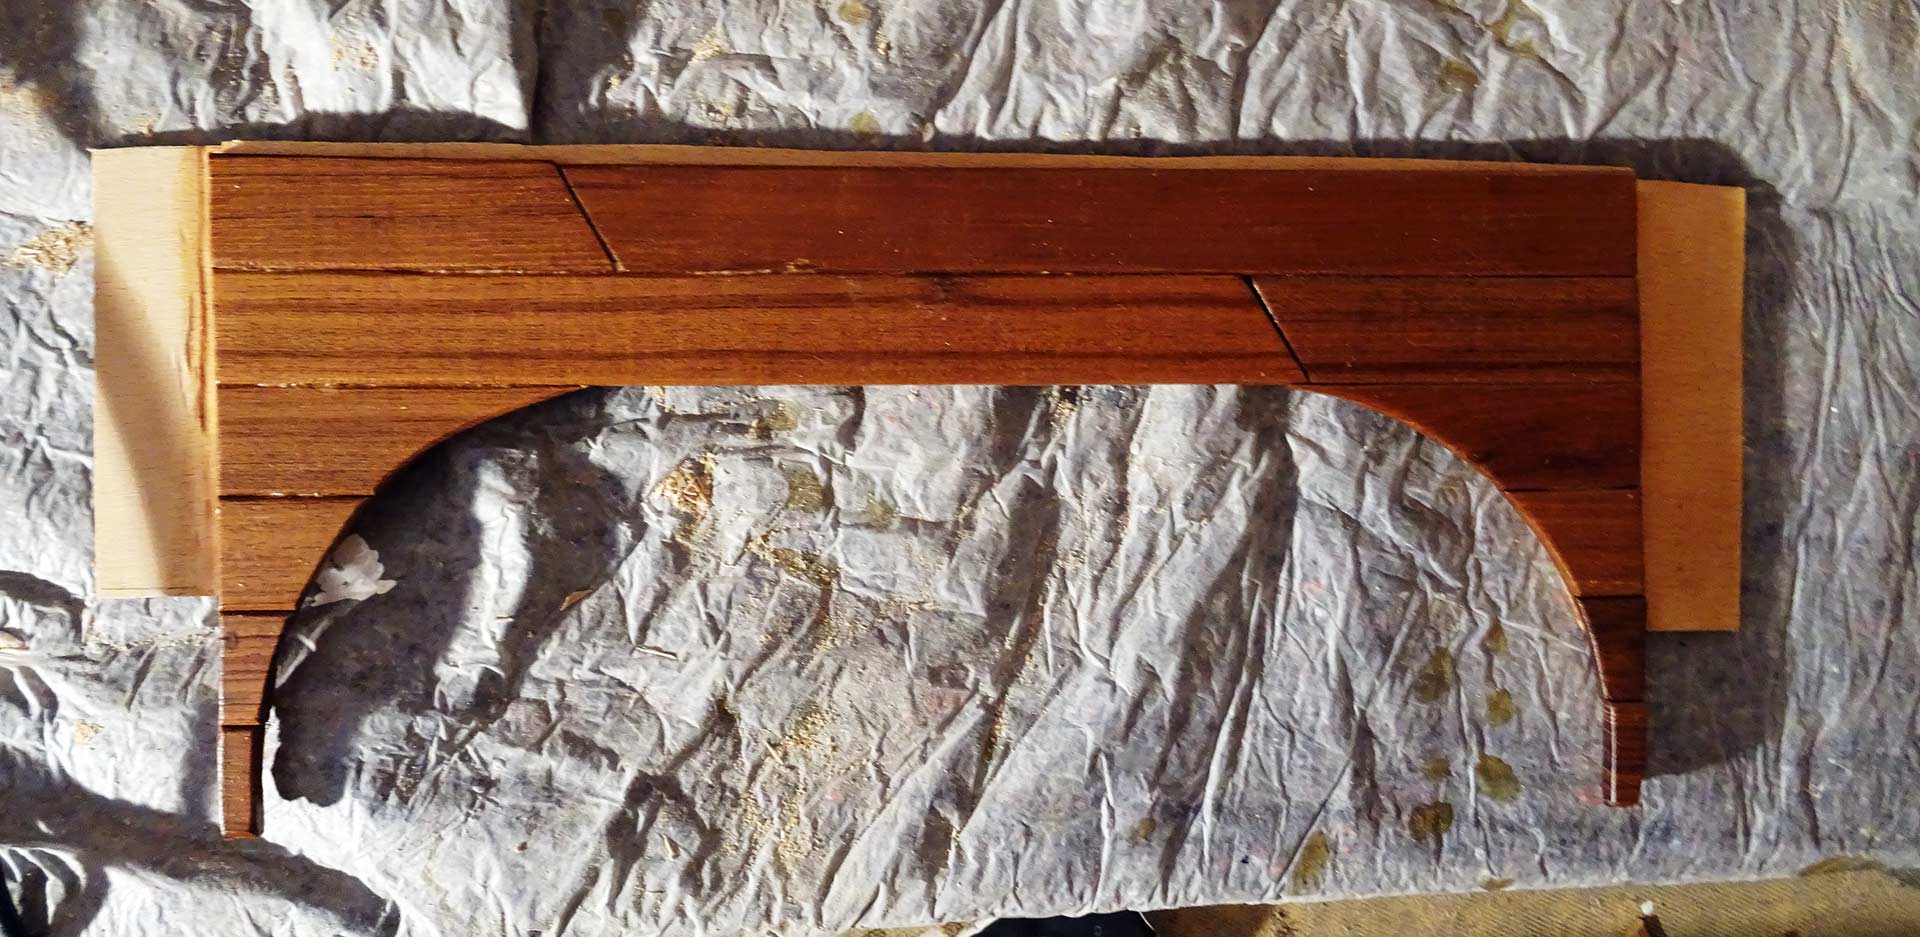
First thought was that I wanted to have the sight onto the lockbox a bit screened, so I needed a panel of some kind. I thought that a round-curved panel covered with some offcut Teak of which I still have plenty of back from the days when I was working on the roofing would be suiting best, so I cut out a nice curve from plywood.
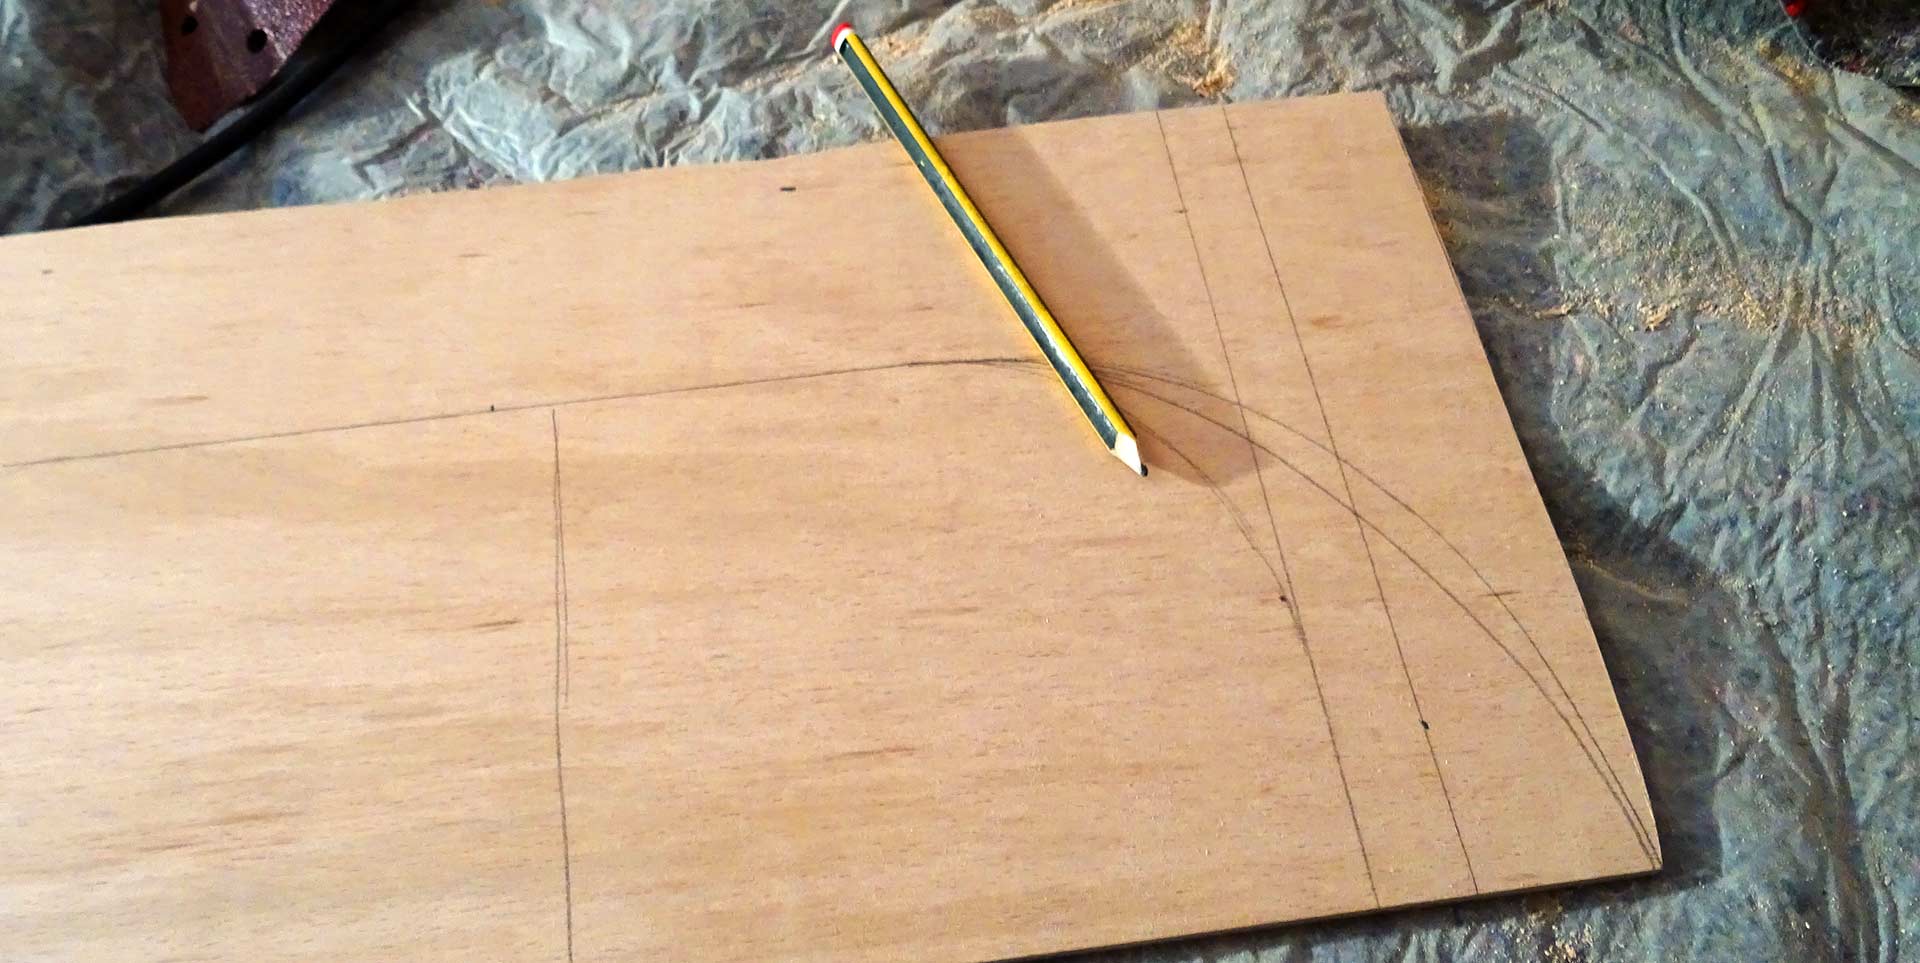
I added offcut Teak which was partially glued and partially screwed to the plywood substruction. I liked it because it is resembling the ceiling pattern of both the salon and the fore cabin into which so many working hours went over the past years. Fitting and adjusting the newly made panel I was happy with the outcome.
Now it was time to have it glossy painted. I originally – and I still am – was planning to have all of the newly installed wooden things glossy painted after all of the sawing, sanding and grinding work was done and I would have the boat cleansed from all the dirt and dust it still is accumulating. That´s because I am sanding inside: It would most certainly kill my back if I would climb oit of the boat to have the sanding done outside …
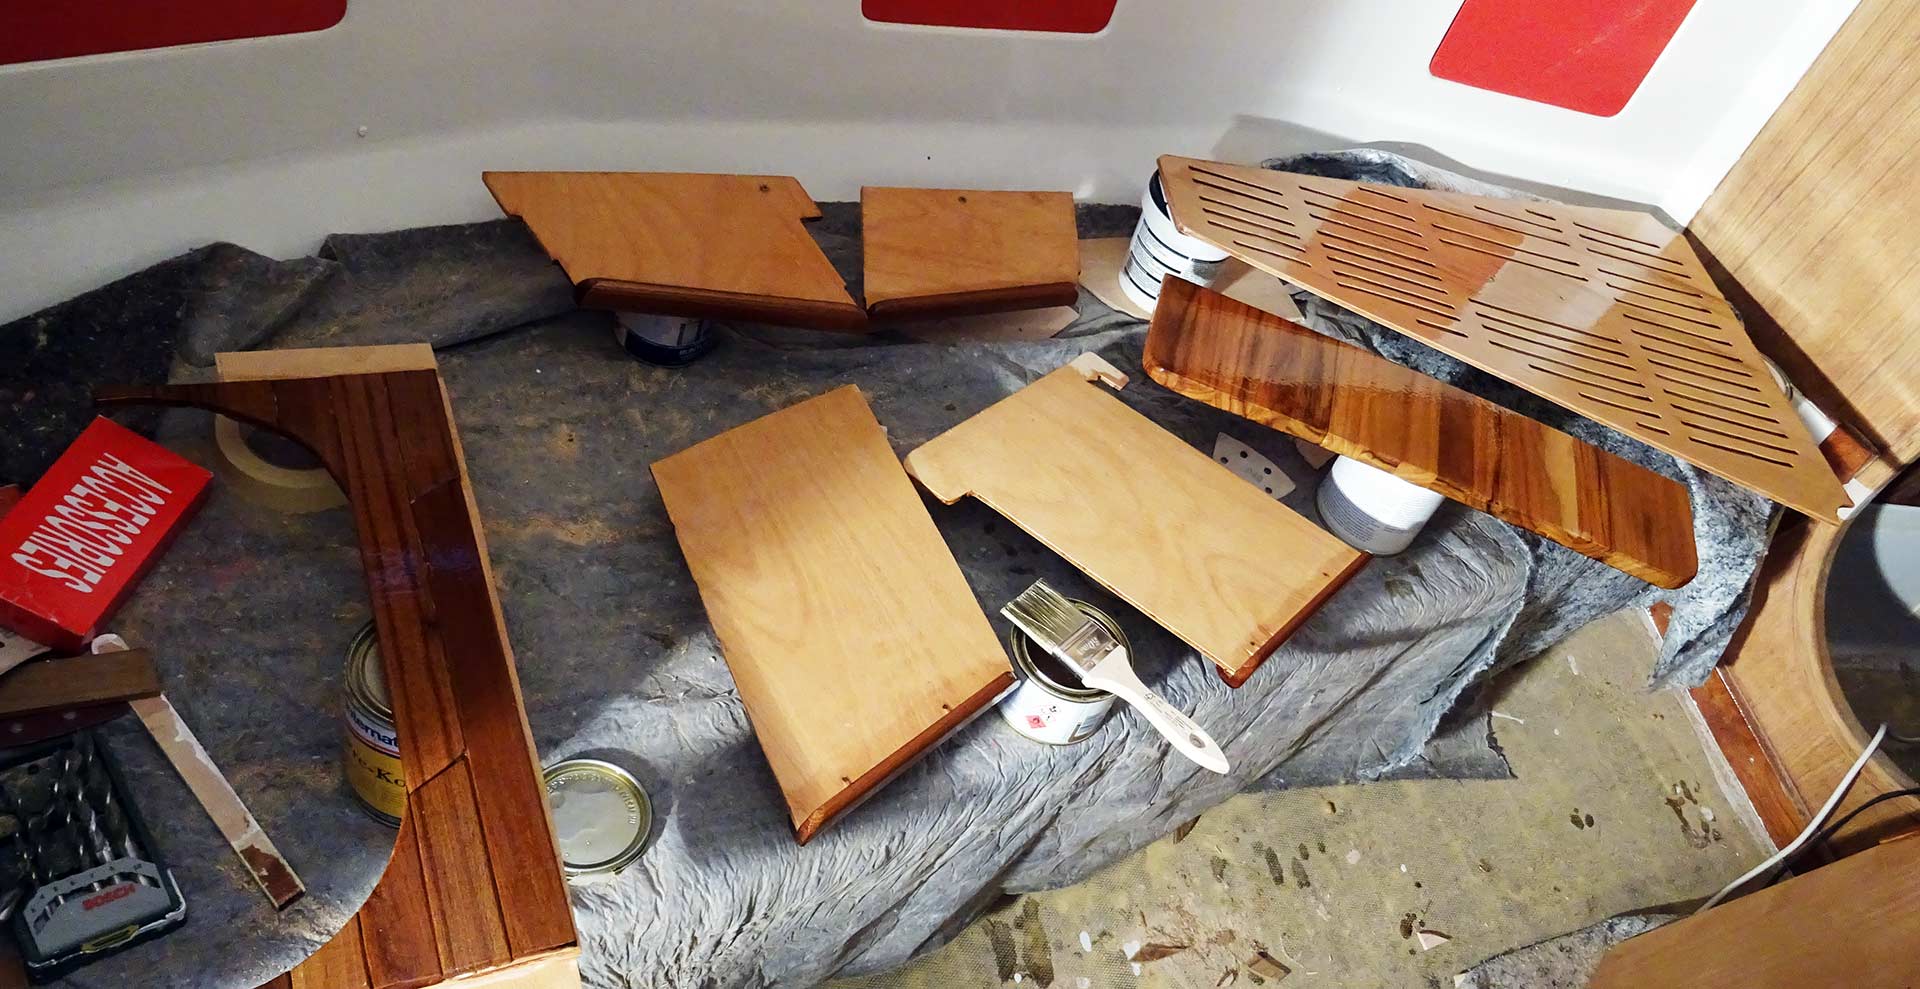
So I glossy painted the panel as well as parts of the visible shelves where the yacht´s safe would be fitted to and some other small parts, like the fronts of the shelves which I´ve made after finally installing the chain plate covers (which is another great story, ranging from taking off the chain plates and cleaning them to re-installing the refurbished steel parts. Let´s finish this!
Installing the yacht´s safe
I´ve gone for a small but solid lockbox made by Dometic. The safe can be opened by a key and will later contain the ship´s papers, VAT-certificate, my sailing certificates as well as board-cash and other valuable stuff. I think it´s a far better place here in the fore cabin than in the chart table where on most boats these things are stowed.
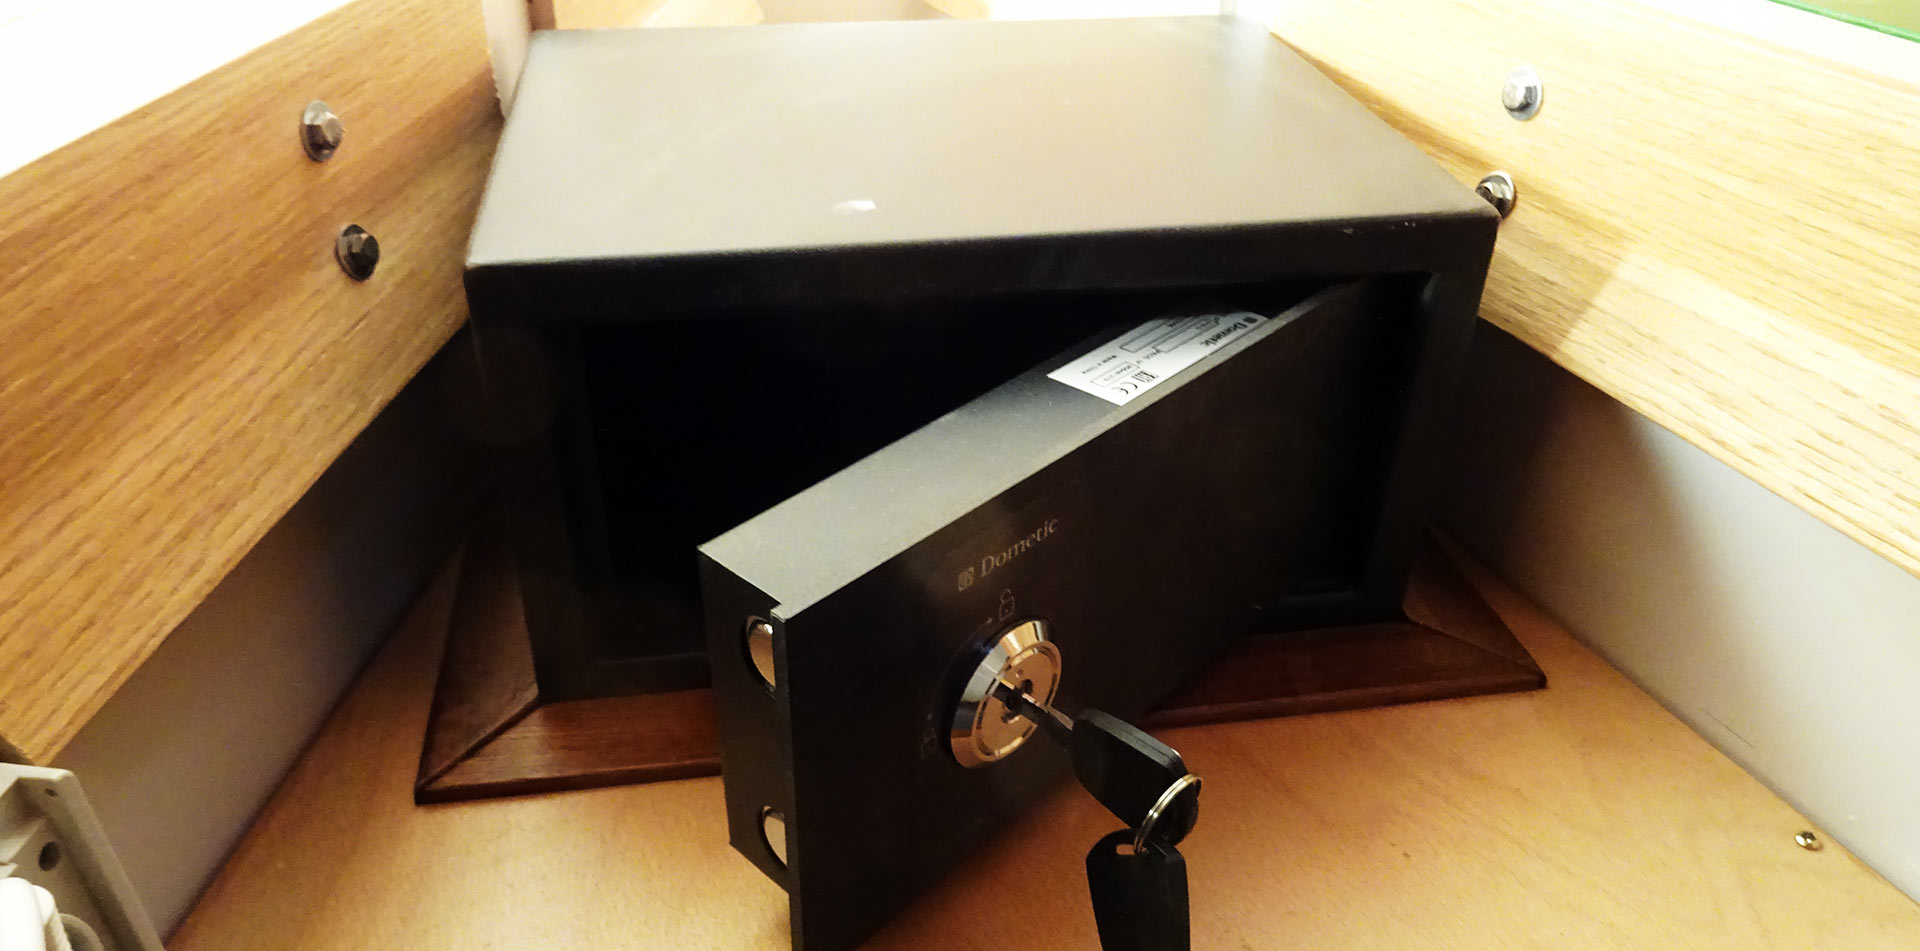
I began to fix the shelf to the GRP and then fixed the safe on the wooden part. The lockbox is fitted with strong bolts to the construction – although I know that a professional burglar wouldn´t have any problem in removing the safe, it´s at least fixed against wild flying in high seas. I then fitted the wooden parts for supporting the V-shaped triangular plating which I´ve made from offcut Oak I´ve found. Siince this stuff will never be visible, I didn´t care for the type of wood used here.
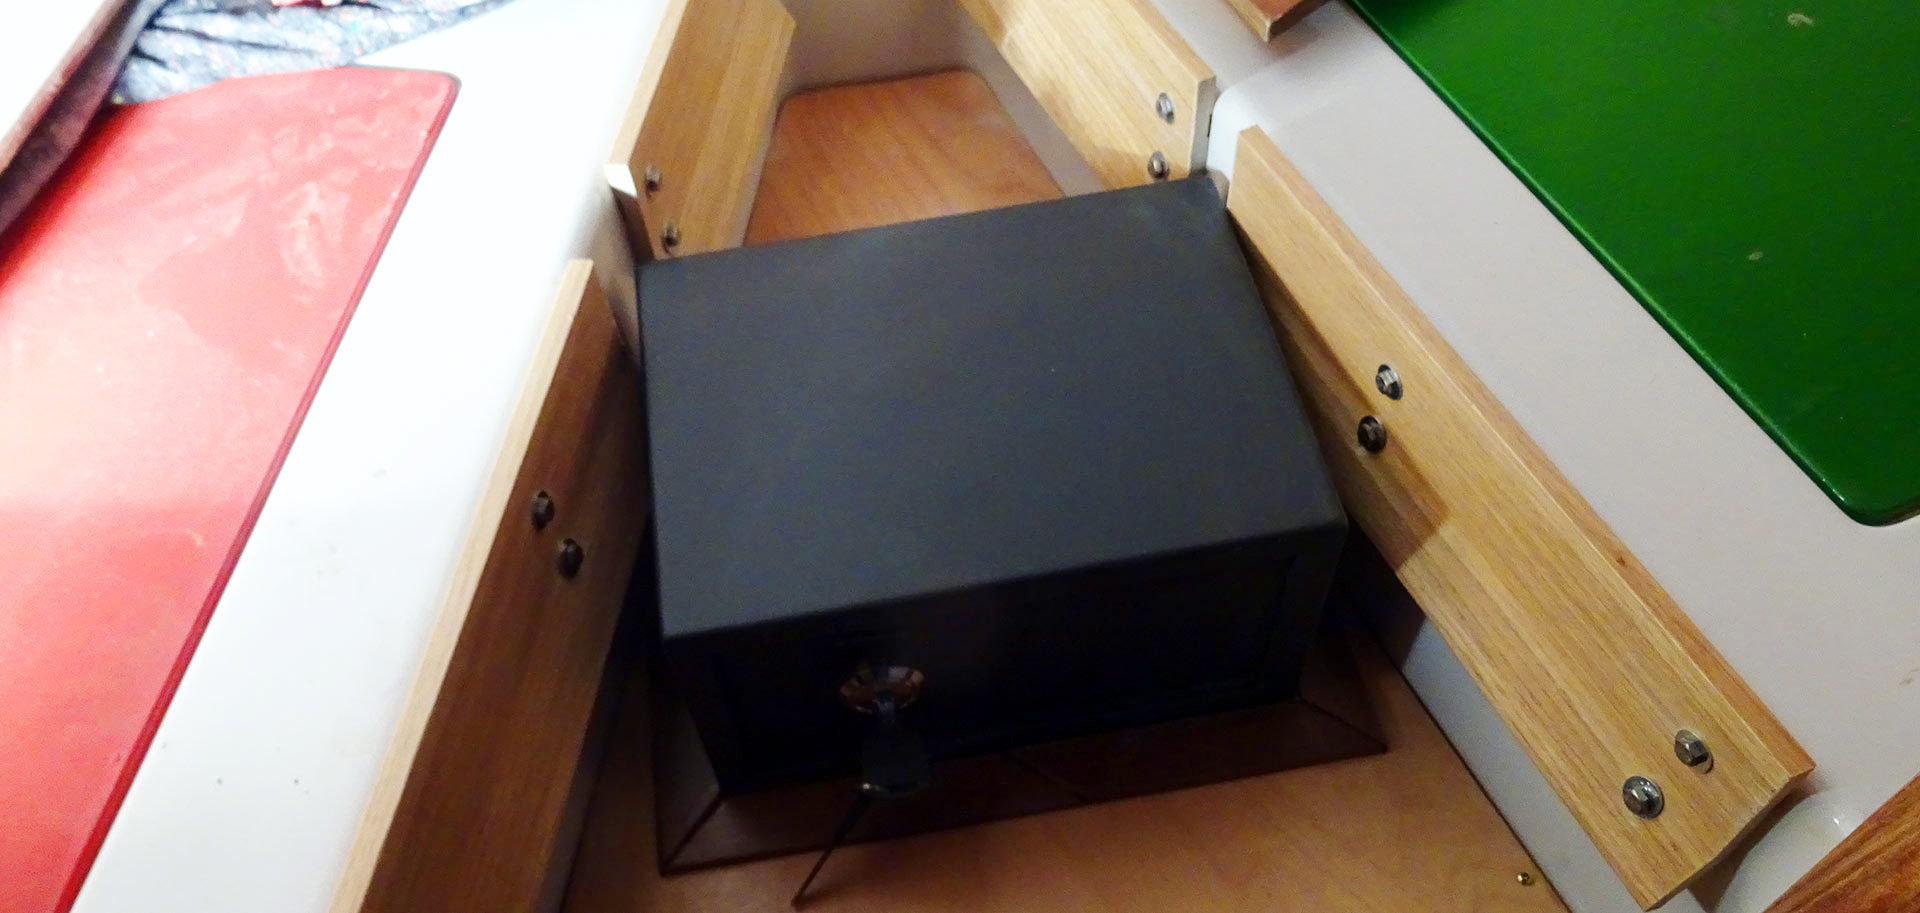
After everything had been done and the safe was installed rock solid, I was happy with my work. Furthermore: Behind the safe an even “safer” secret compartment has now been created. I really don´t know what to do with this thing, but I am sure over the course I will find something to hide here, maybe the underpants of the last resort, how knows?

Finishing touches
When I was putting the triangular plating on top of the whole thing – despite the fact that it all has to be sanded and glossy-painted of course – it looked just awesome! I had the final test and was putting all of my weight onto the newly installed wooden construction. Perfect fit!
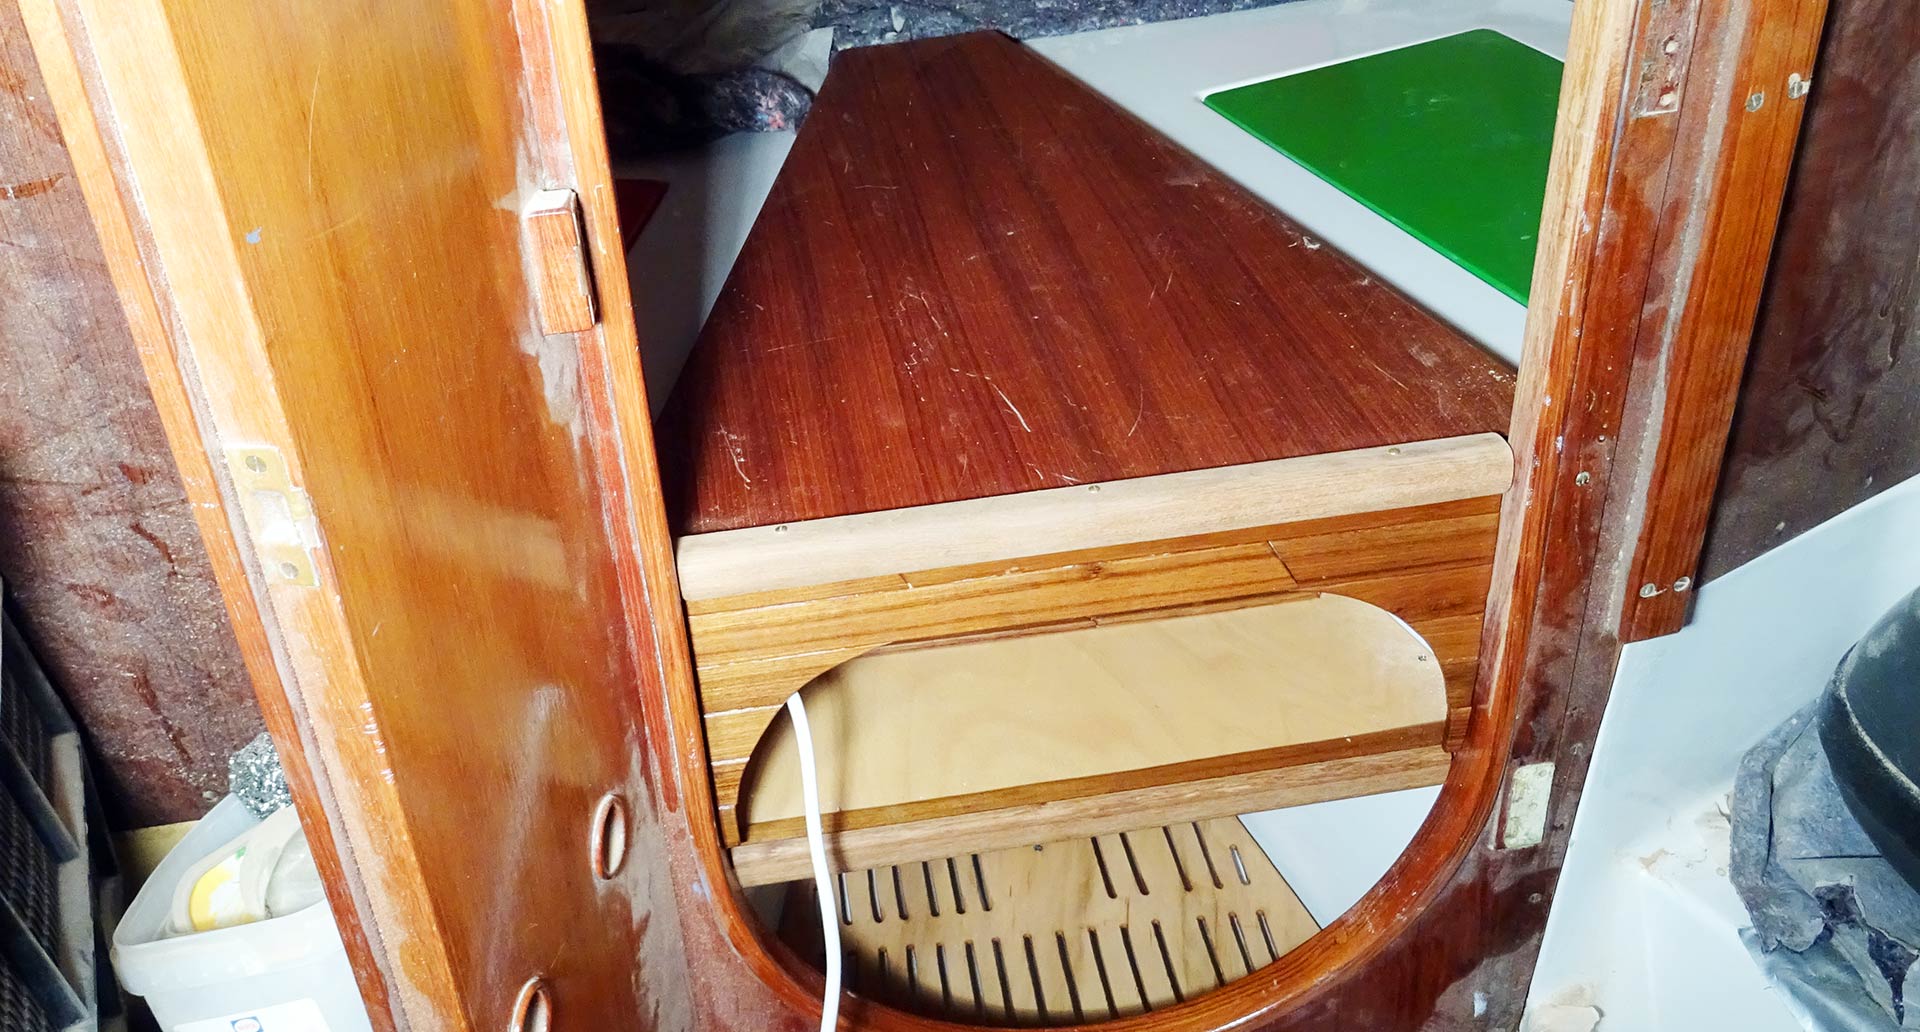
Now the fore cabin is a step further to being finished: After having renewed the ceiling and the roofing with completely newly made panels and wooden parts, all that is left to do is adding the hatch again (which is my next project), install the LED-lights in the roof and have a reading light on port side and then … have it all painted and glossy painted. Then, maybe, I can sleep in here again for the first time in 3 years.

What is more and more causing a headache is whether I should re-install the heavy ship´s doors again or not. The bow compartment of the King´s Cruiser has two of them: One is either closing the fore cabin, having the head open or closing the head whilst having the forepeak open. The second closes the salon or the wet locker. Both doors are pretty heavy. And in working on the yacht´s safe I had to wonder all the time if I should substitute those heavy doors with lighter, more colourful drapery, like the one on the First 30 I was sailing with – see it here. Well, soon there will have to be a decision made. For now I am happy with today´s work.
Read some other interesting articles on my sailing yacht´s refit here:
Teak furniture for covering the chain plates
How to get some pretty accurate panels
Black hole refit?